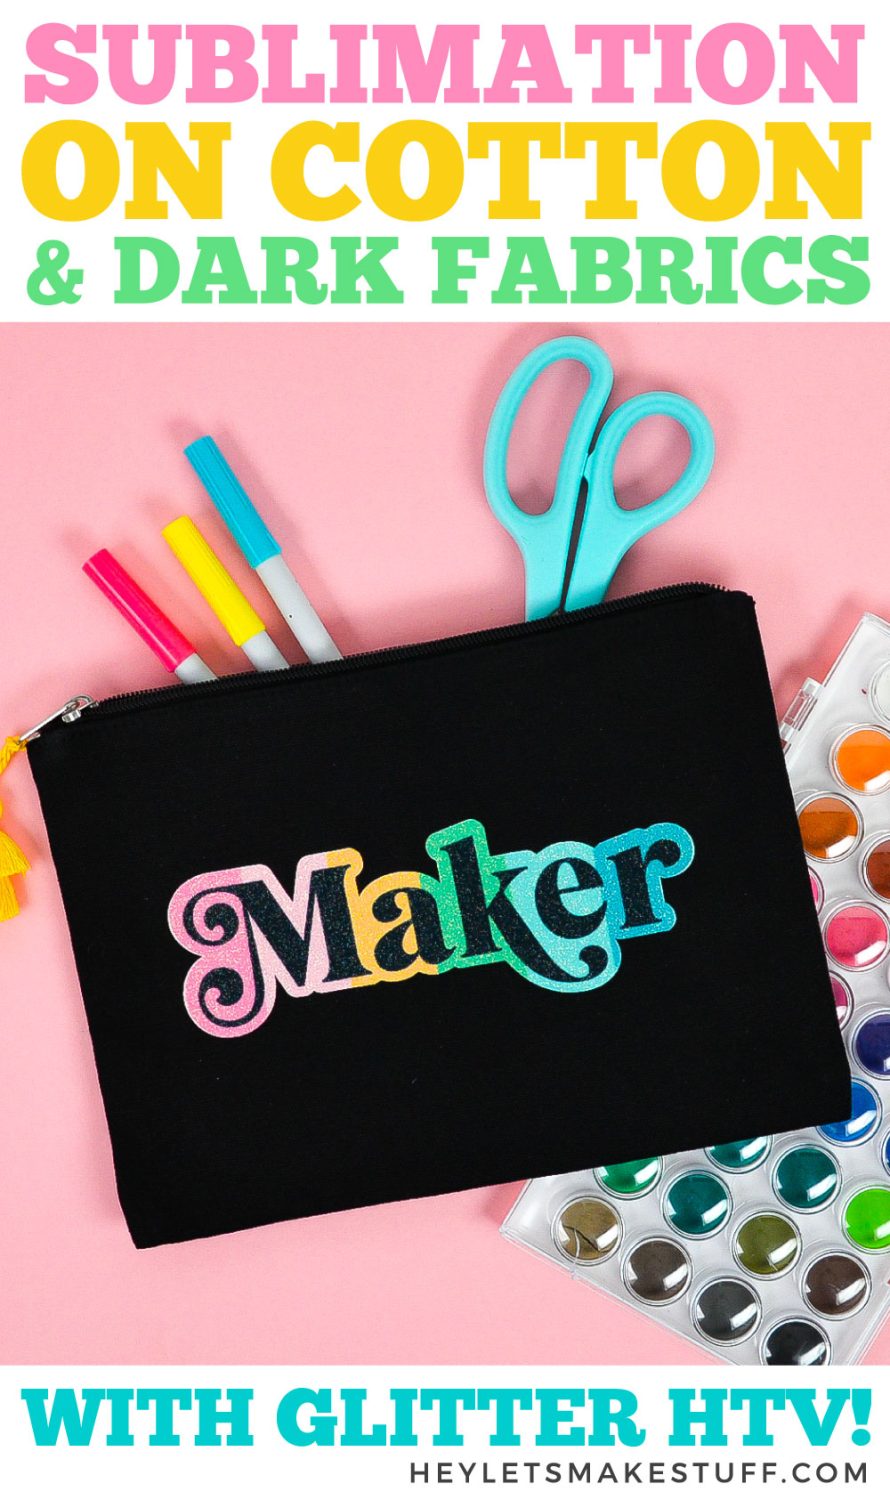
Want to move beyond sublimating white polyester fabrics? You can sublimate on glitter HTV! Use this trick for adding sublimated images to cotton and dark fabrics.
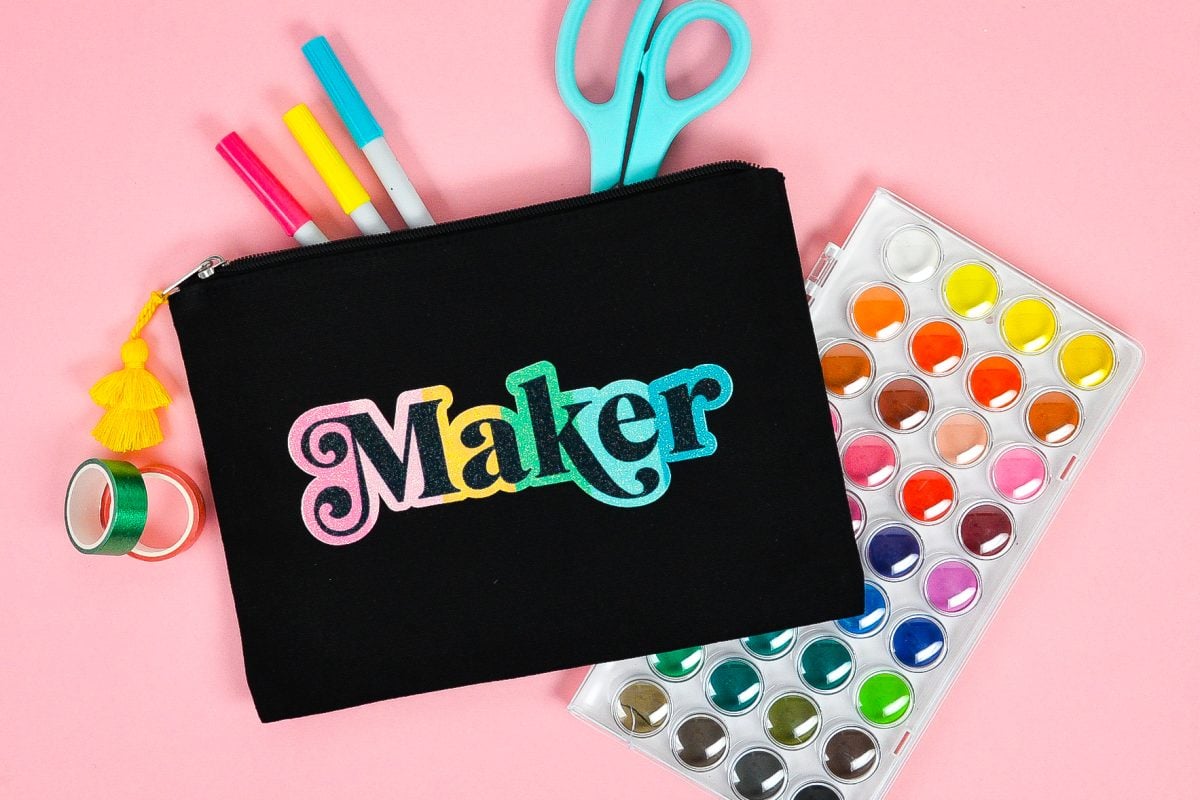
Have you ever wanted to sublimate something other than a white polyester fabric? Today I’m sharing one of my favorite tricks for being able to use your sublimated images on cotton and dark fabrics! This is a fantastic way to expand the types of projects you can make using your sublimation printer if you also have a cutting machine like a Cricut.
It’s National Craft Month! March is the perfect month to try out a craft or technique you haven’t tried before. If you’ve been looking for a sign to start sublimation crafting, this is it!
This post is part of my in-depth series about sublimation—these posts are written for the everyday crafter! No confusing jargon or technical knowledge needed. Plus you can get everything needed for this project at your local craft store or online!
Watch My Sublimation on Glitter HTV Video!
Want a quick video tutorial? Watch now! Or scroll down for written instructions.
Let’s start this post off with a few frequently asked questions about using glitter HTV (HTV is also called heat-transfer vinyl or iron-on vinyl) for sublimation.
Frequently Asked Questions About Sublimation on Glitter HTV
Glitter HTV is actually a polyester product! That, combined with the durability to withstand the high heat of the press, makes it the perfect material for sublimation.
Nope! It’s not a polyester product so your sublimation print will be faded or won’t transfer at all, much like trying to sublimate cotton or a mug without a poly-coating.
One of the benefits of sublimation on polyester fabrics is that the ink becomes one with the fabric—you can’t feel the outline of the transfer. In this process, however, the HTV sits on top of the fabric, so you can feel the edges of the transfer.
I have found that the more simple the outline/edge of the image, the better. And the fewer pieces the better. This is primarily because you have to line up your sublimation image on the glitter HTV and that’s just easier with fewer intricate pieces. The glitter HTV layer will all be lined up on the carrier sheet, but any individual pieces will have to be arranged by hand for the sublimation layer.
White is the best color to use for this process, much like white is the best for other sublimation crafts. You can technically use other colors, but the color of the HTV will combine with the colors of your print and you’ll most likely have unexpected results. But you can always play around and do test prints to see if you find one you like!
Supplies to Sublimate on Glitter HTV
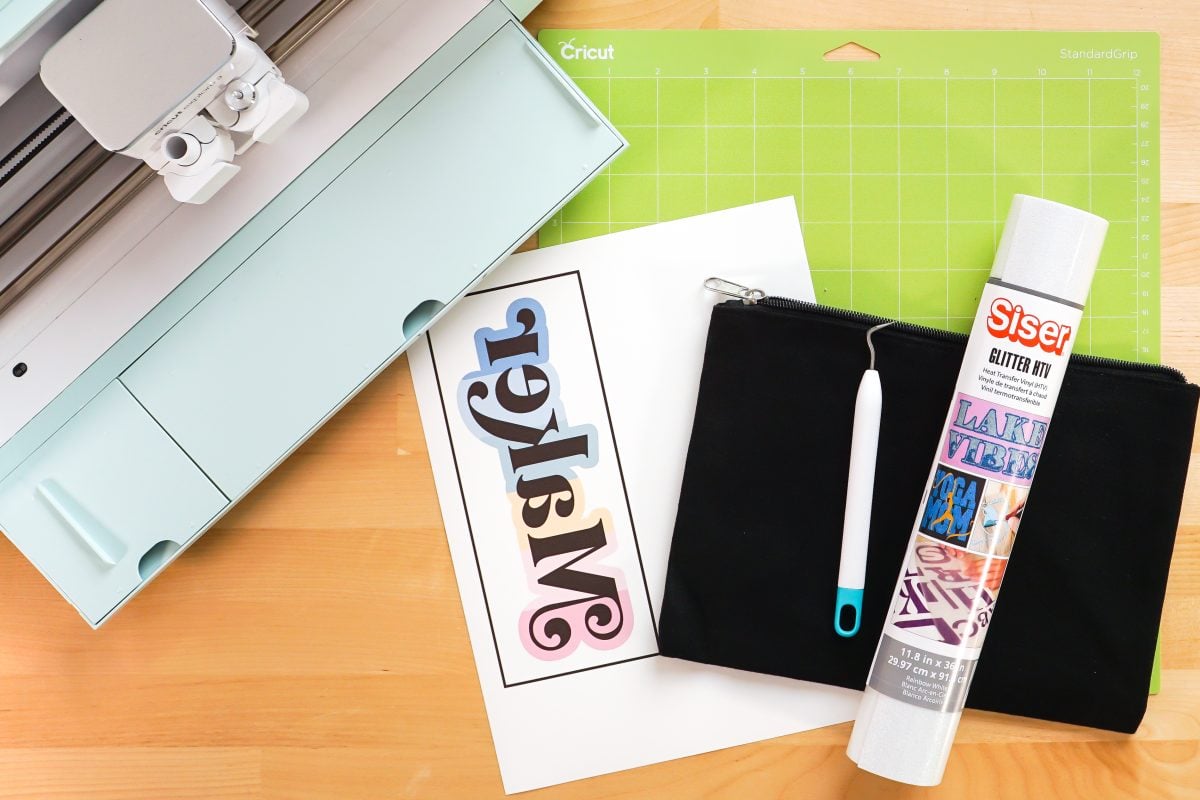
- Sublimation printer or converted inkjet printer
- Sublimation paper
- Siser Glitter HTV
- Cricut or other cutting machine
- Weeding tool
- Blank or substrate
- Pressing pillow (optional)
- Lint roller
- Heat-resistant tape
- Heat press or Cricut EasyPress
- “Maker” PNG to make this project (see below)
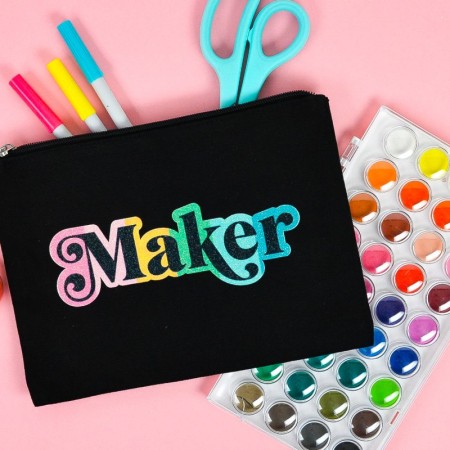
For this project, I’m using a black cotton zippered pouch, but this technique works on just about any fabric blank you have—t-shirts, hoodies, garden flags, bandanas, tote bags, etc.
I am using my Cricut Explore 3 and Cricut Design Space for this project, but you can also use your Silhouette and Silhouette Studio. The process is similar using the “Cut Edge” feature in Silhouette Studio.
Get the Free File
Want access to this free file? Join my FREE craft library! All you need is the password to get in, which you can get by filling out the form below. The file number is: S4.
NOTE: There are two files in this Maker freebie. One has Maker in black and can be used on any fabric, but if you want the word “Maker” to be the color of your blank (for example, if you’re using a dark blue tote bag and you want the dark blue to show through), you can use the cutout version. The process is the same, just make sure to weed the cutout. You’ll need to place and tape down the interior of the “a” and “e” when you get to the sublimation press.
How to Sublimate on Glitter HTV
Prepare the file in Cricut Design Space
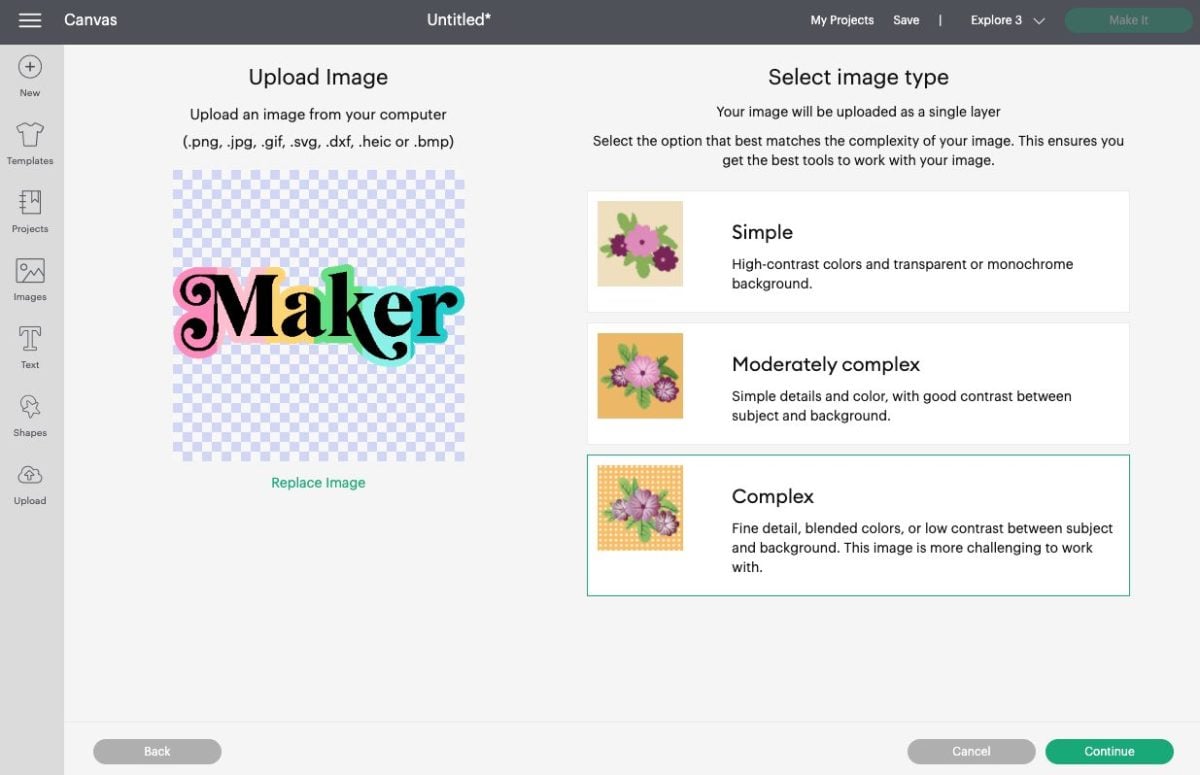
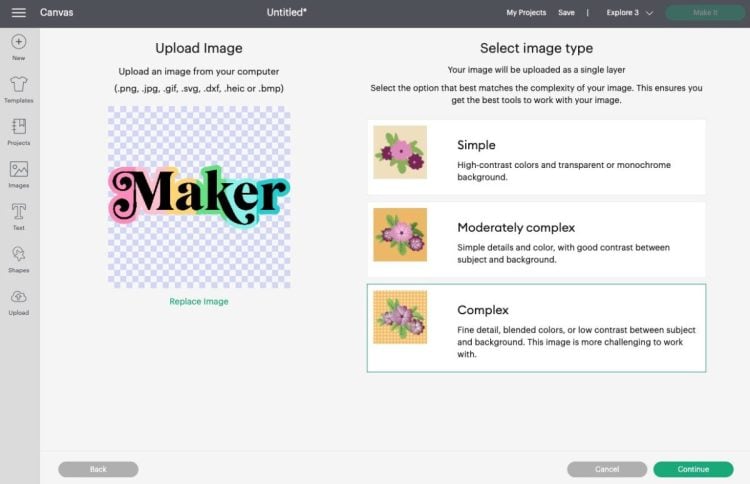
Start by uploading the “Maker” PNG to Cricut Design Space. Under “Select Image Type,” choose Complex. Click Continue.
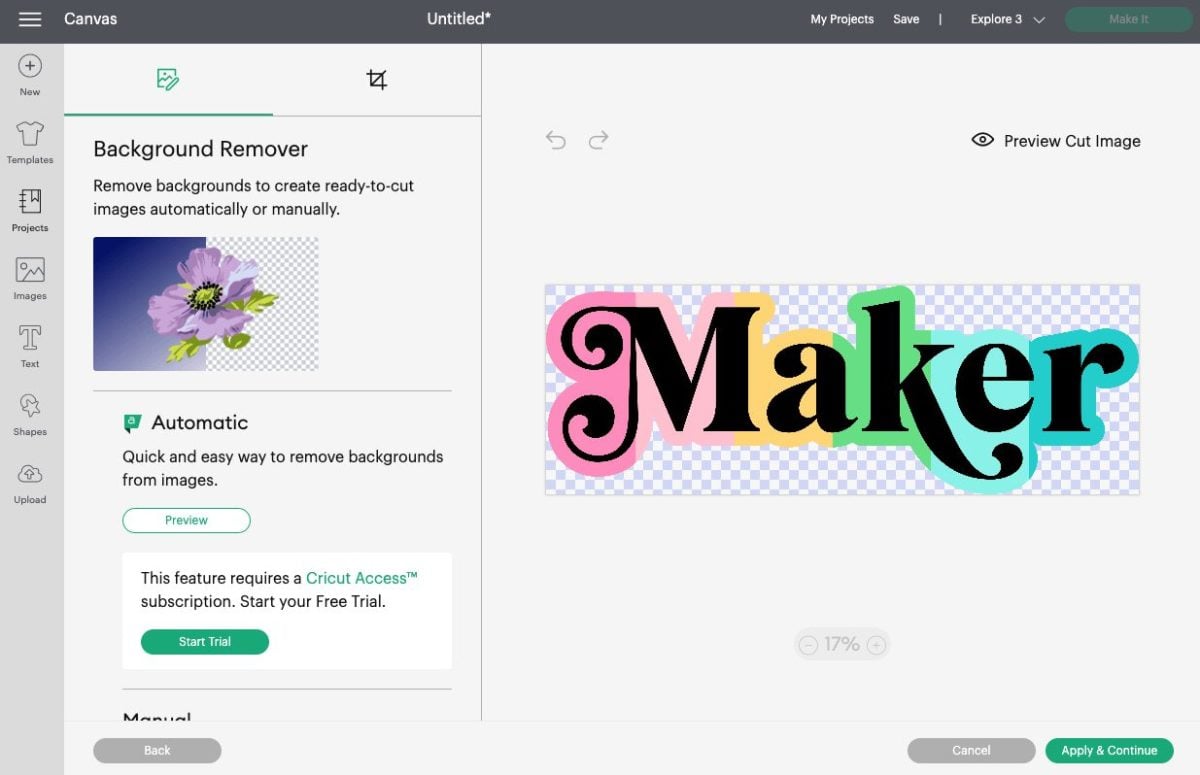
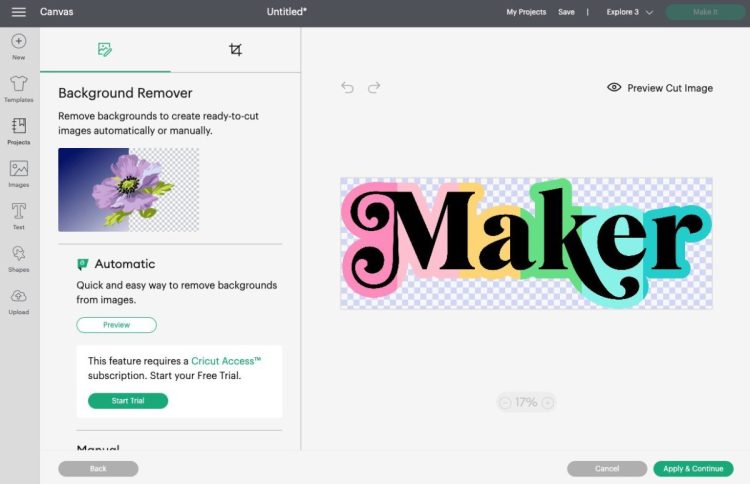
This next screen is where you would delete a background if needed. Because these files are designed to have a transparent background, you can just click Apply & Continue.
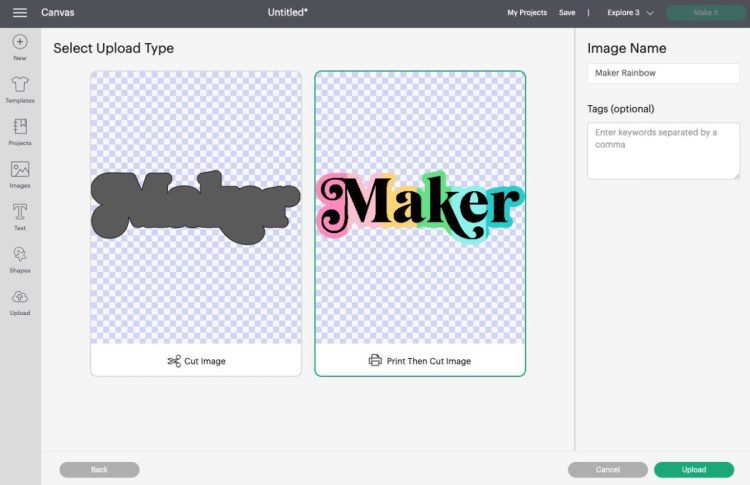
Next, you’ll select your Upload Type. We will be using this image in two ways, but start with Print then Cut image and click Upload.
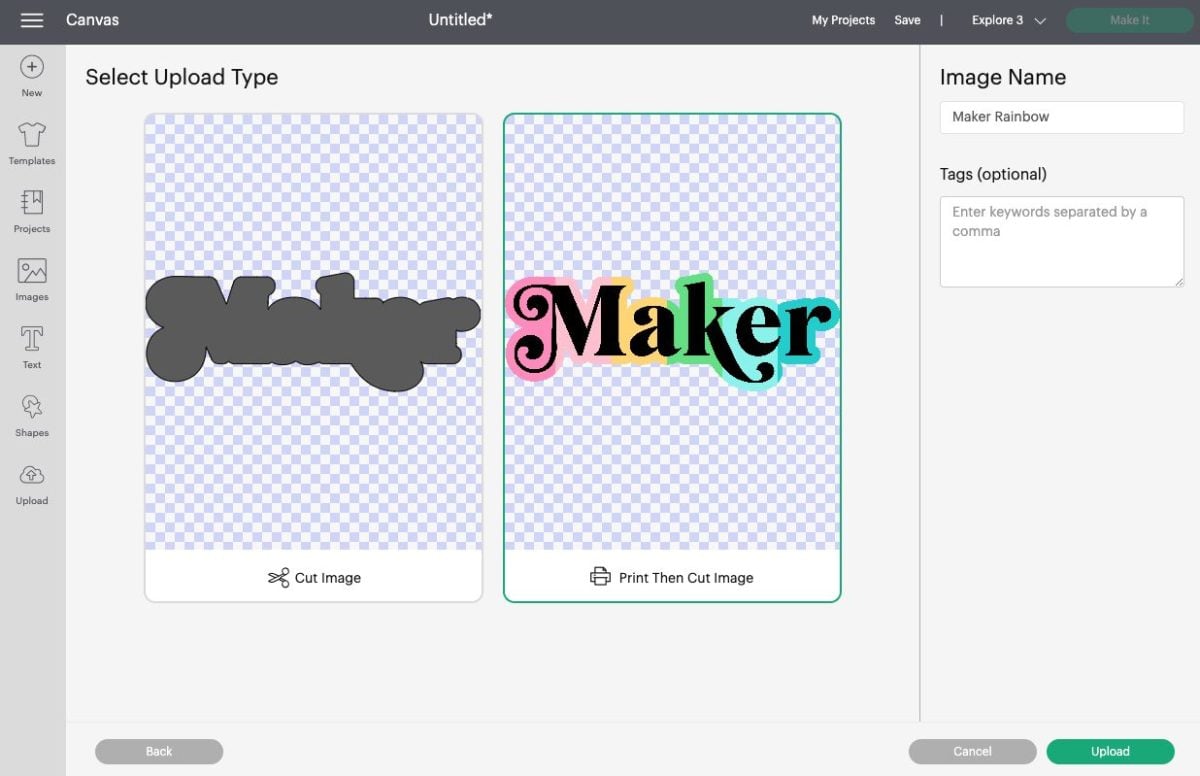
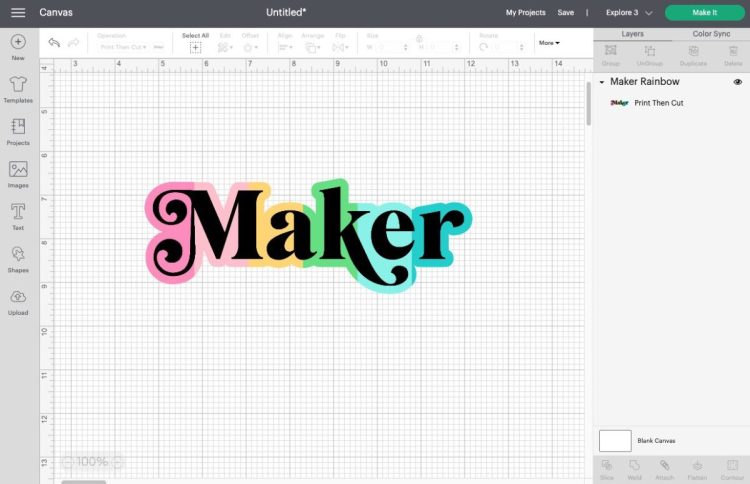
Your file will upload and you can bring it onto your canvas. Your file will import large, so resize it to fit on your project using the Size tool at the top. I made mine 7.5″ wide to fit on my zippered pouch. Remember that the maximum cut size for Print then Cut is 6.75″ X 9.25″.
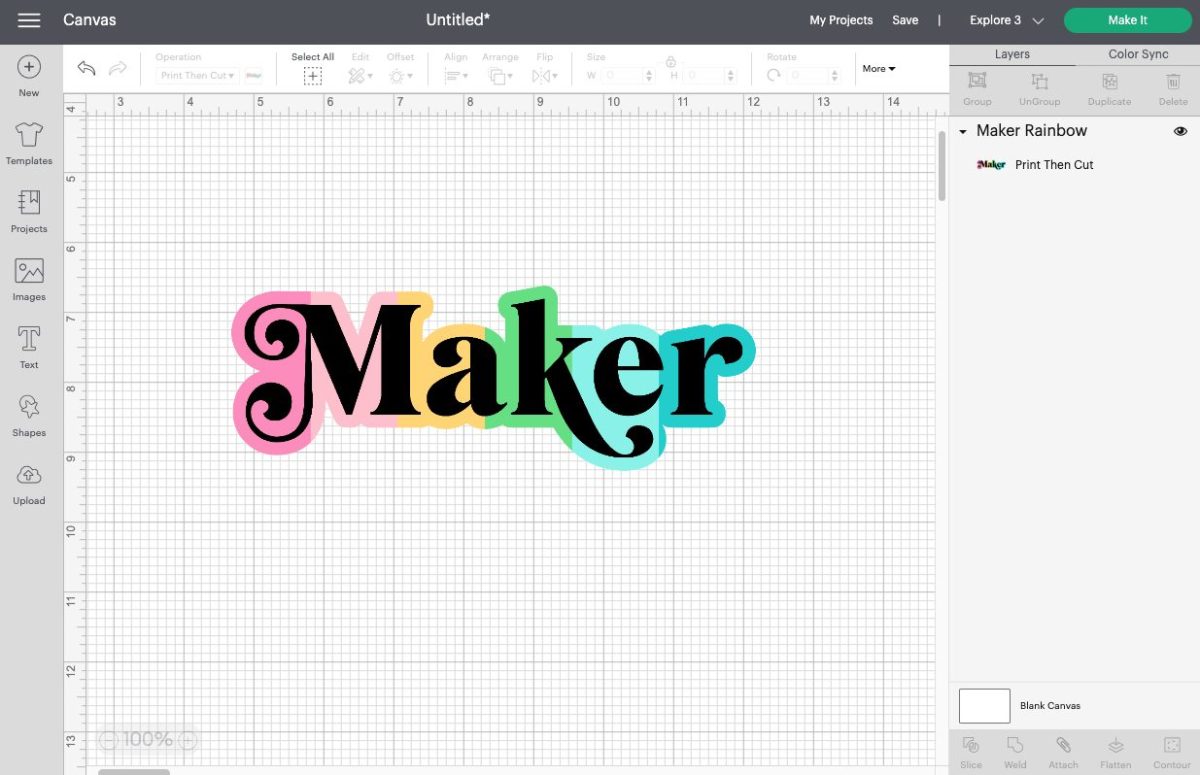
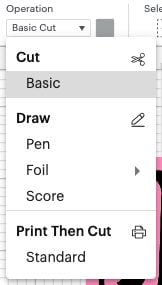
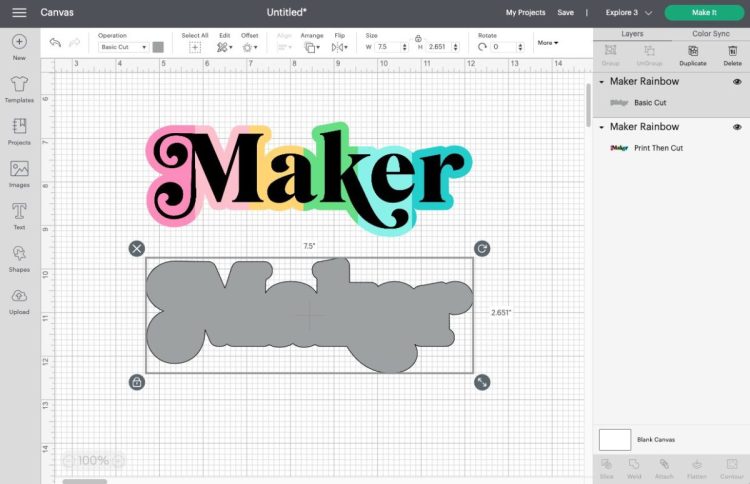
Then duplicate this image by selecting it and clicking Duplicate at the top of the Layers Panel on the right. Then change that duplicate to a cut image using the dropdown in the menu at the top.
Your second image should change to an outlined version of the Print then Cut image.
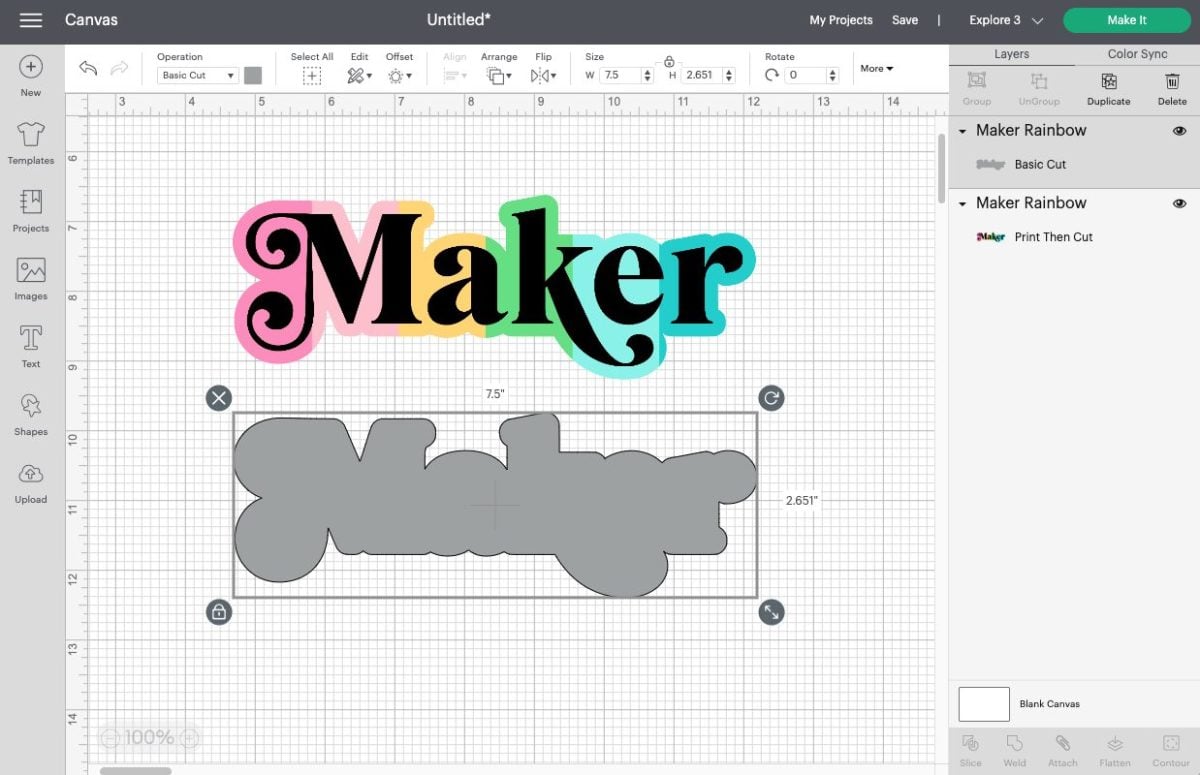
You’re ready to cut your project!
Print, Cut, and Weed Your Project
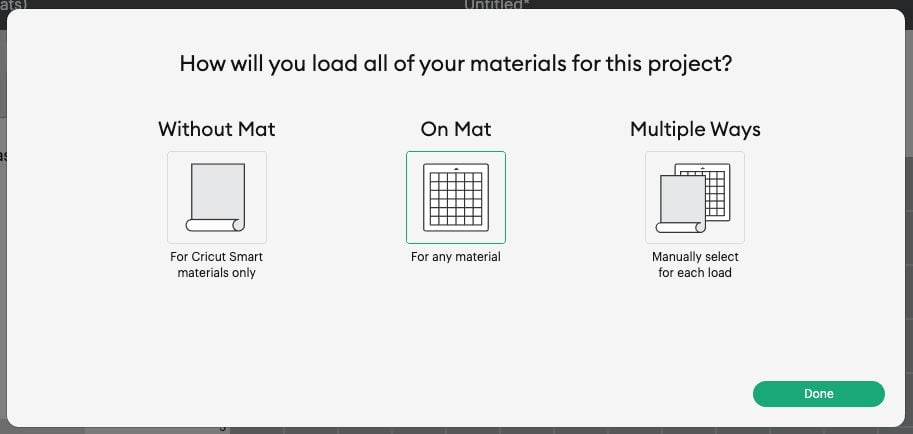
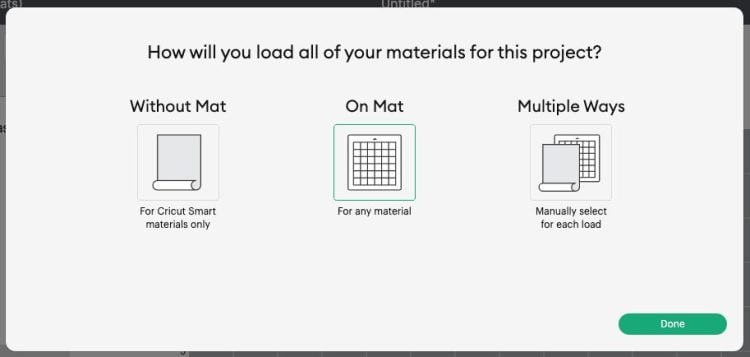
Click Make It in the upper right. If you have a Cricut Explore 3, Cricut Maker 3, or Cricut Joy, you’ll see a Load Materials pop-up. Choose On Mat. If you have an older machine, you won’t see this option.
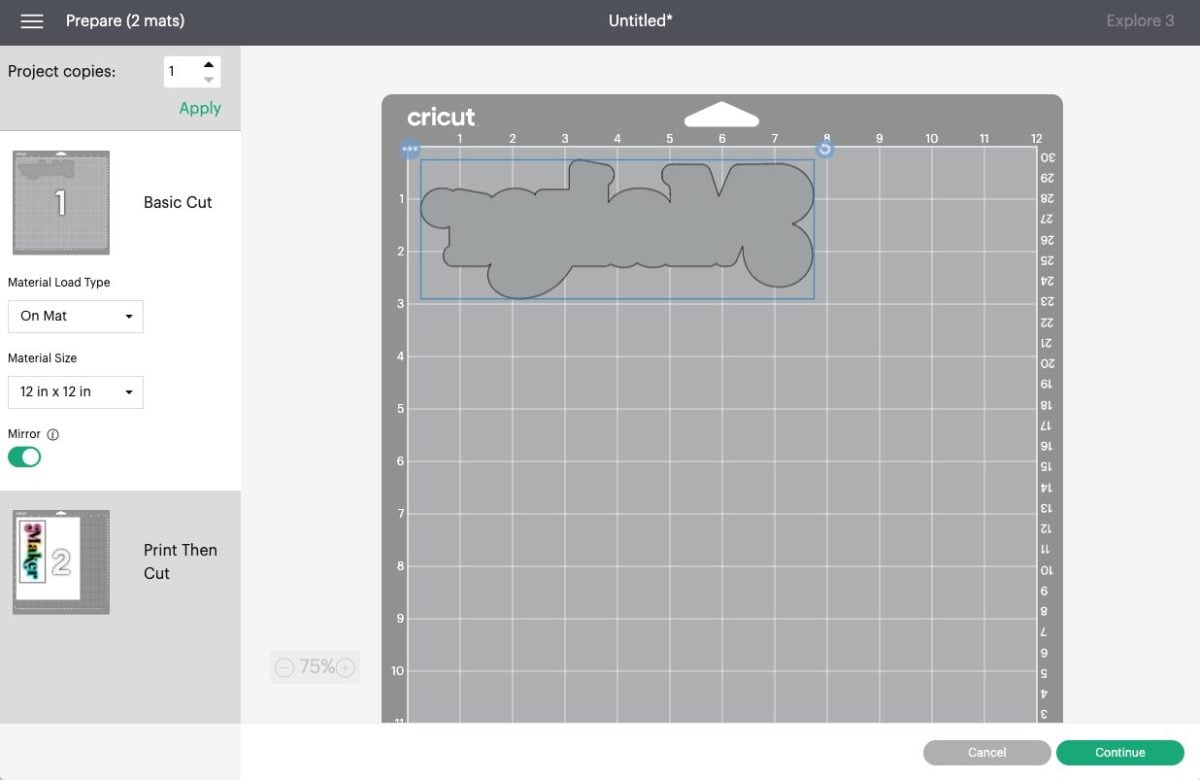
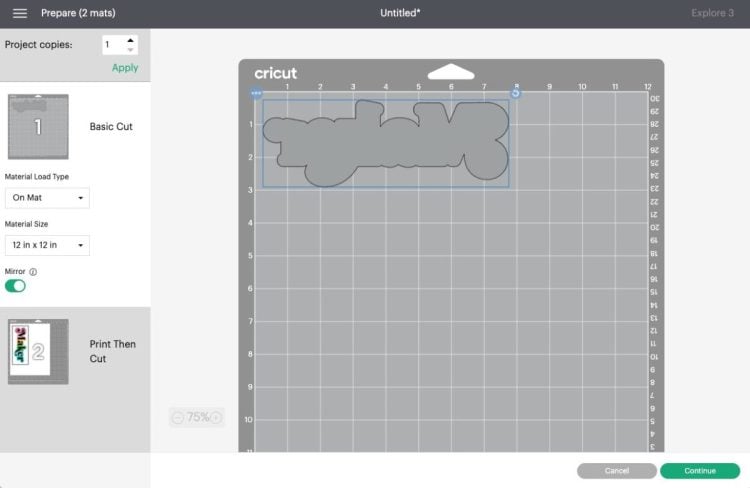
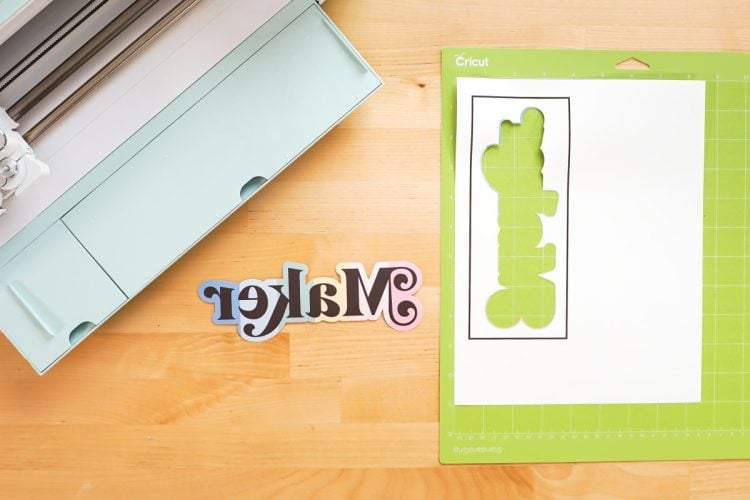
In the Prepare Screen, you’ll see your cut image, which is your Glitter HTV layer. Click Mirror.
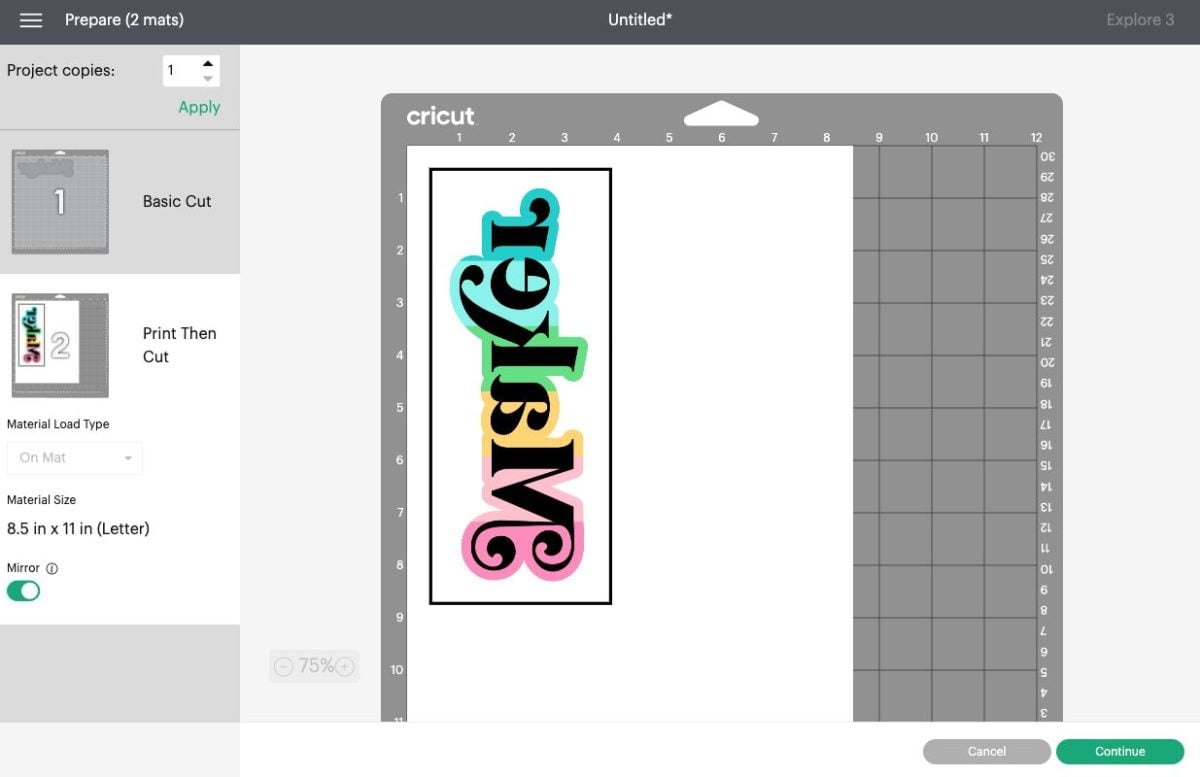
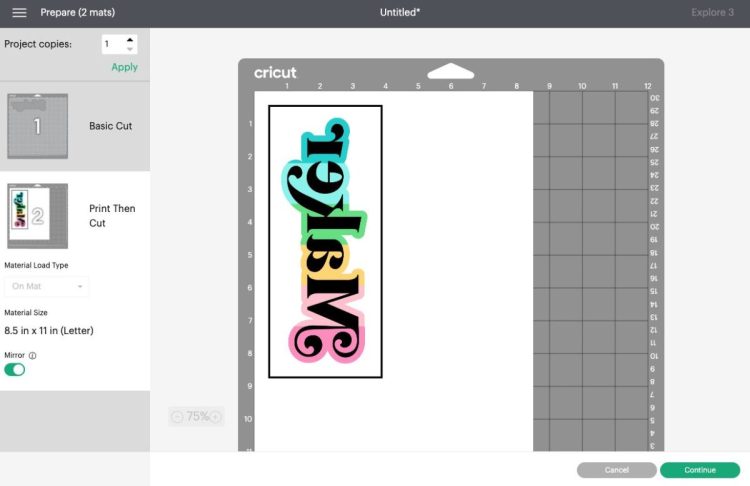
Then click on the second mat on the left and you’ll see your Print then Cut image. Mirror this one as well.
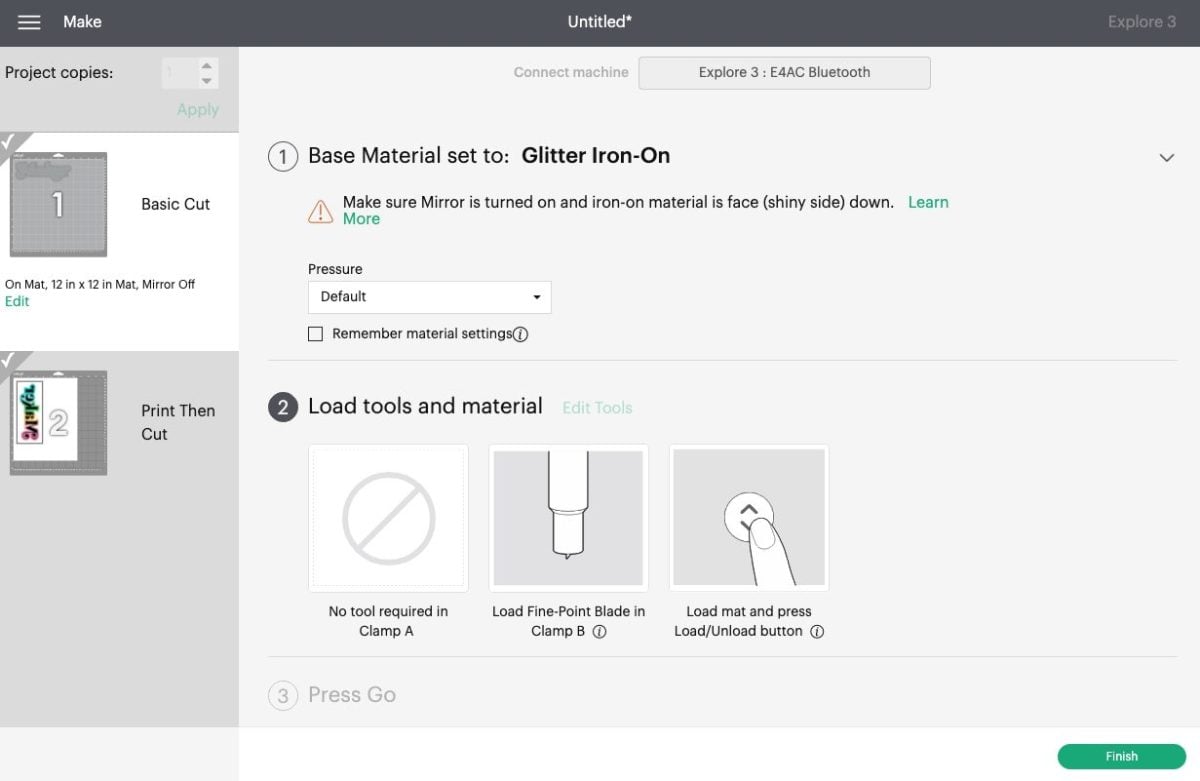
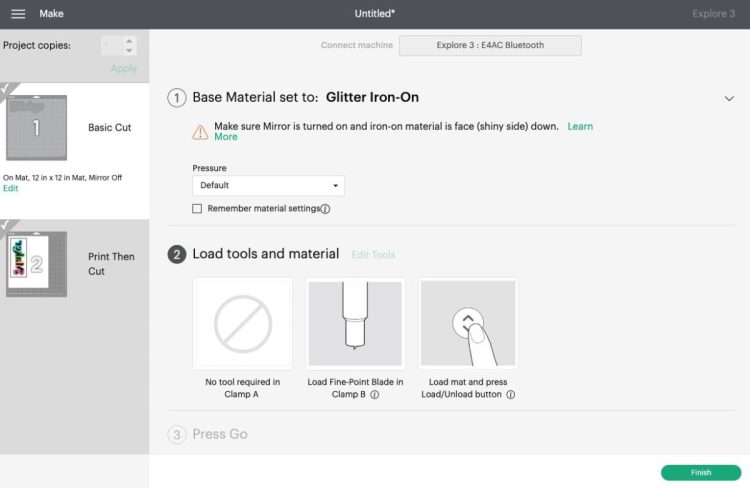
Then click back on the first cut layer. Connect your Cricut and choose Glitter Iron On as your material.
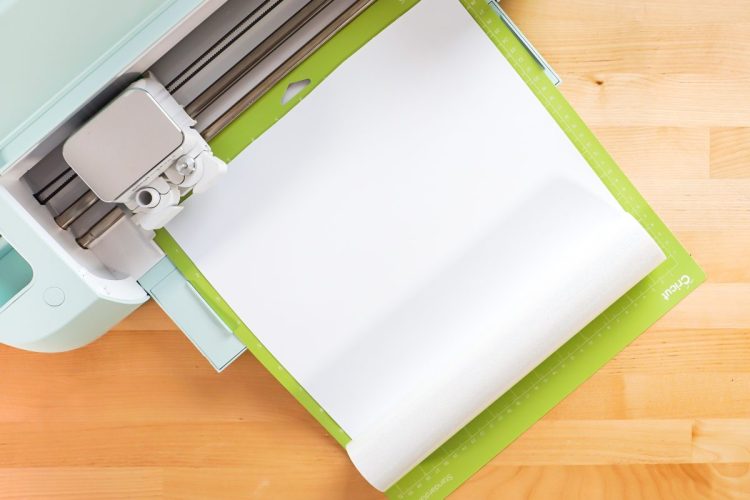
Cut your glitter HTV. I always keep the entire roll on my mat so I can just cut off what I used—I find I waste less vinyl this way.
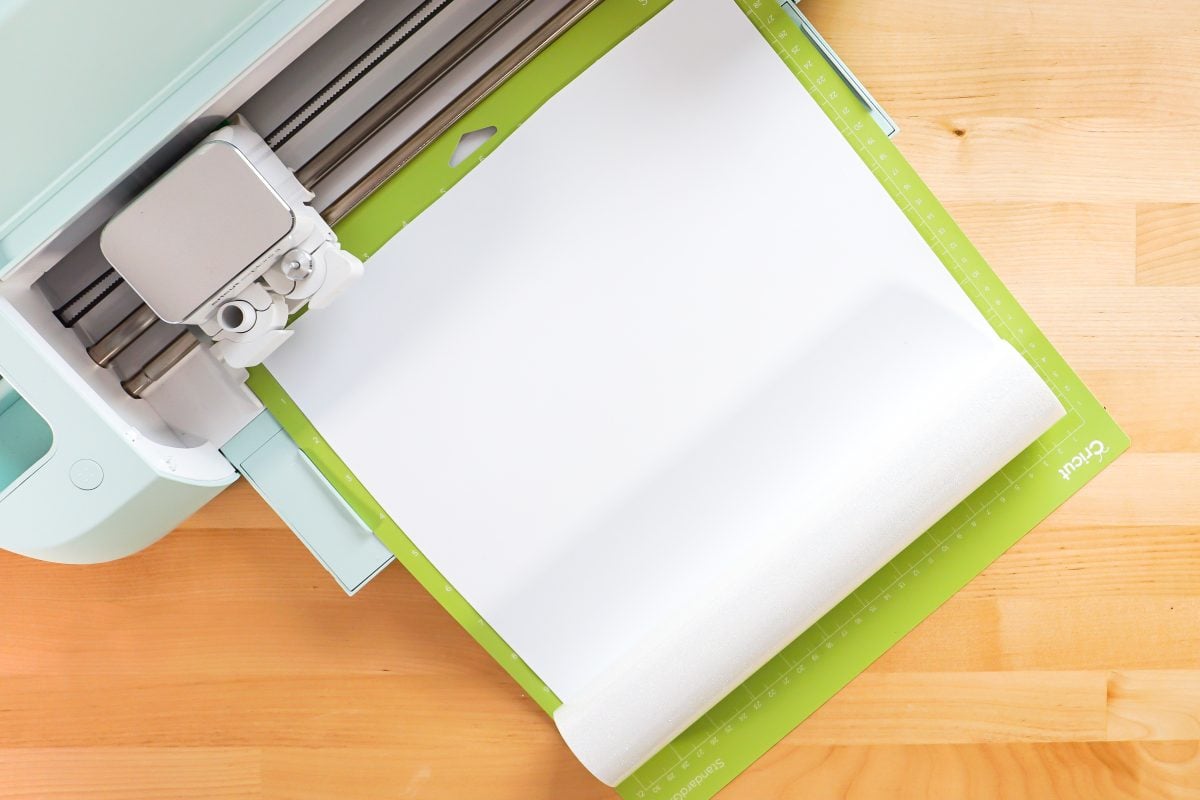
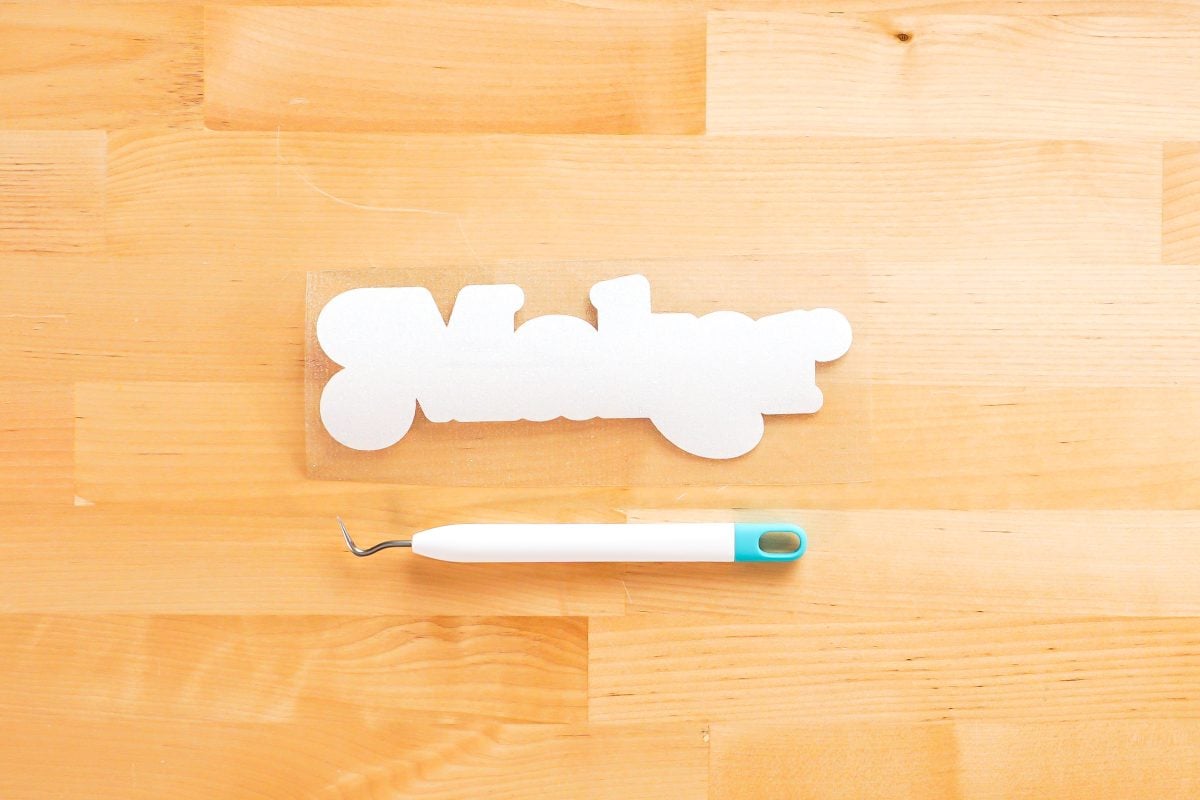
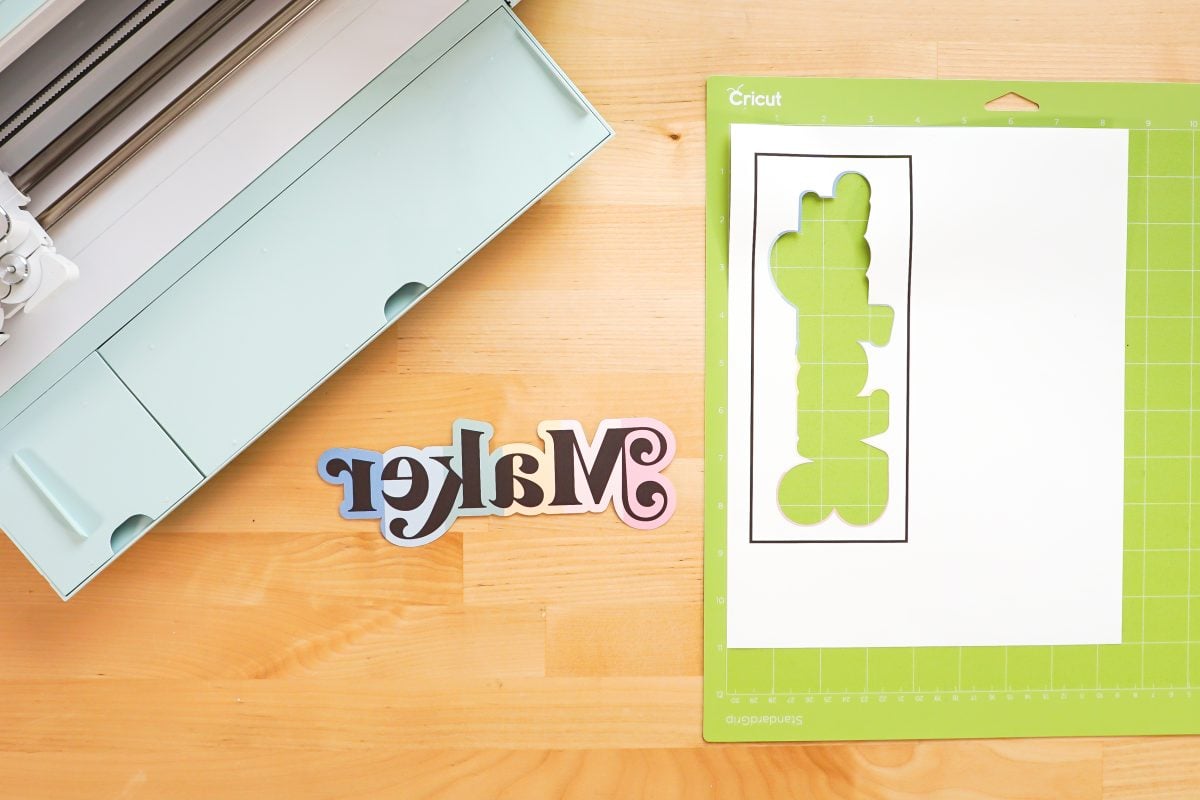
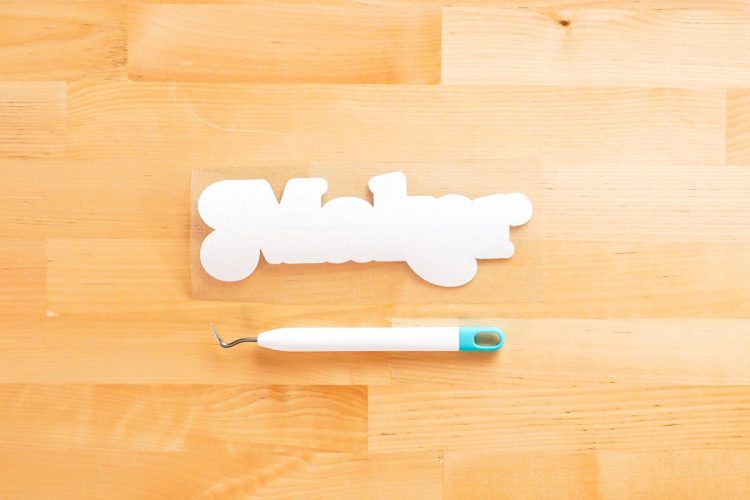
Now weed your Glitter HTV. If you need help with weeding, check out my post Weeding Iron On Vinyl: Tips and Tricks for Making it Easy. It will just be a solid piece—weed around the edge.
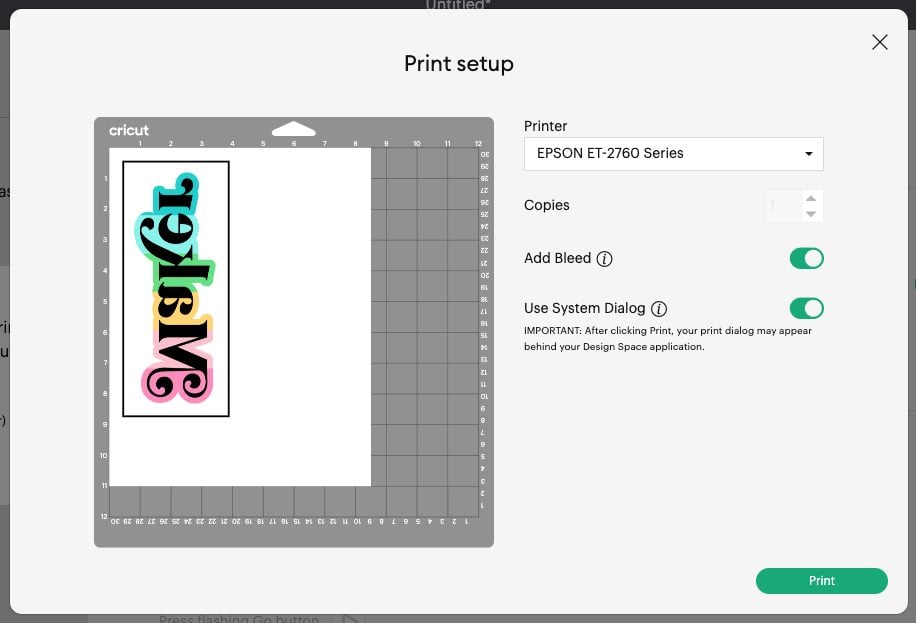
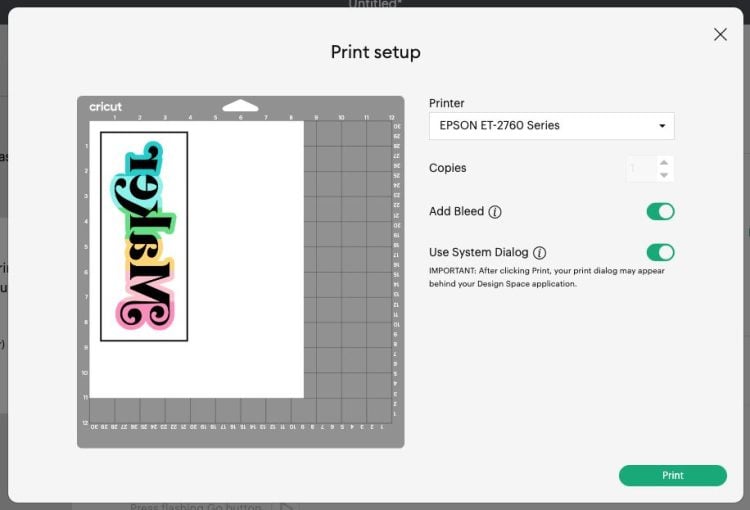
Now we’ll do the Print then Cut image. Click Send to Printer. Here you’ll want to select your sublimation printer as well as click the sliders for Add Bleed and Use System Dialog Box.
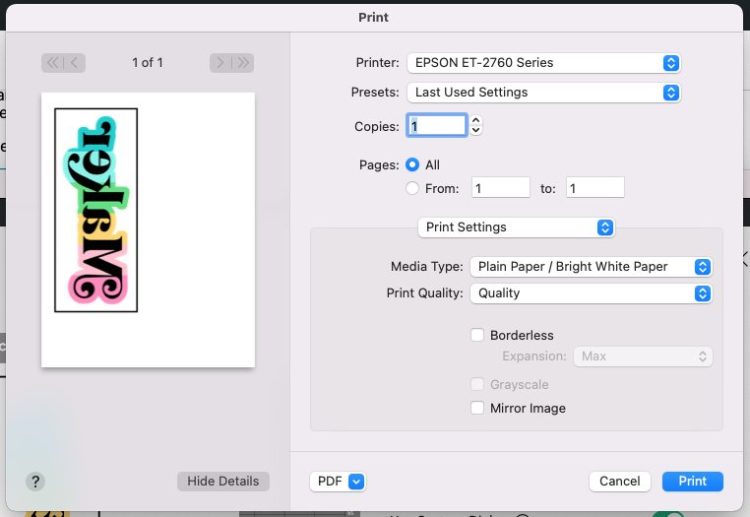
The system dialog box will open behind your Cricut Design Space window, so click behind it to see the window. You’ll double check two things here. If you are using a converted inkjet printer, you’ll want to select your ICC profile under color management. This will help correct color issues. Check out these two posts for more information on this important part of sublimation:
- Sublimation ICC Profiles & Color Management for Beginners
- How to Use Cricut Design Space for Sublimation Crafts
For my color management, I am using a Hiipoo Epson ET-4700 ICC profile.
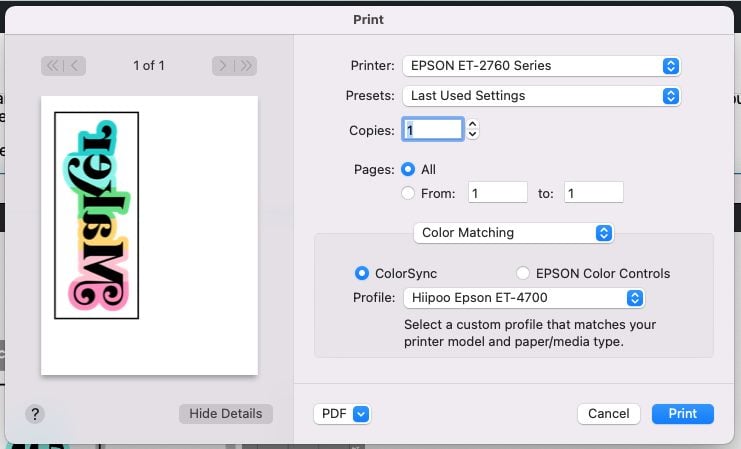
Then select Print Settings and change your Print Quality to Quality (Mac) or High (PC). You can see screenshots of both of these options on a PC in this post.
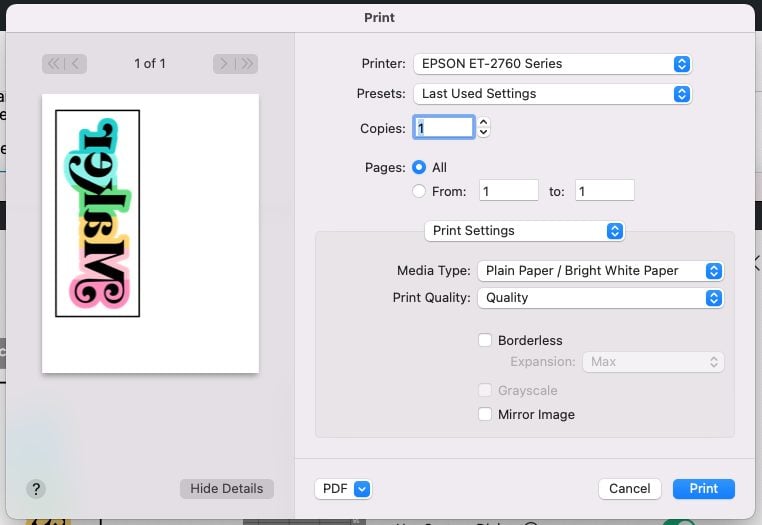
Click Print! Your sublimation printer will print out the Maker image with a black registration box around the edge. This is what your Cricut’s sensors will use to cut accurately around your image.
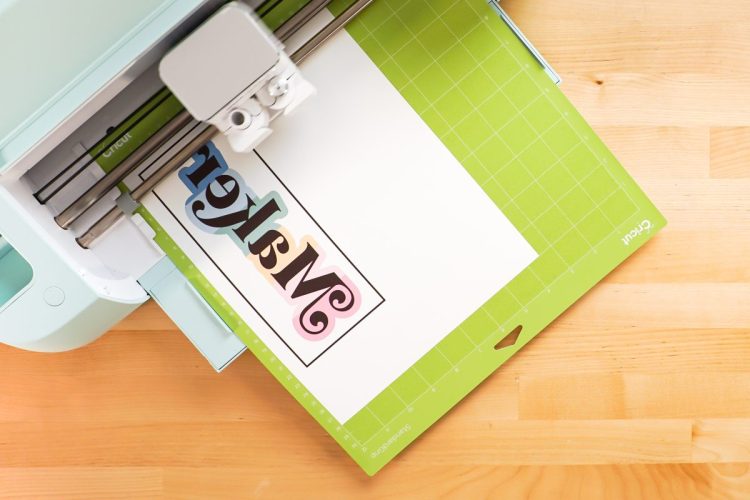
Once your image is printed, place your printed image in the top left of a Cricut Mat. Insert it into your machine and your Cricut will scan the registration box and cut around your image.
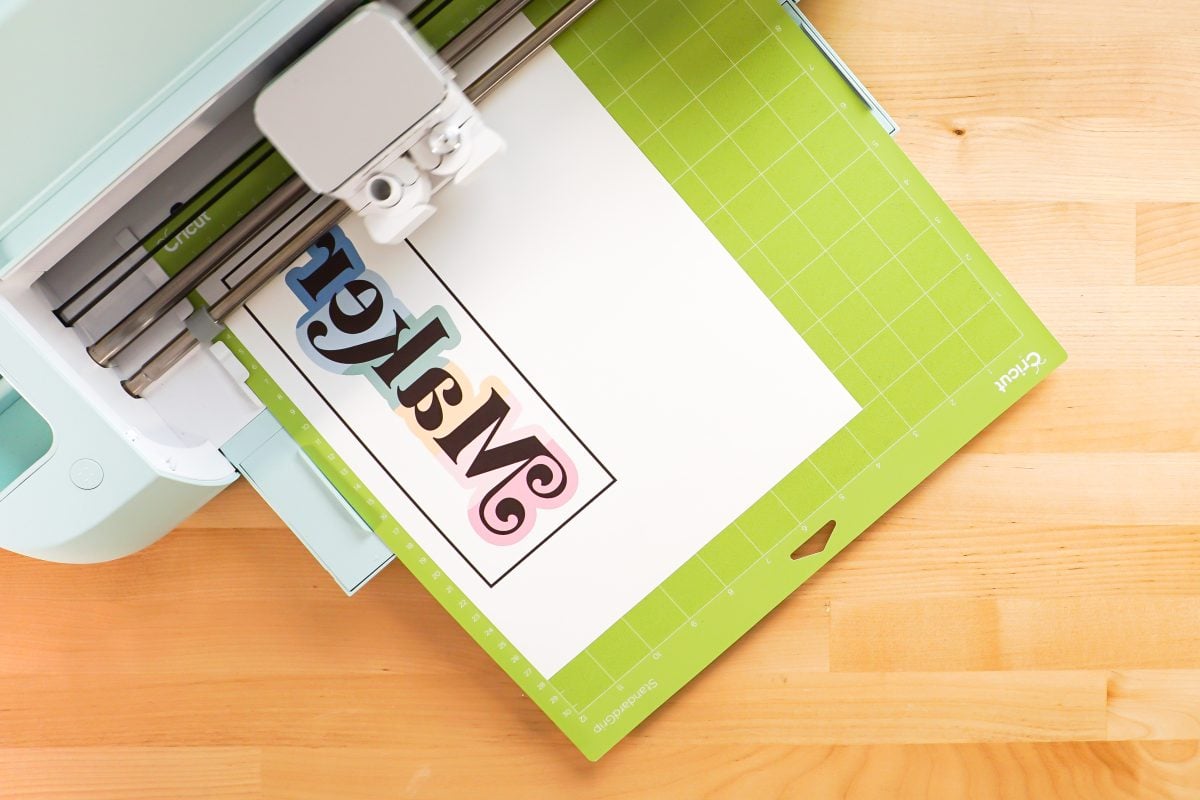
Peel the cut image carefully off your mat. See my post Tips for Removing Materials from Your Cricut Mat for tips and tricks.
Press Your Project to Sublimate on Glitter HTV
For this project, I’m using my heat press. You can also use a Cricut EasyPress, and you’ll want to use firm even pressure when you press.
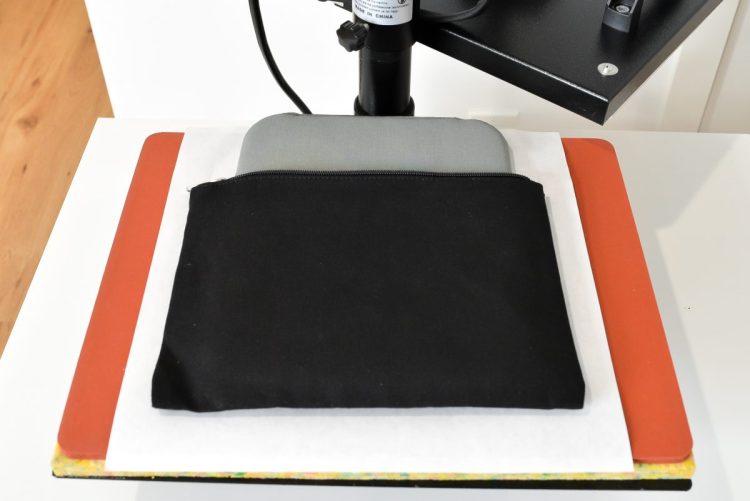
Start by placing your blank on the heat press (or EasyPress mat). If you have a blank that has zippers or seams, you might want to use a pressing pillow. This helps give you a flatter surface to press, which equals a more even transfer. I used my small EasyPress mat inside my zippered pouch and it fit perfectly.
Lint roll your blank to remove any fibers or lint.
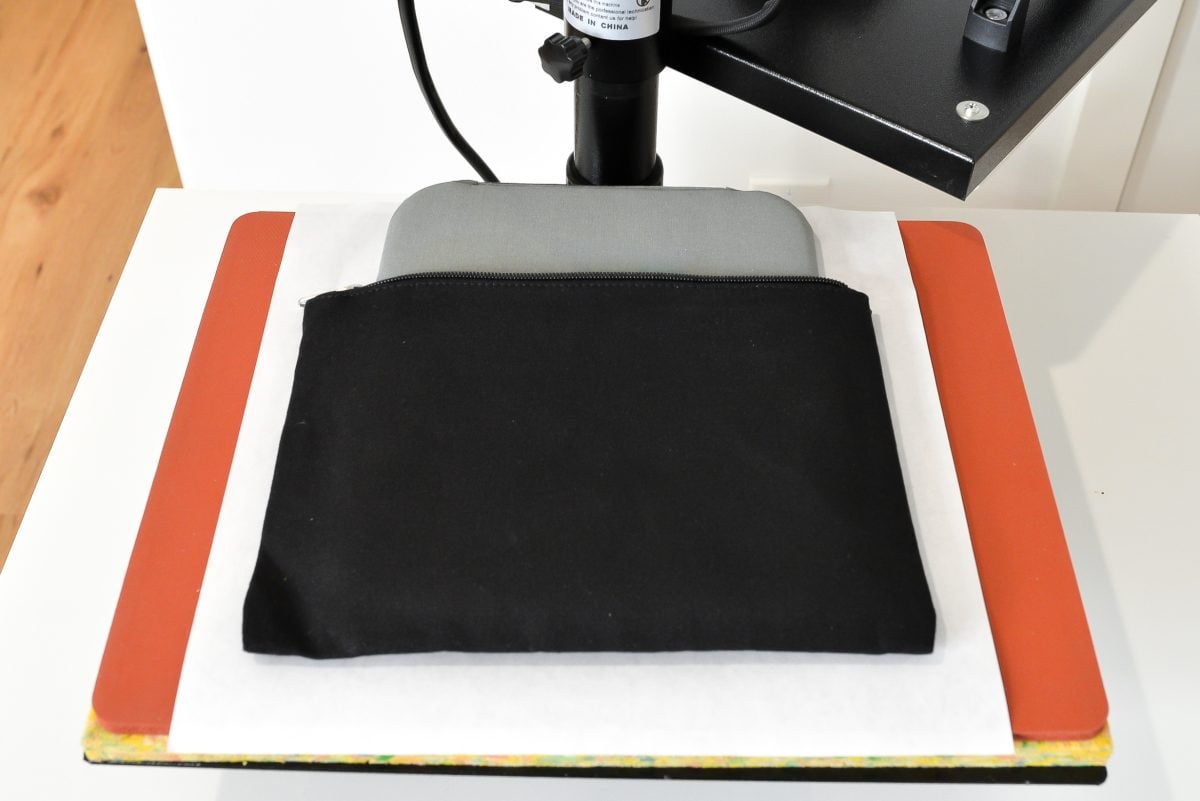
Set your heat press or EasyPress to 320°.
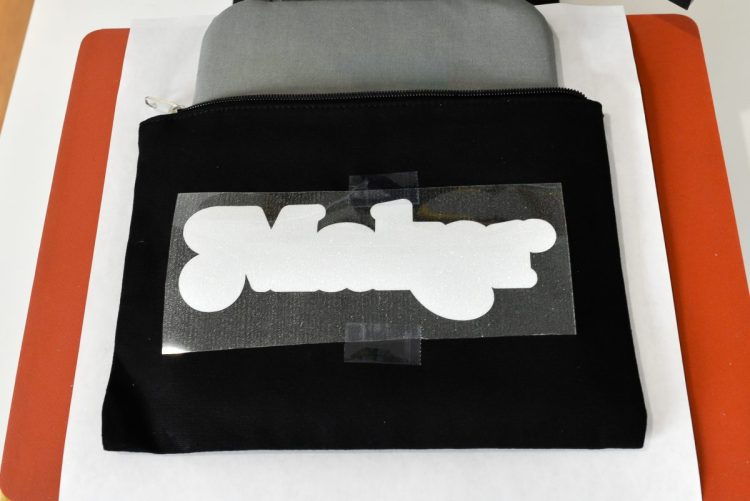
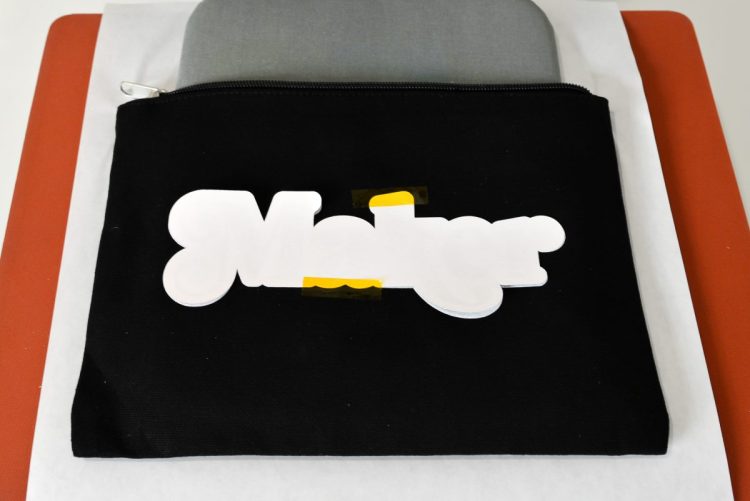
Pre-press your blank at 320° for 15 seconds to remove any moisture and give you a nice flat surface. Once it cools a bit, place your glitter HTV piece on the blank, with the carrier sheet up. Tape down using heat-resistant tape if needed.
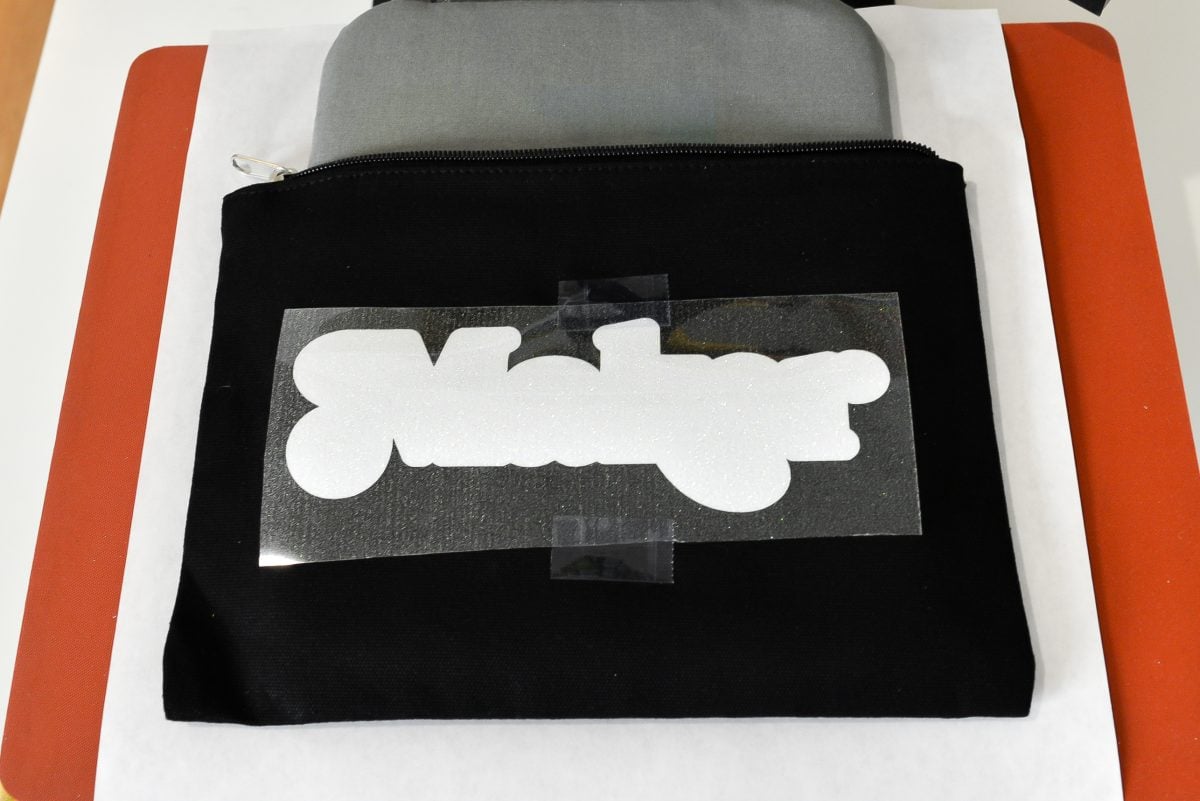
Then press your HTV to your blank for 20 seconds at 320°.
Then WAIT. Wait for your blank and HTV to cool completely before peeling back the carrier sheet. I have found that this helps minimize the possible white outline around your image. If the HTV is cool, it stretches less. Once it’s completely cooled, peel back the carrier sheet slowly and carefully, doing your best not to stretch the HTV.
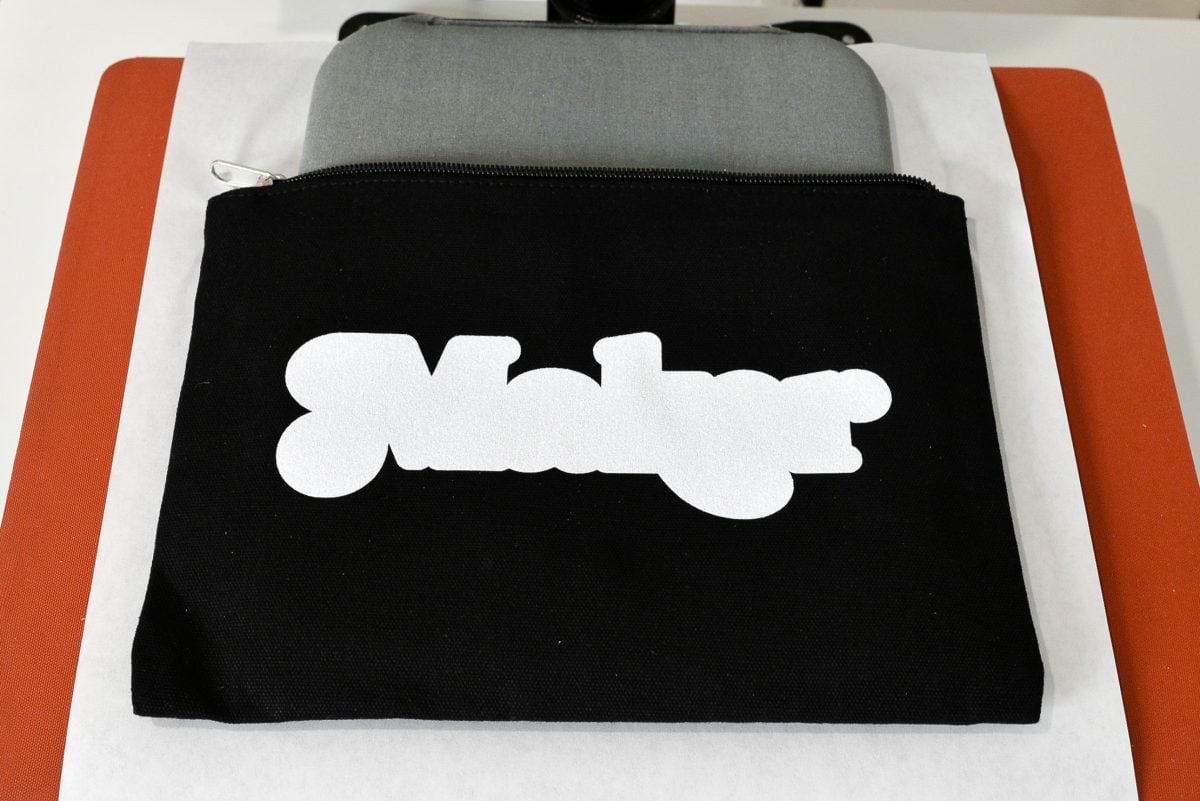
Now place your printed image face down on your glitter and tape.
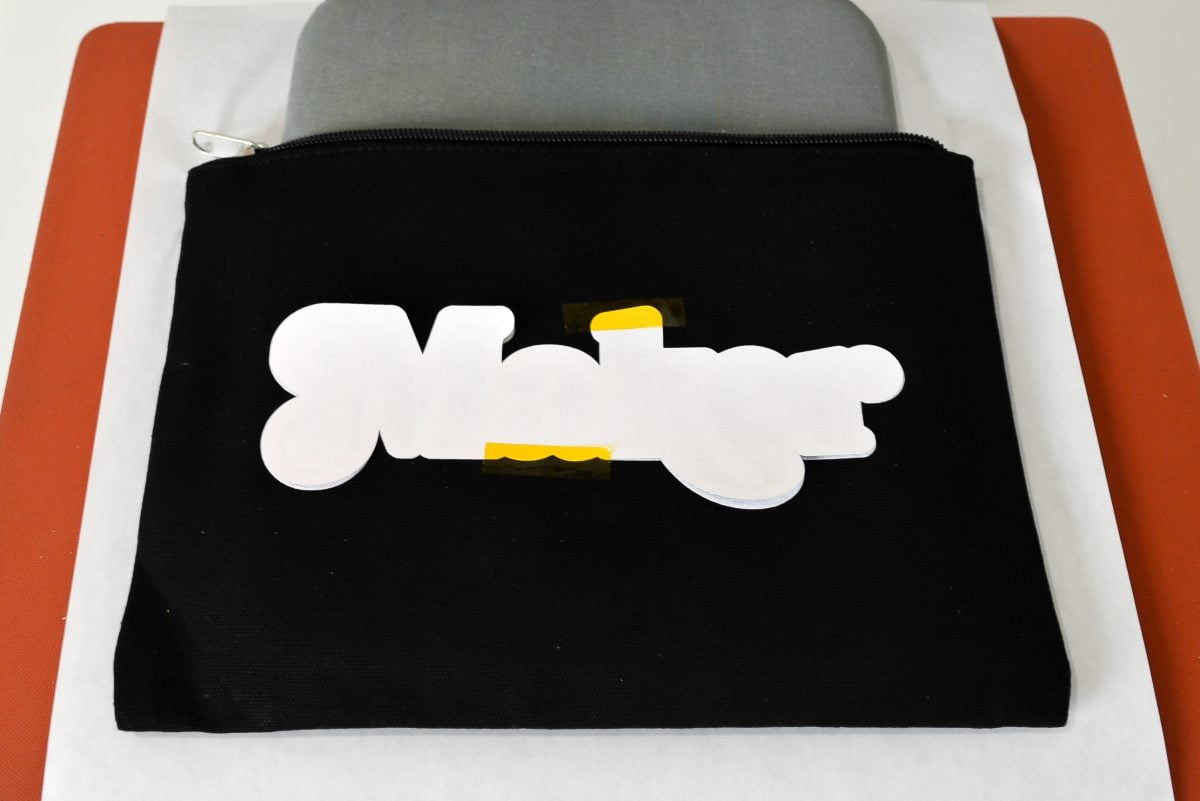
Reset your heat press / EasyPress to 400°. Once it’s to temperature, press your printed sublimation transfer to the HTV for 60 seconds.
Then WAIT. Again. I like to wait until it’s completely cool to remove the transfer—that way I minimize the risk of ghosting. You can read more about ghosting and other sublimation issues in my Troubleshooting Sublimation Printing post.
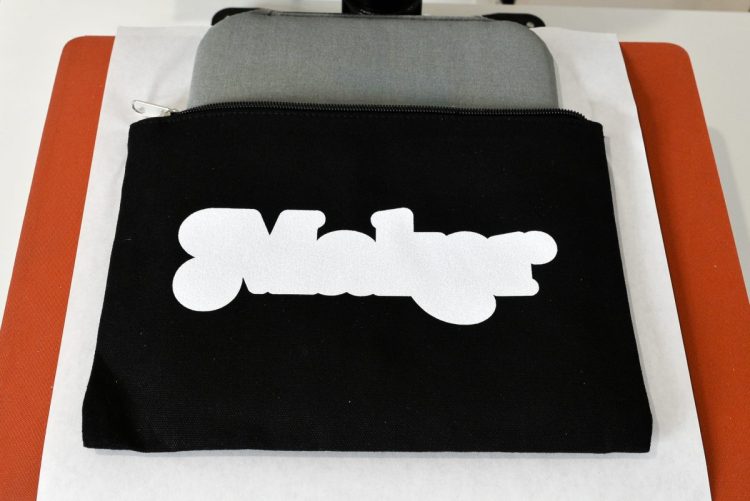
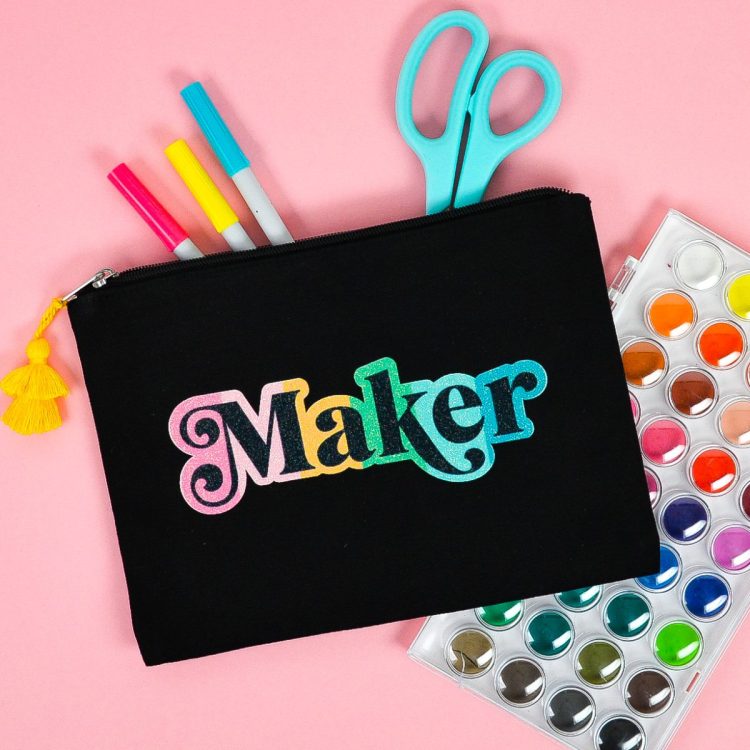
Once it’s cool, remove the transfer sheet and your image is done!!
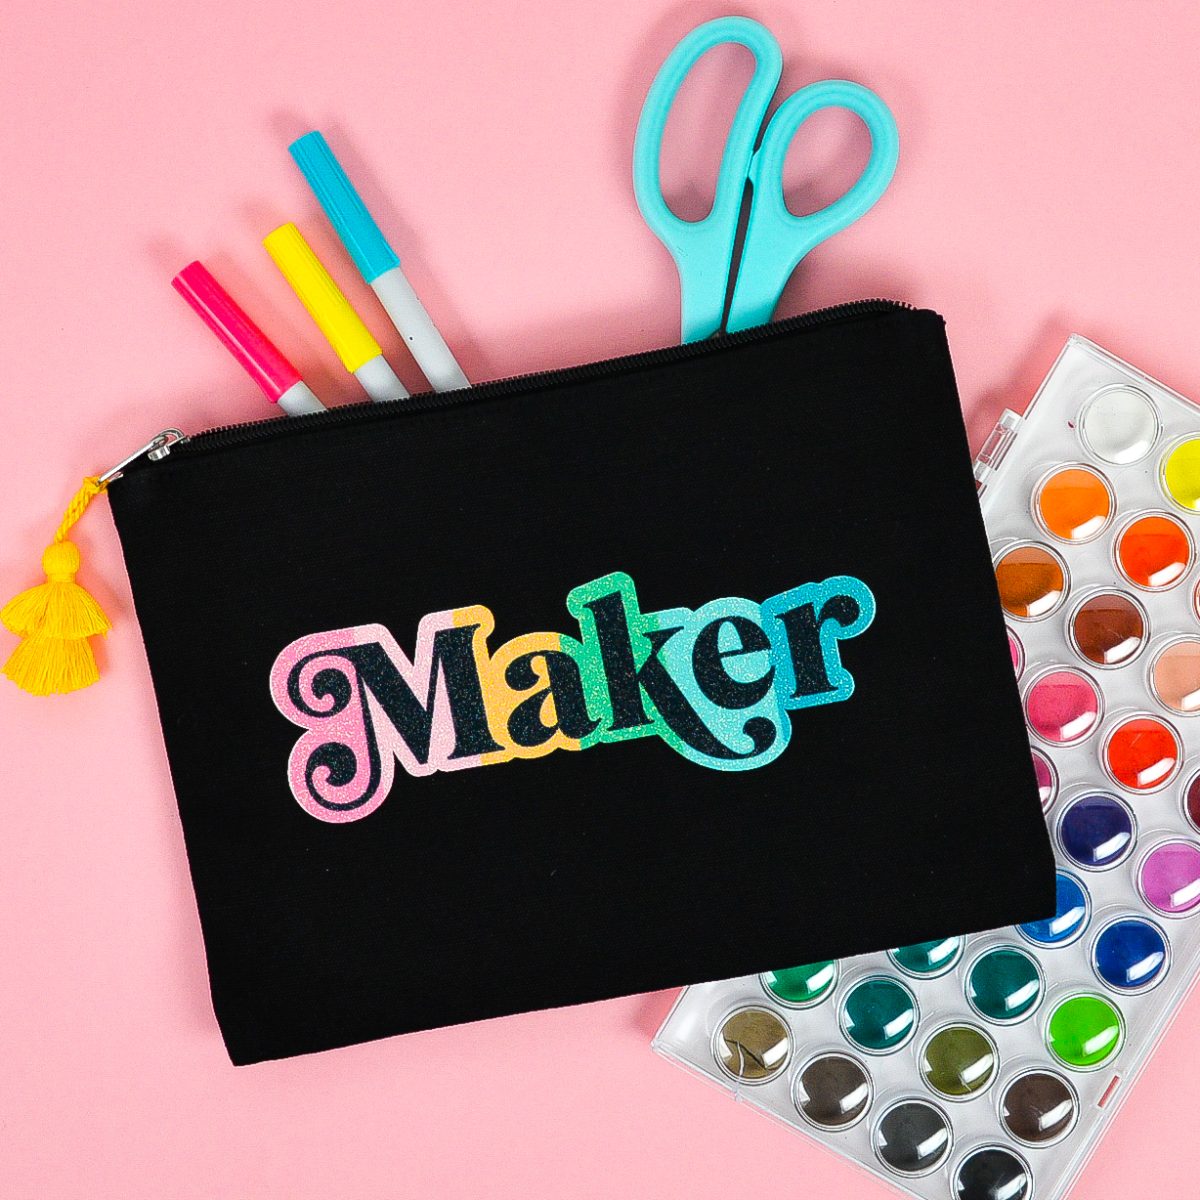
Love this tutorial to sublimate on glitter HTV? Grab all the supplies you need to make this project and have fun!
Want to learn more about sublimation? Check out all of the posts in this sublimation for beginners series!
- The Ultimate Guide to Sublimation Printing & Crafting
- What’s the Difference Between Sublimation, Cricut Infusible Ink, and HTV?
- How to Convert a Printer for Sublimation
- ICC Profiles & Color Management for Beginners
- Sublimation Software: What’s Best for Your Needs?
- The Best Sublimation Blanks and Substrates for Crafters
- Must-Have Sublimation Supplies and Tools
- Sublimation Paper Comparison
- Heat Press Machine Comparison for Sublimation Crafters
- Using Sublimation Prints with the Cricut Mug Press
- The Beginner’s Guide to Sublimation on Ceramic
- Troubleshooting Sublimation Printing
- Sublimation Cheat Sheets for Time, Temperature, Pressure & More!
HOW TO SUBLIMATE ON GLITTER HTV FOR COTTON AND DARK FABRICS
Equipment
- Cricut or other cutting machine
- Pressing pillow (optional)
- Heat press or
Instructions
- NOTE: There are two files in this Maker freebie. One has Maker in black and can be used on any fabric, but if you want the word "Maker" to be the color of your blank (for example, if you're using a dark blue tote bag and you want the dark blue to show through), you can use the cutout version. The process is the same, just make sure to weed the cutout. You'll need to place and tape down the interior of the "a" and "e" when you get to the sublimation press.
- How to Sublimate on Glitter HTVPrepare the file in Cricut Design SpaceStart by uploading the "Maker" PNG to Cricut Design Space. Under "Select Image Type," choose Complex. Click Continue.

- This next screen is where you would delete a background if needed. Because these files are designed to have a transparent background, you can just click Apply & Continue.

- Next, you'll select your Upload Type. We will be using this image in two ways, but start with Print then Cut image and click Upload.

- Your file will upload and you can bring it onto your canvas. Your file will import large, so resize it to fit on your project using the Size tool at the top. This design was made to measure 7.5" wide to fit on the zippered pouch. Remember that the maximum cut size for Print then Cut is 6.75" X 9.25".

- Then duplicate this image by selecting it and clicking Duplicate at the top of the Layers Panel on the right. Then change that duplicate to a cut image using the dropdown in the menu at the top.

- Your second image should change to an outlined version of the Print then Cut image.You're ready to cut your project!

- Print, Cut, and Weed Your ProjectClick Make It in the upper right. If you have a Cricut Explore 3, Cricut Maker 3, or Cricut Joy, you'll see a Load Materials pop-up. Choose On Mat. If you have an older machine, you won't see this option.

- In the Prepare Screen, you'll see your cut image, which is your Glitter HTV layer. Click Mirror.

- Then click on the second mat on the left and you'll see your Print then Cut image. Mirror this one as well.

- Then click back on the first cut layer. Connect your Cricut and choose Glitter Iron On as your material.

- Cut your glitter HTV.

- Now weed your Glitter HTV. If you need help with weeding, check out this post Weeding Iron On Vinyl: Tips and Tricks for Making it Easy. It will just be a solid piece—weed around the edge.

- Now we'll do the Print then Cut image. Click Send to Printer. Here you'll want to select your sublimation printer as well as click the sliders for Add Bleed and Use System Dialog Box.

- The system dialog box will open behind your Cricut Design Space window, so click behind it to see the window. You'll double check two things here. If you are using a converted inkjet printer, you'll want to select your ICC profile under color management. This will help correct color issues. Check out these two posts for more information on this important part of sublimation:Sublimation ICC Profiles & Color Management for BeginnersHow to Use Cricut Design Space for Sublimation CraftsFor the color management for this project, we are using a Hiipoo Epson ET-4700 ICC profile.

- Then select Print Settings and change your Print Quality to Quality (Mac) or High (PC). You can see screenshots of both of these options on a PC in this post.Click Print! Your sublimation printer will print out the Maker image with a black registration box around the edge. This is what your Cricut's sensors will use to cut accurately around your image.

- Once your image is printed, place your printed image in the top left of a Cricut Mat. Insert it into your machine and your Cricut will scan the registration box and cut around your image.

- Peel the cut image carefully off your mat. See this post Tips for Removing Materials from Your Cricut Mat for tips and tricks.

- Press Your Project to Sublimate on Glitter HTVFor this project, we are using a heat press. You can also use a Cricut EasyPress, and you'll want to use firm even pressure when you press. Start by placing your blank on the heat press (or EasyPress mat). If you have a blank that has zippers or seams, you might want to use a pressing pillow. This helps give you a flatter surface to press, which equals a more even transfer. Here, a small EasyPress mat was used inside the zippered pouch and it fit perfectly. Lint roll your blank to remove any fibers or lint.

- Set your heat press or EasyPress to 320°.Pre-press your blank at 320° for 15 seconds to remove any moisture and give you a nice flat surface. Once it cools a bit, place your glitter HTV piece on the blank, with the carrier sheet up. Tape down using heat-resistant tape if needed.Then press your HTV to your blank for 20 seconds at 320°.

- Then WAIT. Wait for your blank and HTV to cool completely before peeling back the carrier sheet. This helps minimize the possible white outline around your image. If the HTV is cool, it stretches less. Once it's completely cooled, peel back the carrier sheet slowly and carefully, doing your best not to stretch the HTV.

- Now place your printed image face down on your glitter and tape.

- Reset your heat press / EasyPress to 400°. Once it's to temperature, press your printed sublimation transfer to the HTV for 60 seconds.Then WAIT. Again. Wait until it's completely cool to remove the transfer—this way you minimize the risk of ghosting. You can read more about ghosting and other sublimation issues in this Troubleshooting Sublimation Printing post.Once it's cool, remove the transfer sheet and your image is done!!




Comments & Reviews
Beth says
Can you help please. When I sub on white glitter the image turns green. But when I sub the same image on poly fabric it’s perfect. What’s causing my white glitter subs to turn green? And it’s only when I do white glitter
Crystal Summers says
Hi Beth,
Gosh, that’s so frustrating! Have you confirmed that the blank you are using is definitely for sublimation? Sometimes if a blank isn’t specifically for sublimation (or marketed incorrectly) images will transfer really faded and look green-ish. Hope this helps!
Happy crafting,
Crystal, HLMS Community Manager
mary sergeant says
Here’s one for you. I sublimated over Siser Sparkle (white) and part of the SUBLIMATION lifted in a small spot. Trying to figure out how to fix it. it’s a frog. and a small section of the leg actually lifted off the HTV. the rest is fine.
I’d really like to know what happened since sublimating infuses into the substrate. it didn’t. I haven’t washed the shirt yet. it was for my daughter and she wore it then noticed part of the ‘leg’ lifted. so before I wash it – I need to fix it if that’s possible. without melting anything.
or do have to just use fabric glue for now and hope it holds?
thank you in advance for your quick reply. I’d really like to fix this. or at least get an idea of what happened.
Marti says
I tried this and my glitter scotched. I did use a different manufacturers glitter HTV, would this make a difference?
Crystal Summers says
Hi Marti,
Yes, your brand of HTV does matter. Often times, different manufacturers have different time and temperature settings. Double check yours. Your time or temp may have been too long/hot. If you still have the issue, you may want to try for less time. You can always add more time, but can’t take it away. Hope this helps!
Happy crafting!
Crystal, HLMS Community Manager