Did you know you can use a convection oven for sublimation? This post walks you through how to sublimate a tumbler using shrink wrap and a convection oven. It’s easier than you think!
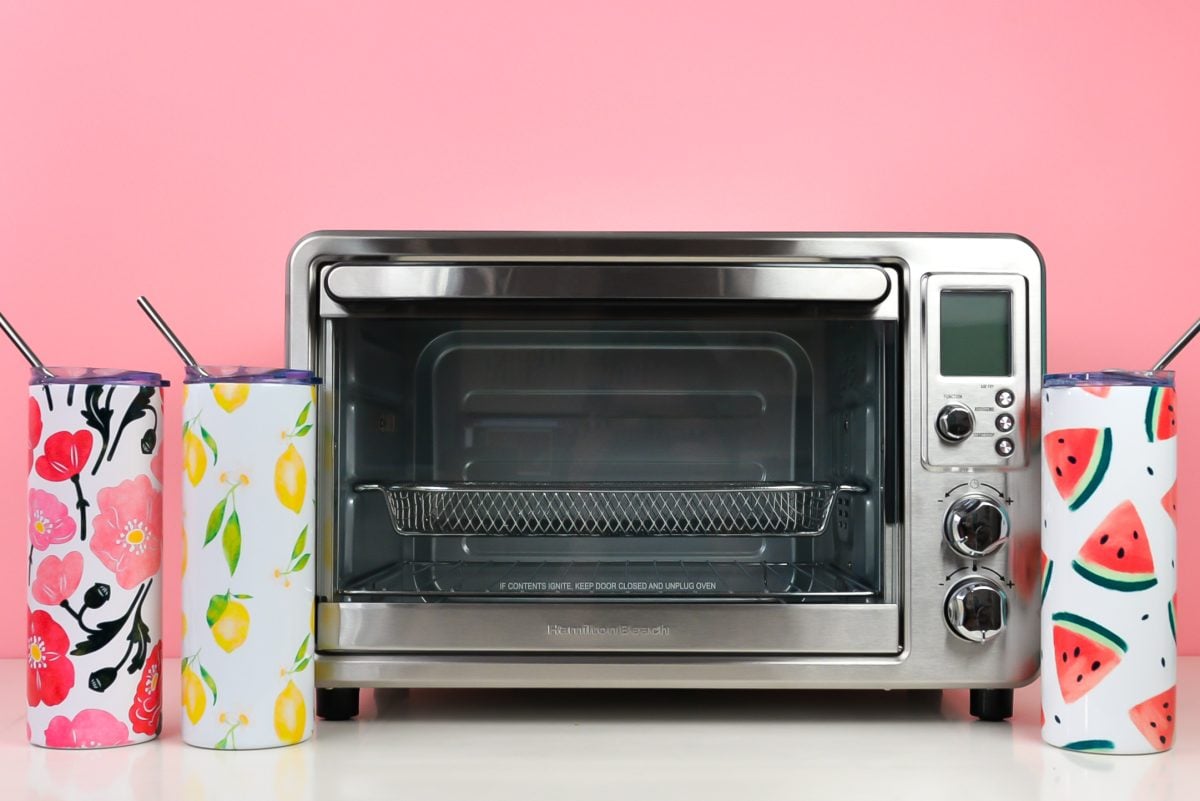
If a standalone mug press or tumbler press is outside your budget, or you have something like a Cricut Mug Press which is limited to certain sizes, a convection oven is a great option for sublimating!
You can easily spend $200 and up on a specific heat press for mugs and tumblers—not to mention all of the different inserts for doing a variety of sizes. But you can spend less than $100 for a convection oven and sublimate all sorts of different items using shrink wrap!
Today I’m going to share how to sublimate a tumbler using shrink wrap using a convection oven. One of the things I love about this method is that it’s one and done. You don’t need to press the top half of the tumbler and then press the bottom half of the tumbler. If your convection oven is evenly heated, you don’t even need to rotate the tumbler while it’s cooking! It’s so easy.
This post is part of my larger series on sublimation for beginners—everything you need to know about sublimation without all of the technical tutorials and confusing jargon. You can see all of the sublimation posts in this series here!
I’ll be using a 20oz. skinny tumbler with a clear lid and a metal straw for this project, but you can buy all sorts of sublimation blanks and different sizes of shrink wrap to expand the types of sublimation projects you can make in your oven.
Watch the Video Tutorial
Watch here for an easy video tutorial of sublimating tumblers in a convection oven. If you’d prefer written instructions, read on!
Before we get to the tutorial, let’s cover some frequently asked questions!
Using Shrink Wrap for Sublimation Questions
Absolutely not! During sublimation process, the ink turns into a gas and some of this escapes into the inside of the oven. It is unsafe for food consumption. Do not use your sublimation convection oven for food.
Again, NO! It’s not safe to do sublimation in an oven you are also using for cooking food.
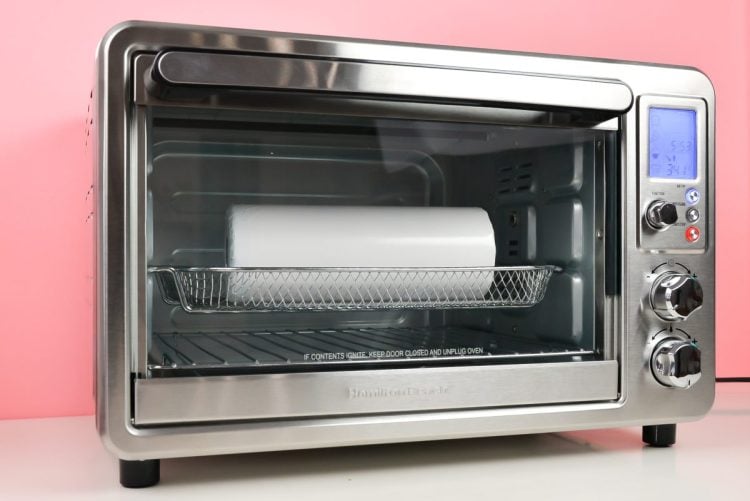
YES! Again, this can’t be used for food if it is used for sublimation. My convection oven is actually an air fryer. They are technically the same cooking process. I’ve seen people use air fryers that look like a conventional convection oven, as well as the trendy ones that are shaped more like round…spaceship.
I really like using the air fryer basket in my oven because it doesn’t leave any heat marks on my tumbler.
You must have a sublimation tumbler for this project. It must have the poly coating for the sublimation process to take place.
Yes! Make sure you are using a sublimation image that is designed for the taper on your tumbler, and then a regular shrink wrap sleeve should work.
Yes! You can cut an Infusible Ink transfer sheet using your Cricut and apply it to your tumbler using this same process.
I know you need butcher paper for almost all sublimation crafts, but you can skip the butcher paper for this particular technique.
Nope, they are good to go as is! The permanent design will not wash off and you don’t need to seal them in any way.
Supplies for Sublimating a Tumbler using Shrink Wrap
- Sublimation Printer with sublimation ink
- Sublimation Paper
- Skinny Tumbler
- Convection Oven
- Tumbler Shrink Wrap – you can also purchase skinny tumblers with shrink wraps included
- Lint roller
- Heat-resistant tape
- Heat-resistant gloves (optional)
Setting Up the Tumbler Sublimation File
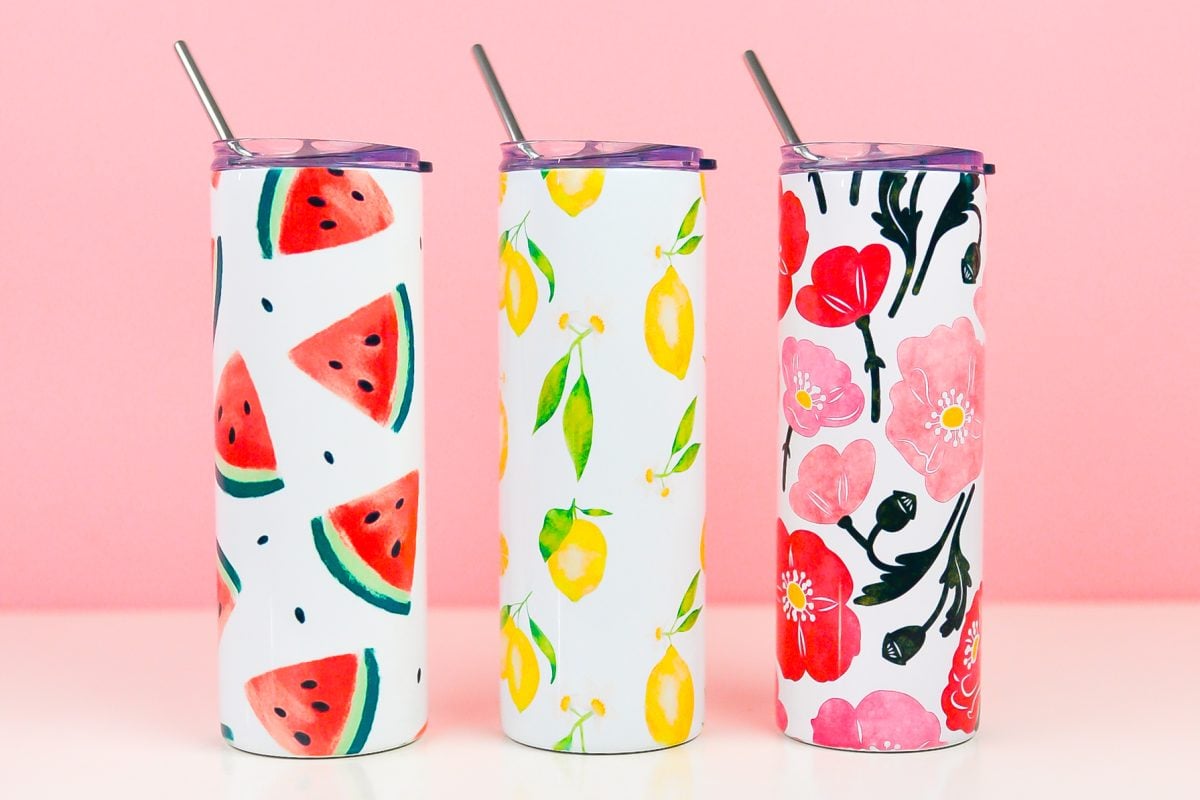
Let’s start by setting up our file in our software. For this project, I used three different files:
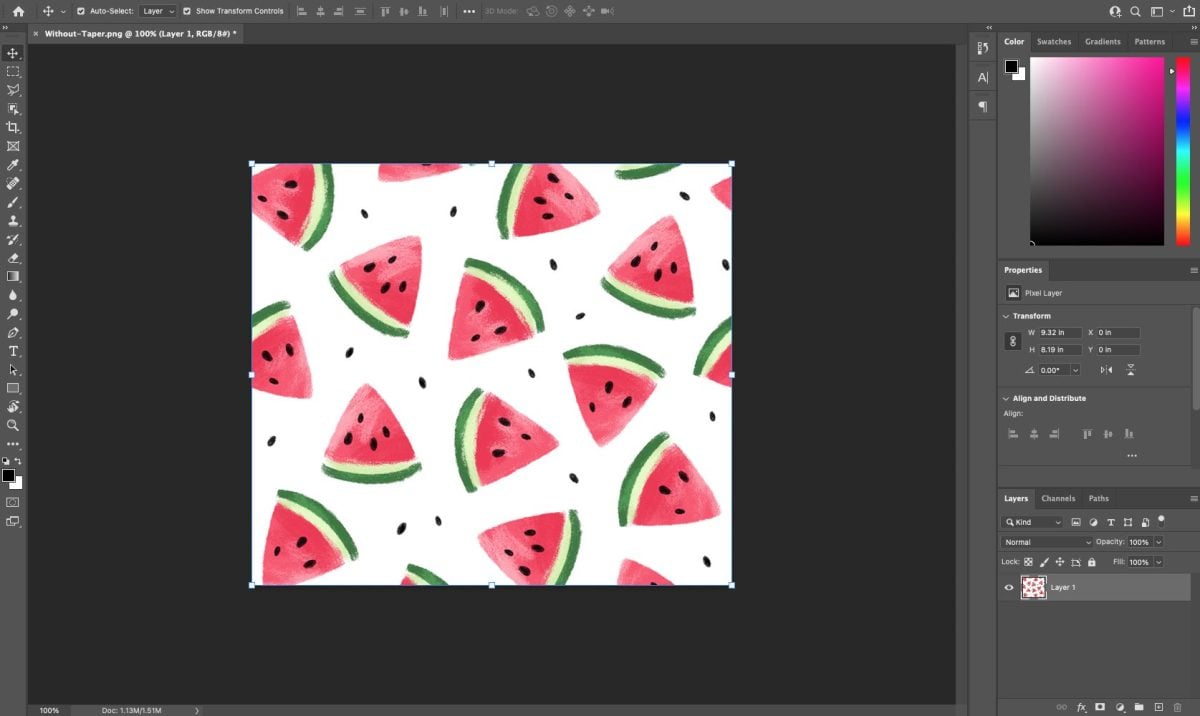
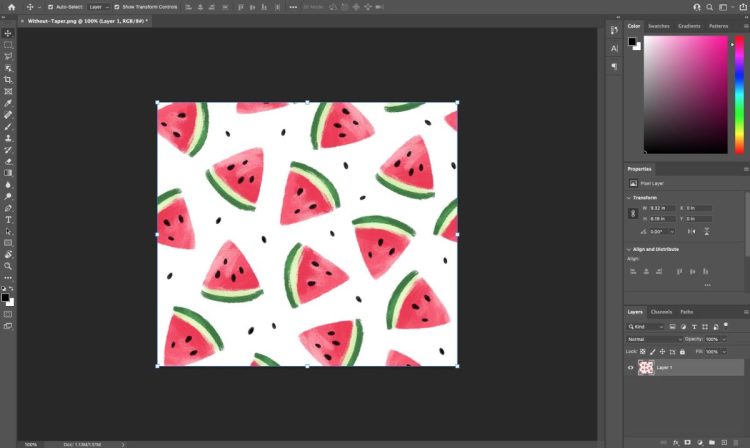
You can use almost any graphic design software for this part. Cricut Design Space does have its limitations, since the size of the image needed for a skinny tumbler is larger than the Print then Cut maximum of 6.25″ x 9.25″. So for this project, I opened the PNG in Adobe Photoshop.
If needed, resize your image and then print using your sublimation printer. I’m a big fan of converted Epson EcoTank printers, but if you have a different sublimation printer that’s great too!
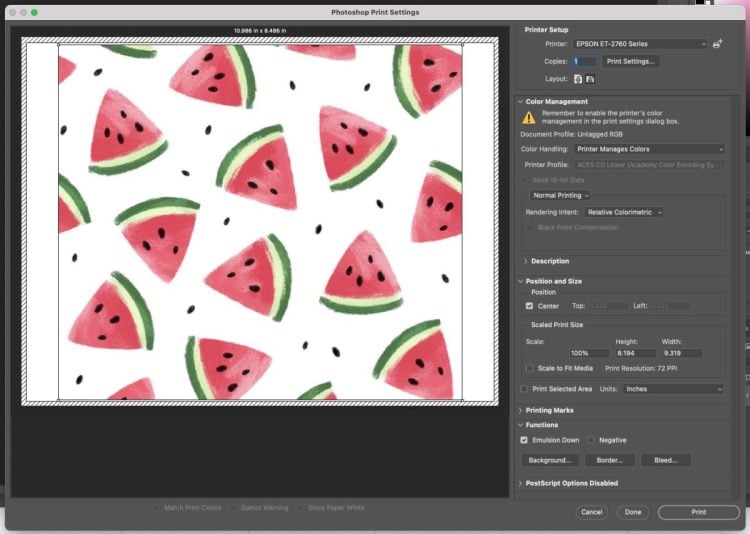
In the Print Settings, make sure you have your ICC Profile selected if needed, and click Emulsion Down to reverse your image.
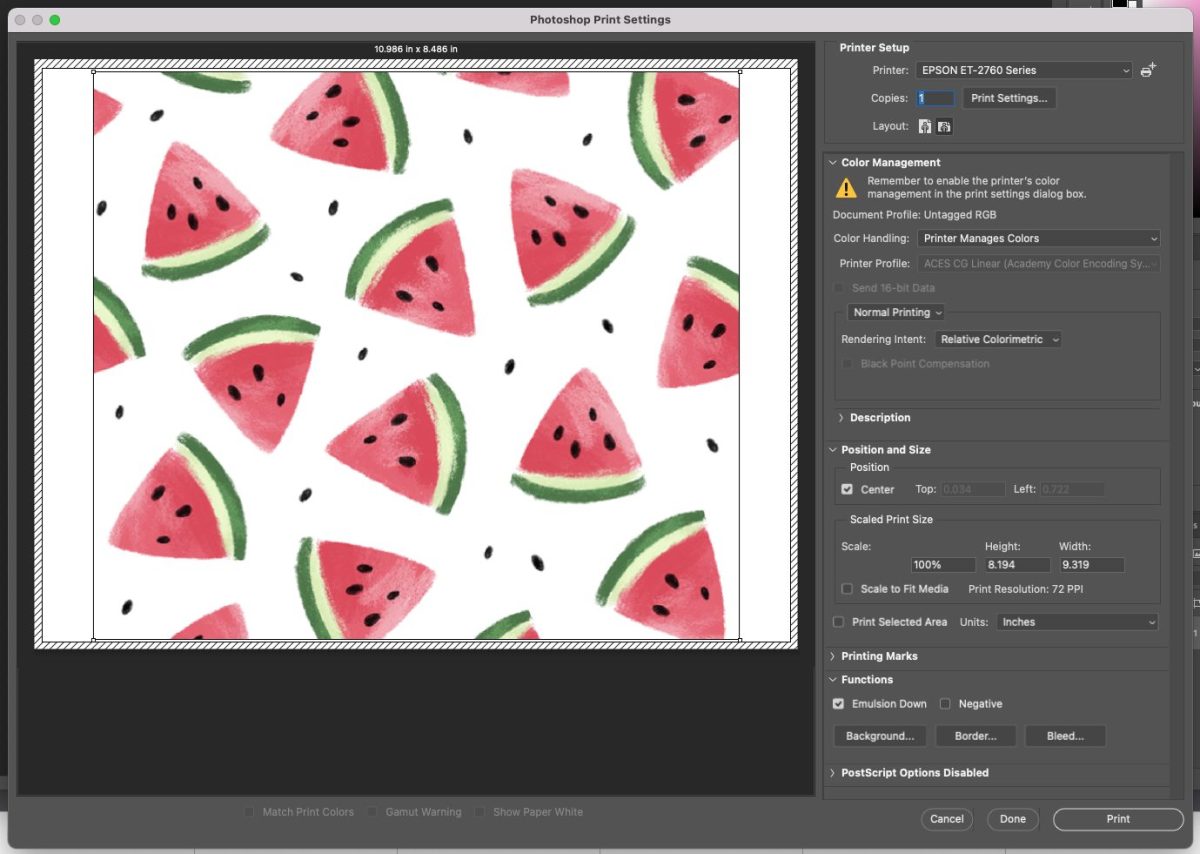
Note that your transfer will be duller and the color may not be quite what you expect on the print. If you’d like, you can do a test press using a piece of polyester fabric to make sure the colors are correct before printing another transfer and using it on your more expensive blank.
How to Sublimate a Tumbler in an Oven
Okay, let’s make our tumbler using shrink wrap sleeves! Start by turning on your convection oven and setting it to 375 degrees so it heats up fully while you work on creating your transfer.
NOTE: Temperature will vary based on the manufacturer of your blank. Always check manufacturer instructions. I also like to use two inexpensive thermometers inside my oven to make sure I have even temperature. Even the digital convection ovens aren’t always 100% accurate with heat settings.
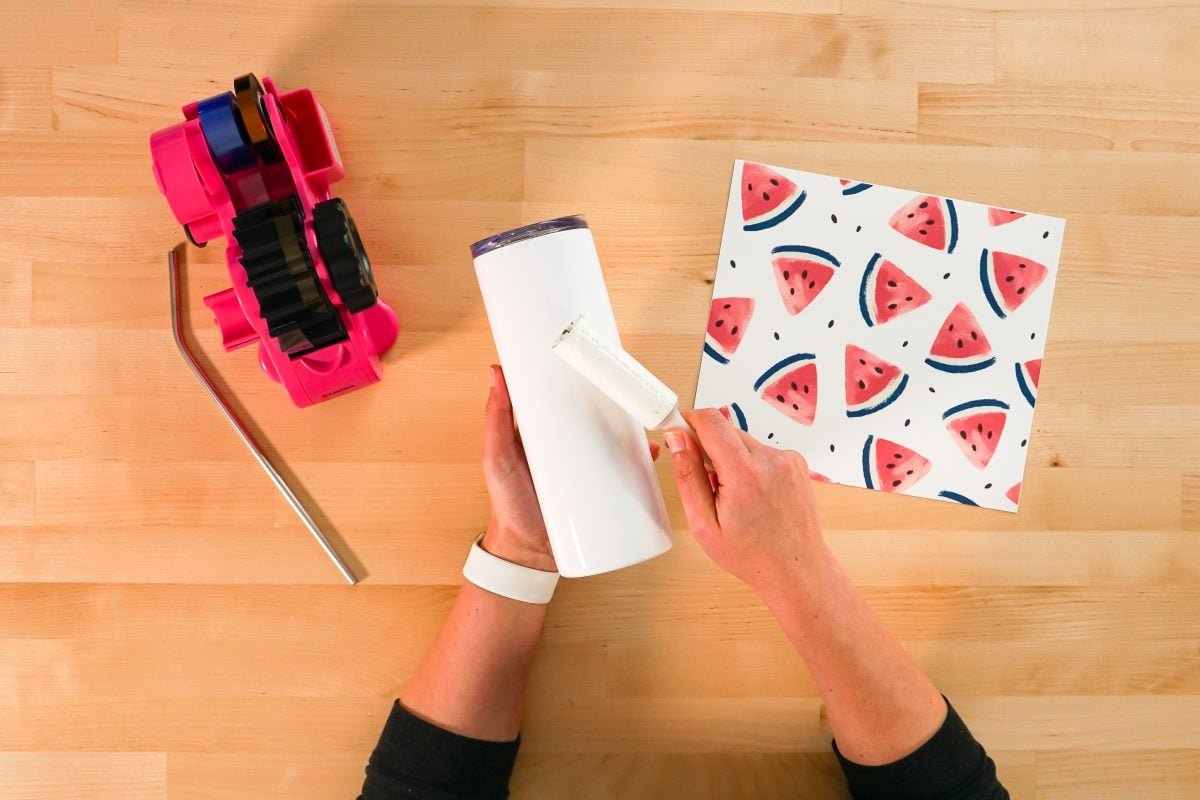
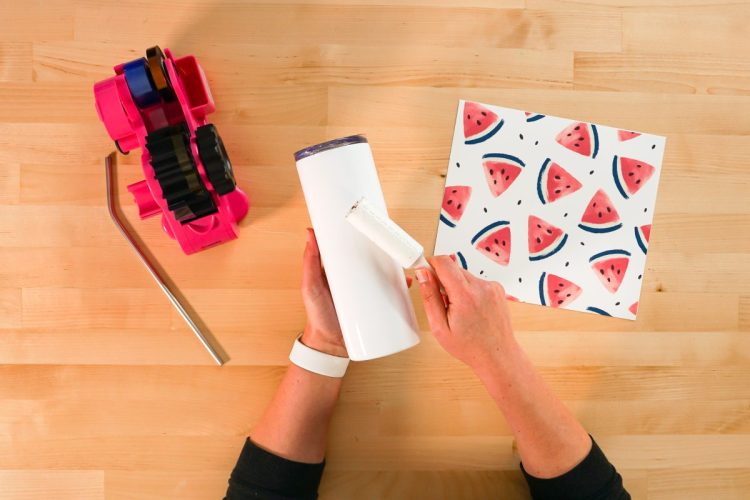
Clean your tumbler using a lint roller. Any pieces of lint or dust can sublimate onto the tumbler and leave spots.
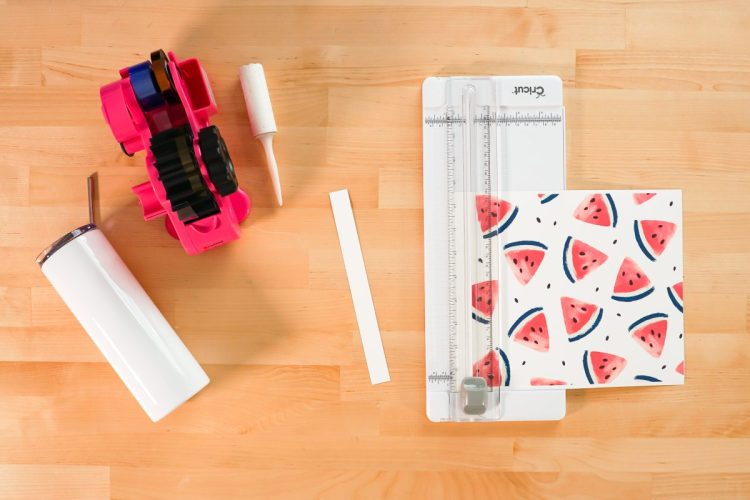
Trim your design to fit on your skinny tumbler. Leave a tiny bit of overhang on both the top and bottom of the mug. You’ll want this so there isn’t a blank white area around the edges. Also, ensure you have just the tiniest bit of extra so your transfer overlaps slightly when it’s fully wrapped around your tumbler.
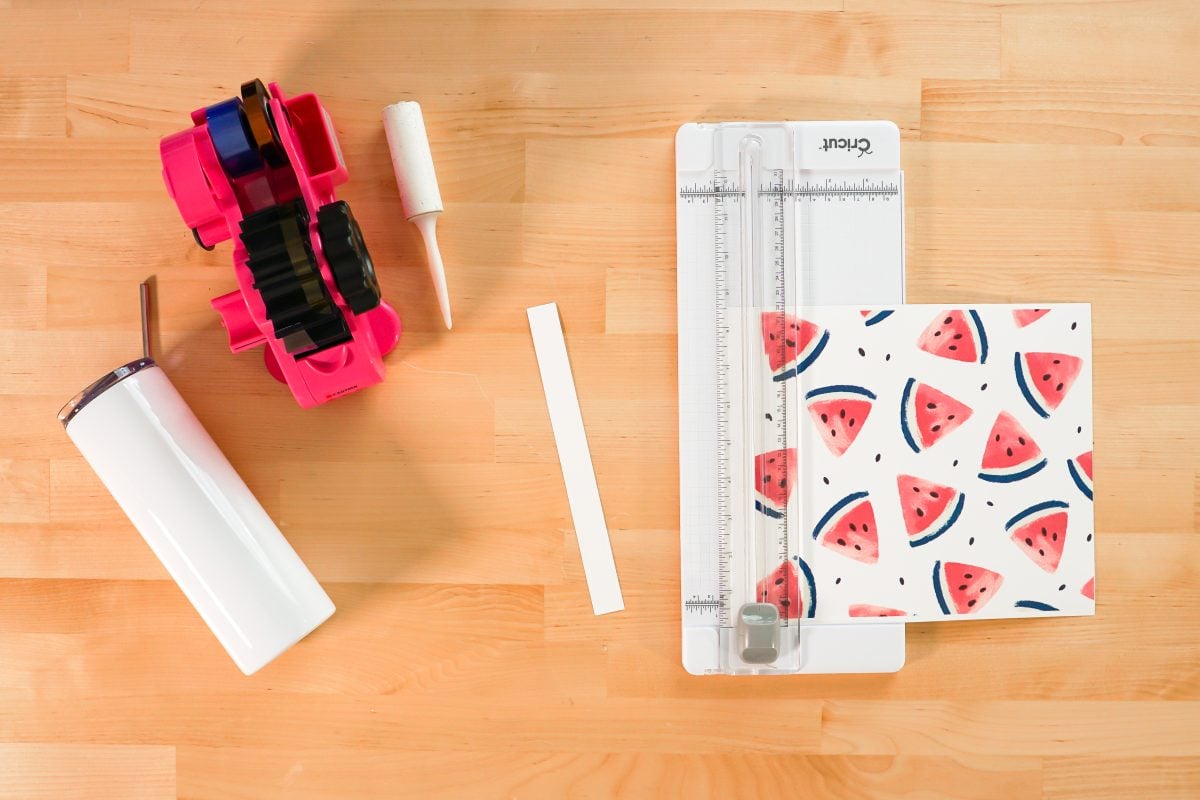
Remove the cap and straw from your tumbler.
For a more detailed tutorial, check out my post How to Tape a Tumbler to Minimize Seams and Uneven Edges!
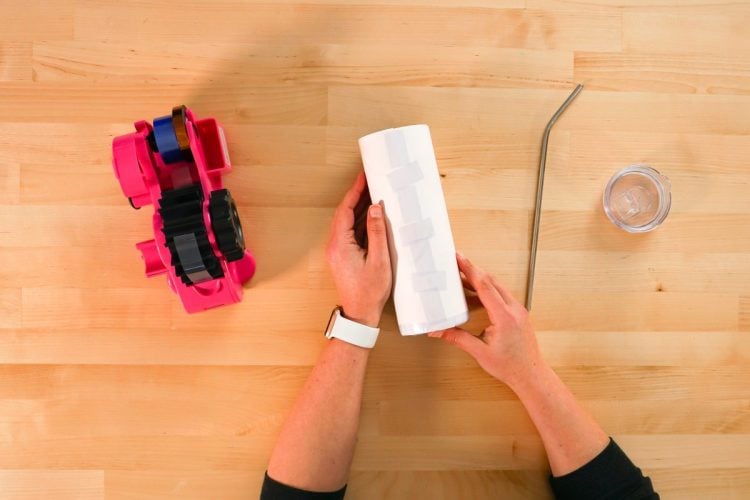
Center the design on your tumbler, pull it tightly and tape down the entire seam using piece of heat resistant tape. You’ll want the slightest little bit of overlap so there isn’t white space where your design connects. Fold down the bottom of your transfer paper slightly and tape around the bottom of the tumbler, as well. I’ve found leaving the top un-taped works pretty well, but you can tape the top if you’d like. Be sure everything is taped as tightly as possible. This will help prevent “gassing out” and blurry images.
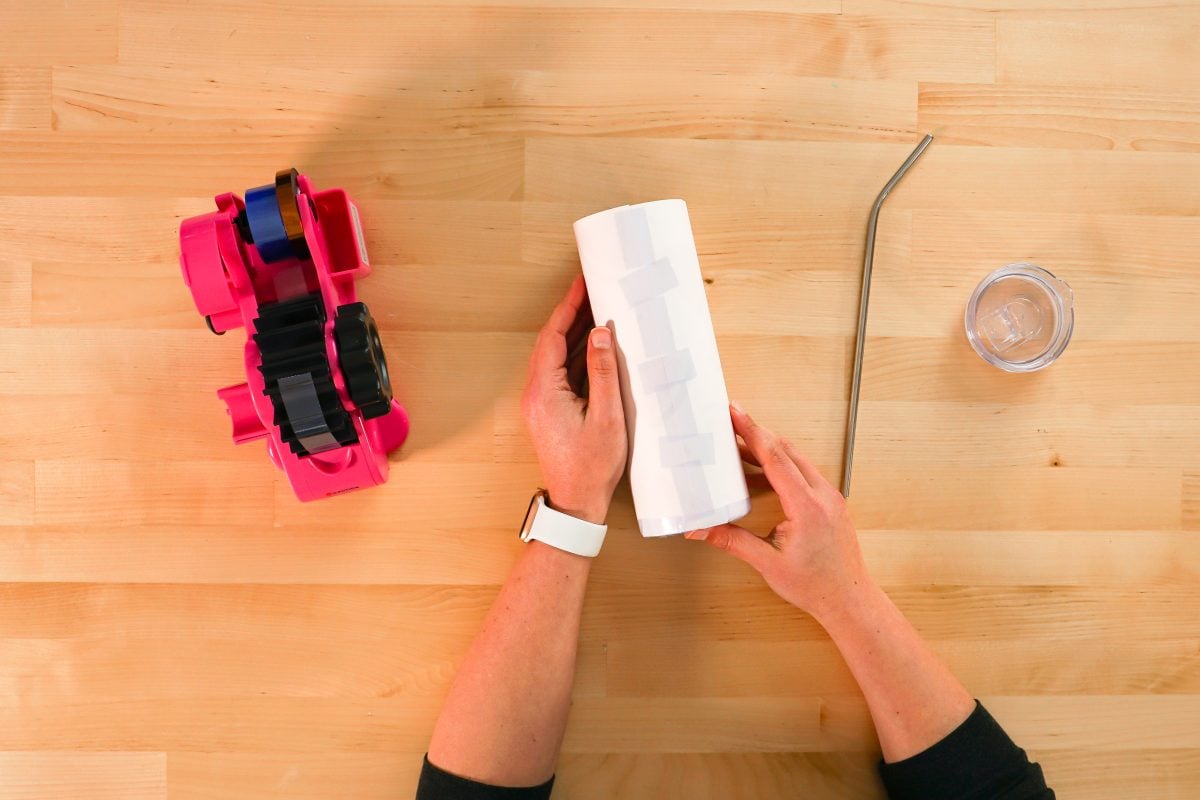
PS: love my auto-cut tape dispenser? Learn more in my post Must-Have Sublimation Supplies and Tools!
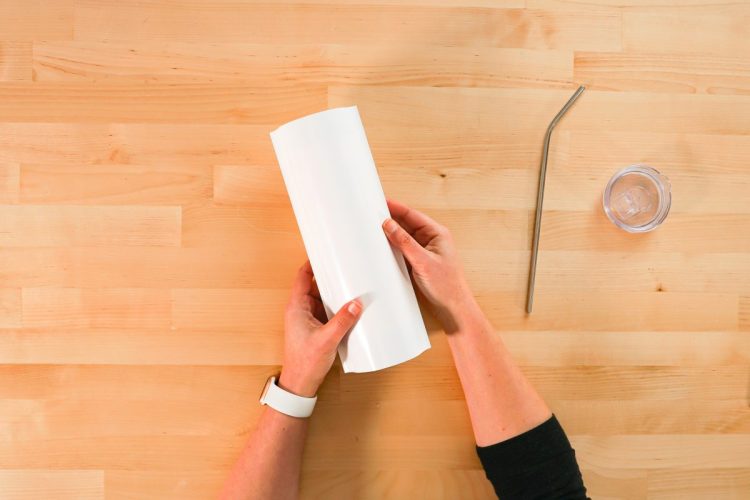
Place your tumbler inside the shrink wrap sleeve. Center it inside the sleeve as much as possible. Note that a lot of other tutorials will have you use a heat gun to pre-shrink your sleeve, but I haven’t found this necessary. The second it gets in the oven the sleeve shrinks right up in the heat.
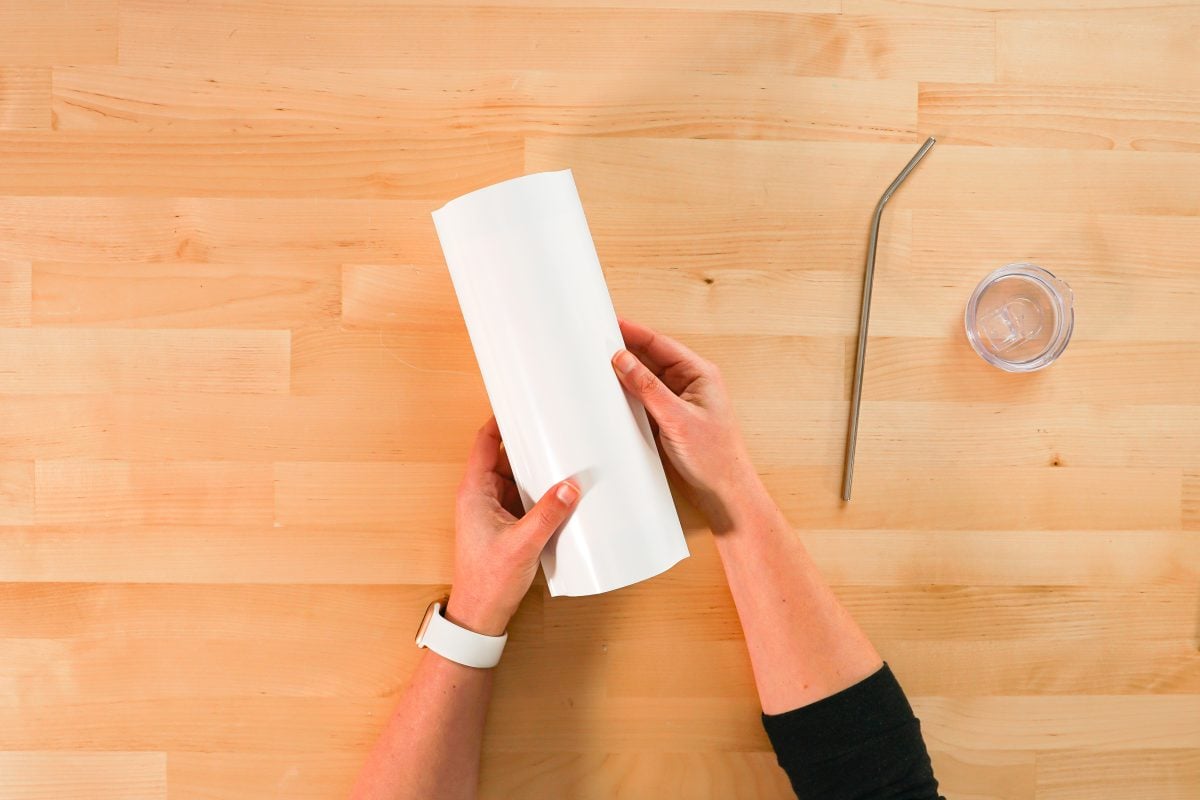
Once your oven is heated, place your tumbler inside laying flat. Set your timer for six minutes (or the manufacturer’s recommended time for your blank). You may want to flip your tumbler halfway through, but I haven’t found it necessary with my oven. But if you have an uneven transfer, you’ll want to add this step.
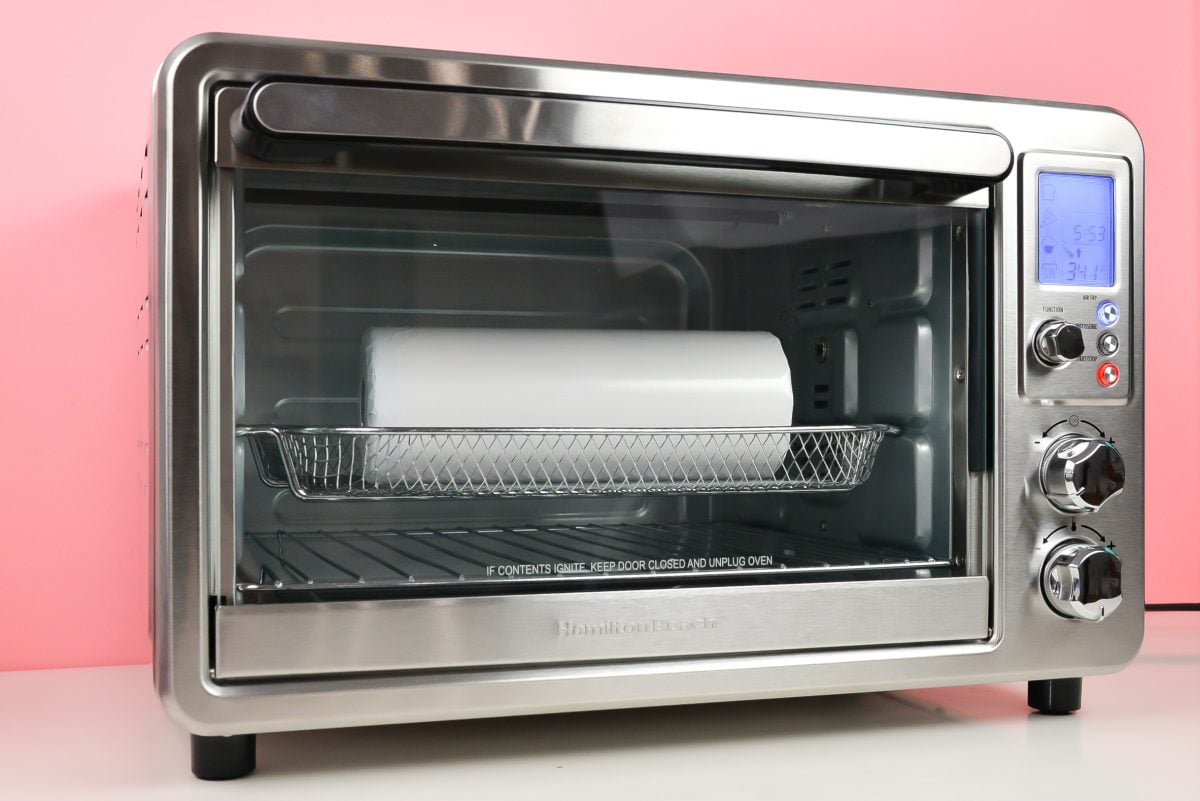
When the timer beeps, remove your tumbler from the oven. Use your heat resistant gloves to carefully handle the tumbler while cutting away the shrink wrap and transfer sheet. You’ll want to remove the shrink wrap and transfer sheet right away. First because it helps keep your image from ghosting and second because it is SO MUCH easier removing that shrink wrap when it’s warm.
Trust me on that one.
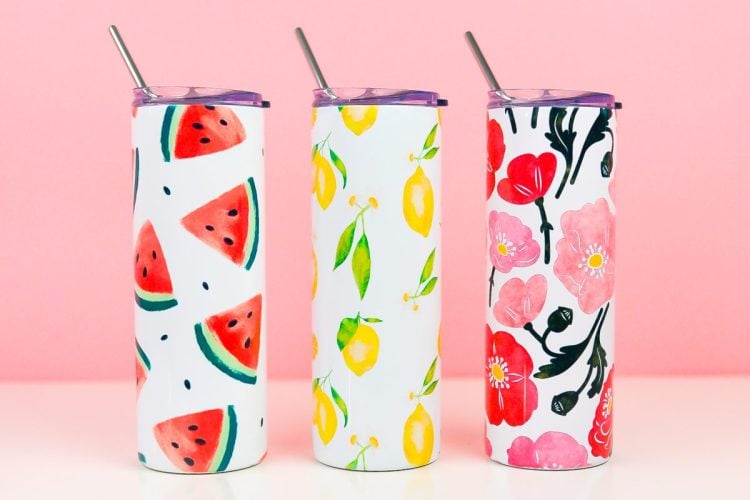
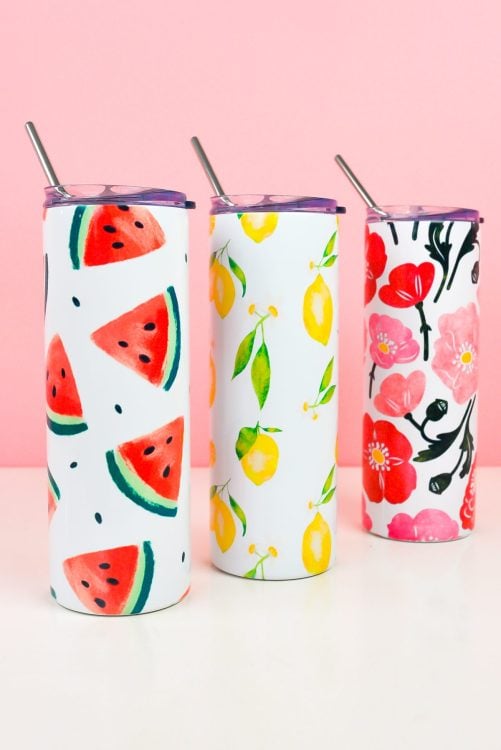
I’ve been doing sublimation for a while now and I’m always impressed with the end result. These tumblers are cute!
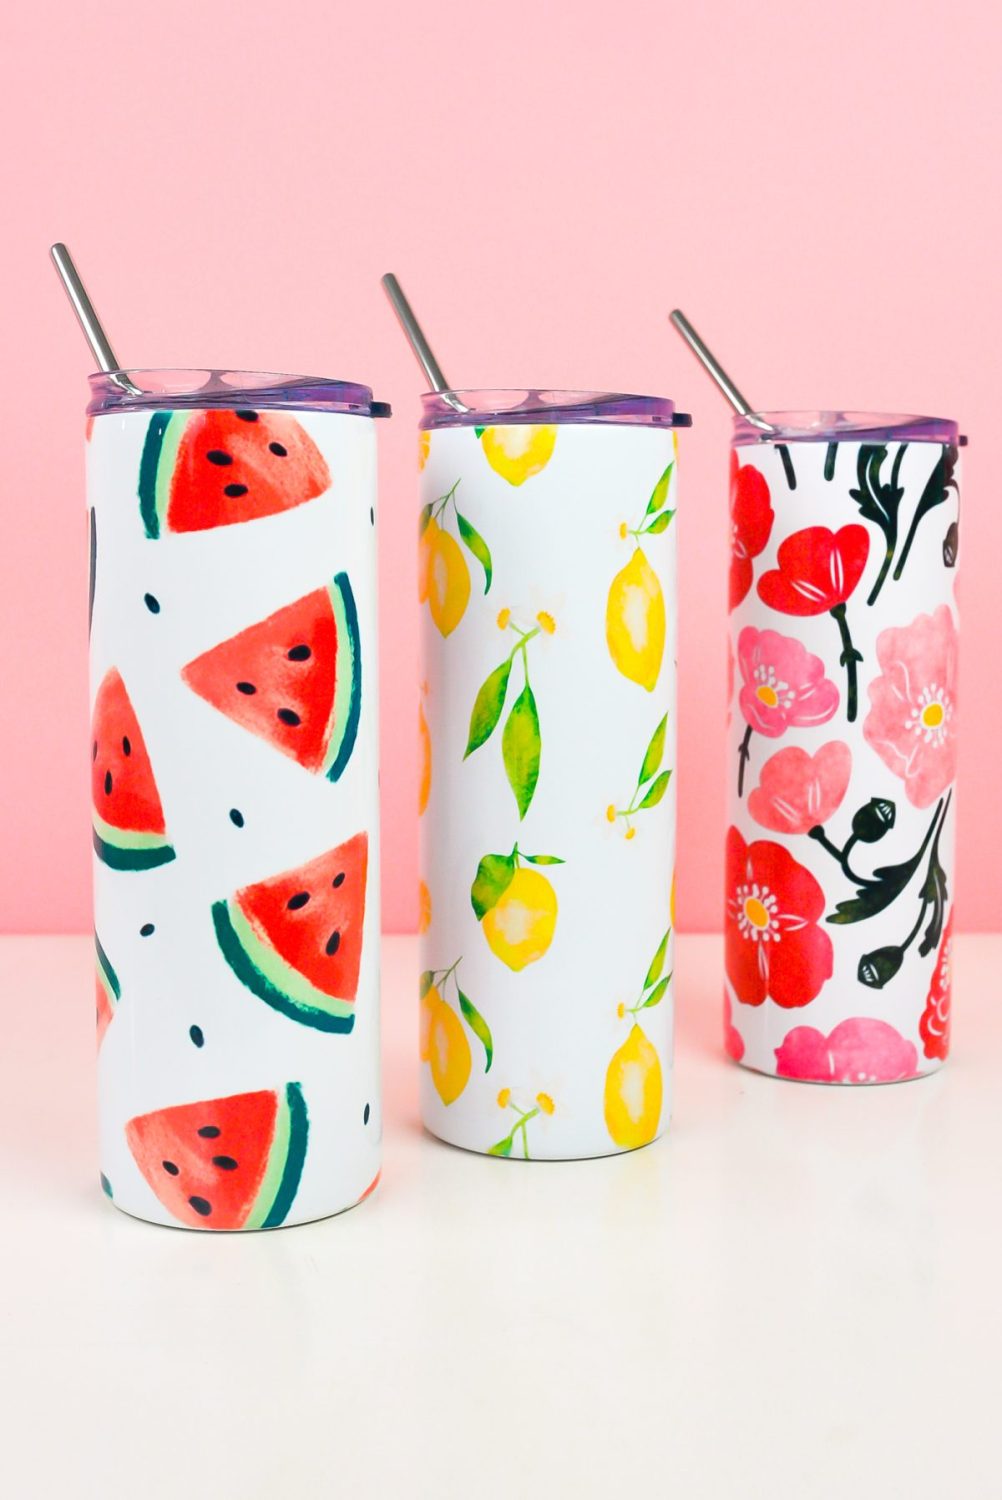
Hope you found this information about sublimation on skinny tumblers to be helpful! Stay tuned for more tutorials featuring other substrates and blanks. And, as always, if you have any questions, let me know in the comments and I’ll be happy to answer them!
More Posts on Sublimation:
- The Ultimate Guide to Sublimation Printing & Crafting
- What’s the Difference Between Sublimation, Cricut Infusible Ink, and HTV?
- How to Convert a Printer for Sublimation
- ICC Profiles & Color Management for Beginners
- Sublimation Software: What’s Best for Your Needs?
- The Best Sublimation Blanks and Substrates for Crafters
- Must-Have Sublimation Supplies and Tools
- Sublimation Paper Comparison
- Heat Press Machine Comparison for Sublimation Crafters
- Using Sublimation Prints with the Cricut Mug Press
- The Beginner’s Guide to Sublimation on Ceramic
- Troubleshooting Sublimation Printing
- Sublimation Cheat Sheets for Time, Temperature, Pressure & More!
Interested in another non-sublimation tumbler idea? Check out my blog on How to Make a Sublimated Snow Globe Tumbler!
Sublimate a Tumbler Using Shrink Wrap & a Convection Oven
Equipment
- Sublimation printer with sublimation ink
- Heat-resistant gloves (optional)
Supplies
Instructions
- NOTE: Before starting this process, please read the section in this post under "Using Shrink Wrap for Sublimation Questions".Setting Up the Tumbler Sublimation FileLet's start by setting up our file in our software. For this project, three different files were used:Watermelon Sublimation TransferLemon Sublimation TransferPoppies Sublimation Transfer

- You can use almost any graphic design software for this part. Cricut Design Space does have its limitations, since the size of the image needed for a skinny tumbler is larger than the Print then Cut maximum of 6.25" x 9.25". So for this project, the PNG was opened in Adobe Photoshop.If needed, resize your image and then print using your sublimation printer.

- In the Print Settings, make sure you have your ICC Profile selected if needed, and click Emulsion Down to reverse your image.Note that your transfer will be duller and the color may not be quite what you expect on the print. If you'd like, you can do a test press using a piece of polyester fabric to make sure the colors are correct before printing another transfer and using it on your more expensive blank.

- How to Sublimate a Tumbler in an OvenOkay, let’s make our tumbler using shrink wrap sleeves! Start by turning on your convection oven and setting it to 375 degrees so it heats up fully while you work on creating your transfer. NOTE: Temperature will vary based on the manufacturer of your blank. Always check manufacturer instructions. I also like to use two inexpensive thermometers inside my oven to make sure I have even temperature. Even the digital convection ovens aren't always 100% accurate with heat settings.Clean your tumbler using a lint roller. Any pieces of lint or dust can sublimate onto the tumbler and leave spots.

- Trim your design to fit on your skinny tumbler. Leave a tiny bit of overhang on both the top and bottom of the mug. You'll want this so there isn't a blank white area around the edges. Also, ensure you have just the tiniest bit of extra so your transfer overlaps slightly when it's fully wrapped around your tumbler.

- Remove the cap and straw from your tumbler.For a more detailed tutorial, check out my post How to Tape a Tumbler to Minimize Seams and Uneven Edges!Center the design on your tumbler, pull it tightly and tape down the entire seam using piece of heat resistant tape. You'll want the slightest little bit of overlap so there isn't white space where your design connects. Fold down the bottom of your transfer paper slightly and tape around the bottom of the tumbler, as well. Leaving the top un-taped works pretty well, but you can tape the top if you'd like. Be sure everything is taped as tightly as possible. This will help prevent "gassing out" and blurry images.

- Place your tumbler inside the shrink wrap sleeve. Center it inside the sleeve as much as possible. Note that a lot of other tutorials will have you use a heat gun to pre-shrink your sleeve, but haven't found this necessary. The second it gets in the oven the sleeve shrinks right up in the heat.

- Once your oven is heated, place your tumbler inside laying flat. Set your timer for six minutes (or the manufacturer's recommended time for your blank). You may want to flip your tumbler halfway through, but I haven't found it necessary with my oven. But if you have an uneven transfer, you'll want to add this step.

- When the timer beeps, remove your tumbler from the oven. Use your heat resistant gloves to carefully handle the tumbler while cutting away the shrink wrap and transfer sheet. You'll want to remove the shrink wrap and transfer sheet right away. First because it helps keep your image from ghosting and second because it is SO MUCH easier removing that shrink wrap when it's warm. Trust me on that one.Always impressed with the end result. These tumblers are cute!




Comments & Reviews
Kris says
Thank you very much for the detailed tutorial!
I have plans to dye sub over 3D print with strange curves, so no heat press will do.
I just found out there is a method like this, and it seems like this method can work on my 3D prints.
My hope was lost after finding out I couldn’t use a regular oven. Convection ovens for home use are very rare in my country, the common ones are ordinary ovens. When I checked, the cheapest convection oven was around $1000. This is just a fun project, so I don’t want to spend that much money. 🤣
But later, when I have free time, I will try it in a regular oven.
Have you tried it? was the results bad?
Kim says
Loved your tutorial!! Can you put two tumblers at once in the convection oven? Or one at a time? Thanks.
sarah says
hey i put my tumbler in a conventional oven at 450 degrees and put on OVEN for 4 mins and it melted the shrink wrap what am i doing wrong, and burnt the tumbler and made it yellowish.
Cori says
Hi Sarah,
For the blank I used it recommended 375 for 6 min. Each blank may have different instructions from the manufacturer, so it is best to flow those guidelines :)
B says
I am super confused. I got ganged up on because I did not do my research after I saw a bunch of people using ovens and I was in a pinch. Plus, I use my oven to melt pony beads. Which admits stronger fumes.
After doing my research on the web and through medical journals, they all state the gas is nontoxic. Even the FDA states sublimation is eco-friendly and nontoxic. That if it was toxic, it would not be recommended for mugs.
Connie says
Awesome tips!! Thank you. Could you use a toaster oven? One that goes up to 450degrees?
Crystal Summers says
Hi Connie,
Yes, you can! However, you want to make sure it is one you do NOT plan on cooking food in. Sublimation printing releases gasses during the heat transfer process, which could be harmful if ingested.
Happy crafting,
Crystal, HLMS Community Manager
Lorrie says
Can I sublimate a Tumblr in a non-convection oven?
I have an old regular oven that I am not using am I able to sublimate in that?
Cori says
Hi Lorrie,
Thank you for reaching out to us! No, a regular oven is not recommended for sublimation. You will want to use a convection oven dedicated to your sublimation projects :)
Kimberly says
Can I wash my cup before I do the sublimation?
Cori says
Hi Kimberly,
Yes, you can wash your mug before sublimating; however, to remove any soap residue, you will want to clean it with a lint roller or rubbing alcohol as well before applying your sublimation print :)
Amelia says
Hi there!
For the air fryer why is it ok to use the air fryer but not your oven?
Also. What setting should I put it on for the air fryer
Thanks so much.
Cori says
Hi Amelia,
During the sublimation process, the ink turns into a gas, and some of this escapes into the inside of the oven. It is unsafe for food consumption. Please do not use your convection oven for food once you have sublimated in it; you need a dedicated appliance just for your crafting.
My countertop convection oven is actually an air fryer. They are technically the same cooking process but remember it needs to be a dedicated appliance just for your crafting. I set mine at 375 degrees; however, the temperature will vary based on the manufacturer of your blank, so always check manufacturer instructions. I also like to use two inexpensive thermometers inside my oven to make sure I have an even temperature throughout the oven. Even the digital convection ovens aren’t always 100% accurate with heat settings.
Happy crafting!
Cori