Here are step by step instructions on how to use adhesive vinyl to make a water bottle decal! Learn tips and tricks for cutting and weeding your adhesive vinyl sheets, as well as adhering it using transfer tape.

Over the years I’ve written lots of projects that use Cricut adhesive vinyl, but today I’m finally writing the ultimate guide to using adhesive vinyl! There are many affordable and free options to design Cricut crafts, which are my favorite kind of cutting machines for these types of projects.
This post will go through step by step how to use Cricut vinyl Cricut, from cutting it with your Cricut to weeding it to using transfer tape to apply it.
This applies to the Cricut Maker, Cricut Explore, and Cricut Joy machines.
Use my code HLMSSAVE22 at Cricut.com to save 10% on supplies and materials and to get free shipping on orders over $50! Excludes machines, digital files, and Cricut Access.
As always, if you have any questions, let me know in the comments!
What is Adhesive Vinyl?
Adhesive vinyl is a thin adhesive- (or sticky-) backed material that you can cut with your Cricut or other electronic cutting machine and then apply to a myriad of surfaces. You can even cut simple shapes by hand if you don’t have a cutting machine.

Adhesive vinyl comes in many types as you’ll see below, including matte, glossy, permanent, removable, and a whole range of specialty vinyls. It comes in sheets or rolls, depending on the size of the vinyl.
Note: recently I ordered some white adhesive vinyl without paying attention to the width—it was 15″ wide. The Cricut can cut a maximum width of 12″…so I had to cut my vinyl down by hand to make it fit on the mat. A bit of a pain in the rear—make sure you’re buying 12″ vinyl when you’re shopping!
How is Adhesive Vinyl Different than Iron On Vinyl (HTV)?
It may be hard to tell which type of vinyl you have with a bunch of options on your craft table. As mentioned above, adhesive vinyl has a sticky back. Iron on vinyl (often called heat transfer vinyl or HTV) has a heat-activated back. Adhesive vinyl applies more like a sticker whereas you’ll need a heat source (like an EasyPress, iron, or heat press) for iron on vinyl.
Adhesive vinyl is best for smooth surfaces, like glass, plastic, metal, notebook covers, painted wood (raw wood is harder), and even paper.
Iron on vinyl is primarily used on fabric, so you can use it to make t-shirts, onesies, and more, as well as on raw wood and other hard surfaces that are more porous. You can check out my post How to Use Cricut Iron On Vinyl for more information!
How Can I Tell Adhesive Vinyl and Iron On Vinyl Apart?
I get this question a lot! If you have a drawer full of vinyl and it’s not labeled, you may find it frustrating to figure out exactly what you have in front of you.
Generally, adhesive vinyl has the colorful vinyl on one side and is backed by a paper carrier sheet that is most often white. Sometimes that sheet has a grid on it to make it easy to cut straight. You should be able to get your fingernail between the two layers and peel the adhesive vinyl off the carrier sheet like a sticker.

Iron on vinyl, on the other hand, has a shiny clear plastic carrier sheet on one side and the colorful matte back of the iron on vinyl on the other. You should not be able to peel back the iron on vinyl from the plastic sheet easily.

What Supplies Do I Need for Adhesive Vinyl Projects
While every project differs you will most often need the following supplies for most adhesive vinyl projects:
- Adhesive vinyl
- Blue LightGrip or green StandardGrip mat
- Weeding hook
- Transfer tape
- Scraper
- Base or blank material (generally something smooth and non-porous)

Types of Adhesive Vinyl
When you are trying to decide which vinyl to use for a project, take into account the type of project you are doing. If you’re making a tumbler, you’ll want it to hold up to washing—choose permanent vinyl. If you’re doing a decal on a wall that will need to come down at some point, removal vinyl is a better choice.
Permanent / Outdoor Vinyl
Permanent vinyl is great when you want a lasting stick, like car decals, mugs and tumblers that will be washed, and outdoor projects. In most cases, permanent vinyl will need a solvent to remove the adhesive and it may leave a residue. Permanent vinyl may be called:
- Cricut Permanent Vinyl
- Premium Vinyl
- Oracal 651: glossy and matte (the most popular)
- Oracal 641: matte (rated for outdoor use, but not as water resistant as other permanent vinyl
- Oracal 751: glossy (rated for even longer outdoor use)
Removable / Indoor Vinyl
Removable vinyl is ideal for applications where you may want to remove the vinyl in the future. Think removable decals, wall art, temporary signs and decorations, etc. Most removable vinyl adhesive can be removed by just peeling it up.
- Cricut Removable Vinyl
- Cricut Vinyl (older and being discontinued, does not specify permanent or removable)
- Oracal 631: matte
** Fun Fact: If you’re using Cricut brand vinyl and unsure whether it’s permanent or removable, here’s a little hack… If it has a green grid on the back, it’s permanent; grey grid, it’s removable!
Specialty Adhesive Vinyl
There are other kinds of adhesive vinyl as well! Many of these aren’t rated for long-term outdoor use, but you can always read the label to find out the suggested uses. Here are a few types of specialty adhesive vinyl:
- Holographic
- Glitter
- Metallic
- Foil
- Chalkboard
- Dry Erase
- Glow in the Dark
- Patterned
- Printable
- Fluorescent / Neon
- Window Cling
Smart Vinyl
For the Cricut Explore 3, Cricut Maker 3, and Cricut Joy, there is also Smart Vinyl. This is vinyl that does not use a mat! You can read all about it in my post Cricut Smart Vinyl.
Where to Buy Vinyl
There are so many places to buy adhesive vinyl. Shop around—many of these stores have sales on vinyl!
Buy Adhesive Vinyl Online
Buy Adhesive Vinyl in Store
- Michaels
- Walmart
How to Cut Adhesive Vinyl
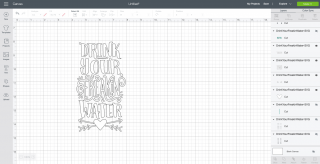
Let’s make a project! Start by opening Cricut Design Space. For this file, I’m using a funny cut file from Etsy seller Fresh Cuts Studio to make a water bottle.
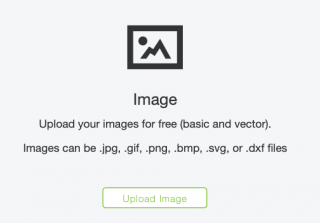
To begin, create a new project in Cricut Design Space. Then click Upload in the Design Panel on the left.

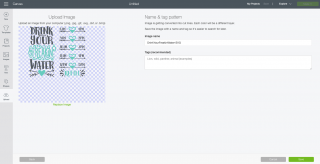
You’ll be taken to the upload screen where you can navigate to the file you want to upload. If you need more help with SVG files, see my post How to Upload an SVG to Cricut Design Space. If you want to find more free and cheap cut files for Cricut machines, check out my post The Best Cheap and Free SVG Files for Cricut Crafters.
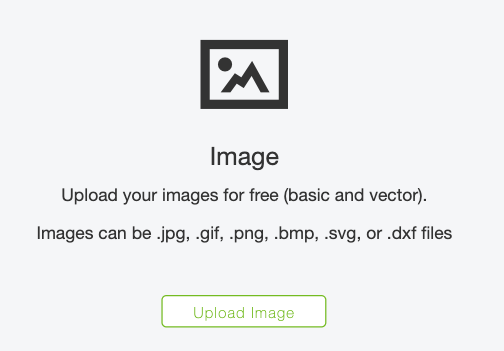

Insert your file onto your canvas.

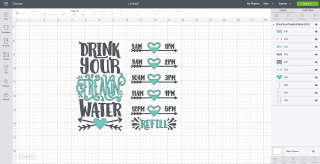
You’ll notice that there are a two sides to this water bottle. I am only using the left half of this cut file—the right half was designed for a clear water bottle so you can see how much you have had to drink during the day. So let’s hide the right half of this cut file. Start by ungrouping the image.

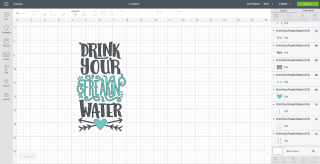
This allows you to manipulate the pieces of the image individually. Select each piece on the right and hide them in the Layers Panel by clicking the “eye” icon.


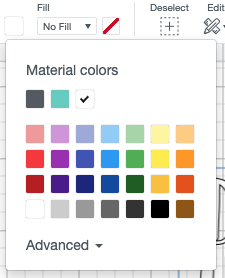
Once you have hidden all of the pieces you don’t want to cut, you may want to change the color of your image. I decided an all-white decal would look best on this water bottle, so I selected my cut file and clicked the color dropdown in the Edit Toolbar at the top to select white.

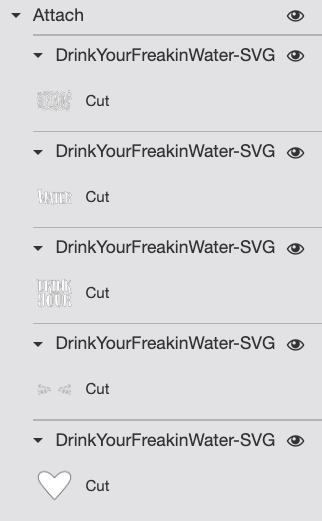
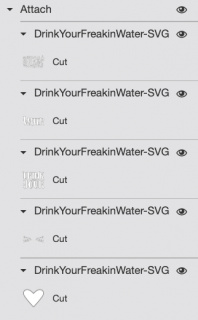
Now, to make sure it cuts as one single piece, select your project and click Attach. All of your pieces will be nested under an Attach heading in the Layers Panel. Read more about Using Attach in Design Space.

Finally, you may need to re-size your image to fit on your water bottle. I changed my height to 6″ tall.

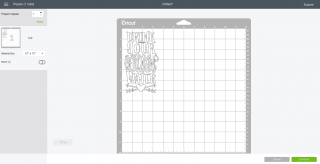
Now you’re ready to cut your image! Click Make It in the upper right to be taken to the Prepare Screen. You do NOT need to mirror your vinyl—you can cut it as is.

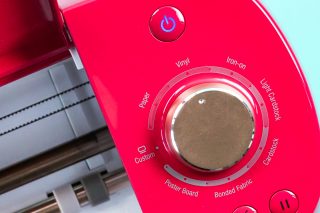
After clicking continue, you’ll be taken to the Make Screen. From here, select your material—if you have a Cricut Explore, you’ll set the material with the dial; if you have a Cricut Maker, you’ll set the material in that screen.

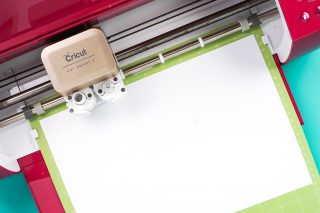
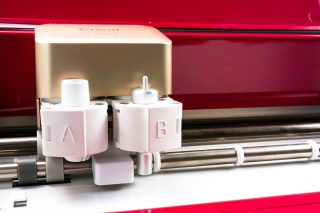
Place your material with the paper backing down and the colored vinyl up on your mat and insert into your machine. Make sure you have the Fine Point blade installed.


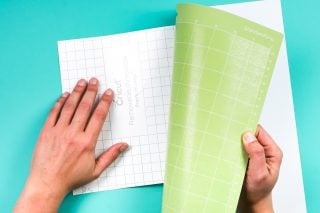
Click the blinking “C” on your machine and your Cricut will cut your vinyl for you! To remove your vinyl from your Cricut mat, bend your mat away from the vinyl instead of peeling the vinyl up off the mat. This helps prevent curling.

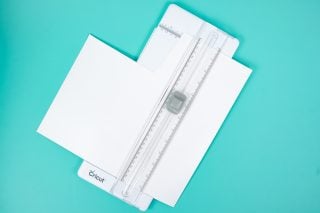
Finally, I like using a paper trimmer to cut down my vinyl so I can save the scraps and use later!

How to Weed Adhesive Vinyl
I have an extensive Weeding Adhesive Vinyl post that goes into all my tricks for weeding vinyl. Here are just the basics—make sure to check out that post for more helpful tips!
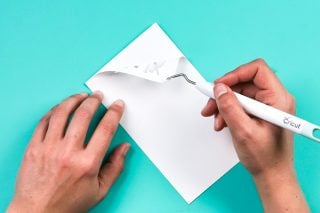
Weeding is the process of removing anything that’s not part of your design. Start by digging the tip of your weeding tool into a piece of the vinyl that is NOT your design, and gently pull up. Often once I get a good chunk going, I’ll use my fingers to pull up on the vinyl, and my weeding tool to get the more difficult bits, including the insides of letters.

Continue to remove all of the pieces around the image until all that’s left is the image. Double check your work to make sure you don’t have any extra bits that need weeding—try holding your image up to the light to see if you’ve missed anything!
How to Adhere Vinyl with Transfer Tape
Now it’s time to place our decal on the water bottle! Cut a piece of transfer tape about the same size as your decal. Peel back the sticky transfer tape from the liner sheet.

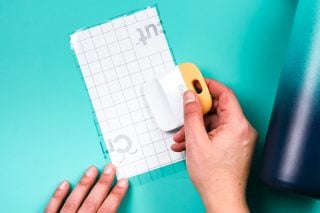
Then place it sticky side down on your decal, and use a scraper to burnish the transfer tape to your decal.

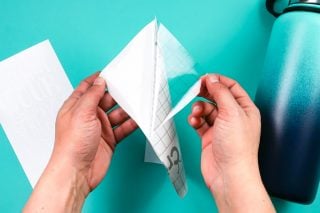
Carefully peel back the transfer tape and the decal should come with it. If it doesn’t stick (this is particularly annoying with glitter vinyl—you may want to try strong transfer tape!), burnish some more and try again. I’ll be honest—sometimes (like this time), it’s SO easy. Other times I want to throw my transfer tape out of the window.

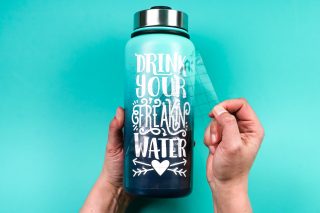
Place your decal on your water bottle and once it’s straight, press to adhere.

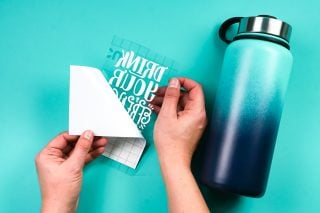
Then peel back the transfer tape—your design should stick! I usually peel back that tape at a sharp angle from the decal—it’s better than pulling it straight up.

Tada! You’ve just made an adhesive vinyl project! Of course there are so many more projects you can make, but this is an easy one to get you over the fear of transfer tape. Here are a couple other tutorials you might want to try:
- How to Use Adhesive Vinyl on Glass
- How to Use Adhesive Vinyl on Plastic
- How to Use Adhesive Vinyl on Painted Wood
- How to Layer Adhesive Vinyl
I hope you found this tutorial helpful! As always, if you have any questions, please don’t hesitate to ask in the comments!

Get Vinyl on Amazon
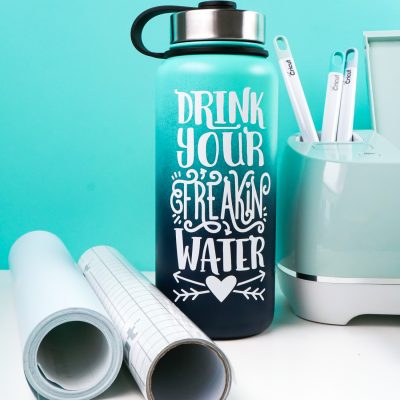
HOW TO CUT, WEED AND ADHERE ADHESIVE VINYL
Supplies
- Adhesive vinyl
- Base or blank material (generally something smooth and non-porous)
- funny cut file from Etsy seller Fresh Cuts Studio
Instructions
- Start by opening Cricut Design Space. To begin, create a new project in Cricut Design Space. Then click Upload in the Design Panel on the left.

- You'll be taken to the upload screen where you can navigate to the file you want to upload. If you need more help with SVG files, see this post How to Upload an SVG to Cricut Design Space. If you want to find more free and cheap cut files for Cricut machines, check out this post The Best Cheap and Free SVG Files for Cricut Crafters.


- Insert your file onto your canvas.

- You'll notice that there are a two sides to this water bottle. For this project only the left half of this cut file is bein used—the right half was designed for a clear water bottle so you can see how much you have had to drink during the day. So let's hide the right half of this cut file. Start by ungrouping the image.

- This allows you to manipulate the pieces of the image individually. Select each piece on the right and hide them in the Layers Panel by clicking the "eye" icon.


- Once you have hidden all of the pieces you don't want to cut, you may want to change the color of your image. For this project, an all-white decal would look best on this water bottle, so the cut file was selected and the color dropdown was clicked in the Edit Toolbar at the top to select white.


- Now, to make sure it cuts as one single piece, select your project and click Attach. All of your pieces will be nested under an Attach heading in the Layers Panel. Read more about Using Attach in Design Space.


- Finally, you may need to re-size your image to fit on your water bottle. I changed my height to 6" tall.

- Now you're ready to cut your image! Click Make It in the upper right to be taken to the Prepare Screen. You do NOT need to mirror your vinyl—you can cut it as is.

- After clicking continue, you'll be taken to the Make Screen. From here, select your material—if you have a Cricut Explore, you'll set the material with the dial; if you have a Cricut Maker, you'll set the material in that screen.

- Place your material with the paper backing down and the colored vinyl up on your mat and insert into your machine. Make sure you have the Fine Point blade installed.


- Click the blinking "C" on your machine and your Cricut will cut your vinyl for you! To remove your vinyl from your Cricut mat, bend your mat away from the vinyl instead of peeling the vinyl up off the mat. This helps prevent curling.

- Finally, use a paper trimmer to cut down the vinyl to save the scraps and use later!

- How to Weed Adhesive VinylWeeding is the process of removing anything that’s not part of your design. Start by digging the tip of your weeding tool into a piece of the vinyl that is NOT your design, and gently pull up. Often once you get a good chunk going, use your fingers to pull up on the vinyl, and your weeding tool to get the more difficult bits, including the insides of letters.Continue to remove all of the pieces around the image until all that’s left is the image. Double check your work to make sure you don’t have any extra bits that need weeding—try holding your image up to the light to see if you've missed anything!

- How to Adhere Vinyl with Transfer TapeNow it's time to place our decal on the water bottle! Cut a piece of transfer tape about the same size as your decal. Peel back the sticky transfer tape from the liner sheet.

- Then place it sticky side down on your decal, and use a scraper to burnish the transfer tape to your decal.

- Carefully peel back the transfer tape and the decal should come with it. If it doesn't stick (this is particularly annoying with glitter vinyl—you may want to try strong transfer tape!), burnish some more and try again.

- Place your decal on your water bottle and once it's straight, press to adhere.

- Then peel back the transfer tape—your design should stick! I usually peel back that tape at a sharp angle from the decal—it's better than pulling it straight up.





Comments & Reviews
Jen says
Hello, thank you for all of this information! I used a gold permanent cricut vinyl decal but after application there is adhesive still on the gold letters from the transfer tape. Is there a way to safely remove this? It makes the gold look cloudy and it is sticky. I used the standard transfer tape but I’m hoping I can fix this. Thanks so much!
Lori says
We are attempting to cut large vinyl iron-on letters for a table cloth. We are having trouble with two things: one, the vinyl is rolled and it doesn’t want to stick to the matt, however, we tried a new one (both green) and it is too sticky and the vinyl wouldn’t come off! The other issue is that the Cricut isn’t cutting all the way through the vinyl. We are using a new blade stated for vinyl and have the Cricut setting set to vinyl. Any suggestions?