The Foil Quill is a revolutionary heating tool that works in all major cutting machines to beautifully foil projects on a variety of materials! Here’s how to use the Foil Quill, tips and tricks for getting the best results, and a few ways to troubleshoot if you’re having problems.
How to Use the Foil Quill with your Cricut
The Foil Quill is the newest tool from We R Memory Keepers, and is designed to work with your electronic cutting machine. Last week, I went over what the Foil Quill actually is, as well as a bunch of frequently asked questions.
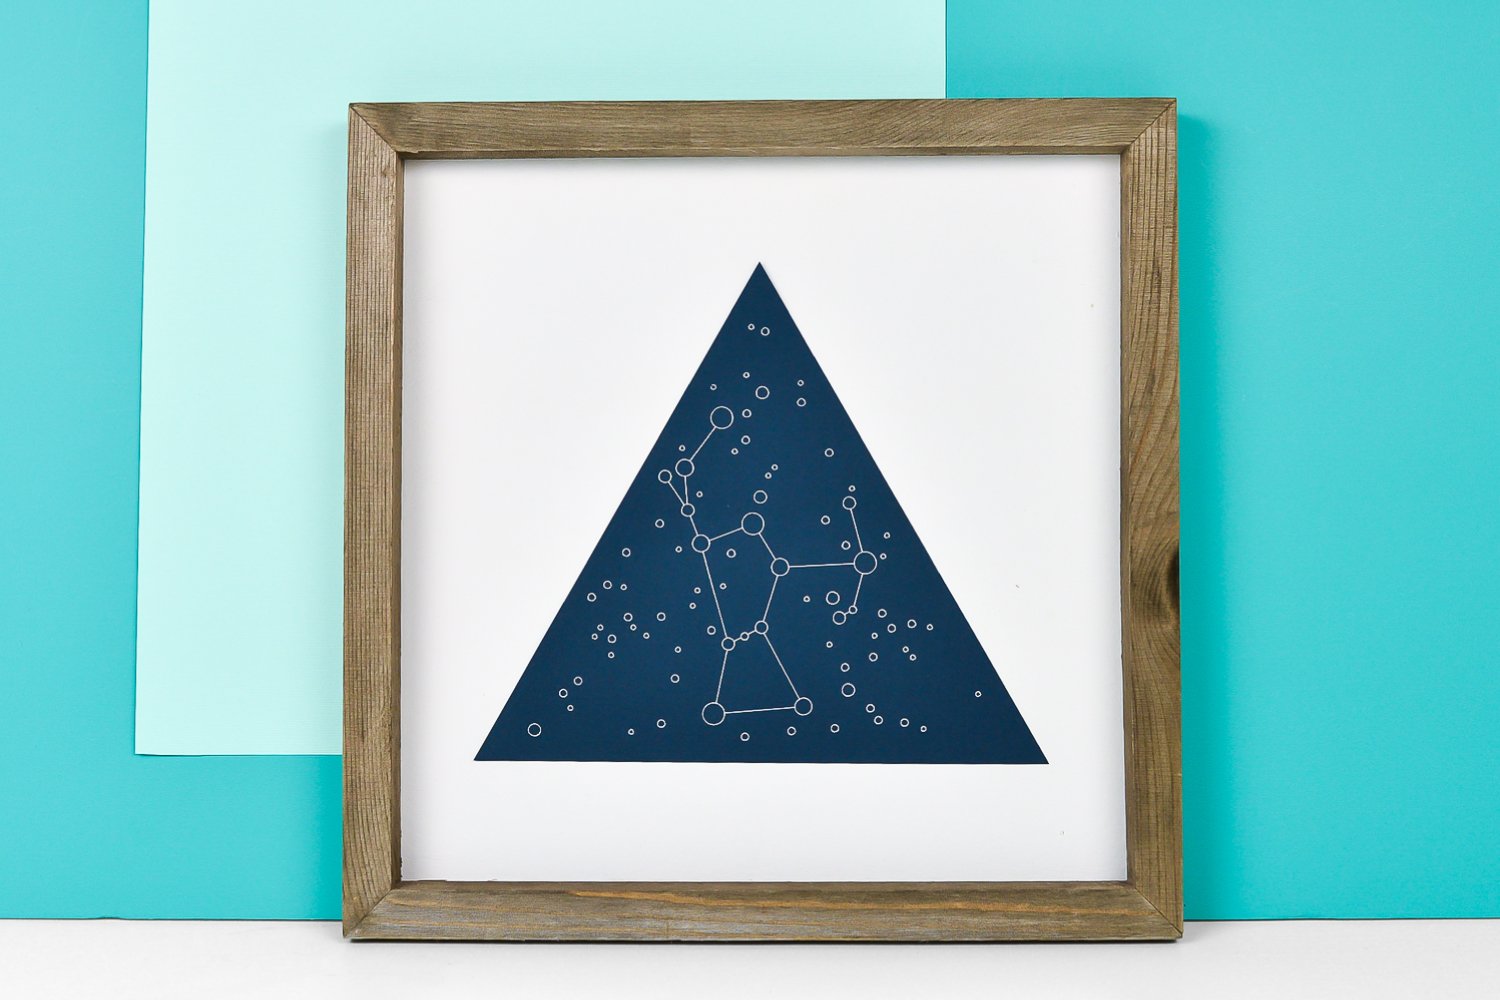
Today I’m sharing a tutorial for a quick project—constellation artwork. I’m using the easiest and most basic material for foiling—cardstock. I’m also working on tutorials that cover foiling leather, fabric, and more! The Foil Quill really is a fun and versatile tool to have in your cutting machine toolbox.
How to Use the Foil Quill with a Cricut Explore and Cricut Maker
Today I’m using my Cricut Explore Air 2 to make this project. The directions are exactly the same if you want to use your Cricut Maker. Need more help using your Cricut? I have a blog for that – check out The Ultimate Guide to Cricut Explore Air 2!
Important: Cricut has stated that using the Foil Quill will void your machine’s warranty. I am using my older machine, which is already out of warranty. If you have an issue with your Cricut related to the Foil Quill, We R Memory Keepers has asked for you to contact them at acinfo@americancrafts.com for resolution. Use at your own discretion.
Constellation Artwork Supplies
- Foil Quill—Fine Point
- Silver heat-activated foil (I am using the sample foil that came with my Foil Quill)
- Placement tape
- Cricut Explore or Maker
- Navy cardstock
- Frame
Creating Your Project in Cricut Design Space
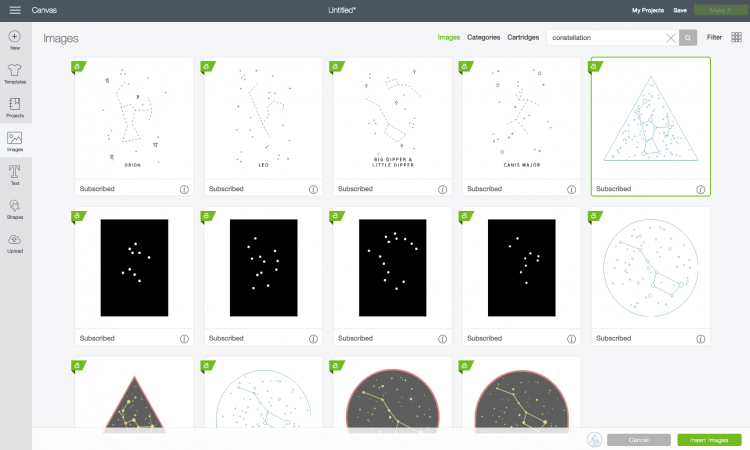
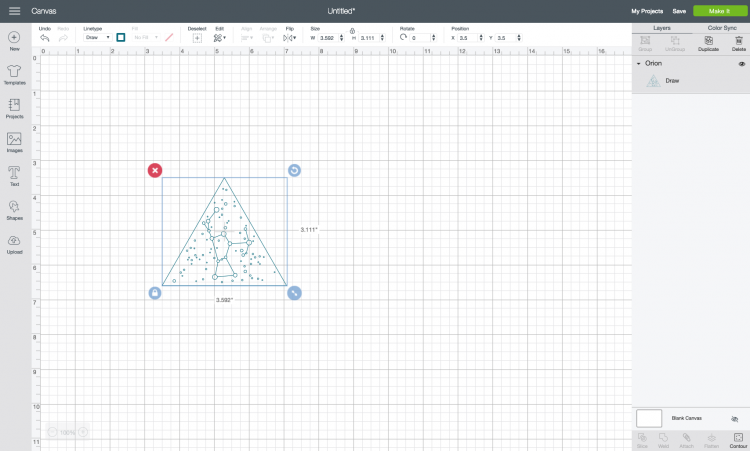
Let’s start by creating your file in Cricut Design Space. Create a new document and click on Images, and then search in the upper right for “constellation.” I chose the “Orion” draw file.
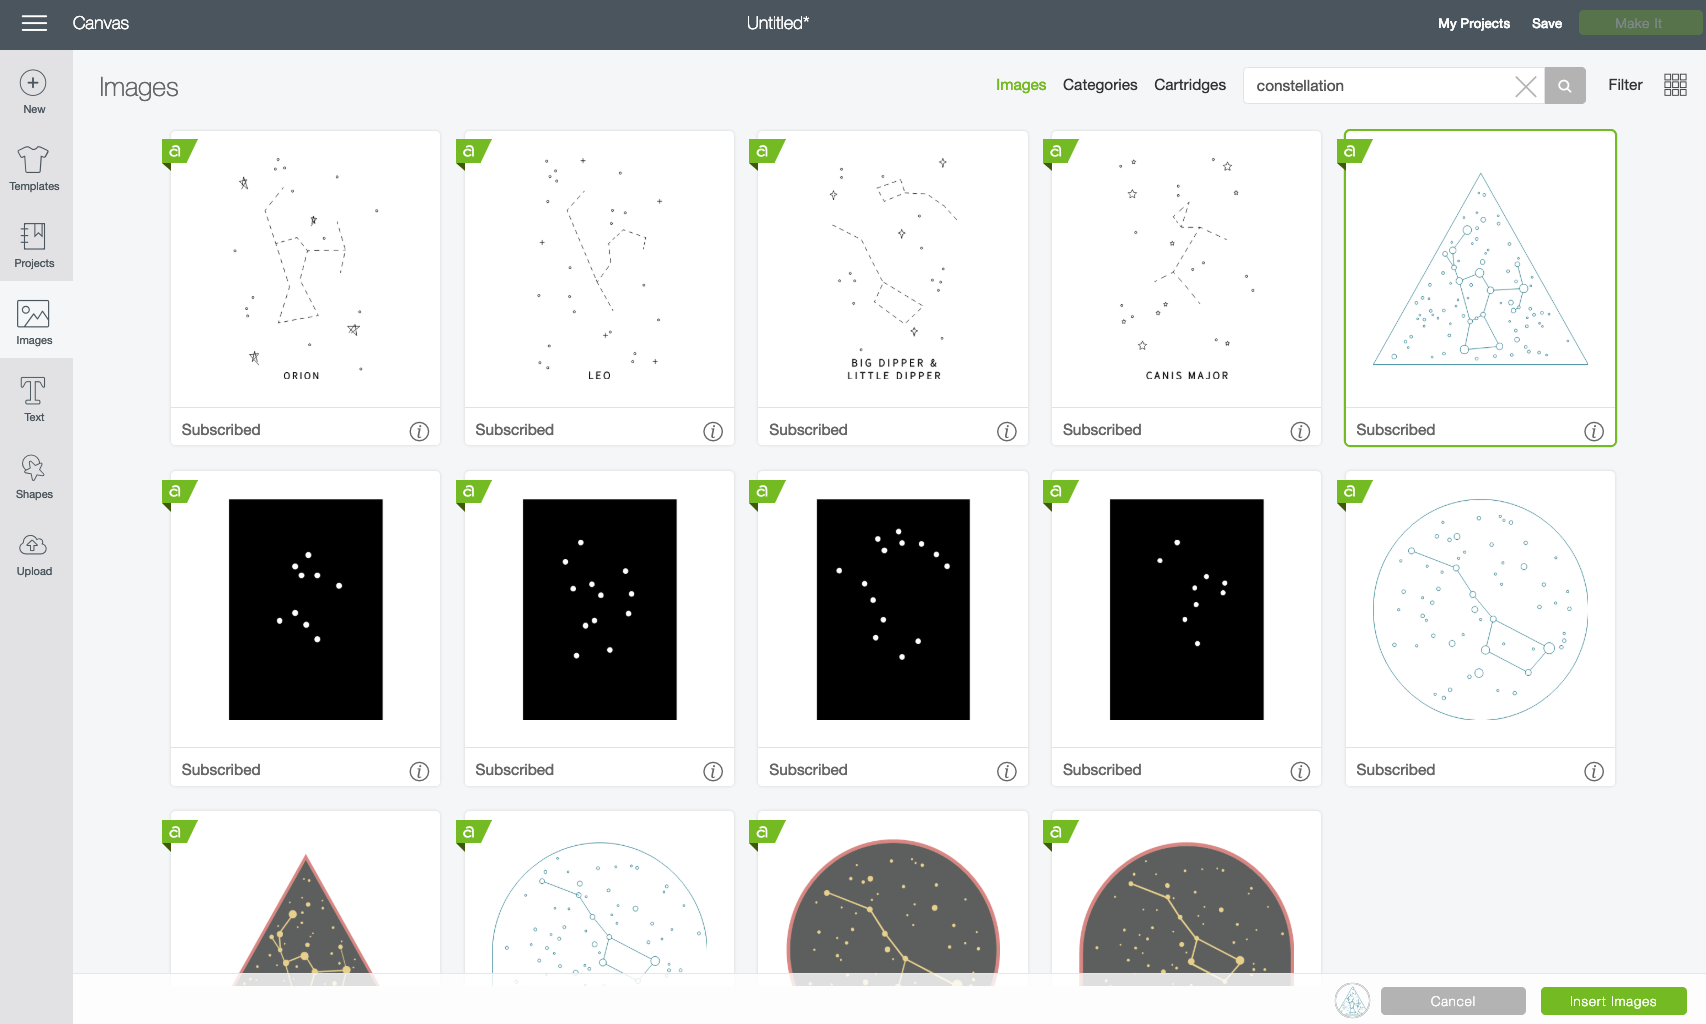
Select the image you’d like and click Insert Images.
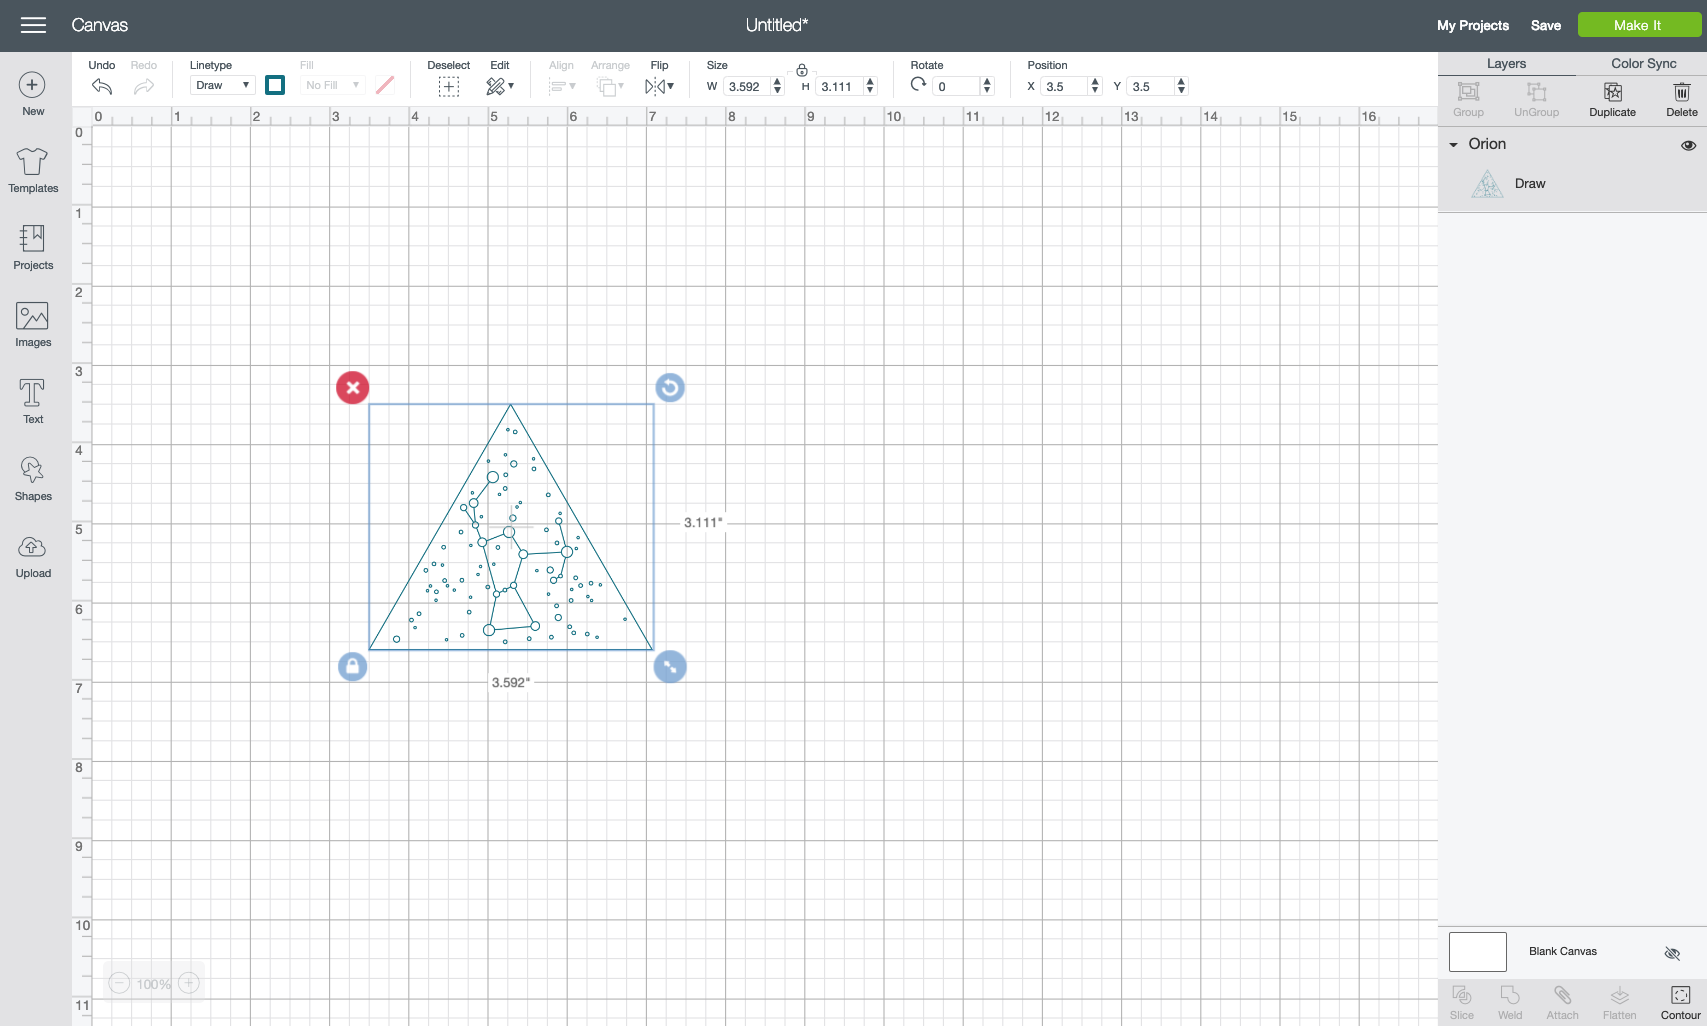
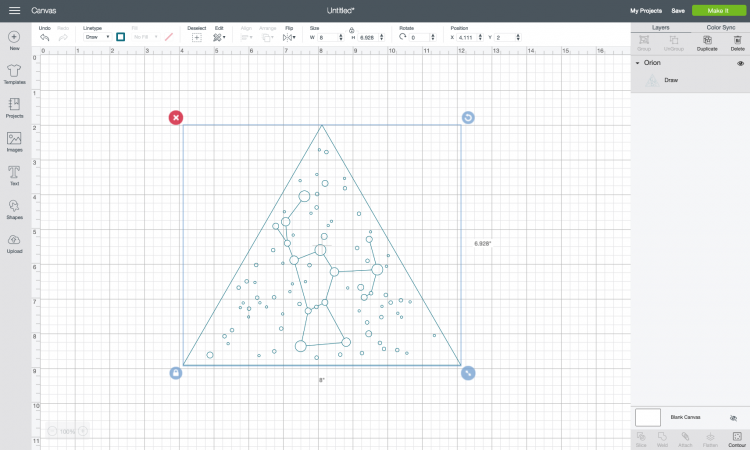
Using the Size adjusted in the Edit Toolbar at the top, change the size of your constellation to your project size. I made mine 8″ across.
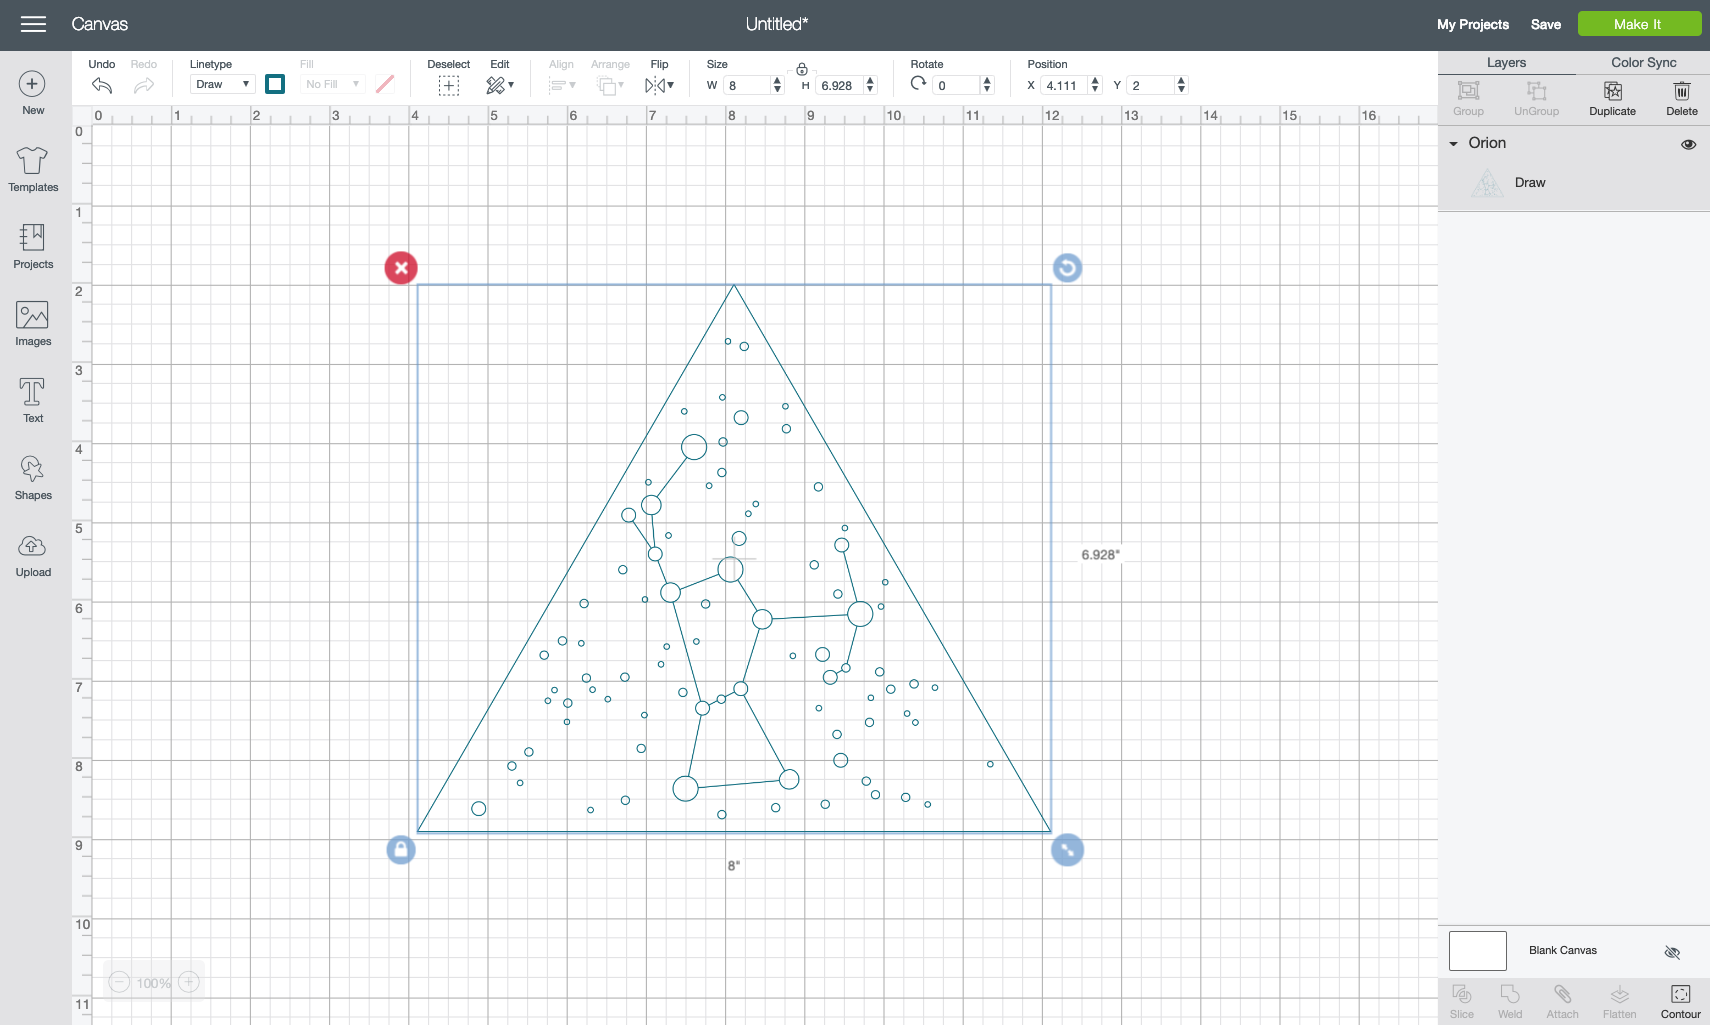
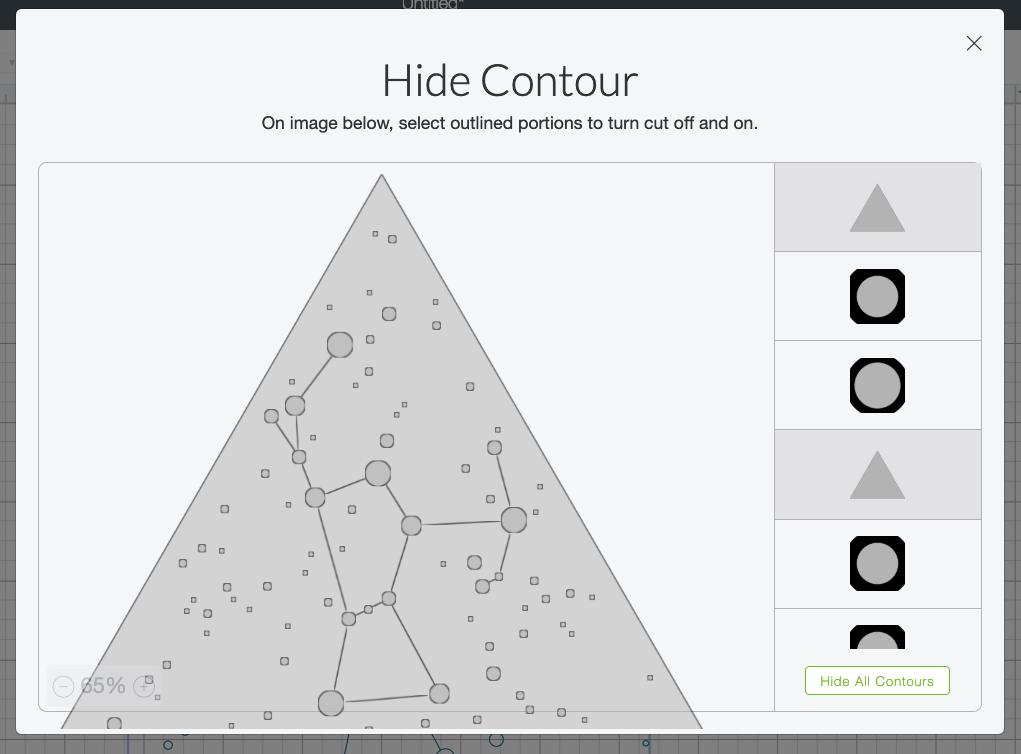
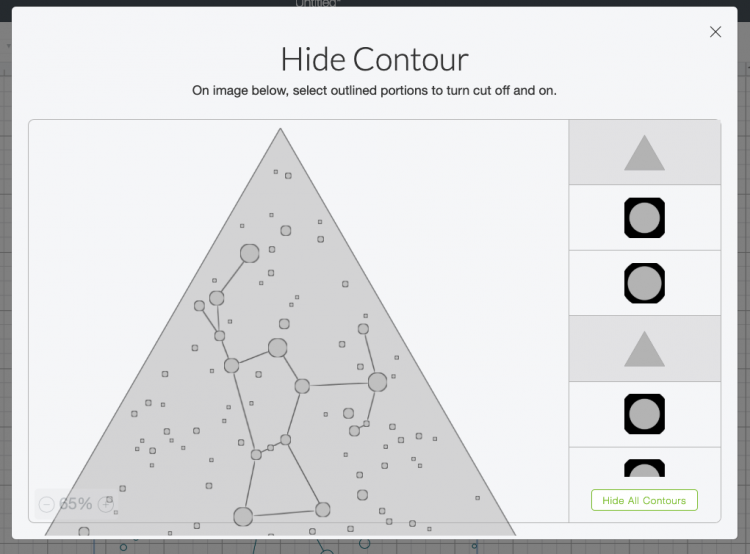
This is a draw file, meaning it supposed to be drawn using the Cricut’s pen. Instead, we are going to use the Foil Quill. I don’t want that triangle shape around the outside to draw, so use Contour in the lower left to delete the triangle from around the shape. I found that there were actually two triangle shapes and I had to click on both to get the triangle to disappear. Learn more about Contour here.
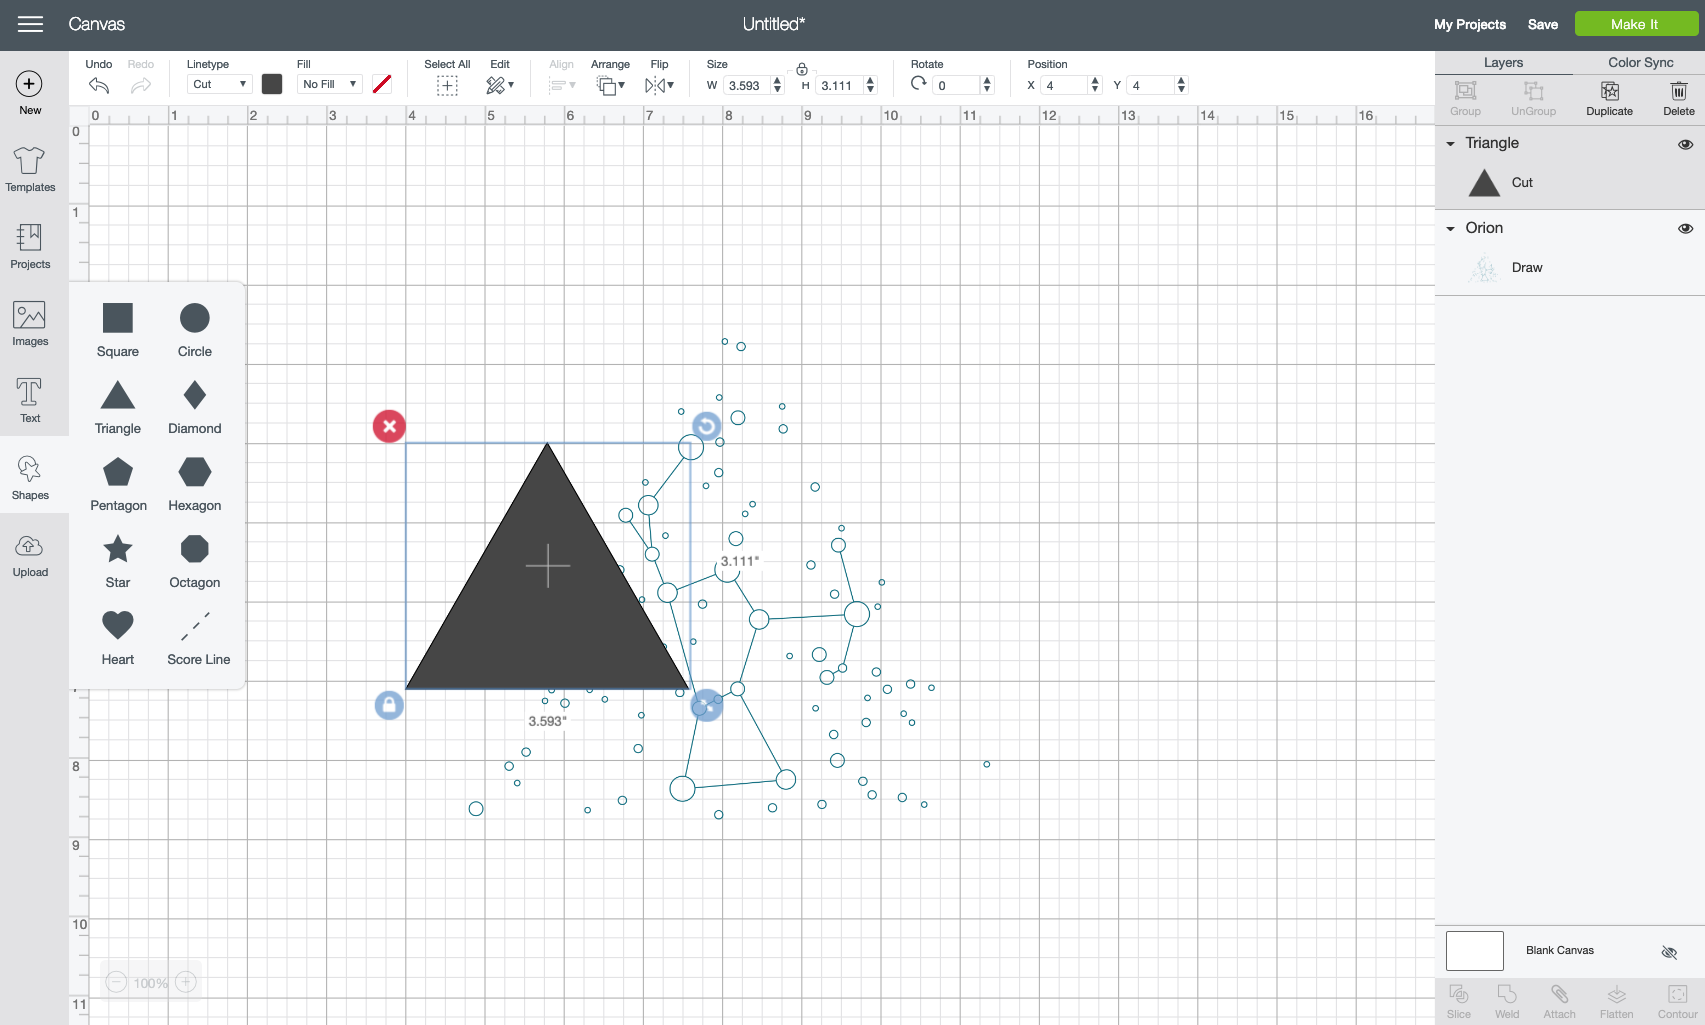
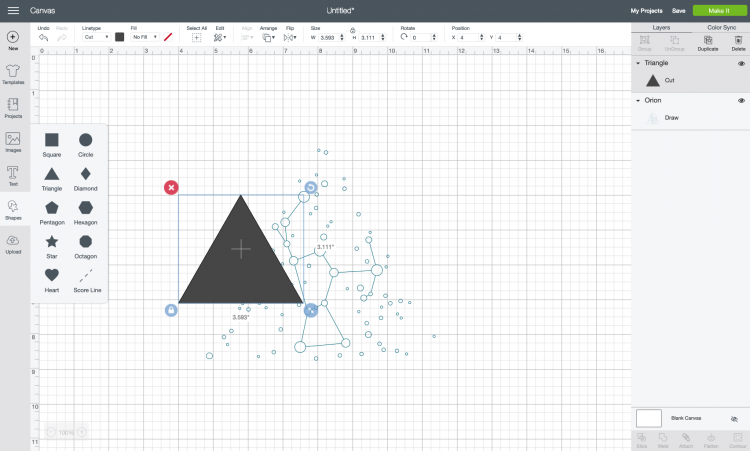
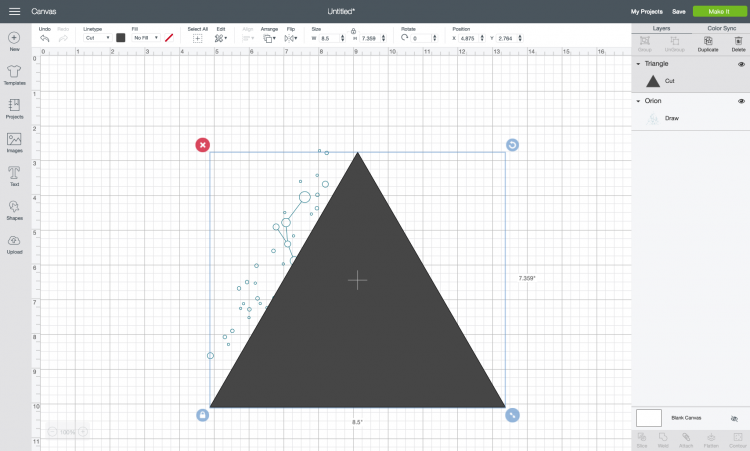
Now I need an actual cut shape so that this will cut into a triangle. Thankfully it’s an equilateral triangle, which is easy to make using the Shapes tool in the Design Panel on the left.
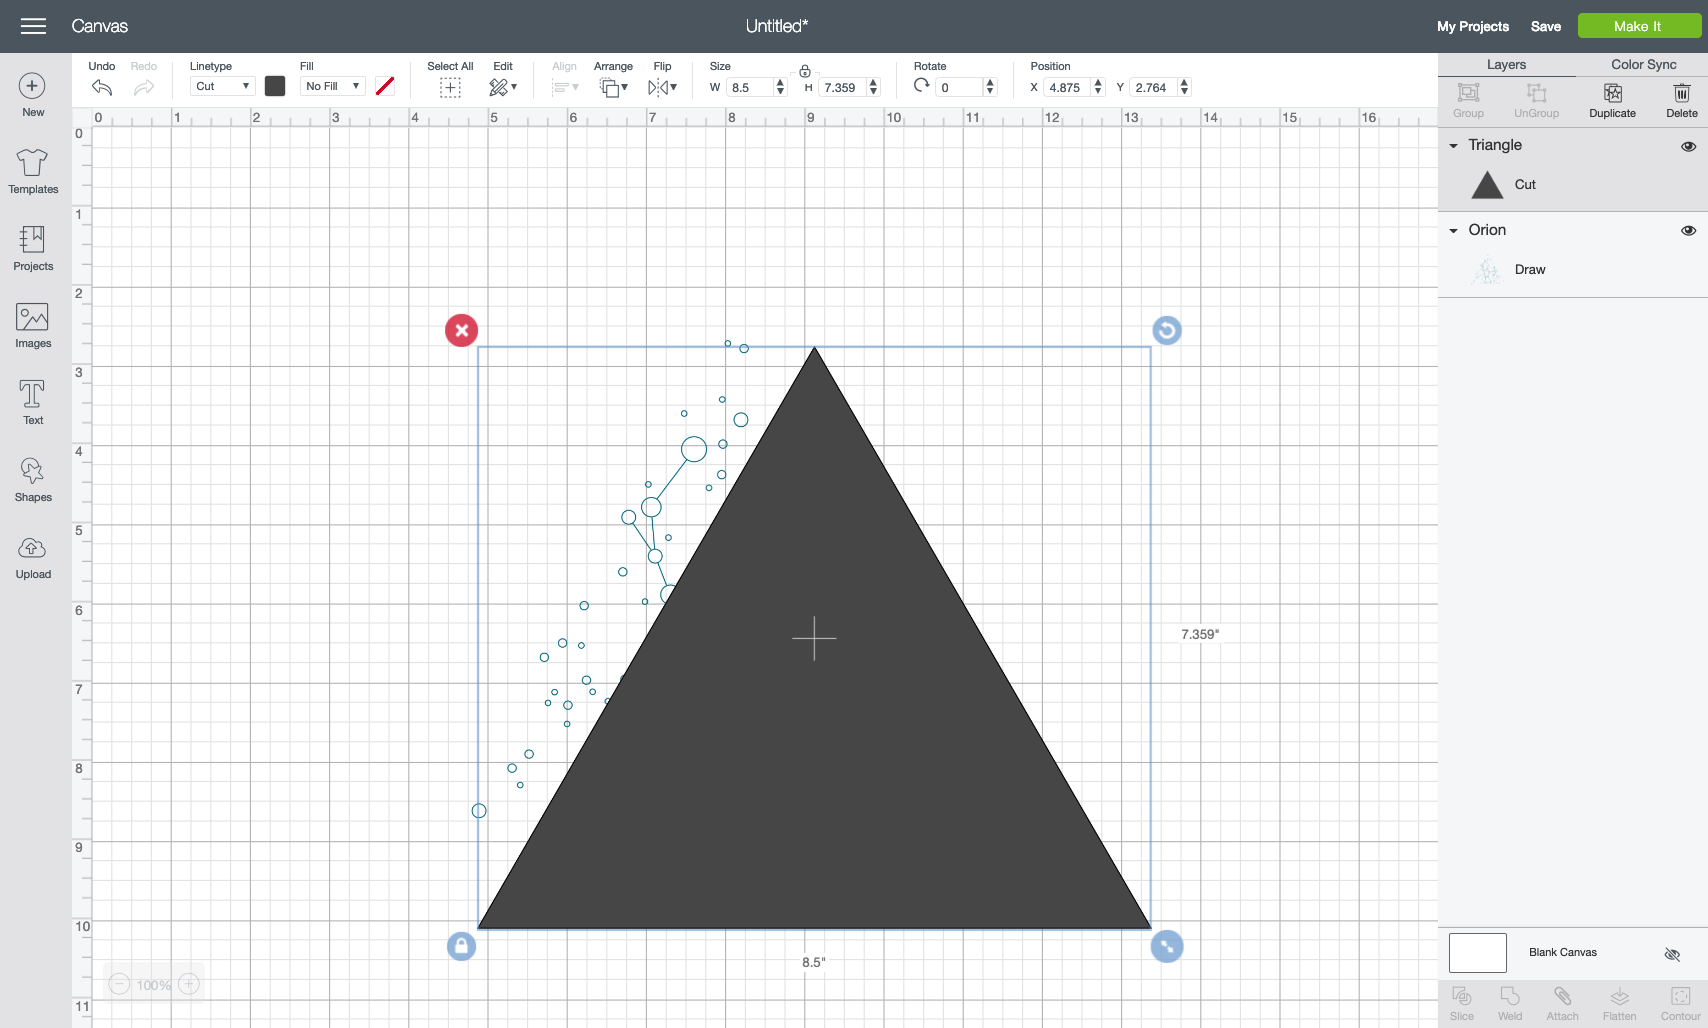
Then resize the triangle to be just larger than your image. I made mine 8.5″ wide, because the original drawn triangle was a little tighter than I preferred for this project.
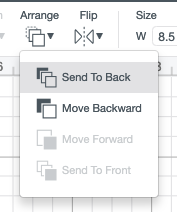
Your triangle will be in the front of your project but we need it behind the draw image. Use the Arrange tool in the Edit Toolbar at the top to send the triangle to the back (make sure your triangle is selected when you use this tool).
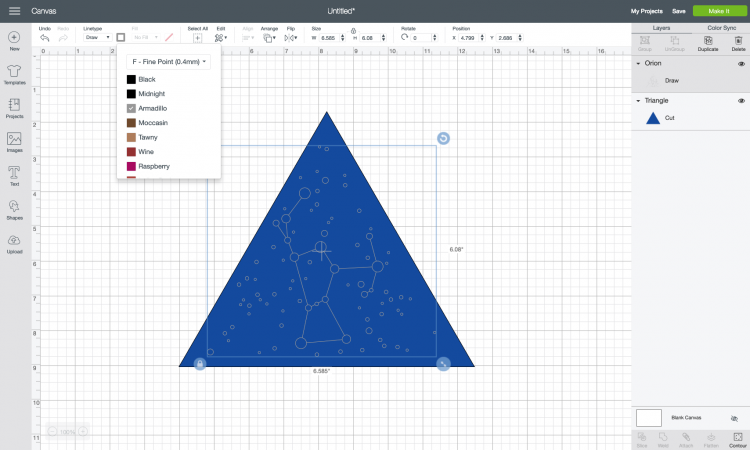
Then center the triangle and the constellation shape. You can also change the colors using the color dropdown in the Edit Toolbar (this used to be in the Layers Panel on the left, but recently moved). I made my triangle navy and my writing gray to get a better idea what my final project will look like.
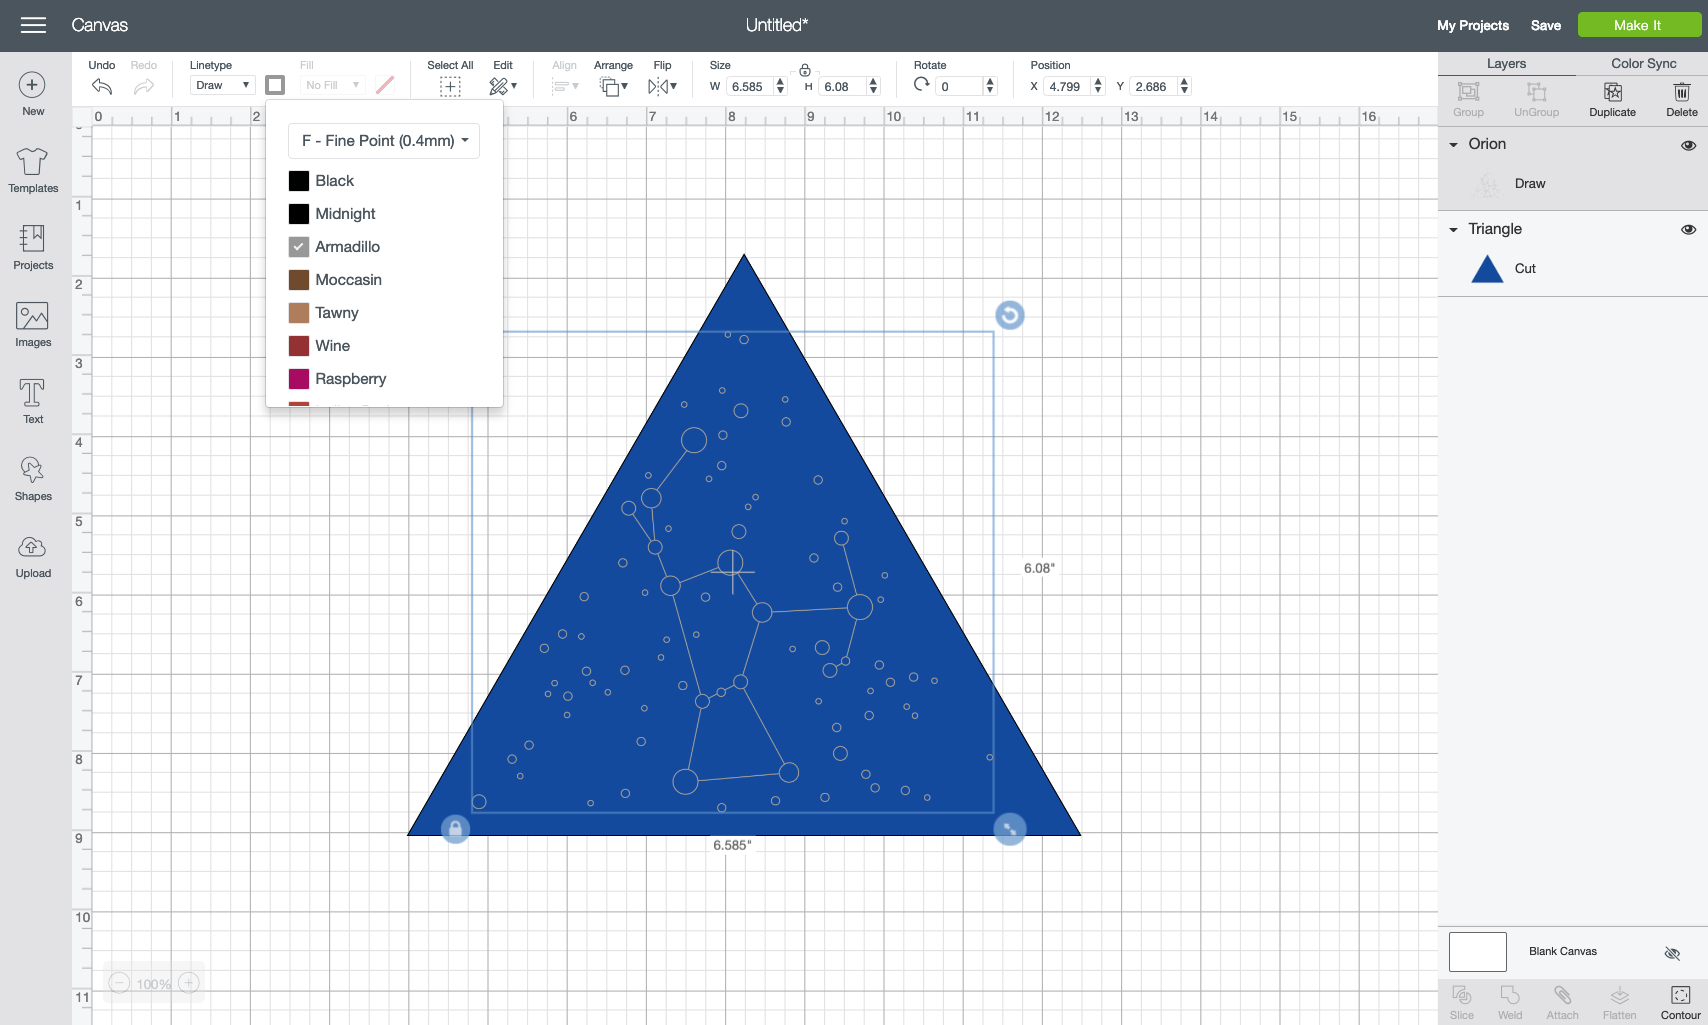
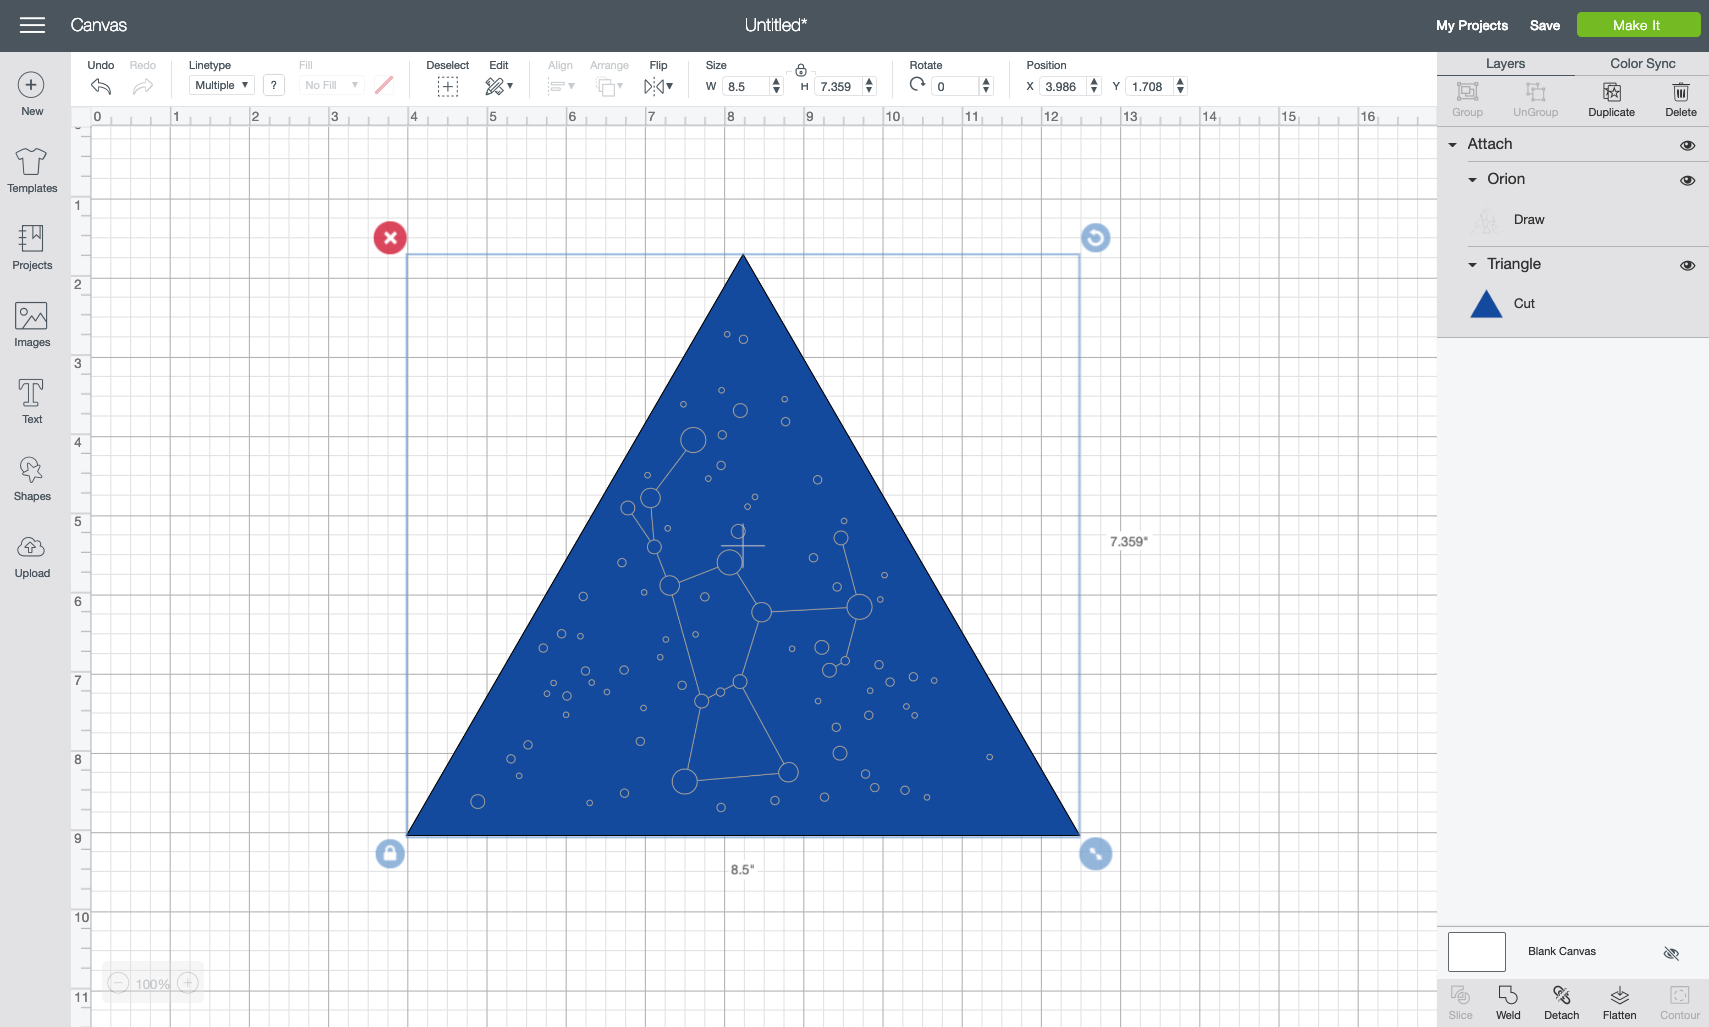
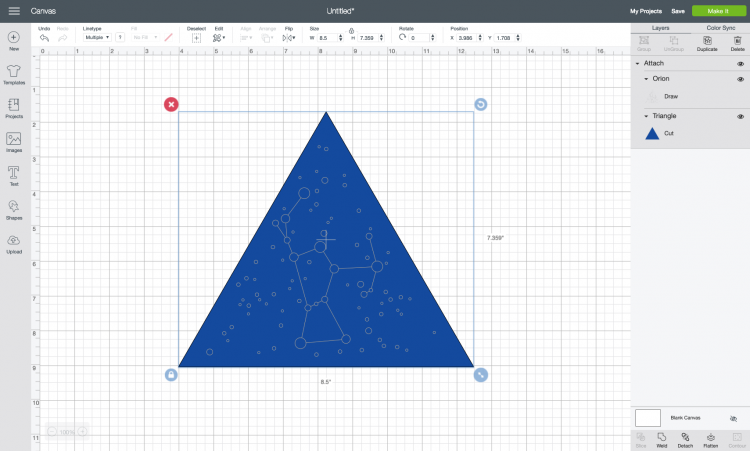
Then select both the triangle and the constellation shape and click Attach at the bottom of the Layers Panel on the left. This will keep them together when you go to foil and cut.
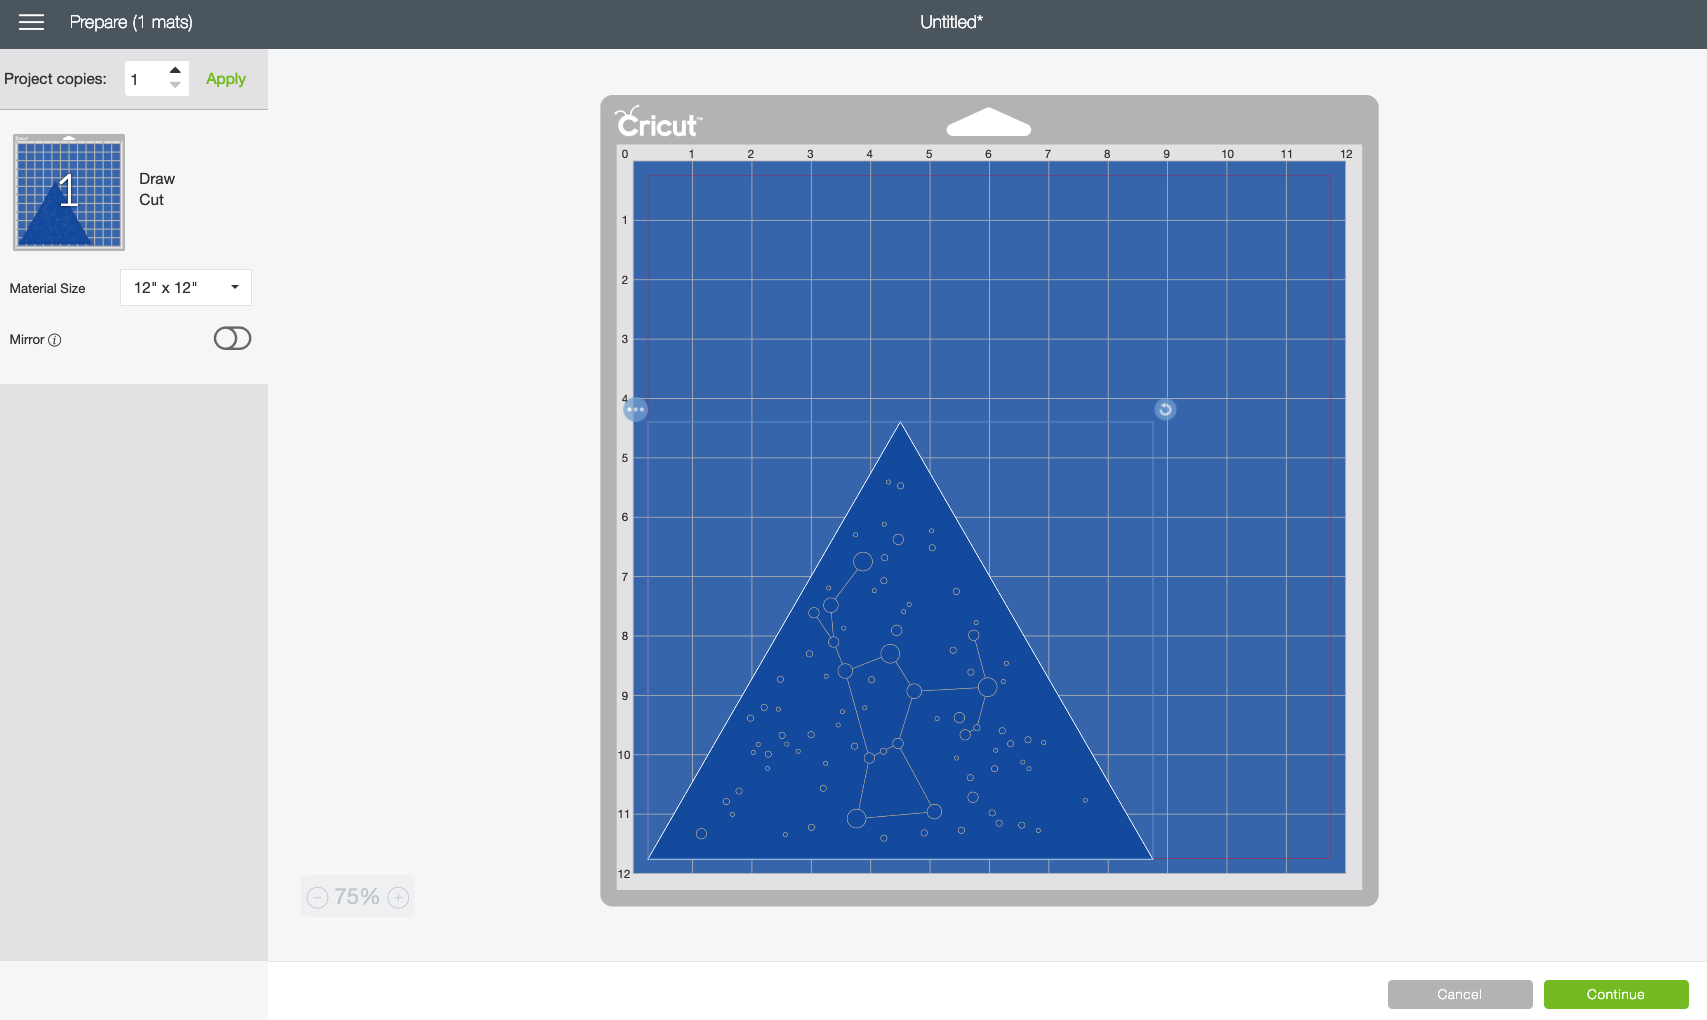
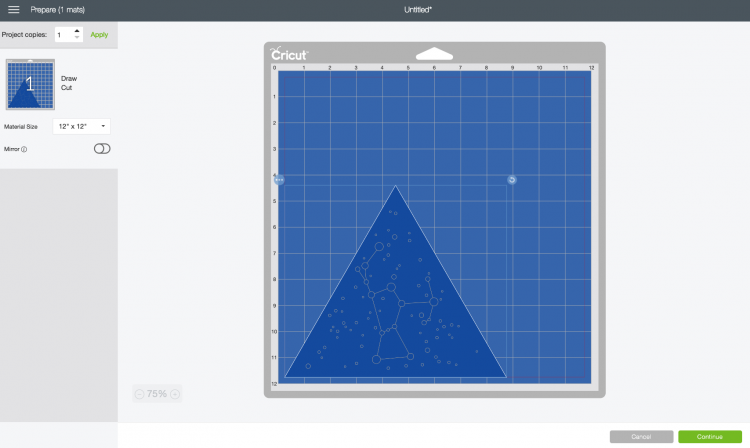
You’re ready to make your project! Click Make It in the upper corner. On the Prepare Screen, move your image to the bottom of your mat. I find it easier to remove the foil in between the foiling and cutting stage if the project is at the bottom of the mat (shoutout to Melissa at Silhouette School for that tip).
Using the Foil Quill to Foil a Cricut Project
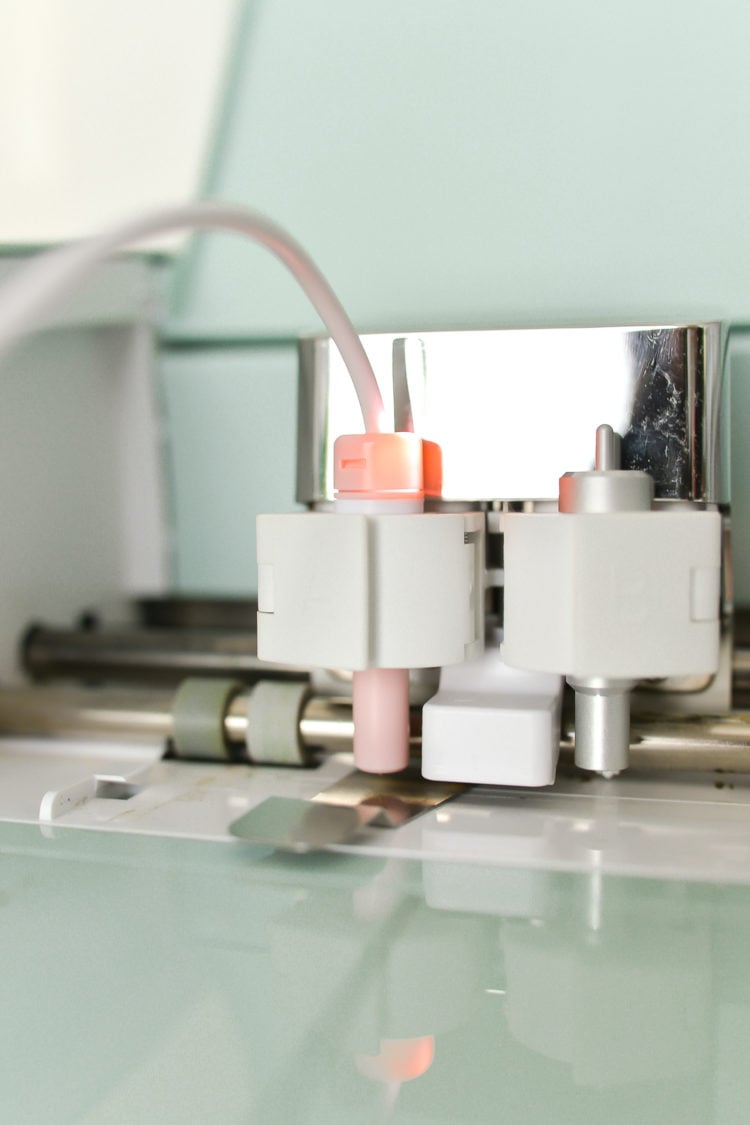
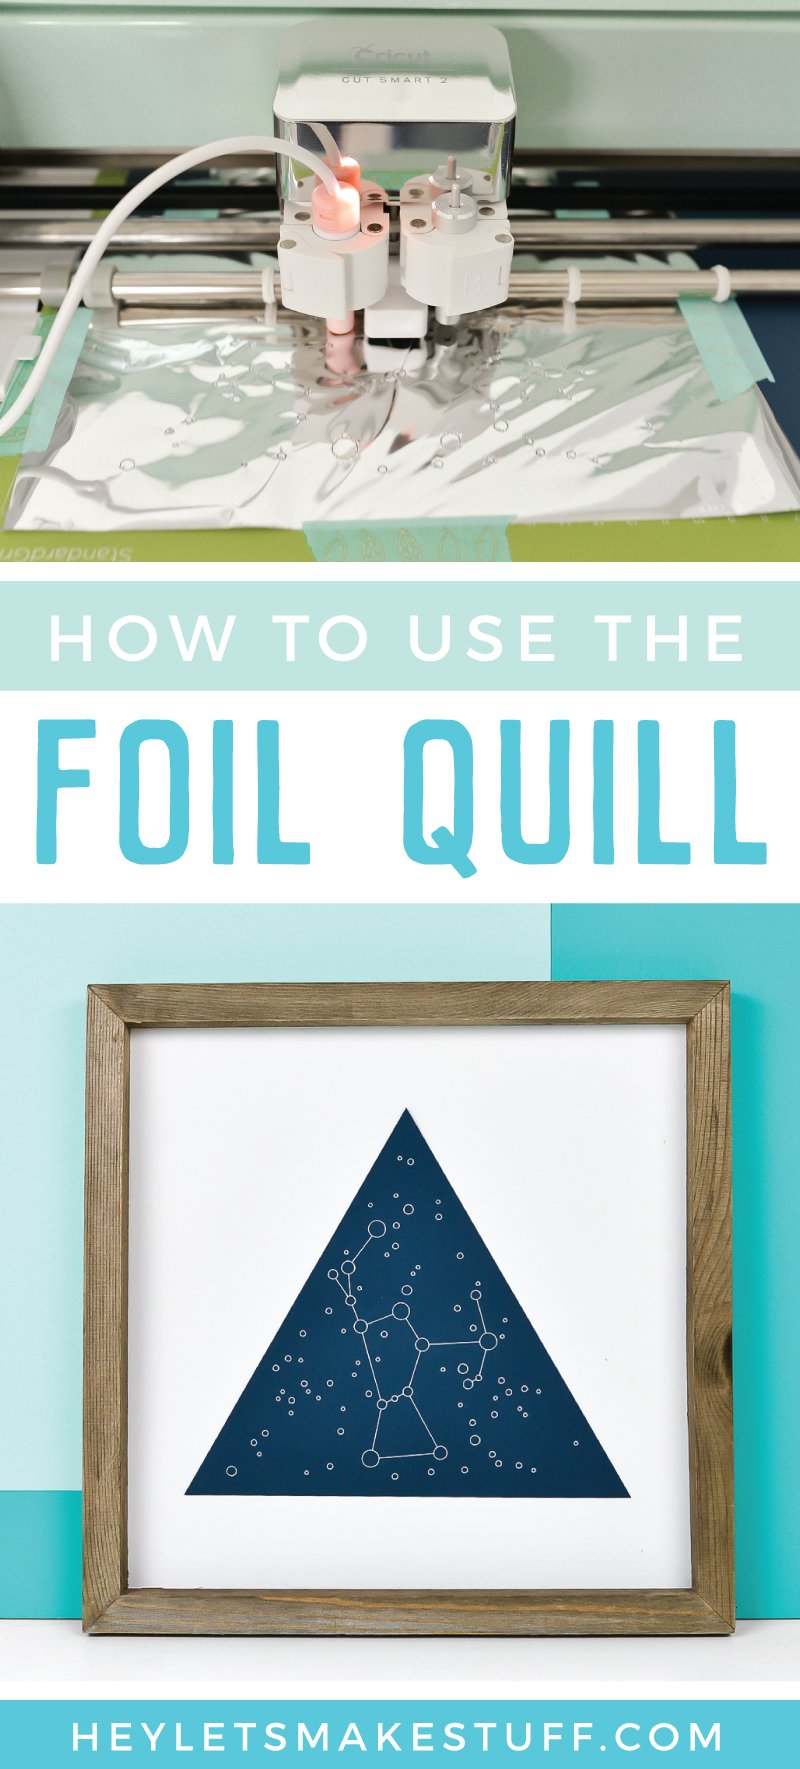
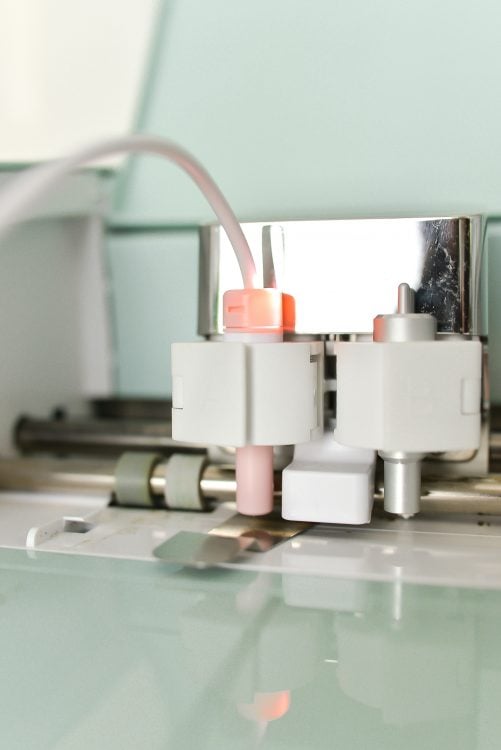
Instead of loading a pen into your machine, you’ll load the Foil Quill into the A tool holder. Screw the “C” adapter onto the Foil Quill. You’ll need to pop out the pen adapter that sits inside the A tool holder—just push up from underneath and it pops right out. Then seat the Foil Quill into the holder and close the clamp.
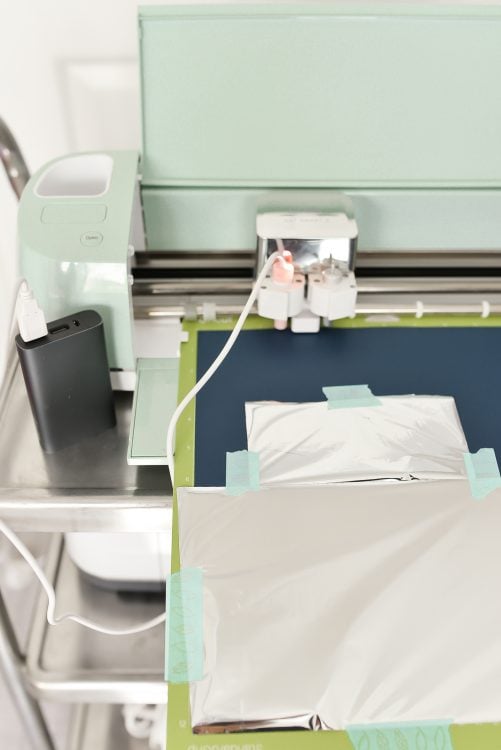
Plug the Foil Quill into a power source, like your laptop, an external battery (my choice), or the wall if there’s an outlet close enough to your machine. Let it heat up for five minutes, with the heat shield underneath to protect your machine.
While the Foil Quill is heating up, place your cardstock on your mat and tape the foil over the foiling area using the placement tape. I wouldn’t necessarily recommend doing the patchwork method I used here (the sample foil is only 6″, whereas the full rolls are 12″). But it actually worked pretty well so if you need to, go for it. Don’t overlap but get the two pieces as close as you can.
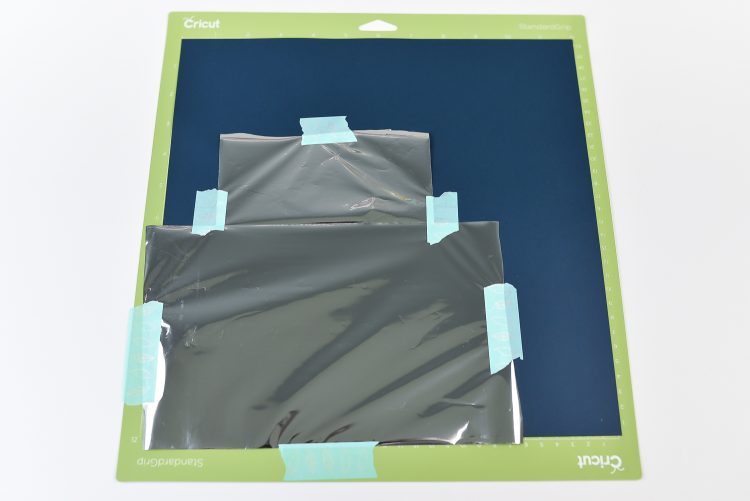
Then remove the heat shield and insert your mat into your machine.
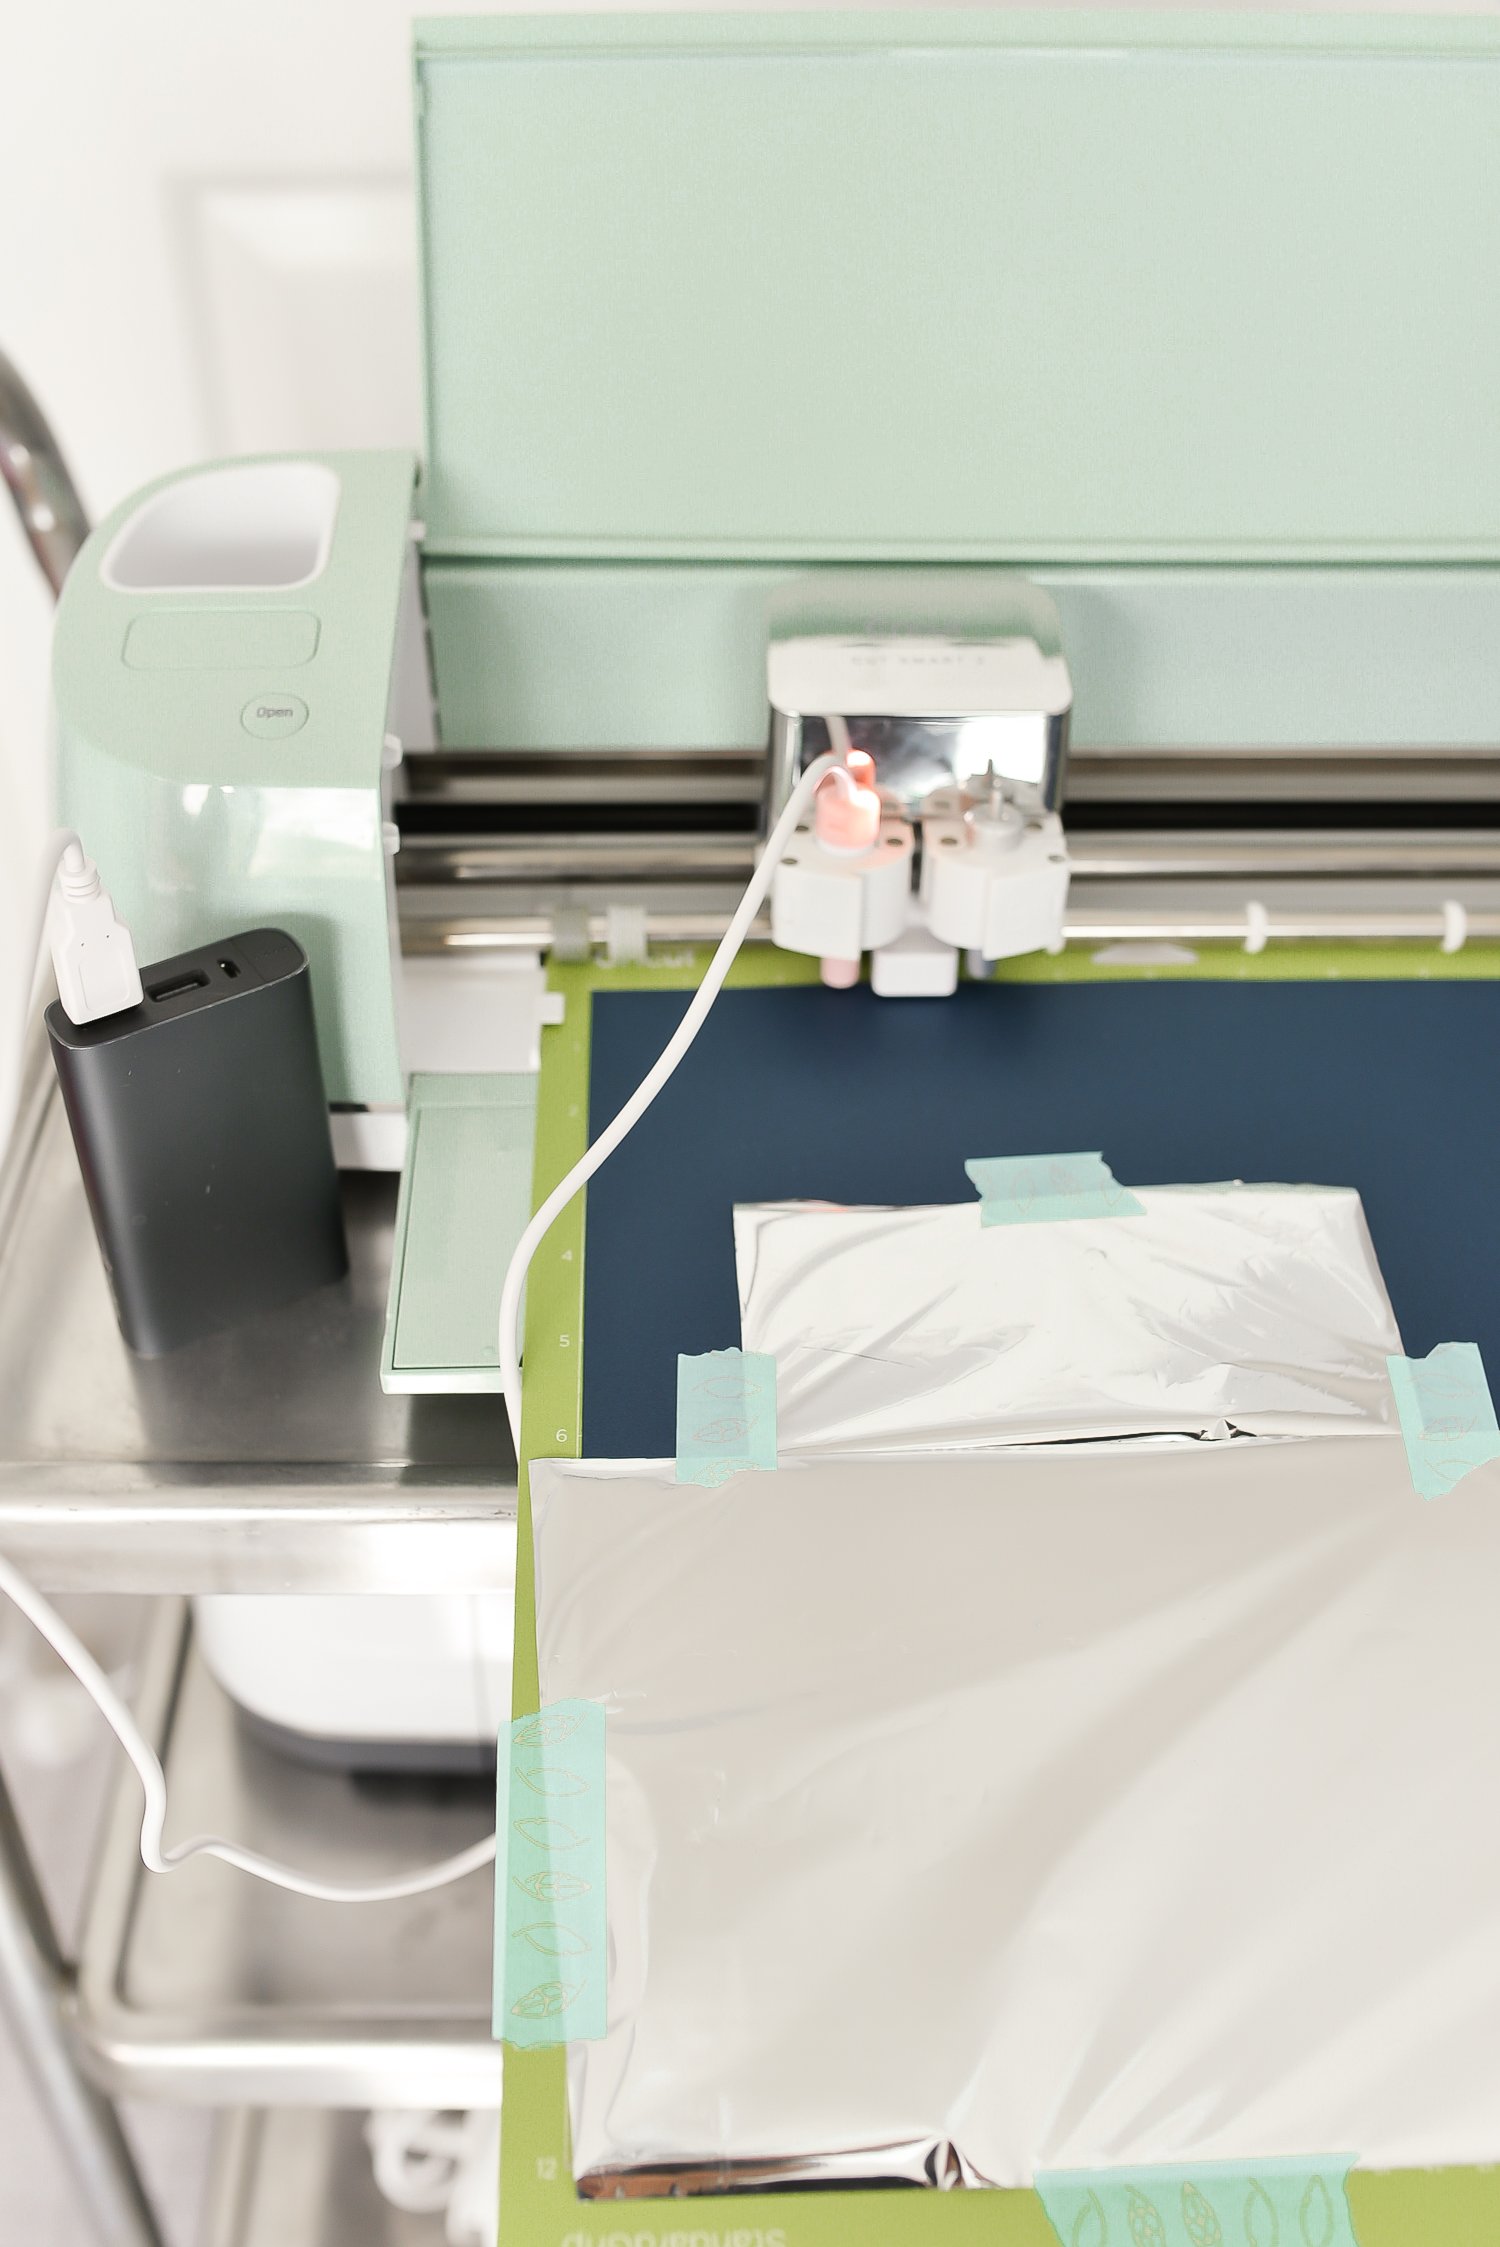
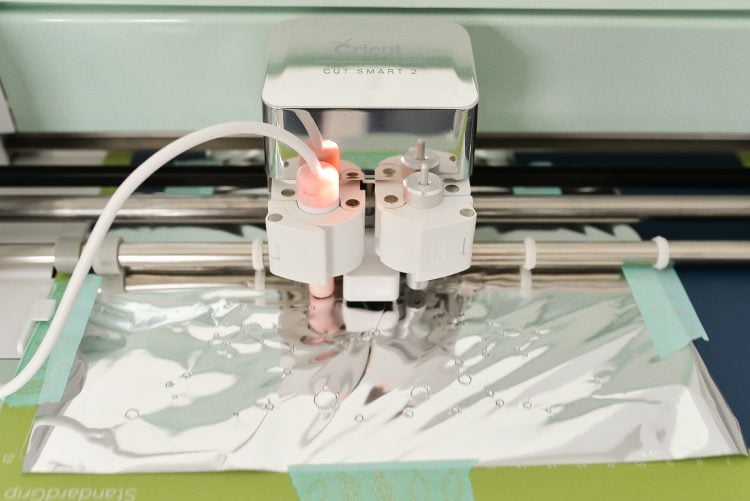
Hit the blinking C on your machine to start the foiling process!
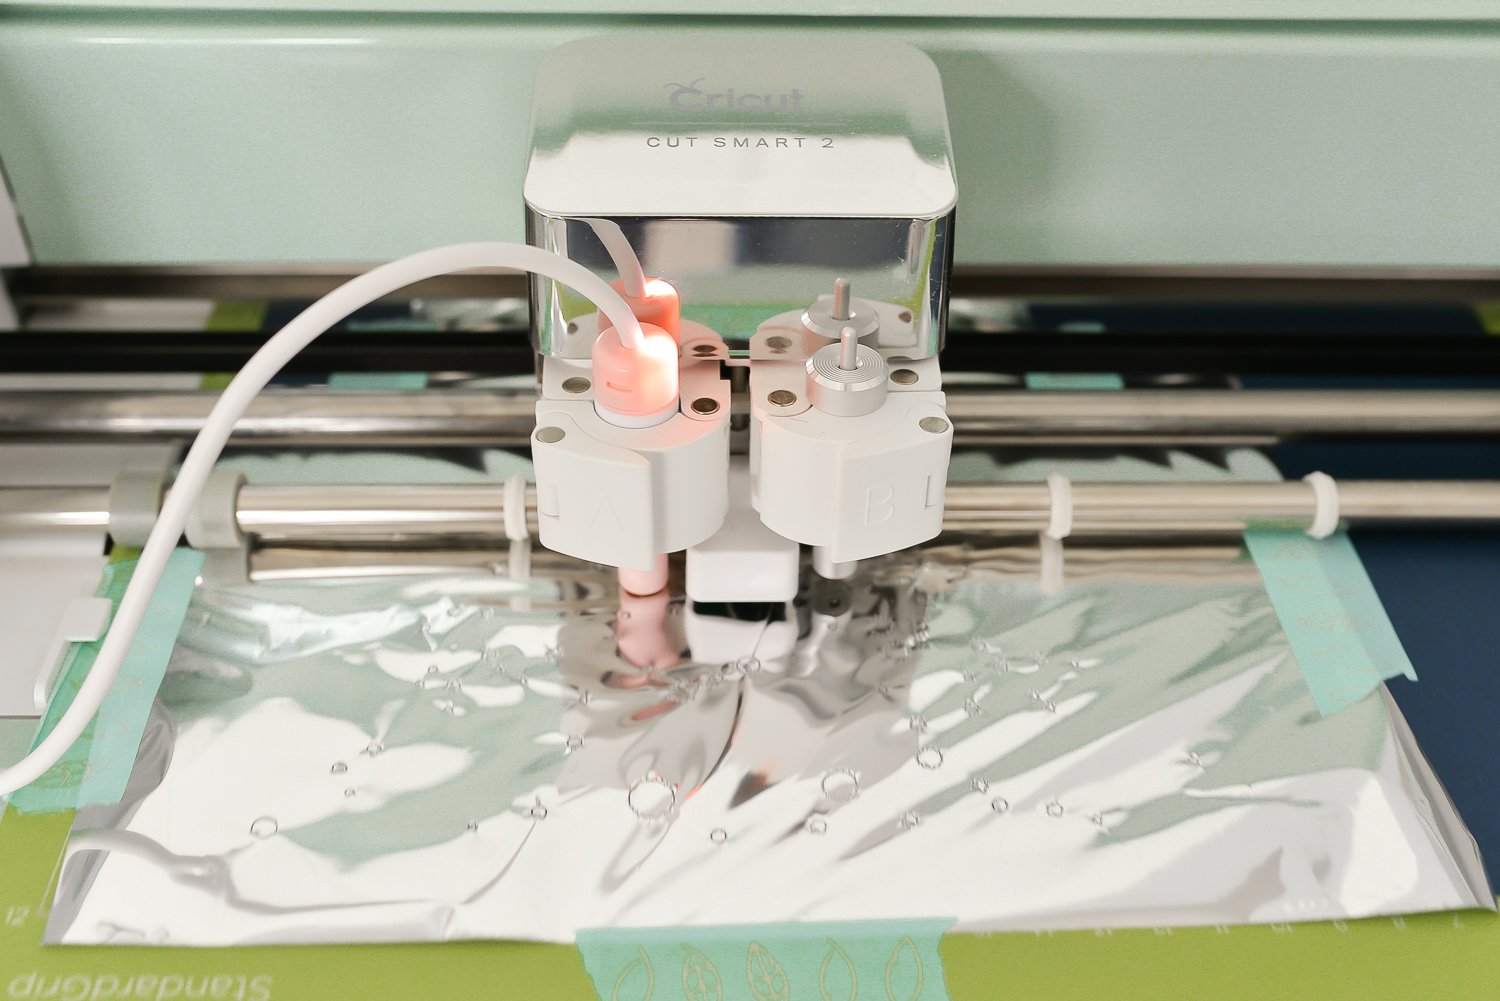
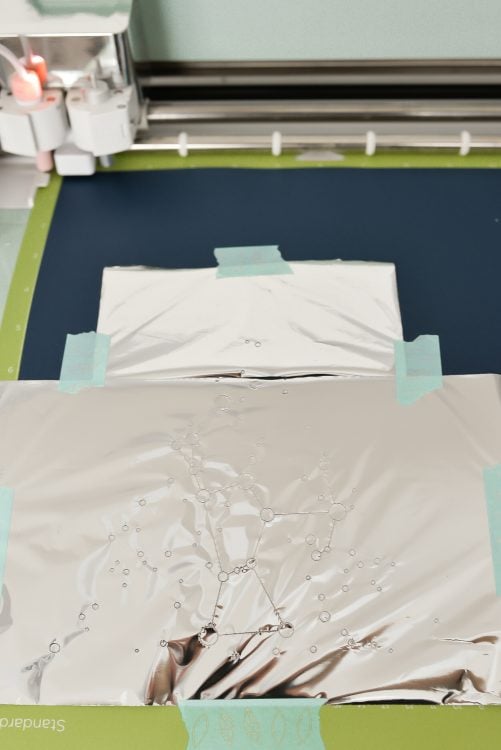
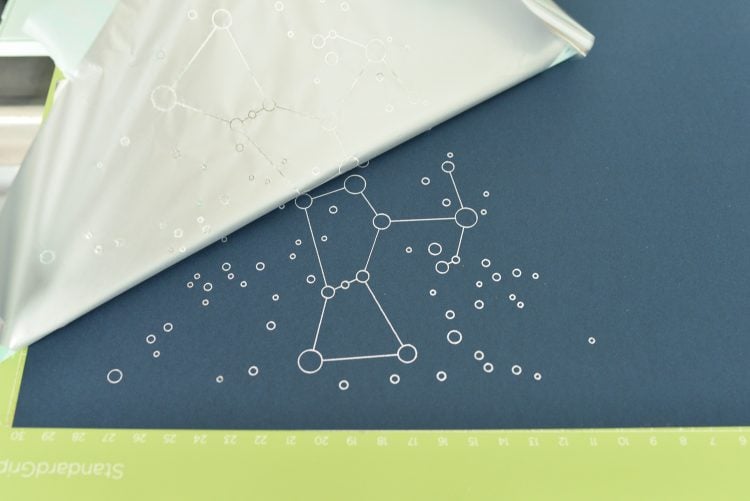
Once the foiling is done, your Cricut will nearly eject the mat. Wait for this moment and hit the pause button on your machine. This will give you a chance to remove the foil and tape from your project so the cutting process goes smoothly.
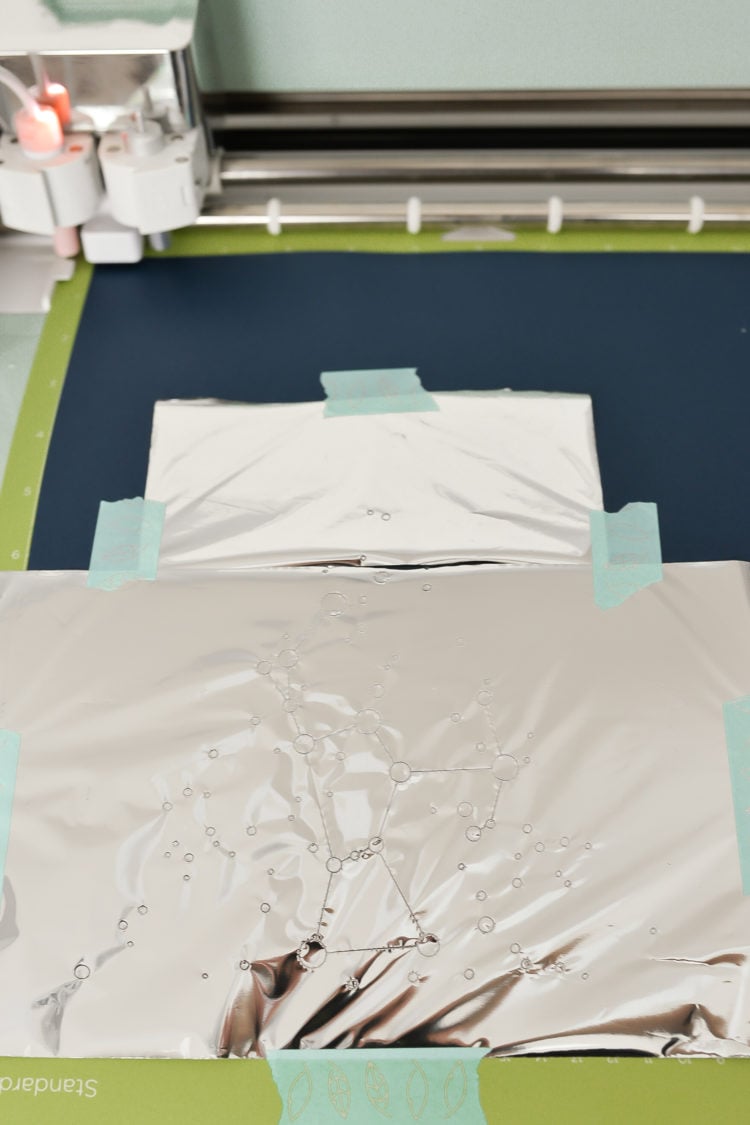
I love the “reveal” moment when I peel back the foil! It does SUCH a good job when it comes to coverage. I never got this kind of perfection out of other foiling methods.
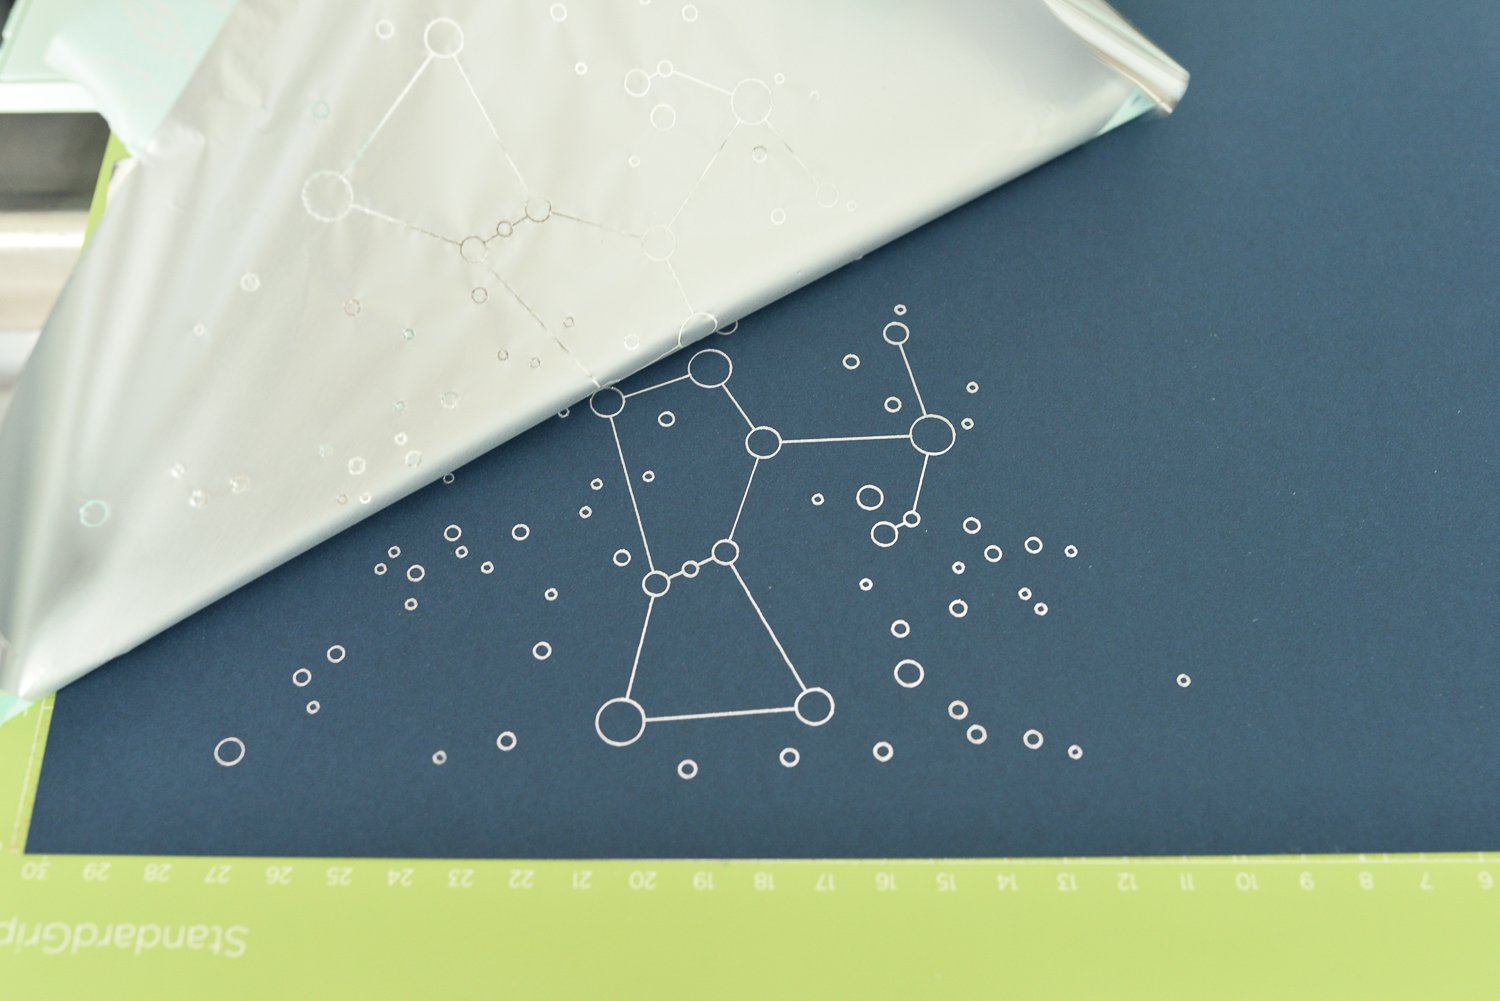
Once you’ve removed the foil and the tape, hit the C button again to finish cutting out your project.
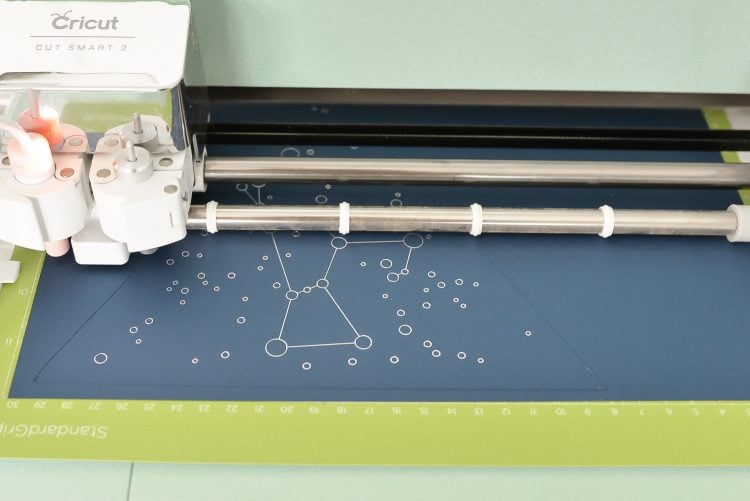
Once your project is finished, don’t forget to unplug the foil quill!
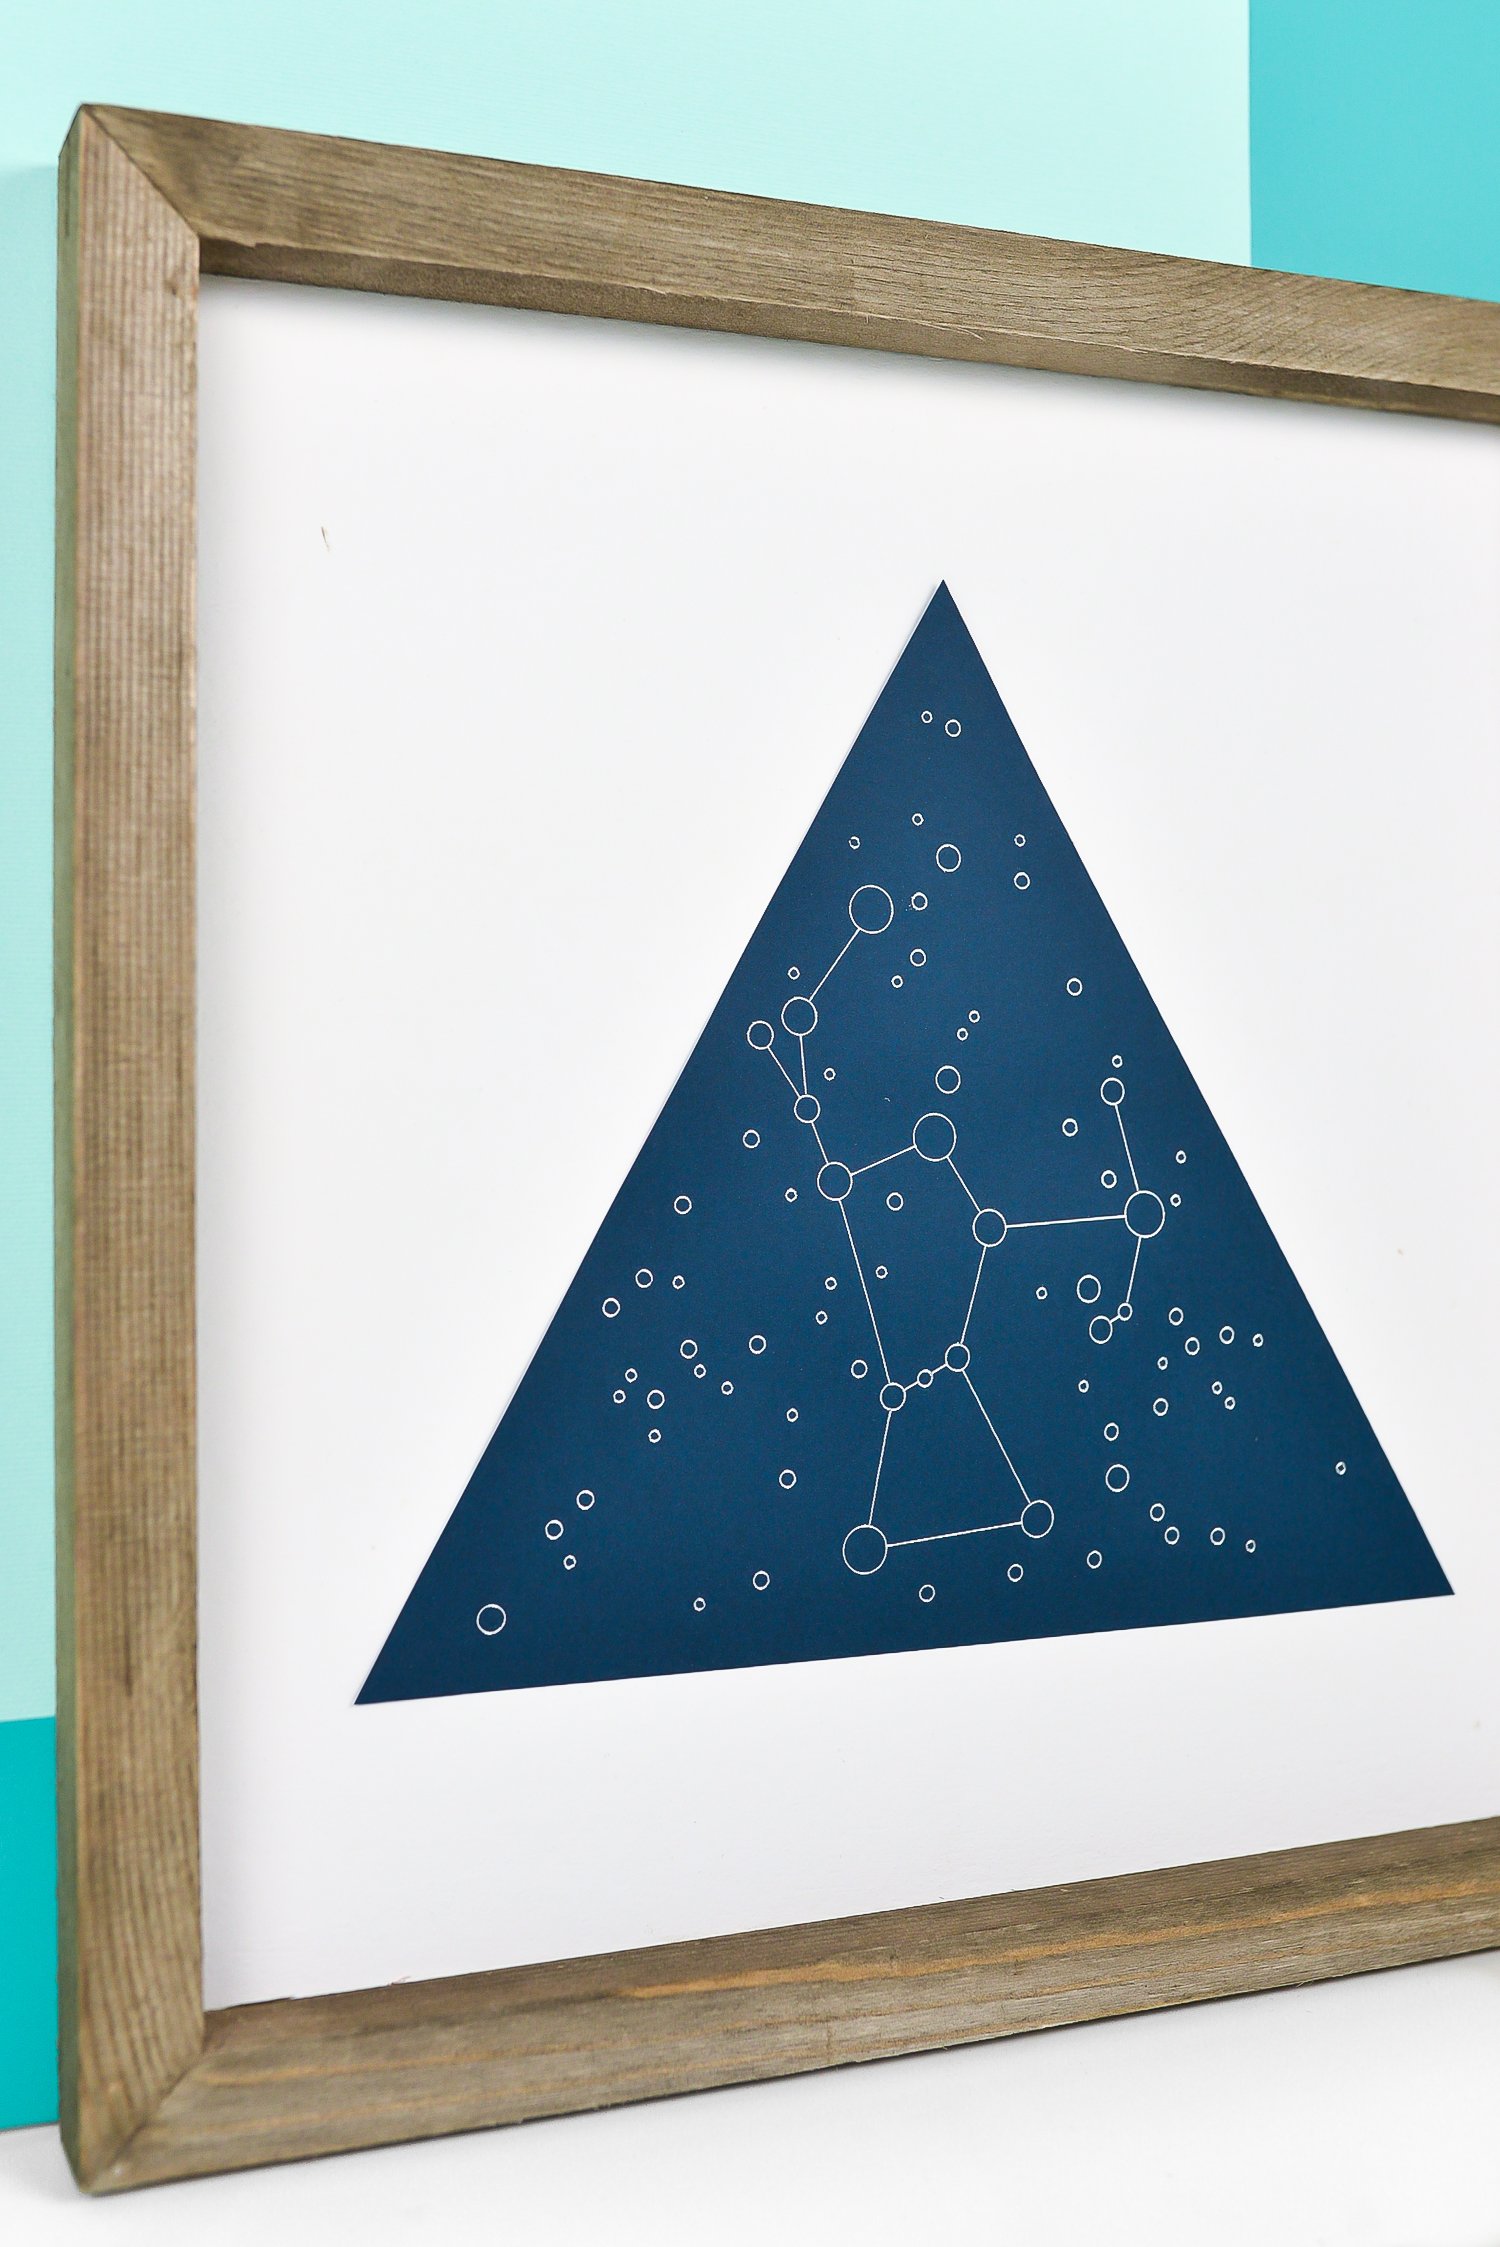
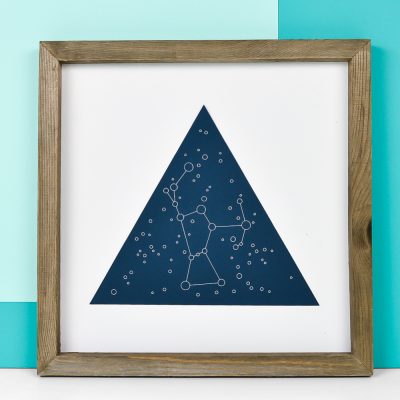
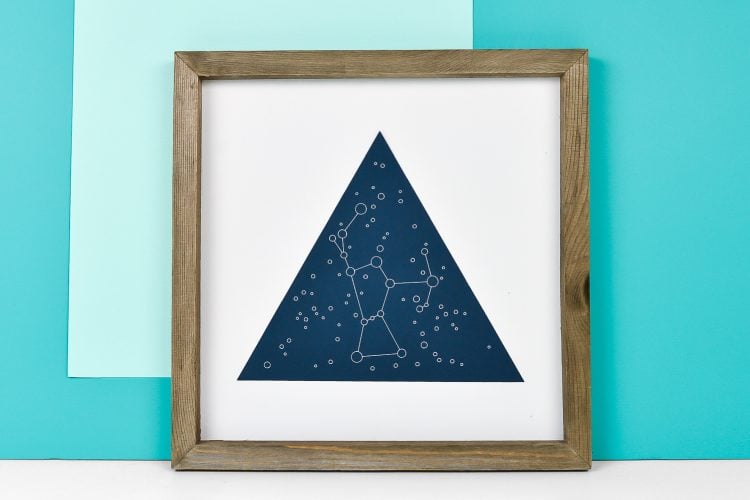
I love this project—perfect for a starry nursery, celestial wedding, or beautiful home decor piece!

Troubleshooting the Foil Quill
There are a few problems you might run into while using the Foil Quill.
The Foil Quill doesn’t work when it runs over the placement tape. Make sure your foil is large enough that the tape doesn’t cover where your design is going to be foiled. I ran into that several times when I first started. I am frugal and wanted to save as much foil as possible! But you really do need to get that tape where it is NOT going to be foiled.
I also tried using a roll of washi tape on my project instead of the placement tape. It stuck to my cardstock much more than the placement tape, which removed really easily (could be my washi tape too—you can always try!). The placement tape is a little expensive but it does leave your base material clean of tape remnants. They were testing a magnetic mat at the WRMK Creativation booth, which could be revolutionary for applications like this. Can’t wait to see if that materializes into something that’s available to the general public.
If your foil is ripping, clean the tip of the Foil Quill—it’s possible there is foil residue on there.
HOW TO USE THE FOIL QUILL
Equipment
- Cricut Maker or
Instructions
- Important: Cricut has stated that using the Foil Quill will void your machine's warranty. For this project an older machine is being used which is already out of warranty. If you have an issue with your Cricut related to the Foil Quill, We R Memory Keepers has asked for you to contact them at acinfo@americancrafts.com for resolution. Use at your own discretion.
- Creating Your Project in Cricut Design SpaceStart by creating your file in Cricut Design Space. Create a new document and click on Images, and then search in the upper right for "constellation." For this project the "Orion" draw file was chosen.

- Select the image you'd like and click Insert Images.

- Using the Size adjusted in the Edit Toolbar at the top, change the size of your constellation to your project size. For this project the design is 8" across.

- This is a draw file, meaning it supposed to be drawn using the Cricut's pen. Instead, we are going to use the Foil Quill. We don't want that triangle shape around the outside to draw, so use Contour in the lower left to delete the triangle from around the shape. Found that there were actually two triangle shapes and had to click on both to get the triangle to disappear. Learn more about Contour here.

- Now you need an actual cut shape so that this will cut into a triangle. Thankfully it's an equilateral triangle, which is easy to make using the Shapes tool in the Design Panel on the left.

- Then resize the triangle to be just larger than your image. This one was made 8.5" wide, because the original drawn triangle was a little tighter than preferred for this project.

- Your triangle will be in the front of your project but we need it behind the draw image. Use the Arrange tool in the Edit Toolbar at the top to send the triangle to the back (make sure your triangle is selected when you use this tool).

- Then center the triangle and the constellation shape. You can also change the colors using the color dropdown in the Edit Toolbar (this used to be in the Layers Panel on the left, but recently moved). For this design, the triangle was made navy and the writing gray to get a better idea what the final project will look like.

- Then select both the triangle and the constellation shape and click Attach at the bottom of the Layers Panel on the left. This will keep them together when you go to foil and cut.

- You're ready to make your project! Click Make It in the upper corner. On the Prepare Screen, move your image to the bottom of your mat. Found that it is easier to remove the foil in between the foiling and cutting stage if the project is at the bottom of the mat (shoutout to Melissa at Silhouette School for that tip).

- Using the Foil Quill to Foil a Cricut ProjectInstead of loading a pen into your machine, you'll load the Foil Quill into the A tool holder. Screw the "C" adapter onto the Foil Quill. You'll need to pop out the pen adapter that sits inside the A tool holder—just push up from underneath and it pops right out. Then seat the Foil Quill into the holder and close the clamp.Plug the Foil Quill into a power source, like your laptop, an external battery, or the wall if there's an outlet close enough to your machine. Let it heat up for five minutes, with the heat shield underneath to protect your machine.

- While the Foil Quill is heating up, place your cardstock on your mat and tape the foil over the foiling area using the placement tape. Don't necessarily recommend doing the patchwork method used here (the sample foil is only 6", whereas the full rolls are 12"). But it actually worked pretty well so if you need to, go for it. Don't overlap but get the two pieces as close as you can.

- Then remove the heat shield and insert your mat into your machine.

- Hit the blinking C on your machine to start the foiling process!

- Once the foiling is done, your Cricut will nearly eject the mat. Wait for this moment and hit the pause button on your machine. This will give you a chance to remove the foil and tape from your project so the cutting process goes smoothly.

- The "reveal" moment!! Peel back the foil!

- Once you've removed the foil and the tape, hit the C button again to finish cutting out your project.

- Once your project is finished, don't forget to unplug the foil quill!Perfect for a starry nursery, celestial wedding, or beautiful home decor piece!



Comments & Reviews
Zoe says
Has anyone ever heard of this damaging their Cricut? What would be the issue?
Heather Kredo says
That totally makes sense! Thank you for the feedback, I really appreciate it.
Heather says
Hi Cori! Thank you for this, and I have a question. I am trying to decide between freestyle or machine quill, and I’m wondering if there is some reason why we can’t hold the machine quill and freestyle with it? Do you feel it would be uncomfortable or not work? Too hot? There isn’t an adapter that I can find, but it seems like it would be simple to do! I have never used a quill and stumbled here researching. Thanks so much!
Amy Motroni says
Hi Heather
,
I think the foil quill is too hard to hold, and maybe too hot and not sturdy. I agree an adapter would be great!
Amy, HLMS Reader Support
Lexi says
What setting did you have your circut on? Paper, cardstock, custom?
Amy Motroni says
Hi Lexi,
Use the same material setting as the material you are foiling.
Happy Crafting!
Amy, HLMS Reader Support
Samantha Huet says
Hi! Im having trouble with my fine tip foil quill tearing my foil while its “writing”…I have the foil pulled tight and taped down. I’ve tried making the lettering larger but it still catches and tears mid production. Suggestions?
Cori George says
Are you using the fine-tipped pen? How large is the piece of foil you’re trying to use?
Jennifer says
Hi, I’ve been using your videos and posts so much the past few days. Thanks! One question–I’m having my Cricut write a quote with the Foil Quill tool but it’s coming out “patchy” (the foil isn’t applying to all of the words/parts of words). I changed the setting on my machine to go slower, but it still happened. My next step will be to change Foil Quill tips. I’ve been using the normal one so far. I don’t know if I should switch to the bolder one or the fine tip one for this particular problem. The bolder one seems logical, but sometimes these things are counter-intuitive. Thanks in advance for your help!
Jennifer says
I’m using a first-gen Cricut Explore, and I’m adding the quotes to postcards I had printed by Moo.com. So the base material is like cardstock.
Shey says
I have found the thin tip quill to work best in many situations. The patchy look can be caused by two different things, either the quill isnt warm enough when you use it (leave it plugged for at least 5 minutes before loading your project) or your artwork is a double stroke image, causing the quill to run over the same spot twice, which will not darken the lines as you would hope, it will just reheat and distort the already drawn part of the image. I’ve been working with the quill system every day for the last two weeks trying to get his technique down! hopefully my trial and error helps you!! :)
Jennifer says
Thanks for the advice! I feel so dumb that I tried to run the quill twice in the same spot–what you said about reheating makes perfect sense. I guess I was so desperate to get a better print that I let logic fly out the window.
Tshell says
Hi! Which of the three quills do you think you’ll use the most? My bundle is on backorder and I’m tempted to just buy them separately from JoAnn’s. But I don’t want to waste money on a size that I probably won’t use much. Would appreciate any feedback!
Cori George says
I think the normal one is the one I’d use the most! Hope that helps!
LucyLicorice says
Hi
HSN has all 3 pens and foil and a few other things with it for only $63.00! A huge savings compared to the craft store and it will be on the hsn craft show May 7th, 2019
Sandra Lee says
Is there a way to do solid fill using Cricut Explore Air? I have seen videos for Silhouette and Brother ScanNcut that can achieve this look.
Liz, HLMS Reader Support says
Currently there isn’t a way to do a solid fill using a pen, but I will be the first one to post if they do :)
In the meantime, you can place cute patterns inside the letter like squiggles or diagonal lines if you can find the image and just Slice them into the letter itself?
I hope this helps!!
Happy Crafting!!
Liz, HLMS Reader Support
Beth Waldeck says
Have you tried multiple colors of foil on the same project? I asked WRMK how to set up the foil on the mat to accomplish this and they were clueless except to say “carefully unload your mat, change colors and repeat.” They don’t realize that doing so will generally mess up your alignment and ruin your project. Does the mat come out far enough to change the foil color without completely removing it? The machine does prompt you to change pen colors obviously, but wondered if the mat comes out far enough to change the foil color on the mat.
Cori George says
If you move your project to the bottom of you mat (if it is not a 12×12 project, that is), the mat does come out far enough for you to change foil colors. I haven’t tried it, but I do notice the mat comes out pretty far and allows me to remove the foil before the cutting sequence. Hope that makes sense!
Beth Waldeck says
THANK YOU for taking the time to make a video on how to do this! WRMK couldn’t manage to do this for some reason!