Quilt-As-You-Go is so much more than just log cabins! Try this new Blooming Quilt Pattern technique for a fun effect.

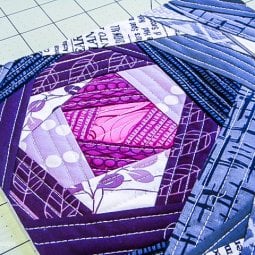
I recently shared a pillow on my Instagram and I was asked a number of times how I created it. I finally got my act together and created this little how-to. I’m calling it the Blooming Quilt Pattern, as it looks a lot like a flower starting to bloom. If you have any questions, just leave them in the comments and I’ll try and help you out and/or modify the tutorial so it makes more sense.
I learned the basic scrappy quilt-as-you-go via a great tutorial over at Oh, Fransson! Her version is lovely and straight, like a log cabin block. It was the perfect introduction to QAYG, and I’d highly recommend giving something small like this a shot to get comfortable with it.
I’ve taken the same process and made it wonky. The technique is the same, but it sort of requires a bit of mental geometry — the ability to see where you’re headed before you get there.
I’m participating in the Pretty Little Pouch Swap, so I thought I’d create the front panel of the pouch using this method, and write up this tutorial as I went! I hope my partner loves the pouch I’m creating.
Blooming Quilt Pattern Supplies
- Backing fabric
- Batting
- Scrap fabric
- Iron
- Cutting mat
- Fabric scissors
- Ironing board
- Spray basting
- High-quality thread
- Bobbin
- Sewing machine
- Walking foot
- Rotary cutter
Blooming Quilt Pattern Instructions
There will be three layers to this panel. A backing fabric, the batting, and the scrappy top. Unlike a normal quilt sandwich, the back of your panel will be not so pretty. So it’s perfect for making things with a lining — pouches, bags, pillows, etc. It doesn’t work so well for an actual quilt.
You’ll want your iron and cutting mat close by, as well as your scissors. I lower my ironing board and put it right next to my table, as well as put my small cutting mat right next to my machine. This saves me from walking over to my big cutting table after each step.
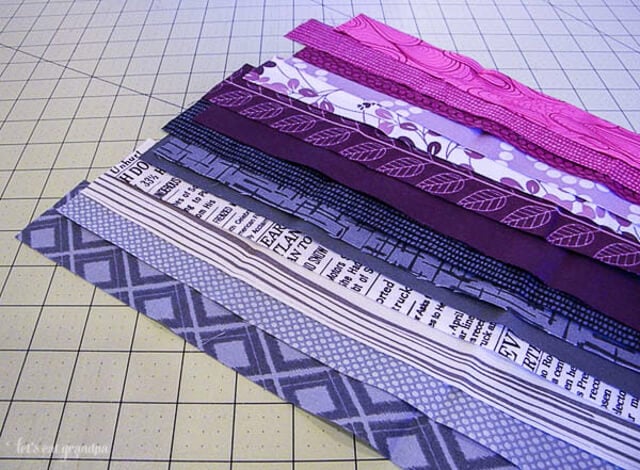
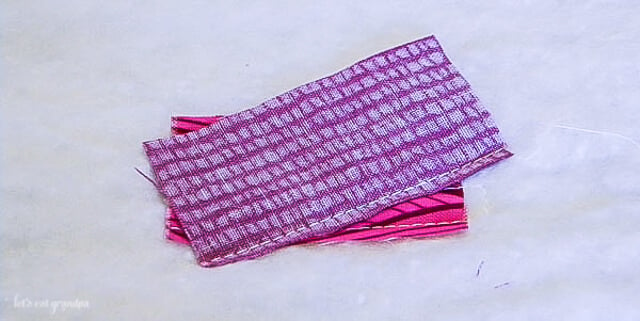
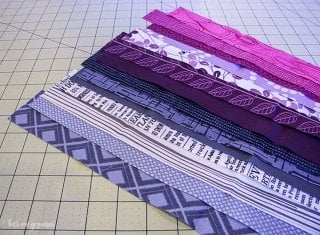
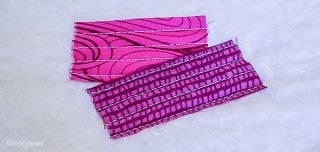
Choose your fabrics. You can do this with any fabrics, but I find that a gradation of color works particularly nicely, as well as a range of values — dark to light. For this pouch, I chose a selection of pinks, purples, and grays. Cut strips between 1″ and 2″ wide, or pull from your stash. It’s perfect for scrap-busting.
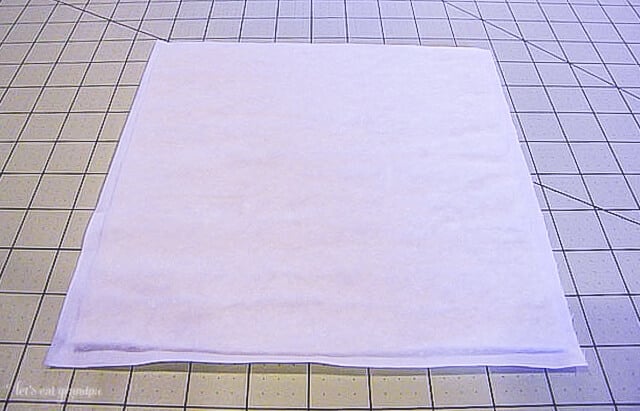
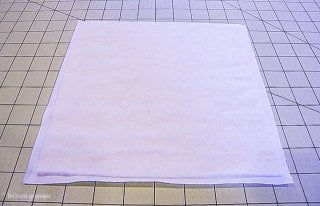
Cut a piece of batting the size of the panel you want. My panel is 8.5″ x 8.5″. Back the panel with a utility fabric. For this pouch, I used an inexpensive cotton (seriously, like $1.99 a yard) since it will be inside the lining of the pouch. I cut it a little wider than the batting, just in case it shifts. You can spray-baste them together if you’d like.
Set up your machine to quilt. Lengthen your stitch a bit, and use high-quality thread. This is a thread-intensive project, so you might want to wind an extra bobbin or two, depending on how big your panel is, or how many you’re making. Just to make this small square I used nearly an entire bobbin!
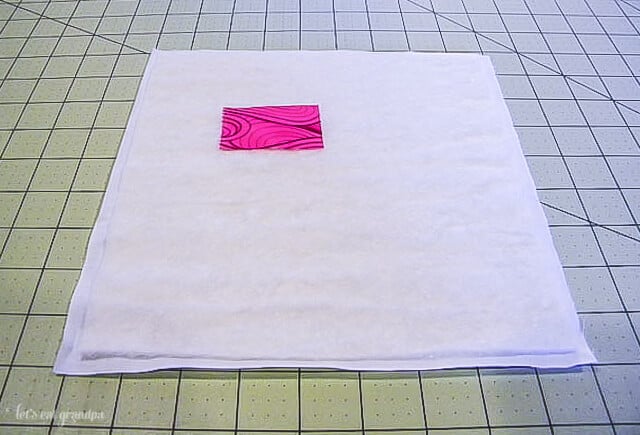
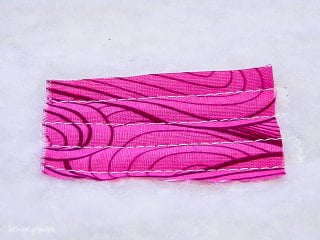
I didn’t use my walking foot — my machine quilts fine without it. But if you’re more comfortable quilting with it, go for it. Pick the fabric you’d like as the center of the “flower,” and quilt it, right-side up, straight to the batting. I like to start it a bit off-center, but you could start it anywhere on the panel.
I used simple straight-line quilting, but you could do some FMQ or use other patterns. To save thread, when I came to the end of the fabric, I turned the panel, stitched three stiches down, and then stitched back the other way across the fabric. It actually goes pretty quickly once you get the hang of it.
Here’s a quick video I made of how to do the turning: QAYG Video Tutorial. Can I figure out how to embed it? Of course not. Does it have a bit on the end where I pick up the camera to turn it off? Indeed. Are my thumbs blocking the camera half the time? You betcha. But the fact I even made a video in the first place should be cause for celebration. Hip, hip, hooray!
Moving on.
Here is what should have:

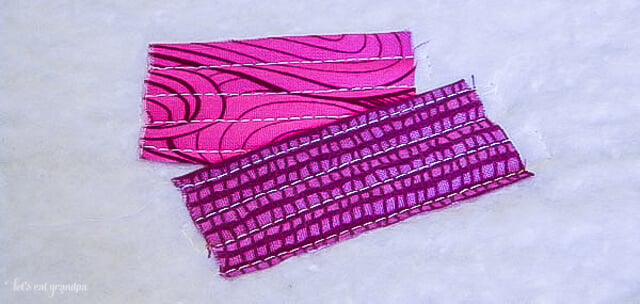
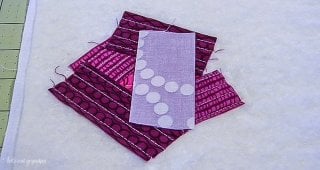
In a traditional log cabin, you’d lay the next piece perpendicular to the first piece. Instead, lay your second piece face down at an angle, so the two pieces are right-sides together. Sew along the edge of the piece with 1/8″ seam.
Open up the two pieces and press the new piece away from the first piece. Quilt that one using the same technique you used on the first piece.
Add another piece across from it using the same method. Basically, instead of making a square, you want to make more of a pentagon, with five sides instead of four. So every piece will be angled. I use each fabric (except the first fabric) two or three times as I work my way out from the center. You’ll see this more as it starts to come into form.
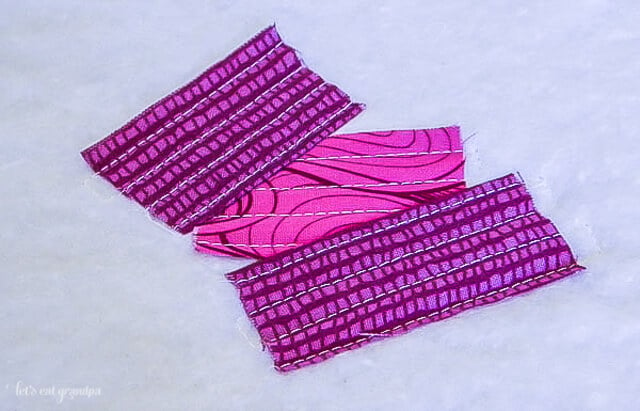
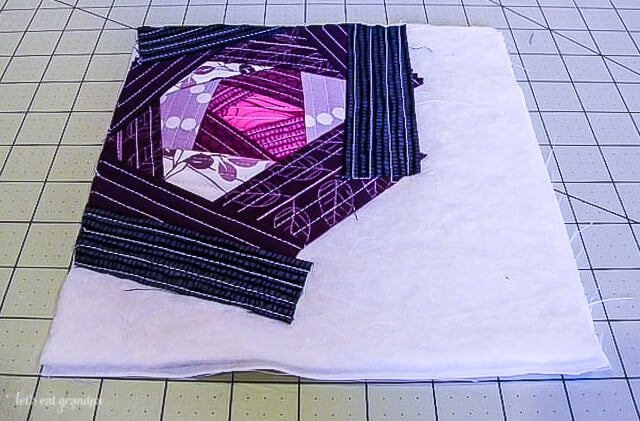
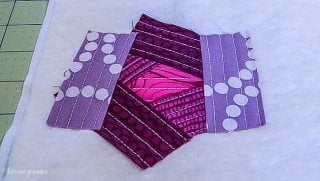
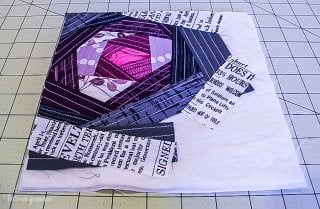
Continue adding pieces at an angle. You want to make sure to cover up all edges and seams with the pieces you’re adding. You’ll see below that the light purple piece (right-side down in the photo) covers the two ends of the darker pink pieces, so that when it’s opened, those ends are hidden.

You can already see the flower starting to take shape.

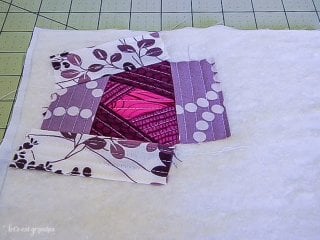
Keep adding pieces. It’s hard to go wrong — I’ve had whole pieces I’ve ended up covering up. Just make sure that the pieces you are adding are covering up the ends of the strips as you go — you don’t want frayed edges showing.

When I start to get to the edge, I like to trim as I add pieces. I trim after I open up a piece and iron it, but before quilting it. That means I’m not quilting anything extra.
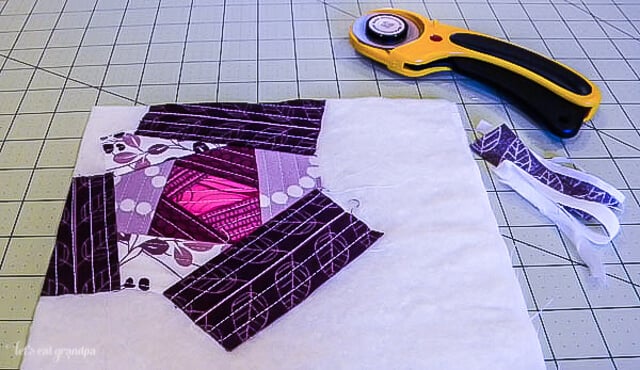
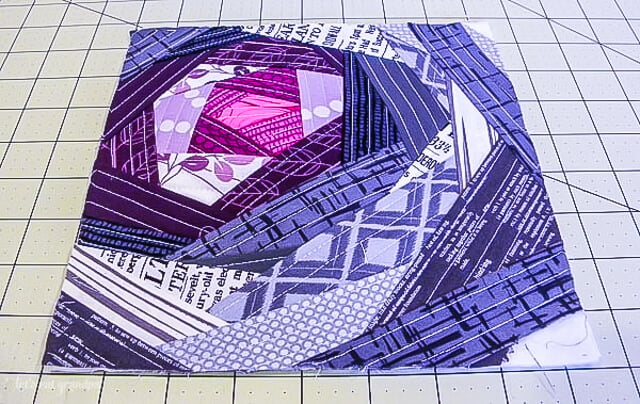
Keep going around in a circle, adding pieces. You’ll be surprised. You’ll cut a large piece of fabric, and by the time you’ve added others on top of it, only a small triangle is showing in the end.
It’ll take some getting used to, but as you see the shape take form, where to put the next pieces will become more clear. It’s difficult to visualize at first, but after a while it should make more sense (I hope!)

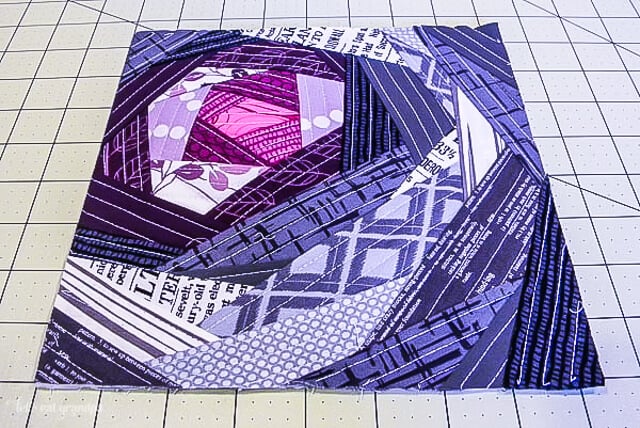
Keep on adding. You’ll use more fabric strips than you’d expect.
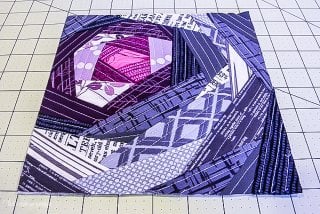
Soon you’ll be finished! Trim down your edges and square up your block (if you’re making a square). You’re ready to use this panel when you make a bag or pillow or mug rug!
Let me know if you give this Bloomin’ Quilt-As-You-Go a shot — I’d LOVE to see what you create with it!
More Quilt as You Go Fun!
- Learn Quilt-As-You-Go: Easy Big Stripes Panel
- Bloomin’ Quilt-As-You-Go Tutorial
- Seaside Boardwalk Quilt-As-You-Go Tutorial
- Scattered Geese Quilt-As-You-Go Tutorial
- Go Fly a Kite Quilt-As-You-Go Tutorial
- Step It Up Quilt-As-You-Go Tutorial
- Bear Mountain Quilt-As-You-Go Tutorial
- Scottish Thistle QAYG Block
- North West Quilt-As-You-Go Block Tutorial
BLOOMING QUILT PATTERN
Equipment
Supplies
- Backing fabric
- Batting
- Scrap fabric
- High-quality thread
Instructions
- There will be three layers to this panel. A backing fabric, the batting, and the scrappy top. Unlike a normal quilt sandwich, the back of your panel will be not so pretty. So it's perfect for making things with a lining — pouches, bags, pillows, etc. It doesn't work so well for an actual quilt.You'll want your iron and cutting mat close by, as well as your scissors. Lower your ironing board and put it right next to your table, as well as put your small cutting mat right next to the sewing machine. This will save you time with each step.Choose your fabrics. You can do this with any fabrics. Find though that a gradation of color works particularly nicely, as well as a range of values — dark to light. For this pouch, a selection of pinks, purples, and grays were chosen. Cut strips between 1" and 2" wide, or pull from your stash. It's perfect for scrap-busting.

- Cut a piece of batting the size of the panel you want. This panel is 8.5" x 8.5". Back the panel with a utility fabric. For this pouch, an inexpensive cotton (seriously, like $1.99 a yard) was used since it will be inside the lining of the pouch. Cut it a little wider than the batting, just in case it shifts. You can spray-baste them together if you'd like.

- Set up your machine to quilt. Lengthen your stitch a bit, and use high-quality thread. This is a thread-intensive project, so you might want to wind an extra bobbin or two, depending on how big your panel is, or how many you're making. Just to make this small square I used nearly an entire bobbin!The walking foot wasn't used as this machine quilts fine without it. But if you're more comfortable quilting with it, go for it. Pick the fabric you'd like as the center of the "flower," and quilt it, right-side up, straight to the batting. Start it a bit off-center, but you could start it anywhere on the panel.

- Use a simple straight-line quilting, but you could do some FMQ or use other patterns. To save thread, when it comes to the end of the fabric, turn the panel, stitch three stiches down, and then stitch back the other way across the fabric. It actually goes pretty quickly once you get the hang of it.Here's a quick video of how to do the turning: QAYG Video Tutorial. Here is what you should have:

- In a traditional log cabin, you'd lay the next piece perpendicular to the first piece. Instead, lay your second piece face down at an angle, so the two pieces are right-sides together. Sew along the edge of the piece with 1/8" seam.

- Open up the two pieces and press the new piece away from the first piece. Quilt that one using the same technique you used on the first piece

- Add another piece across from it using the same method. Basically, instead of making a square, you want to make more of a pentagon, with five sides instead of four. So every piece will be angled. Use each fabric (except the first fabric) two or three times as you work your way out from the center. You'll see this more as it starts to come into form.
- Continue adding pieces at an angle. You want to make sure to cover up all edges and seams with the pieces you're adding. You'll see below that the light purple piece (right-side down in the photo) covers the two ends of the darker pink pieces, so that when it's opened, those ends are hidden.

- You can already see the flower starting to take shape.

- Keep adding pieces. It's hard to go wrong — Just make sure that the pieces you are adding are covering up the ends of the strips as you go — you don't want frayed edges showing.
- When you start to get to the edge, trim as you add pieces. Trim after you open up a piece and iron it, but before quilting it. That means you are not quilting anything extra.

- Keep going around in a circle, adding pieces. You'll be surprised. You'll cut a large piece of fabric, and by the time you've added others on top of it, only a small triangle is showing in the end.

- It'll take some getting used to, but as you see the shape take form, where to put the next pieces will become more clear. It's difficult to visualize at first, but after a while it should make more sense.

- Keep on adding. You'll use more fabric strips than you'd expect.

- Soon you'll be finished! Trim down your edges and square up your block (if you're making a square). You're ready to use this panel when you make a bag or pillow or mug rug!


Comments & Reviews
Claudette says
How do you prevent the rat’s nest from showing on the backside?
Cori says
Hi Claudette,
I wish I knew, lol! The backs of my projects always look messy, but the fronts look beautiful, and that is the important part :)
Ann says
My scraps were all odd shapes, but I really enjoyed trying this technique. I made a pillow for my friend who recently lost her mother. The scraps of fabric was from her mom’s robes and pajamas – I made her nephews memory quilts and these were scraps from that for her pillow. Thanks for the tutorial.
Cori says
Hi Ann,
Those sound like beautiful projects of love and friendship, and I’m sure they mean the world to them! Thank you so much for sharing how you used the ideas I shared to bless others :)
Rhonda G says
I adore this idea and LOVE your fabric choices. Right now I have five big projects in the works, so as soon as I get one or two out of the way, I hope to come back and give this one a try. Thank you so much for sharing it with us.
Christie says
I have read the comments and nowhere does it tell how to join the blocks together. I love the idea of qayg but I can only use so many pot holders. I would like an actual quilt out of them.
Helen Caudill says
Love this block … haven’t been quilting for various reasons but this is too good not to try. Thank you so much for this.
MaLinda says
Wish I could post a pic, but mine is sure not as good as yours. But I love this and will do some more!!!!
Batsheva Sida says
Thank you for explaining an easy way of doing that. I have plenty of scraps and did not know how. I was looking for inspiration.
Melanie says
I love this and I love the fabrics that you have choosen, can you tell me the names of each of the fabrics you used? I would love to try to make this!
Dawn says
I did it but have no idea how to post a pic
RR says
My sister’s middle name is Rose. I’ve been looking high and low for a pieced (preferably) rose block for the corners of the widest outside border. Without paperpiecing!
This is so perfect, thank you so very much for posting it. I may do it with a light clth foundation, rather than QAYG, depending on my final decision(s) on the border quilting.
However, this is such a perfect Bloomin’ Rose, all other hard-sought options have fallen off the design board. Great timing for it to show up on an email listing too, I’m starting on adding those borders this afternoon.
BRAVA on the design AND the tutorial.