By learning to layer vinyl, you can create dimension in your Cricut Explore, Maker, and other cutting machine projects! It’s easy to layer vinyl using transfer tape—here are the best tips and tricks for getting it right the first time.

Adhesive vinyl is one of the staple materials that many cutting machine crafters love to work with. In the last few years, I’ve come to really love iron on vinyl, but lately I’ve been returning to adhesive vinyl for a lot of projects, like pantry labels, tumblers, and more.

When I recently made over my craft room, I wanted to add some labels in an attempt to keep myself a little more organized. A lot of times I feel like craft room organization is a bit of a lost cause, but I do think that I should at least make an attempt!
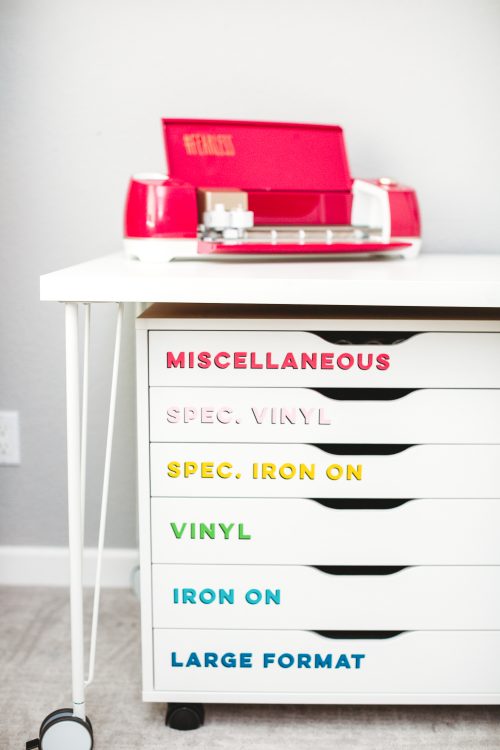
One of the hardest things for me to organize is my adhesive and iron on vinyl. I had it all in rolls, but I had so much and found I was constantly not sure what I had, plus storing vinyl rolls is just awkward. So I decided to remove my vinyl from the rolls and store it in a drawer unit under my crafting table.
I’m surprised how well this has worked for me! Taking the vinyl off the rolls and cutting it down to fit was a bit of a pain, but now I love being able to just slide open a drawer to find what I’m looking for.

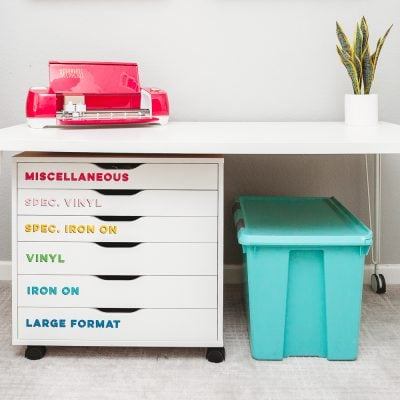
I knew I wanted to make labels for my vinyl drawers, so I created these fun layered labels. Anything to make my craft room more bright, fun, and easier to organize! Head to the bottom of this post to download the organizational labels for this project.
What Type of Vinyl Can I Layer?
Let’s start with what kinds of vinyl you can layer. It’s a lot easier than iron on vinyl—there are just two basic guidelines.
- Permanent or removable vinyl is perfect for layering vinyl. It can be used as the top, middle, or bottom layer. Layer at will!
- Glitter and other specialty vinyl should only be used as a top layer. The uneven surface makes it impossible to get good adhesion if you put more vinyl on top of it.
How Many Layers of Vinyl Can I Use?
Next, let’s see how many layers of vinyl you can use before things get dicey.
- If you’re using it on something that isn’t handled often, like a wall or a piece of artwork, have at it! You can use as many layers as you want, within reason.
- If you don’t want too many layers of vinyl right on top of each other, you can use the Slice Method to build your file in Design Space—this means you can use a lot of colors without actually stacking vinyl on top of vinyl.
- If your surface is something that is handled more (like a tumbler), I’d stick to one or two layers, or maybe three or even four if you’re using the Slice Method.
How to Prepare Your Surface for Adhesive Vinyl
Vinyl works best on solid surfaces, like plastic, glass, and painted wood. You can wipe down your surface with rubbing alcohol to make sure it is free from any dust or oils. This will help ensure your vinyl sticks well.
How to Layer Adhesive Vinyl Onto Transfer Tape
Let’s get layering! It’s actually easy to layer vinyl. Working with more than one layer of vinyl may seem intimidating, but it can create such depth and style to your projects.
We’re going to use the transfer tape method—this allows you to put the layers of vinyl on your surface in one shot, vs. trying to line up each layer on your surface. You line it up on the transfer tape itself!
Here’s what you’re going to need:
- Cricut Explore, Maker or other cutting machine
- At least two colors of adhesive vinyl
- Weeding tool
- Scraper / burnishing tool
- Transfer tape
- Level (optional)
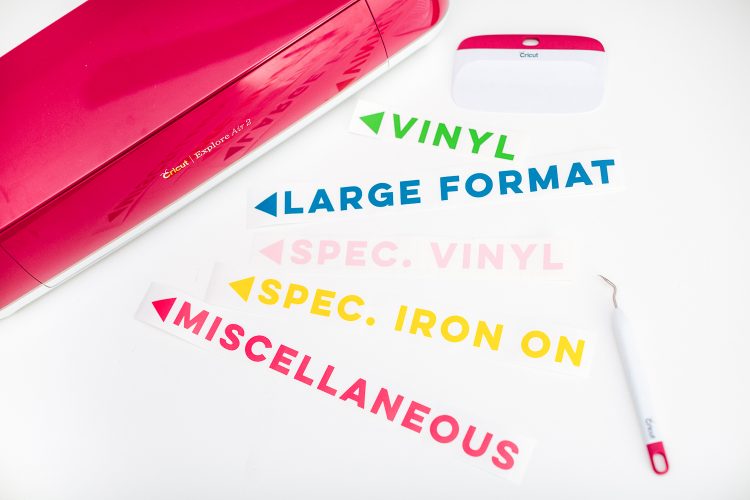
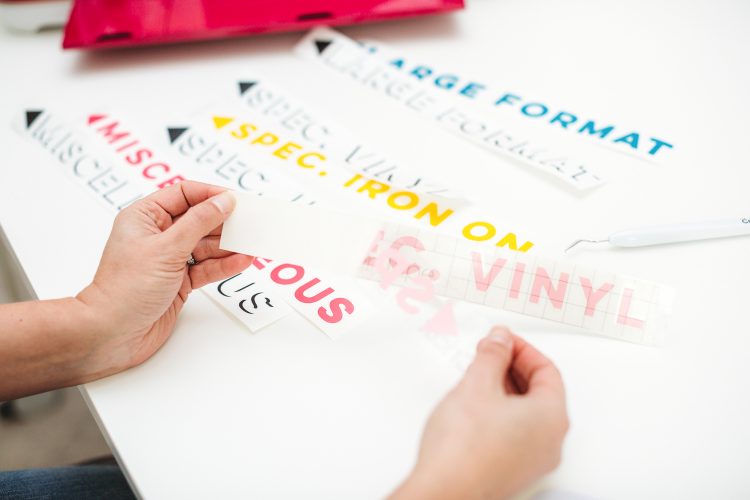
Start by cutting and weeding both layers of your labels. I used several colors of adhesive vinyl cut on my Cricut Explore, but you can use a different Cricut as well.

Unlike iron on vinyl, you do NOT need to mirror adhesive vinyl when cutting it—what you see is exactly what goes on your surface.
You’ll notice that each file has a triangle to the left. The triangle functions as registration marks for each layer and will help you line up your vinyl.
Vinyl Layer #1
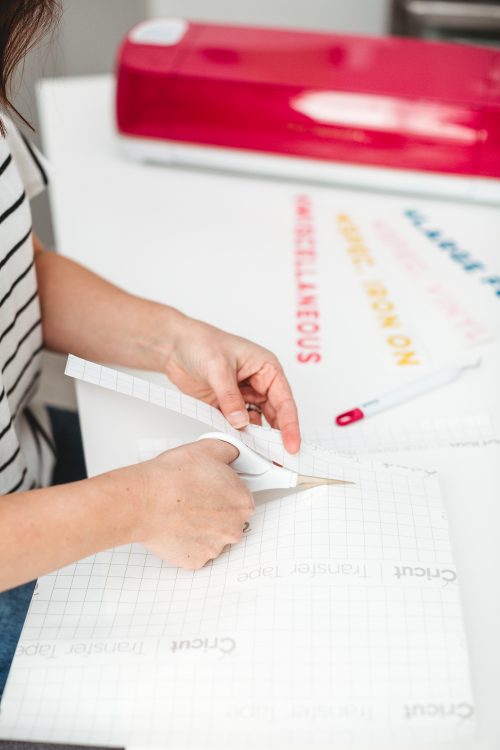
Cut a piece of transfer tape slightly larger than each label.

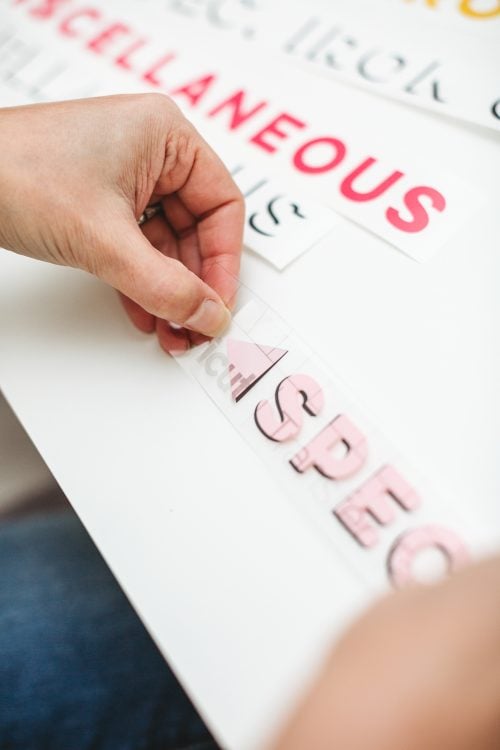
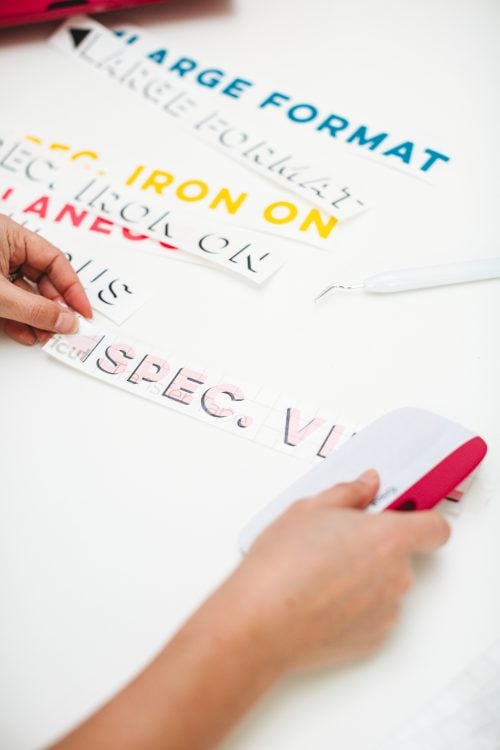
Peel off the backing paper on the transfer tape and place it over the colored label, pressing it into the label using your fingers or a burnishing tool.

Peel up the transfer tape and the vinyl should come with it. If it doesn’t burnish some more.

Vinyl Layer #2
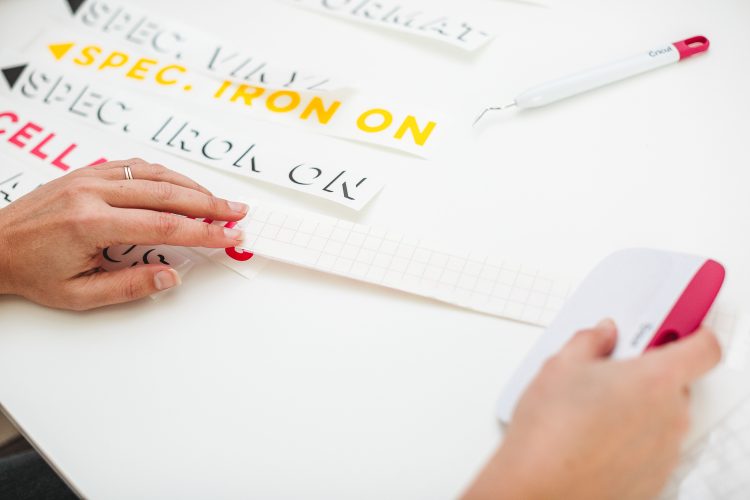
Now take that piece of transfer tape with the vinyl and line it up over the black layer of vinyl. Line up the triangles perfectly on top of each other and your two layers should line up perfectly!

If you’re making your own files in Design Space or other cutting machine software, you can add your own registration marks. Some people use one or two rectangles or other shapes—whatever works best for you! I like triangles, but you can use whatever shapes you like.
Press the second layer of the label into the transfer tape, and peel up the transfer tape and the two layers of vinyl should come with it.

Putting Layered Vinyl on a Surface
Before you put your decal on your surface, peel off the layers of registration triangles off the transfer tape and discard. You don’t want them on your project!
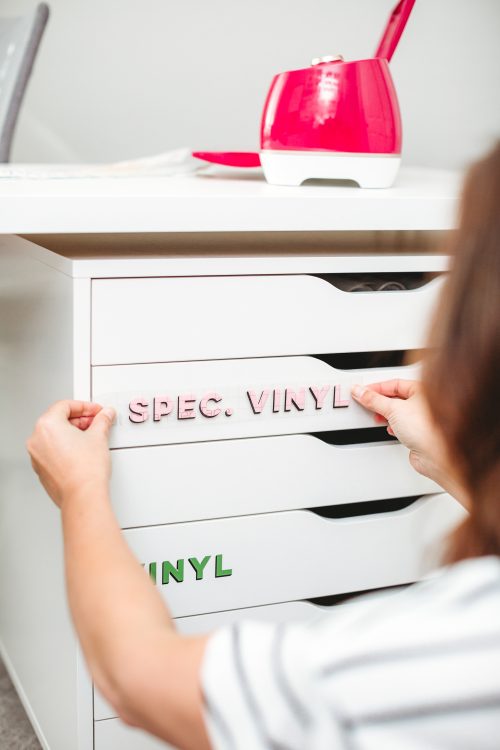
Now let’s put that vinyl on your surface—mine is the set of drawers.
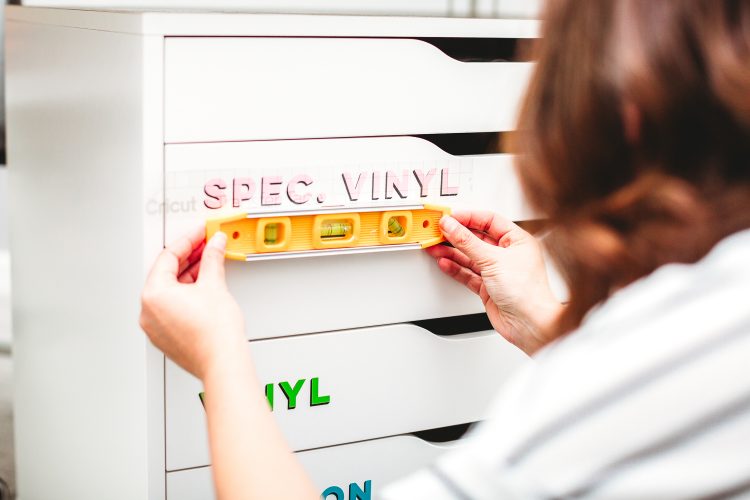
Carefully line up your transfer tape with your two layers of vinyl on the drawer. If you want it to be precise, you can use masking tape to tape off exactly where your labels should go. I’m pretty good at eyeballing, so I just placed it on my drawers. I did use a level to help make sure everything was even.


Press your vinyl into your surface/drawers, burnishing with your fingers or a tool. In this case, I prefer my fingers because I don’t want to damage the surface.
Then carefully peel back the transfer tape at a 45° angle or more. If your surface is smooth and nonporous like my drawers, the vinyl should stick fairly easily. If you are having trouble, burnish again and peel even more slowly, using your fingernail to help “guide” the vinyl off the transfer tape. But really, it should work really nicely on most smooth surfaces!

Get the Free File
Want access to this free file? Join my FREE craft library! All you need is the password to get in, which you can get by filling out the form below. The file number is: C192.

HOW TO LAYER VINYL USING TRANSFER TAPE
Equipment
- Cricut Maker or
Supplies
- adhesive vinyl at least two colors
- Free Craft Room Organization Labels #C192
Instructions
- Let’s get layering! We’re going to use the transfer tape method—this allows you to put the layers of vinyl on your surface in one shot, vs. trying to line up each layer on your surface. You line it up on the transfer tape itself!Start by cutting and weeding both layers of your labels. Unlike iron on vinyl, you do NOT need to mirror adhesive vinyl when cutting it—what you see is exactly what goes on your surface.You’ll notice that each file has a triangle to the left. The triangle functions as registration marks for each layer and will help you line up your vinyl.

- Vinyl Layer #1Cut a piece of transfer tape slightly larger than each label.

- Peel off the backing paper on the transfer tape and place it over the colored label, pressing it into the label using your fingers or a burnishing tool.

- Peel up the transfer tape and the vinyl should come with it. If it doesn’t burnish some more.

- Vinyl Layer #2Now take that piece of transfer tape with the vinyl and line it up over the black layer of vinyl. Line up the triangles perfectly on top of each other and your two layers should line up perfectly!

- If you’re making your own files in Design Space or other cutting machine software, you can add your own registration marks. Some people use one or two rectangles or other shapes—whatever works best for you! Prefer triangles, but you can use whatever shapes you like.Press the second layer of the label into the transfer tape, and peel up the transfer tape and the two layers of vinyl should come with it.

- Putting Layered Vinyl on a SurfaceBefore you put your decal on your surface, peel off the layers of registration triangles off the transfer tape and discard. You don’t want them on your project!Now let’s put that vinyl on your surface—mine is the set of drawers.Carefully line up your transfer tape with your two layers of vinyl on the drawer. If you want it to be precise, you can use masking tape to tape off exactly where your labels should go. Use a level to help make sure everything is even.


- Press your vinyl into your surface/drawers, burnishing with your fingers or a tool. In this case fingers were used so as to not damage the surface of the drawers.Then carefully peel back the transfer tape at a 45° angle or more. If your surface is smooth and nonporous like these drawers, the vinyl should stick fairly easily. If you are having trouble, burnish again and peel even more slowly, using your fingernail to help “guide” the vinyl off the transfer tape. But really, it should work really nicely on most smooth surfaces!



Comments & Reviews
Rachel says
Hi Cori! This is so helpful, thank you for sharing! Newbie question: if I wanted to make a set of these to give to a friend, could I adhere them to say, a plastic sheet so they can take it and apply it themselves? Or would I just not peel it off the backing of the second layer? Thank you!
Chelsea says
I love your vinyl drawer organizer! May I ask where you got it? Thank you! :)
Susan says
Can you tell me what font this is? I am trying to find a good font to layer like you but I can’t find this font. Thanks!
Crystal Summers says
Hi Susan,
The font name is Tokyo. Here is a link (affiliate): https://heyletsmakestuff.com/recommends/tokyo-font-creative-market/
Happy crafting!
Crystal, HLMS Community Manager
Lisa says
Hi, do you have any suggestions for when the transfer tape is too thick and you can’t see the bottom layer through it? It’s very frustrating! I’ve used different lights etc and my eyesight is good, but basically I end up guessing/eyeballing it. Or can you recommend a good transfer tape that you can see through for layering?
MissyTruth says
Try regular contact paper.
Lauren says
Where did you get that beautiful table!?
Amy Motroni says
Hi Lauren,
It’s from IKEA. You can get all the links and details in this post:
https://heyletsmakestuff.com/craft-room-tour/
Enjoy!
Amy, HLMS Support
Susan H. Graham says
Where did you purchase your set of drawers?