Customize a plain shirt using iron on vinyl! You can make all sorts of designs for custom projects and family vacation tees when you learn to use Cricut iron on vinyl on a shirt!
Lately I’ve been writing more basic Cricut tutorials—things that beginners need to know to make the most of their machine right out of the box. Today we’re talking t-shirts. Whether you want to make a one-off shirt for an event or a dozen different shirts for a family trip to a theme park, you’ll want to follow the tips and tricks in this post to get the best results.
I’ve been crafting with my gorgeous Wild Rose Cricut Explore Air 2, which is exclusively found at JOANN. This is part of my series talking about why I’m a #fearless crafter, but this tutorial also applies to making shirts with the Cricut Maker!
Let’s get started!
What T-Shirts Work Best with Cricut Iron On?
When looking for shirts for your iron on project, I suggest going with 100% cotton, 100% polyester, or a 50/50 blend of the two. I have found that quality counts when it comes to your shirt—a higher quality shirt is going to have a better result with iron on vinyl.
You can use other shirt materials, like nylon, though you’ll want to make sure you’re choosing the right type of iron on vinyl to get the best result, as you’ll see in the next section.
What Type of Cricut Iron On Vinyl Works Best On Shirts?
For cotton and polyester, Cricut Everyday Iron On will be your best choice for “regular” vinyl, and almost all of Cricut’s specialty vinyls like glitter and foil will work as well.
The one exception is if you want to use an “activewear” shirt material, like nylon or stretchy polyesters. Then you’ll want to use Cricut SportFlex Iron On. It’s designed to stretch with the material, meaning that it’s less likely to crack or peel.
Preparing a Shirt for Iron On Vinyl
Before you make your shirt, pre-wash it. If your material is prone to shrinking, you’ll want it to shrink before you put the iron on vinyl on your shirt. If you do it after, there’s a chance it might crack or peel off after the first few washes.
I also like to iron my shirt before I get started. Not only does this give a flat surface to work on, it helps me lay out my shirt evenly, so I know that I am getting my cut out in the center of my shirt.
Cutting Iron On to Use on a Shirt
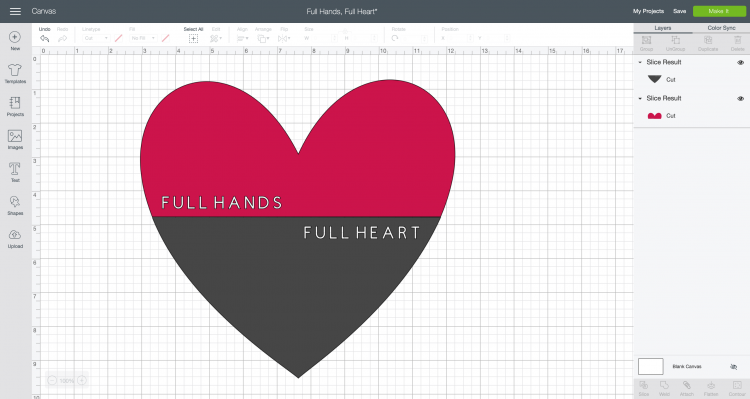
Let’s start by cutting our our iron on to use on our shirt. I created this fun file in Cricut Design Space that says Full Hands, Full Heart. You can make this file, choose one of the thousands of other images in Cricut Design Space, or upload your own!
As a business owner and a mom of young twin boys, I have gotten more than my fair share of “woah, you have your hands full!” comments over the last four years. You really do have to be #fearless to be an entrepreneur or a twin mom…and I’m BOTH!
The “hands full” always makes me want to roll my eyes. My boys are pretty darn easy kids and while having twins was hard in the beginning, it’s awesome now.
Built-in best friends who had to learn patience and sharing from day one? Yes please! They make it easy for me to run my business—they can play independently from me more than any other kids I know.
So now when people tell me my hands are full, I usually respond with “my heart is full too!” I designed this file in Design Space to be a cute encapsulation of that sentiment.
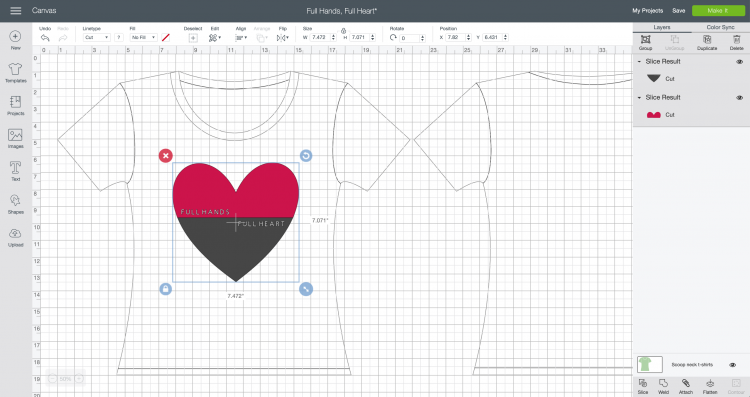
Before cutting your file, make sure that it is sized however large you’d like the decal on your shirt. Use Cricut’s templates to help you size your decal correctly (click here for a detailed post on using templates).
Then click Make It in the upper right of Cricut Design Space to cut your project!
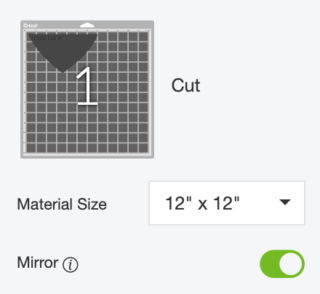
In the Prepare Screen, you’ll see that your two colors of iron on are split onto two mats. Before continuing, you MUST make sure Mirror is turned on for both layers. Iron on vinyl cuts in reverse, so this step is vital if you do not want your words to be backward on your shirt.
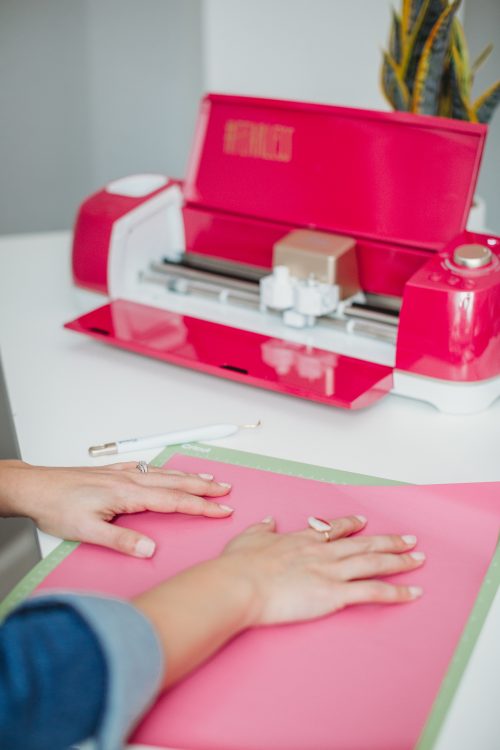
Then place your iron on face-down (shiny side down) on your cutting mat.
If you are using a Cricut Explore, turn the dial to “iron on.” If you are using a Cricut Maker, you’ll choose iron on from the materials directly in Design Space.
Then insert your mat into your machine by pushing the blinking arrow button. Press the blinking C and your vinyl will cut! Cut both layers.
Once your layers are done, you’ll want to weed them. This means you’re removing anything that doesn’t belong on your decal. In this case, that’s the iron on around the heart and inside the letters. I have an extensive post on weeding iron on vinyl that you’ll want to check out.
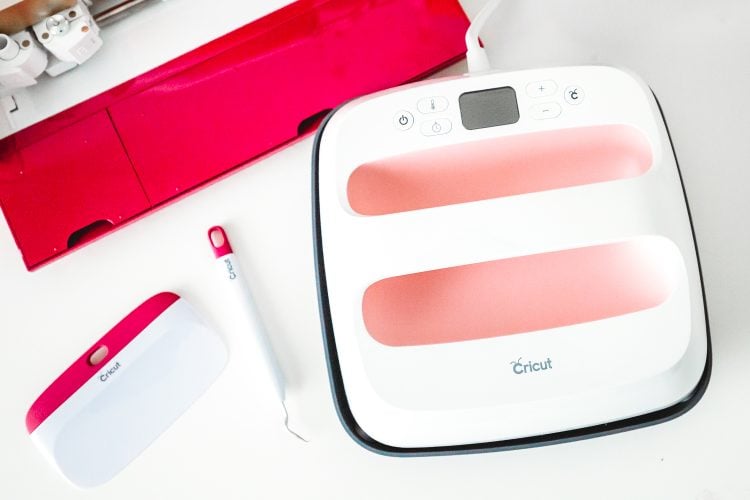
Now you’re ready to adhere your iron on to your shirt! I love using my EasyPress 2. I have an iron, an EasyPress, and a heat press and 99% of the time turn to my EasyPress over the other two heating methods. Find out why by checkout out my comparison post. I’m using this gorgeous new Rose EasyPress 2, which is also an exclusive at JOANN. It comes with bonus iron on vinyl as well—everything you need to get started making a project!
I am loving all of these shades of pink in my craft room!
Lay out your shirt on an EasyPress mat or folded towel on a solid surface. Make sure it’s flat and even. You don’t want your decal off center because you didn’t take the time to make sure your placement was correct.
Place your two layers of vinyl on your shirt to get the ideal placement. Then remove one layer so you’re only working with a single layer at a time.
Make sure to check out my post on layering iron on vinyl for even more information. Obviously if you’re working with a single layer, you just have to do this process once.
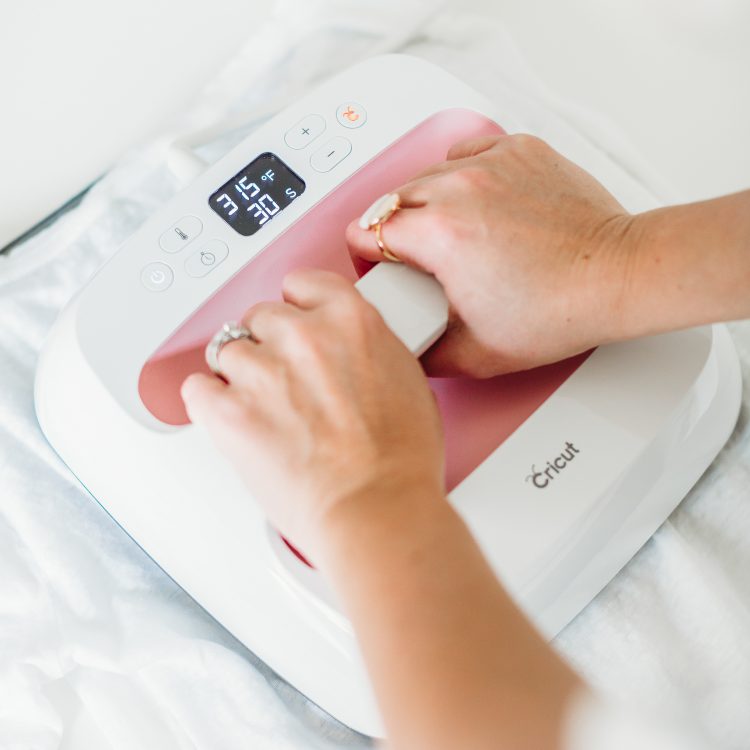
Regular iron on vinyl has a temperature setting of 315°. Press for 30 seconds.
Peel back the plastic carrier sheet and your iron on should adhere to your shirt. If not, press again.
Then place your second layer down. I actually cut as close as I could to the bottom edge of the pink (after I took this photo) so it wouldn’t leave an imprint in the black vinyl. I also use a piece of fabric between my iron on and my EasyPress. This way the already-pressed iron on doesn’t come in contact with the plate of my EasyPress. It can lead to bubbles.
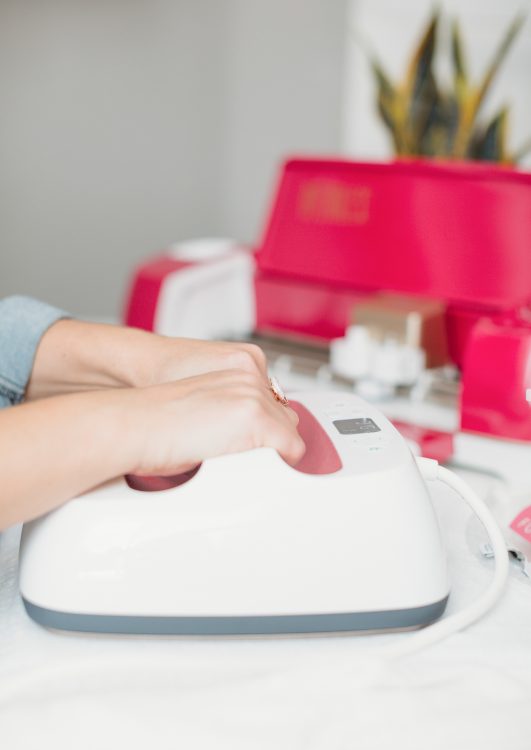
Peel off that second carrier sheet. Then flip your shirt inside out, and do a 15-second press of your iron on from the backside. Sometimes I think this final press is the secret to getting really good adherence!
You’ll want to make your shirt last! Make sure not to wash it for at least 24 hours, giving the adhesive time to cure. Then wash, inside out, in cold water. Hang to dry and then enjoy wearing your DIY shirt!
Mother’s Day is right around the corner! Get your #fearless mom or friend a new Wild Rose Cricut Explore Air 2 or Rose Cricut EasyPress 2 from JOANN!
Comments & Reviews
Vanessa E says
I always wanted to learn more about how to use a cricut (for iron on)and this tutorial was awesome and easy to understand. Thanks
LaDell Durham says
Literally just got my Cricut and I’m so excited
Kathy Rojas says
I have the explorer 2 and I’m using Apple IPad Air I don’t see a Templet icon to size my designs on my shirts also Tks for sharing the videos they’re great
Audrey says
Love how Simple you make this look! Do you have to apply a lot of pressure with the Easy press?
Claudia says
Loved the video, like step by step instructions 💗
Tia says
I loved your links on other topics such as layering vinyl! I learned alot of helpful tips from your blog!
Brenda says
Thank you so much for sharing. I love hearing about how others work with HTV.
Dasha says
I love this. And I love your craft room. AMAZING!!
Amanda says
I’d love to snag one of these
Kyeisha Hall says
Beautiful work! I honestly didn’t know about this page until my friend, Vanessa shared it on Facebook just now. This is a great blog! Every day we can learn something new.
Sheliza says
I had no idea about doing another press after flipping the shirt inside out. I will definitely start doing this!
Carissa says
Love that design!
I need this easy press to match my maker 💗
I’m a new follower and I must say I love you craft room!
Margarita says
Great tutorial!
Sarah Blankenship says
Thanks for the tips! I am having so much trouble figuring out how to use my cricut!
Dana says
I would LOVE to try the EasyPress!!! I got my Cricut for Christmas and have made 2 iron-on projects so far using an iron and I’ve had some peeling. Looks like you get professional results with the EasyPress and the process is so quick! I would LOVE an EasyPress for Mother’s Day ! ❤️
Sarah says
Thanks for an easy tutorial!
April Ruiz says
Love all your creative creations , and are so inspiring. Me and my daughters have been so excited using the cricut maker but now with more idea juices flowing through our minds we can’t wait to see what we can see what we can produce and we have just been using old fashion ironing and can’t wait to see how it would make thing more enjoyable and ease and better results in working with some of the upgraded products like the easy press . You make it seem so easy and oh so cute items love seeing to apply these ideas to shirts , onesies, shirts , totes , and hopefully other items as well like the cereal containers was such a great idea . Thank you for blogging and having us as followers .
Kristina Y says
You make it look so easy!
Ashley Knox says
Thank you for this tutorial, give me confidence to try.
Violet says
You’re work is beautiful! I’ve been wanting an easy press for some time now but wasn’t sure how good it worked but you make it look so easy!
Rosy Rosales says
Such a great tutorial! It can be a little tricky to get it right, esp for a newbie like me! But your tutorial was super easy to follow!
Amiann says
Thanks for the tutorial! I will be checking out the rest and contemplating an easy press 😊
Emily M. says
Thank you for this! I am new to working with iron-on
Tristen says
I would love to win this easypress! You made your shirt look amazing but made it look so simple to do at the same time.
Kirsten says
Thank you for all of these awesome tips! I haven’t tried using HTV yet but this blog makes it seem very doable. Can’t wait to try!
Sara Caldwell says
Thank you for this great tutorial!! I always gain extra tidbits and tips from your blogs! Keep up the great work!!
Alexa Boo says
LOVE the pink color 💕
Chesney says
OMG! The Easypress comes in so many cute colors! I want one in each color!
Heather Howard says
So helpful! Thank you!
Sue says
Thanks Cori! So many good tips for iron-on in your post!
Joyce R says
Great tutorial! I would love to win this!!
Amanda Guthrie says
The easy press looks so much simpler to use than an iron since you can set an exact temperature and time to press! The first time I did iron on I melted the carrier sheet with my iron because it was too hot and I didn’t know it. 🤦🏼♀️
Rebecca Turner says
Such a great blog!
Lilly Dohanich says
So easy to follow along! Thanks so much!!
Carmen says
Thank you for this post! Any suggestions when using Foil Iron On. It seems I always get bubbles :(
Nancy P says
Great tutorial!
I’ve been eye all the crafters using the easypress and I gotta admit, I’m intimidated by it.. you did an awesome job. Looks easy. Now I gotta buy one & start creating things!
Nancy B says
Thanks for a great tutorial!
Nicole K. says
This is an excellent tutorial! I’ve been using my Cricut maker and iron on for a few years now and love my orignal easy press. I’ve been wanting to upgrade to the 2 for some time now.
Tam Myers says
I’ve been really wanting an EasyPress! I have a Girl Scout Troop and I’m planning to have them make their own shirts. Many of them are interested in making stuff to sell to raise funds for our service projects too. This would make it so much easier!
Sara R. says
I’ve wondered how the easy press works compared to a heat press. I like using the heat press but it takes up a lot of space and is not easy to move around. The easy press seems to more practical option.
Sandra Philalack says
Thank you for sharing this! I’m new at this cricut world but always love reading your blogs on helpful hints, tricks, and ideas.
Elise Laney says
I love my EasyPress too. It is sooooo much easier than my iron.
Leslie says
Great detailed tutorial East press seems to be close enough to a heat press vs and regular Iron
Analisa says
I need this press! I have a huge one, but my office is now turning into a nursery for my sweet girl. This is the perfect size!
Luana says
Your tutorials and blog posts are the best. I have them pinned on Pinterest, so I can easily refer to them when I’m working with my Cricut, especially vinyl!
Stephanie says
What a beautiful creations! My fav blog now!! Yayyyy 👐👐💖💖
Stefanie says
Thanks for the tips! What a great tutorial!
Lidia says
Would be awesome to win! I’m so obsessed with rose gold! Also thanks for giving me the feeling that I can make stuff cause you make it easy enough to follow along!
Laine D says
I would so love to have an easy press! No more applying vinyl and ironing on the dining room table!
Sammantha Mendieta says
I really enjoy your blog. I haven’t found one that I actually enjoy, is easy to navigate & understand.
Kittenluvr12 says
I love this soft Rose color. I have been wanting to try an easy press from Cricut, but have just resorted to my iron for now. Thanks for providing amazing tips in your blog to make things a little easier. ❤
Karla says
Just started doing iron-on tshirts! Thank you for the tips!
Christie says
Thanks for the tips. I’m busy making Baseball shirts but I’ve been using my iron.
Elizabeth says
Thank you so much for the tutorial.. I have one and is still on the box don’t even no where to start..
Minnie says
This is a great step by step!
Danielle D says
Thanks for the great tutorial!
Helen Bisesi says
Very cute shirt! I love to do iron on but haven’t tried layering. That will be something to try this summer I hope!
Megan says
Just getting started! I am so excited for this new adventure as a cricut artist. Your videos, blogs, and posts have been helping me with the basics. I have always been a crafter since a child. Taking after my grandmother. She would have loved all these inventions we now have the opportunity to embark our creativity with.RIP Grandma this adventure in my life is for you! 💖
Brittany says
Love your tips! I just got a cricut last month for my birthday and have loved seeing all of your creative ways to use it!
Evelyn Medina says
Very informative!! Thanks for sharing your experience! Definitely want to get to customizing!!
Samantha Shinkle says
Thanks so much for this step by step tutorial, you made it so easy to follow and simplified it!! I also love the comparison chart for heat times! Amazing, thanks again :)
Monica Garcia says
Luving everything you do, trying to learn my cricut and ur such a big help, want to be just as awesome as u, thank u for all the tutorials.
Evelyn Medina says
Ty for the information!! So inspiring!
Kelly says
How do you best place your shirt vinyls? Sometimes I feel like they look right on the shirt, but then look too high/low once I put the shirt on. Any tips? Necklines tend to mess me up, too… I will get the placement right for a deep v, but then, it looks crazy on a crew neck.
Karen Gutierrez says
Hey!
What are the benefits from using the easy press compared to a big press?? I’m debating on which of the two to get.
Thanks!
Teresa says
I would soo like to win this! Thank you for the opportunity!!!
AUTUMNROSE says
I could make shirts for my Husbands football players and coaches! Live the tutorial, answers so many questions.
Kayley says
What a cute design! The finished shirt looks great!
Jeanne says
Thanks for another great tutorial!
Kk says
I love the ideas I get from your insta and your blog! It’s inspiring!
Angie says
I love this project! Simply adorable!
Erika says
You makes this look so easy!!! I always nervous of layering HTV. Thanks for the tips.
Sarah says
The layering advice & best products for athletic wear was SO helpful! ❤️
Suzanne V Rogers says
This has been on my wish list for long time
Kristine Kerby says
Great job!
Heather Payne says
I wasn’t sure how much of a difference an easy press made versus an iron. Based on what you’ve said, I feel like I’ve been missing out!
Stacie H says
Great tutorial. Thank you!
Kristine Ramos says
This project is so cool! Thank you for sharing! Love your blog and Instagram, and the color on that press is gorgeous!!
Kyli Mecum says
Do you have to put a lot of weight on the easy press? Just Just wondering how the vinyl holds up. Does it get enough “pressure”
Love it! Thanks for an easy tutorial! 😊😊
Heather Hoy says
Love this. Great shirt. Thank you for a great explanation!
Genia says
Love your craft room
Rachel L Shewmaker says
Love everything you do.
Allison Y says
I have an ooooooold cricut, and seeing all the fun, cool stuff you can do makes me want to get a new one!
Sarah says
Do you have to push / apply pressure with the easy press or just sit it on? And do you have to count how long it’s on or will it tell you?
Nancy M says
Regarding the time, you set the time on the easy press and once you press start it counts down for you and beeps when times up. I dont know if youre *supposed* to press down or not. Good question. Maybe someone else can answer that. I do though. :)
Carole says
Pink is my fave!!
Sarah says
I have been working with my vinyl cutter for almost 2 years now and I have wanted an easy press since the beginning but continue to use my regular iron. 🤷♀️
rosella erdmann says
love the video thank you
Ann Snowgren says
Winning this press would make my iron on projects so much easier and this blog was a great help
Lucinda says
Great tutorial!
Zoey says
You don’t know how many shirts I messed up using my regular iron, an easy press would be so much easier. Thank you for the tutorial.
Ashley says
I love working with cricut iron-on and making so many fun things for my family and friends! An easy press would make it so much easier!
Nadia says
Thank you for the tutorial on the Easy Press 2. I have one but haven’t used it yet — this will definitely help. That pink rose color though…. I’m in LOVE!
Amanda Bishop says
I definitely have to get one of these, I have so much trouble getting my iron on to stay
Molly Yock says
Thanks for all your help!!
Beth Watson says
You always make it look so easy, Cori! Thanks for the step by step tutorial!
@creativelybeth
Lisa Stapert says
Love all of the tutorials!!!!
Shannon Blanchette says
Love, love, LOVE this idea! I always have a hard time lining up my pieces, and you make it look easy. They seem to shift or shrink when I do it. Maybe it’s just my heat temp is too high?
Rachael says
I’ve never done any iron-ons with more than 1 color. This tutorial makes it look super easy, and I might now have the confidence to break out of that and try something a little more difficult now! Thanks!!
Thadarkskindiva says
This tutorial is very easy to follow!!! Thank you
Angela says
Great tutorial
Nicole Dehner says
This definitely looks easier to use than an iron.
Linda says
So easy to follow your tutorials! I’m new to Cricut and you have helped me so much already. Keep the basics coming!
Kimbelrey says
I am new to Cricut this year and am excited to try the iron-on vinyl. This is such a great tutorial!
MaryN says
Great information. Easy to follow.
Rebecca Lamb says
I love your blog. I found it randomly, but have stayed for the great ideas and freebies. I know have a Cricut thanks to your clever projects (and your promotion of the sale). Thanks so much.
Jordan says
Such a cute shirt! Iron-on vinyl scares me a little haha!
Alanna Frederick says
I would LOVE to add one to my Cricut arsenal!
Myrna Rinesmith says
I am slowly learning. Thank You for all your great tutorials and all you do for us.
Ashley says
I have always wanted to try the easy press. It looks so handy!
Myrna Rinesmith says
Thank You for all you do for everyone. I am slowly learning.
Michelle Kimmell says
My very first iron project: I made some coozies for my nephews wedding and used a regular iron…wish I had an easy press! Most of them turned out OK but there were a few I had to throw out. I’m a teacher, so I have a group of elementary students who are designing shirts and an easy press would be better than worrying about them getting burned on a regular iron. Thanks for your tutorial!!!
Sandra Pride says
There’s always more projects to get done! That’s why we have jumbled craft rooms or crap room as my son-in-law calls it!
Charlotte E says
Your tutorials are always so easy to understand. Thanks for sharing your knowledge with us!
Teresa B says
I am changing all of my Cricut to the Rose color. I have a Rose Maker, Rose Bright Pad, Rose Cutting Mat, Rose Ruler….but I don’t have a ROSE EASY PRESS!!!! I’d love to win and add to my Cricut Rose collection! Thanks for all of the great tutorials and ideas that you share. They have helped me a lot.
Brenda Gillespie says
I’m so glad I found your site, excellent information. Also, learning how to iron on wood was amazing!!!!!
Iris Antu says
Awesome tutorial. Hope I get lucky
Cheryl says
So glad I found your blog last week. Already learned lots of good stuff. My next project is earrings. :o Thank you again.
Brie Godbout says
Thanks for this. Im obsessed with my cricut and love learning new tips and tricks.
Kathy Barefield says
I enjoy your blog and learn so very much.
Amy Vastine says
Love that design
Amber says
I would love an easy press! So much easier than an iron!
Elaine says
Have been using an iron so using an Easy Press could be so much easier
Jessica M says
I’m new to the cricut and silhouette world and had no idea about turning the shirt inside out to press as well! Thanks for informing!
Amanda J says
Thanks for always sharing great content!
Devin says
Very well written, as usual, and some pretty good tips that I hadn’t thought of! I’m constantly on the lookout for craft ideas and you always have something interesting to make!
Stephanie S. says
Thank you for sharing and being able to win a great machine.
Sarah R. says
Super cute shirt! I have a few friends I might have to make something like this for! Plus one for me too!!
jAN says
Each time I get into a crunch, I lean on your tutorials to pull me through! I share them whenever I can to other cricut users.
Thank you- YOU ARE A VALUABLE ASSET!
Dee Asbill says
Thanks for all the great information!
Mikayla Harris says
Great tutorial!
Emily says
Great Post!
Deb in WA says
I found your blog not too long ago and am happy I did! Really enjoy reading your tips and tricks on Cricut. Thanks!
Linda B. says
It’s great to have these useful tutorials all in one place. This area is one I’ve not attempted…now I will.
Hayley L says
Love the shirt design!
Shamile McBroom says
I LOVE this new color! I don’t have a Easy Press so I would LOVE to be able to own this beauty! I follow your blog. It is one of my favorites.
Amy S says
Such a cute design! Thanks for showing the layer look and application!
Amber B says
Your tutorials are so helpful! Thank you for taking the time to make them to help new users!
Ana Miranda says
Thanks for the iron on tips!
Haven says
My sister just got a Cricut and we’ve been playing around with all the fun options! She’s made a few shirts and they’ve turned out amazingly!! She doesn’t have a press, just uses an iron so this would be fun for her. =) Thanks for sharing!!
Caryn Hogg says
I love this page! I always learn something new when I visit.
Hilary says
Love your blog! Thank you for sharing your tips and tricks!
TaraC says
This is the easiest tutorial i have seen so far! Thank you!
Verna Bradshaw says
Would love to have the chance how to use this. So intriguing but so scary at the same time. And its beautiful!
Kim Jones says
I love the possibilities of all that can be created. And you make it look so very easy! Thank you!
Lauren Jones says
Very helpful!
Anita says
I love your tutorials!!!! They are always so helpful and fun!
Katie Smiddy says
Awesome tutorial! Thanks for sharing!!!
Becky G. says
These are helpful tips! I will try the additional time with heat on the inside of the shirt next time! I’m anxious to try that! Thanks for the help!
Kelli says
So glad I recently joined your blog and receive the email updates, love it! :)
Jessica Salinas says
Awesome!
megan turner says
i love your website and your videos!
Tracy Meyer says
This is awesome. I love the email updates!
Norma says
Looking forward to seeing all my new Cricut can do…thanks for the great tutorials!
Jane says
I am a Cricut newbie. Thanks for the tips
Tiffany says
Great tutorial! I love the tip to iron from the backside of the project as well. The EasyPress makes it look super simple. My iron on projects never seem to stick that well, partly because of my cheap old iron but I think the ironing from the reverse side is a great extra step to ensure adhesion.
Pam Baker says
Love your work!! Easy and simple to follow. Can you do a vinly for a diaper bag? Like babies name or mammas name? I have a little girl :)
MaryLee says
Great info! I’d love to win an Easy Press!
Nan says
What a great Mother’s Day gift.
Gina says
Would love to win the Cricut easy press.
Melissa Eiklor says
What a great giveaway; thanks for the opportunity to win this :)
Roxanne says
Love the color of this easy press!!!
Nicole W says
Love this tutorial… Love the wild rose Cricut…goes perfect with the easy press…
Nicole Couse says
I have wanted a press for a long time but can’t find the extra money to get one vs. using my old fashioned iron. This would be amazing. Thanks for sharing.
Heather says
I just purchased a Cricut & can’t wait to learn all of your tips & tricks! An Easy press looks like it would make projects so much easier!
Meri Fox says
Thank you for the great hints on using the Way Press!Oh my! Easy Press in for Rose! I would love to win it to match my Maker!
Debbie says
Love the color & love my Cricut!
iashia barnes says
Thank you for this tutorial
Donna Martin says
My best crafting buddy has a Cricut (not this one) and the things she’s done is really tempting me. I would love to get into this new branch of crafting! And this machine sounds like it does awesome things.
Dawn says
I’ve learned so much from your blog. Thank you for your amazing and informative content.
kris says
I have been researching a heat press and the easy press seems to fit my needs. Would love to be the winner!
Christina Lederer says
This is an excellent tutorial of using the cricut for iron on with different colors. Thank you!
Cindy Evans says
Your tutorials are so helpful!
Jessica says
I love my Cricut, can’t wait to make more shirts!!
Lillian C says
Thank you so much for your detailed tutorials. I am a Cricut newbie and really appreciate those who put time in making these tuts for those of us who are just starting. This came just in time as i was asked to cut iron ons for a big softball game this weekend. I’m so glad I found your blog.
Jessie Adams says
Your tutorials are so detailed, really helpful!
Leesha Kay Taylor says
Thank you this was really helpful ☺️
Amy says
Such a great tutorial! I never knew to iron the back side!
Daisy M. Flores says
I love that you added pictures of the steps along with the descriptions it makes it so much easier to follow along and visualize the process of making this shirt also I love how this project turned out it is lovely!
Tiffanie says
Thank you for your easy to follow tutorials!
Kayla M. says
Your step by steps make these projects look so easy to recreate with CONFIDENCE! Loving that shirt too!
Dan says
You make it look easy
Amanda F says
I love how portable the Easy Press 2 is, I would definitely get a lot of use out of it.
Ellen Nicol says
Thanks for all the info! Entered the giveaway!
Kristina says
My poor iron is not up to the challenge anymore. This would help me keep an even temperture and having it timed 😍😍😍
Gloria V says
I would love to have this Easy Press. It is portable and I could take it with me to our girls’ weekends!
Amy E says
Great tutorial and the rose gold EasyPress color is gorgeous!
Sharon Gibson says
I love your videos and refer to them often. I don’t really know what I would do without them! My large heatpress quit yesterday and I used my little cricut one. Forgot how! How terrible. Keep the videos coming and thanks for sharing your knowledge with us!
MaryEllen says
I Love the pink colors of all your Cricut items. Sure would love to win the easy press. My almost first experience with the Cricut Maker was making 14 t-shirts and having to use my old iron to iron them. It was for my daughters Boy Scout Troop in the Valentines day parade, yah, they received first place in their division.
Mary E says
Cool!
Camille M says
Have been wanting an Easy Press. The iron just doesn’t do it well.
Natasha says
I luv watching your tutorials! You always have great advice, thank u!
Annie says
This would be a great addition to my Maker. Thanks for the great tutorial.
Amy says
Live your websit and tutorial. I would an easy press.
Trenese Jackson says
Thanks for the awesome tutorial!
Laurie Holz DeMoon says
Thanks for the post-this press looks so much les scary than the ones I looked up on Amazon and takes up less room.
I also appreciated your instructions for washing!
SharonPJ says
I love this and your craft room. These ae soooo AMAZING!!
Laura says
Your tutorials/instructions are so easy to follow!! Thank you for always sharing. I love this chance to win a Cricut EasyPress!!! Thank You,
JulieD says
Thank you for the tips! I am new to HTV, and I appreciate the tips to help with my success!
Cassie Wiselka says
Great tutorial! Thanks for the opportunity, too!
Megan Smith says
So helpful. Thanks for all you do!
Kriste Buck says
LOVE YOUR EMAILS AND POSTS!!
Jessm29 says
Looks like so much fun! It would be so fun to make shirts for the family reunion!
Linda S says
I’m just starting to work with vinyl & my Cricut. You sure make this look easy!
Kelly says
One of the best quotes for a twin momma! Love it!
Rochelle says
Great Tutorial! I’m no longer intimidated by the process.
Marissa says
Thanks for the tutorial. I’m new to all this circut stuff and your tutorials are great!!!
Katy says
<3 this! Always enjoy seeing your tutorials! Thank you! Great inspiration!
Julieakrout says
Thank you for the tutorial. I would love an easy press, as of now I am just using my iron!
Dotte says
Thanks for the opportunity!! Would love to try it out….
Natasha Porras says
What an awesome giveaway! I would love one of these to use with my new Cricut!!
Jeanie Langdon says
I have been drooling over these heat presses for a while! I definitely suffer from “I must have all the craft tools!” Syndrome 😂
Desirae Debellis says
Love when you offer such informal posts!! Now I need to get a few of the Cricut’s Easy Press 2 for our art studio!!!
linda johnson says
Great tutorial!!!! I cant wait until the day I get one of these and quit using an iron! What a pain it is! Maybe Mothers day, I keep dropping hints lol.
linda johnson says
Oh boy! Just saw about the giveaway!! Please enter me in that for sure!!
Elise says
Love how this post promotes being an entrepreneur while your children are with you. Initially it is a bit more stressful but soon they get into a routine with you. I enjoy having them with me while I work and be able to be available to them throughout the day.
Carmel Jalinski says
I hope to get an easy press soon
VickieB says
Thanks for the tips in this post. I didn’t know about not letting the heat touch the vinyl the 2nd time. I surely don’t want to get bubbles!
April Rose Drohn says
🙌🤞🏻
Jillian Too says
I’d love to use this to make silly shirts for summer vacation.
Rosemary says
Thank you so much. Your tutorials are so helpful.
Kimberly Leger says
Thank you for the wonderful tutorial
Barbara Carlson says
This would match my Rose Maker
Leah says
Great tutorial, thanks!
Crystal Wilken says
Love the tutorial! Thanks for sharing!
Cydney says
Thank you for all the tips!
Karina Moreno says
Thank you for the tutorial!! I love your work!!
Karey says
I’m still new to the Cricut and using iron on. The tutorials are so helpful.
Sue Weiss says
thank you for your tutorial. I’ve just started using iron-on vinyl so this is very timely for me.
Michele W says
You have some really cute ideas! Thank you for the tutorial. The Easy Press looks like it is a great tool.
Karen Kasik says
I’ve always wanted to try iron on vinyl, but thought it would be very difficult. These instructions seem easy enough!
Amy Hanks says
I love the new rose color Cricut press. Thank you for the wonderful, easy to follow tutorial.
Cathy McKenna says
Thank you for all your tips….I just love making tee shirts and projects for my family!
Jaime Graveley says
Love all the great ideas on this site!
Shirley Avalos says
Thank you for the tutorials. I need all the help I can get. Ready to give HTV a try!
Lorraine Petree says
This is really helpful! Thanks!
Tara says
I love Cricut iron on. Made my kids the cutest Harry Potter pjs with the sport flex iron on!
Jean says
Pretty in PINK… this easy press would match my pink MAKER perfectly.
Sonja McLane says
Thank you so much for all the tips. I have a silhouette but many tips work for both items. Also thanks for the fun ideas
Kelly says
I appreciate the tutorial! I have been a paper crafter for years, but have only just started working with vinyl and with Design Space. So many possibilities!!
Sherri Upp says
You always have great projects!
Sarah says
Thanks for the giveaway
Deb Middleton says
Totally Adorbs!
Jessica Murawski says
I have been waiting to have a little more time to start working with vinyl more. I love all of the tips! I am sure I will be back here much more once I start working.
ELIZABETH KUNTZ says
I am just learning to craft with vinyl and it’s so much fun.
Annette Canonica says
Love the positive message in this post! Thanks for sharing these tutorials.
Lorie Gammill says
Great tutorial! I just got a Cricut marker and would like to explore HTV a little more, but I just don’t know where to start! There’s so many great ideas!
Talisa says
Really enjoyed this tutorial! Thanks for this!
Christine B. says
What a cute design! I’m definitely going to have to make one for my friend who’s expecting her 4th.
Charles says
My wife recently got a cricut and is learning to make so many neat things for the kids. She’d love this design.
Tamara Moore says
Would love to have a bigger easy press.
Tammy says
Thanks for the awesome tutorial!
Melissa says
Thank you for this tutorial. Very thorough and detailed so it was very helpful :-)
Marquida Gilbert says
Love it!!!
Frances says
I love this shirt! Thanks for the tutorial!
Katie Millener says
This is a great tutorial!
Lisa C says
Oh MyLanta! I think I need the EasyPress!!!!
Tiffany K says
I love your blog and instagram page! Your tutorials are so easy to follow, thanks for sharing!
Leticia V says
I would love one to make shirts for my kids.
Jenn Gomez says
Great tutorial! Very detailed and informative.
Lorena Michel says
I love how creative we can be with circuit projects! Can’t wait to get my hands on them 😁
Cynthia Humphrey says
I can’t wait to make this..love it.
Laura Austin says
I would love to win an Easy Press! I have made a few shirts with my household iron and the iron-on vinyl just doesn’t seem to adhere as well as I would like it to.
susan traill says
Looks so much easier than an iron
Renee B. says
Thank you for sharing. I have been interested in getting a Cricut and this is very helpful.
Stephanie says
Love the split design – it could be used on so many shapes!
nickie says
Great tutorial!
Keri says
An easy press would make crafting so much easier! Haven’t made the splurge quite yet. I’m gonna hope that I win one so I can save that money for other crafting supplies!
Deborah Hooper says
You’ve laid this out so that beginners can easily follow. Great job! Love, love your craft room!
Heather says
This is very helpful. Thank you!
Natalie says
Thanks for sharing!
Stacie says
I’ve always been so curious about these presses!
Melinda Goyette says
Love your blog.
RJ says
Never inquired about this tool but it appears great for those hobbyist that are always on the go like ME!
Jacqueline says
Can’t wait to try it out
Kacie Orlando says
Been wanting some sort of press. My iron works, but I bet this is so much easier since you can press the entire design at once.
Heidi says
This is awesome! I see so many possible applications for my sewing projects especially. Thanks for the thorough tutorial!
Co says
Love this shirt!
Noor says
Love your blog
Thanks for the tutorial. Very easy to follow.
rovergirl says
Great tutorial and very easy to understand. Thank you
Jamie says
Great tutorial.
Michael Woods says
I love the tutorial. I could see so many practical uses for this machine.
Ivelisse Woods says
I love my current Cricut. Thanks for all the tips.
Kia T says
Keeping my fingers and toes crossed I win this. I’ve heard so many good things about the Cricut heat press.
Victoria Bown says
Great tips. Im dieing to try these out
Kat says
I’m currently still using an iron. Boo! I love that you can get an even distribution and exact temperature using the press. Time and project saver I’m sure!
Vflores says
just started crafting and this just helped alot.. I have the shirts and vynil just didnt know where to start..
Amanda says
Awesome tutorial – thank you!
Yvette French says
Love the Mother’s day shirt, such a cute project. Going to make one for my daughter.
Linda Yoder says
Thanks for all the great information. This is my first time making a shirt so I needed all the info I could find. You seem to cover it all. Thanks!!
Amber says
Do you have a way to soften stiff vinyl on shirts?
Cori says
Hi Amber,
The stiffness often depends on the type of vinyl you choose. You may have better results with a lighter material such as Siser EasyColor DTV instead :)