Customize a plain shirt using iron on vinyl! You can make all sorts of designs for custom projects and family vacation tees when you learn to use Cricut iron on vinyl on a shirt!

Lately I’ve been writing more basic Cricut tutorials—things that beginners need to know to make the most of their machine right out of the box. Today we’re talking t-shirts. Whether you want to make a one-off shirt for an event or a dozen different shirts for a family trip to a theme park, you’ll want to follow the tips and tricks in this post to get the best results.
I’ve been crafting with my Cricut Explore Air 2. This is part of my series talking about why I’m a #fearless crafter, but this tutorial also applies to making shirts with the Cricut Maker!
Let’s get started!
What T-Shirts Work Best with Cricut Iron On?
When looking for shirts for your iron on project, I suggest going with 100% cotton, 100% polyester, or a 50/50 blend of the two. I have found that quality counts when it comes to your shirt—a higher quality shirt is going to have a better result with iron on vinyl.
You can use other shirt materials, like nylon, though you’ll want to make sure you’re choosing the right type of iron on vinyl to get the best result, as you’ll see in the next section.
What Type of Cricut Iron On Vinyl Works Best On Shirts?
For cotton and polyester, Cricut Everyday Iron On will be your best choice for “regular” vinyl, and almost all of Cricut’s specialty vinyl’s like glitter and foil will work as well.

The one exception is if you want to use an “activewear” shirt material, like nylon or stretchy polyesters. Then you’ll want to use Cricut SportFlex Iron On. It’s designed to stretch with the material, meaning that it’s less likely to crack or peel.
Preparing a Shirt for Iron On Vinyl
Before you make your shirt, pre-wash it. If your material is prone to shrinking, you’ll want it to shrink before you put the iron on vinyl on your shirt. If you do it after, there’s a chance it might crack or peel off after the first few washes.
I also like to iron my shirt before I get started. Not only does this give a flat surface to work on, it helps me lay out my shirt evenly, so I know that I am getting my cut out in the center of my shirt.
Cutting Iron On to Use on a Shirt
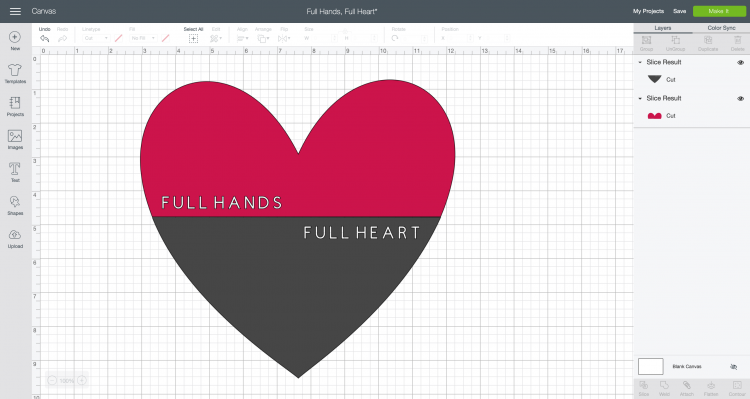
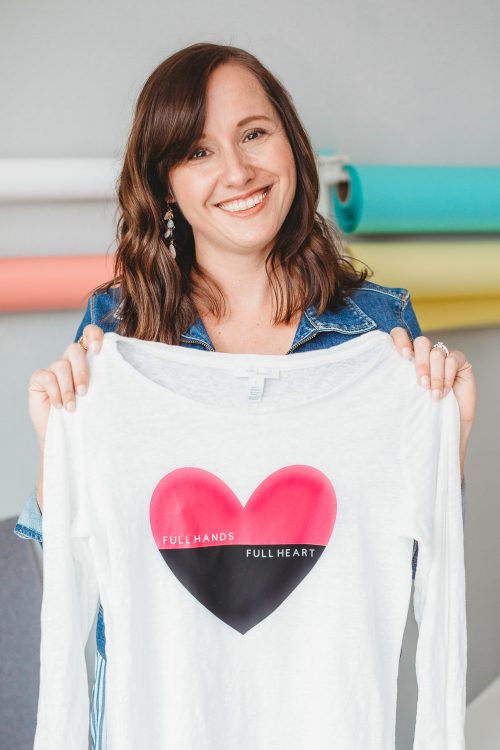
Let’s start by cutting our our iron on to use on our shirt. I created this fun file in Cricut Design Space that says Full Hands, Full Heart. You can make this file, choose one of the thousands of other images in Cricut Design Space, or upload your own!

As a business owner and a mom of young twin boys, I have gotten more than my fair share of “woah, you have your hands full!” comments over the last four years. You really do have to be #fearless to be an entrepreneur or a twin mom…and I’m BOTH!
The “hands full” always makes me want to roll my eyes. My boys are pretty darn easy kids and while having twins was hard in the beginning, it’s awesome now.
Built-in best friends who had to learn patience and sharing from day one? Yes please! They make it easy for me to run my business—they can play independently from me more than any other kids I know.

So now when people tell me my hands are full, I usually respond with “my heart is full too!” I designed this file in Design Space to be a cute encapsulation of that sentiment.
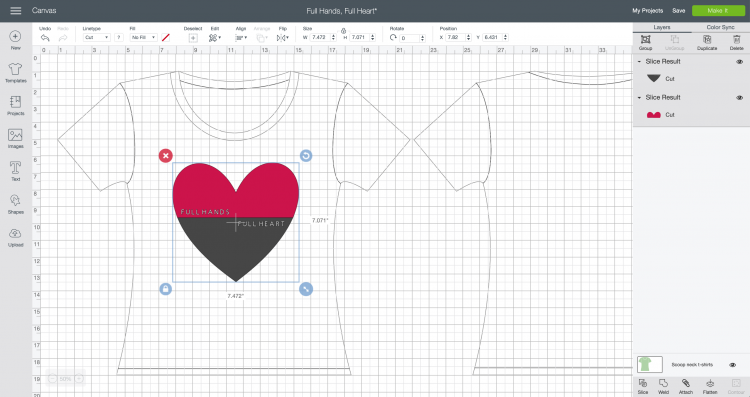
Before cutting your file, make sure that it is sized however large you’d like the decal on your shirt. Use Cricut’s templates to help you size your decal correctly (click here for a detailed post on using templates).

Then click Make It in the upper right of Cricut Design Space to cut your project!
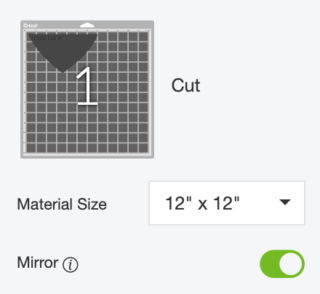
In the Prepare Screen, you’ll see that your two colors of iron on are split onto two mats. Before continuing, you MUST make sure Mirror is turned on for both layers. Iron on vinyl cuts in reverse, so this step is vital if you do not want your words to be backward on your shirt.
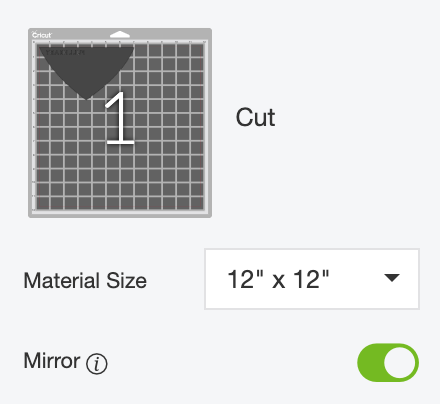
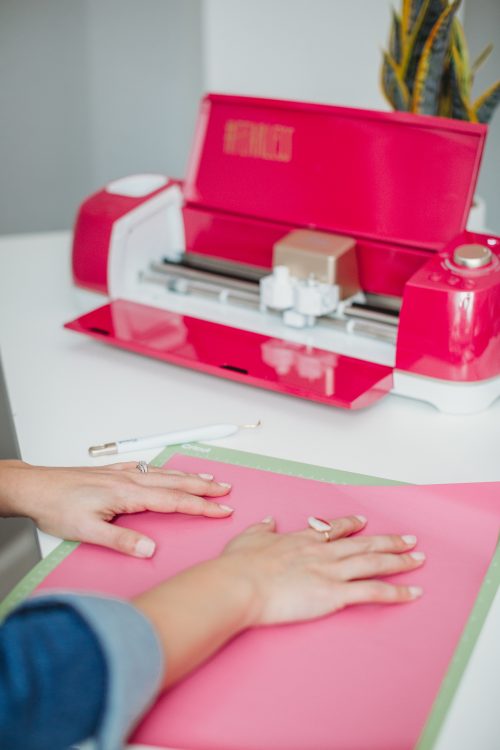
Then place your iron on face-down (shiny side down) on your cutting mat.

If you are using a Cricut Explore, turn the dial to “iron on.” If you are using a Cricut Maker, you’ll choose iron on from the materials directly in Design Space.
Then insert your mat into your machine by pushing the blinking arrow button. Press the blinking C and your vinyl will cut! Cut both layers.

Once your layers are done, you’ll want to weed them. This means you’re removing anything that doesn’t belong on your decal. In this case, that’s the iron on around the heart and inside the letters. I have an extensive post on weeding iron on vinyl that you’ll want to check out.

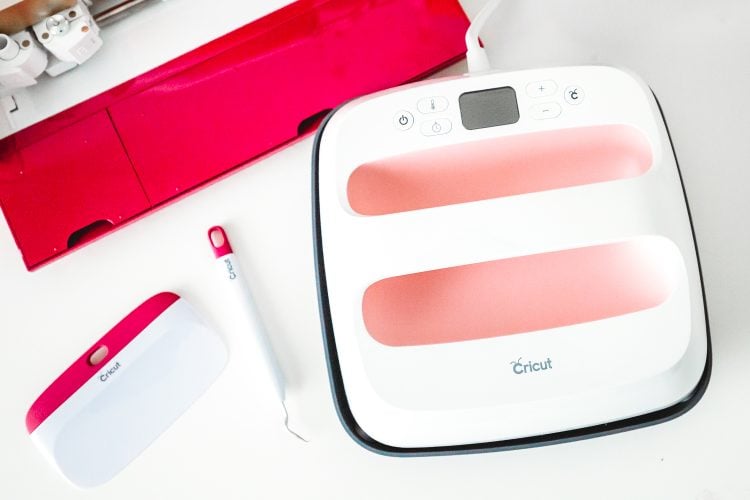
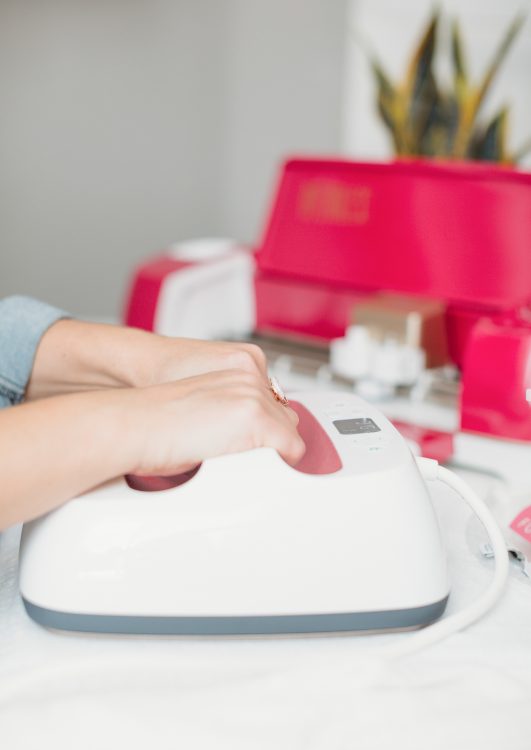
Now you’re ready to adhere your iron on to your shirt! I love using my EasyPress 2. I have an iron, an EasyPress, and a heat press and 99% of the time turn to my EasyPress over the other two heating methods. Find out why by checking out out my comparison post. It comes with bonus iron on vinyl as well—everything you need to get started making a project!
Lay out your shirt on an EasyPress mat or folded towel on a solid surface. Make sure it’s flat and even. You don’t want your decal off center because you didn’t take the time to make sure your placement was correct.
Place your two layers of vinyl on your shirt to get the ideal placement. Then remove one layer so you’re only working with a single layer at a time.
Make sure to check out my post on layering iron on vinyl for even more information. Obviously if you’re working with a single layer, you just have to do this process once.

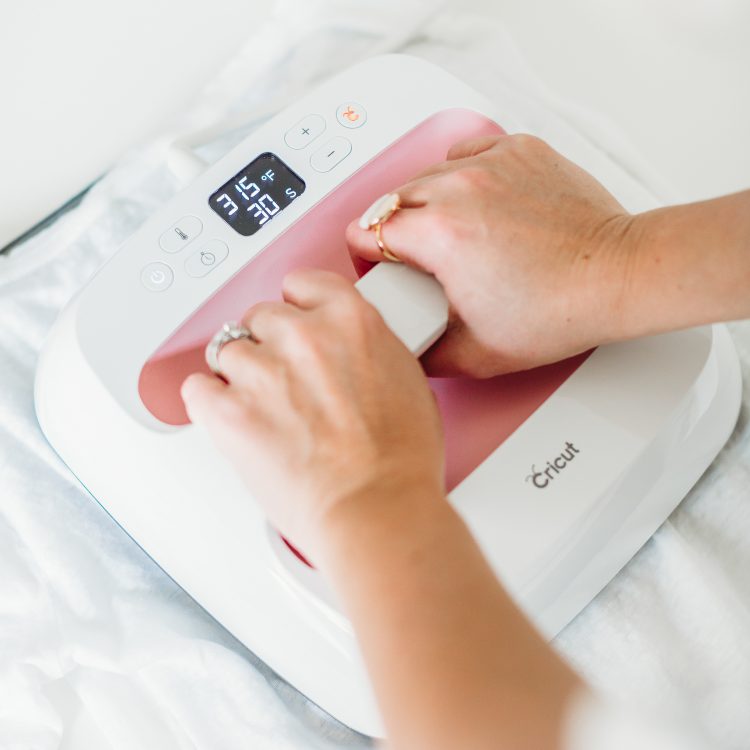
Regular iron on vinyl has a temperature setting of 315°. Press for 30 seconds.

Peel back the plastic carrier sheet and your iron on should adhere to your shirt. If not, press again.

Then place your second layer down. I actually cut as close as I could to the bottom edge of the pink (after I took this photo) so it wouldn’t leave an imprint in the black vinyl. I also use a piece of fabric between my iron on and my EasyPress. This way the already-pressed iron on doesn’t come in contact with the plate of my EasyPress. It can lead to bubbles.

Peel off that second carrier sheet. Then flip your shirt inside out, and do a 15-second press of your iron on from the backside. Sometimes I think this final press is the secret to getting really good adherence!

You’ll want to make your shirt last! Make sure not to wash it for at least 24 hours, giving the adhesive time to cure. Then wash, inside out, in cold water. Hang to dry and then enjoy wearing your DIY shirt!


USING CRICUT IRON ON VINLY ON A SHIRT
Equipment
- Cricut Maker or
Supplies
Instructions
- Preparing a Shirt for Iron On VinylBefore you make your shirt, pre-wash it. If your material is prone to shrinking, you'll want it to shrink before you put the iron on vinyl on your shirt. If you do it after, there's a chance it might crack or peel off after the first few washes. Also, iron the shirt before you get started. Not only does this give a flat surface to work on, it helps lay out the shirt evenly, so that you are getting the cut out in the center of the shirt.
- Cutting Iron On to Use on a ShirtLet's start by cutting our our iron on to use on our shirt. This fun file is in Cricut Design Space – Full Hands, Full Heart. You can make this file, choose one of the thousands of other images in Cricut Design Space, or upload your own!

- Before cutting your file, make sure that it is sized however large you'd like the decal on your shirt. Use Cricut's templates to help you size your decal correctly (click here for a detailed post on using templates).Then click Make It in the upper right of Cricut Design Space to cut your project!

- In the Prepare Screen, you'll see that your two colors of iron on are split onto two mats. Before continuing, you MUST make sure Mirror is turned on for both layers. Iron on vinyl cuts in reverse, so this step is vital if you do not want your words to be backward on your shirt.

- Then place your iron on face-down (shiny side down) on your cutting mat.

- If you are using a Cricut Explore, turn the dial to "iron on." If you are using a Cricut Maker, you'll choose iron on from the materials directly in Design Space.Then insert your mat into your machine by pushing the blinking arrow button. Press the blinking C and your vinyl will cut! Cut both layers.

- Once your layers are done, you'll want to weed them. This means you're removing anything that doesn't belong on your decal. In this case, that's the iron on around the heart and inside the letters. I have an extensive post on weeding iron on vinyl that you'll want to check out.

- Now you're ready to adhere your iron on to your shirt!

- Lay out your shirt on an EasyPress mat or folded towel on a solid surface. Make sure it's flat and even. You don't want your decal off center because you didn't take the time to make sure your placement was correct.Place your two layers of vinyl on your shirt to get the ideal placement. Then remove one layer so you're only working with a single layer at a time. Make sure to check out this post on layering iron on vinyl for even more information. Obviously if you're working with a single layer, you just have to do this process once.

- Regular iron on vinyl has a temperature setting of 315°. Press for 30 seconds.

- Peel back the plastic carrier sheet and your iron on should adhere to your shirt. If not, press again.

- Then place your second layer down. Cut as close as you can to the bottom edge of the pink so it won't leave an imprint in the black vinyl. Also use a piece of fabric between the iron on and the EasyPress. This way the already-pressed iron on doesn't come in contact with the plate of the EasyPress. It can lead to bubbles.

- Peel off that second carrier sheet. Then flip your shirt inside out, and do a 15-second press of your iron on from the backside. This final press is the secret to getting really good adherence!You'll want to make your shirt last! Make sure not to wash it for at least 24 hours, giving the adhesive time to cure. Then wash, inside out, in cold water. Hang to dry and then enjoy wearing your DIY shirt!







Comments & Reviews
Shamile McBroom says
I LOVE this new color! I don’t have a Easy Press so I would LOVE to be able to own this beauty! I follow your blog. It is one of my favorites.
Hayley L says
Love the shirt design!
Linda B. says
It’s great to have these useful tutorials all in one place. This area is one I’ve not attempted…now I will.
Deb in WA says
I found your blog not too long ago and am happy I did! Really enjoy reading your tips and tricks on Cricut. Thanks!
Emily says
Great Post!
Mikayla Harris says
Great tutorial!
Dee Asbill says
Thanks for all the great information!
jAN says
Each time I get into a crunch, I lean on your tutorials to pull me through! I share them whenever I can to other cricut users.
Thank you- YOU ARE A VALUABLE ASSET!
Sarah R. says
Super cute shirt! I have a few friends I might have to make something like this for! Plus one for me too!!
Stephanie S. says
Thank you for sharing and being able to win a great machine.