Use printable vinyl to make all sorts of stickers, labels, and decals! Here’s everything you need to know about using printable vinyl, as well as a set of cleaning labels made from printable vinyl and cut on a Cricut!

Did you know that you can make stickers and labels with your Cricut? It’s easy using the Print then Cut feature, your home printer, and printable vinyl! If you’re new to Print then Cut, check out my The Ultimate Guide to Cricut Print then Cut, which has tons of tips and tricks for getting the best results!
You can also follow this tutorial and make these same labels using your Silhouette Cameo and Print and Cut, though you’ll need to know how to do the Print and Cut processes in Silhouette Studio.

Frequently Asked Questions about Printable Vinyl
Let’s start out by learning about printable vinyl and what you can do with it.
What is Printable Vinyl?
Printable vinyl is a sticky-backed material that you can print on. You can use your Cricut Explore or Cricut Maker or other cutting machine to then cut out the designs (or you can even use scissors if your designs are simple enough!)
One of the perks of using this type of vinyl is that you don’t need to weed your project! Just print, cut, and apply like a sticker. Easy!
I also love Cricut printable vinyl because it allows you to use as many colors as you want (the only limit being your printer!). With traditional adhesive vinyl, you’re limited to the colors of the vinyl, and if you want to create something with several colors, you’ll need to cut and layer each color of vinyl. With printable vinyl, you’ll print once, cut once, and apply once. You have endless possibilities!
Which Cricut Machines Can Use Printable Vinyl?
Using printable vinyl with a Cricut means you need Print then Cut capabilities. You’ll need one of the Cricut Maker or Cricut Explore machines. Cricut Joy does not have Print then Cut capabilities. Learn more in my Cricut Comparison.
Types of Printable Vinyl
Here are a few different types of printable vinyl:
• Cricut Printable Vinyl
• Silhouette Printable Vinyl
The Silhouette vinyl is thicker than the Cricut vinyl. I’ve used both and I now prefer the Cricut printable vinyl—I like the more flexible material. That being said, the Silhouette will work great for most projects!
How are Printable Vinyl and Printable Sticker Paper Different?
Cricut, Silhouette, and other brands have both printable sticker paper as well as printable vinyl sheets Both use your printer to create your design. Both have a smooth matte surface. The main difference for me is thickness—the sticker paper is much thicker than the vinyl. Printable vinyl is also generally more durable than sticker paper.
The price point, however, tends to be a little lower on printable sticker paper. For most projects, even with the higher cost, I prefer the vinyl over the sticker paper—the sticker paper tends to get jammed in my own inkjet printer and messes with my ink flow.
How are Printable Vinyl and Printable Iron On Vinyl Different?
In addition to printable sticker paper, there’s one more printable material you may run across—printable iron on vinyl (sometimes called printable heat transfer vinyl or printable HTV).
Both printable iron on and printable vinyl use your printer to create your design, but the main difference is how they are applied to your base surface. Printable vinyl applies more like a sticker whereas you’ll need a heat source (like an iron, Cricut EasyPress, or heat press) for printable iron on vinyl.
Printable vinyl is best for smooth surfaces, like glass, plastic, metal, water bottles, laptops, notebook covers, and even paper. On the other hand, printable iron on vinyl is primarily used on fabric, so you can use it to make t-shirts, onesies, and more.
You can check out my tutorial How to Use Printable Iron On if you’re interested in using that material instead!
What Can I Make?
- Stickers for planners, notebooks, etc.
- Labels (see my tutorial below for labels for cleaning supplies!)
- Decals
What Printer Do I Need?
To get the best results, use a home inkjet printer with your printable vinyl. A regular inkjet printer is relatively inexpensive compared to other printers. My favorite is the HP Envy series.
Laser printers heat to very high temperatures and could melt the vinyl inside your printer—nightmare!
Is Printable Vinyl Waterproof?
The Cricut and Silhouette brands are not waterproof, though it will hold up to water a bit better than the sticker paper.
I am working on a post using waterproof printable vinyl, so be on the lookout for that! Waterproof vinyl decals are better for tumblers, mugs, car decals, bumper stickers, and more—basically anything that might get wet.
Do You Need Transfer Tape for Printable Vinyl?
Most vinyl projects require transfer tape to move your design from the backing carrier sheet to your final base surface. Printable vinyl does NOT need transfer tape—in fact, transfer tape will ruin your project.
So make sure your printable vinyl projects are not too intricate. You’ll need to pick up the label like a sticker and transfer it to your project by hand.
How to Make Labels with Printable Vinyl
Okay! Let’s actually make something with this material. I have a set of nine printable cleaning labels for you to download for free, but you can also visit my shop and get the full set of more than 70 labels!
Get the Free File
Want access to this free file? Join my FREE craft library! All you need is the password to get in, which you can get by filling out the form below. The file number is: C256.
Printable Label Supplies
For this project, you’ll need:
- Printable Vinyl
- Cricut Explore or Maker
- Blue LightGrip or Green StandardGrip Mat
- Various glass, plastic or metal bottles and containers

How to Use Cricut Printable Vinyl
Create Your File in Cricut Design Space
All of the labels, both the free and paid versions, come in sets of nine labels to make uploading them to Cricut Design Space easier. Learn more about uploading SVGs to Design Space.
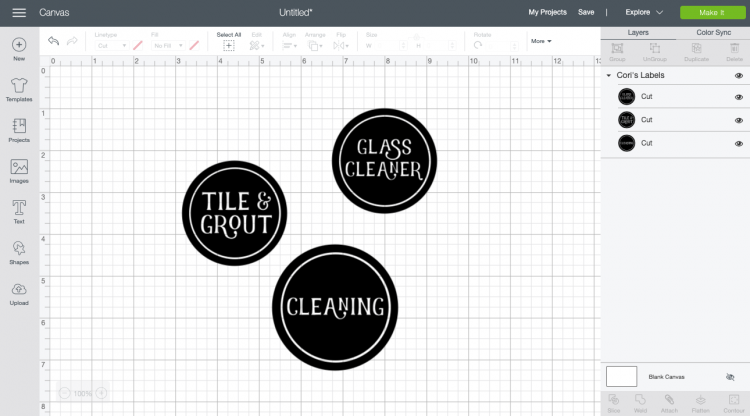
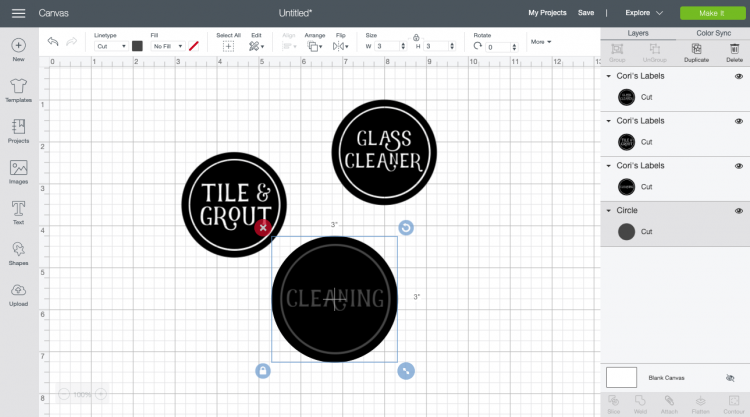
Once you upload the files, click “Ungroup” at the top of the Layer Panel on the right so that all of the labels can be manipulated individually.

Delete the labels you are not going to use, and resize the remaining labels based on the size of your bottles and containers. I made my cleaning caddy label 3″ wide and my bottle labels 2.5″ wide.

Right now, these three labels are SVG files—all of the letters will be cut out of the background, like in my pantry labels (you can use them as SVGs like this if you’d like!). To use these labels like stickers with Print then Cut, we’ll need to “flatten” them.
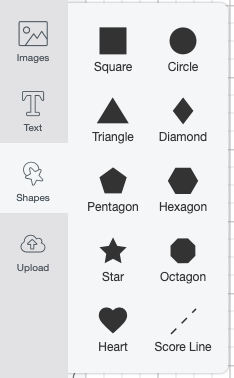
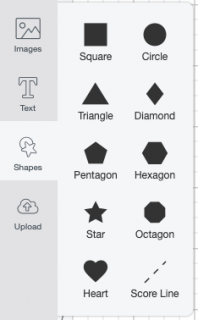
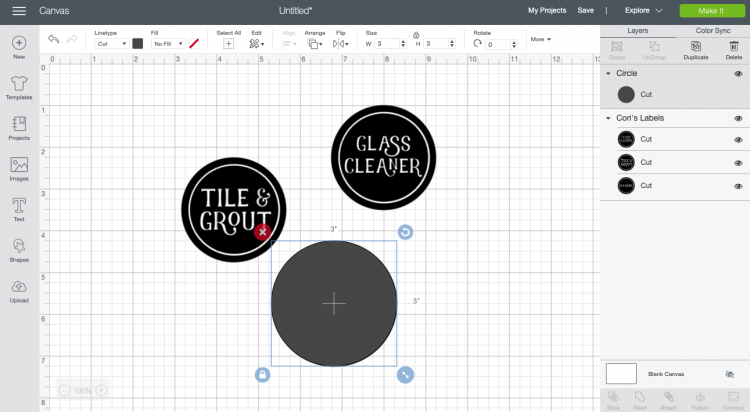
If we flatten them as is, however, the letters will still be cut out of the label. So we’re going to make a white circle and flatten it to the back of each label to make them circular stickers. Insert a circle using the Shapes tool in the Design Panel on the left.

Then change the size of the circle to match your label. In this case, I made it 3″ round to match the “cleaning” label.
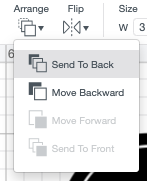
Then use the Arrange tool in the top Edit Toolbar to “send to back” so the circle is behind your label.
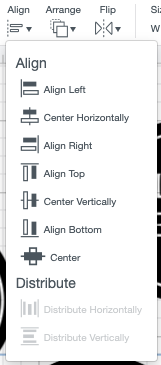
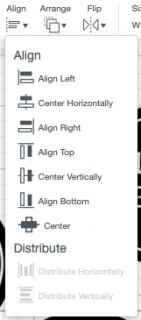
Use the “center” tool under the Align dropdown to align your circle and your label exactly.

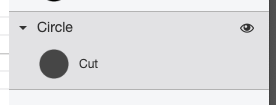
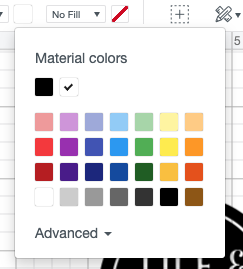
If you flatten as is, though, your label will be gray and black. Click on the gray circle in the Layers Panel on the right and change it to white using the dropdown in the Edit Toolbar at the top.
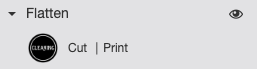
Okay! Now your labels is ready to flatten. Select the white circle and the label and click “Flatten” at the bottom of the Layers Panel on the right.

Your label won’t look much different but you’ll see that it’s now a print then cut image in the Layers Panel.
Repeat this process with your remaining labels and now you’re ready to print then cut!
Cutting your Cleaning Labels on Your Cricut
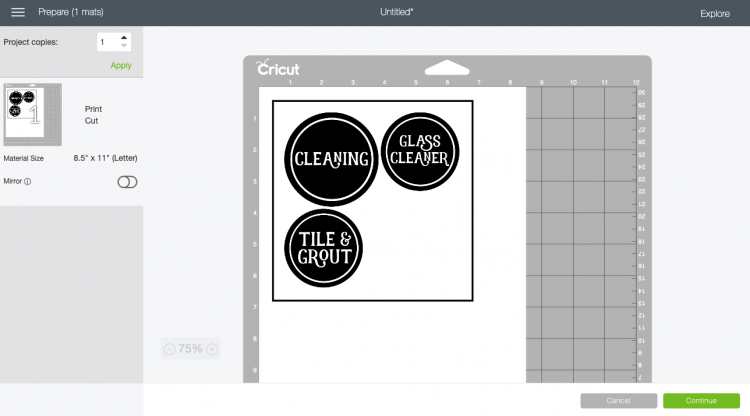
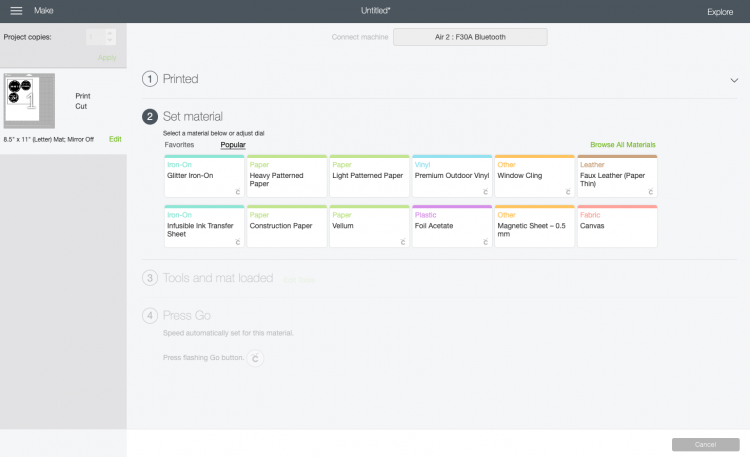
Click Make It in the upper right. There are no changes to make in the Prepare Screen, so click Continue.

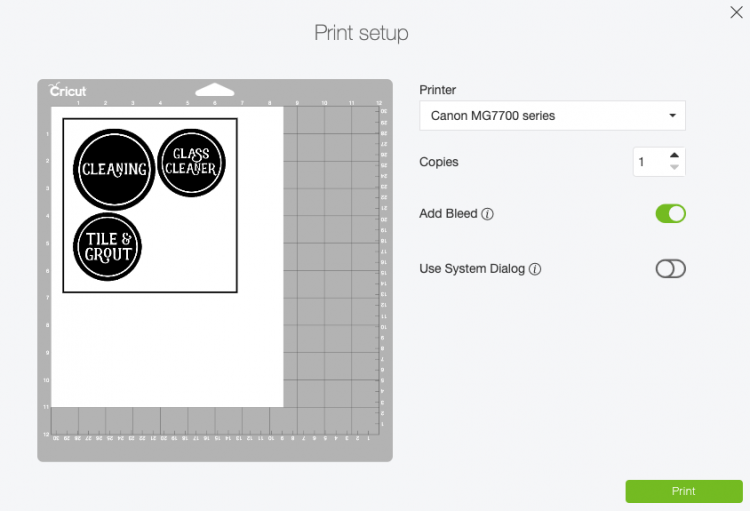
In the Make Screen, Design Space will prompt you to print your image on your vinyl. Remember, use an ink jet printer. For this project, keep “add bleed” checked—this will help ensure that there’s no white edges around your circle.

Once your printer finishes printing your labels, place them on a blue or green mat.

If you’re using a Cricut Explore, set the dial to Custom and select Printable Vinyl as your material. If you’re using a Maker, directly select Printable Vinyl as your material.

Then insert your mat into the machine and your Cricut will cut circles around your labels!
Troubleshooting: If your machine is struggling to read the registration marks, shine a light on your Cricut—sometimes if it’s in a darker corner of your craft room, there’s not enough light for it to read the registration marks.
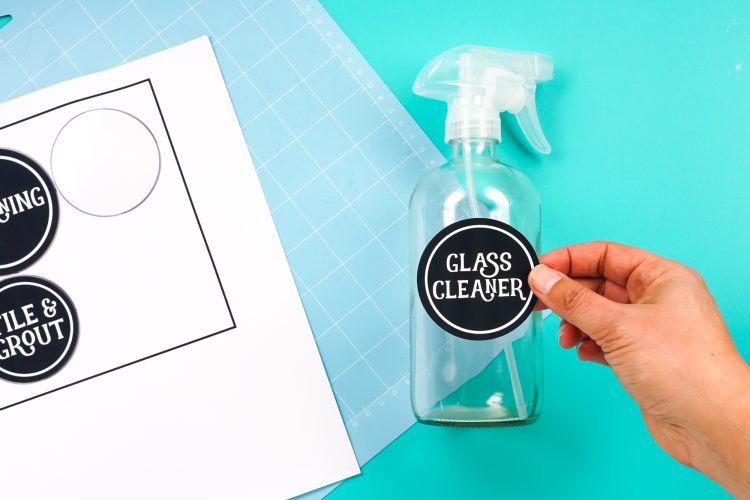
Then all you have to do is pick up your labels like stickers and place them on your containers and jars.

This is a simple way to make labels using printable vinyl and your Cricut! Have any questions about printable vinyl or the label-making process? I’d be happy to answer them in the comments!
More Printable Vinyl Projects to Make
Looking for more ideas to make with printable vinyl? Here are some ideas!
- New Year’s Resolution Planner Stickers from Hey, Let’s Make Stuff
- Adulting Stickers from Crafting in the Rain
- How to Print Your Own Patterned Vinyl from Silhouette School
- Draw then Cut Planner Stickers from 30 Minute Crafts
- Back to School Planner Stickers from Hey, Let’s Make Stuff
- Print then Cut Floral Decals from Kayla Makes
- Craft Room Labels from the Country Chic Cottage
- Free Planners Gonna Plan SVG from Hey, Let’s Make Stuff

HOW TO USE PRINTABLE VINYL
Equipment
- Cricut Maker or
Supplies
- Free Cleaning Labels #C256
- Printable Vinyl
- Various glass, plastic or metal bottles and containers
Instructions
- Create Your File in Cricut Design SpaceAll of the labels, both the free and paid versions, come in sets of nine labels to make uploading them to Cricut Design Space easier. Learn more about uploading SVGs to Design Space. Once you upload the files, click "Ungroup" at the top of the Layer Panel on the right so that all of the labels can be manipulated individually.

- Delete the labels you are not going to use, and resize the remaining labels based on the size of your bottles and containers. For this project, the cleaning caddy label was made 3" wide and the bottle labels 2.5" wide.

- Right now, these three labels are SVG files—all of the letters will be cut out of the background, like in the pantry labels (you can use them as SVGs like this if you'd like!). To use these labels like stickers with Print then Cut, we'll need to "flatten" them.

- If we flatten them as is, however, the letters will still be cut out of the label. So we're going to make a white circle and flatten it to the back of each label to make them circular stickers. Insert a circle using the Shapes tool in the Design Panel on the left.

- Then change the size of the circle to match your label. In this case, it was made 3" round to match the "cleaning" label.

- Then use the Arrange tool in the top Edit Toolbar to "send to back" so the circle is behind your label.

- Use the "center" tool under the Align dropdown to align your circle and your label exactly.


- If you flatten as is, though, your label will be gray and black.

- Click on the gray circle in the Layers Panel on the right and change it to white using the dropdown in the Edit Toolbar at the top.

- Okay! Now your labels are ready to flatten. Select the white circle and the label and click "Flatten" at the bottom of the Layers Panel on the right.

- Your label won't look much different but you'll see that it's now a print then cut image in the Layers Panel.Repeat this process with your remaining labels and now you're ready to print then cut!

- Cutting your Cleaning Labels on Your CricutClick Make It in the upper right. There are no changes to make in the Prepare Screen, so click Continue.
- In the Make Screen, Design Space will prompt you to print your image on your vinyl. Remember, use an ink jet printer. For this project, keep "add bleed" checked—this will help ensure that there's no white edges around your circle.

- Once your printer finishes printing your labels, place them on a blue or green mat.

- If you're using a Cricut Explore, set the dial to Custom and select Printable Vinyl as your material. If you're using a Maker, directly select Printable Vinyl as your material.

- Then insert your mat into the machine and your Cricut will cut circles around your labels!Troubleshooting: If your machine is struggling to read the registration marks, shine a light on your Cricut—sometimes if it's in a darker corner of your craft room, there's not enough light for it to read the registration marks.Then all you have to do is pick up your labels like stickers and place them on your containers and jars.


Comments & Reviews
Linda says
Can you print a picture to make into a sticker?
Maddy says
Hi! I have found that when cutting the printable vinyl, it sometimes leaves stringy pieces around the cut. Is there a different material setting I should be using?
Crystal Summers says
Hi Maddy,
Oh no! You may want to try the “more pressure” setting in Design Space and see if that does the trick. You may also need a new blade. Sometimes when they get dull, they start to rip or tear materials. This may be the case.
Hope this helps,
Crystal, HLMS Community Manager
MEEEEEe says
I just use sticker paper and just put some waterproof clear vinyl over it
Michelle says
How to keep my printable vinyl from getting ruined if it gets wet
Crystal Summers says
Hi Michelle,
I believe there are some waterproof versions of printable vinyl. However, there’s no way to ensure it won’t be slightly damaged if wet. My best advaice would be to keep it off surfaces and areas you are worried about. You could also cover it with a clear vinyl to “seal” it.
Hope this helps!
Crystal, HLMS Community Manager