Looking for easy Christmas decor? These felt Christmas trees are so easy to make using your Cricut! Just cut, assemble, and display—perfect for beginner crafters.

Christmas is coming and I’m in make-all-the-things mode with my Cricut Maker!
(I know it’s early…but has Christmas ever NOT snuck up on you? I don’t think so! I am 100% surprised that it’s already Christmas every time it rolls around, like it doesn’t fall on the exact same day every year.)
One thing I hear often about the Cricut Maker is that it’s Cricut’s “advanced” machine. While it’s true that it has more capabilities than the Cricut Explore (for example it can cut 300+ materials, including fabric without backing and thicker materials using the Knife Blade), I want to dispel the myth that it’s for expert crafters. It can do everything a Cricut Explore can do, in pretty much the exact same way.
And yes, it can do more than the Explore, too. But newbies, don’t be afraid of the Cricut Maker! Let me show you how to make an easy project, using one of the Maker-specific tools—the rotary blade. This is one of those crafts that will have even the non-craftiest of people saying, “that was so easy!”

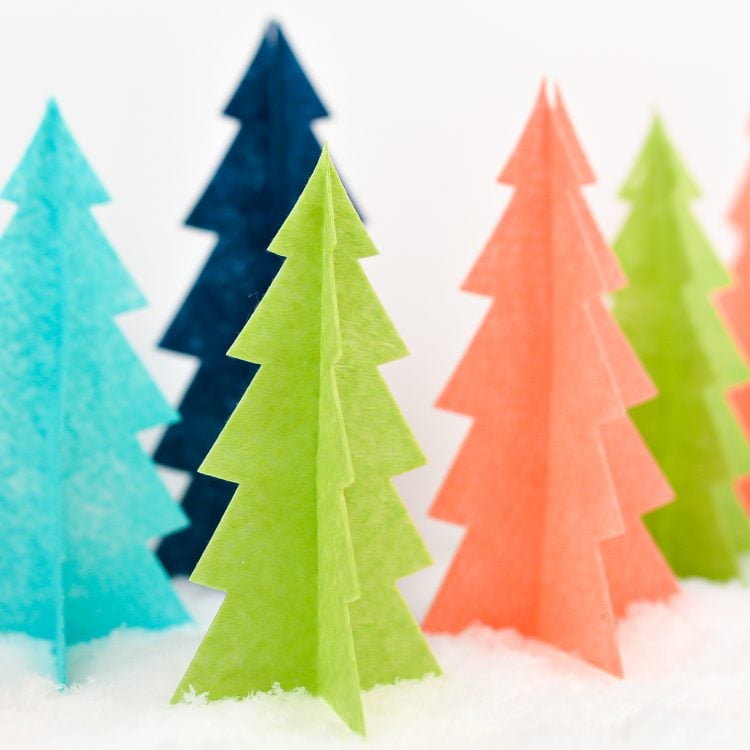
I’m a bit obsessed with felt lately and have so many ideas for felt Christmas decorations, ornaments, and gifts. These felt Christmas trees are so easy to make using your Cricut Maker—just cut, slide together, and display! Let’s make them!
[adthrive-in-post-video-player video-id=”vbocUiky” upload-date=”2022-07-30T18:33:30.000Z” name=”Christmas Projects with a Cricut” description=”Let’s get crafting for Christmas using the Cricut! Here are a ton of easy Cricut Christmas ideas that are easy and fun to make using your Cricut Explore or Cricut Maker!” player-type=”static”]
Felt Christmas Trees: Supplies
- Cricut Maker with the Rotary Blade
- Cricut Felt in a variety of colors
- File in Cricut Design Space
That is literally it. You can make these easy felt Christmas trees, Sharon-from-Accounting (insert your name and your own non-crafty profession)! Cricut’s line of felt is really perfect for these trees because it is stiffer than traditional wool felt. The trees stand up perfectly. Put them on the mantel, use them as a table centerpiece, or add a bit of glue and ribbon and hang them as ornaments.
Felt Christmas Trees: Instructions
Set Up Your Felt Christmas Tree File in Cricut Design Space
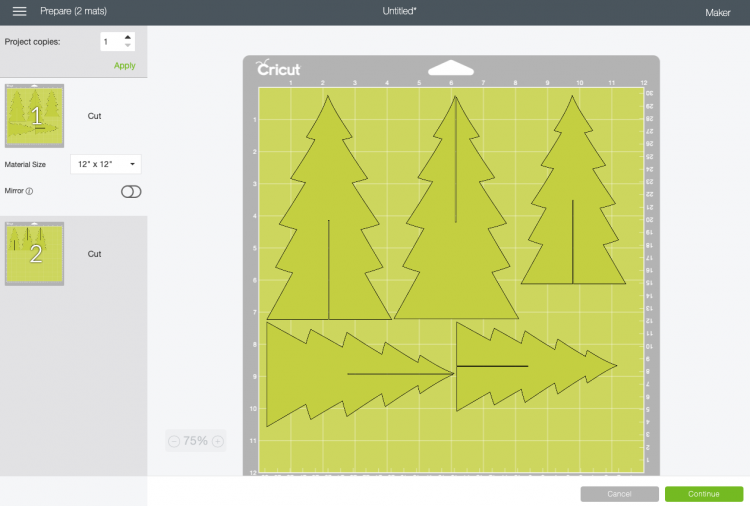
Start by opening the file in Cricut Design Space. I’ve included three sizes of trees (1 big, 1 medium, 2 small) that will fit perfectly on a single sheet of 12″ x 12″ Cricut felt. Click Make It in the upper right corner.
The Design Space program will sort your trees onto two mats in the Prepare Screen.

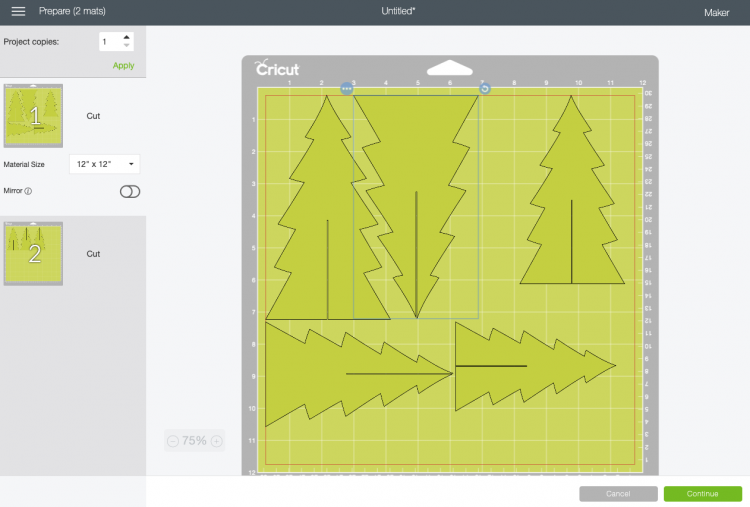
Here, you’ll use two tools to move all of the trees onto a single mat. The first is the rotate icon. Click on a tree and rotate it so that you can nestle it closer to its neighbor. If you hold down the shift key, it will keep your rotation straight.

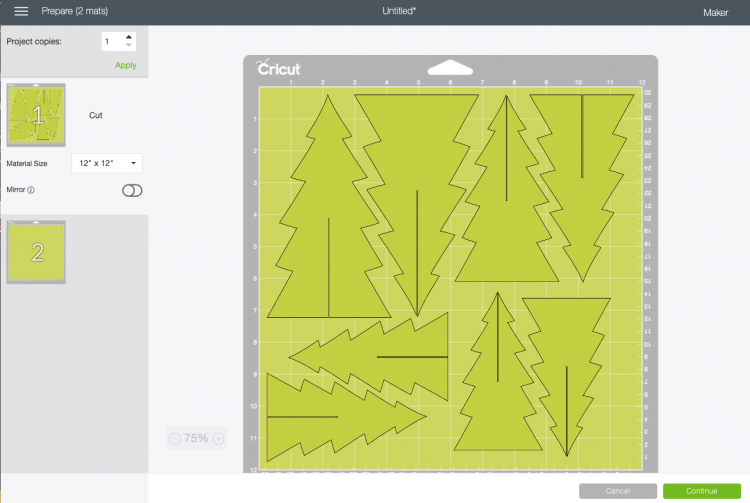
You can also use the Move to Another Mat tool to move the other trees to your first mat. Click the three-dot menu on one of the trees on the second mat.

Then select the first mat and Design Space will move your image.

Continue to rotate and move all of your tree pieces so they fit on a single mat.

Cut Your Felt Christmas Trees
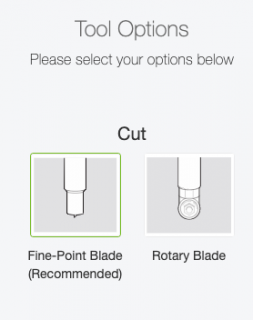
Click Continue to move to the Make Screen. From here, select Felt as your material. Then click Edit Tools to change your blade to the rotary blade.
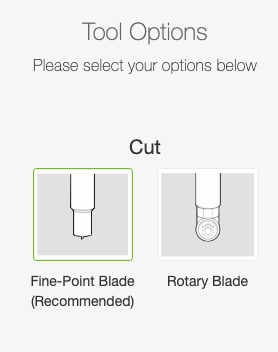
Technically, the regular fine point blade can cut felt, but I prefer the rotary blade for this project. The two sides of the line for the slit are very close to each other. The rotary blade cuts this like butter, but it’s a spot where the regular blade may get caught up.
Then place your felt on the cutting mat and insert it into your machine. Click the blinking “C” and the Cricut Maker will cut your tree pieces.
Assemble Your Felt Christmas Trees
Assembling these trees is so easy—just slide the two tree pieces together using the slits.

I love that this project will fold flat for storage, making them easy to pull out and use year after year.

5 Reasons I Love My Cricut Maker
As I finished up my newest cutting machine materials book in October (coming to a bookstore near you next year!), I was thinking about just how incredible my Cricut Maker is.
I still use my Cricut Explore Air 2 all the time as my workhorse machine (if I’m making simple projects using cardstock, adhesive vinyl, or iron-on vinyl), but the Cricut Maker really has become the machine I turn to for truly special projects. It really is ultimate machine for professional-level cutting performance and versatility.
If you’re hemming and hawing about which Cricut to put on your Christmas wish list, I thought I’d share some reasons I really love my Cricut Maker.
1. The Cricut Maker works for every level of crafter
Whether you want to make simple vacation t-shirts for your family or a huge wood Christmas village, you can do it on the Cricut Maker. I like to think that the Cricut Maker grows with you as a crafter.
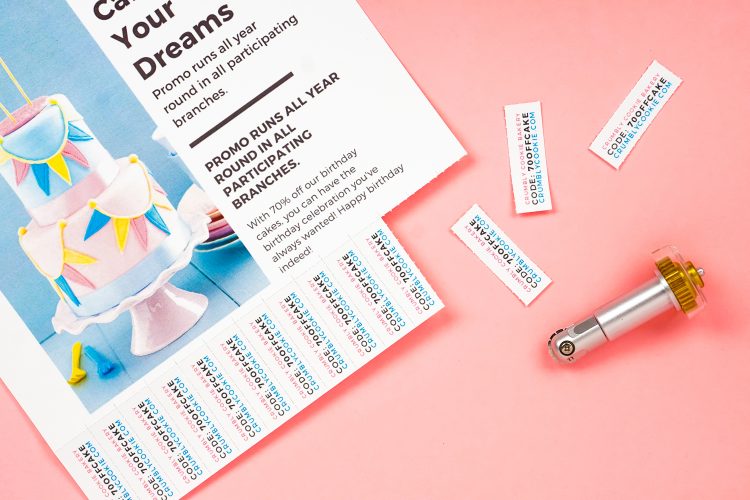
You start out doing simple projects (that you can also do on the Cricut Explore), and then you start testing the waters with new materials. Use the rotary blade to make a few felt flowers. Cut some simple wood letters with the knife blade. Perforate a flyer for your kids’ bake sale with the perforation blade.

Before you know it, you’ve grown as a crafter. You are doing things you never even considered doing before you had a Cricut. That’s one of the things I love about the Cricut overall. You—yes you, you not-crafter person—can make amazing things. I promise!
2. The Cricut Maker Cuts Fabric, Felt, Basswood, Leather, and More
When the Maker first came out, I used it a lot for cutting fabric with the rotary blade. That was the extent of my “advanced” use.
But then, I realized just how beautifully the Cricut Maker could cut felt. And felt is one of my favorite materials to work with! Being able to cut it so precisely made felt crafts more accessible to me. I’ve mentioned this before, but using scissors can cause quite a bit of pain in my hand. Now that I have a Cricut that can cut felt, a whole new world of felt crafting opened up to me.

After felt, I tried leather with the rotary blade. So easy!

Soon I was cutting basswood, engraving metal, and making chipboard projects. There’s so much more I can make with my Maker.
3. The Cricut Maker is Smart
I am so thankful for one particular feature on the Cricut Maker and that is its ability to know what tool you have inserted into the machine. If your tool has a gear, the Cricut Maker will check before it cuts to make sure you are using the correct tool.
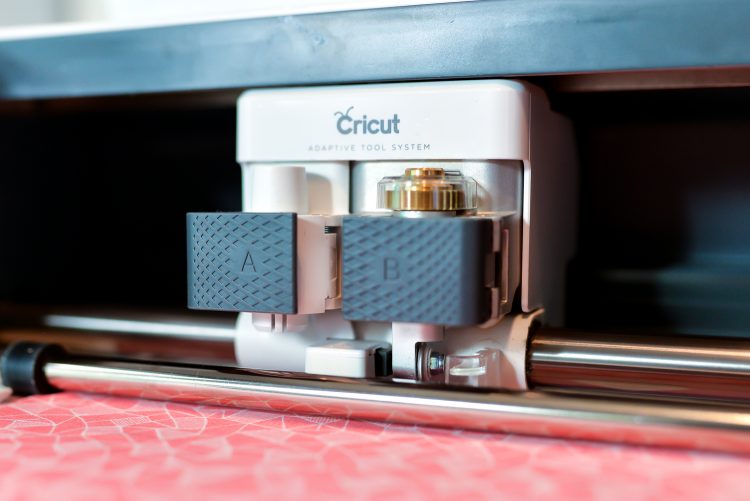
I can’t tell you how many times I’ve gone to cut cardstock and still had the knife blade in my machine—surely I would cut through my cardstock, mat, and maybe machine if it had cut with the knife blade.
4. The Cricut Maker Keeps Getting Better
When Cricut announced their Adaptive Tool System for the Maker, we could only speculate what kinds of new tools would come out to cut (and more!) even more materials. Here’s what we have so far. The first three blades, scoring stylus, and pens are all available on the Explore. But check out my tutorials for the additional tools for the Maker—you’ll be excited to see how many specialty projects you can make.
- Fine Point Blade
- Deep Cut Blade
- Bonded Fabric Blade
- Scoring Stylus
- Pens
- Rotary Blade
- Knife Blade
- Single Scoring Wheel
- Double Scoring Wheel
- Engraving Tip
- Debossing Tip
- Perforation Tip
- Wavy Blade
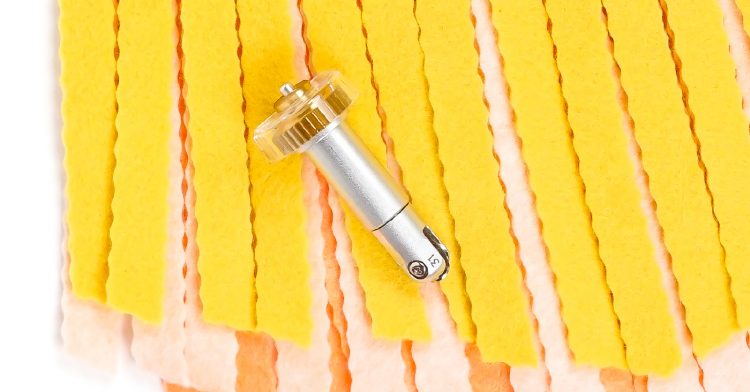
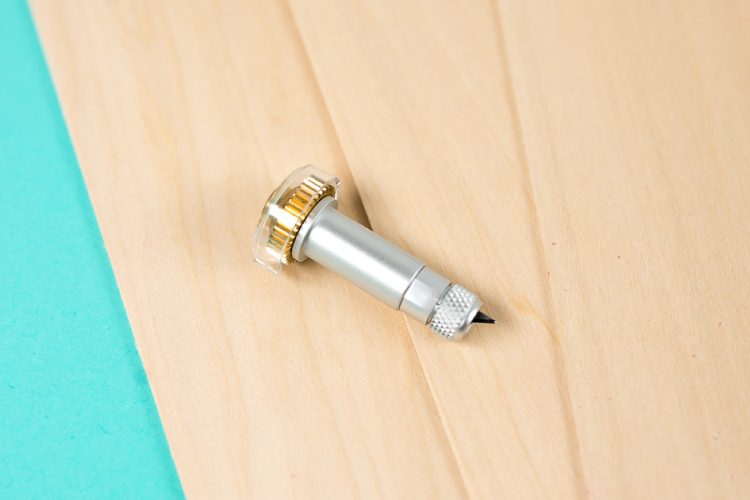
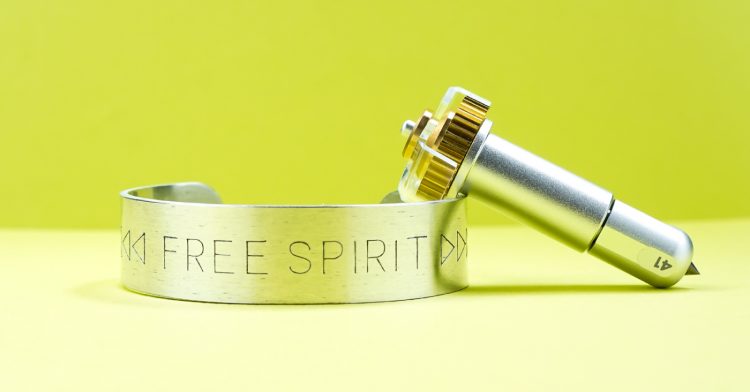


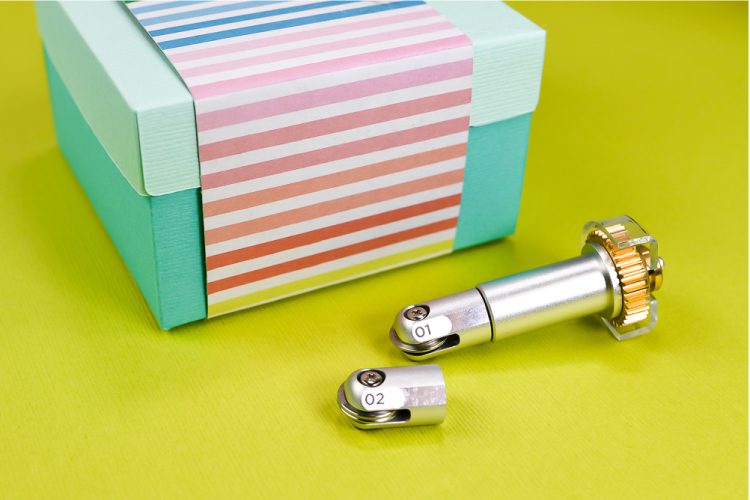
I know this is a big frustration to Explore owners—why won’t these tools work with the Explore? The secret is in that Adaptive Tool System and the gear on top. The gear allows these tools to be even more precise. And the force of the Maker is 10x greater than that of the Explore—the Maker is just built for these emerging tools. Imagine what they might come out with next!
BIG NOTE: the Cricut Explore is NOT obsolete. Cricut is still selling and supporting it and I still use mine all the time. If you want to make projects primarily of cardstock, adhesive vinyl, and iron on vinyl without venturing into these other areas, the Explore is a GREAT choice.
5. The Cricut Maker Doesn’t Chirp
This is such a silly thing, but it’s something I really appreciated about the design that went into the Cricut Maker. The Cricut Explore line of machines “chirp” (like a cricket) when they are ready to go. I’m sure this is helpful for many people, but not for me.

I have my machines on 90% of the time in my craft studio. I also work in silence, because my life is loud enough (thank you, four-year-old twin boys) and I appreciate the quiet time to let my brain be a brain. But that chirping has really started to get to me! I’m sure it doesn’t bother most people, but I really do love that my Maker doesn’t chirp. A definite improvement!
I’m excited to see everything you’ll make with your Cricut Maker! Leave a comment sharing what you’ve made.

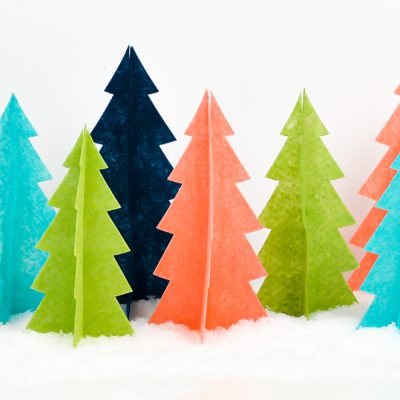
Easy Felt Christmas Trees
Equipment
- Cricut Maker 3 with the Rotary Blade or
- Cricut Maker with the Rotary Blade
Supplies
- Cricut Felt in a variety of colors
- File in Cricut Design Space
Instructions
- Set Up Your Felt Christmas Tree File in Cricut Design SpaceStart by opening the file in Cricut Design Space. Three sizes of trees are included (1 big, 1 medium, 2 small) that will fit perfectly on a single sheet of 12" x 12" Cricut felt. Click Make It in the upper right corner. The Design Space program will sort your trees onto two mats in the Prepare Screen.

- Here, you'll use two tools to move all of the trees onto a single mat. The first is the rotate icon. Click on a tree and rotate it so that you can nestle it closer to its neighbor. If you hold down the shift key, it will keep your rotation straight.

- You can also use the Move to Another Mat tool to move the other trees to your first mat. Click the three-dot menu on one of the trees on the second mat.

- Then select the first mat and Design Space will move your image.

- Continue to rotate and move all of your tree pieces so they fit on a single mat.

- Cut Your Felt Christmas TreesClick Continue to move to the Make Screen. From here, select Felt as your material. Then click Edit Tools to change your blade to the rotary blade.

- Technically, the regular fine point blade can cut felt, but the rotary blade is preferred for this project. The two sides of the line for the slit are very close to each other. The rotary blade cuts this like butter, but it's a spot where the regular blade may get caught up.Then place your felt on the cutting mat and insert it into your machine. Click the blinking "C" and the Cricut Maker will cut your tree pieces.
- Assemble Your Felt Christmas TreesAssembling these trees is so easy—just slide the two tree pieces together using the slits.

- This project will fold flat for storage, making them easy to pull out and use year after year.






Comments & Reviews
Brenda verbonach says
could these be made from wood
Crystal Summers says
Hi Brenda,
Of course! You would need to adjust the cut settings/pressure to adjust for the wood, but it should work just fine. Let us know if you create them with wood!
Happy crafting,
Crystal, HLMS Community Manager
Yuriko Endo says
Hi!
Could you please advise where can I find your Cricut file “Felt Christmas tree”?
Thank you!
Amy Bair says
I already have the Design space software and I cannot chose how the file opens. It keeps telling me to download the software again. Is there just the file I can find?
Cori George says
So sorry, but I used Design Space files for this project. Have you contacted Cricut support? – CG
Natalie says
Hello,
Quick question. Could these cute felt trees be made with a Cricut explorer? Thank you, Natalie