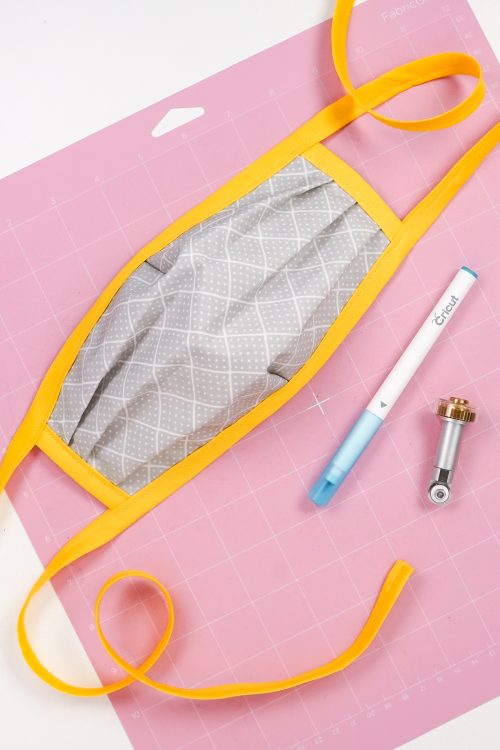
This free Cricut N95 Mask Cover pattern is designed to go over an N95 respirator mask or worn alone. Make it easily by marking and cutting the pattern with your Cricut Maker’s rotary blade.

Before I get into this post, ALL the credit goes to Jessica Nandino, who is a nurse, for this pattern and instructions.
Jessica, you are a hero. Thank you.
Making masks hits particularly close to home for me because my sister-in-law is a nurse. Because her hospital was prioritizing PPE for presumptive COVID-19 cases, she was not wearing a mask when a patient coughed on her. The patient had come in for an unrelated reason and later was shown to have COVID-19 symptoms. All my SIL had on were gloves. Thankfully it looks like she’s virus-free, but as more and more cases come up, the more and more unsafe our healthcare professionals are.
So, my deepest gratitude to all of the healthcare workers who are risking your lives for us. You deserve more than a hand-sewn mask. It is criminal that you don’t have the personal protective equipment (PPE) that you need. Our system has failed you and for that I am deeply sad.
Making the Right Masks
It’s looking more and more likely that authorities are going to suggest the general public wear masks to help prevent the spread of COVID-19. This mask can be worn over a healthcare worker’s respirator as I talk about below, or it can be worn on its own by the general public.
Before you start churning out masks, talk to healthcare folks you know. What do they actually need? The reason I settled on this pattern is because I know someone who wanted this particular style to cover her respirator.
There’s no reason to make a bunch of masks that won’t be used, so talk to someone before getting started. DO NOT drop off hundreds of masks at a hospital that hasn’t asked for them. They will be trashed.
Find the specific need. Meet the specific need.
Remember that other healthcare workers, like those in nursing homes, retirement communities, and birthing centers, may be looking for masks as well. Here are a few options:
- Pleated Mask Pattern
- Fitted Mask Pattern
- Filter Pocket Fitted Mask Pattern
- No-Sew Mask Pattern
- Scrub Cap Pattern
My friend Cheryl also has a super helpful mask lanyard tutorial, which is a must for keeping your (or your kid’s!) mask from dropping to the ground.
DIY N95 Mask with the Cricut Maker
These DIY N95 mask covers are not intended to replace the real thing. This particular mask is primarily designed to be worn over an existing N95 respirator mask. A respiratory therapist friend, for whom I am sewing masks, says these particular DIY masks potentially extend the life of the hospital-grade N95 respirators, keeping healthcare workers protected for longer.
It can also be worn alone by individuals, even if they feel healthy—COVID-19 can be spread even if you’re not showing symptoms and wearing a mask is one possible way to prevent that. The best way to prevent spread, however, is by staying home.
I reworked Jessica’s pattern as an SVG for the Cricut Maker so that masks could be marked with a fabric pen and cut quickly and easily. Cutting has always been the most difficult part of a pattern for me because of tendonitis in my hands, so I am hoping others find this pattern useful.
Supplies
- Cotton Fabric cut to 12″ x 24″
- Thread
- Cricut Maker with Rotary Blade
- Large FabricGrip Mat
- Cricut Fabric Pen
- Double Fold Bias Tape
- Pleated Mask SVG
Get the Free File
Want access to this free file? Join my FREE craft library! All you need is the password to get in, which you can get by filling out the form below. The file number is: C281.

This Cricut Maker SVG is free (I’m not even asking for your email!) so that as many masks can be made as possible. As Jessica said in her post, do not sell this pattern or sell masks made using this pattern. Masks are for personal use or should be donated to healthcare workers (not sold).
There are two versions of the pattern. One with Jessica’s original 1/2″ seam allowance and notches, and one with a 1/4″ seam allowance and fabric marks instead of actual notches.
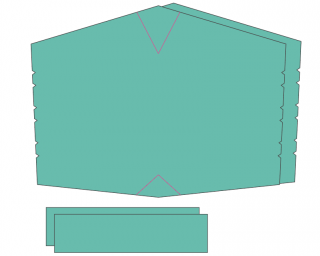
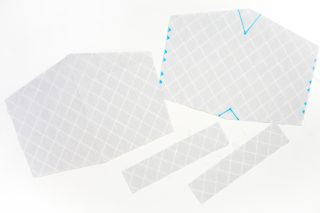
Each pattern has two layers, but only one of the layers has markings.
Both versions have pattern pieces to make the side binding, but you will need to cut the longer binding pieces for the top binding / ties by hand since the Maker cannot cut such lengths. See below for a modification using bias tape.
Please see Jessica’s post for assembly. I have made some suggestions below for ways that you can change up the pattern based on the materials you may have.
Want a fitted mask? Check out my fitted mask SVG post.
Setting Up Your Cricut Mask File to Mark and Cut
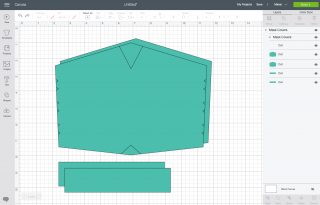
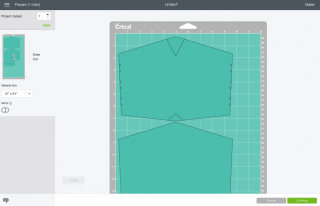
Upload the SVG to Cricut Design Space. You’ll see five layers—two mask layers, a markings layer, and two binding pieces.

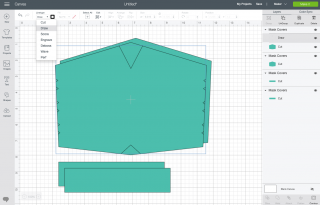
Click ungroup so you can manipulate each layer individually. Click on the markings layer and change the linetype to draw in the top Edit menu.

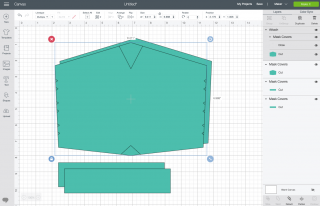
Select the markings layer and the single mask piece right below it and click Attach. This will ensure the Cricut Maker writes on the correct layer of fabric.

You’re ready to cut your mask. You can fit both mask pieces and the binding pieces on a piece of 12″ x 18″ fabric. If you are making more than one mask, use the Project Copies tool at the top of this screen to increase the number of masks.

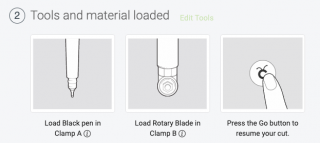
Choose cotton as your fabric, and insert the fabric marker and rotary blade into your Cricut Maker. You can learn more about Using the Fabric Pen.

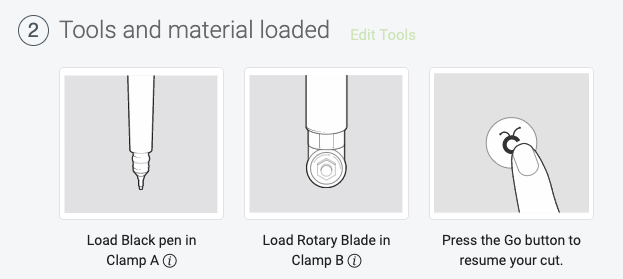
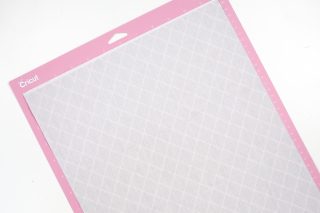
You’ll want to put your fabric face-down on the mat, particularly if you are using a darker fabric. The fabric pen will show up better.
Update: A nurse suggested using two different fabrics for each layer, so she could tell which was the front of the mask and which was the back. If you do use the same fabric, keep the inside layer wrong-side out so that it’s clear it’s the inside of the mask.

Then click Go and your Maker will mark and cut your pattern pieces for you! Head over to Jessica’s tutorial for how to sew your mask.

Modifications
If you want to save yourself the step of trimming the pattern, use the 1/4″ seam allowance SVG and skip the trimming step.
Use the fabric pen in the Cricut Maker to mark your notches/darts. So much faster than notching and marking by hand.
Instead of making my own binding, I used double-fold bias tape. You’ll need one package of bias tape per mask (I raided my stash). Cut the two long pieces at 48″ each, and the two side bias pieces at 6″ each (I find the extra bit on the ends of the side binding makes it easier to pull through my machine as I’m sewing—my feed dogs get fussy if there are too many layers). Do the sides, then the longer pieces. All you need to do is sandwich the mask in between the two layers and sew from end to end.

You can size this Cricut N95 mask cover pattern up by an inch or down by an inch to make it work better for smaller or larger faces. People of all sizes are on the front lines of this COVID-19 crisis.
Have another free tutorial or pattern? Let me know and I will link it here!
If you have any questions about sewing this pattern, please let me know. I am so sad that this blog post even needs to exist. Support our healthcare workers, demand real PPE, and STAY HOME.

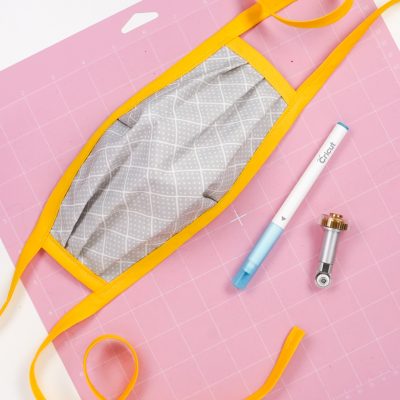
DIY N95 MASK
Equipment
- Cricut Maker with Rotary Blade
Supplies
Instructions
- NOTE: ALL the credit goes to Jessica Nandino, who is a nurse, for this pattern and instructions.This Cricut Maker SVG is free (I'm not even asking for your email!) so that as many masks can be made as possible. As Jessica said in her post, do not sell this pattern or sell masks made using this pattern. Masks are for personal use or should be donated to healthcare workers (not sold).There are two versions of the pattern. One with Jessica's original 1/2" seam allowance and notches, and one with a 1/4" seam allowance and fabric marks instead of actual notches.Each pattern has two layers, but only one of the layers has markings.Both versions have pattern pieces to make the side binding, but you will need to cut the longer binding pieces for the top binding / ties by hand since the Maker cannot cut such lengths. See below for a modification using bias tape.Please see Jessica's post for assembly. Some suggestions are below for ways that you can change up the pattern based on the materials you may have.Want a fitted mask? Check out my fitted mask SVG post.

- Setting Up Your Cricut Mask File to Mark and CutUpload the SVG to Cricut Design Space. You'll see five layers—two mask layers, a markings layer, and two binding pieces.

- Click ungroup so you can manipulate each layer individually. Click on the markings layer and change the linetype to draw in the top Edit menu.

- Select the markings layer and the single mask piece right below it and click Attach. This will ensure the Cricut Maker writes on the correct layer of fabric.

- You're ready to cut your mask. You can fit both mask pieces and the binding pieces on a piece of 12" x 18" fabric. If you are making more than one mask, use the Project Copies tool at the top of this screen to increase the number of masks.

- Choose cotton as your fabric, and insert the fabric marker and rotary blade into your Cricut Maker. You can learn more about Using the Fabric Pen.


- You'll want to put your fabric face-down on the mat, particularly if you are using a darker fabric. The fabric pen will show up better.Update: A nurse suggested using two different fabrics for each layer, so she could tell which was the front of the mask and which was the back. If you do use the same fabric, keep the inside layer wrong-side out so that it's clear it's the inside of the mask.

- Then click Go and your Maker will mark and cut your pattern pieces for you! Head over to Jessica's tutorial for how to sew your mask.

- ModificationsIf you want to save yourself the step of trimming the pattern, use the 1/4" seam allowance SVG and skip the trimming step.Use the fabric pen in the Cricut Maker to mark your notches/darts. So much faster than notching and marking by hand.Instead of making your own binding, for this project double-fold bias tape was used. You'll need one package of bias tape per mask. Cut the two long pieces at 48" each, and the two side bias pieces at 6" each (the extra bit on the ends of the side binding makes it easier to pull through the machine while sewing—because the feed dogs get fussy if there are too many layers). Do the sides, then the longer pieces. All you need to do is sandwich the mask in between the two layers and sew from end to end.You can size this Cricut N95 mask cover pattern up by an inch or down by an inch to make it work better for smaller or larger faces. People of all sizes are on the front lines of this COVID-19 crisis.




Comments & Reviews
Kindery says
This message perfectly captures what needed to be said
Lauren says
Thank you so much for this!! Can you tell me how to adapt it with using elastic instead of ties?
Z says
Do these fils work with the Air 2 as well?
Cori George says
Cutting unbonded fabric on a Cricut Explore is not possible. This really is a pattern that is best used on the Cricut Maker. Sorry!
Mrs. Catherine Thomas says
I bought a Maker just for that reason. I didn’t know the Air 2 didn’t cut fabric. I sold the Air 2 for almost as much as I paid, so it wasn’t too bad.
Krystal says
Thank you so much me and my kids don’t go out but I made them for an emergency. Thank you so much!
Joe Kapala says
Hi Cori, love to see the mask made with the military as well. This would help them as well… plus police @ fire….
ciara says
Hi, i make all styles of mask if you’re looking for some, kids and adults. I can be reached at (404) 736-4440
Karen C. says
Oh yes, please! I just spent the entire day figuring out how to make myself a couple of surgical caps. A Cricut SVG would be awesome!
Tara says
Would you please be willing to share a post with multiple DIY surgical cap options too please? Thank you!
-A desperate nurse without appropriate protective equipment
Valerie Sullivan says
Do you have a .pdf of this pattern? I do not have a cricut machine. Need to make some for my family members and for at work.Va
Cori George says
Hi Valerie — if you click on the link in the post to the original mask, there are PDF files in the comments :)
ciara says
Hi, i make all styles of mask if you’re looking for some, kids and adults. I can be reached at (404) 736-4440
Jeanne says
Thank you Cori. Last night a friend got a call from a former high school student, now a doctor. The woman said there are 50 anesthesiologists in her group and they have been told to wear bandanas starting today. A group of us plan to have at least 50 masks made and delivered (150 miles away) by tonight or early tomorrow. We’ll then make more. Having the svg file without taking time to make it myself is fantastic. Thanks!
Cori George says
That’s great, Jeanne!