Cricut’s newest cutting machine makes cards in a snap! The Cricut Joy Card Mat makes it SO easy to make all sorts of greeting cards for birthdays, baby and bridal showers, holidays, anniversaries, and more!

Earlier today you met Cricut Joy, and I’m going to show you how easy it is to make quick cards using the Cricut Joy Card Mat (yes, two posts in one day!).
Cricut Joy launched March 1, 2020! Want to learn more about Cricut’s newest (and tiniest!) cutting machine? Check out these posts:
- What is Cricut Joy and What Can It Do?
- How to Cut Cards with Cricut Joy Card Mat
- Matless Cutting with Cricut Joy
- Writable Labels with Cricut Joy
- 5 Ways to Make Labels with Cricut Joy
- Cutting Adhesive Paper with Cricut Joy
- Must-Have Cricut Joy Accessories
Cricut Joy Card Mat
One of the exclusive features of Cricut Joy cutting machine is the Cricut Joy Card Mat. I was lucky enough to be invited out to Cricut headquarters to learn about the Cricut Joy before it was announced (a big thank you to Cricut for hosting us!), and the second they mentioned making cards in a single go, my mind started trying to engineer the mat that would be needed to make cards in the way they were describing.
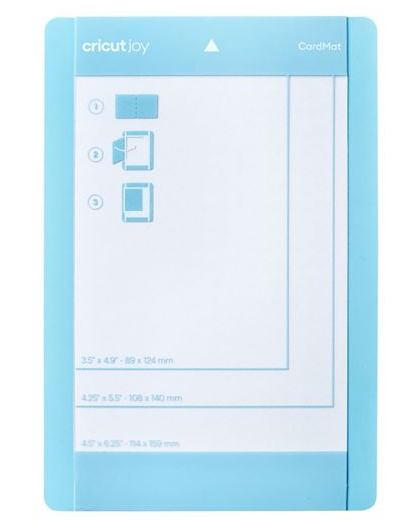
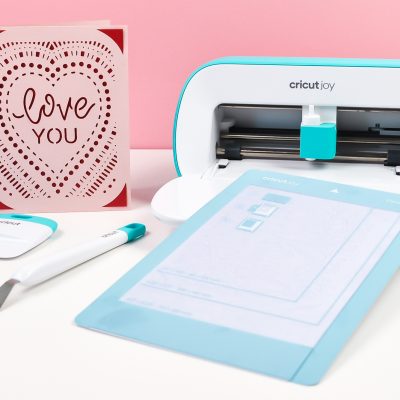
It turns out they have created a double layer Cricut Joy Card Mat! You slide a pre-folded card with the back between the two layers and the front sticks to the top layer. This allows you to cut with the front of the card without cutting the back of the card. It’s a simple, elegant solution for quick cards.
Remember, these are quick cards. You can still use your Cricut Explore or Cricut Maker to make multi-layered personalized cards. But if you’re in a rush, these cards can be made in a flash with your Cricut Joy!
Important: when you use the card mat for the first time, remove the plastic covering that protects the mat (it’s similar to what you find on other Cricut mats) to reveal the sticky mat surface.
Cricut Joy Card Insert Sets
If you want to make a card using your Cricut Explore or Cricut Maker, you’ll need to cut the card itself, score it, and in some cases, make the envelope. Cricut Joy is designed to simplify this process so you can make quick cards. Forgot that baby shower was today? You can make a card in less than 5 minutes.

One of the ways Cricut is helping facilitate this quick card making is with their Card Insert sets and Quick Corner cards in Cricut Design Space. The Card Insert sets contain 10 pre-scored cards, 10 coordinating insert pieces, and 10 envelopes. They are designed to work with Quick Corner card images in Cricut Design Space—choose one, cut, and go.
I also love the idea of making my own card inserts with patterned paper!
Making a Card with Cricut Joy
Let me show you how easy it is to make a card using Cricut Joy and the Cricut Joy Card Mat. Remember, all of these go on sale March 1!
Supplies
Note: there is a new toolset specifically for Cricut Joy that has the basic spatula, scraper, and weeding tool. I’ve long wanted a set with these basics—it’s great set for any machine you have!
Instructions
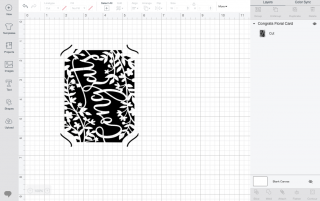
To show how this works, search for #MFA32A2E in Cricut Design Space and insert the card onto your Canvas. You may actually not see this yet—because I’m writing this before the official launch, things might change. I will update with more information as we get closer to launch.

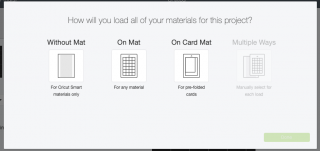
That’s it—you can just hit Make It in the upper right to be taken to the next screen. Here, you’ll see a pop up asking you which type of mat you are going to use. For this card, select Card Mat.

Then click Continue to be taken to the Make Screen. Plug in your Cricut Joy (it turns on automatically—no power button!) and Design Space will connect to your machine. Then select Insert Card cardstock as your material.

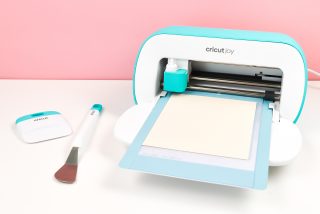
From the Insert Card set, choose a card and insert it into the card mat. Align the card at the top left of the mat, with the back of the card between the two layers of the mat, and the front of the card stuck to the mat surface on top.

When you insert your card into the machine, the rollers will automatically grab and straighten your mat (remember, there are no buttons on Cricut Joy for inserting or releasing your mat). Then you’ll hit “Go” in Cricut Design Space and your Cricut Joy will cut your card!
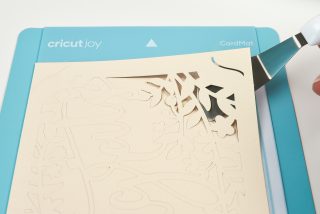
Normally, I bend the mat away from cardstock to remove it from the mat. But because the card mat is two layers thick, it’s difficult to bend. Instead, the spatula comes in really handy for removing your card from the Cricut Joy Card Mat.

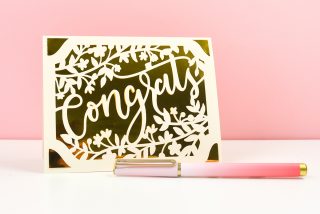
Once your card is removed from the mat, you can slide the insert card into the corner slots from behind to finish!

I am SO excited about the Cricut Joy—I can’t wait for you to get your hands on Cricut’s newest little machine!

For some more Cricut Mat information, check out my blog on How to Use the Cricut Card Mat: Maker and Explore Machines!
Get a Cricut Joy from Amazon
HOW TO USE THE CRICUT JOY CARD MAT
Supplies
Instructions
- To show how this works, search for #MFA32A2E in Cricut Design Space and insert the card onto your Canvas. You may actually not see this yet—because this is being written before the official launch, things might change. Updates will be forthcoming with more information as we get closer to launch.

- That's it—you can just hit Make It in the upper right to be taken to the next screen. Here, you'll see a pop up asking you which type of mat you are going to use. For this card, select Card Mat.

- Then click Continue to be taken to the Make Screen. Plug in your Cricut Joy (it turns on automatically—no power button!) and Design Space will connect to your machine. Then select Insert Card cardstock as your material.

- From the Insert Card set, choose a card and insert it into the card mat. Align the card at the top left of the mat, with the back of the card between the two layers of the mat, and the front of the card stuck to the mat surface on top.

- When you insert your card into the machine, the rollers will automatically grab and straighten your mat (remember, there are no buttons on Cricut Joy for inserting or releasing your mat). Then you'll hit "Go" in Cricut Design Space and your Cricut Joy will cut your card!Normally, the mat is bent away from the cardstock to remove it from the mat. But because the card mat is two layers thick, it's difficult to bend. Instead, the spatula comes in really handy for removing your card from the Cricut Joy Card Mat.

- Once your card is removed from the mat, you can slide the insert card into the corner slots from behind to finish!




Comments & Reviews
Donna says
I just got one and learning how to use it now. I was so excited when i seen it so i got one so i can i make cards for all the grandkids for their birthdays.
I’m going to love it when after i learn how to use it.
Teresa Bond-Mason says
Great video! You’re right, it’s great for us teal lovers!
Lisa says
This little gem needs a place in my craft room!!
andi says
this looks amazing! Love the small size since I don’t have a lot of craft space
Lorah says
I am so excited about the Cricut Joy! Thank you for your video!
Ashley says
I am so excited!! My Craft room and Cricut Maker are upstairs and our living area and toddlers toys are downstairs. As you can imagine I don’t get much crafting done these days. When I do I have to tote everything up and down the stairs and completely pick up when I’m done. The Cricut Joy is going to be a perfect solution for small projects! I also never make cards but this looks so quick and easy. I have to know what card pack came with those rainbow inserts! Everyone is going to get Cricut made cards out of that one this year lol! Thanks so much for sharing!
Donna Wilson says
I can’t wait for it to come out so i can get one for i caft all the the time at at home
Eva says
I am always interested in sticker and card making, and I have been looking at the circuit machine for ages. As you have mention I am one of those person not dare to buy the machine and try it as it is costly and bulky in my small space. I am very excited to see they have mini version. I think that’s is it, that’s the one I need . Thank you for introducing it, I wouldn’t know they have new version until I see your post.
Kathleen Bluett says
I can definitely see using this with my Cub Scout Den! This is something my Lion’s(kindergarten-age) could try out to write thank you notes to different presenters. Their printing skills are not there yet, but most are able to recognize their letters, so making the cards would be awesome!
Sheila Rogers says
I go to crops at least twice a month and this would be perfect to take. Oh I need this baby!