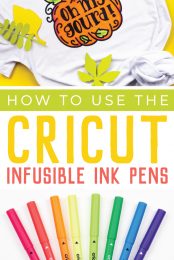
Projects made with Cricut Infusible Ink pens and markers are designed to last! Use them to create t-shirts, bodysuits, coasters, and more. Here’s how to use the Infusible Ink pens and markers and get the best results!

After using Cricut Infusible Ink for a while, I’m still impressed with how the ink itself really gets into your base material, making it one with your project. If you’ve ever struggled with peeling iron or cracking iron on vinyl, Infusible Ink is a great alternative!
Today I’m talking specifically about using the Cricut Infusible Ink pens and markers, but before I get started, you might want to check out these other Infusible Ink posts:
- What is Cricut Infusible Ink?
- How to Layer Infusible Ink with the Slice & Set Method
- Tote Bag with Infusible Ink
- Onesie with Infusible Ink
- Ceramic Coasters with Infusible Ink
- Troubleshooting Infusible Ink
I’m going to start with some frequently asked questions, and then we’ll make a project. Let’s get started!

What are Cricut Infusible Ink Pens & Markers?
Cricut Infusible Ink pens and markers have a special ink that fuses with your base material in a chemical sublimation process. The solid ink in the pen turns into a gas when heated, without going through a liquid stage. Basically the solid ink turns into a gas that then permeates the base material and then dries back into a solid and becomes one with the material. Magic! (Okay, not magic. It’s science. But for this crafty girl, it feels like magic!)

You will use laser copy paper to transfer your drawn design to your base material, as you’ll see below.
The pens and markers both come in two colorways: traditional colors (red, green, purple, brown, and black) and neon brights (blue, yellow, green, orange, pink) and two sizes, .4mm pens and 1mm markers.
What is the Difference Between Infusible Ink Pens & Markers?
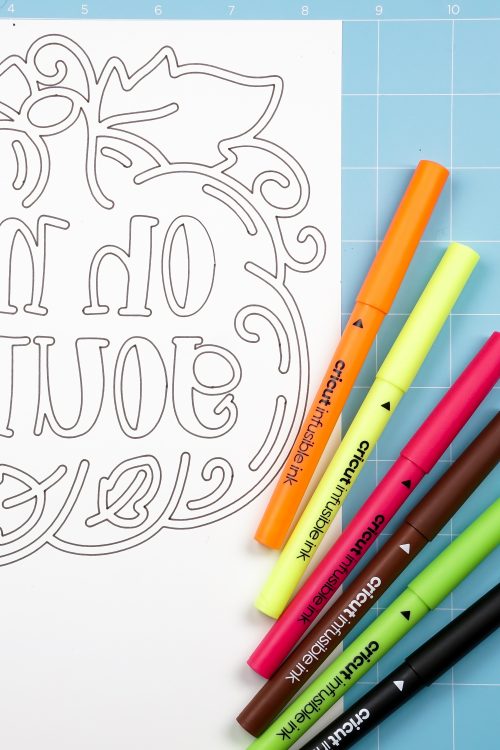
The only difference between the pens and markers is the nib size. The Infusible Ink Pens have a .4mm tip and write and draw in thin, clean lines. Infusible Ink Markers, on the other hand, are 1mm thick and create thicker lines. I prefer the pens for drawing and writing, and the markers are great for coloring in the designs that you draw with the pens.

What Supplies Do You Need?
You’ll need the following supplies:
- Infusible Ink Markers or Pens
- Cricut Explore or Maker
- LightGrip Mat
- Base material (like a t-shirt or tote bag)
- Cricut EasyPress or heat press
- EasyPress Mat
- Lint roller (for fabric) or lint-free cloth (for coasters)
- Laser printer paper
- Heat resistant tape
- Scissors
- Piece of white cardstock
- Butcher paper
What Heating Tool is Best for Infusible Ink?
The Cricut EasyPress 2 is my favorite heat tool (see my comparison here), and it’s definitely my pick for Infusible Ink projects. It heats up to 400°, which is the temperature needed for most Infusible Ink applications. The original EasyPress, which goes up to 350°, may work for some applications, but Cricut has said the results might not be as vibrant.
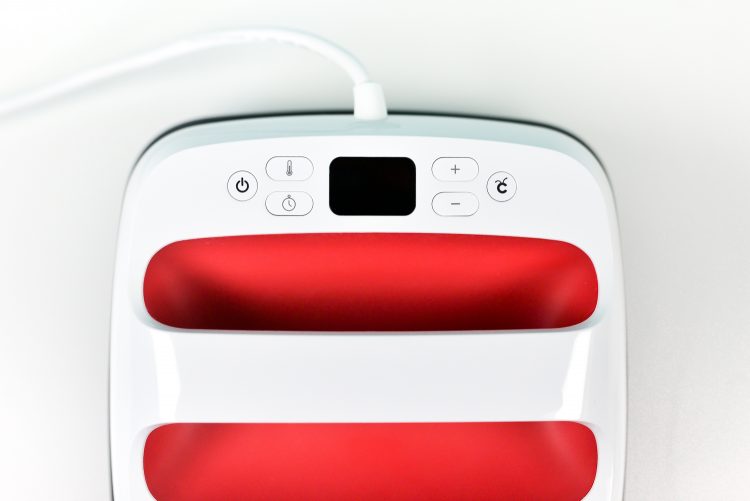
You can also use a traditional heat press. I would NOT recommend using an iron. The heating plate on a household iron is not designed to give perfect, even heating and your project will most likely end up splotchy and uneven.
You can view all of the temperature settings in Cricut’s interactive Heat Settings Guide.
What Base Materials Work with the Pens and Markers?
Cricut has a line of blanks that are specially designed to work with Infusible Ink.
- Men’s, Women’s and Kids’ T-Shirts
- Baby Onesies
- Tote Bags
- Round and Square Coasters
Generally, all sublimation processes need a polyester or poly-coated base material. This is one of the limitations of this process—you can’t just use Infusible Ink on any base. Cricut does say that results are not guaranteed on non-Cricut blanks, so keep that in mind!
Can I Draw/Write Directly On My Base Material?
Unfortunately, no. The pens are designed to be transferred using laser copy paper, because…science. You need to draw your design on the laser copy paper by hand or using your Cricut to draw, and then transfer that drawing to your blank using heat.
Will My Image Be Reversed?
YES! This is important. Like with iron on, your image will be reversed when you go to make your project. So if you want to use your hand lettering or other sketch, you’ll need to draw it on paper (you can use any pens) and then upload that drawing to Cricut Design Space. Then you’ll mirror it and then have your Cricut it re-draw it backward. If you need help uploading a hand-drawn image to Design Space, see this post.
Do I Have to Use Laser Paper?
For the brightest, most true-to-color transfer, Cricut recommends using laser copy paper vs. regular copy paper. Laser paper is designed to withstand higher heat temperatures and will give you a better transfer. Thankfully, it’s fairly inexpensive!
How to Use the Cricut Infusible Ink Pens and Markers
Here’s a very basic overview of the process, but we’ll make an actual project using both the pens and markers below, so head there for the nitty gritty.
Choose Your Blank: Pick one of Cricut’s sublimation blanks. All of them work with the pens/markers.
Create Your Design: Create a file in Cricut Design Space to draw, or you can choose to draw by hand. Make sure to resize your image to both fit on your blank and to fit under your EasyPress 2 / heat press in one go (you don’t want to have to press more than once!).
Draw Your Design On Laser Paper: Use your Cricut Explore or Make and the Infusible Ink pens/markers to draw your design onto laser paper. Color in your design if desired.
Transfer Your Image: Apply with an EasyPress or heat press according to the directions in the Cricut Heat Settings Guide.
Fall T-Shirt with the Cricut Infusible Ink Markers and Pens
Whew! That was a long overview. Are you ready to actually make a project?
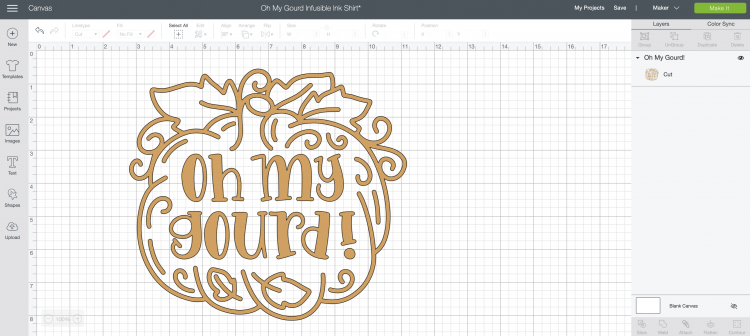
Start by creating your design in Cricut Design Space. I am using this funny Oh My Gourd! image from Design Space (#M8A1D271). It’s almost fall here and I am READY!

Choose Your Blank
For this project, I’m using a Cricut women’s t-shirt. This would also be so cute on a tote bag!
Create Your Design
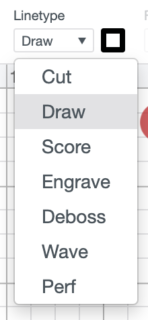
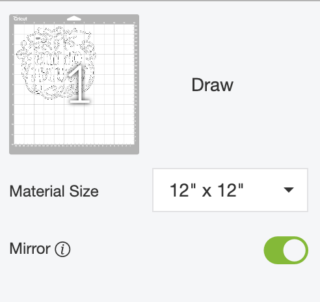
This is a cut file. To be able to draw it with the Infusible Ink pen, change it to be a draw image.
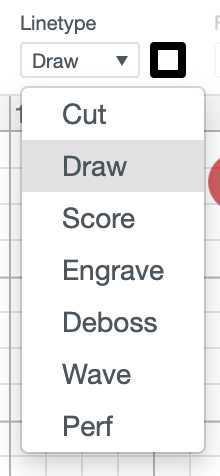

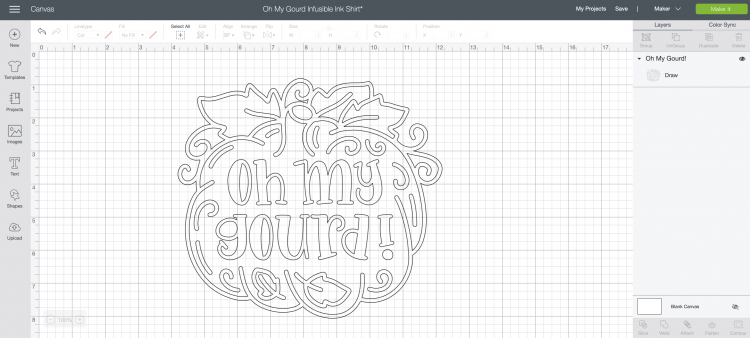
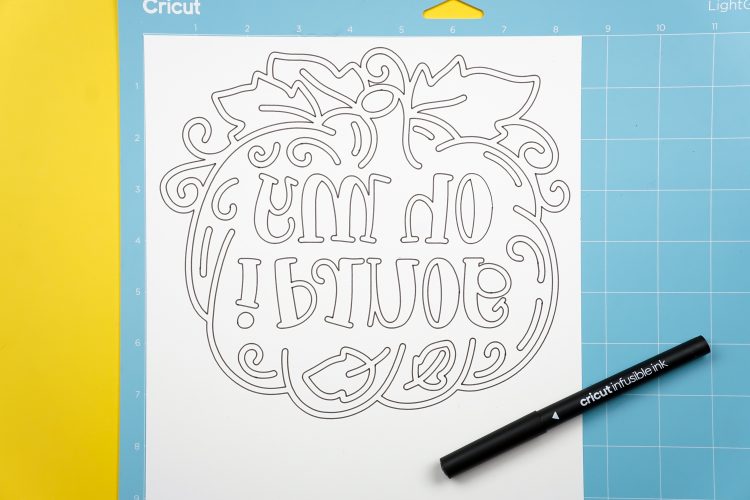
You’ll notice that Design Space actually outlines the image when making it a draw image. I’ll be coloring it in by hand after the Cricut draws it.
For this project, I’m going to draw the outline with the black pen. If you want to use other colors, you can change that using the color picker in the Edit toolbar at the top. Also make sure to resize it to fit on your shirt.
Draw Your Design on Laser Paper
Then click Make It in the upper right. IMPORTANT: In the Prepare screen, mirror your image—that way it will be correct when you iron it onto your project.
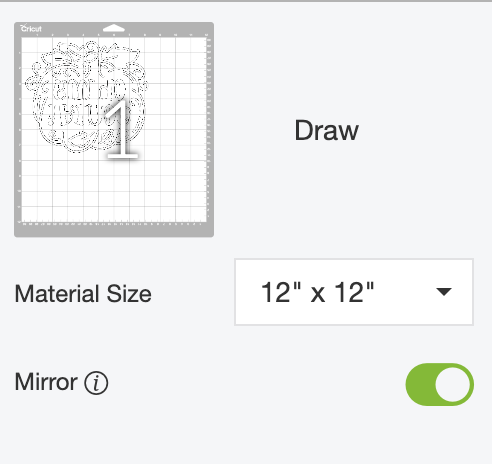
In the Make screen, select Copy Paper as your material. The software will tell you to load your pen or marker into the auxiliary housing on your Cricut.
Place a piece of laser copy paper on a LightGrip mat and insert it into your Cricut. Press the flashing “C” and your Cricut will draw the image for you! If you are using more than one color for your project, your Cricut will prompt you to change your pens.

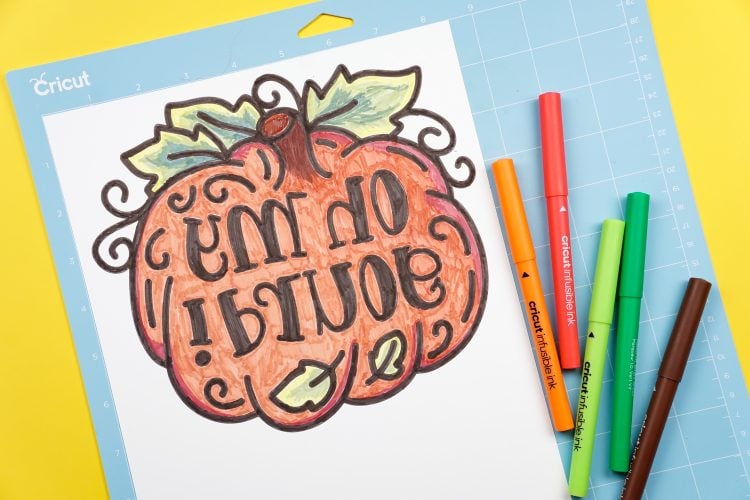
If desired, color in your project by hand. I used a variety of colors to create my look.


Transfer Your Image
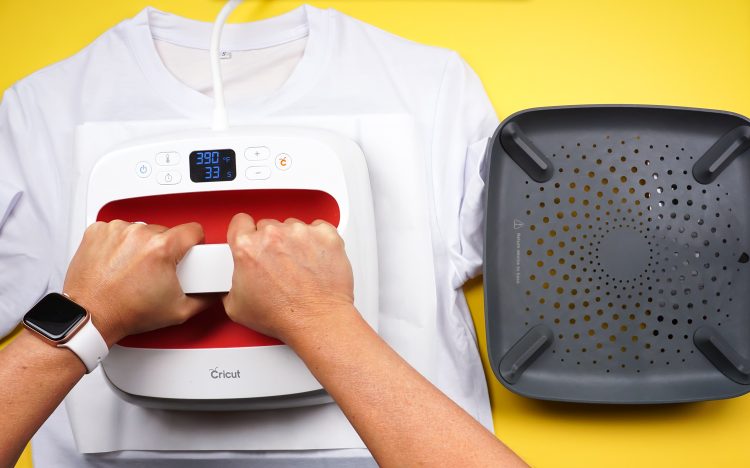
For a shirt, set the temperature and time of your EasyPress 2 or heat press to 400° and 40 seconds (note that the heat guide says 385°, but I have found that the press cools a bit when it hits the mat, so I’ve had more success with a slightly hotter temperature).
Trim around the edges of your transfer so there isn’t a lot of white blank space.
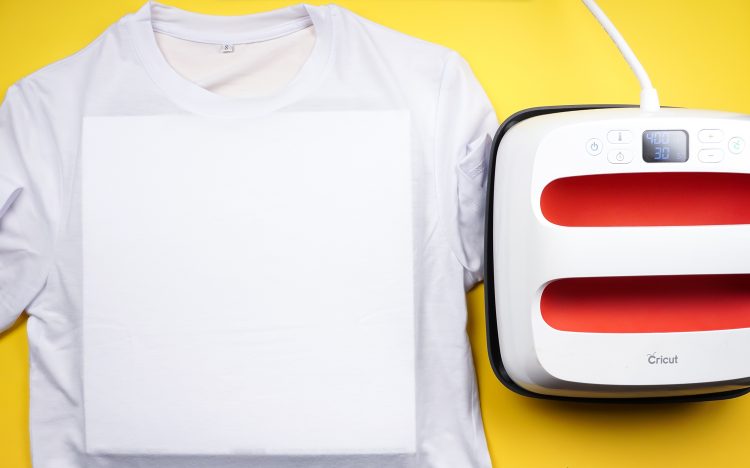
Place the piece of cardstock inside your shirt—this will help keep the ink from bleeding through to the back. Then put your EasyPress mat inside the shirt, between the cardstock and the back of the shirt.

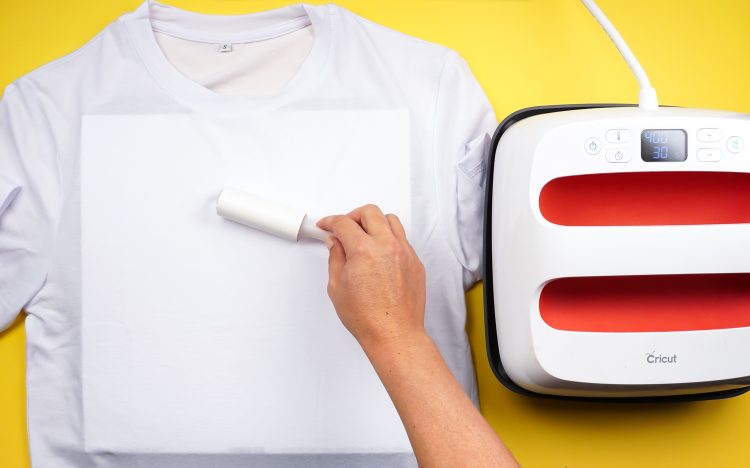
Use the lint roller to clean off the shirt before you do your transfer (see my troubleshooting tips). If you are using coasters, use a lint-free cloth to clean them off.

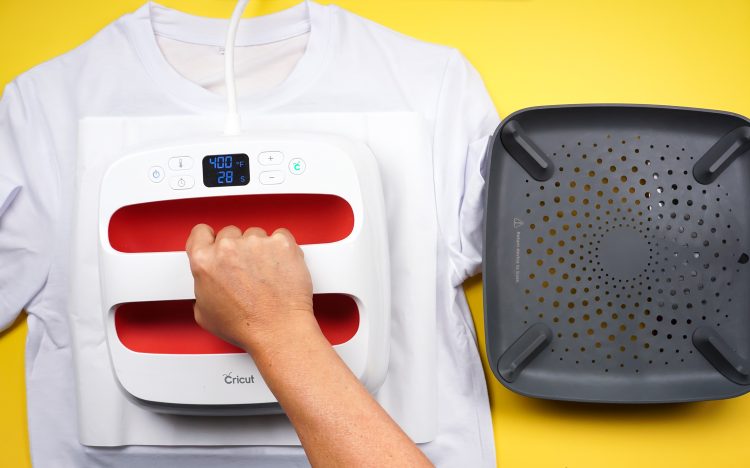
Place a piece butcher paper larger than your heat plate on top of your shirt and pre-press for 15 seconds to remove any moisture from the shirt.

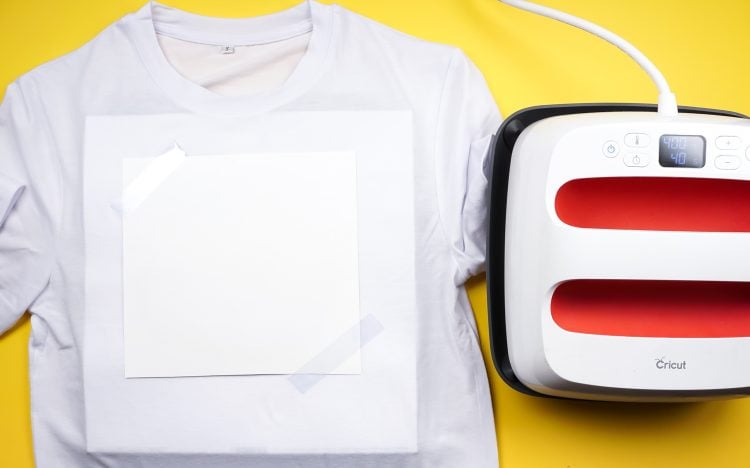
Remove the butcher paper and place your design face down on the shirt, securing it with heat-resistant tape if desired.

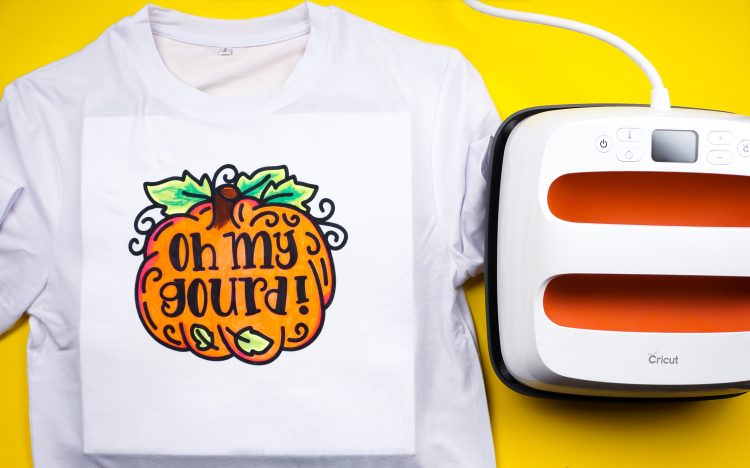
Then place the butcher paper on top of your design. Press for 40 seconds. Cricut says the weight of the EasyPress is enough. I haven’t found that to work for me, however, so I use quite a bit of pressure. Do NOT move the press around, even just slightly—this can cause the edges of your image to blur.

Lift carefully and let the shirt cool completely before you pick up the paper.

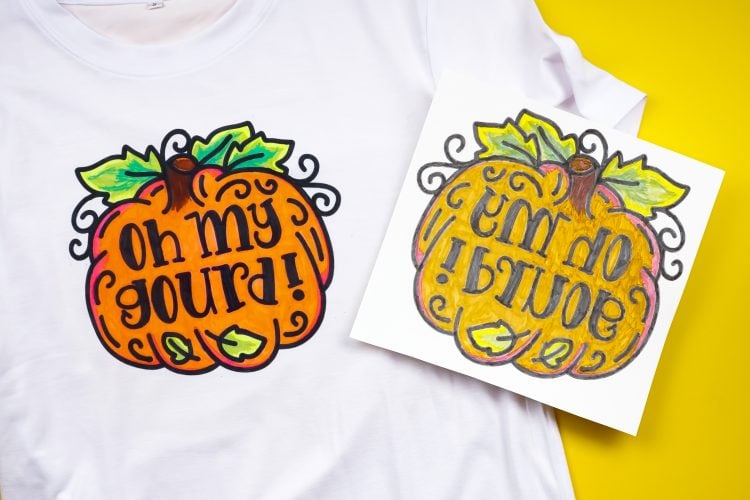
It’s pretty amazing how much different the pens look before and after! Like all Infusible Ink products, the pens look much duller before being transferred.

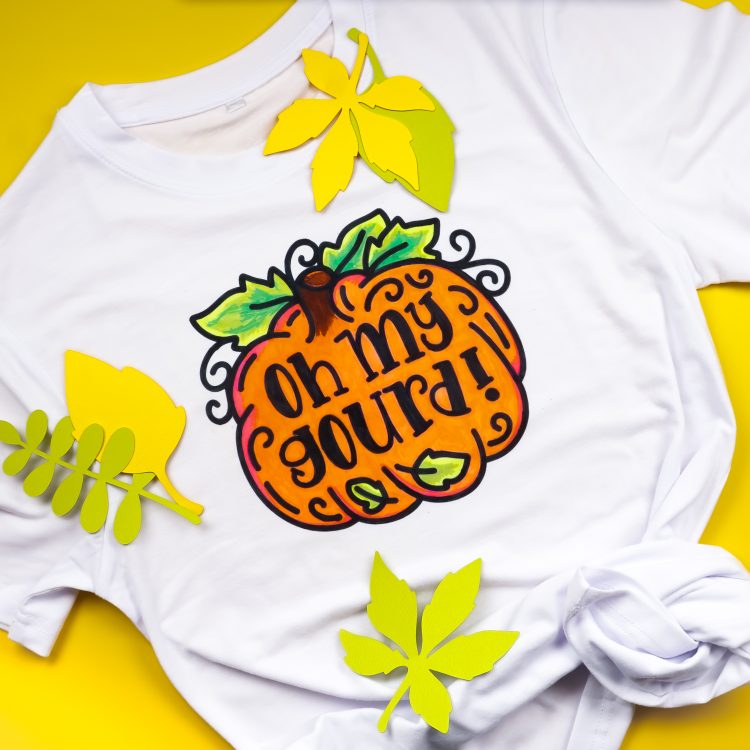
Seriously, though…is it fall yet? Because I’m totally over the 100° days—bring on the pumpkins, fall leaves, and scarves!


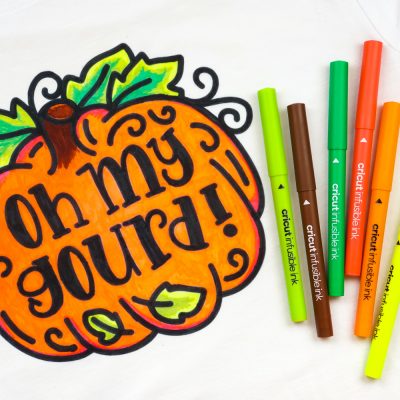
FALL T-SHIRT WITH THE CRICUT INFUSIBLE INK MARKERS AND PENS
Equipment
- Cricut Maker or
Supplies
- Image from Design Space (#M8A1D271)
- Your choice of blank – t-shirt, tote bag, etc.
Instructions
- Choose Your BlankFor this project, a Cricut women's t-shirt is being used. This would also be so cute on a tote bag!
- Create or Choose Your DesignStart by creating your design in Cricut Design Space. For this project we are using this funny Oh My Gourd! image from Design Space (#M8A1D271).

- This is a cut file. To be able to draw it with the Infusible Ink pen, change it to be a draw image.

- You'll notice that Design Space actually outlines the image when making it a draw image. I'll be coloring it in by hand after the Cricut draws it.For this project, the outline is going to be drawn with the black pen. If you want to use other colors, you can change that using the color picker in the Edit toolbar at the top. Also make sure to resize it to fit on your shirt.

- Draw Your Design on Laser PaperThen click Make It in the upper right. IMPORTANT: In the Prepare screen, mirror your image—that way it will be correct when you iron it onto your project.

- In the Make screen, select Copy Paper as your material. The software will tell you to load your pen or marker into the auxiliary housing on your Cricut.Place a piece of laser copy paper on a LightGrip mat and insert it into your Cricut. Press the flashing "C" and your Cricut will draw the image for you! If you are using more than one color for your project, your Cricut will prompt you to change your pens.

- If desired, color in your project by hand. Here, a variety of colors were used to create this look.


- Transfer Your ImageFor a shirt, set the temperature and time of your EasyPress 2 or heat press to 400° and 40 seconds (note that the heat guide says 385°, but it has been found that the press cools a bit when it hits the mat, so have had more success with a slightly hotter temperature). Trim around the edges of your transfer so there isn't a lot of white blank space. Place the piece of cardstock inside your shirt—this will help keep the ink from bleeding through to the back. Then put your EasyPress mat inside the shirt, between the cardstock and the back of the shirt.

- Use the lint roller to clean off the shirt before you do your transfer (see these troubleshooting tips). If you are using coasters, use a lint-free cloth to clean them off.

- Place a piece butcher paper larger than your heat plate on top of your shirt and pre-press for 15 seconds to remove any moisture from the shirt.

- Remove the butcher paper and place your design face down on the shirt, securing it with heat-resistant tape if desired.

- Then place the butcher paper on top of your design. Press for 40 seconds. Cricut says the weight of the EasyPress is enough. Haven't found that to work however, so use quite a bit of pressure. Do NOT move the press around, even just slightly—this can cause the edges of your image to blur.

- Lift carefully and let the shirt cool completely before you pick up the paper.

- It's pretty amazing how much different the pens look before and after! Like all Infusible Ink products, the pens look much duller before being transferred.




Comments & Reviews
Marsha Harrison says
The pens might be a better option if you’re working on a project that calls for precise writing and intricate patterns. The markers can be a better choice if your project calls for larger drawings or fills.
https://www.intermediaarts.org/cricut-infusible-ink-pens-vs-markers/
Anne says
Is it possible to outline a design with the infusible ink marker then layer in your design elements into made with the infusible ink sheets?
Crystal Summers says
Hi Anne,
I think what you are asking is whether you can outline the design with the marker and then cut the rest of the design with infusible ink sheets? Yes, that is totally possible! You’ll just want to be cautious of colors if you are layering.
Hope this helps!
Crystal, HLMS Community Manager
Linda Kalwishky says
How far in advance can the in fusible ink be on the copy paper before transferring to the project? Can you do the coloring in days ahead of transferring?
Crystal Summers says
Hi Linda,
You *should* be okay to do it a few days beforehand. However, we haven’t tested to see how long it would last. It should act similar to sublimation in that you can print (in this case, color) ahead of time and have it work just fine.
Hope this helps!
Crystal, HLMS Community Manager
Alexandra says
Hello!
I used the infusible ink macadores on a t-shirt but the colors were not vibrant like your pumpkin example. Please leave any coment and really appreciate
Crystal Summers says
Hi Alexandra,
Did you use Cricut Infusible Ink blanks or a shirt made of 100% polyester? Infusible Inks transfer best onto special poly-coated blanks. The higher the polyester color, the more vibrant the design.
Hope this helps. Feel free to email hello@heyletsmakestuff.com if you need to troubleshoot further.
Happy crafting!
Crystal, HLMS Community Manager
Alexandra says
Hello!!
I used the infusible ink macadores on a t-shirt but the colors were not vibrant like your pumpkin example. Please leave any coments. I appreciate.
Joy says
Can you use infusible ink pens and markers with the Cricut Joy?
Crystal Summers says
Hi Joy,
Yes, you can. Cricut makes a line of infusible ink markers (https://heyletsmakestuff.com/recommends/cricut-joy-infusible-ink-markers-cricut-com/) and pens (https://heyletsmakestuff.com/recommends/cricut-joy-infusible-ink-pens-cricut-com/) specific to the Cricut Joy.
I hope this helps!
Crystal, HLMS Community Manager
Cindy Dillard says
I am trying to use laser paper with the cricut infusable ink pens. I printed the design on laser paper then colored it in. I am placing them on sublimation mugs. I have done this before with regular printer paper and it worked fine. But with the Laser paper I am getting a flaking that is taking the ink off in places. Is that from the paper? someone told me to use sublimation paper, not laser paper????
Help, I am wasting my mugs! New to this and trying to figure out the correct way. I have a heat press with connections for mugs.
Monica says
Whats the aftercare instructions? How long do we wait to wash the shirt or project? And how long do these pens last on the design?
Crystal Summers says
Hi Monica,
I would wait at least 24 hours to wash. Cricut recommends you wash in cold water inside out and tumble dry low or hang dry. The design should last quite a long time. The ink is transferred into the fibers of the shirt, so it should last the lifetime of your blank.
Happy crafting!
Crystal, HLMS Community Manager