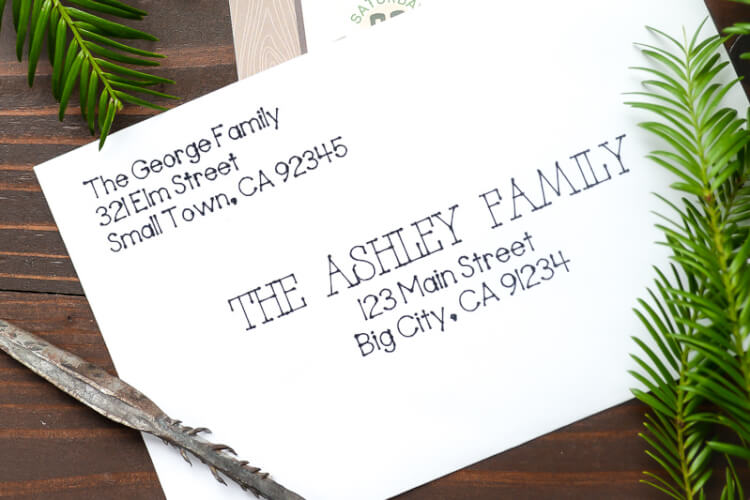
Put your Cricut Explore to work—have it address your birthday invitations! Using the pen tool, the Cricut Explore can beautifully “hand letter” your invitations for you.
I can’t believe it’s April! Mostly because that means that my twin babies are somehow going to be TWO next month! People are always telling me that it goes quickly, but when I’m up to my elbows in diapers and sleep regressions, it’s hard to take it to heart. But it’s true! We’ve been doing this parenting thing for almost two years and it’s gone by in the blink of an eye.
Today I’m here to share another project for their camping birthday party using my Cricut Explore Air 2. For Christmas, I used my Cricut Explore to address my holiday cards, so I knew I wanted to do the same for the boys’ camping-themed birthday invitations.
While using the Cricut to address invitations is not the fastest process out there (each card takes about 4 minutes, depending on the fonts you use), it is one of those things you can just set moving while you’re working on other things. I managed to clean my craft room while my Cricut was hard at work addressing the invitations for the boys’ party!
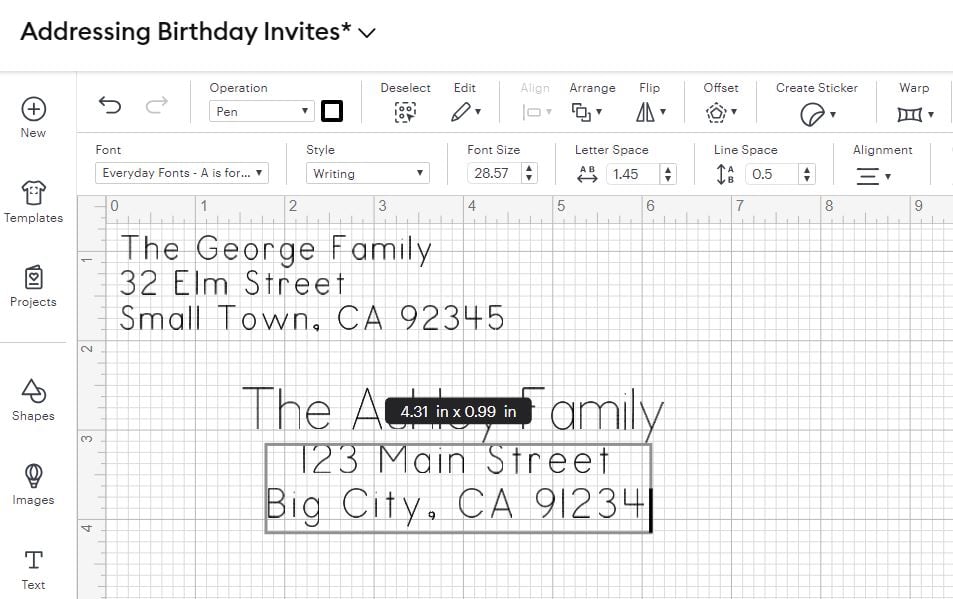
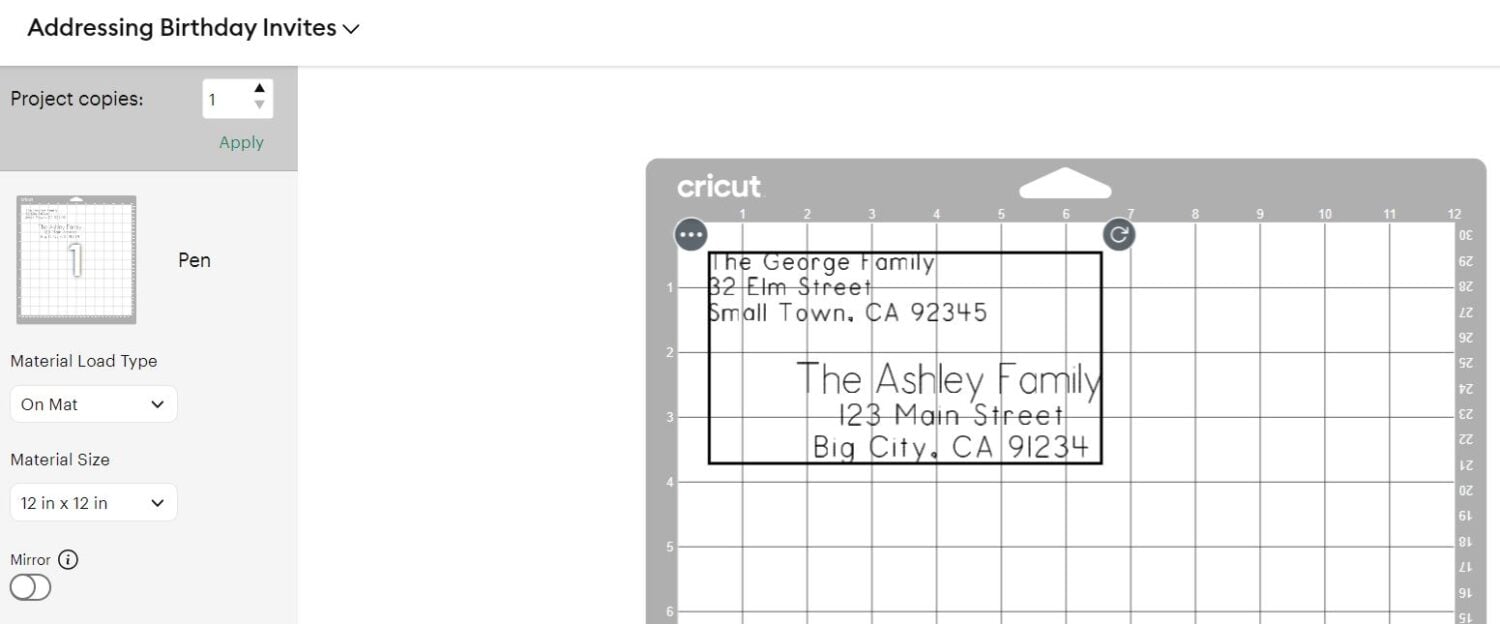
Start by opening the Cricut Design Space. Use the Type Tool in the left-hand sidebar menu to create your addresses. I have three text boxes — a simple font for our return address that doesn’t change from envelope to envelope, one for the invited family name in a fun font, and the same simple font for the family name address.
My envelopes are 5×7, so I used the grid in the Cricut Design Space to approximate the envelope.
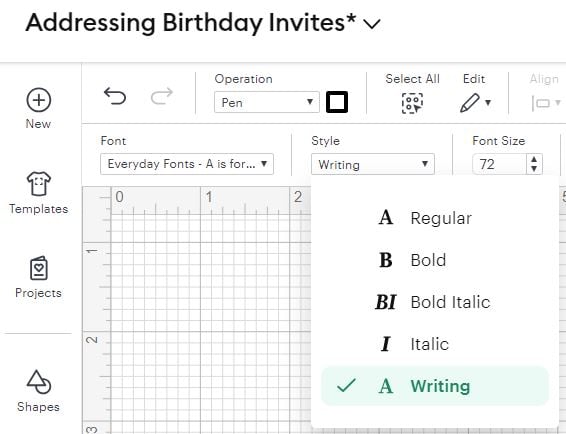
You will notice that ALL your fonts load into the Cricut Design Space, but you’ll want to select “Writing” from the Style dropdown menu on the left-hand side – (make sure you have your text selected—the Text Editing toolbar only appears if you have text selected). This will limit the fonts to ones that the Cricut Explore can write easily. It can write any font, but it will outline any that don’t have a designated writing style, which isn’t as neat as the single-line writing of fonts that have a writing style.
Once you have all of your text boxes ready to go, you’ll want to “attach” everything. Select the whole image and then click on the Attach icon in the lower right-hand corner of the screen, so that it appears as you’ve laid it out when the Cricut goes to write it. Then click the green MAKE button in the upper right-hand corner!
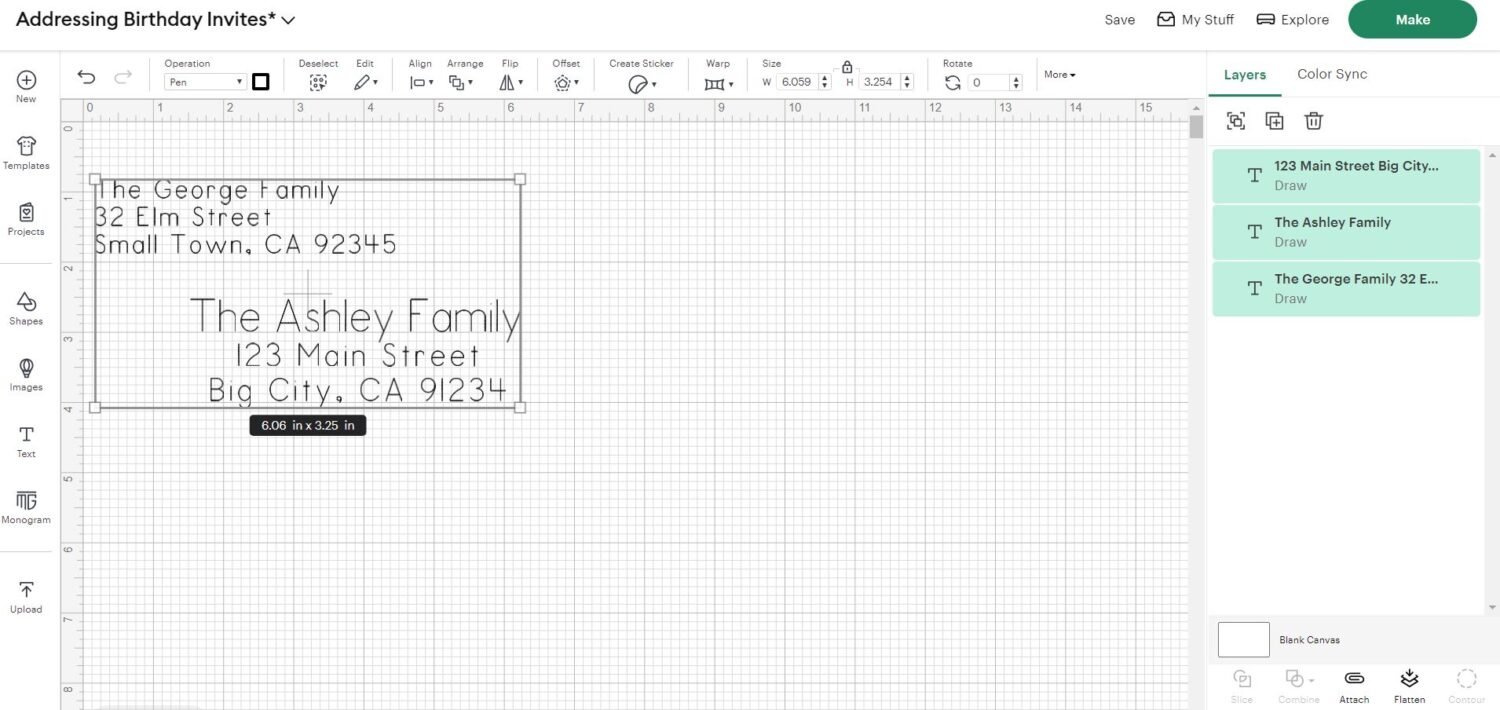
Once you are in the layout screen, nudge your whole project in 1/4″ so that it doesn’t write the return address right at the edge of your envelope.
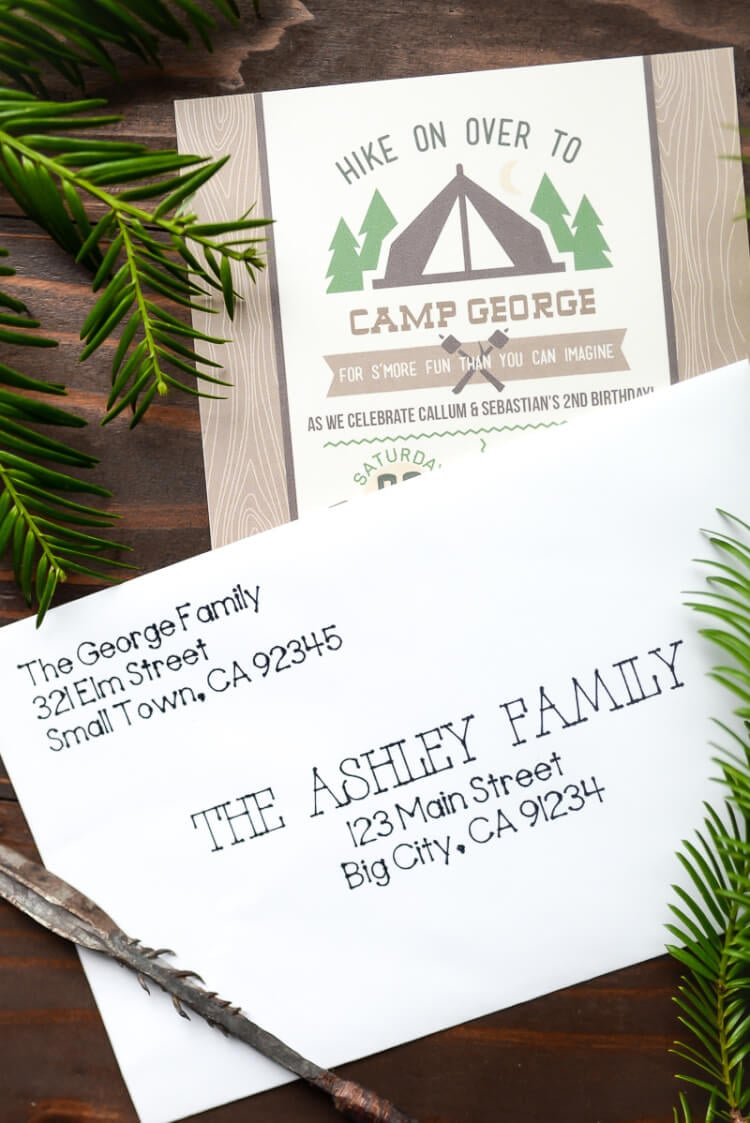
Put the pen in the auxiliary holder, making sure to press it in all the way, place your envelope in the upper left corner of your cutting mat, and click Go! I like using the finest .03 tip black pen for the most legible writing. I used a .04 here and wished it was little lighter. You can see how the .03 writes here.
And then you’re done! So easy, right?


Comments & Reviews
Katie says
What is the name of the font used in your example?
Lori says
Hi,
I have to use the app from my phone and I am trying to address save the date postcards. When I attach it and then go to “Make” it puts the name and address at the top in a straight line.
Also I don’t need to draw the outline of the postcard I put so I hide it but needed it to see where the address goes.
Is there anything I can do to keep the address where I have it in the measurement board?
Thank you
Amy Motroni says
Hi Lori,
Unfortunately, there’s no way to do what you need it to do.
You can figure out about where on the envelope the address should go, and then drag the address in the prepare screen to that approximate location.
Hope that helps!
Amy, HLMS Reader Support
Keisha says
any advise on calligraphy fonts that i can use? i want the last name of the address to be more fancy…
Amy Motroni says
Hi Keisha,
Cori uses the Elizabeth font a lot when she’s feeling fancy.
You can see it in action here: https://heyletsmakestuff.com/address-christmas-cards/
Happy Crafting!
Amy, HLMS Reader Support
Tracy Watkins says
How do you make the envelope in design space? I know how to do the writing, just never made an envelope.
Liz, HLMS Reader Support says
You’re going to LOVE making your own envelopes with your Cricut.
There are several templates and different designs in Design Space if you search for the word envelope in their image library.
There is also a useful blog post that shows how to cut and assemble envelopes and cards at the link below:
https://heyletsmakestuff.com/valentines-day-idea/
Happy Crafting!
Liz, HLMS Reader Support
Missy says
Is it possible to do more than one envelope at a time if you space the text boxes properly? You could fit at least 2 5×7 ones at a time. More if using a smaller size.
Liz, HLMS Reader Support says
Yes absolutely – you’ll just need to make sure that you space the lettering for each envelope so that they show up on your envelopes correctly each time – happy crafting!!
Liz, HLMS Reader Support
Kenadee says
Do you ever have a problem with the pin not picking up and it dragging? It will let me do about 2 invitations perfect then it stops picking up then pin and leaves lines everywhere!
Tarissa, HLMS Reader Support says
That sounds like a bummer! Has not happened to me. I would just make sure your pen is inserted correctly. Best of luck to you! :)
Tamra says
How do you cut and paste to your Cricut??? Help!!????
Thanks
Cori George says
Hi Tamra — I just use ctrl+C and ctrl+V (or cmd+C and cmd+V on a Mac). Your text should copy over. Hope that helps!
Adria Rapp says
gosh I’m so new at this and 78 years old don’t learn easy. I’ve had a cricut expression for years and have done scrapbooks for all my 2 children and 5 grandchildren. Now I bought a new Cricut Air Explore and don’t have a clue how to do things. I’ve never used any of the media things like blogs, face book or ?????????????????? don’t even know where to start. thanks
Cori George says
I have a page with a bunch of beginner tutorials and resources — hope this helps!!
https://heyletsmakestuff.com/cricut-explore/
Rachel says
I may be missing something here but you must cut and paste every address into this to address the cards? You can’t load an excel spreadsheet of who you want to address cards to or some sort of file? I am new to this so I could be missing something very important. I just don’t see doing them one by one even though they are beautiful. HELP….
Cori George says
Hi Rachel — yes, it’s a copy and paste situation. Like I said, it’s not a fast process but the results are worth it, especially if you don’t have pretty handwriting :)