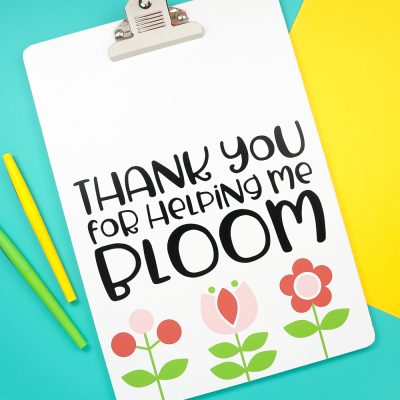
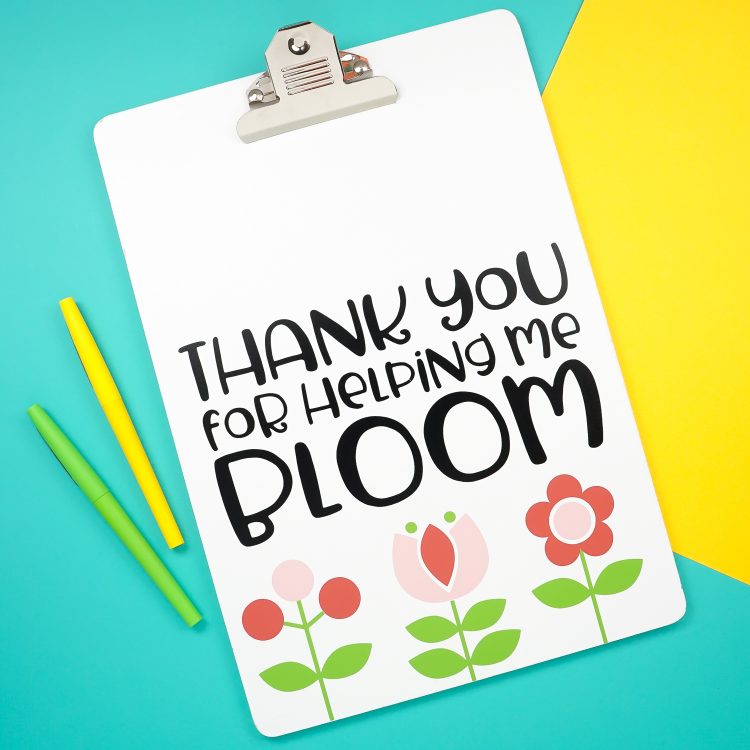
Say thank you to a favorite educator with this sweet and easy teacher gift idea! Use your Cricut Explore or Maker to make this clipboard, which says “thank you for helping me bloom,” along with cute Scandinavian-style flowers.

There are several times during the school year you might need a fast and easy teacher gift idea. When your kiddos are returning to the classroom in the fall, during Teacher Appreciation Week, for the teacher’s birthday, or at the end of the school year, right before summer gets going.
You may also want to celebrate a teacher outside the traditional classroom—a music instructor, dance teacher, or even a close family friend that has had a significant impact on your child’s life.
This “thanks for helping me bloom” clipboard is easy to make, inexpensive, and useful for your child’s teacher. It’s a great teacher gift idea that can be made using your Cricut Explore or Maker and four colors of permanent vinyl. Because none of the vinyl pieces is huge, it’s a great scrapbuster too—just use some of the colors you have on hand!
You could also make this project using one of the files in my Teacher SVG Bundle!

For this project, make sure to pick a “smooth” clipboard, like this white painted one, as opposed to one that is more rustic or made of particleboard. Vinyl needs a non-porous surface for long-lasting adherence.
Supplies for this Teacher Gift Idea

- Blank clipboard
- Cricut Explore or Maker
- Green StandardGrip mat
- Four colors of vinyl (permanent vinyl)
- Transfer tape
- SVG File (see below or design your own in Cricut Design Space)
Get the Free File
Want access to this free file? Join my FREE craft library! All you need is the password to get in, which you can get by filling out the form below. The file number is: C215.
How to Make this Teacher Gift Idea
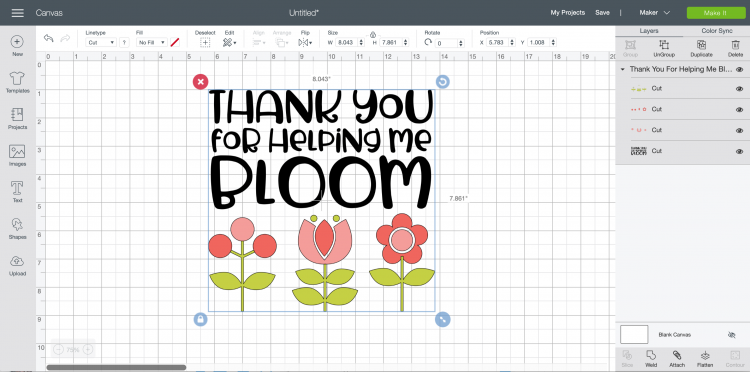
Start by either uploading the SVG from my shop to Cricut Design Space (see this tutorial for uploading instructions) or design your own using text and images in Cricut Design Space. The file is sized for a 9″ x 11″ clipboard, but you may need to resize for your project.

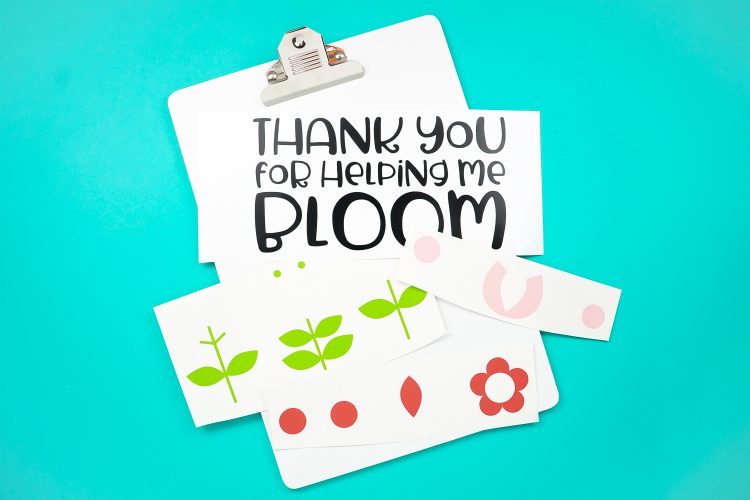
Cut out all the layers on your Cricut Explore or Maker using the standard Fine Point Blade. Then use these weeding tips to remove the excess permanent vinyl from your transfer, leaving just the words and the flower pieces.

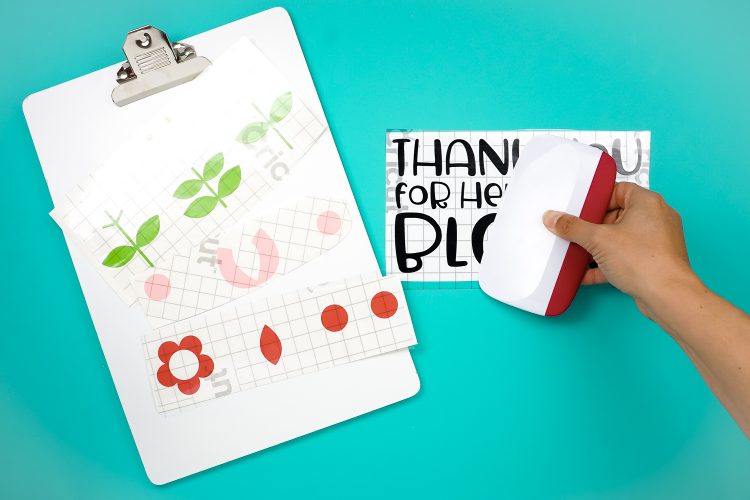
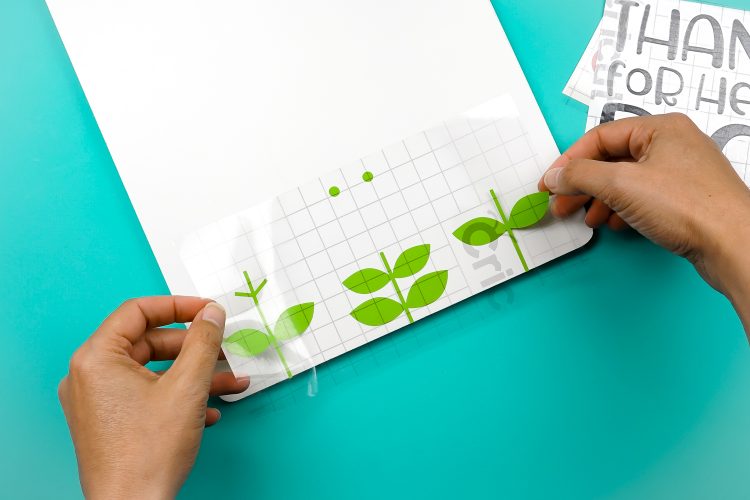
Cut a piece of transfer tape the size of each of your transfers. Carefully peel back the backing paper on the transfer tape and lay the transfer tape over your images. Use a scraper to burnish the transfer tape.

Carefully peel back the backing paper of your transfer—your image should stick to the transfer paper. If it doesn’t burnish some more.

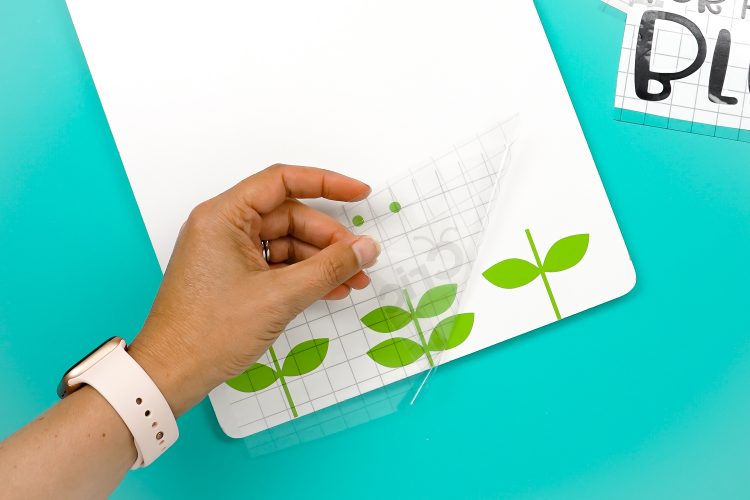
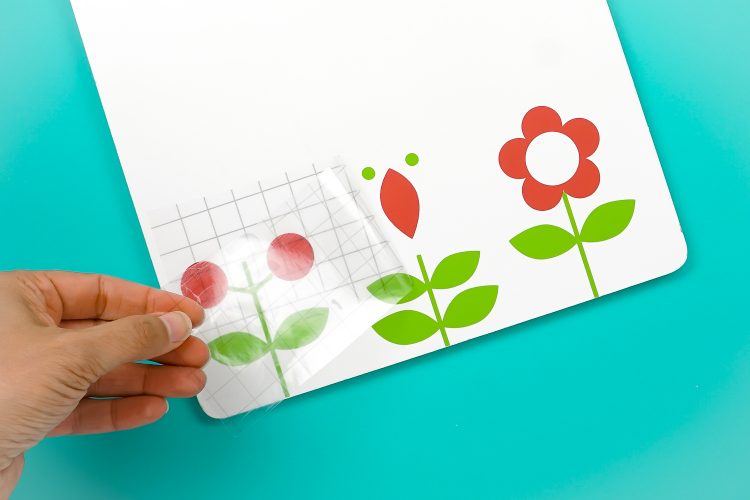
Then start with the green stems and carefully place them on the clipboard, using the scraper to burnish the transfer to the clipboard.

Peel back the transfer tape and your image should stick to your clipboard! If it doesn’t burnish again. Check out this transfer tape tips and tricks post for additional information.

Then do the same with your other three layers.

Once you’ve added the words, you’re done! Because the clipboard is smooth, the vinyl should stick well and last a long time—you don’t need a sealant.


THANK YOU FOR HELPING ME BLOOM CLIPBOARD
Equipment
Supplies
Instructions
- Start by either uploading the SVG from my shop to Cricut Design Space (see this tutorial for uploading instructions) or design your own using text and images in Cricut Design Space. The file is sized for a 9" x 11" clipboard, but you may need to resize for your project.

- Cut out all the layers on your Cricut Explore or Maker using the standard Fine Point Blade. Then use these weeding tips to remove the excess permanent vinyl from your transfer, leaving just the words and the flower pieces.

- Cut a piece of transfer tape the size of each of your transfers. Carefully peel back the backing paper on the transfer tape and lay the transfer tape over your images. Use a scraper to burnish the transfer tape.
- Carefully peel back the backing paper of your transfer—your image should stick to the transfer paper. If it doesn't burnish some more.
- Then start with the green stems and carefully place them on the clipboard, using the scraper to burnish the transfer to the clipboard.
- Peel back the transfer tape and your image should stick to your clipboard! If it doesn't burnish again. Check out this transfer tape tips and tricks post for additional information.
- Then do the same with your other three layers.
- Once you've added the words, you're done! Because the clipboard is smooth, the permanent vinyl should stick well and last a long time—you don't need a sealant.


Comments & Reviews
Jessica says
SO CUTE! Thanks for joining the Summer of Flowers event!