Learn the basics for creating a simple SVG cut file in Illustrator that can then be cut using a Cricut Explore or Silhouette Cameo.
UPDATE! I expanded this post as a part of my Illustrator for Crafters and SVG Designers series! You can view my new post Make an SVG from a Font or start at the beginning with my Adobe Illustrator Workspace Overview!
One of my goals recently is to tackle the reader questions I get a lot. One of those is how I design my own cut files for my Cricut Explore and Cricut Maker. While I sometimes design cut files using the Cricut Design Space, I prefer using Adobe Illustrator to design my own files.
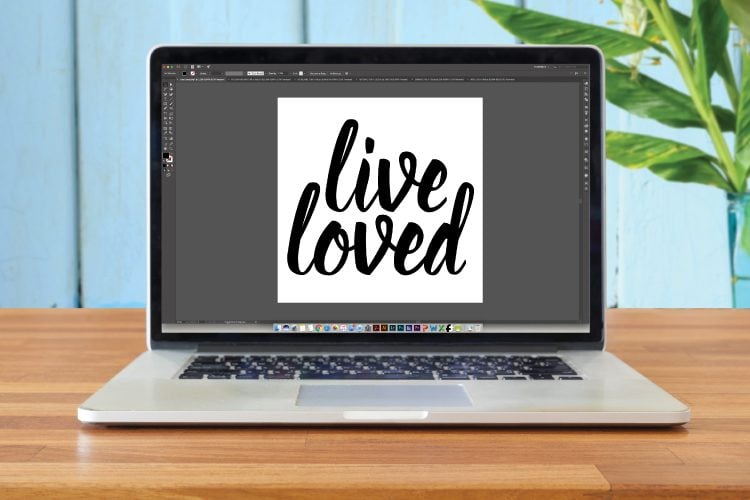
To start, we’ll create a simple design to show the basics of creating a cut file in Illustrator. Illustrator is a highly powerful software and can be intimidating for beginners. So let’s start with something easy—a quote: “Live Loved.”
I am working on a Mac, but I will also give the PC commands. I am a HUGE proponent of keyboard shortcuts, so I am going to share those as well in teal. USE THEM. I am twice as fast at designing files now because my hands rarely leave the keyboard.
NOTE: the layout of your workspace might be different than mine—I have found the menus that work best for me. If you don’t have a panel that I reference, go to Window and scroll down to find it, making sure to look in sub-menus if necessary.
Step 1: Create a New Document
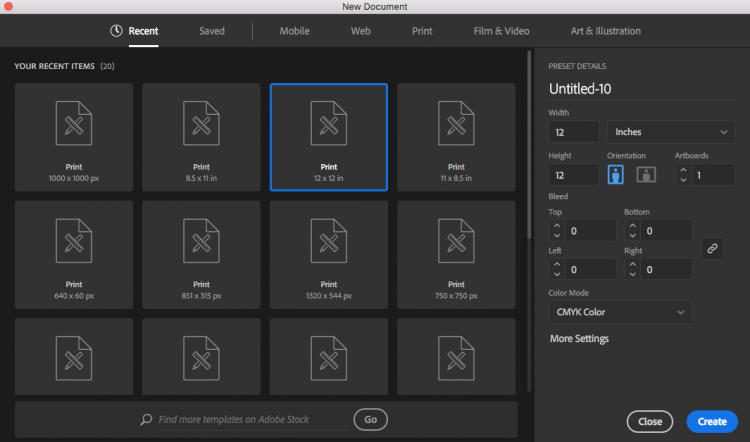
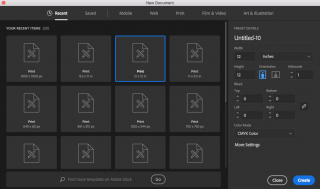
Create a new document that is 12″ x 12″ — the size of a Cricut cutting mat.
File > New (cmd+N / ctrl+N)
You can specify both the dimensions and the unit here. I choose 12 x 12 and set the unit to inches.
Step 2: Type Your Quote
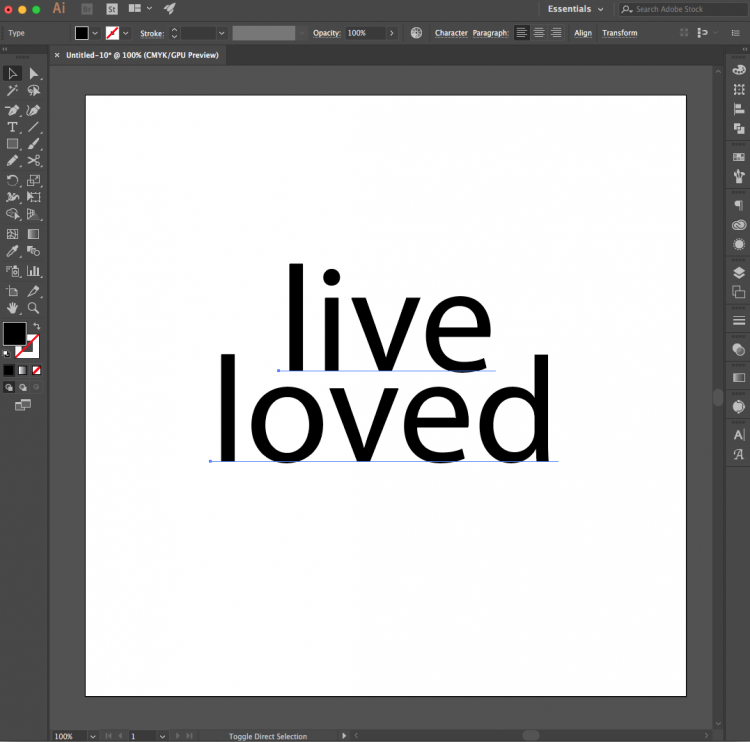
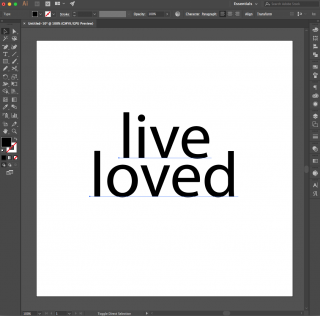
Click the Type Tool (T) in the left-hand panel and type your words: live loved. I used separate text boxes for each word, because I prefer to be able to move each line individually. It’s easier than dealing with line spacing and centering and all that.
Step 3: Change Your Font
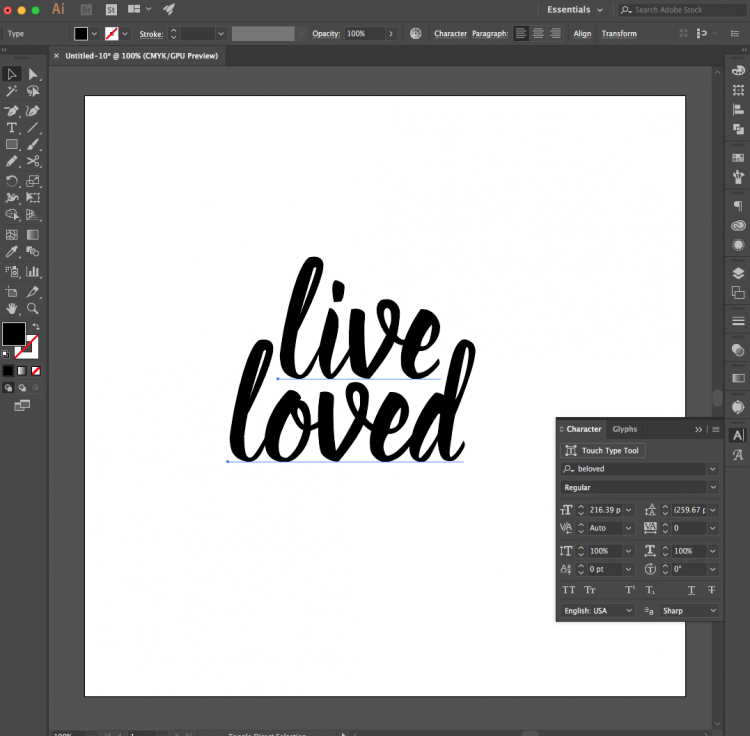
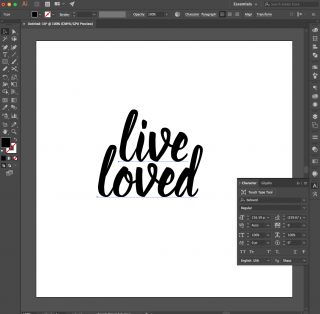
I didn’t love the default font (does anyone?) so I went to the menu Type > Font > Beloved. (Get the Beloved font here.) Once the new font was selected, I moved each line around until I was happy.
Step 4: Outline Your Fonts
The next step is to outline your fonts. This basically turns them from fonts into shapes. You must outline your fonts or the Cricut Design Space and Silhouette Studio will not be able to read them. You’ll get an error when you try to upload them.
Type > Create Outlines (shift+cmd+O / shift+ctrl+O)
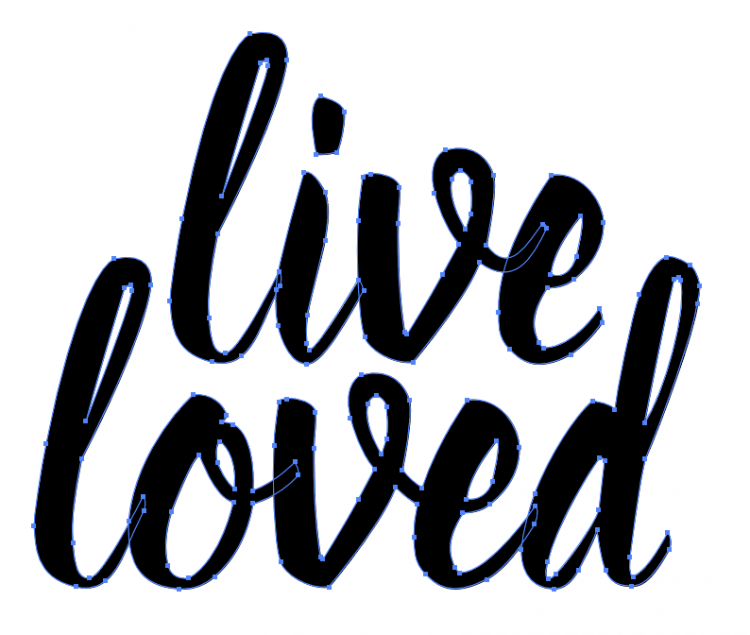
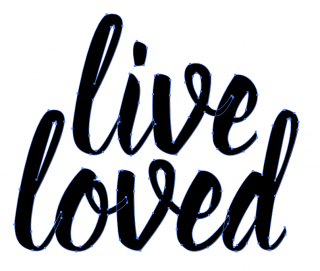
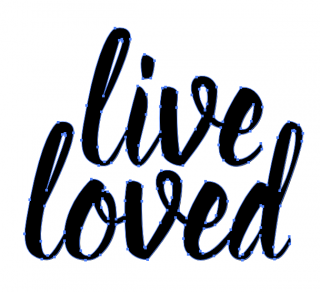
An important note about using fonts. The Cricut and Silhouette cut “simple” artwork the best. And by this I mean that the machine software prefers fewer “nodes.” It can cut incredibly intricate designs, but the more mathematically simple they are, the better. The easiest way to see your font’s nodes is looking at your fonts once you’ve outlined them. You’ll see that Beloved is a fairly straightforward font—a reasonable number of “nodes” (those tiny squares) around the font.
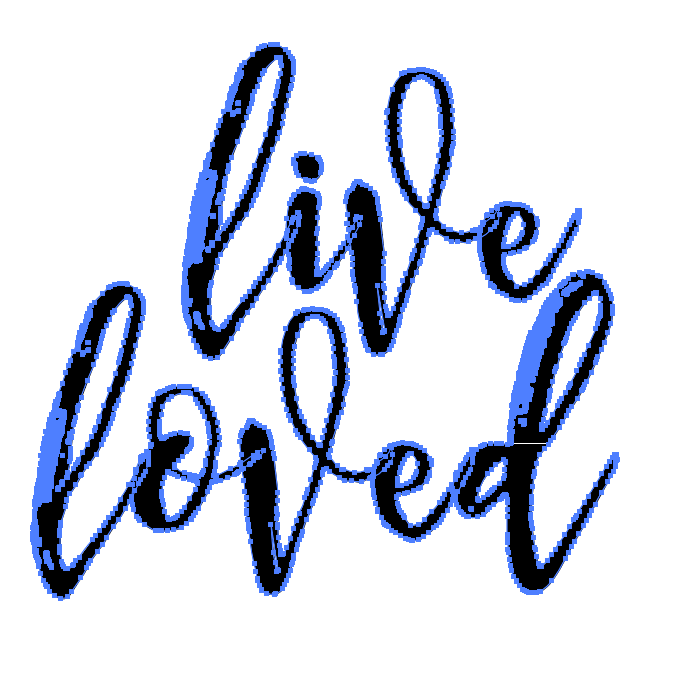
To illustrate a complicated font, I used one of my favorites, Midnight. Notice just how many more nodes there are in this font! For each of those nodes, the blade will change directions ever so—and there’s a good chance that it will mess up your materials with so many different cuts.
Step 5: Unite
As our file is right now, the Cricut will still read each letter as an individual shape and cut them separately. You can see in the above screenshot that the blue outlines of the letter tails overlap each other. To make each word one single shape, you’ll use the Unite tool under the Pathfinder Panel.
Window > Pathfinder (shift+cmd+F9 / shift+ctrl+F9)
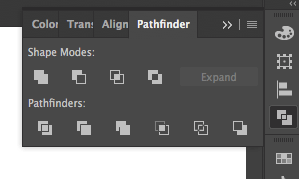
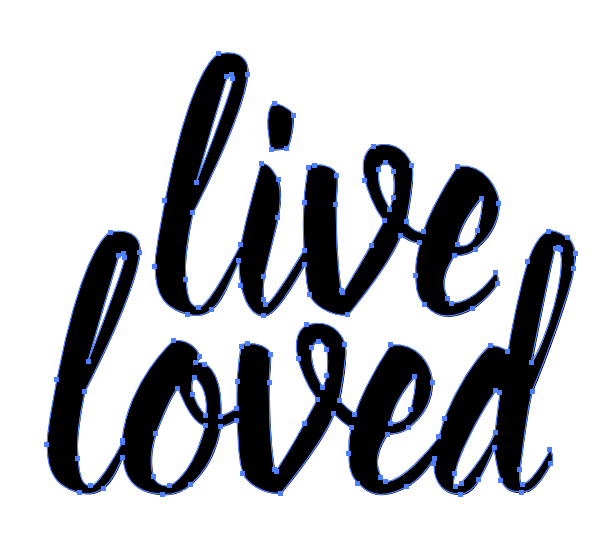
The Unite tool is the first top left option under Shape Modes (if you hover over each button, it will tell you what they are). Make sure all of your text is selected and click the Unite option. You’ll see that the tails of each letter are gone and you now have one continuous shape.
Step 6: Make a Compound Path
If you want, you can continue to saving as an SVG at this point. But I like to do one more quick step to save myself some time in the Cricut Design Space. Right now, this image we’ve made is actually three shapes — “live,” “loved,” and the dot over the “i” in lived (it’s separate because it’s not overlapping either of the other two shapes). If you bring this file into the Cricut Design Space as is, you’ll have these three shapes and you’ll need to attach them to cut them properly. Instead, I make everything a compound path in Illustrator and it imports it as one shape.
Object > Compound Path > Make (cmd+8 / ctrl+8)
Step 7: Save as an SVG
Illustrator files are natively “.ai” file extensions. Usually I will save an Illustrator version of my artwork, and then save a separate SVG for cutting.
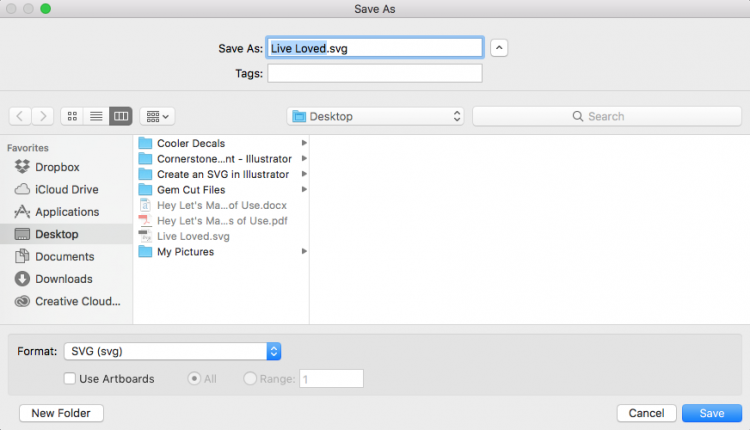
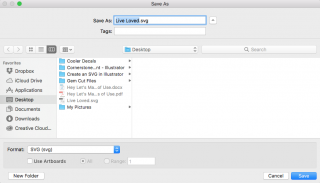
File > Save As (shift+cmd+S / shift+ctrl+S)
In the dropdown Format menu, select SVG and save! Don’t worry about any of the options in the pop-up—just hit OK and your file will save as an SVG that you can open in the Cricut Design Space or Silhouette Studio Designer Edition.
Then you’re ready to cut your file and use it however you’d like!

I hope this tutorial helps you get your feet wet in using Illustrator to design cut files for the Cricut and Silhouette! Illustrator is such a wonderful program with so many capabilities—it’s time to start exploring them!
Are you interested in the whole Adobe Illustrator Series? Click on the links below to delve further into the tutorials. It is strongly recommended to follow them in order. I have also added some ‘bonus’ links for more information on Adobe Illustrator.
- Workspace Overview (video)
- Paths, Anchor Points, and Handles (video)
- Make an SVG from a Font (video)
- Tips for Using Fonts in SVGs (video)
- Color Basics (video)
- Using Shapes and Lines to Make Illustrations (video)
- Using the Pen Tool (video)
- Creating Fun Text Effects (video)
- Image Trace (video)
- 10 Quick Tricks for SVG Design (video)
Bonus Links:
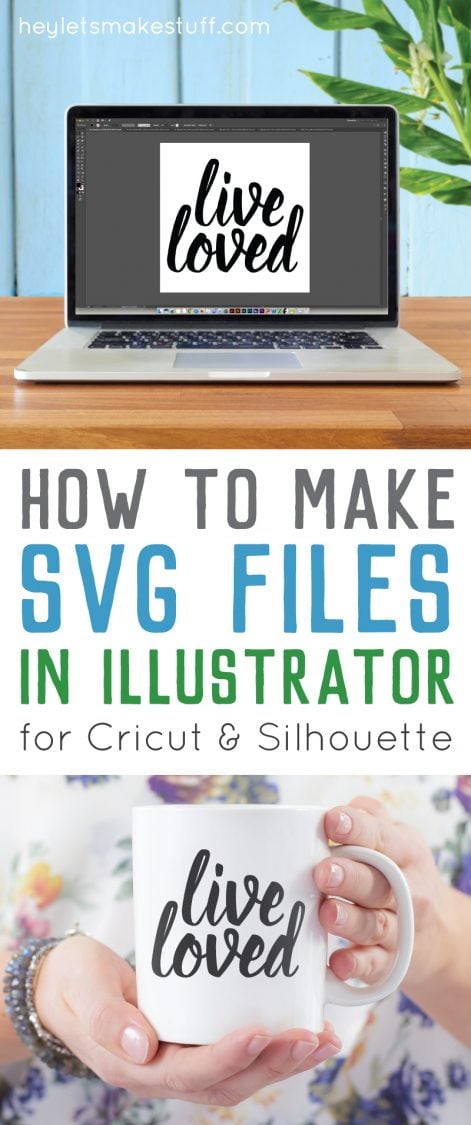
HOW TO MAKE SVG FILES FOR CRICUT USING ILLUSTRATOR
Equipment
- Adobe Illustrator installed on your PC or laptop
Instructions
- Step 1: Create a New DocumentCreate a new document that is 12" x 12" — the size of a Cricut cutting mat.File > New (cmd+N / ctrl+N)You can specify both the dimensions and the unit here. Choose 12 x 12 and set the unit to inches.

- Step 2: Type Your QuoteClick the Type Tool (T) in the left-hand panel and type your words: live loved. Use separate text boxes for each word, because it will allow you to move each line individually. It's easier than dealing with line spacing and centering and all that.

- Step 3: Change Your FontIf you don't love the default font (does anyone?) go to the menu Type > Font > Beloved (or font of your choice) Once the new font is selected, move each line around until you are happy with it.

- Step 4: Outline Your FontsThe next step is to outline your fonts. This basically turns them from fonts into shapes. You must outline your fonts or the Cricut Design Space and Silhouette Studio will not be able to read them. You'll get an error when you try to upload them.Type > Create Outlines (shift+cmd+O / shift+ctrl+O)

- An important note about using fonts. The Cricut and Silhouette cut "simple" artwork the best. And by this, it means that the machine software prefers fewer "nodes." It can cut incredibly intricate designs, but the more mathematically simple they are, the better. The easiest way to see your font's nodes is looking at your fonts once you've outlined them. You'll see that Beloved is a fairly straightforward font—a reasonable number of "nodes" (those tiny squares) around the font.To illustrate a complicated font, see this favorite font named, Midnight. Notice just how many more nodes there are in this font! For each of those nodes, the blade will change directions ever so—and there's a good chance that it will mess up your materials with so many different cuts.

- Step 5: UniteAs our file is right now, the Cricut will still read each letter as an individual shape and cut them separately. You can see in the screenshot that the blue outlines of the letter tails overlap each other. To make each word one single shape, you'll use the Unite tool under the Pathfinder Panel.Window > Pathfinder (shift+cmd+F9 / shift+ctrl+F9)

- The Unite tool is the first top left option under Shape Modes (if you hover over each button, it will tell you what they are). Make sure all of your text is selected and click the Unite option. You'll see that the tails of each letter are gone and you now have one continuous shape.

- Step 6: Make a Compound PathIf you want, you can continue to saving as an SVG at this point. But do one more quick step to save yourself some time in the Cricut Design Space. Right now, this image we've made is actually three shapes — "live," "loved," and the dot over the "i" in lived (it's separate because it's not overlapping either of the other two shapes). If you bring this file into the Cricut Design Space as is, you'll have these three shapes and you'll need to attach them to cut them properly. Instead, make everything a compound path in Illustrator and it imports it as one shape.Object > Compound Path > Make (cmd+8 / ctrl+8)
- Step 7: Save as an SVGIllustrator files are natively ".ai" file extensions. Recommended to save an Illustrator version of your artwork, and then save a separate SVG for cutting.File > Save As (shift+cmd+S / shift+ctrl+S)In the dropdown Format menu, select SVG and save! Don't worry about any of the options in the pop-up—just hit OK and your file will save as an SVG that you can open in the Cricut Design Space or Silhouette Studio Designer Edition.

- Then you're ready to cut your file and use it however you'd like!




Comments & Reviews
Judy Quiroga says
I am having problems creating a ready to cut file for my cricut explorer 2. Do you create svg files? Please help
Cori George says
Sorry — my busy schedule doesn’t allow me to do custom work! Hopefully you’re able to find someone to help!
Cece says
Hi Cori, so glad I found your blog! I have the Explore Air and been trying to figure out how can I find info on how to create my own images. You are awesome to share this knowledge! Thank you!
XOXO <3
Tarissa, HLMS Reader Support says
I’m so glad you found the blog, too! :)
Erin R says
Hello! Would this process work for getting the cricut to draw the design/words?
Thanks for the great information!
Tarissa Hopkins says
Yes, you would just need to adjust the setting in your Cricut Design Space to draw rather than cut. Hope that helps!
Lori says
Now I have a question for you…. I made an image on my iPad Pro using Graphics App. I have saved it as an PSD and an SVG. When I pull it into Design Space, I get a black image on every layer ( 1 black and 1 colored). I figured out that the black was the line or outside and the color is the color fill. I even tried DL illustrator and seeing if that made a difference. Same issue happening. I really like doing the work on my iPad with the pencil. I was just hoping to eliminate the black layers – I want it to look professional for sharing with others. Thanks for your help
Ashley says
Do you have a tutorial or tips on how to do this with a pretty intricate design? I have a friend wanting me to cut out a logo that his company created. He emailed me the logo as a jpeg and as a png file. But everytime I try to import it into design space, it is only allowing me to save it as a print then cut file. When i try to change it to just a cut file, it blanks out the whole image. Could illustrator be used to “Edit” the file slightly, to be saved as an SVG file, and then loaded into design space to be used as a cut only file?
Cori George says
I am working on a tutorial for uploading JPGs, but yes, most often they are too detailed or there is not enough contrast to make them into a good cut file. Illustrator might give you better luck, but it’s limited as well for turning jpgs (especially detailed ones or one with lots of similar colors) into SVGs.
I know that’s not a lot of help — it’s just hard for software (any software!) to change a pixel file (like a jpg) into a vector file (like an SVG).
Lori says
I have used inkscape so far for making an svg out of PNG or JPG – works great.
Tammy says
If you will google convert jpeg png to svg free online, there are several sites that do it. Once you pick your site, upload the image and click convert, then click download and it will download it as an svg image. On more intricate stuff I find this is much easier to do! Some sites do better than others so if it isn’t right on the first one convert it using a different site. Also if you use the png image in your Cricut design space most of the time you won’t have as much editing to do as you will a jpeg one. Hope this helps
Luis Castellon says
Can you do this workflow without having to purchase Access? I want to make my designs and send them straight to the cutter, they seem greedy by making it so restrictive. Thanks.
Cori George says
Yes! You can use Cricut Design Space without a subscription to upload your own files. You do not need Cricut Access to use Cricut Design Space — it’s free. Hope that helps!
Marianne says
I make all my SVG files in Illustrator too. Have you had any issues when importing to design space? Every once in a while I get a random wonky line. Something that should be straight is warped etc. Cricut support has no idea how to help.
Cori George says
Hi Marianne — yes, on occasion things aren’t 100% right. Often I have to re-create the piece that is wonky or zoom waaaaaay in to see if there is an extra node or something. I get way fewer of them than I used to — I think the more and more you get comfortable with Illustrator, the less often you’ll experience these little hiccups.
Michelle Scott says
thank you for this quick blurb, just got a cricut for christmas and was hoping someone on the internet would have some tips on how I can use illustrator and my cricut together, going to try your tips out once I hit enter!
Erica says
I’m having issue with Cricut resizing my svg uploads… any issues on your end or suggestions? I’m actually using Inkscape not Illustrator, but same principal.
Cori George says
Hi Erica — are they not pulling into Design Space at the same size you are designing them in Inkscape?
Michelle Cascio says
I’ve gotten text mastered, thanks to your tutorial, but one thing I can’t seem to figure out is how to make a circle border in Illustrator and then import it into Design Space. Once I bring it into design space, it turns completely black (filled in solid black rather than an outline or border). I have looked at the layers box and there is only the path…no clipping mask. It looks perfect in Illustrator. I’m not sure what I’m doing wrong and can’t find the answer online.
Cori George says
Michelle — could you send some screenshots to hello@heyletsmakestuff.com? Thanks!