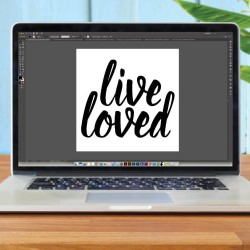
HOW TO MAKE SVG FILES FOR CRICUT USING ILLUSTRATOR
Learn the basics for creating a simple SVG cut file in Illustrator that can then be cut using a Cricut Explore or Silhouette Cameo.
Equipment
- Adobe Illustrator installed on your PC or laptop
Instructions
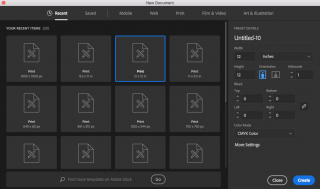
- Step 1: Create a New DocumentCreate a new document that is 12" x 12" -- the size of a Cricut cutting mat.File > New (cmd+N / ctrl+N)You can specify both the dimensions and the unit here. Choose 12 x 12 and set the unit to inches.
- Step 2: Type Your QuoteClick the Type Tool (T) in the left-hand panel and type your words: live loved. Use separate text boxes for each word, because it will allow you to move each line individually. It's easier than dealing with line spacing and centering and all that.
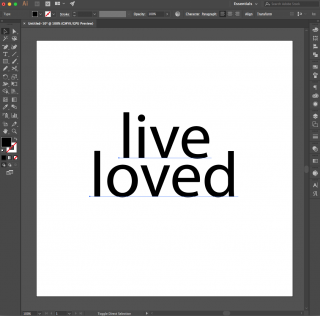
- Step 3: Change Your FontIf you don't love the default font (does anyone?) go to the menu Type > Font > Beloved (or font of your choice) Once the new font is selected, move each line around until you are happy with it.
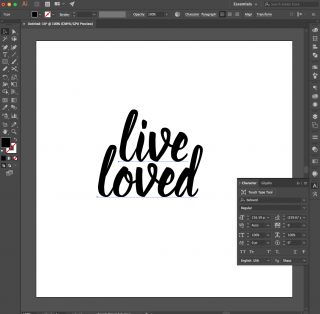
- Step 4: Outline Your FontsThe next step is to outline your fonts. This basically turns them from fonts into shapes. You must outline your fonts or the Cricut Design Space and Silhouette Studio will not be able to read them. You'll get an error when you try to upload them.Type > Create Outlines (shift+cmd+O / shift+ctrl+O)
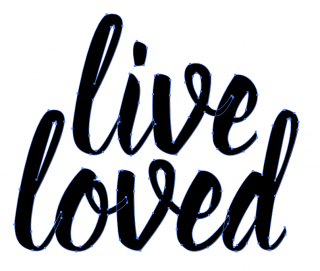
- An important note about using fonts. The Cricut and Silhouette cut "simple" artwork the best. And by this, it means that the machine software prefers fewer "nodes." It can cut incredibly intricate designs, but the more mathematically simple they are, the better. The easiest way to see your font's nodes is looking at your fonts once you've outlined them. You'll see that Beloved is a fairly straightforward font—a reasonable number of "nodes" (those tiny squares) around the font.To illustrate a complicated font, see this favorite font named, Midnight. Notice just how many more nodes there are in this font! For each of those nodes, the blade will change directions ever so—and there's a good chance that it will mess up your materials with so many different cuts.

- Step 5: UniteAs our file is right now, the Cricut will still read each letter as an individual shape and cut them separately. You can see in the screenshot that the blue outlines of the letter tails overlap each other. To make each word one single shape, you'll use the Unite tool under the Pathfinder Panel.Window > Pathfinder (shift+cmd+F9 / shift+ctrl+F9)
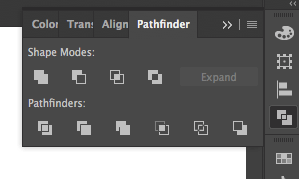
- The Unite tool is the first top left option under Shape Modes (if you hover over each button, it will tell you what they are). Make sure all of your text is selected and click the Unite option. You'll see that the tails of each letter are gone and you now have one continuous shape.

- Step 6: Make a Compound PathIf you want, you can continue to saving as an SVG at this point. But do one more quick step to save yourself some time in the Cricut Design Space. Right now, this image we've made is actually three shapes -- "live," "loved," and the dot over the "i" in lived (it's separate because it's not overlapping either of the other two shapes). If you bring this file into the Cricut Design Space as is, you'll have these three shapes and you'll need to attach them to cut them properly. Instead, make everything a compound path in Illustrator and it imports it as one shape.Object > Compound Path > Make (cmd+8 / ctrl+8)
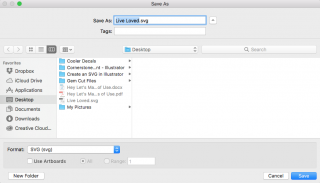
- Step 7: Save as an SVGIllustrator files are natively ".ai" file extensions. Recommended to save an Illustrator version of your artwork, and then save a separate SVG for cutting.File > Save As (shift+cmd+S / shift+ctrl+S)In the dropdown Format menu, select SVG and save! Don't worry about any of the options in the pop-up—just hit OK and your file will save as an SVG that you can open in the Cricut Design Space or Silhouette Studio Designer Edition.
- Then you're ready to cut your file and use it however you'd like!
