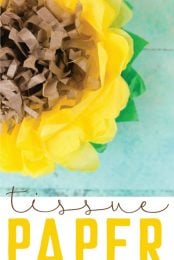
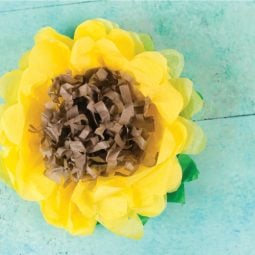
Celebrate summer with these bright tissue paper sunflowers! These are easy to make using a few sheets of tissue paper, scissors, and a stapler!
We’re right at the peak of sunflower season here in northern California. I’ve decided to bring some of that sunshine indoors by making tissue paper sunflowers — the best part is, they’ll last year-round!
Tissue paper flowers are my go-to decoration for parties, showers, and weddings, so I’m always looking for ways to create a new look out for one of my favorite crafts. Sunflowers are just the beginning — I also crafted a poppy and a peony which I’ll be sharing soon! The best part about tissue paper flowers is that they are both inexpensive and easy to make.
Tissue Paper Sunflower Supplies:
Tissue Paper Sunflower Instructions:
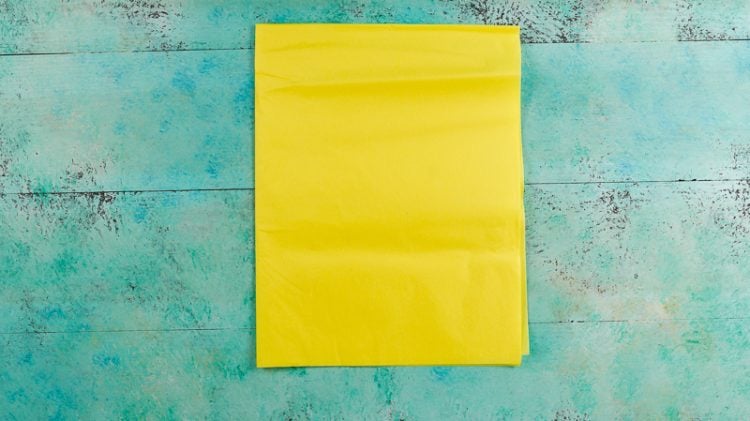
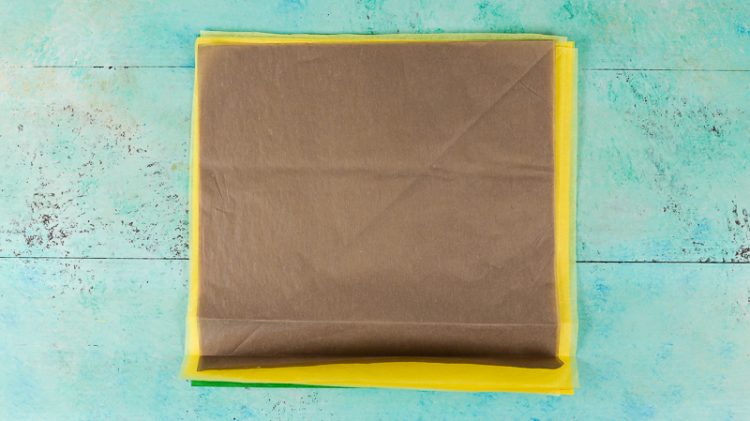
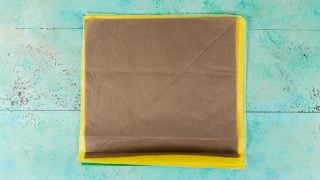
For the sunflower, you’re going to need two sheets of four colors — brown, light yellow, dark yellow, and green. Start with one color of your tissue paper. Fold the two sheets of tissue paper in half.

Fold in half again.
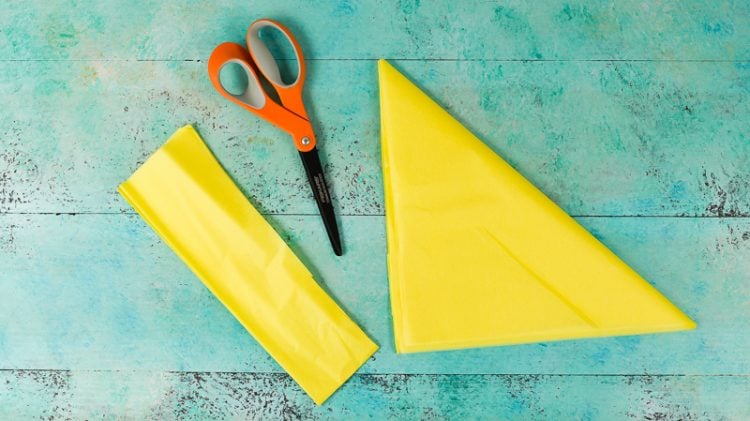
Find the corner with all of the separate pieces of paper (not one with a fold). Take this corner and fold it to the opposite edge to make a triangle.

Trim off the extra rectangle of paper.
When you open up the triangle to make a square, you’ll notice that some edges still have a fold. Trim off that edge by slipping your scissors into the fold and cut to separate all the pieces of paper. Basically, you want eight individual squares. (Yes, I have “paper” written on my scissors like any person who has a separate pair of fabric scissors!)

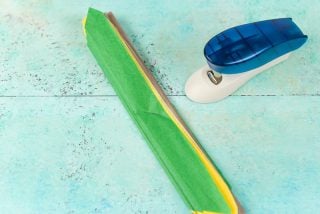
Fold the paper, accordion style. I usually ended up with six or seven folds.

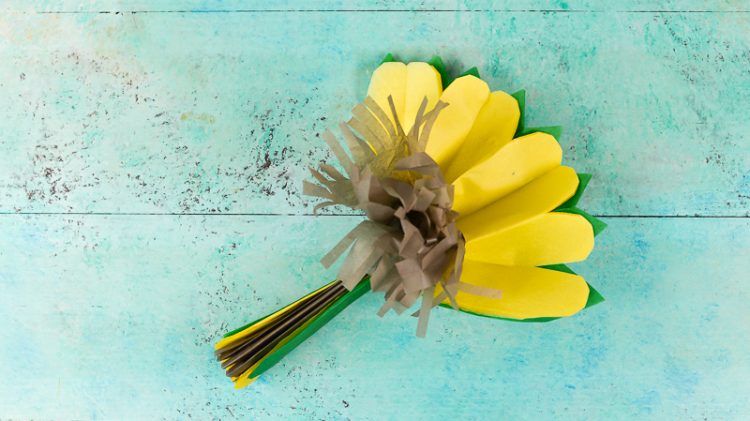
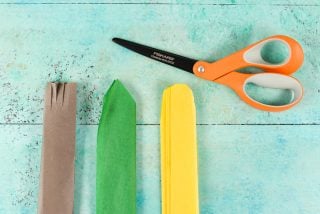
Separate each of your layers — two pieces of brown for the center, four pieces of yellow for the petals, and two pieces of green for the leaves. Trim each set like this:
- Brown: fringe
- Green: triangle
- Yellow: round

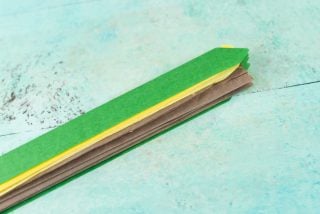
Then nest all of your layers back together in the same order.

Staple the accordion in the center.

Carefully start to separate the layers of the sunflower. Pull from the inside of each layer, as opposed to out on each edge. This will help keep the flowers from tearing.
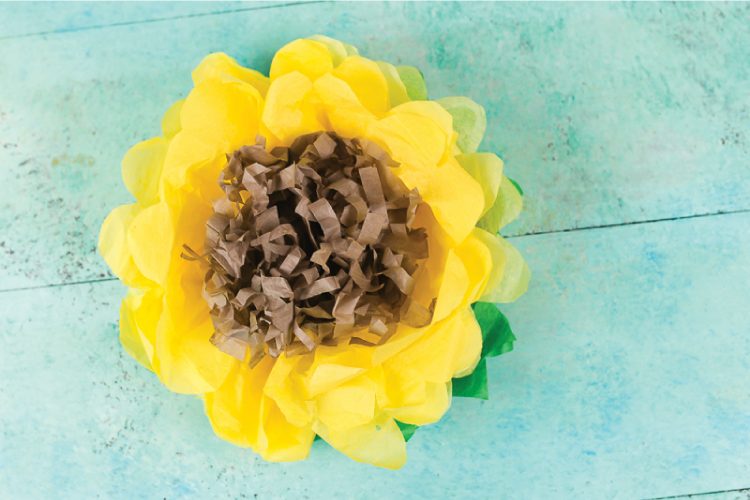
Keep fluffing the layers until you have half the flower, then fluff the other side. Once you have it all fluffed, crinkle the brown center a bit and use your scissors to clean up any long pieces or weirdly shaped petals.
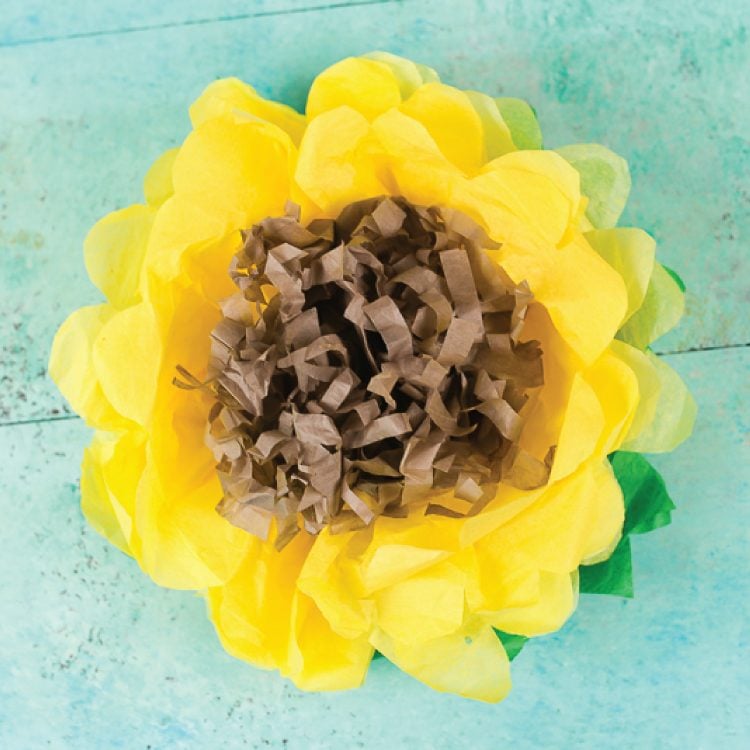
So cute, right?
Would you like another paper flower project? Check out my blog on How to Make a Three Color Tissue Paper Flower!
HOW TO MAKE TISSUE PAPER SUNFLOWERS
Supplies
Instructions
- For the sunflower, you're going to need two sheets of four colors — brown, light yellow, dark yellow, and green. Start with one color of your tissue paper. Fold the two sheets of tissue paper in half.

- Fold in half again.
- Find the corner with all of the separate pieces of paper (not one with a fold). Take this corner and fold it to the opposite edge to make a triangle.
- Trim off the extra rectangle of paper.
- When you open up the triangle to make a square, you'll notice that some edges still have a fold. Trim off that edge by slipping your scissors into the fold and cut to separate all the pieces of paper. Basically, you want eight individual squares.

- Fold the paper, accordion style. Should end up with six or seven folds.
- Separate each of your layers — two pieces of brown for the center, four pieces of yellow for the petals, and two pieces of green for the leaves. Trim each set like this:Brown: fringeGreen: triangleYellow: round
- Then nest all of your layers back together in the same order.
- Staple the accordion in the center.
- Carefully start to separate the layers of the sunflower. Pull from the inside of each layer, as opposed to out on each edge. This will help keep the flowers from tearing.
- Keep fluffing the layers until you have half the flower, then fluff the other side. Once you have it all fluffed, crinkle the brown center a bit and use your scissors to clean up any long pieces or weirdly shaped petals.


Leave A Reply!