
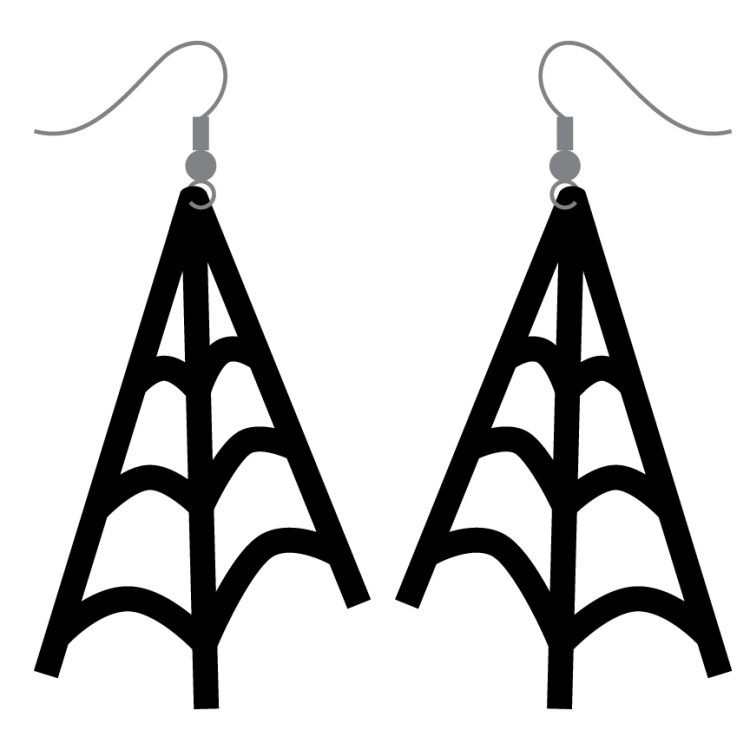
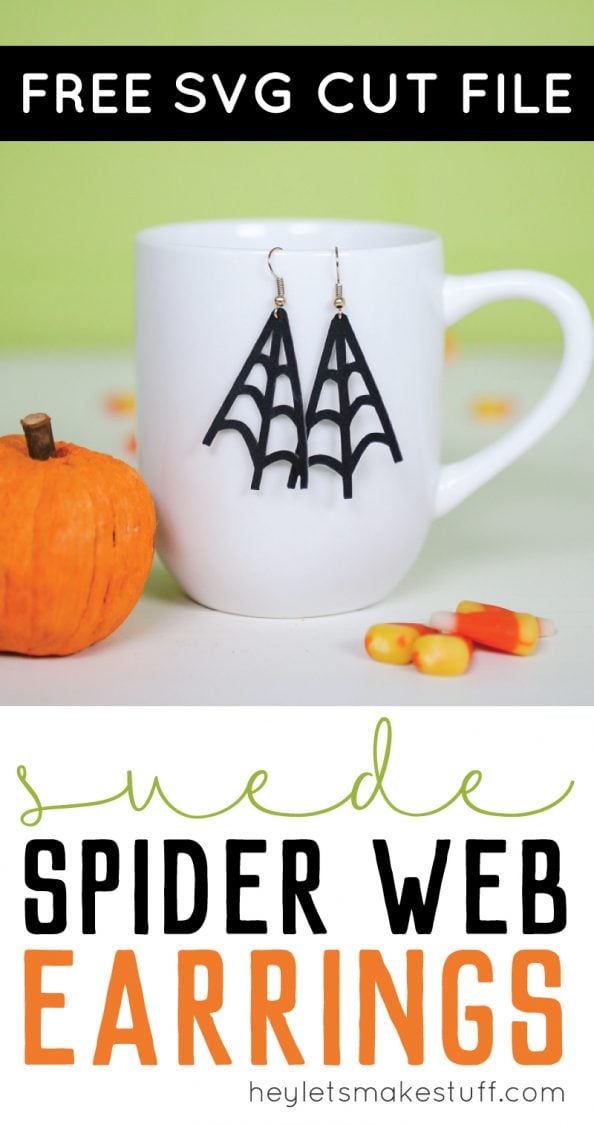
These DIY spider web earrings are designed to be cut on your Cricut or other cutting machine using faux suede or leather. This Halloween accessory project comes together in less than 10 minutes!

I’m sort of a low-key Halloween kind of girl. Although I made a beautiful butterfly costume this year, that’s definitely outside my norm. I’m more of a snarky t-shirt and spooky accessories kind of girl. I’ve been wanting to try cutting some faux suede on my Cricut Maker. So I designed these light-as-a-cobweb spider web earrings! Guys, this is a SUPER quick project for you to make and will give you some Halloween style without going overboard.

This project is designed to also work on a Cricut Explore, if you have that machine.
I recently made these earrings as part of my Sunday Facebook Live series! Head on over and watch how easy they are to make, and then join me every Sunday at 2pm PST to make stuff!
Spider Web Earrings Supplies
- Faux Suede
- Fishhook Earring Findings
- Poker (you can use many things for this — such as a needle or pushpin)
- Needle-nose pliers
- Cricut Maker
- Spider Web Earrings SVG File
Get the Free File
Want access to this free file? Join my FREE craft library! All you need is the password to get in, which you can get by filling out the form below. The file number is: C67.
Spider Web Earrings Instructions
This Halloween project is scarily easy. Simply cut out the downloaded file on your Cricut. I used black faux suede and a purple strong grip mat and it worked really well the first time. You could also try leather or even felt. I think a green mat would also work, provided it still has a nice grip to it.
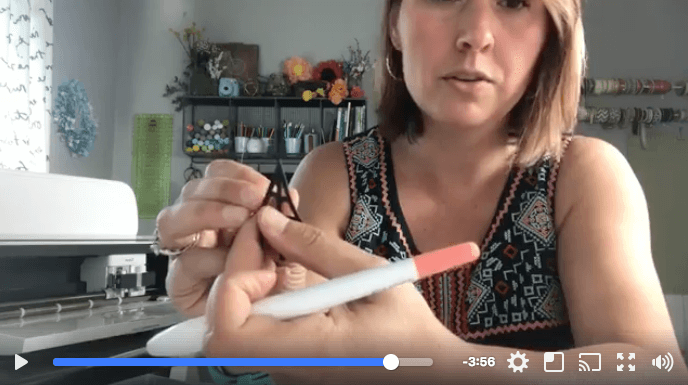
Using your poker, make a small hole at the top of the web. It should be about 1/16″ from the top — pretty darn close to the edge!
Use your needle-nose pliers to work open the ring at the bottom of the fishhook earring. Slide the spider web onto the earring using the hole you just poked, and clamp the ring back in place.
Done! I think designing, cutting, and assembling these earrings took me about 10 minutes. And since I did the design work for you, you just have to cut and make!
Happy Halloween!

Interested in some more seasonal/holiday earrings? Check out the following posts:


Comments & Reviews
Millie Gagliano says
Hi. I was just wondering what size are these spider web earrings? How big can I make them?
thank you.
Crystal Summers says
Hi Millie,
You can resize the SVG file to any size you’d like!
Hope this helps,
Crystal, HLMS Community Manager
Jo says
Can you use the joy for your projects? I’m just deciding which to buy but don’t want to go with that if too limited.
Thank you
Crystal Summers says
Hi Jo,
Yes, you can. However, the Joy only cuts 6 inches wide. That may be prohibitive for larger projects. Here’s a blog post, which compares the machines. This may help you: https://heyletsmakestuff.com/cricut-machine-differences/
Happy crafting,
Crystal, HLMS Community Manager
Cori George says
I’d probably use a spray adhesive!
Andrea T says
Thank you for the cute spider earring SVG! If I make them double sided, what glue would you recommend to glue the fronts and backs together?
Diana says
These are great fun–thank you for sharing the file! When making earrings with svg files, I like to use a tiny circle shape to cut the hole for a jump ring. I’ve use my weeding tool to poke holes (works fine), but I find the circle shape makes a nice, clean hole without as much work! :-) Thanks again!