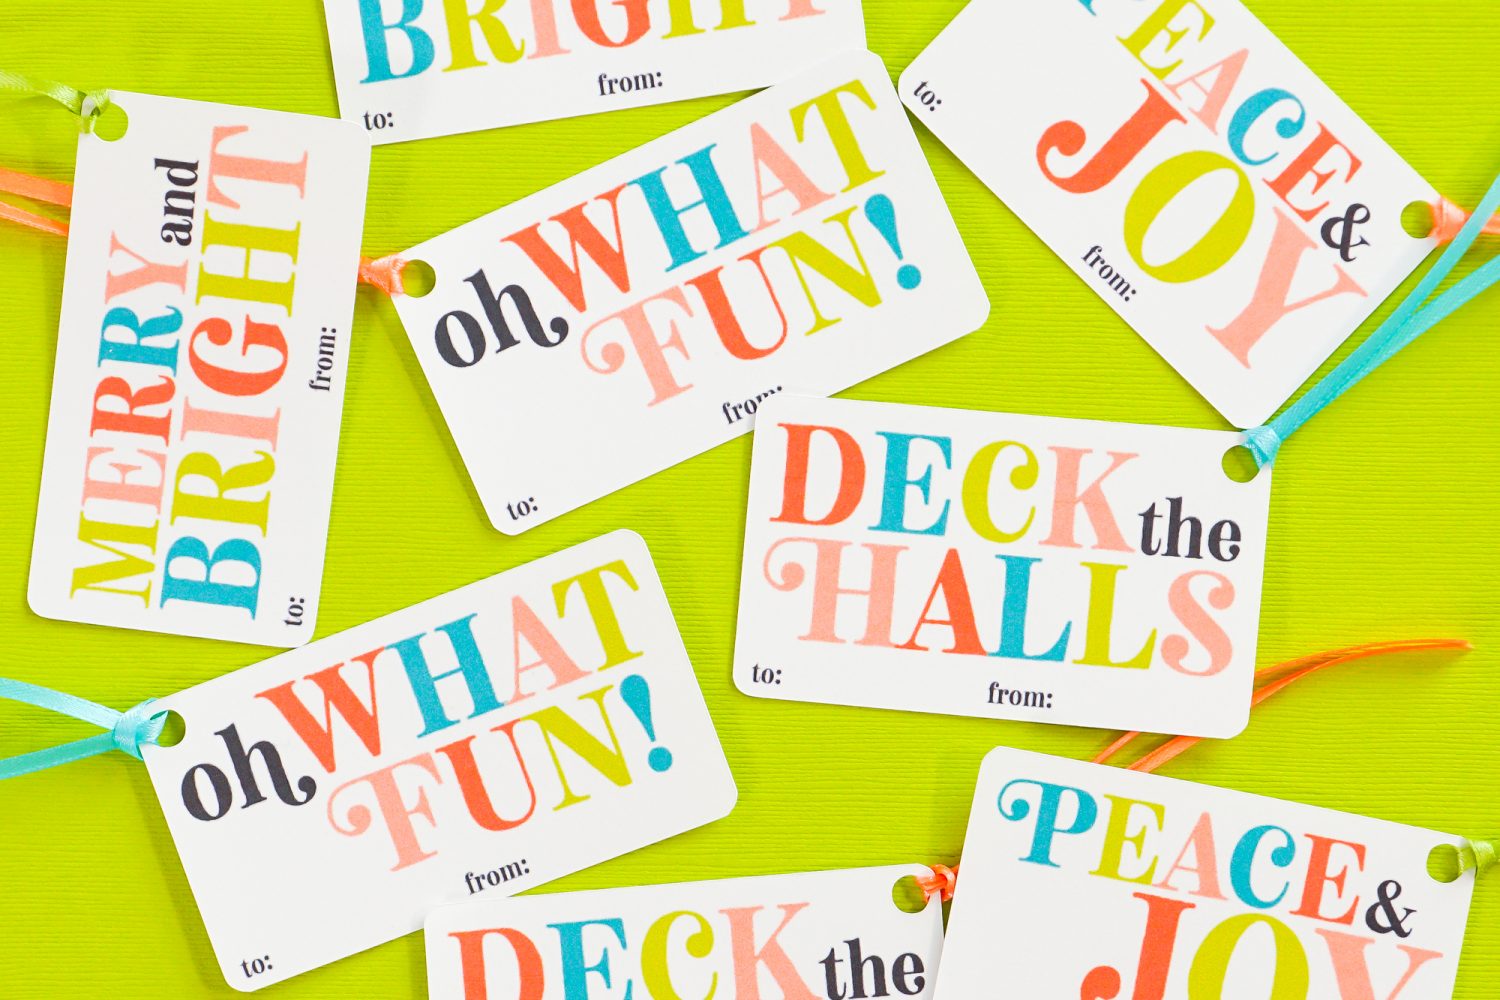
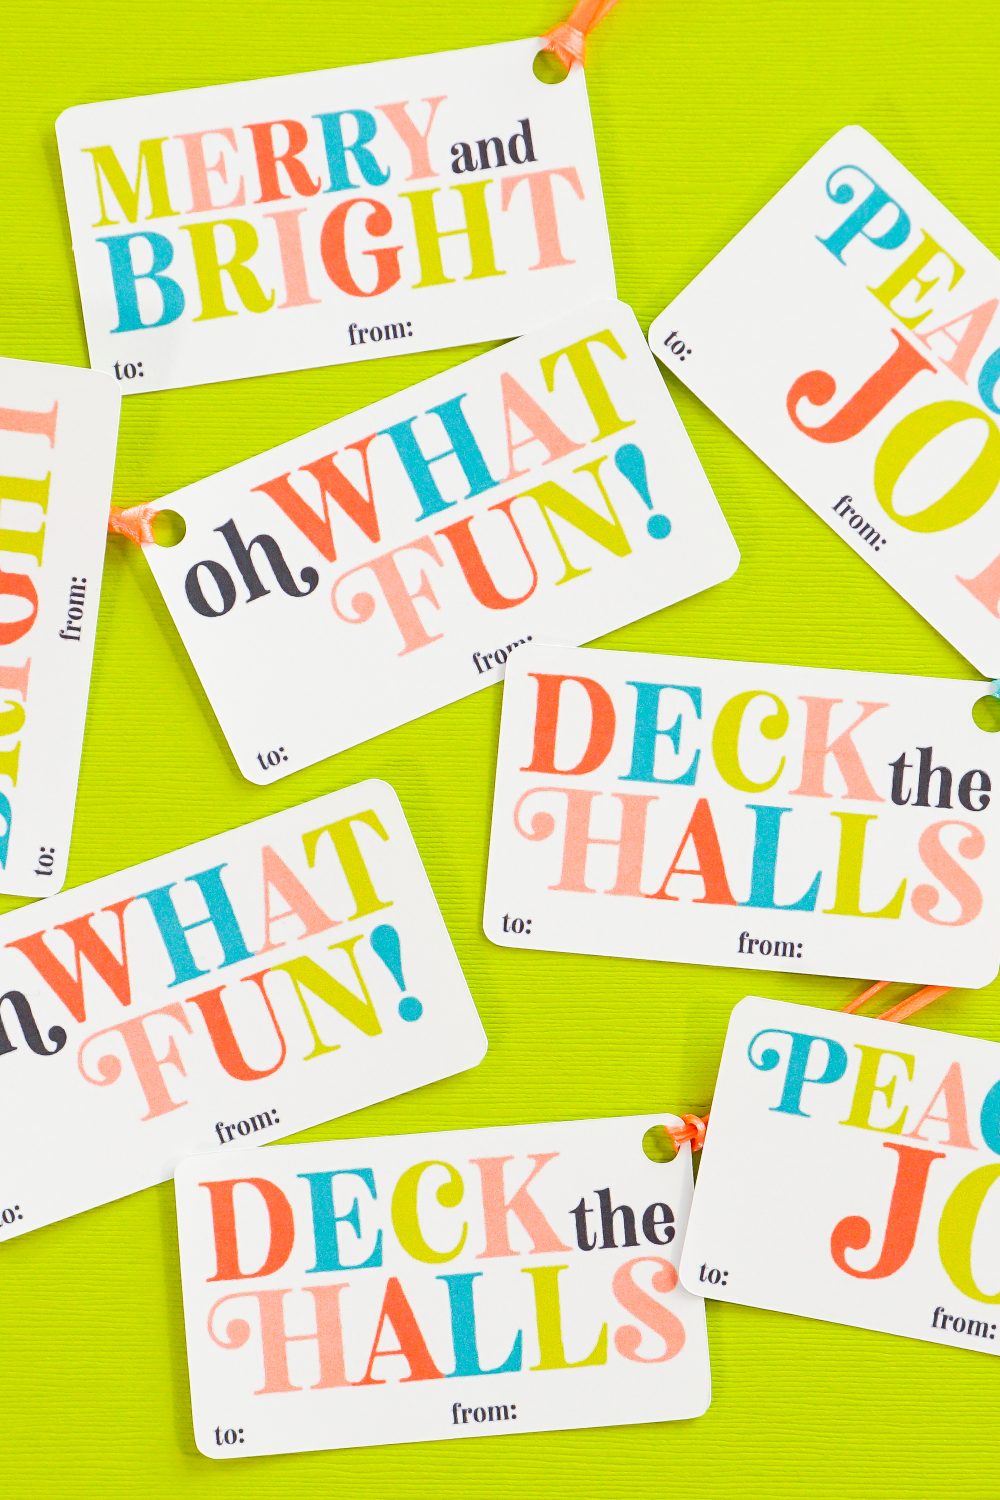
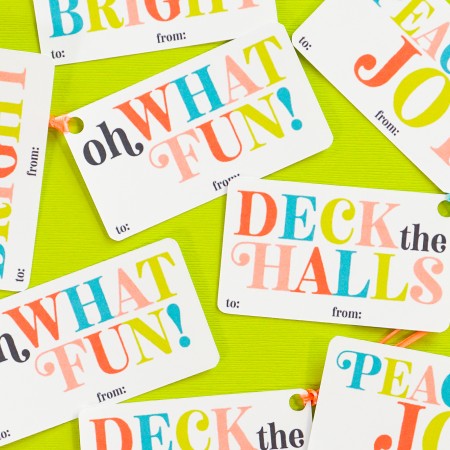
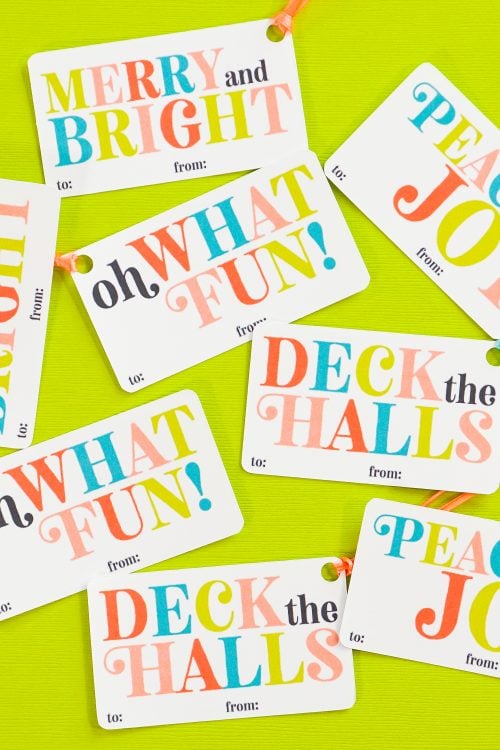
Use your home printer and Cricut Explore or Maker to create these festive gift tags! These brightly colored print then cut Christmas gift tags are the perfect touch on the presents under the tree.
Welcome back once more for the 25 Days of Cricut Christmas! We’re on Day 24—only today and tomorrow left in this fun holiday crafting series! If you want to see all the posts in this series, check out the bottom of this post.
If you’d like to get this series in an ebook format PLUS all of the SVGs needed to make all 25 projects check out the 25 Days of Cricut Christmas eBook Bundle!
We’ve been crafting a ton of gift ideas over the last few weeks, and today I’m sharing an easy way to give your gift wrap that handmade touch. We’re using Cricut’s “print then cut” feature! You can print these colorful and festive gift tags on your home printer, and then your Cricut will perfectly cut around the edges.
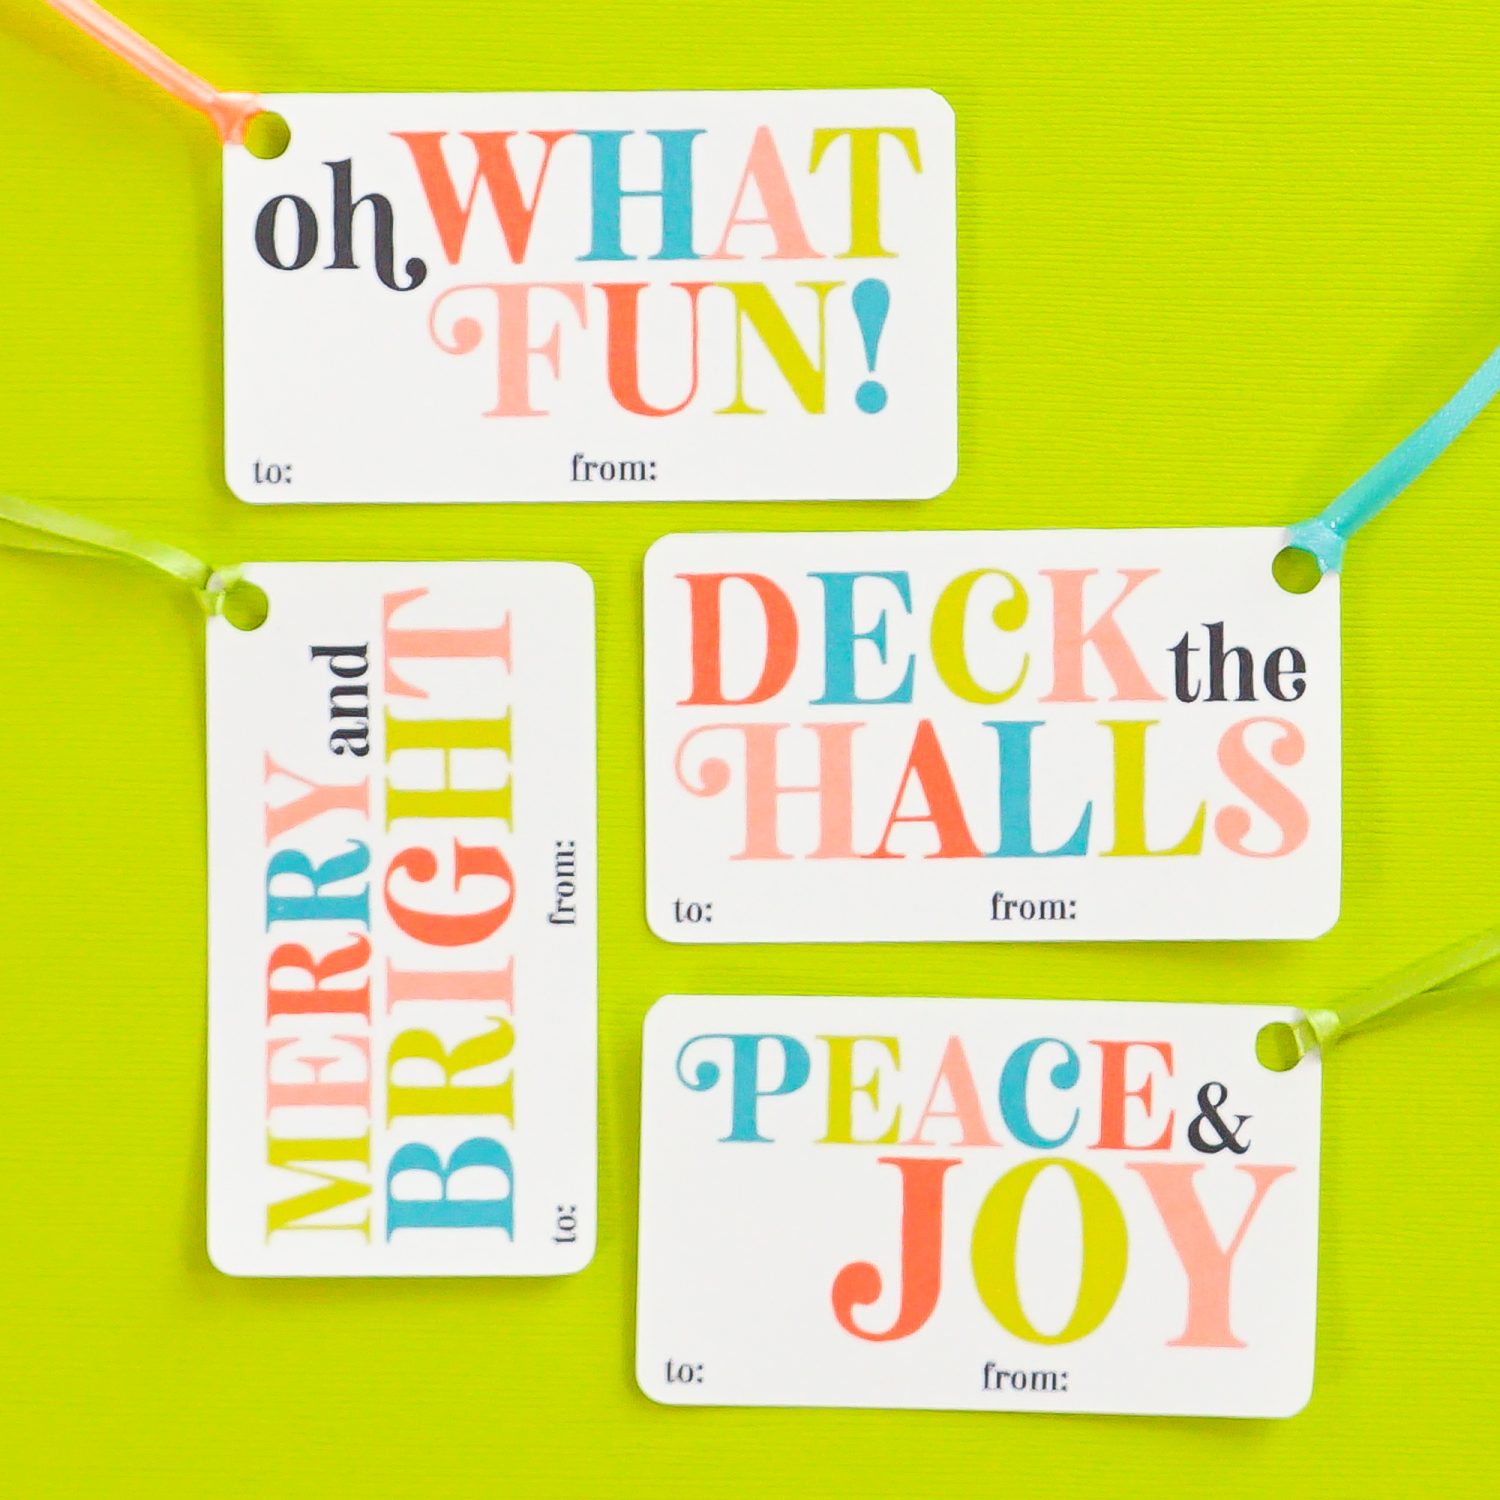
Here’s how to make them!
Print then Cut Christmas Gift Tag Supplies
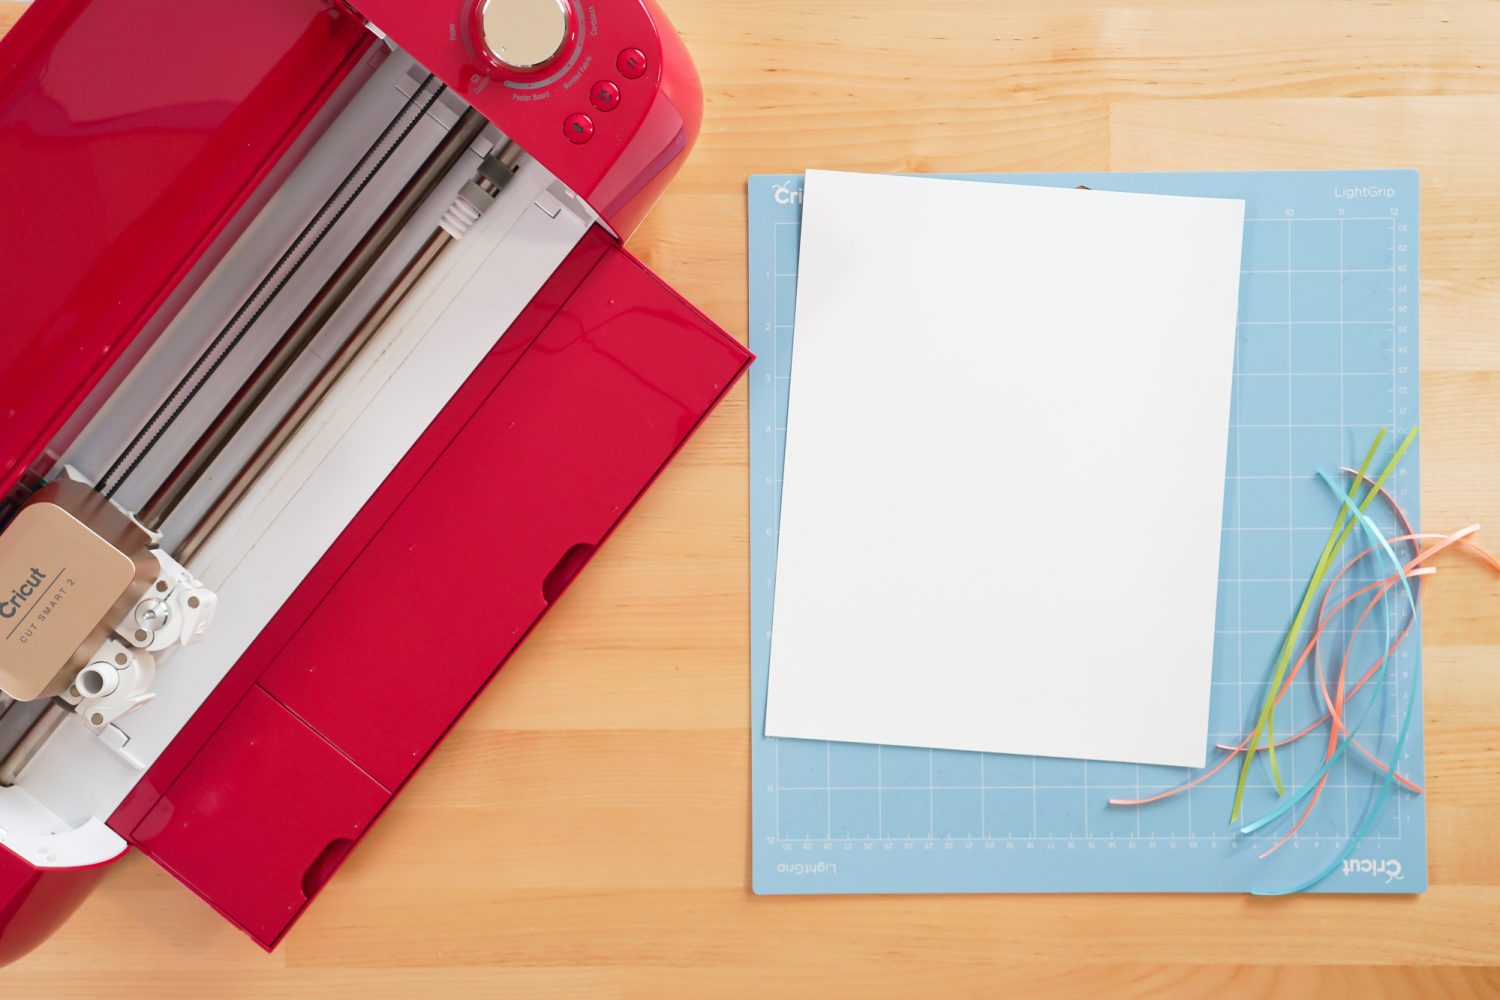
- Cricut Explore or Cricut Maker
- Blue LightGrip mat
- Fine Point Blade
- 8.5″ x 11″ white cardstock or heavyweight paper
- Home printer
- Ribbon
- PNG Gift Tag File
Grab the PNG for this Project
Print then Cut Christmas Gift Tag Instructions
Upload the Print then Cut Gift Tags File to Cricut Design Space
We will start by uploading the gift tag file to Cricut Design Space. For every other project in this series, we’ve been using SVG files.
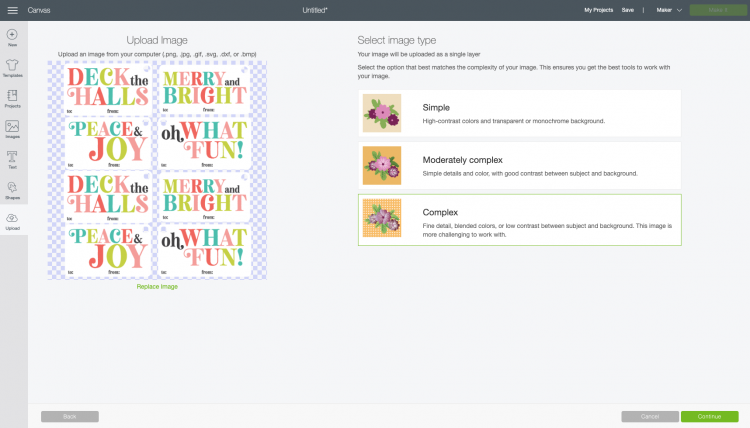
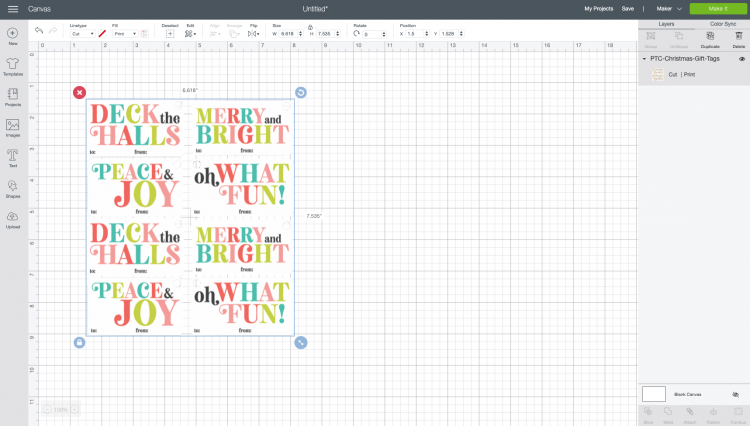
But for this project, I have designed a PNG file for you. Upload the PNG and Cricut Design Space will have you select an image type. For this one, select “Complex” and click Continue.
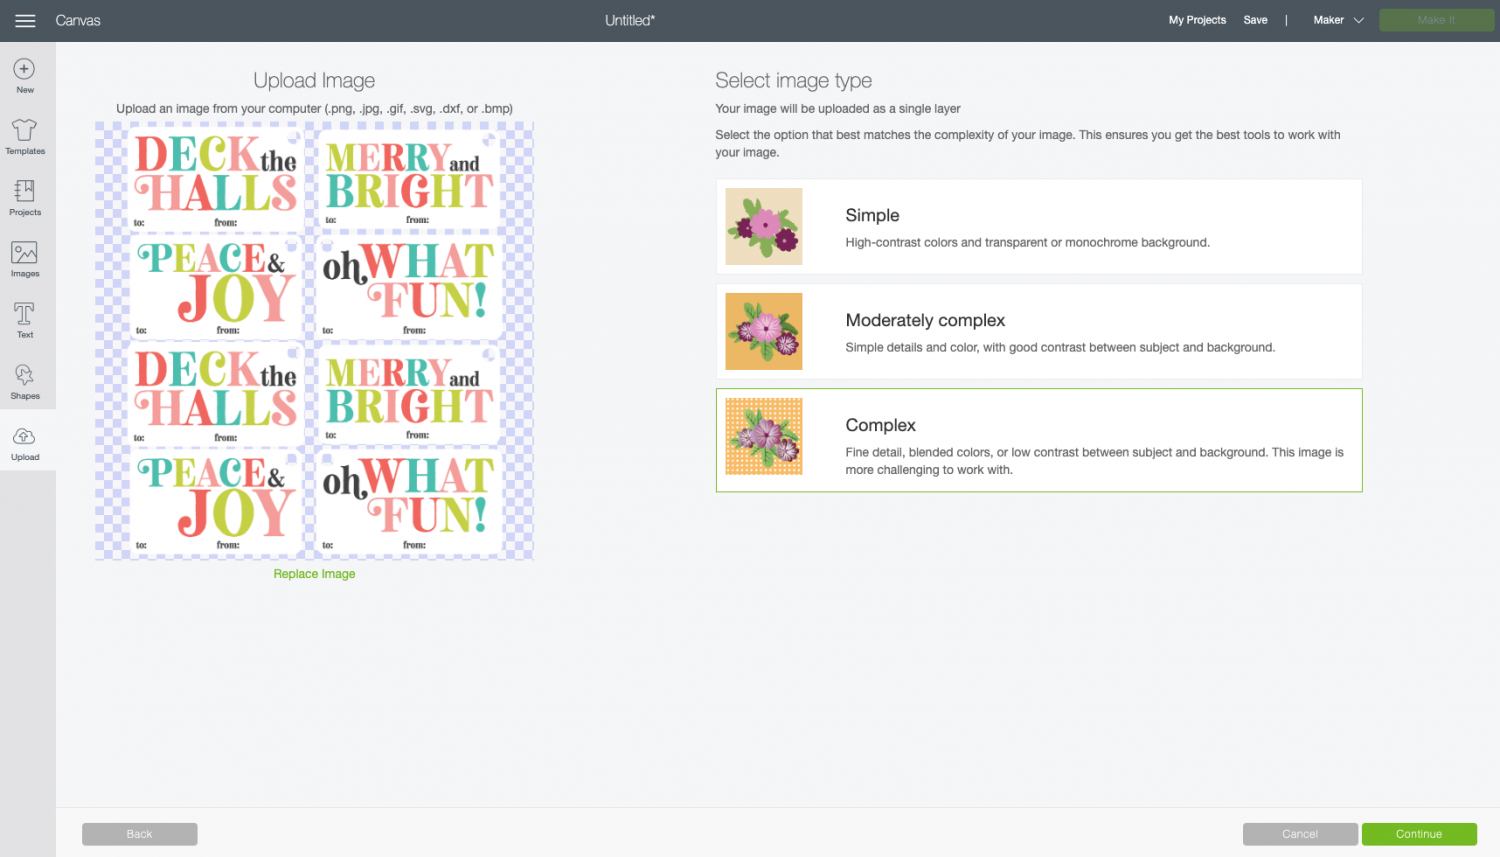
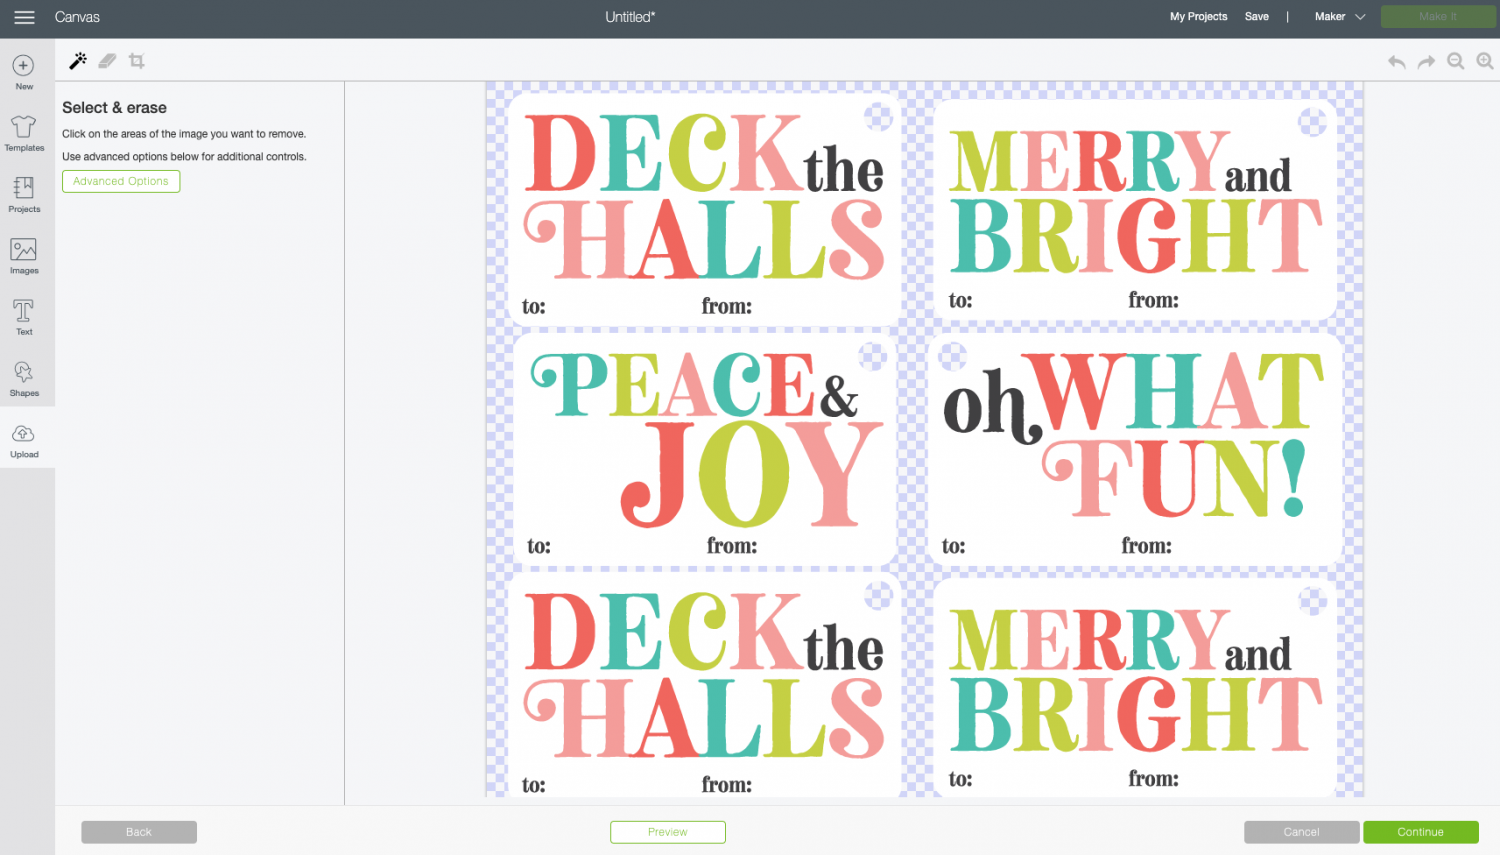
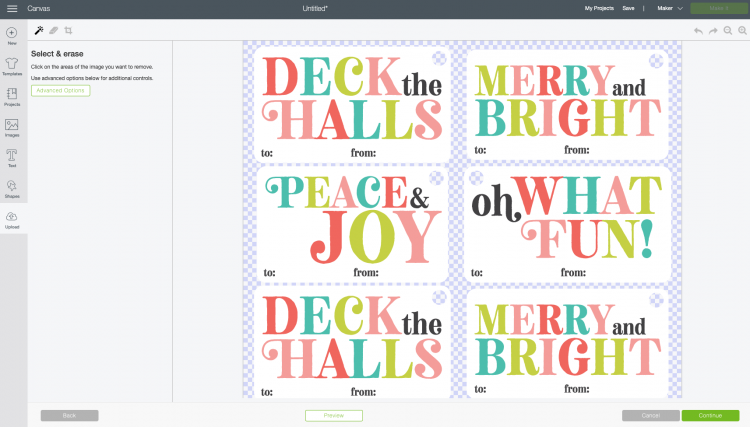
In the next screen, you’ll have the option to select and erase parts of your image. That’s not necessary with the way I’ve set up the file, so click Continue.
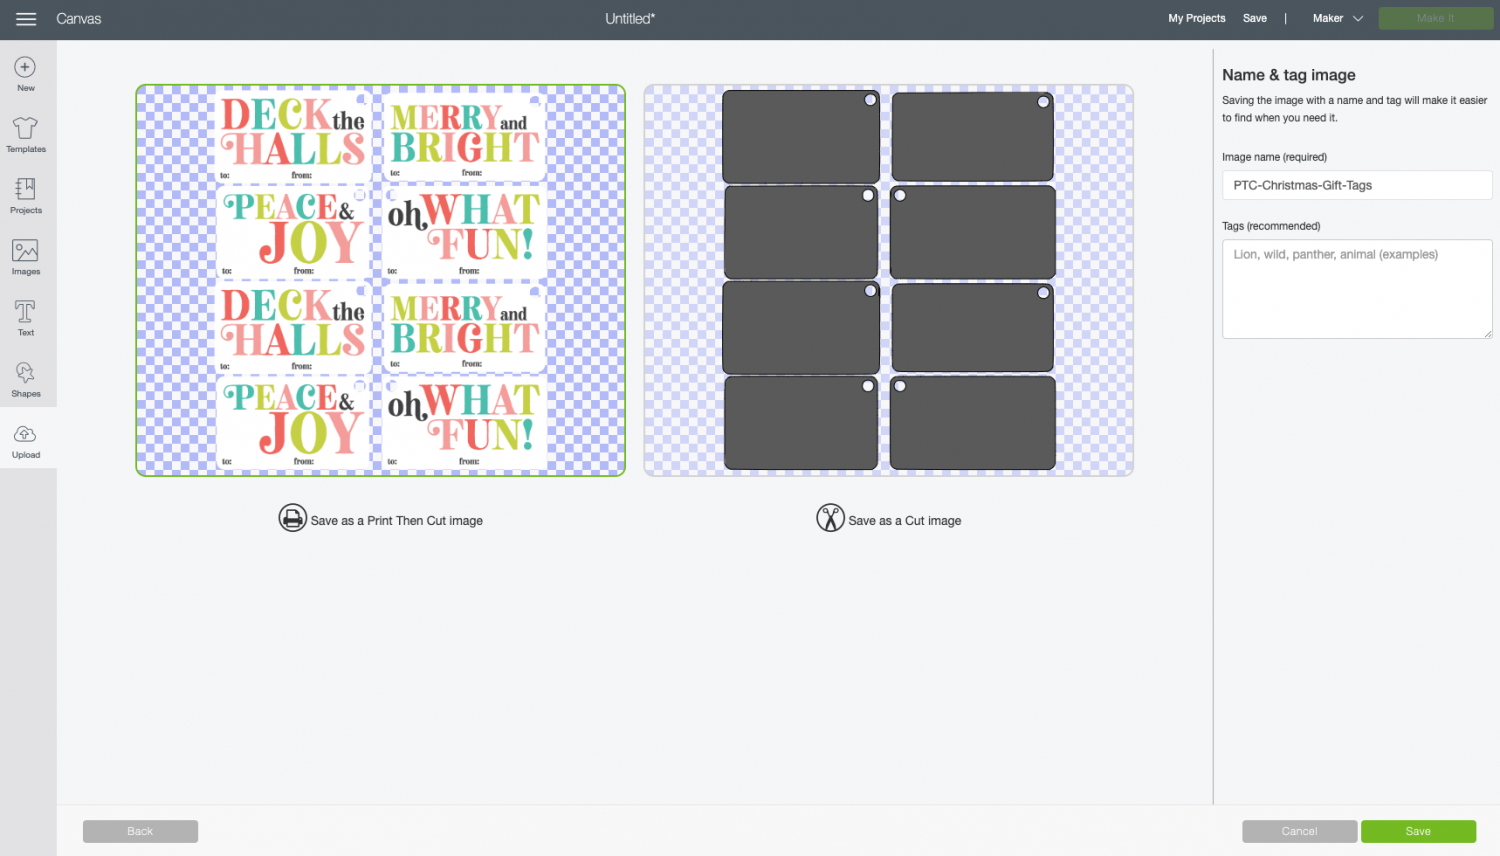
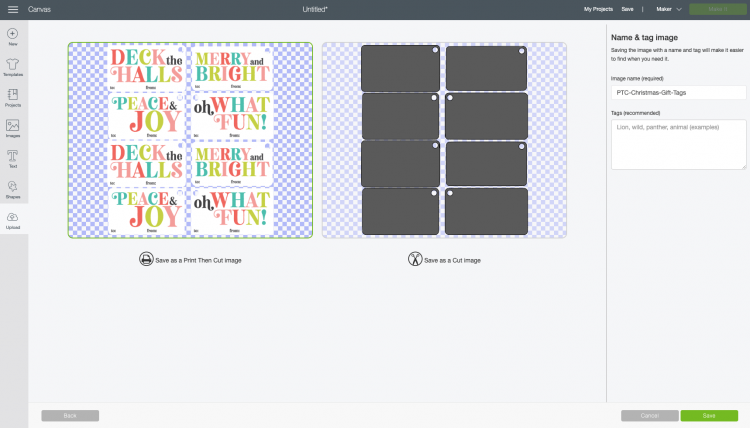
Finally, select “Print then Cut” as your image type.
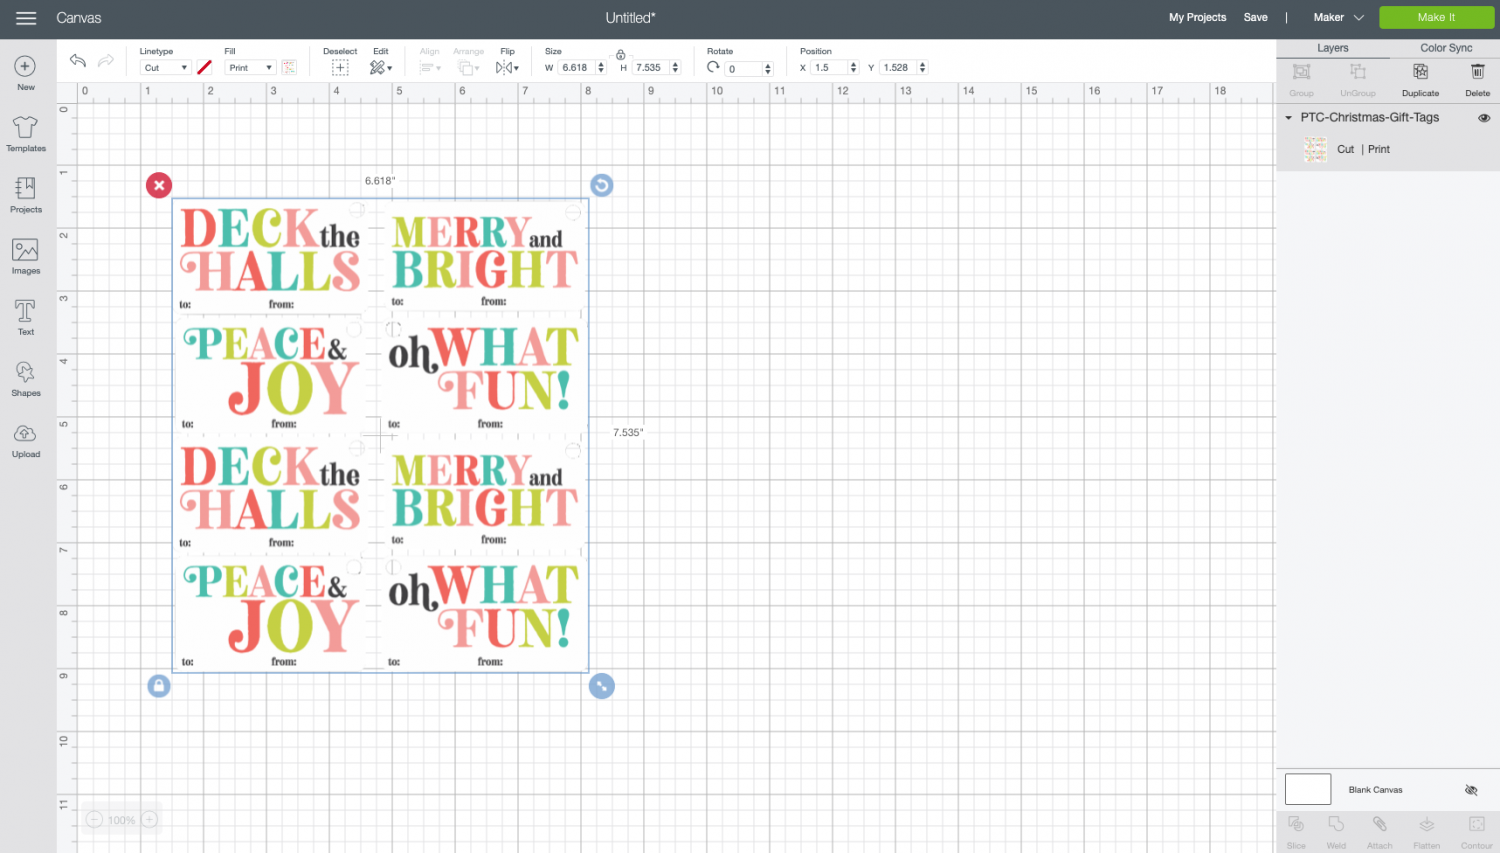
Then you can bring the file into your canvas.
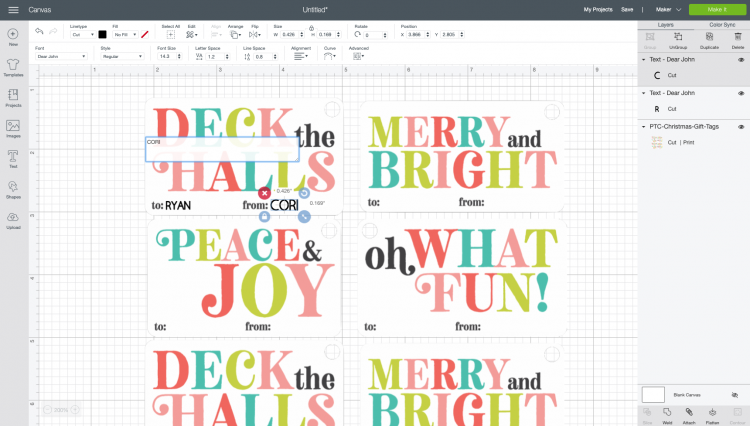
If you’d like, you can use the Text Tool on the left to personalize your gift tags. Just type in the giver and recipient names and add them on top of the gift tag.
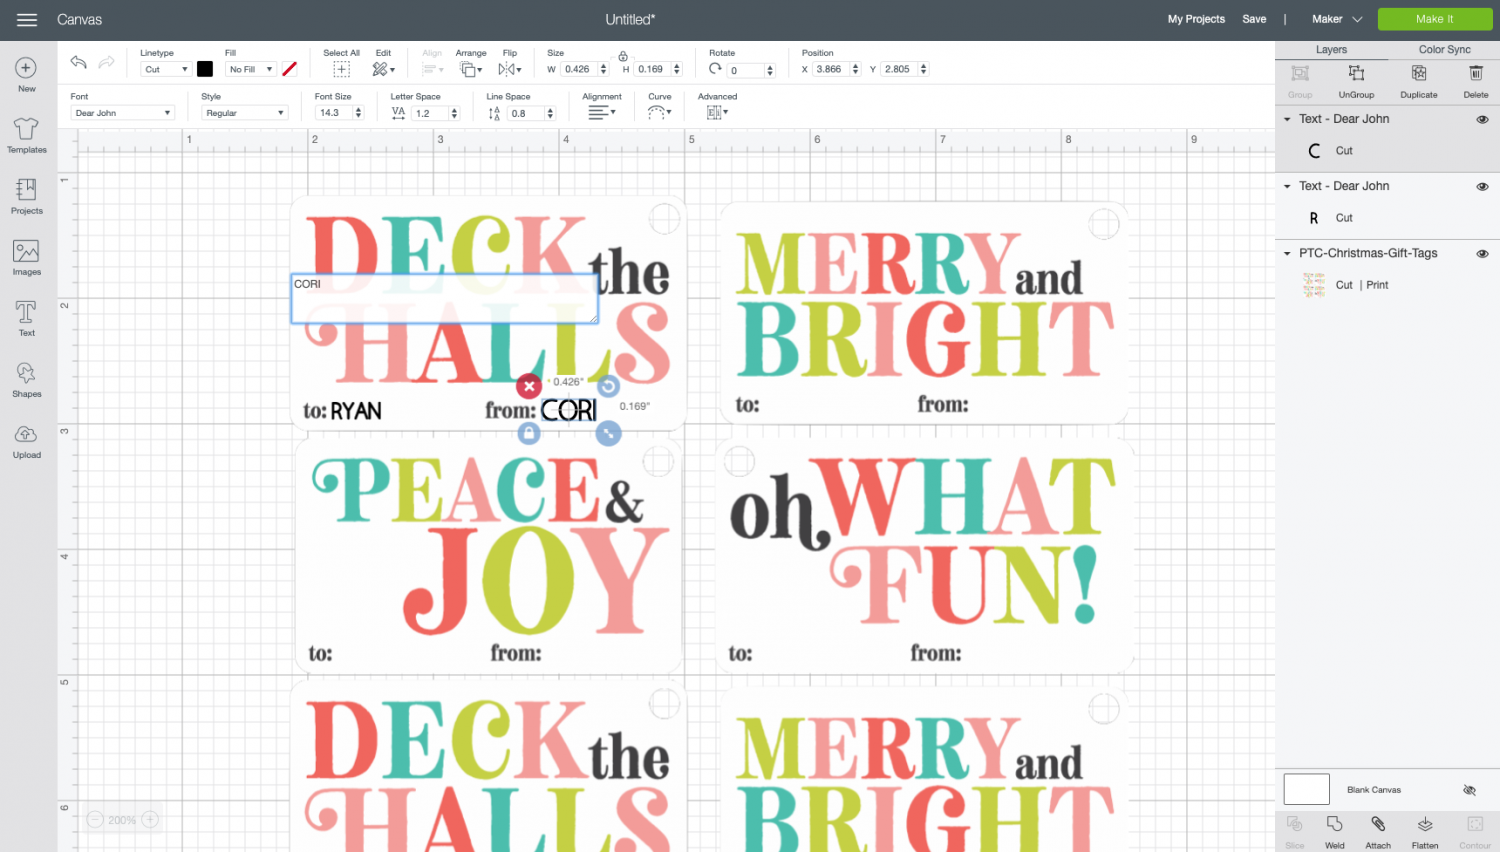
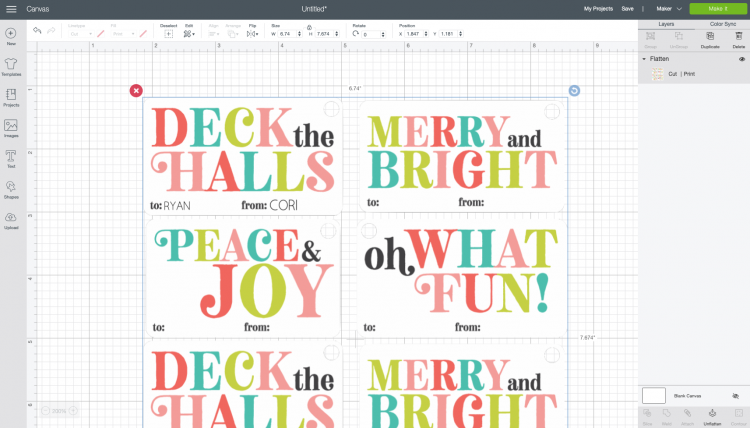
Then select both the names AND the tags and click “Flatten” at the bottom of the Layers Panel on the right.
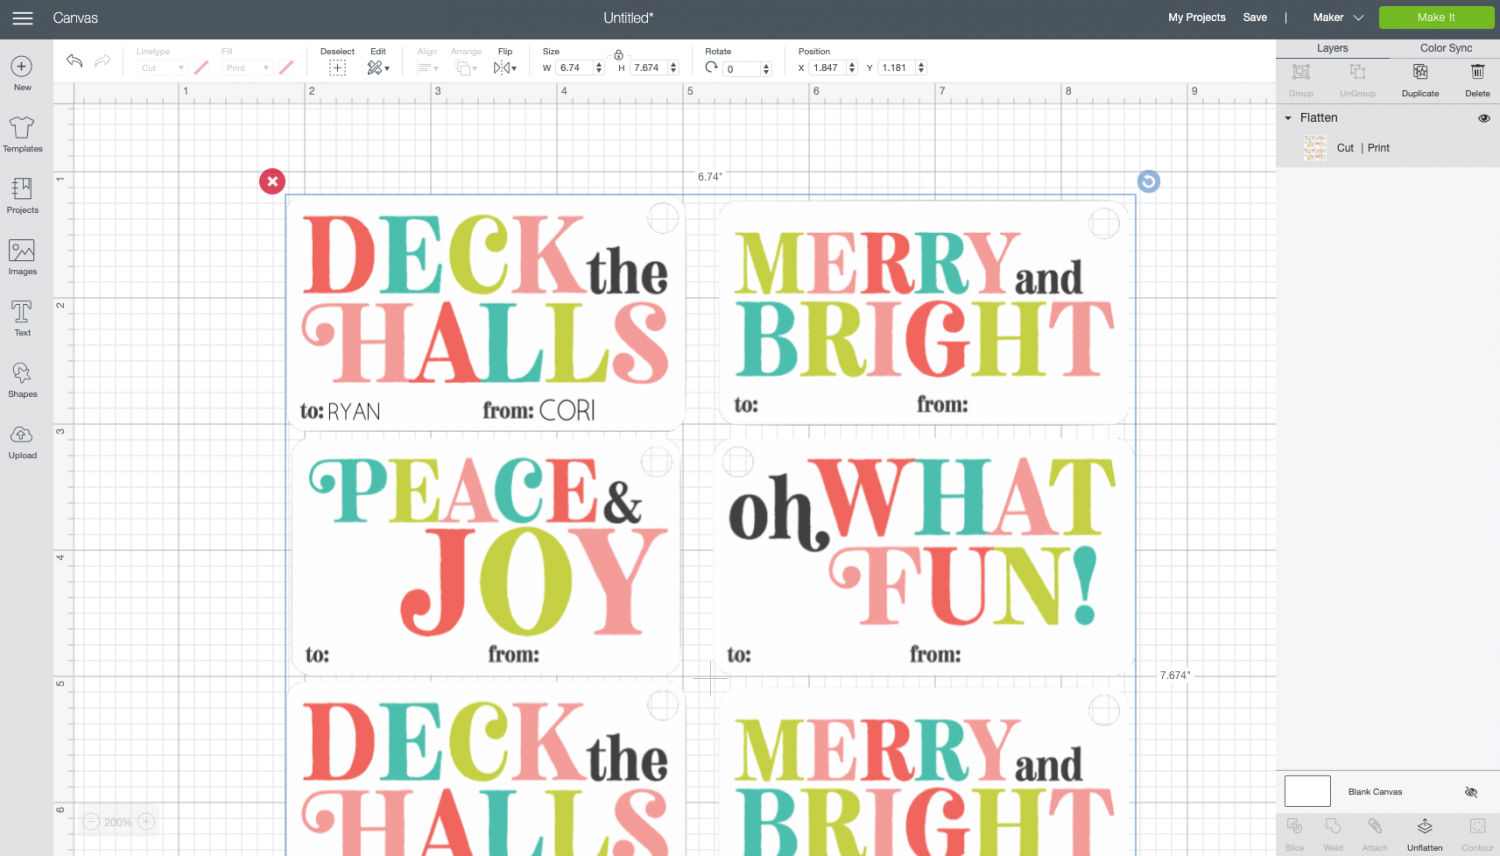
Personally, I don’t think this far ahead when I’m making these tags, so I leave those spots blank and handwrite them in when I’m wrapping my gifts.
Whichever option you choose, when you’re done click Make It in the upper right to print then cut these gift tags!
Print Your Gift Tags
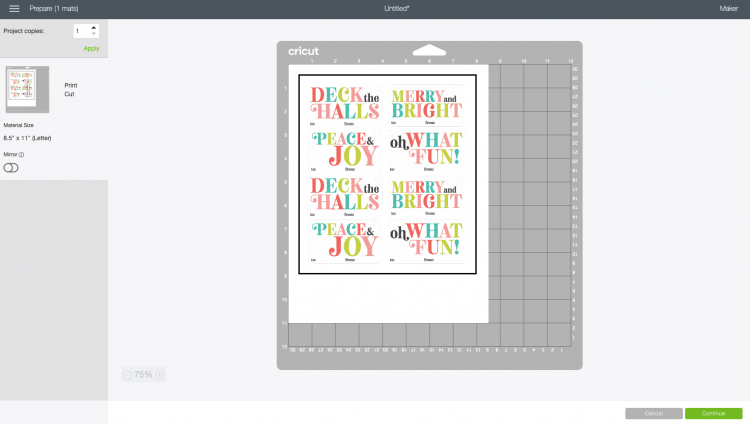
In the Prepare Screen, you’ll see what your image will look like after it’s been printed. Cricut Design Space will automatically put a black registration box around the image—this shows the software where your image is on the mat and where to cut. Click Continue.
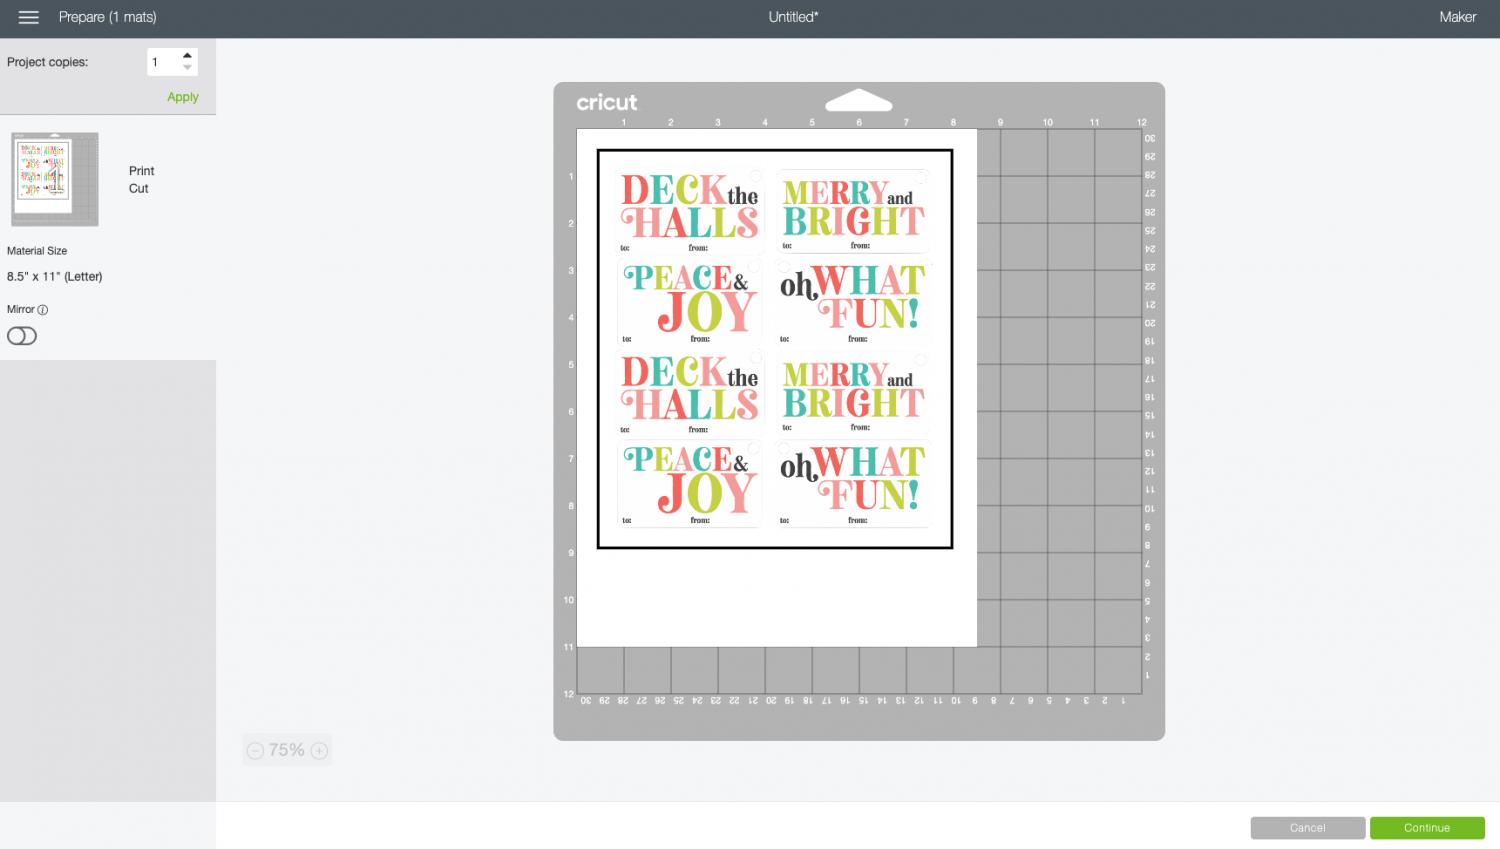
In the Make Screen, you’ll be prompted to print your image on your home printer. Click Send to Printer.

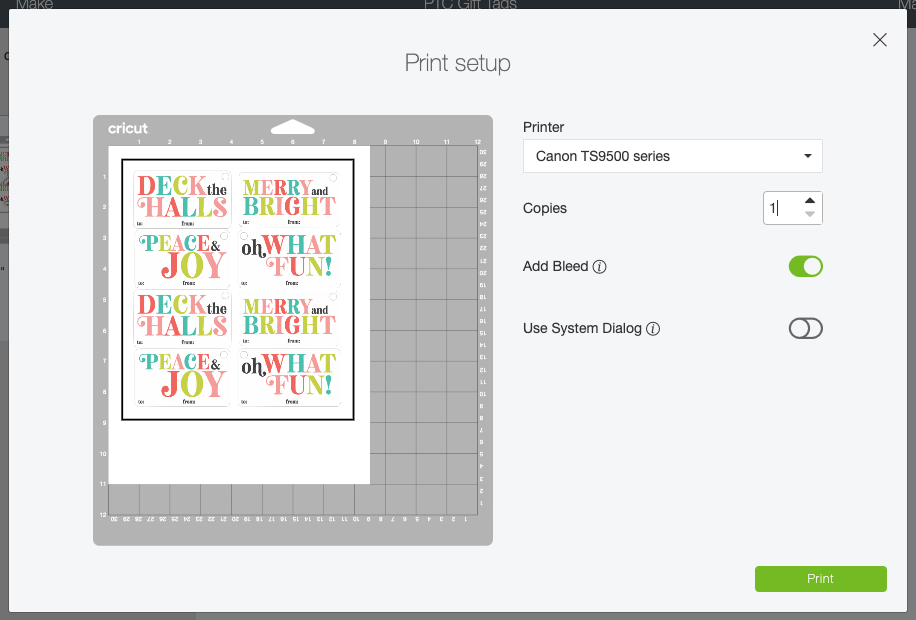
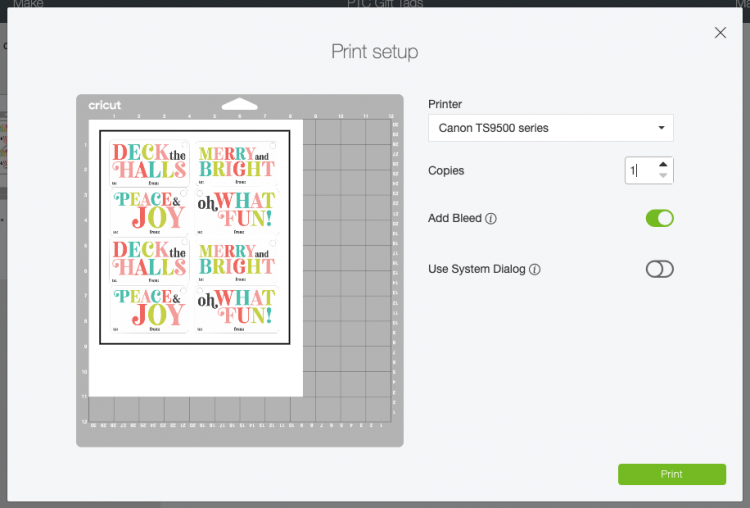
This will open another window. Select your printer and click Print. Your home printer will print your gift tags with the black registration line around them.
Cut Your Gift Tags
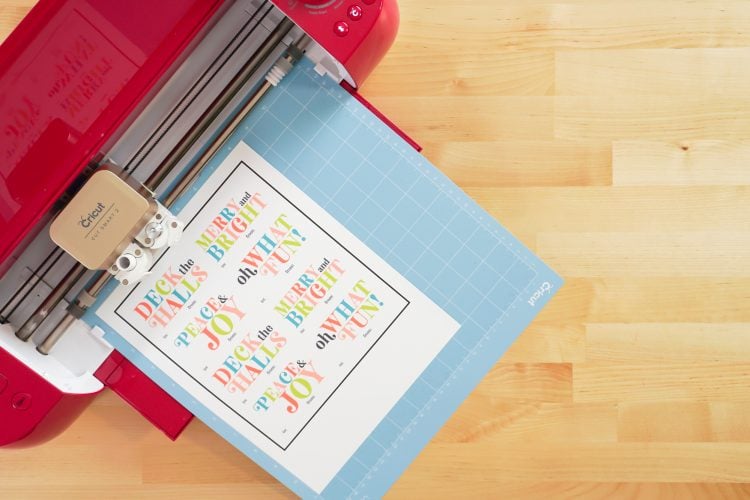
Once you have printed your gift tags, place them on the cutting mat and insert into your Cricut. Your Cricut will then cut around the invisible edges of the cards, as well as cut the holes for the ribbon!
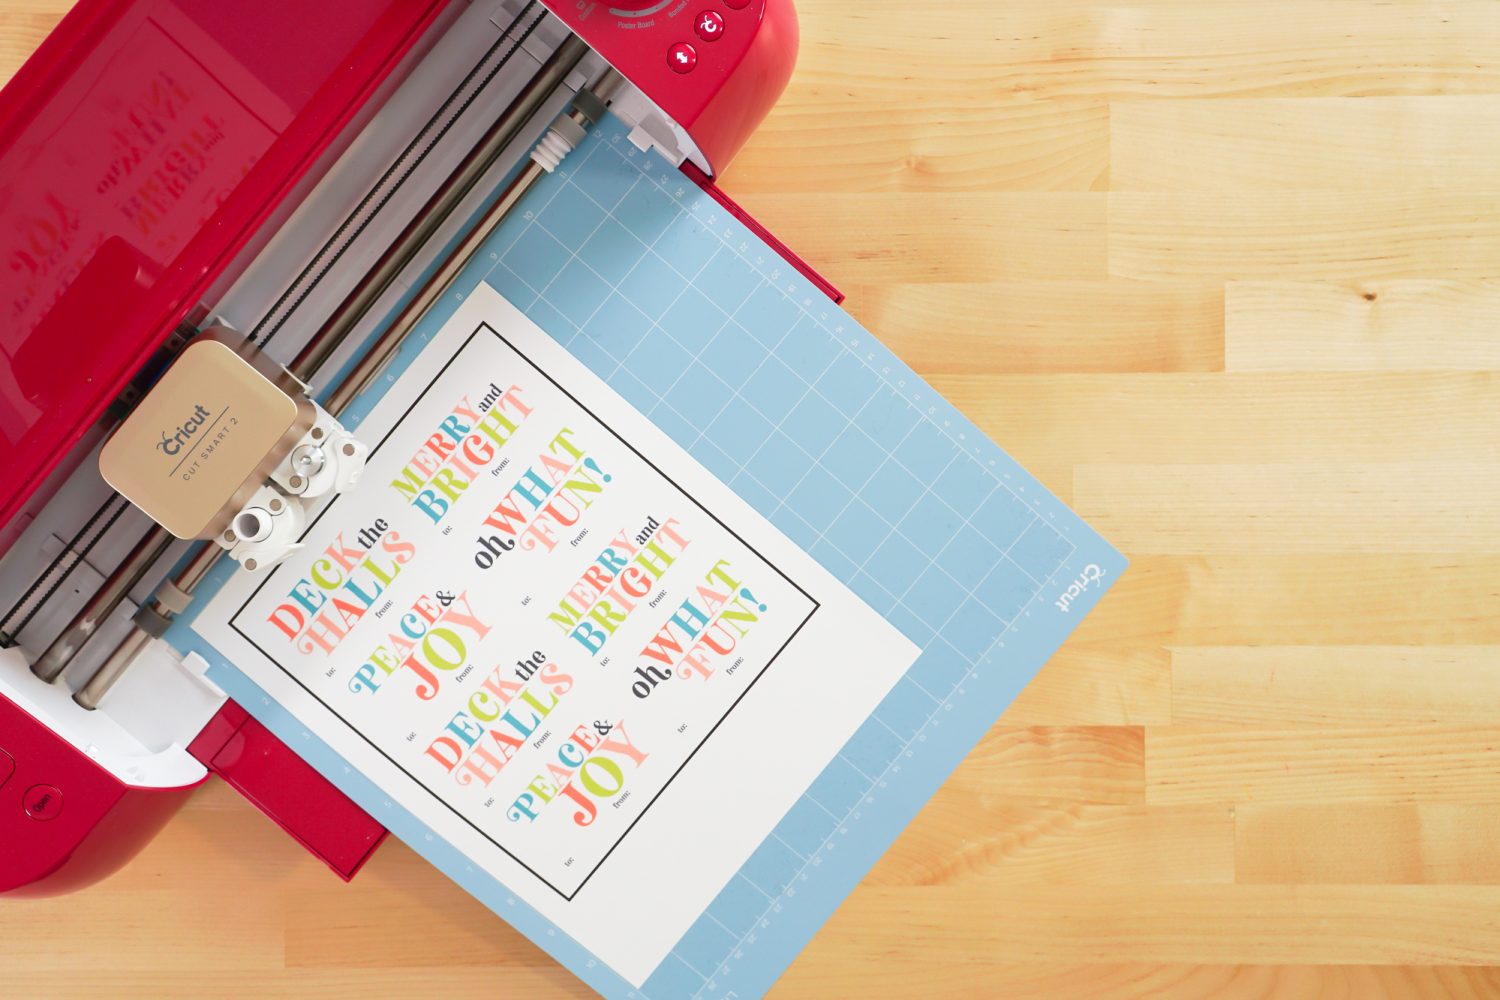
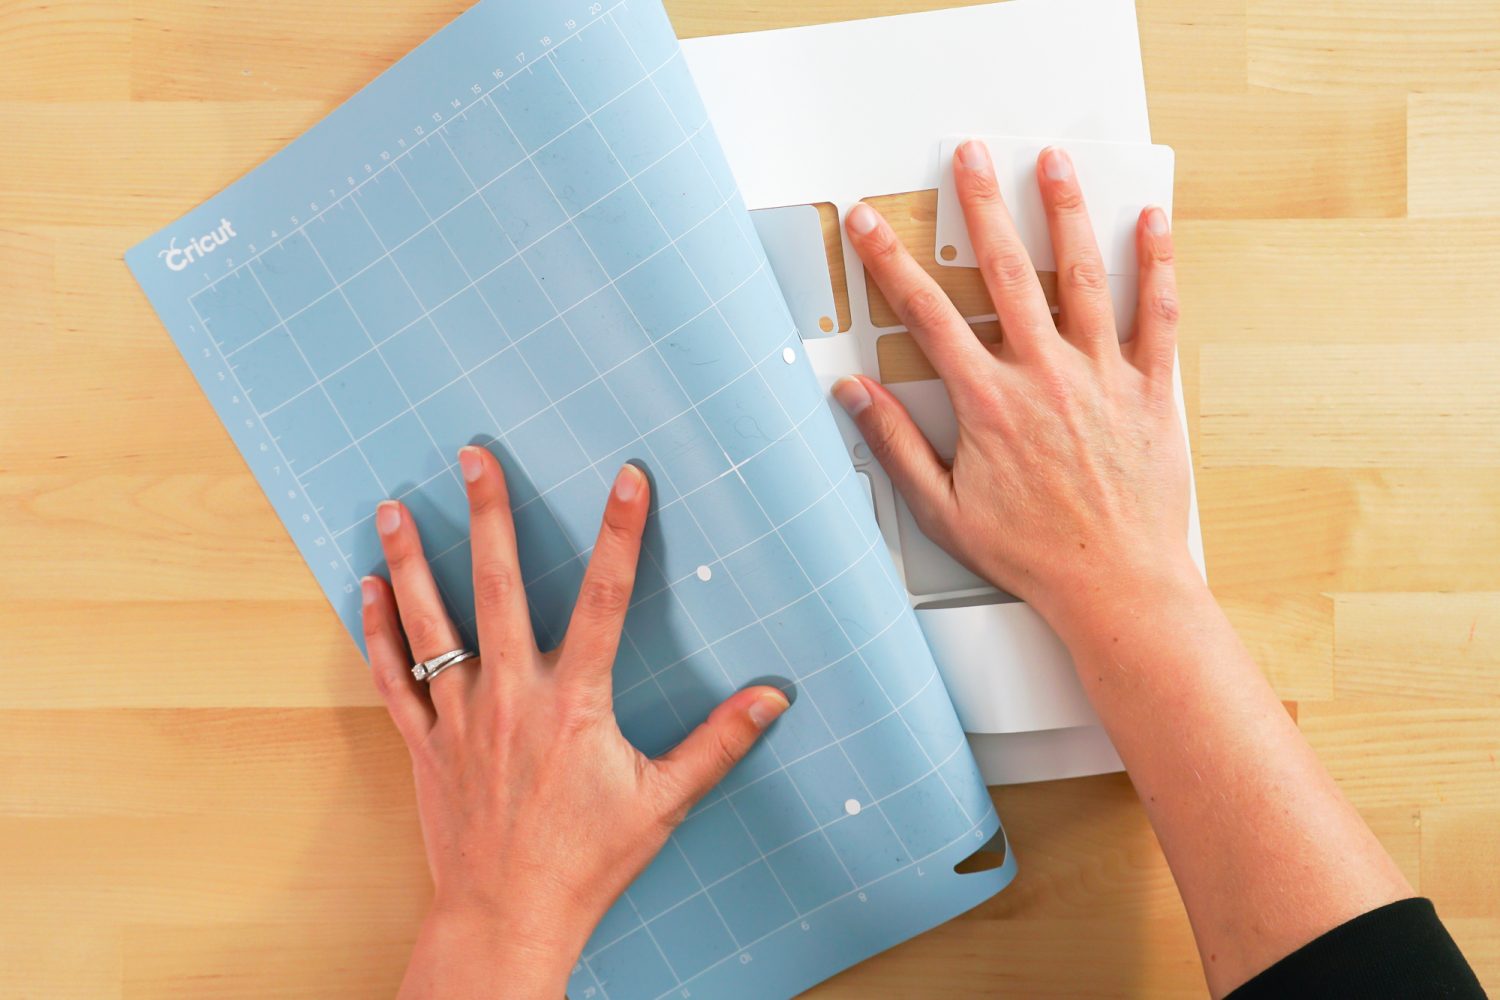
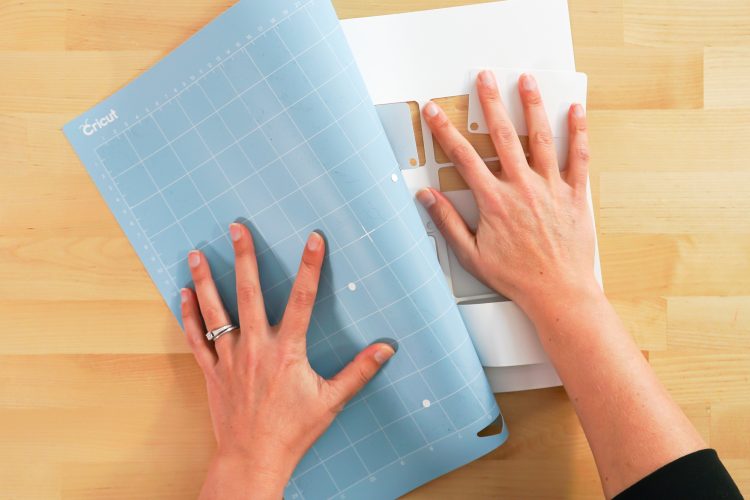
The best way to remove these tags from the mat is to flip the mat over and bend the mat away from the tags—this will release them from the adhesive on the mat without curling them.
Add Ribbon to Your Tags
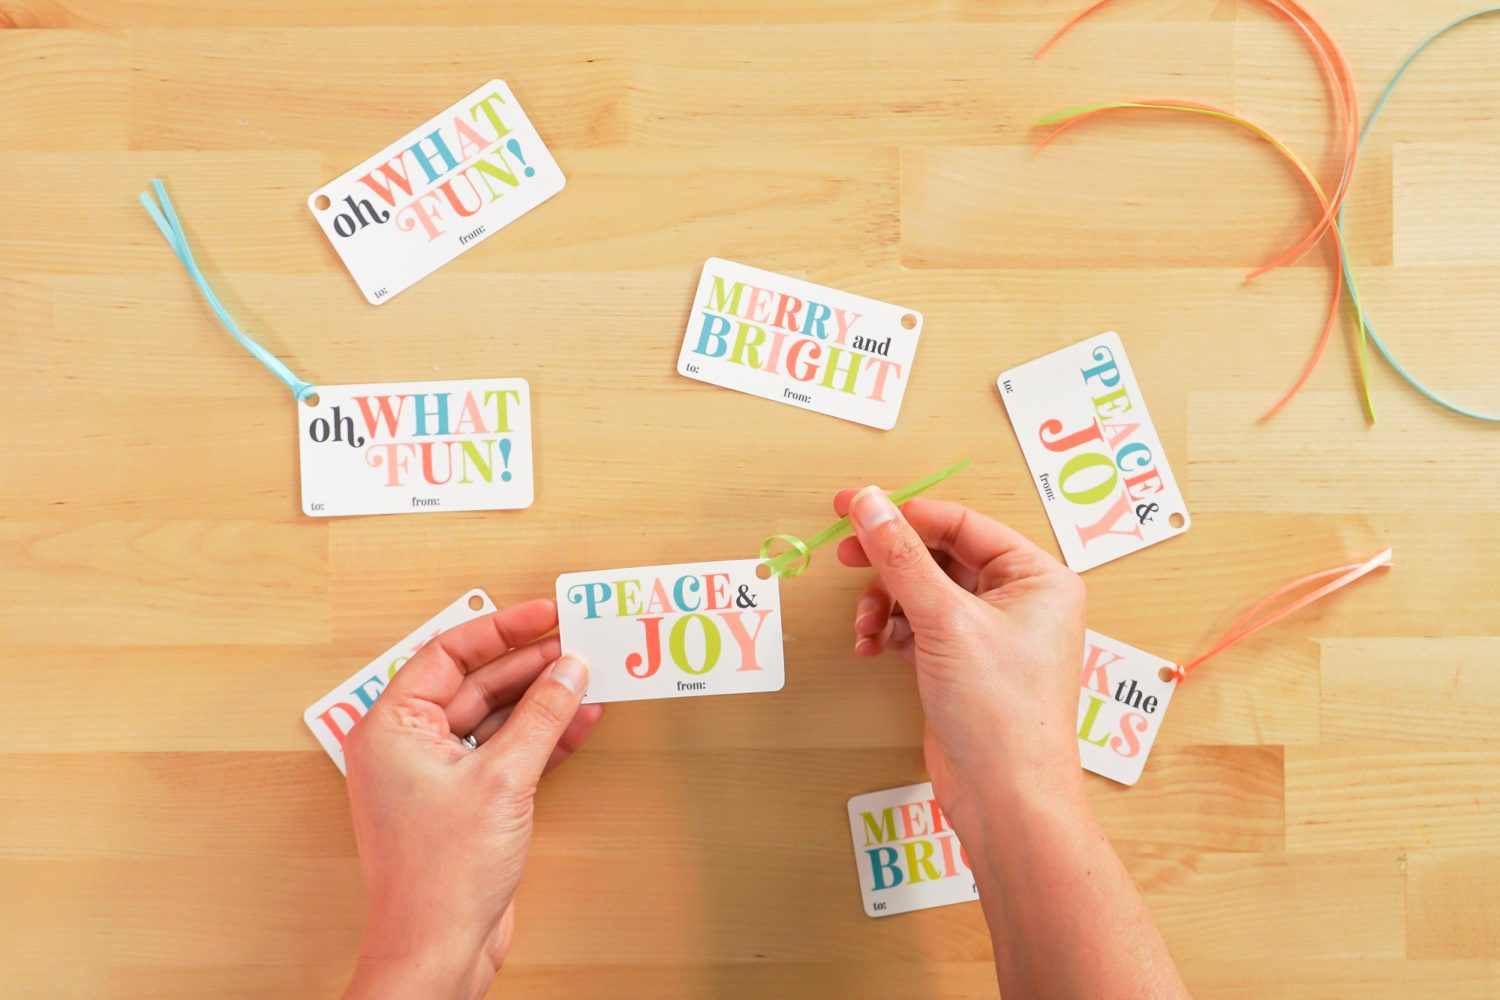
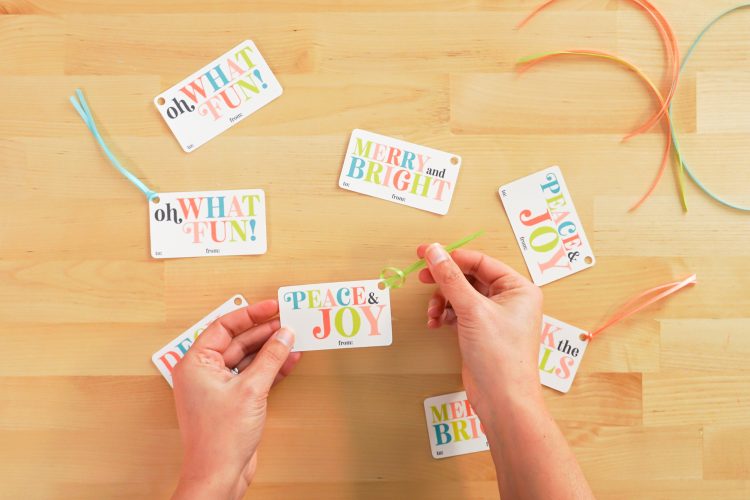
To finish off your tags, add ribbon or twine! You can also just tuck these under a sticky bow if you’d prefer.
Make All the 25 Days of Cricut Christmas Projects!
We’ll be adding links as each day goes live! Grab the full bundle with all of the projects and SVGs in our 25 Days of Cricut Christmas eBook!
- Day 1: DIY Christmas Countdown Calendar
- Day 2: Snow Globe Shaker Card
- Day 3: Happy Holly Days Christmas Banner
- Day 4: Felt Gnome Pillow
- Day 5: Cookies for Santa Tray
- Day 6: Snowflake Coasters
- Day 7: Customized Christmas Banner
- Day 8: Etched Holiday Baking Dish
- Day 9: DIY Gift Card Holder
- Day 10: Christmas Apron
- Day 11: Christmas Quilt Block Artwork
- Day 12: Constellation Glitter Ornaments
- Day 13: DIY Christmas Card Holder
- Day 14: Papercut Christmas Village
- Day 15: Funny Christmas Socks
- Day 16: Veneer Pinecone Earrings
- Day 17: How to Make Felt Bows
- Day 18: Personalized Santa Sacks
- Day 19: Newborn Footprint Ornaments
- Day 20: Layered Christmas Mandala
- Day 21: Customized Pot Holders
- Day 22: Sleigh Rides Christmas Sign
- Day 23: Hot Cocoa Mug Gift
- Day 24: Print then Cut Gift Tags
- Day 25: Matching Christmas Pajamas
CHRISTMAS GIFT TAGS
Supplies
- 8.5" x 11" white cardstock or
- heavyweight paper
- Ribbon
- PNG Gift Tag File
Instructions
- Print then Cut Christmas Gift Tag InstructionsUpload the Print then Cut Gift Tags File to Cricut Design SpaceStart by uploading the gift tag file to Cricut Design Space.Upload the PNG and Cricut Design Space will have you select an image type. For this one, select "Complex" and click Continue.

- In the next screen, you'll have the option to select and erase parts of your image. That's not necessary with the way I've set up the file, so click Continue.

- Finally, select "Print then Cut" as your image type.

- Then you can bring the file into your canvas.

- If you'd like, you can use the Text Tool on the left to personalize your gift tags. Just type in the giver and recipient names and add them on top of the gift tag.

- Then select both the names AND the tags and click "Flatten" at the bottom of the Layers Panel on the right.You can those spots blank and handwrite them in when wrapping your gifts.Whichever option you choose, when you're done click Make It in the upper right to print then cut these gift tags!

- Print Your Gift TagsIn the Prepare Screen, you'll see what your image will look like after it's been printed. Cricut Design Space will automatically put a black registration box around the image—this shows the software where your image is on the mat and where to cut. Click Continue.

- In the Make Screen, you'll be prompted to print your image on your home printer. Click Send to Printer.

- This will open another window. Select your printer and click Print. Your home printer will print your gift tags with the black registration line around them.

- Cut Your Gift TagsOnce you have printed your gift tags, place them on the cutting mat and insert into your Cricut. Your Cricut will then cut around the invisible edges of the cards, as well as cut the holes for the ribbon!

- The best way to remove these tags from the mat is to flip the mat over and bend the mat away from the tags—this will release them from the adhesive on the mat without curling them.

- Add Ribbon to Your TagsTo finish off your tags, add ribbon or twine! You can also just tuck these under a sticky bow if you'd prefer.

- Your finished product!





Leave A Reply!