Make professional-level projects with Cricut Infusible Ink! Get the tutorial plus my tricks and tips for making a Cricut Infusible Ink tote bag right the first time.

Ready for my first Cricut Infusible Ink project? If you’re wondering what Infusible Ink even is, make sure to check out my guide to Cricut Infusible Ink for an overview! Also make sure to check out my troubleshooting guide (including a small mistake I made on this bag!).
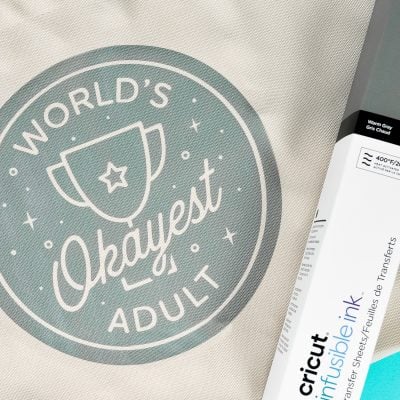
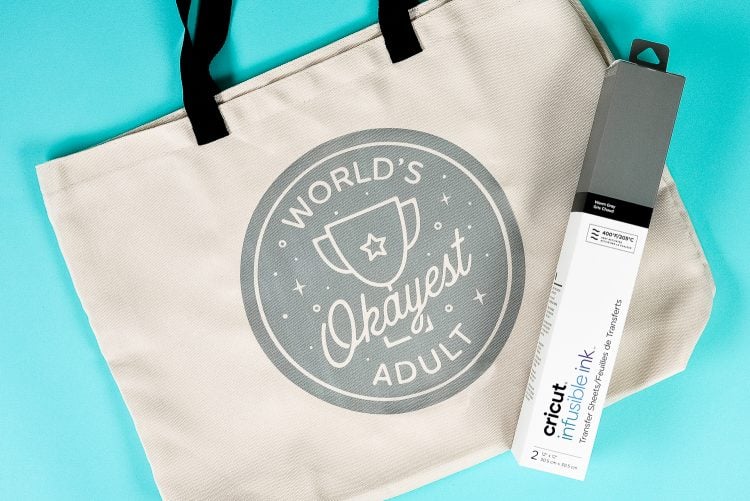
I decided to take this new product for a spin using one of Cricut’s blanks—a polyester tote bag. I have so many ideas for Infusible Ink, but wanted to start with something basic and easy. One of the Infusible Ink transfers I received from Cricut (thanks Cricut!) was a warm gray. I thought I’d use one of the images from my favorite Cricut cartridge: Adulting Affirmations.

Seriously, every image in this cartridge is pure gold. “I kept the tiny humans alive” is basically my only goal every day.
[adthrive-in-post-video-player video-id=”c48Niilj” upload-date=”2022-06-19T23:07:28.000Z” name=”Cricut Infusible Ink Projects” description=”Make all sorts of fun projects using Cricut Infusible Ink! From coasters to apparel to more, Infusible Ink is an easy way to make washable, wearable items with your Cricut!” player-type=”static”]
Let’s make a tote bag!
Infusible Ink Tote Bag Supplies

- Cricut Explore or Maker
- Green StandardGrip Cricut Mat
- Cricut Infusible Ink Transfer Sheet
- Cricut Infusible Ink Blank Tote Bag
- EasyPress 2 (or heat press)
- EasyPress 2 Mat
- Tweezers
- White cardstock
- Butcher paper (comes with your transfer sheet)
- Lint roller
- Heat-resistant tape
Infusible Ink Tote Bag Instructions
Make sure to read these instructions carefully. Infusible Ink is different than other Cricut materials and has its own special process to get the best result. You don’t want to ruin your project, your EasyPress mat, your EasyPress, or your sanity. Plus it’s not exactly inexpensive if you make a mistake!
Create Your Design in Design Space
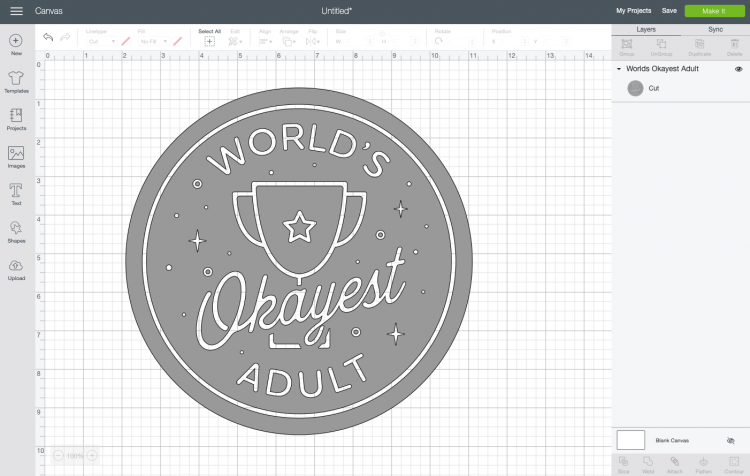
Start by creating your design for your bag in Cricut Design Space. If this is your first project, pick something relatively simple, like this funny “World’s Okayest Adult” badge image.

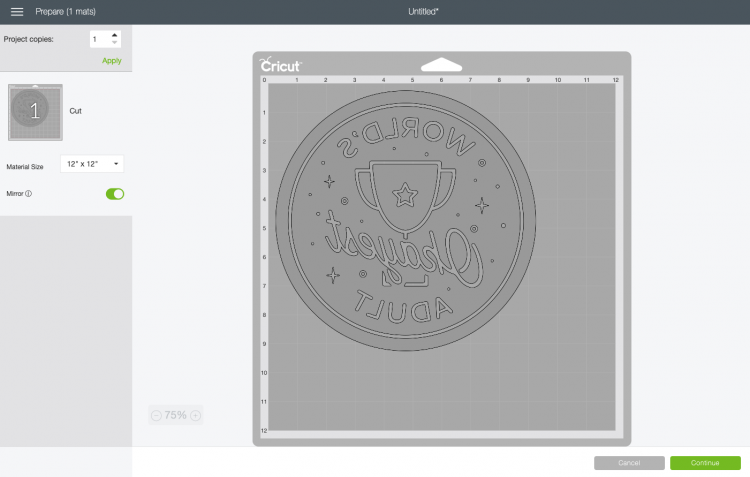
Resize to fit on your tote. I made mine 9″ x 9″ (though I’d suggest making it more like 8.5″ x 8.5″ if you’re using the medium EasyPress 2 so you have more wiggle room around the edge). Click Make It in the upper right corner. When you get to the Prepare screen, make sure to mirror your image. Infusible Ink is like iron on vinyl in that you need to reverse your image for it to adhere correctly to the base surface. Then click Continue.

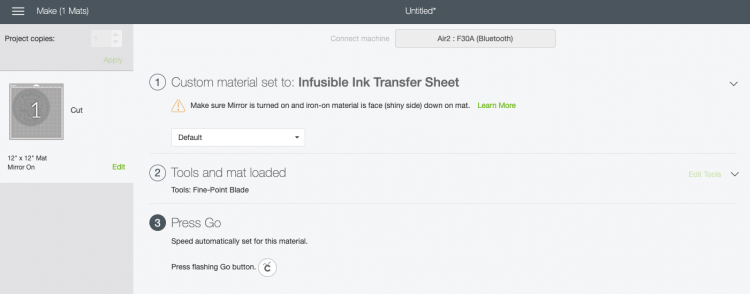
In the Make screen, select Infusible Ink Transfer Sheet as your material (use the Custom Material setting on the Explore dial and then search for “ink”). Make sure you have the Fine Point blade inserted.

Cut Your Design using Your Maker or Explore
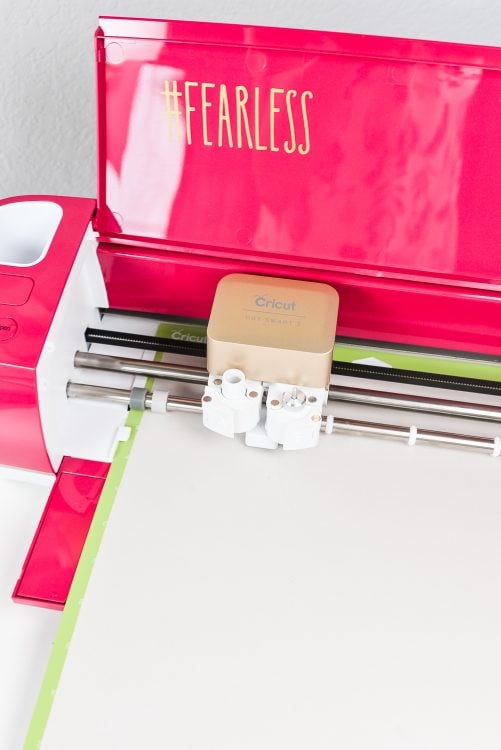
Place your Infusible Ink transfer sheet liner side down on a green cutting mat. I found mine to curl pretty badly, so I used my Cricut brayer to help smooth it out on the mat. You’ll notice that the transfer sheet is super light gray! It’s almost off-white. But as you’ll see, the ink really does brighten up under heat.
Then insert into your machine and cut! I’m using my Cricut Explore Air 2.

Weeding Cricut Infusing Ink
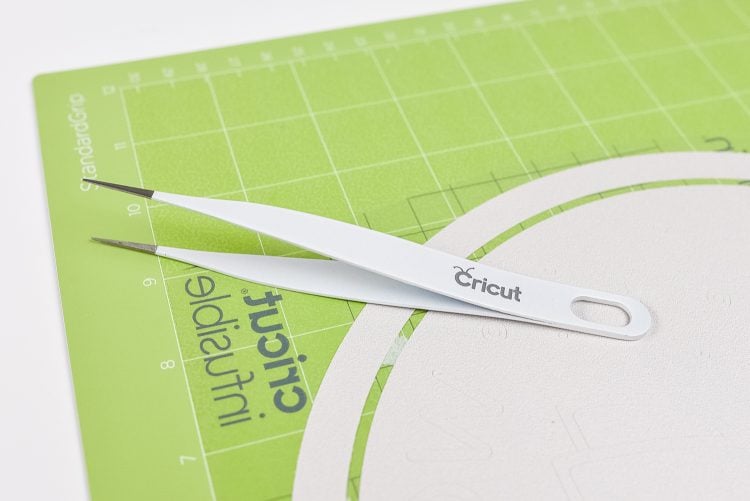
So….apparently I did this wrong. I used my weeding hook and a pair of tweezers. I wouldn’t exactly put this in the category of “weeding for relaxation.” The Infusible Ink is more like a double layer of paper—there’s a paper ink layer and then a thin paper liner. Using my weeding hook, even with quite a bit of pressure, I found that I occasionally just pulled up the top layer, and I’d have to tackle the second layer with my tweezers, as you can see in that little section below.

Now I know that Cricut recommends skipping the weeding hook altogether and using your hands to weed. I did this for my coasters and it is MUCH easier.

Prepare Your Tote Bag for Infusible Ink
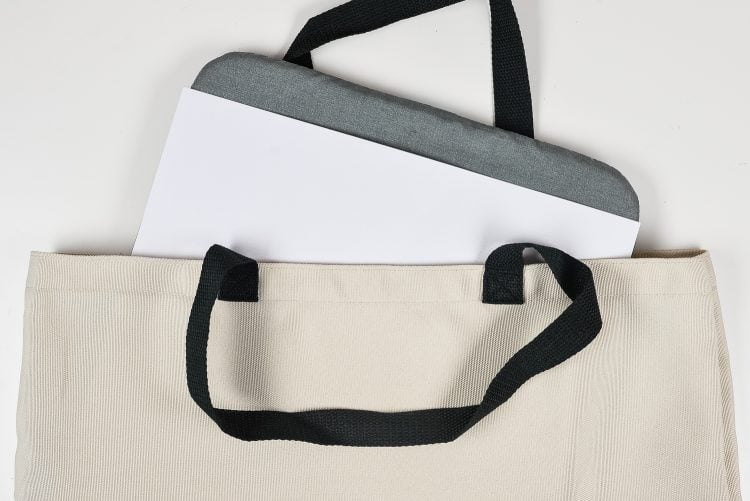
Before you actually do your transfer, you need to prepare your tote bag. Start by inserting your EasyPress Mat inside your tote bag, with a white piece of cardstock on top. The white cardstock will help keep your EasyPress mat clean of ink if it does bleed (mine didn’t). Save the white cardstock for the next time you do an Infusible Ink project.

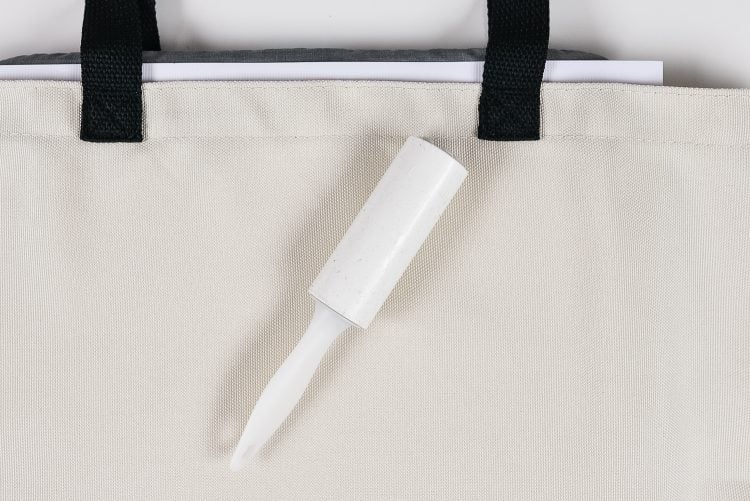
Then use a lint roller to remove any dust and debris from your tote bag. This will help make sure that you get the cleanest transfer possible. A note about the bag: it’s a little thinner and softer than a normal canvas tote, due to the fact it’s made of polyester vs. cotton.

Heat Time & Temperature Settings
Before we continue with the tutorial, let’s first let’s talk about heat method and settings.
I think the EasyPress 2 is the easiest heating method for Infusible Ink. You can also use a heat press (see my heat source comparison post). The EasyPress 2 goes up to 400°, vs the original EasyPress, which only reaches 350°. Cricut has stated that you can try the original, but you may not get quite as vibrant an image.
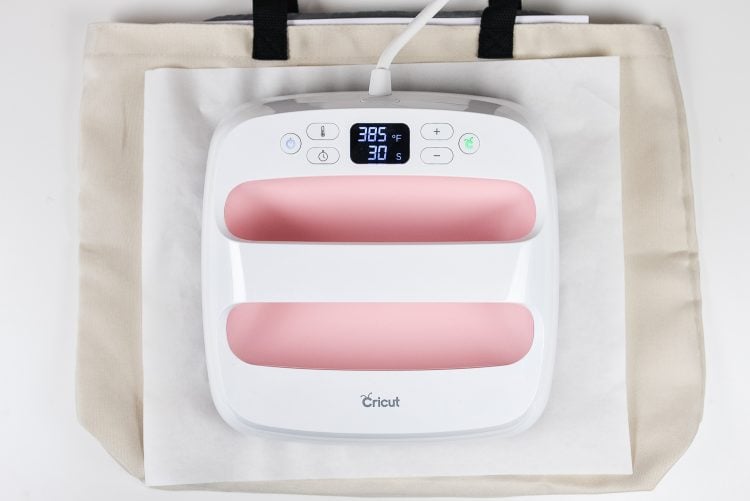
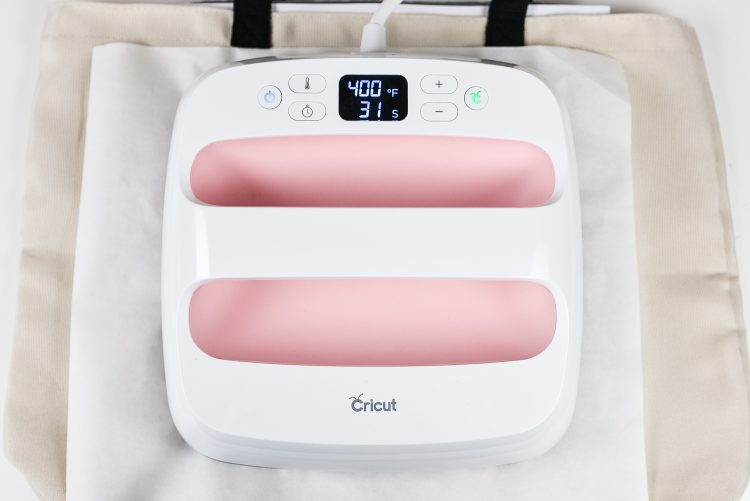
According to Cricut’s Heat Settings Guide, the time and temperature for Infusible Ink on a tote bag is 385° for 40 seconds. But I saw a few people who said that their transfer was still dull at that temperature—someone posted that it was because the EasyPress loses a bit of heat when it hits the cool bag and EasyPress mat, so it’s actually not reaching 385° for those full 40 seconds. So I decided to go with 400° for 40 seconds.
Use the EasyPress to Transfer Cricut Infusible Ink
First cover your blank tote bag with the butcher paper that came with the transfer sheet. You’re going to pre-heat your bag before you apply your transfer, to help flatten your surface and dry any moisture in the bag itself. Press for 15 seconds and let cool completely. Notice that my temperature did drop as it hit the cooler bag and mat!

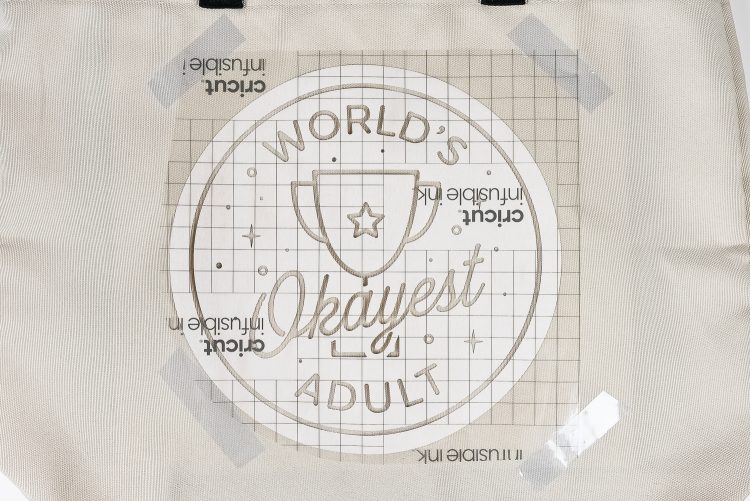
Once your bag is completely cooled, you can add your transfer. I was afraid of it shifting, so I used a bit of heat-resistant tape to secure my transfer to my bag.

Place the butcher paper back on top of the transfer. Then carefully press your EasyPress (or use your heat press) onto your project with light but consistent pressure. Make sure the EasyPress covers the entire transfer.

Do NOT move your EasyPress around—that could cause your transfer to shift and blur your edges. Press for 40 seconds.
Let the transfer cool and carefully pick it up—it will not be stuck to your bag at all.

Overall, I’m really pleased with the results. You can see when I zoom in just how embedded that ink is within the fibers of the tote bag.

I do have a little bit of streaking in my color, which is more noticeable in photos than in person. If I figure out a way to prevent this, I’ll make sure to come back and update this post. Other than that, though, this feels like a professional-quality project!
Enter below to win a huge pack of Infusible Ink goodies!
a Rafflecopter giveaway
Want some tote bag funnies? Check out my blog for this Funny Tote Bag SVG Bundle!
INFUSIBLE INK TOTE BAG
Equipment
- Butcher paper (comes with your transfer sheet)
Instructions
- Make sure to read these instructions carefully. Infusible Ink is different than other Cricut materials and has its own special process to get the best result. You don't want to ruin your project, your EasyPress mat, your EasyPress, or your sanity. Plus it's not exactly inexpensive if you make a mistake!
- Create Your Design in Design SpaceStart by creating your design for your bag in Cricut Design Space. If this is your first project, pick something relatively simple, like this funny "World's Okayest Adult" badge image.

- Resize to fit on your tote. For this project, the design was made to be 9" x 9" (though it is suggested making it more like 8.5" x 8.5" if you're using the medium EasyPress 2 so you have more wiggle room around the edge). Click Make It in the upper right corner. When you get to the Prepare screen, make sure to mirror your image. Infusible Ink is like iron on vinyl in that you need to reverse your image for it to adhere correctly to the base surface. Then click Continue.

- In the Make screen, select Infusible Ink Transfer Sheet as your material (use the Custom Material setting on the Explore dial and then search for "ink"). Make sure you have the Fine Point blade inserted.

- Place your Infusible Ink transfer sheet liner side down on a green cutting mat. I found mine to curl pretty badly, so I used my Cricut brayer to help smooth it out on the mat. You'll notice that the transfer sheet is super light gray! It's almost off-white. But as you'll see, the ink really does brighten up under heat.Then insert into your machine and cut!

- Weeding Cricut Infusing InkSo….apparently I did this wrong. I used my weeding hook and a pair of tweezers. I wouldn't exactly put this in the category of "weeding for relaxation." The Infusible Ink is more like a double layer of paper—there's a paper ink layer and then a thin paper liner. Using my weeding hook, even with quite a bit of pressure, I found that I occasionally just pulled up the top layer, and I'd have to tackle the second layer with my tweezers, as you can see in that little section below.

- Now I know that Cricut recommends skipping the weeding hook altogether and using your hands to weed. I did this for my coasters and it is MUCH easier.

- Prepare Your Tote Bag for Infusible InkBefore you actually do your transfer, you need to prepare your tote bag. Start by inserting your EasyPress Mat inside your tote bag, with a white piece of cardstock on top. The white cardstock will help keep your EasyPress mat clean of ink if it does bleed (mine didn't). Save the white cardstock for the next time you do an Infusible Ink project.

- Then use a lint roller to remove any dust and debris from your tote bag. This will help make sure that you get the cleanest transfer possible. A note about the bag: it's a little thinner and softer than a normal canvas tote, due to the fact it's made of polyester vs. cotton.

- Heat Time & Temperature SettingsBefore we continue with the tutorial, let's first let's talk about heat method and settings.The EasyPress 2 is the easiest heating method for Infusible Ink. You can also use a heat press (see this heat source comparison post). The EasyPress 2 goes up to 400°, vs the original EasyPress, which only reaches 350°. Cricut has stated that you can try the original, but you may not get quite as vibrant an image.According to Cricut's Heat Settings Guide, the time and temperature for Infusible Ink on a tote bag is 385° for 40 seconds. But I saw a few people who said that their transfer was still dull at that temperature—someone posted that it was because the EasyPress loses a bit of heat when it hits the cool bag and EasyPress mat, so it's actually not reaching 385° for those full 40 seconds. So it was decided to go with 400° for 40 seconds.
- Use the EasyPress to Transfer Cricut Infusible InkFirst cover your blank tote bag with the butcher paper that came with the transfer sheet. You're going to pre-heat your bag before you apply your transfer, to help flatten your surface and dry any moisture in the bag itself. Press for 15 seconds and let cool completely. Notice that my temperature did drop as it hit the cooler bag and mat!

- Once your bag is completely cooled, you can add your transfer. Afraid that it would shifting, so a bit of heat-resistant tape was used to secure the transfer to the bag.

- Place the butcher paper back on top of the transfer. Then carefully press your EasyPress (or use your heat press) onto your project with light but consistent pressure. Make sure the EasyPress covers the entire transfer.

- Do NOT move your EasyPress around—that could cause your transfer to shift and blur your edges. Press for 40 seconds.Let the transfer cool and carefully pick it up—it will not be stuck to your bag at all.

- Really pleased with the results. You can see when zoomed in just how embedded that ink is within the fibers of the tote bag.




Comments & Reviews
Natasha says
Love the step by step instructions! Thanks so much, Corey 💞
Crystal Summers says
Hi Lauren,
Welcome! There are many different ways to create a multi-colored look with the Cricut. For example, you could purchase black heat transfer vinyl for the upper half and printed floral/patterned heat transfer vinyl for the bottom. You could also purchase printable vinyl and print the design yourself, then iron it on. I hope that helps! If not, please email hello@heyletsmakestuff.com and I’ll assist you further.
Happy crafting!
Crystal, HLMS Community Manager
Lauren Brown says
Hi! I just got a Cricut Maker and am totally a newbie just learning the basics. So I realize I’m quite a while away from anything too complicated, but I’m dying to know how you made that mermaid image with the black upper half and the floral lower half. Possibly you’ve already a post on this and I just haven’t found it yet, but if you could give me any info, it would be greatly appreciated. Thank you!