Make a shirt for you and your mini with Cricut Infusible Ink raglans! Make professional level projects that won’t peel, crack, or fade with Cricut Infusible Ink.

It’s time for another fun Cricut Infusible Ink project, this time using raglan shirts and baby bodysuits! As a mom, I love making matching clothes for me and my family, so today I’m sharing how to use Cricut images to make coordinating road-trip themed shirts using Cricut Infusible Ink raglans.
But before we get started, let’s go through some frequently asked questions about this project!
What is Cricut Infusible Ink?
If you’ve never worked with it before, Cricut Infusible Ink is basically an ink transfer product. The transfer sheets are made of dry ink, and when high heat is applied, the ink is actually transferred into (not onto) the base material. Basically you are dyeing the base material, vs. putting a material on top of the base material (like with iron on vinyl). This means no peeling, no cracking, and no fading! Want to learn more about Cricut Infusible Ink? Check out these posts:
- What is Cricut Infusible Ink?
- How to Layer Infusible Ink with the Slice & Set Method
- Tote Bag with Infusible Ink
- Onesie with Infusible Ink
- Ceramic Coasters with Infusible Ink
- Troubleshooting Infusible Ink
Because Cricut Infusible Ink needs high heat to transfer, you’ll need the Cricut EasyPress 2 instead of the Cricut EasyPress. Learn more about the differences between the Cricut EasyPress machines.
What is a Raglan?
A raglan is a type of sleeve that extends all the way to the collar of a shirt. Instead of having the seam on top of the arm and shoulder, the seam of a raglan sleeve is under the arm. The style was originally invented to make it easier to wield a sword! Today, however, it’s a fun, casual style that works for men, women, and children. The raglan is perfect for matching family shirts!
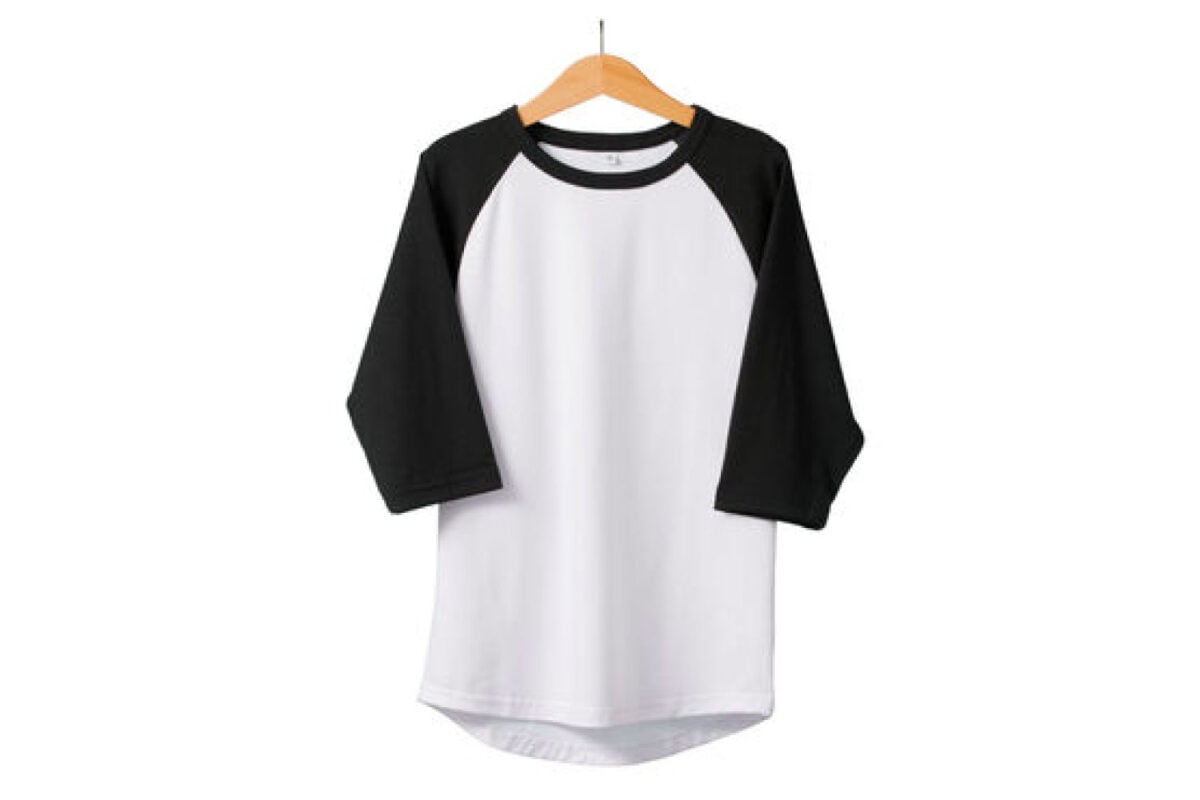
Generally, raglan sleeves are a different color than the shirt itself, and often the bottom hem is curved instead of straight. Raglans are also sometimes called baseball tees or colored-sleeve shirts.
Cricut Infusible Ink Raglan Styles
Cricut Infusible Ink Raglans are high-quality and really comfy. Perfect for the whole family!
Each of the styles is unisex, so make sure you check the sizing on the back for specific measurements.
- Cricut Raglan Unisex Black and White Adult
- Cricut Raglan Unisex Gray Adult
- Cricut Raglan Unisex Black and White Youth
- Cricut Raglan Unisex Gray Youth
- Cricut Raglan Unisex Black and White Baby Bodysuit
For the gray raglan shirts, make sure you are picking a darker Infusible Ink transfer sheet—the lighter, brighter colors won’t stand out on the gray background as well as they do on the white.
Supplies for Cricut Infusible Ink Matching Family Raglan Shirts
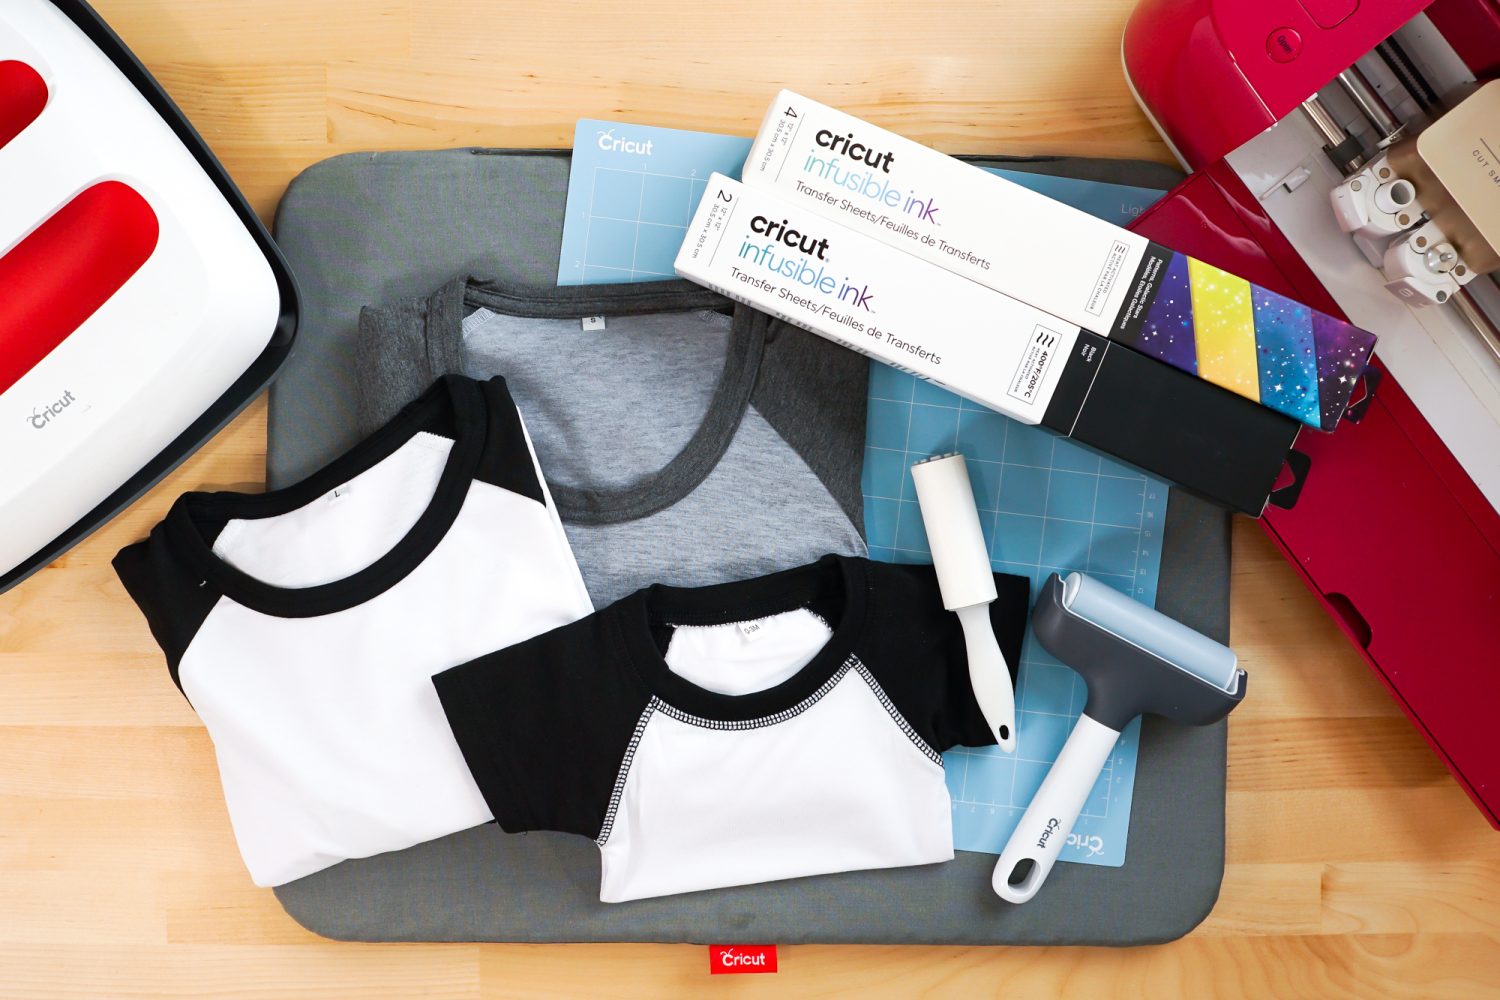
- Cricut Explore or Cricut Maker
- Green StrongGrip mat or Blue LightGrip mat
- Cricut Infusible Ink Transfer Sheets + included butcher paper
- Cricut Infusible Ink raglan shirts in preferred sizes
- Cricut EasyPress
- White cardstock
- EasyPress mat
- Brayer
- Lint roller
I always suggest using the EasyPress 2 that is closest to the size of your Infusible Ink project. You don’t want your EasyPress 2 to sit on any of the seams, because this can cause an uneven transfer. You also do not want to have to double press—pressing half the image and then the other half, because the overlap in the middle can cause ghosting or an uneven transfer. Read more about Troubleshooting Infusible Ink.
Infusible Ink Matching Family Raglan Shirts
Make sure to read these instructions carefully. Infusible Ink is different than other Cricut materials and has its own special process to get the best result. You don’t want to ruin your project, your EasyPress mat, your EasyPress 2, or your day!
Create Your Design In Design Space
(We recently did a big road trip from California to Washington when we moved here, and if you want to know the answer to “how many times can a kid ask ‘are we there yet?’ on a road trip, the answer is…a million billion, give or take a few.)
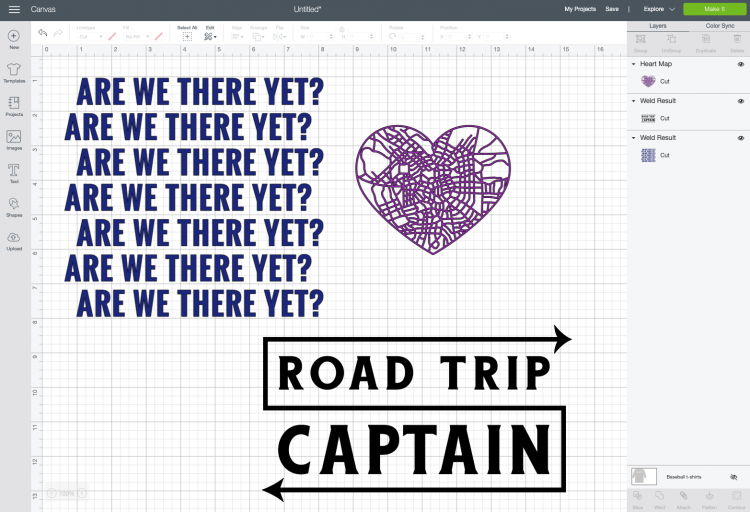
Start by creating your design for your t-shirts in Cricut Design Space. I’m using two Design Space files: Road Trip Captain is #M1A1AB197, the “Are We There Yet?” image is #M1A1AB138, and the map heart is #M1A1AB21E.
For each image, I changed it to a single color that was representative of the Infusible Ink transfer sheet I was using, and welded each one so they would each cut as a single image.
Measure your shirts and resize your images to fit.
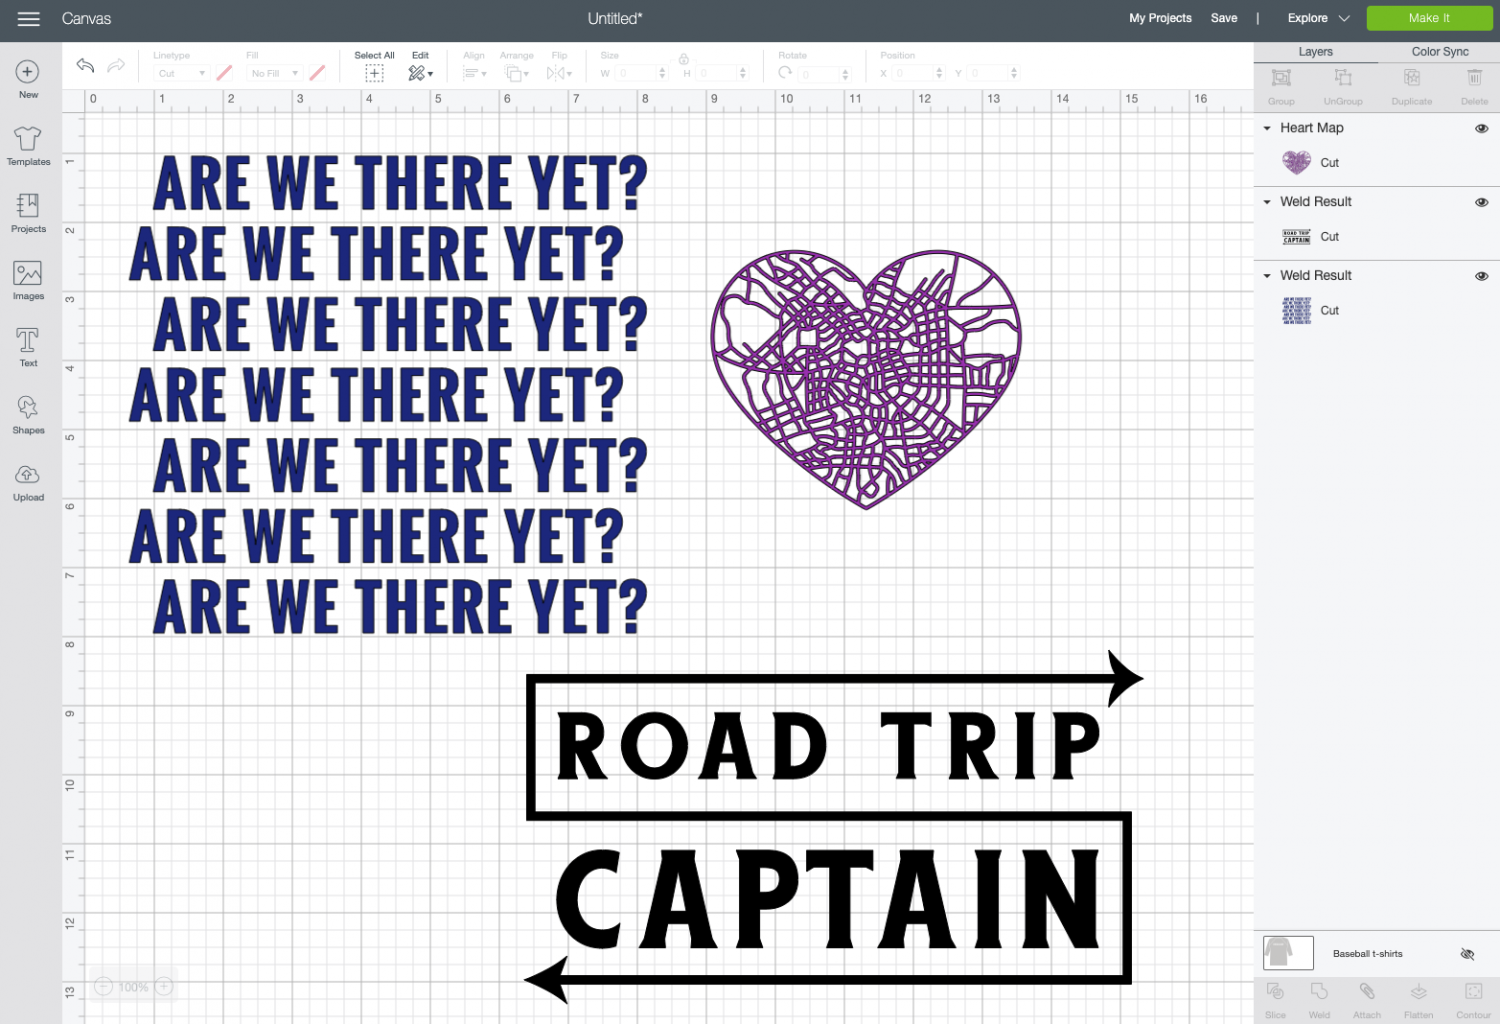
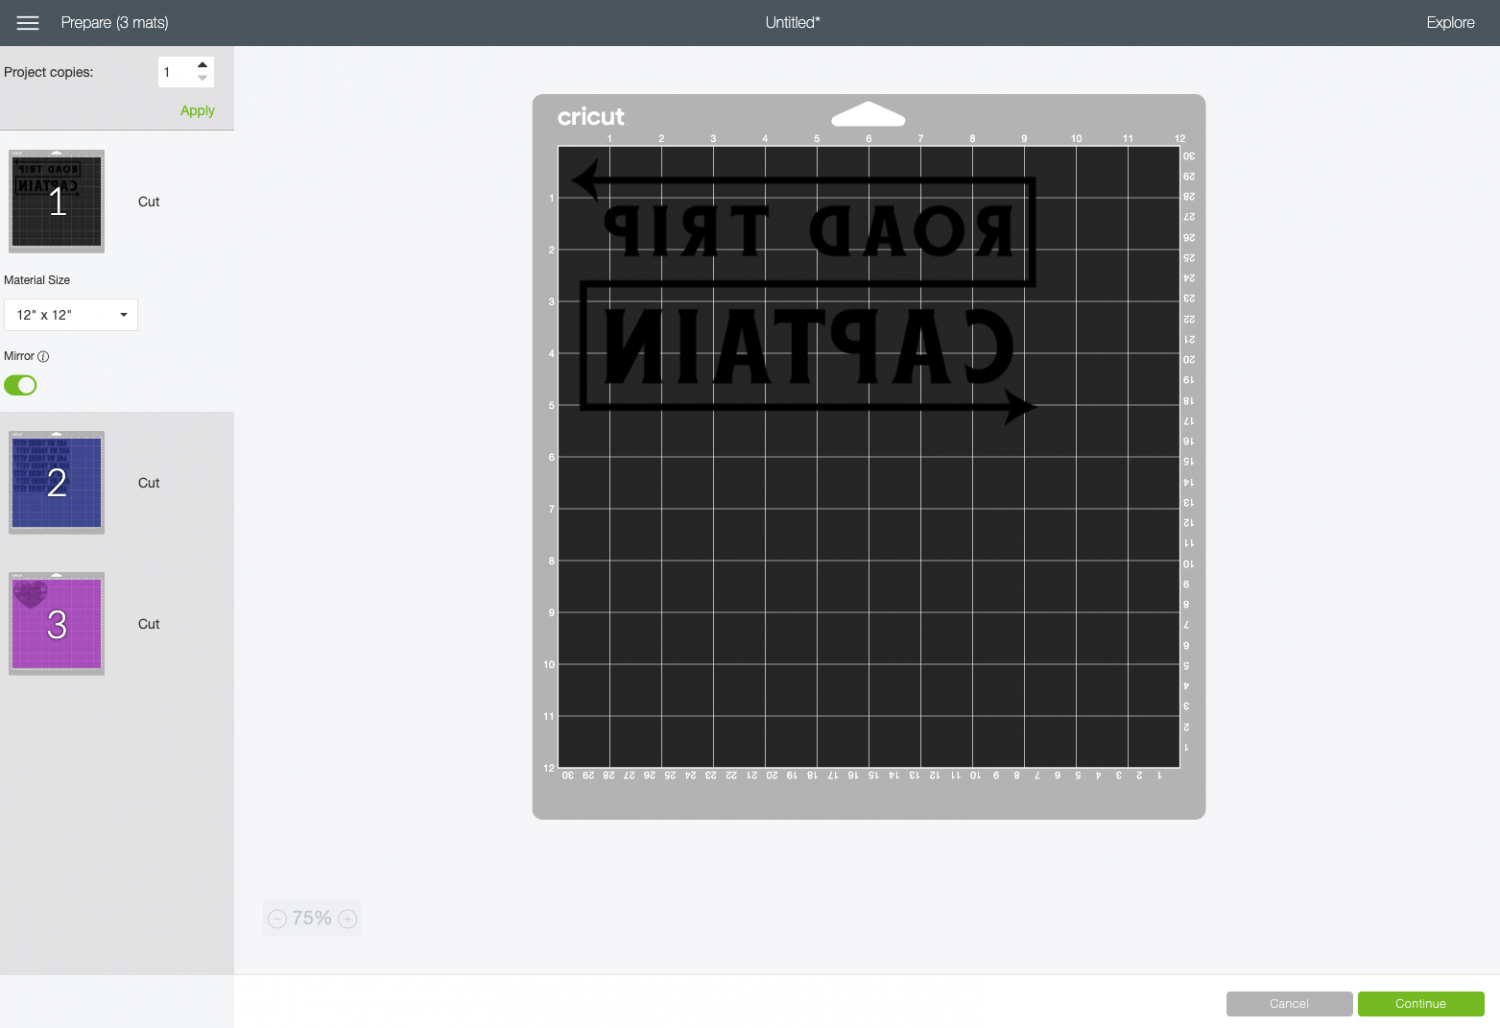
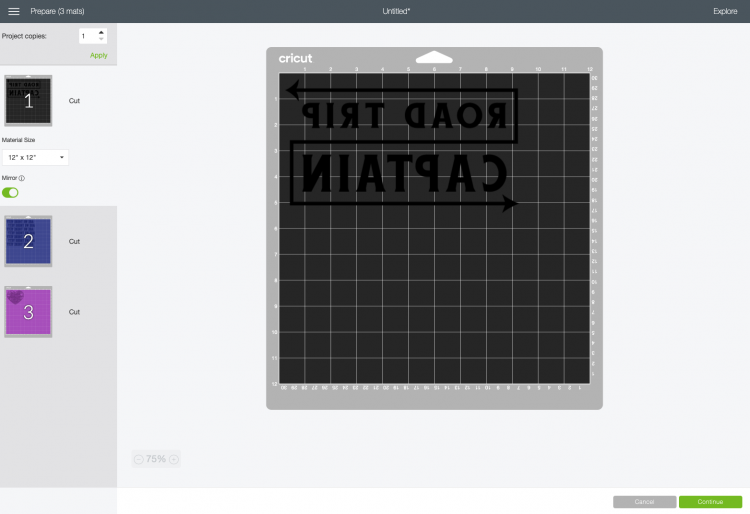
Then click Make It in the upper right corner. When you get to the Prepare screen, make sure to mirror your image. Infusible Ink is like iron on vinyl in that you need to reverse your image for it to adhere correctly to the base surface. Then click Continue.
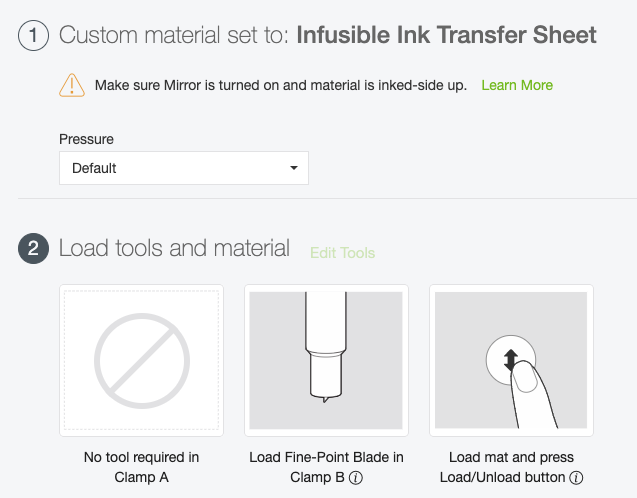
In the Make screen, select Infusible Ink Transfer Sheet as your material (use the Custom Material setting on the Explore dial and then search for “ink”). Make sure you have the Fine Point blade inserted.
Cut Your Design on the Cricut
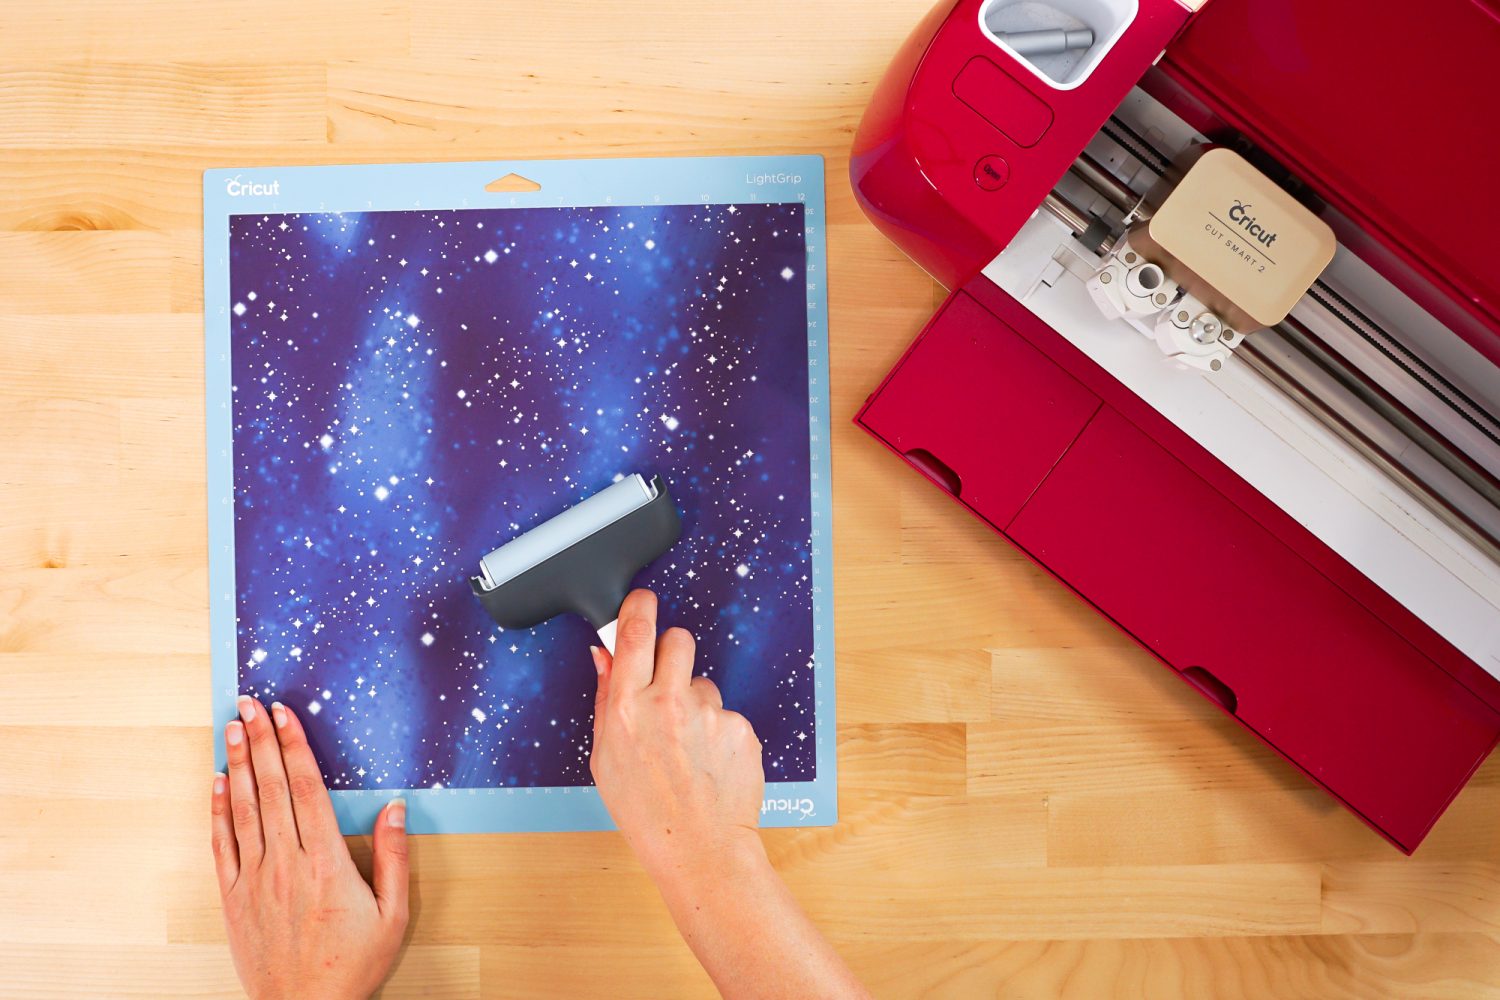
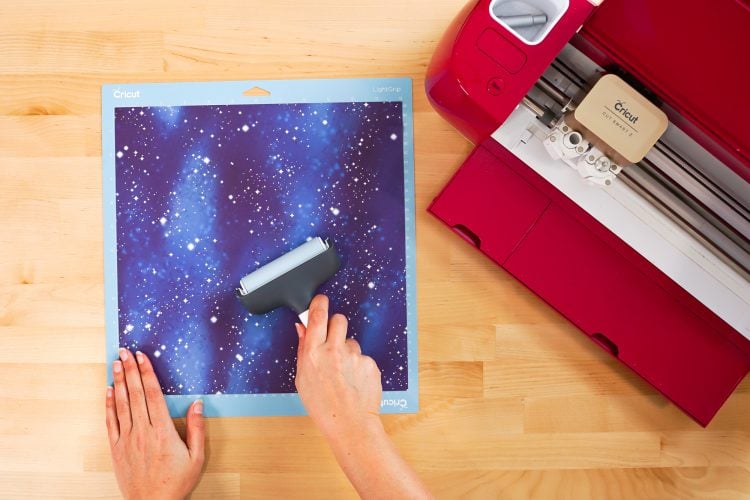
Place your Infusible Ink transfer sheet liner side down on the cutting mat. You can use a brayer to help flatten the transfer sheet onto the mat—you don’t want any bumps or bubbles.
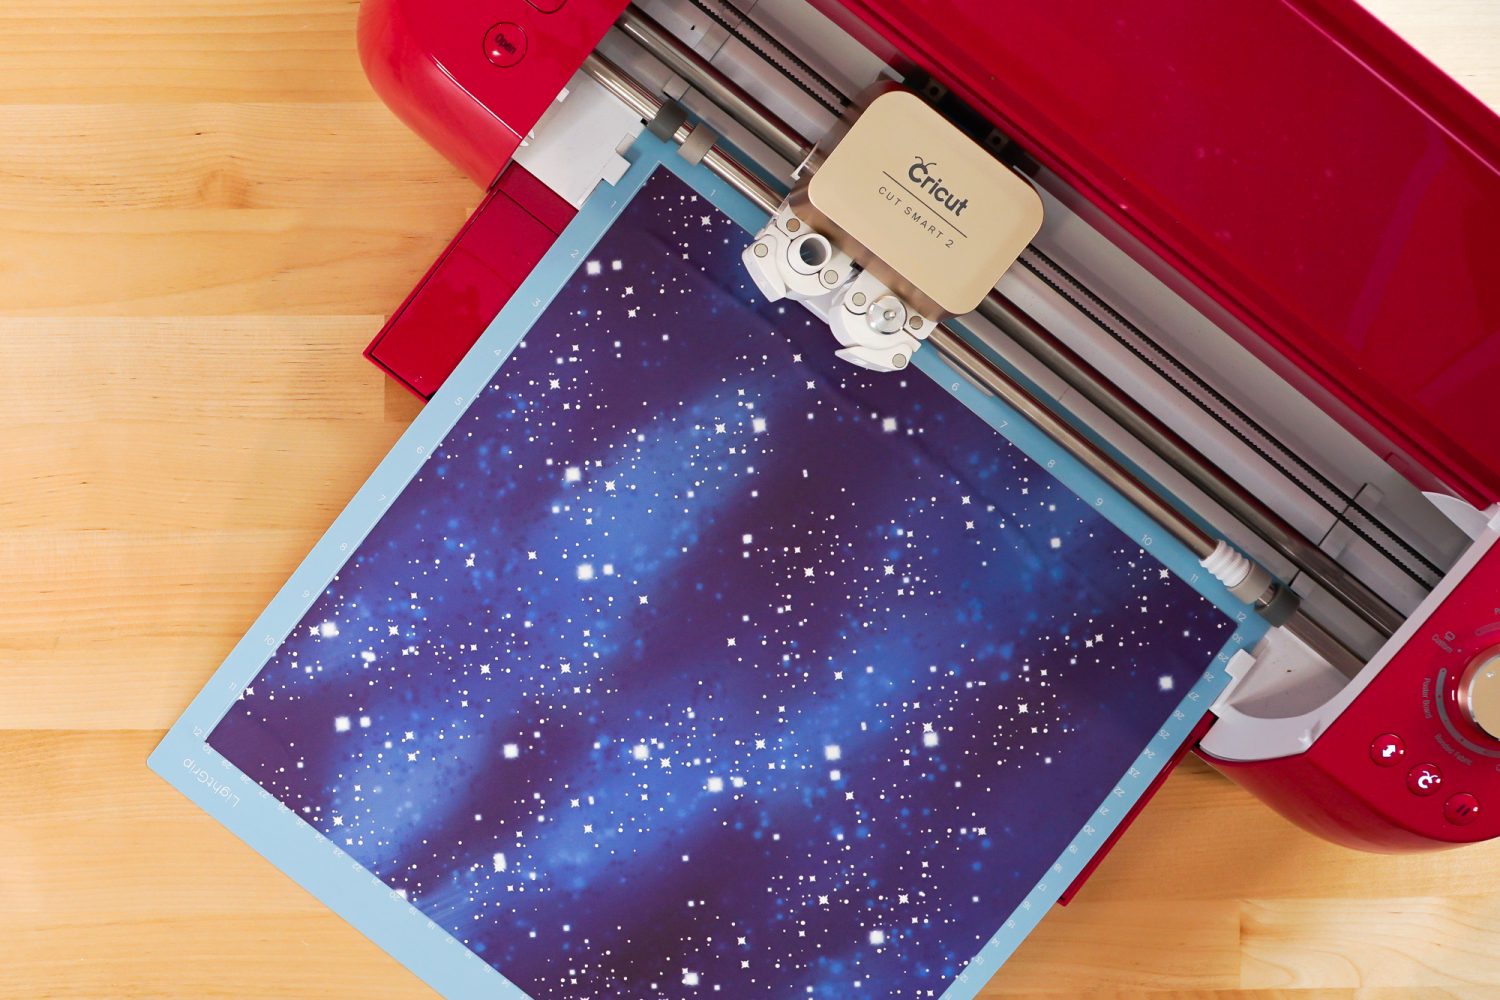
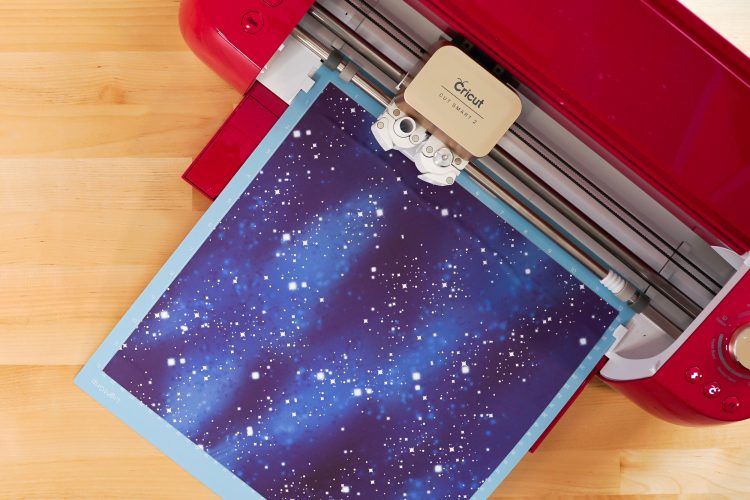
Then insert into your machine and cut!
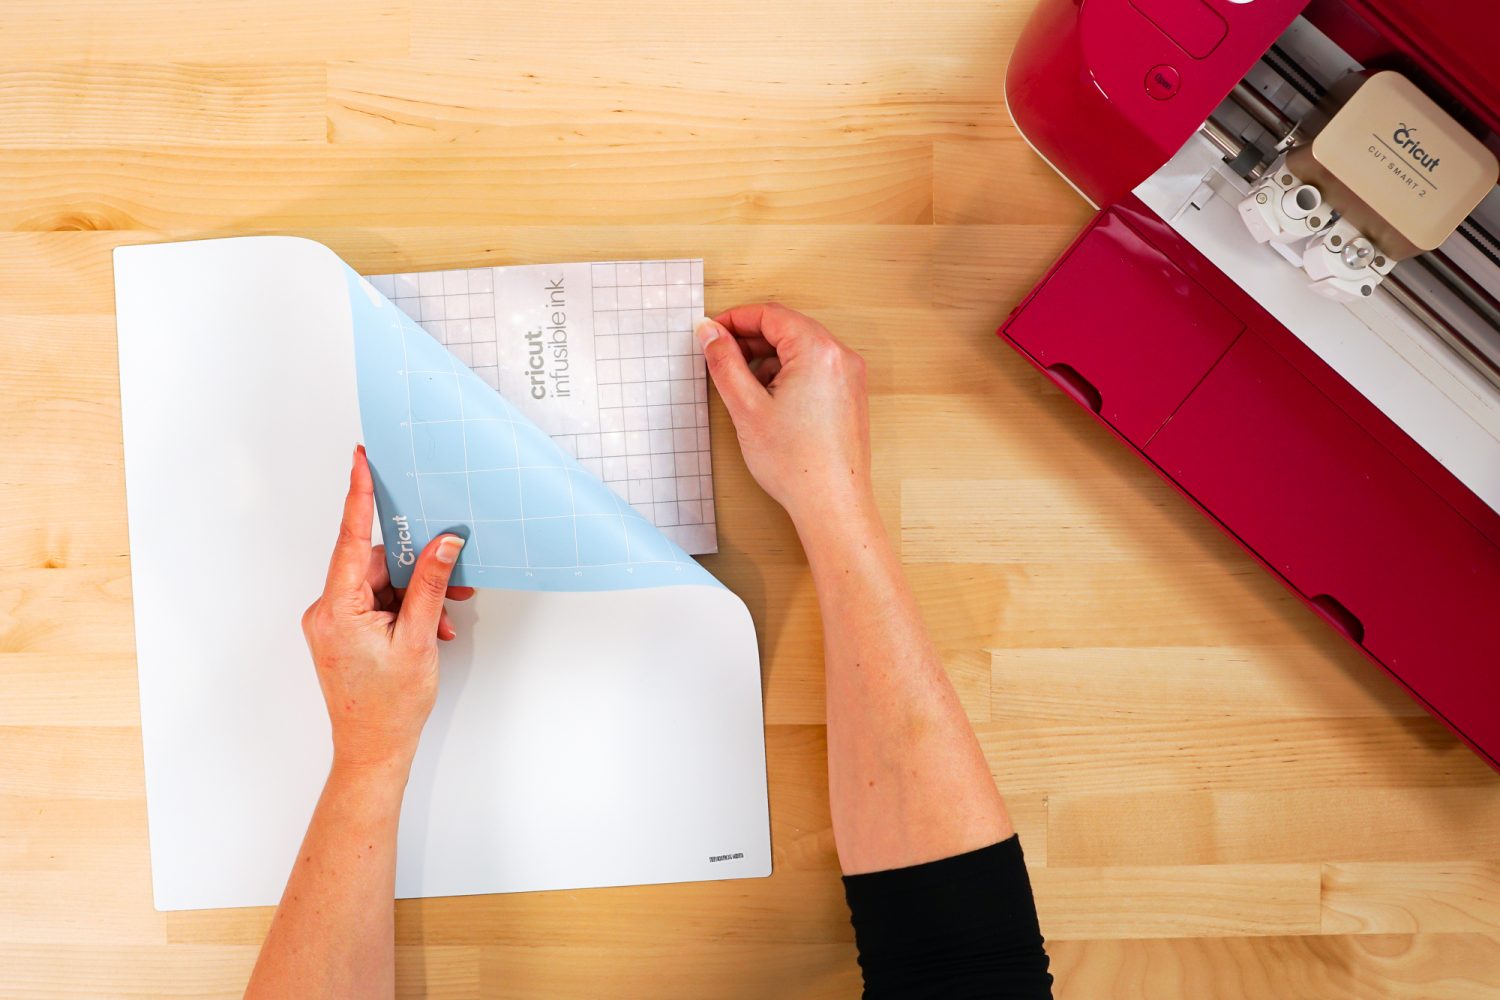
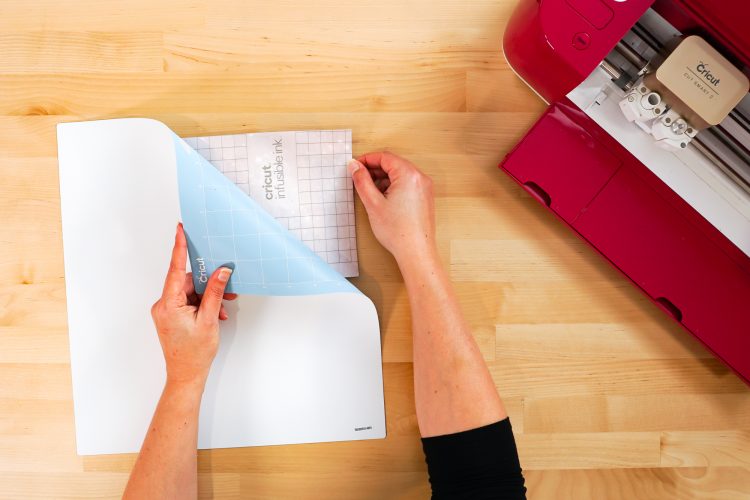
To remove your transfer sheet from the mat, flip the mat over and peel the mat away from the transfer sheet, keeping the transfer sheet flat on your table with your hand.
Weeding Cricut Infusing Ink
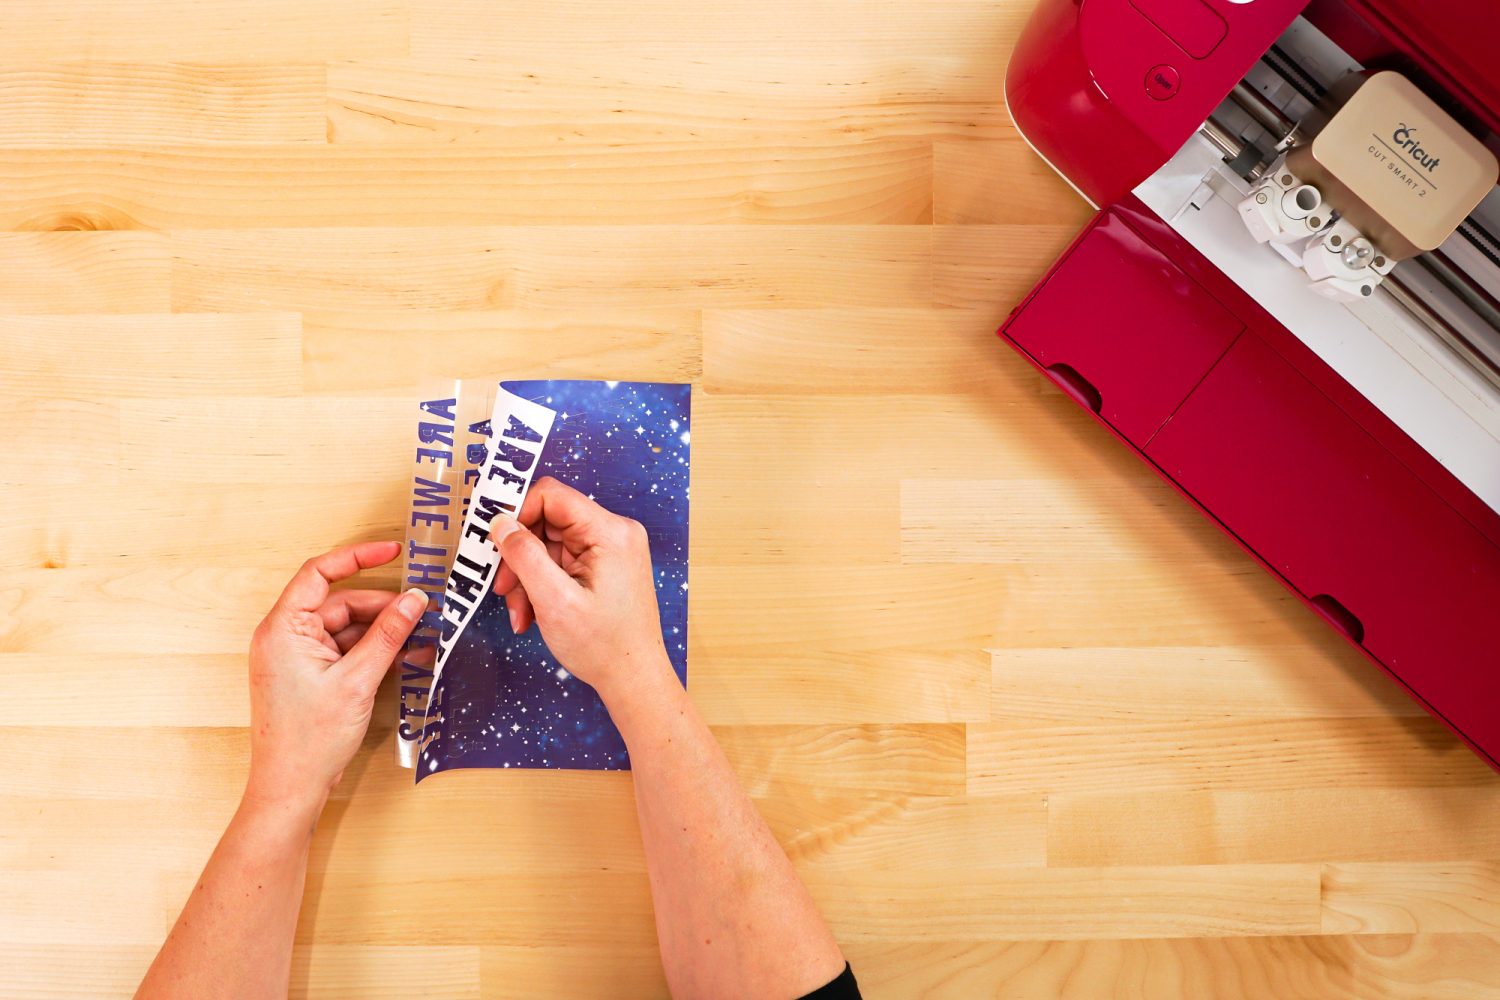
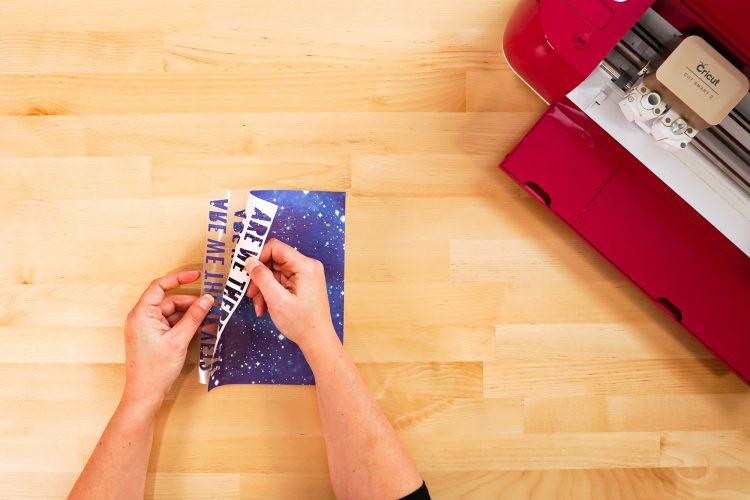
Wash and thoroughly dry your hands. Cricut Infusible Ink is designed to be weeded with your hands, instead of a weeding tool, but the oils from your hands can cause ghosting.
Bend the backing sheet gently and pull off all of the negative material. You can use tweezers for the small bits in letters if needed, but I found that it’s just easier to bend the backing sheet a bit and use my fingernail.
Prepare Your Raglan For Infusible Ink
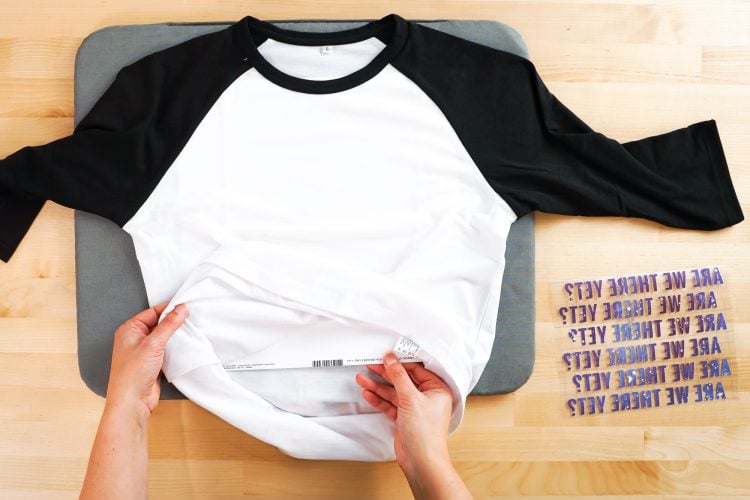
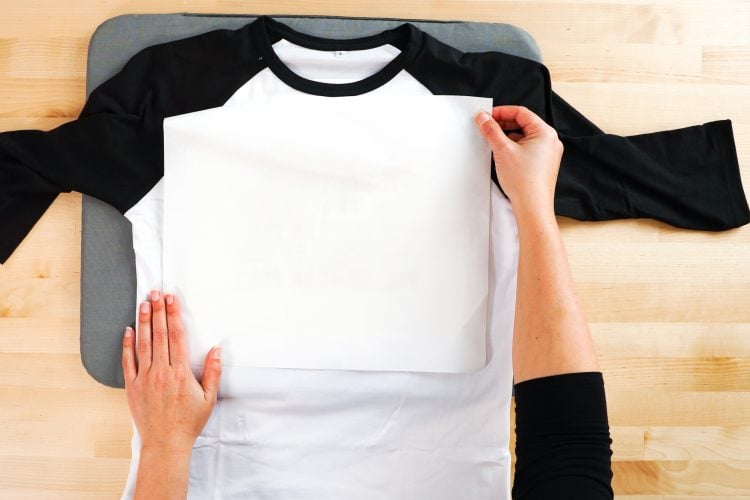
Before you actually do your transfer, you need to prepare your raglan. Start by placing your raglan on a Cricut EasyPress mat. Then place a piece of white cardstock inside the raglan—this will help prevent bleed-through to the back.
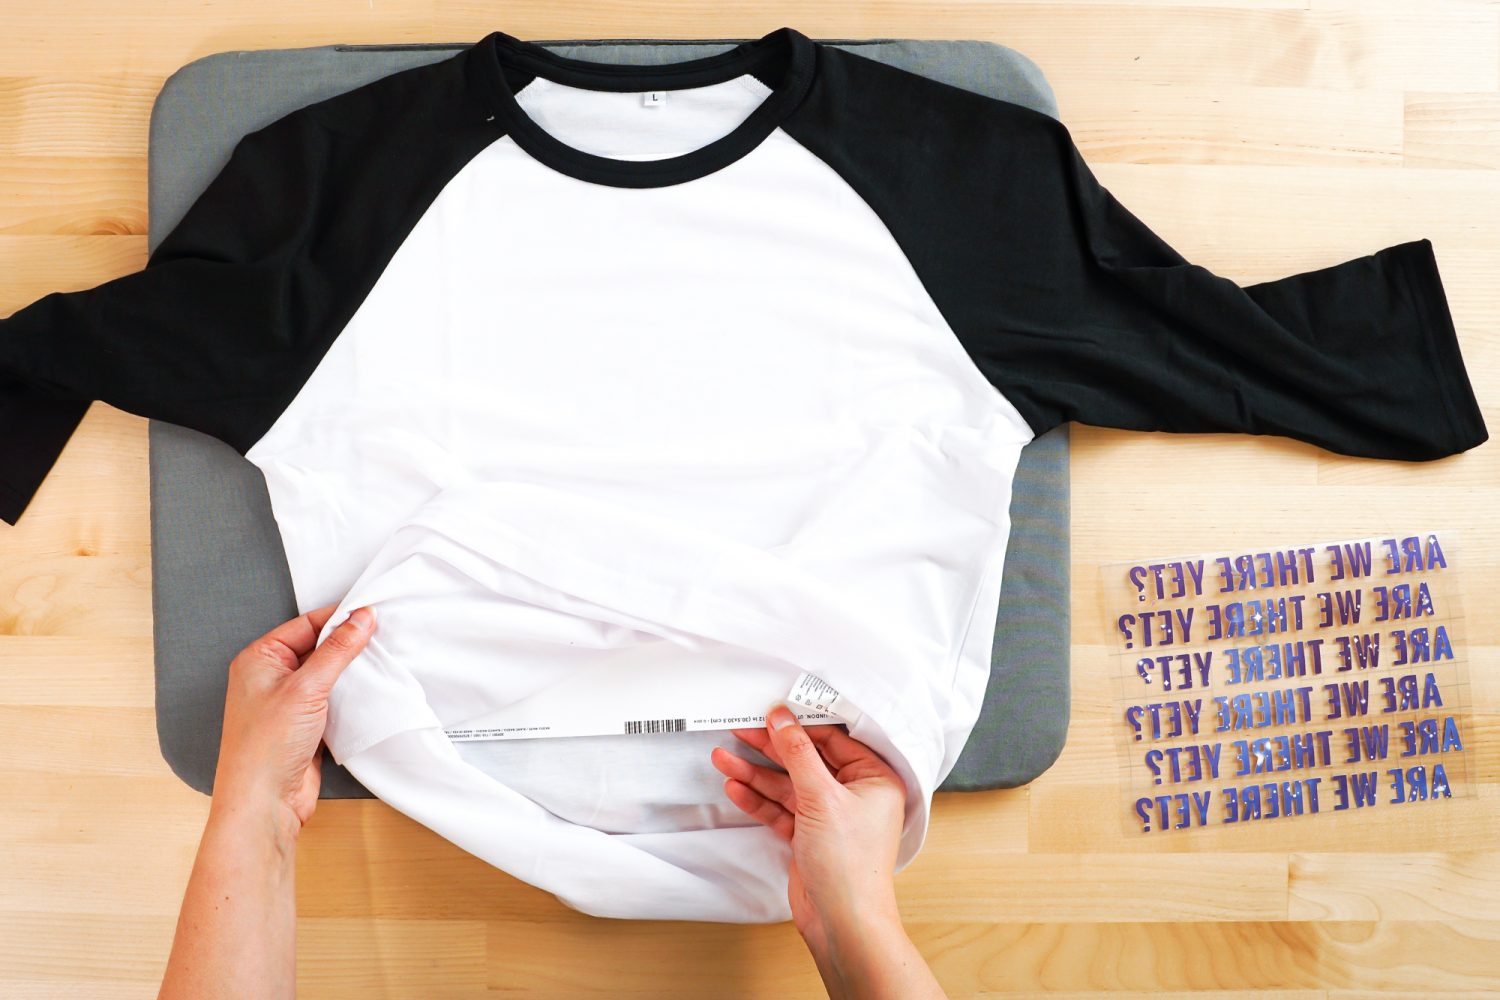
Then use a lint roller to remove any dust and debris from your raglan. This will help make sure that you get the cleanest transfer possible.
Heat Time & Temperature Settings
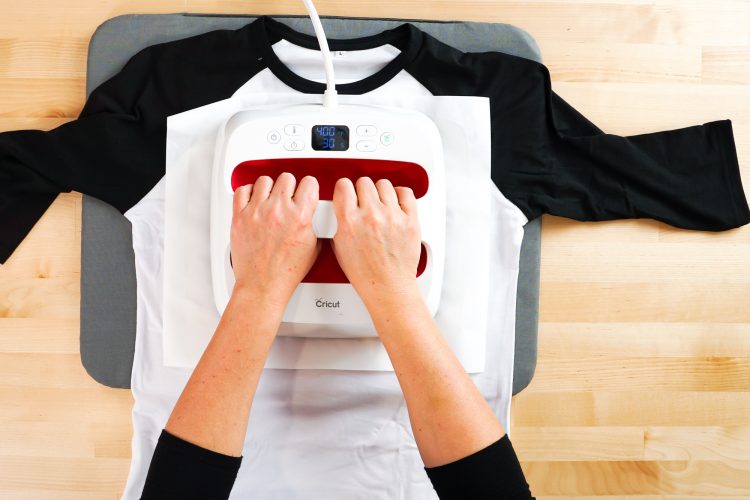
According to Cricut’s Heat Settings Guide, the time and temperature for Infusible Ink on a raglan is 385° for 30 seconds. After my own trial and error, I now go with 400° for 30 seconds—I find that the EasyPress 2 cools a bit when it hits the shirt for the first time.
Use The EasyPress To Transfer Cricut Infusible Ink
First cover your blank raglan with the butcher paper that came with the transfer sheet. Then pre-heat your raglan before you apply your transfer, to help flatten your surface and dry any moisture in the material itself. Press for 15 seconds and let cool completely.
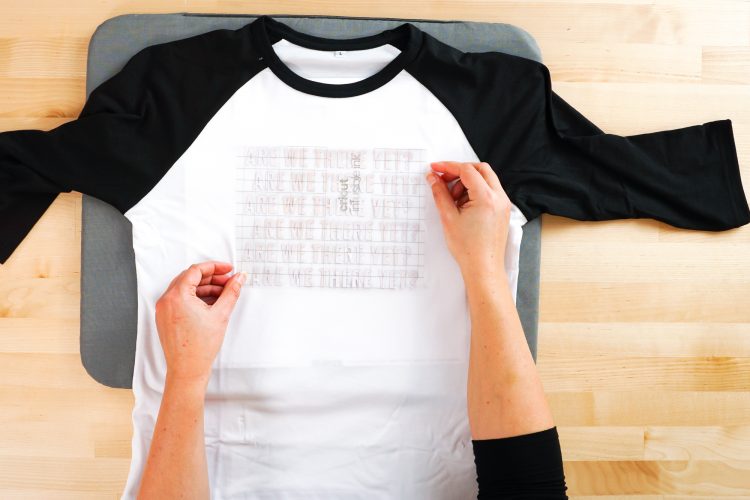
Once your raglan is totally cooled, you can add your transfer, face down on the raglan.
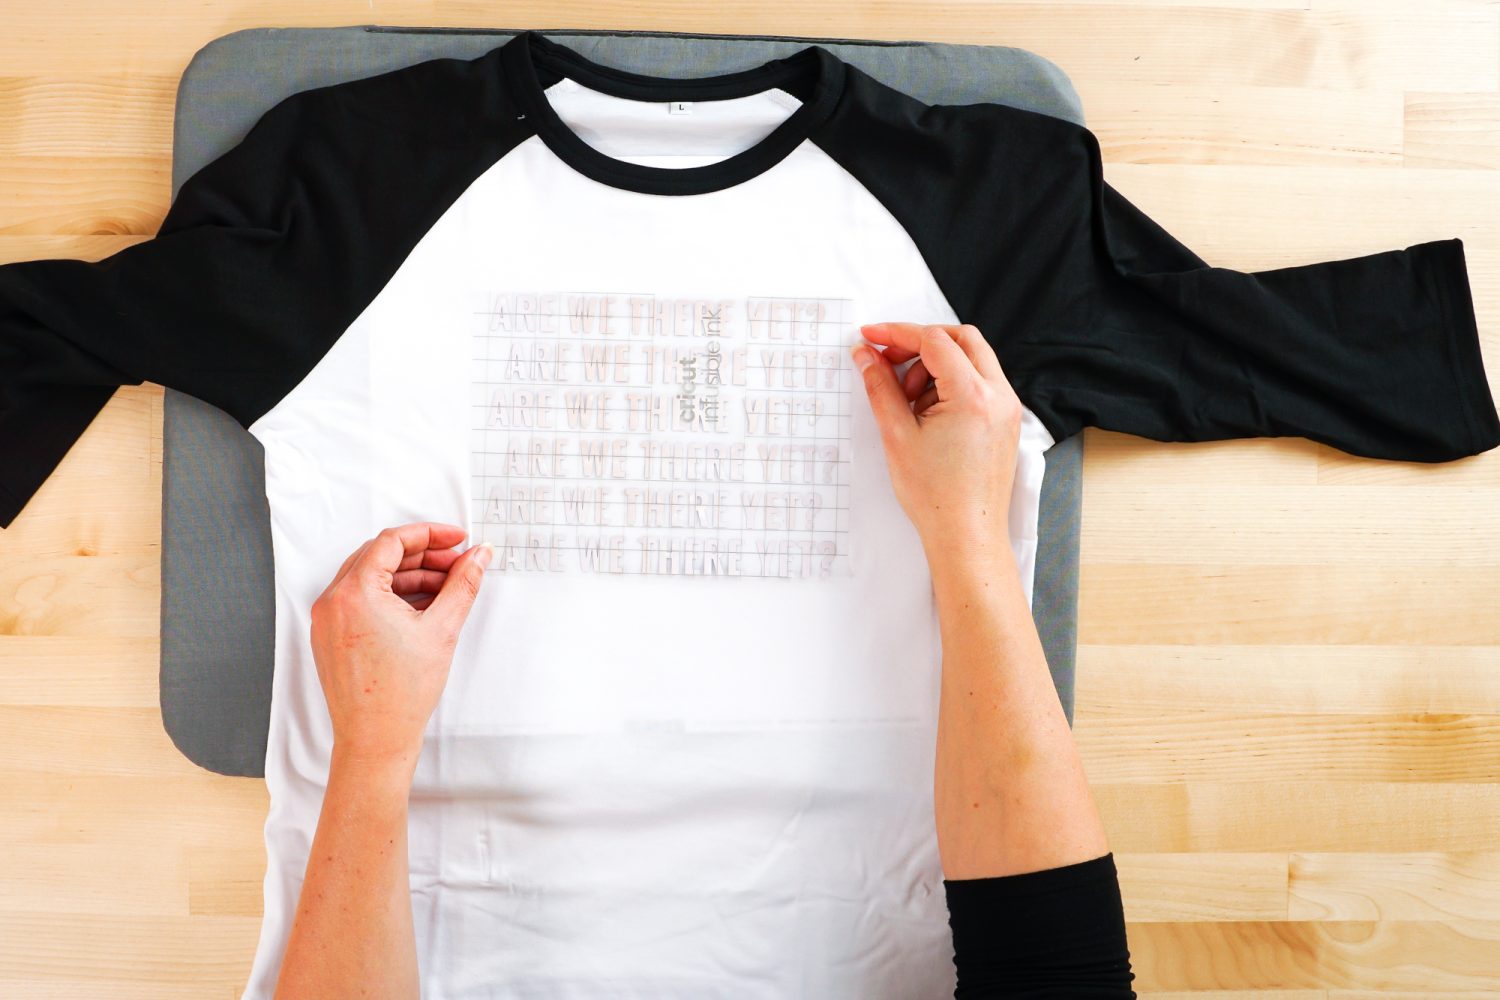
Place the butcher paper back on top of the transfer.
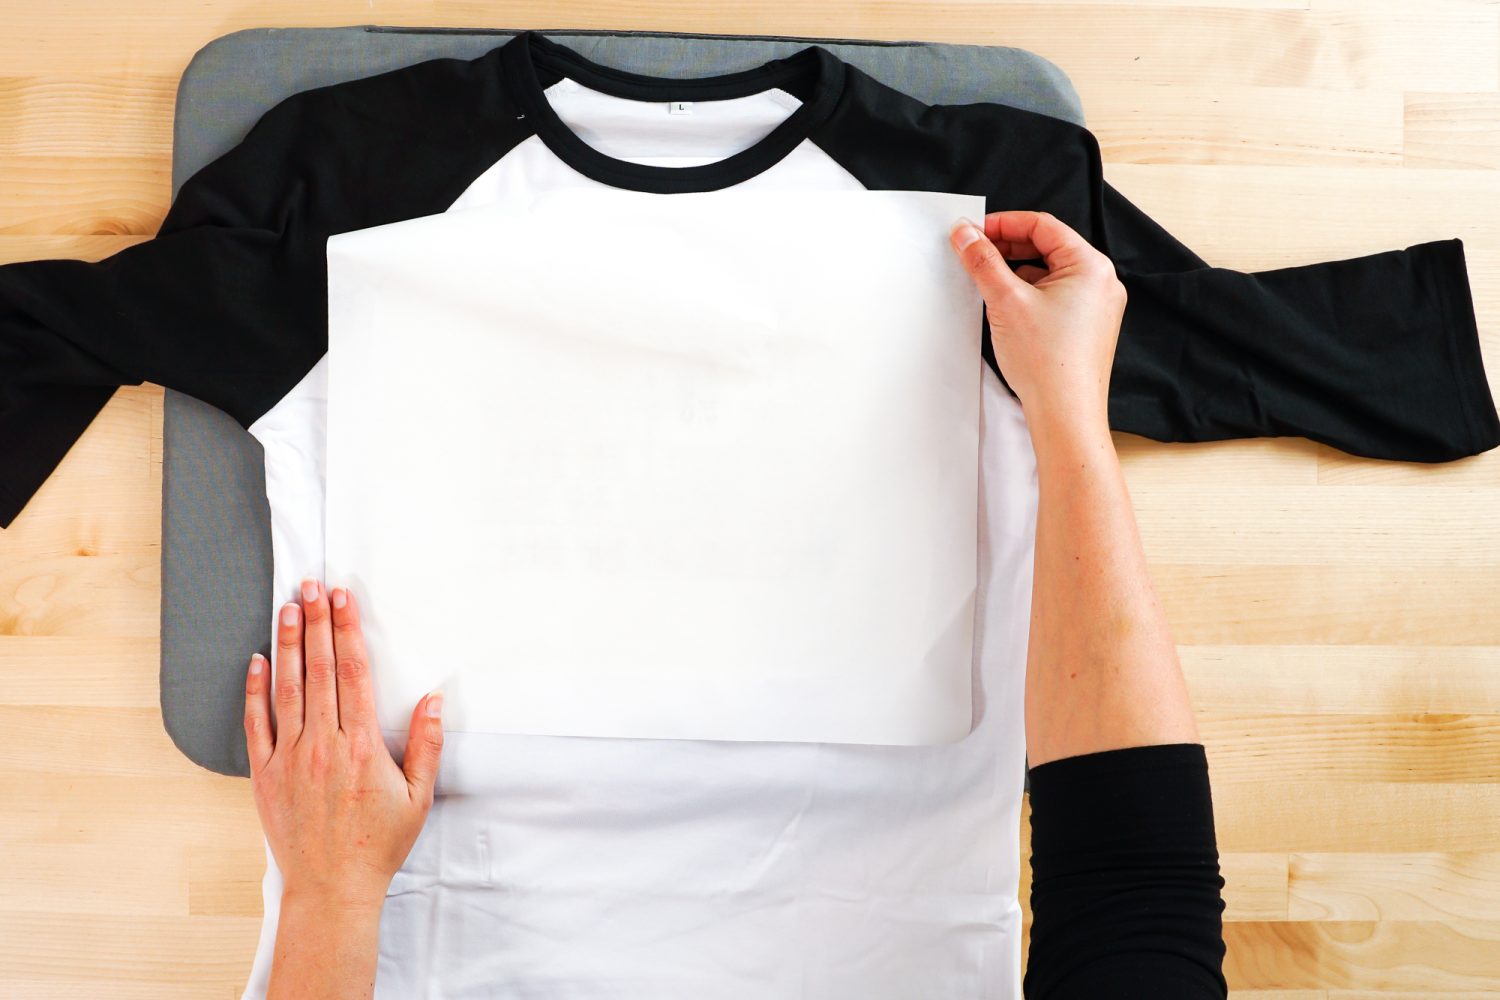
Then carefully press your EasyPress 2 onto your project with steady, consistent pressure. Do NOT move your EasyPress around—that could cause your transfer to shift and blur your edges. Press for 30 seconds.
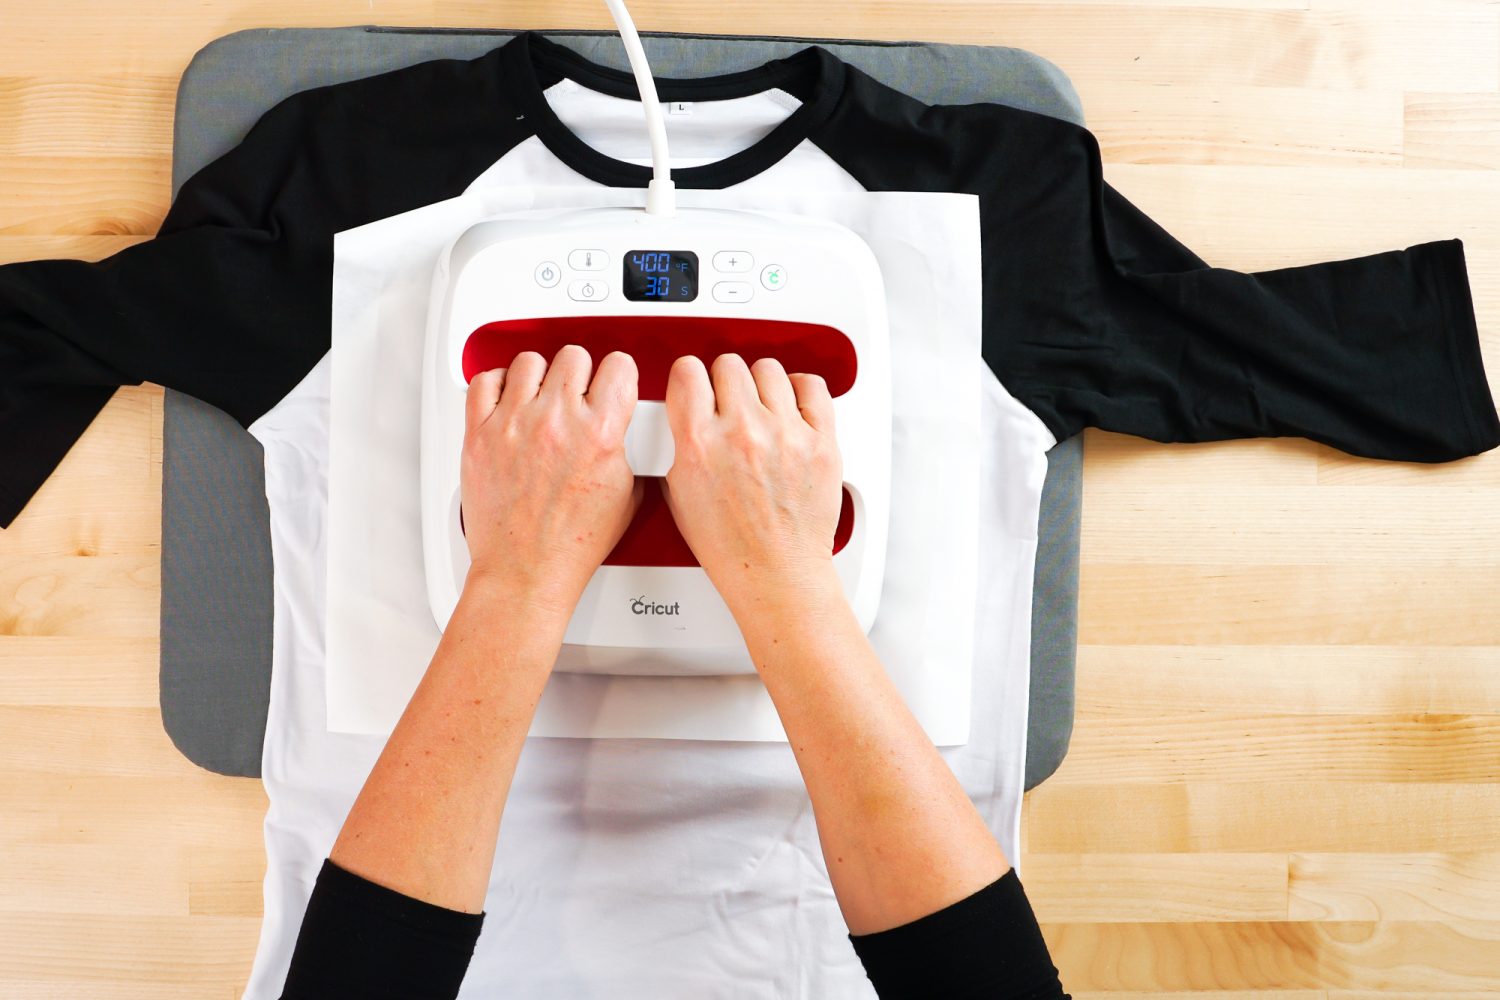
Let the transfer cool completely and carefully pick it up—it will not be stuck to your raglan at all. Continue this process until you’ve made all of your family matching shirts!

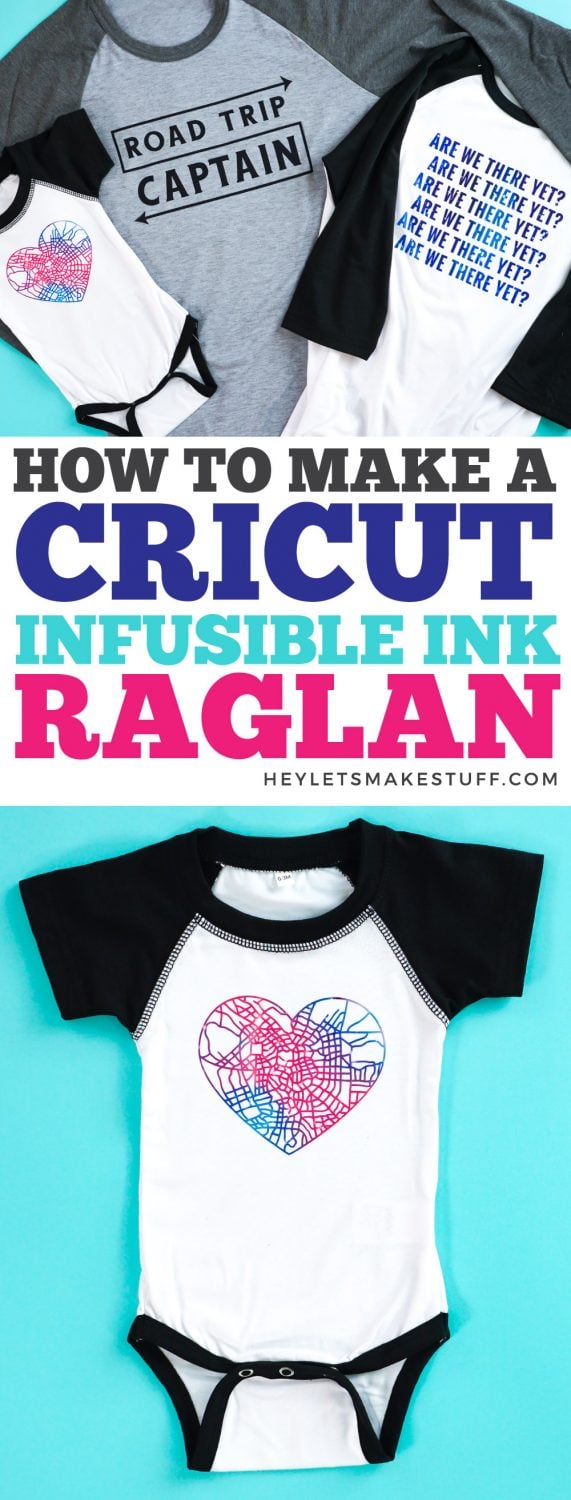
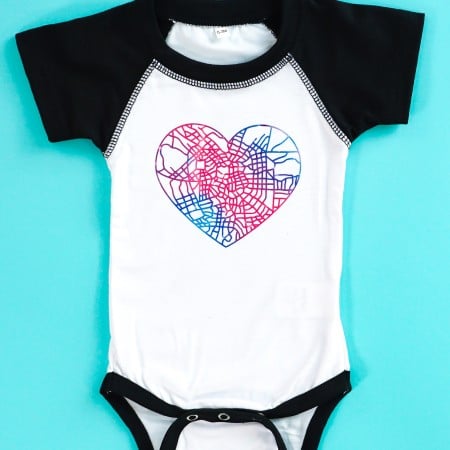
Family Shirts with Cricut Infusible Ink
Equipment
- Cricut EasyPress 2
Supplies
- Cricut Infusible Ink Transfer Sheets + included butcher paper
- Cricut Infusible Ink raglan shirts n preferred sizes
- White cardstock
Instructions
- Infusible Ink Matching Family Raglan ShirtsMake sure to read these instructions carefully. Infusible Ink is different than other Cricut materials and has its own special process to get the best result. You don’t want to ruin your project, your EasyPress mat, your EasyPress 2, or your day!
- Create Your Design In Design SpaceStart by creating your design for your t-shirts in Cricut Design Space. For this project we are using two Design Space files: Road Trip Captain is #M1A1AB197, the "Are We There Yet?" image is #M1A1AB138, and the map heart is #M1A1AB21E. For each image, it was changed to a single color that was representative of the Infusible Ink transfer sheet being used, and also welded each one so they would each cut as a single image. Measure your shirts and resize your images to fit.

- Then click Make It in the upper right corner. When you get to the Prepare screen, make sure to mirror your image. Infusible Ink is like iron on vinyl in that you need to reverse your image for it to adhere correctly to the base surface. Then click Continue.

- In the Make screen, select Infusible Ink Transfer Sheet as your material (use the Custom Material setting on the Explore dial and then search for “ink”). Make sure you have the Fine Point blade inserted.

- Cut Your Design on the CricutPlace your Infusible Ink transfer sheet liner side down on the cutting mat. You can use a brayer to help flatten the transfer sheet onto the mat—you don't want any bumps or bubbles.

- Then insert into your machine and cut!

- To remove your transfer sheet from the mat, flip the mat over and peel the mat away from the transfer sheet, keeping the transfer sheet flat on your table with your hand.

- Weeding Cricut Infusing InkWash and thoroughly dry your hands. Cricut Infusible Ink is designed to be weeded with your hands, instead of a weeding tool, but the oils from your hands can cause ghosting.Bend the backing sheet gently and pull off all of the negative material. You can use tweezers for the small bits in letters if needed, but it's just easier to bend the backing sheet a bit and use your fingernail.

- Prepare Your Raglan For Infusible InkBefore you actually do your transfer, you need to prepare your raglan. Start by placing your raglan on a Cricut EasyPress mat. Then place a piece of white cardstock inside the raglan—this will help prevent bleed-through to the back.Then use a lint roller to remove any dust and debris from your raglan. This will help make sure that you get the cleanest transfer possible.

- Heat Time & Temperature SettingsAccording to Cricut’s Heat Settings Guide, the time and temperature for Infusible Ink on a raglan is 385° for 30 seconds. After some trial and error, we now go with 400° for 30 seconds—found that the EasyPress 2 cools a bit when it hits the shirt for the first time.
- Use The EasyPress To Transfer Cricut Infusible InkFirst cover your blank raglan with the butcher paper that came with the transfer sheet. Then pre-heat your raglan before you apply your transfer, to help flatten your surface and dry any moisture in the material itself. Press for 15 seconds and let cool completely.Once your raglan is totally cooled, you can add your transfer, face down on the raglan.

- Place the butcher paper back on top of the transfer.

- Then carefully press your EasyPress 2 onto your project with steady, consistent pressure. Do NOT move your EasyPress around—that could cause your transfer to shift and blur your edges. Press for 30 seconds.

- Let the transfer cool completely and carefully pick it up—it will not be stuck to your raglan at all. Continue this process until you've made all of your family matching shirts!



Comments & Reviews
Shella says
I love how you blend practicality with personal Sprunki touch, and starting with FAQs is a great way to make the process feel approachable for beginners and seasoned crafters alike.
NancyGrace says
LOVE the mermaid wrap design, Thanks for the file sharing.