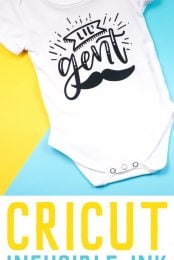
Make professional-level projects with Cricut Infusible Ink! Crafting a Cricut Infusible Ink baby bodysuit is the perfect way to welcome a new baby to the world in style.

Ready to tackle another Cricut Infusible Ink project? If you’re wondering what Infusible Ink even is, make sure to check out my guide to Cricut Infusible Ink for an overview! Also make sure to check out my troubleshooting guide.
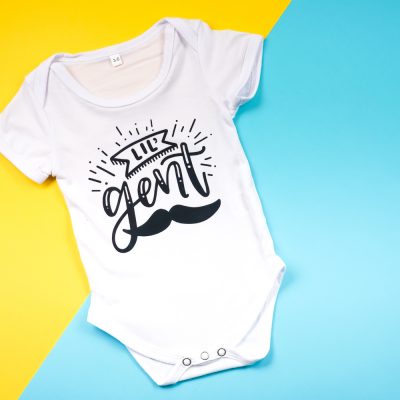
Lots of crafters love making gifts for new babies, and I’m no exception! I recently found out a good friend of mine is welcoming a little boy later this year, and I decided to make him this most adorable bodysuit using the black Infusible Ink transfer sheet.
The file is a hand-lettered gem from one of my favorite shops for SVG files—the Smudge Factory. All her designs are hand-lettered and absolutely adorable! Get this Lil Gent cut file to make your own bodysuit, or choose another image you like.
Infusible Ink Baby Bodysuit Supplies

- Cricut Explore or Maker
- Green StandardGrip Cricut Mat
- Cricut Infusible Ink Transfer Sheet
- Cricut Infusible Ink Bodysuit
- EasyPress 2 (I prefer the small one for bodysuits)
- EasyPress 2 Mat
- Tweezers
- White cardstock
- Butcher paper (comes with your transfer sheet)
- Lint roller
- Heat-resistant tape (optional)
Infusible Ink Baby Bodysuit Instructions
Make sure to read these instructions carefully. Infusible Ink is different than other Cricut materials and has its own special process to get the best result. You don’t want to ruin your project, your EasyPress mat, your EasyPress, or your day!
Create Your Design in Design Space
Start by creating your design for your bodysuit in Cricut Design Space. You can use one of the files in Design Space, or you can upload your own file like the Lil Gent SVG I’m using. Get more information about uploading SVG files to Cricut Design Space.

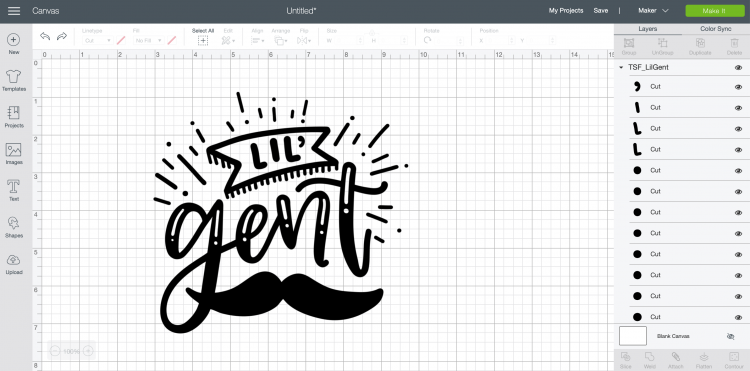
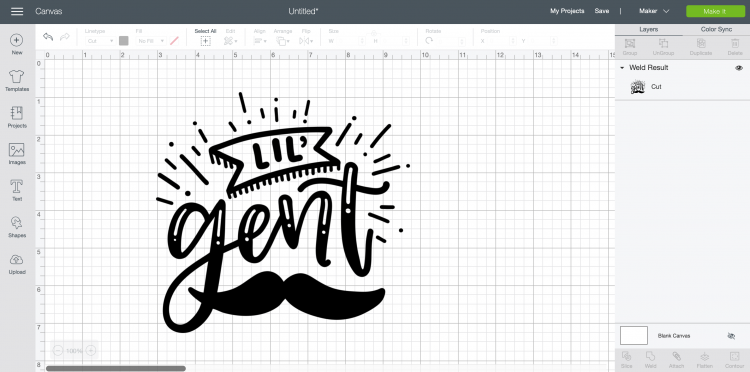
If your file comes into Design Space as a bunch of single pieces, like this file, select everything and click “weld” to make it a single cut piece. You can see the weld result in the Layers Panel on the right in the below screenshot.

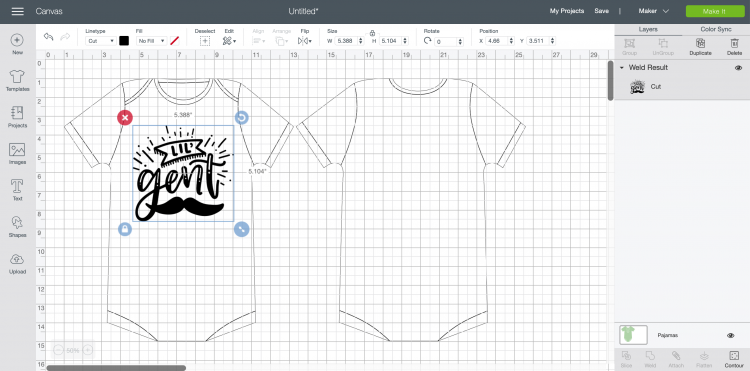
Resize to fit on your onesie. I like using Cricut’s templates for this (bodysuit/onesie is, oddly, under a category called “pajamas”). Learn more about using Cricut templates. You can choose the size of your bodysuit here, and then resize your image accordingly to fit on the bodysuit. I am using a 3-6 month bodysuit, and my image ended up being about 5.1″ wide.

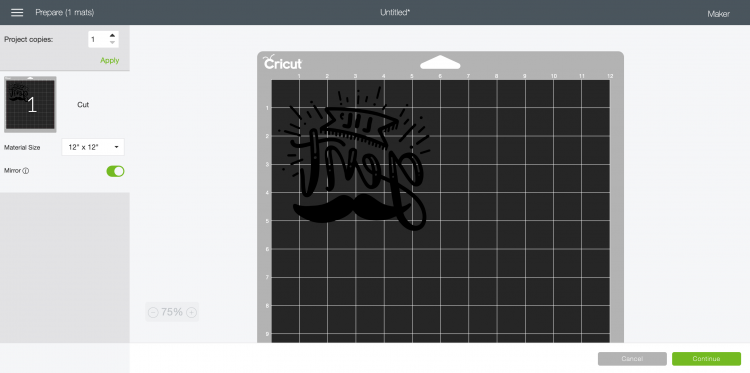
Then click Make It in the upper right corner. When you get to the Prepare screen, make sure to mirror your image. Infusible Ink is like iron on vinyl in that you need to reverse your image for it to adhere correctly to the base surface. Then click Continue.

In the Make screen, select Infusible Ink Transfer Sheet as your material (use the Custom Material setting on the Explore dial and then search for “ink”). Make sure you have the Fine Point blade inserted.
Cut Your Design using Your Maker or Explore
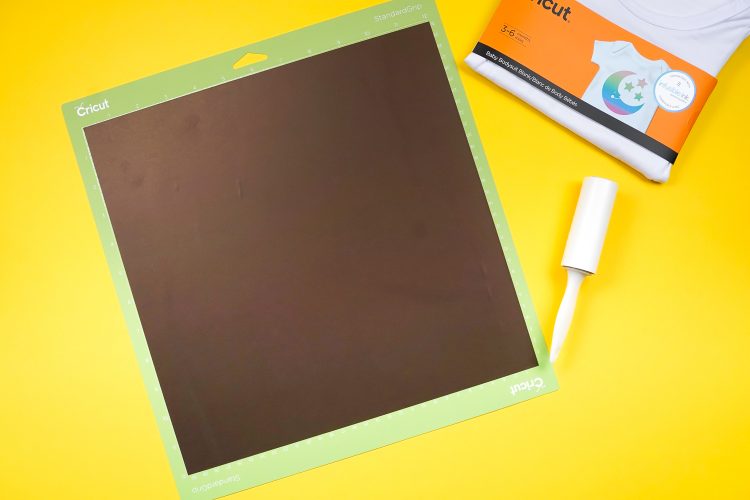
Place your Infusible Ink transfer sheet liner side down on a green cutting mat. You’ll notice that the transfer sheet is almost a coppery brown color. But as you’ll see, the ink really does turn a nice black under heat.

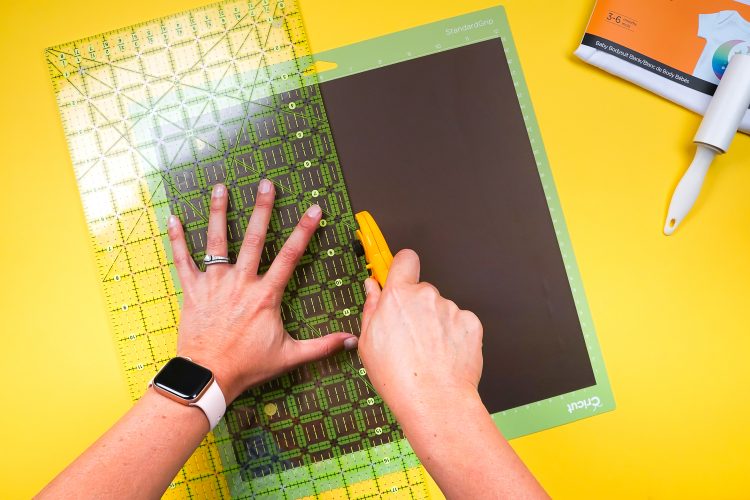
Then insert into your machine and cut! I like to use a rotary cutter and acrylic ruler to trim off the excess material—gives me a clean line for next time.

Weeding Cricut Infusing Ink
Cricut Infusible Ink is designed to be weeded with your hands, instead of a weeding tool. I actually found this particular design just a little tricky—those small bits of flair around the design wanted to pop off the backing paper—I ended up using my tweezers to rescue them.
Prepare Your Baby Bodysuit for Infusible Ink
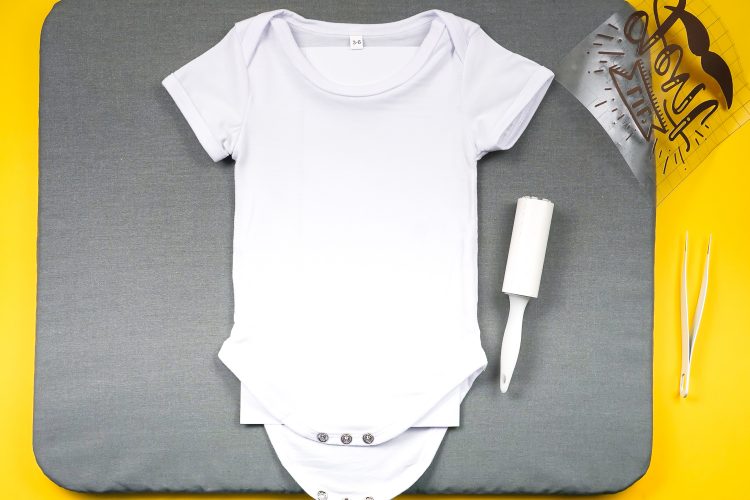
Before you actually do your transfer, you need to prepare your bodysuit. Start by placing your bodysuit on a Cricut EasyPress mat. Then place a folded piece of white cardstock inside the bodysuit—this will help prevent bleedthrough to the back of your bodysuit.
Then use a lint roller to remove any dust and debris from your bodysuit. This will help make sure that you get the cleanest transfer possible.

Heat Time & Temperature Settings
Before we continue with the tutorial, let’s first let’s talk about heat method and settings.
I think the small EasyPress 2 is the easiest heating method for Infusible Ink on bodysuits—it fits so nicely between the seams, and if you read my troubleshooting post you know that even the depth of a seam can really mess up your transfer.
You can also use a heat press (see my heat source comparison post). The EasyPress 2 goes up to 400°, vs the original EasyPress, which only reaches 350°. Cricut has stated that you can try the original, but you may not get quite as vibrant an image.
According to Cricut’s Heat Settings Guide, the time and temperature for Infusible Ink on a bodysuit is 385° for 30 seconds. After my own trial and error, I now go with 400° for 30 seconds, and apply more pressure than is suggested by the Cricut site.
Use the EasyPress to Transfer Cricut Infusible Ink
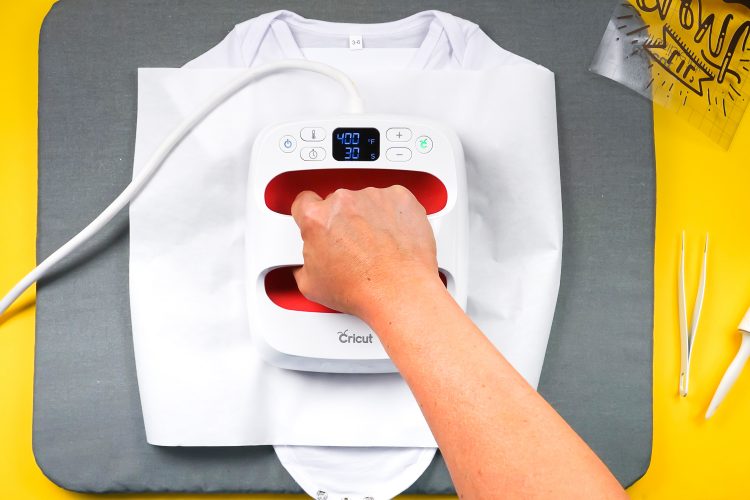
First cover your blank bodysuit with the butcher paper that came with the transfer sheet. You’re going to pre-heat your bodysuit before you apply your transfer, to help flatten your surface and dry any moisture in the material itself. Press for 15 seconds and let cool completely.

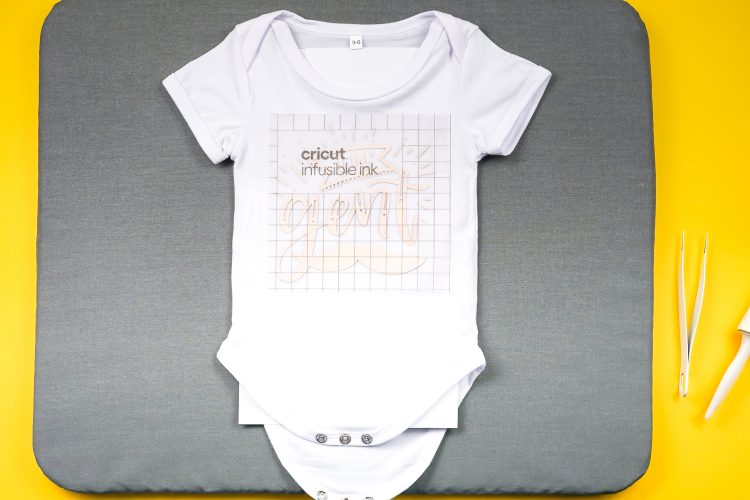
Once your bodysuit is completely cooled, you can add your transfer. If you are afraid of shifting, you can use a bit of heat-resistant tape to secure your transfer to your bodysuit. I didn’t do that for this one, but I do for most of my projects overall.

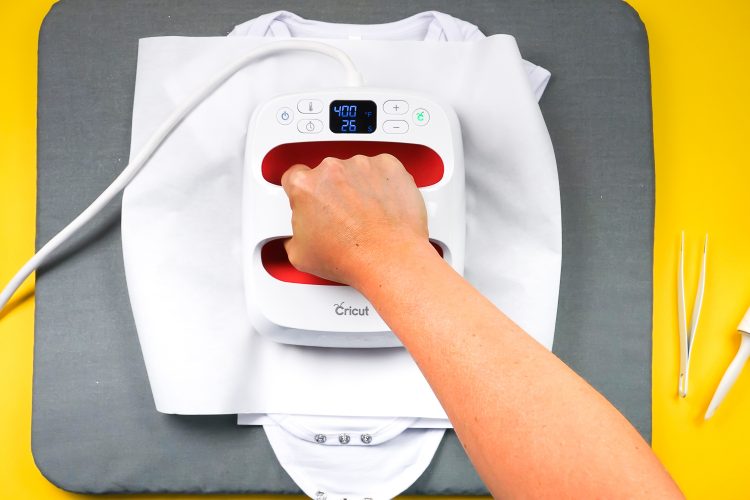
Place the butcher paper back on top of the transfer. Then carefully press your EasyPress (or use your heat press) onto your project with steady, consistent pressure. Make sure the EasyPress covers the entire transfer.

Do NOT move your EasyPress around—that could cause your transfer to shift and blur your edges. Press for 30 seconds.
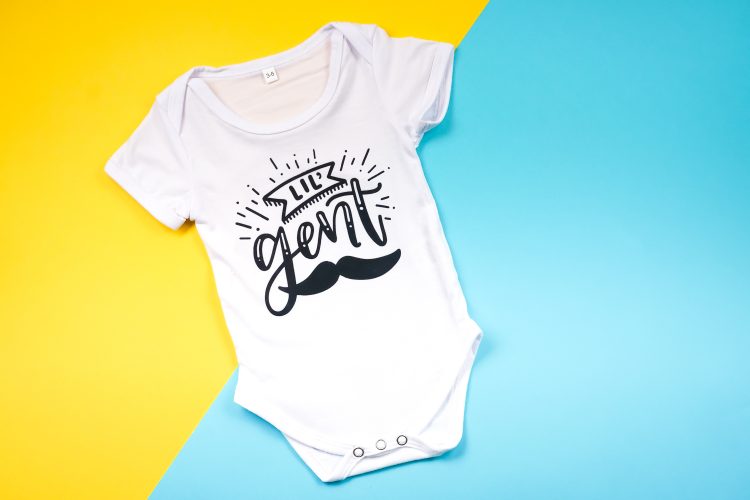
Let the transfer cool completely and carefully pick it up—it will not be stuck to your bodysuit at all.

This is the best project I’ve done so far with the ink! I’ve had quite a few mishaps in the learning process, but I’m thrilled with how this one turned out. My friend is going to love it!
Have questions about Cricut Infusible Ink? I’d love to answer them in the comments! Love this tutorial? Enrollment to my Cricut course, Cricut Academy is closed, however, I now offer my Cricut Basics eBook, which is a great place to get started!

Get a Cricut!
INFUSIBLE INK BABY BODYSUIT
Equipment
- Cricut Maker or
- Butcher paper (comes with your transfer sheet)
Instructions
- NOTE: Make sure to read these instructions carefully. Infusible Ink is different than other Cricut materials and has its own special process to get the best result. You don't want to ruin your project, your EasyPress mat, your EasyPress, or your day!
- Create Your Design in Design SpaceStart by creating your design for your bodysuit in Cricut Design Space. You can use one of the files in Design Space, or you can upload your own file like the Lil Gent SVG being used for this project. Get more information about uploading SVG files to Cricut Design Space.

- If your file comes into Design Space as a bunch of single pieces, like this file, select everything and click "weld" to make it a single cut piece. You can see the weld result in the Layers Panel on the right in the below screenshot.

- Resize to fit on your onesie Use Cricut's templates for this (bodysuit/onesie is, oddly, under a category called "pajamas"). Learn more about using Cricut templates. You can choose the size of your bodysuit here, and then resize your image accordingly to fit on the bodysuit. This is a 3-6 month bodysuit, and the image ended up being about 5.1" wide.

- Then click Make It in the upper right corner. When you get to the Prepare screen, make sure to mirror your image. Infusible Ink is like iron on vinyl in that you need to reverse your image for it to adhere correctly to the base surface. Then click Continue.In the Make screen, select Infusible Ink Transfer Sheet as your material (use the Custom Material setting on the Explore dial and then search for "ink"). Make sure you have the Fine Point blade inserted.

- Cut Your Design using Your Maker or ExplorePlace your Infusible Ink transfer sheet liner side down on a green cutting mat. You'll notice that the transfer sheet is almost a coppery brown color. But as you'll see, the ink really does turn a nice black under heat.

- Then insert into your machine and cut! Use a rotary cutter and acrylic ruler to trim off the excess material—gives you a clean line for next time.

- Weeding Cricut Infusing InkCricut Infusible Ink is designed to be weeded with your hands, instead of a weeding tool. I actually found this particular design just a little tricky—those small bits of flair around the design wanted to pop off the backing paper—I ended up using my tweezers to rescue them.
- Prepare Your Baby Bodysuit for Infusible InkBefore you actually do your transfer, you need to prepare your bodysuit. Start by placing your bodysuit on a Cricut EasyPress mat. Then place a folded piece of white cardstock inside the bodysuit—this will help prevent bleedthrough to the back of your bodysuit.Then use a lint roller to remove any dust and debris from your bodysuit. This will help make sure that you get the cleanest transfer possible.

- Heat Time & Temperature SettingsBefore we continue with these instructions, let's first let's talk about heat method and settings.The small EasyPress 2 is the easiest heating method for Infusible Ink on bodysuits—it fits so nicely between the seams, and if you read my troubleshooting post you know that even the depth of a seam can really mess up your transfer.You can also use a heat press (see this heat source comparison post). The EasyPress 2 goes up to 400°, vs the original EasyPress, which only reaches 350°. Cricut has stated that you can try the original, but you may not get quite as vibrant an image.According to Cricut's Heat Settings Guide, the time and temperature for Infusible Ink on a bodysuit is 385° for 30 seconds. After my own trial and error, go with 400° for 30 seconds, and apply more pressure than is suggested by the Cricut site.
- Use the EasyPress to Transfer Cricut Infusible InkFirst cover your blank bodysuit with the butcher paper that came with the transfer sheet. You're going to pre-heat your bodysuit before you apply your transfer, to help flatten your surface and dry any moisture in the material itself. Press for 15 seconds and let cool completely.

- Once your bodysuit is completely cooled, you can add your transfer. If you are afraid of shifting, you can use a bit of heat-resistant tape to secure your transfer to your bodysuit.

- Place the butcher paper back on top of the transfer. Then carefully press your EasyPress (or use your heat press) onto your project with steady, consistent pressure. Make sure the EasyPress covers the entire transfer.

- Do NOT move your EasyPress around—that could cause your transfer to shift and blur your edges. Press for 30 seconds.Let the transfer cool completely and carefully pick it up—it will not be stuck to your bodysuit at all.

