Want to create your own quotes and other text in Cricut Design Space? Here’s an overview of the Cricut text tool, including fonts, sizing, styling, and more! This tutorial will help you create more professional text in your Cricut projects.
One of the most-used features in Cricut Design Space is the text tool. This tool allows you to type whatever you’d like into the software and cut it using your Cricut Maker, Cricut Explore, or Cricut Joy. Then you can make t-shirts, labels, home decor signs, monograms, and more with your Cricut.
This overview of fonts and text in Cricut Design Space is designed to make you confident in using the text tool, plus the other tools in the Font Toolbar. Text is often where folks start when they first get a Cricut machine—before they move onto graphics, SVG files, etc. This post is square one!
As always, if you have questions about your Cricut, leave them in the comments below.
Video Tutorial for Working with Fonts in Cricut Design Space
Creating Text with the Cricut Text Tool
Note: text boxes can only contain one font. However, you can add as many text boxes to a project as you’d like.
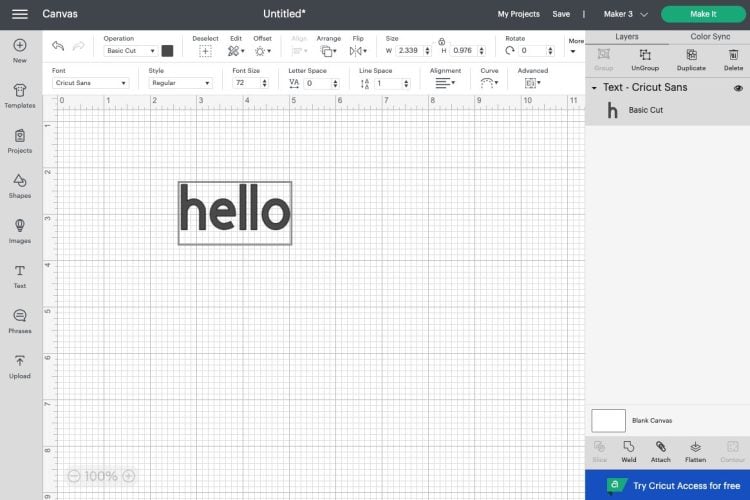
DESKTOP: To create text, click Text in the Design Panel on the left and a text box labeled “Text” will appear on your Canvas. Double click the text box and start typing.
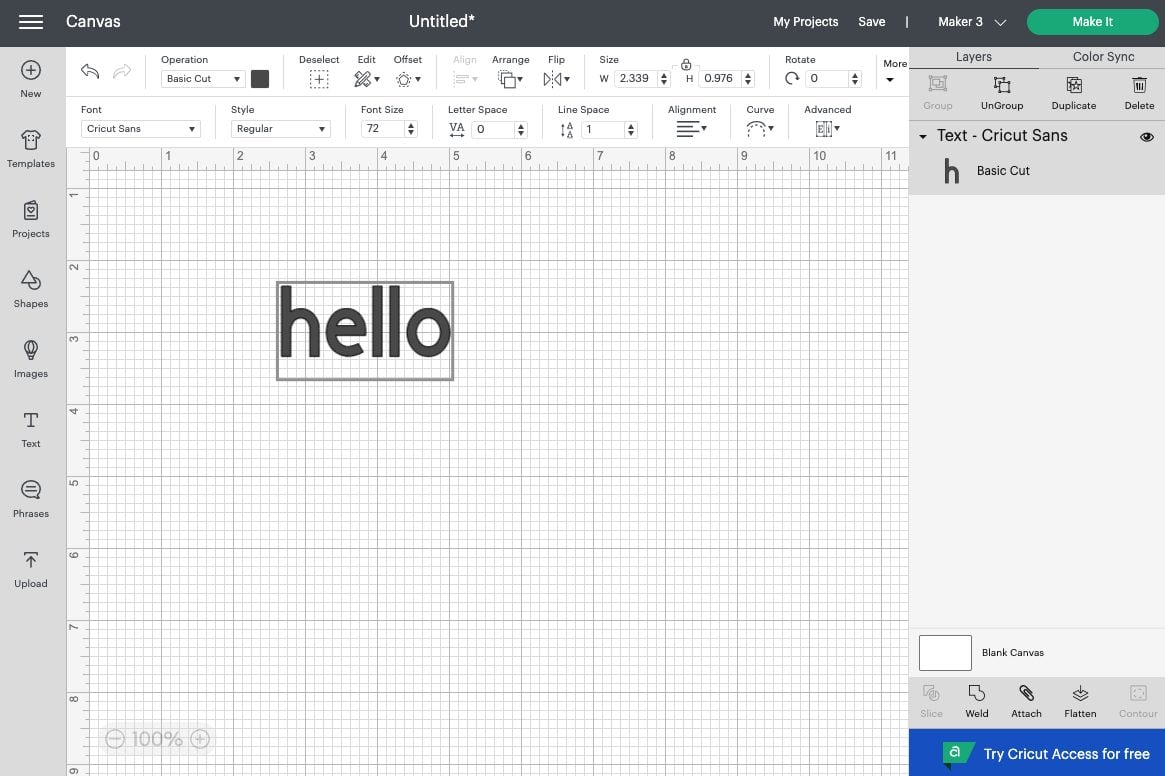
Once you have a text box, you’ll also see a new menu appear at the top of Design Space. This is the Text Toolbar. This only appears when you have text on your Canvas selected.

From left to right, you have:
- Font
- Style
- Font Size
- Letter Space
- Line Space
- Alignment
- Curve
- Advanced (includes Ungroup to Letters, Ungroup to Lines, Ungroup to Layers)
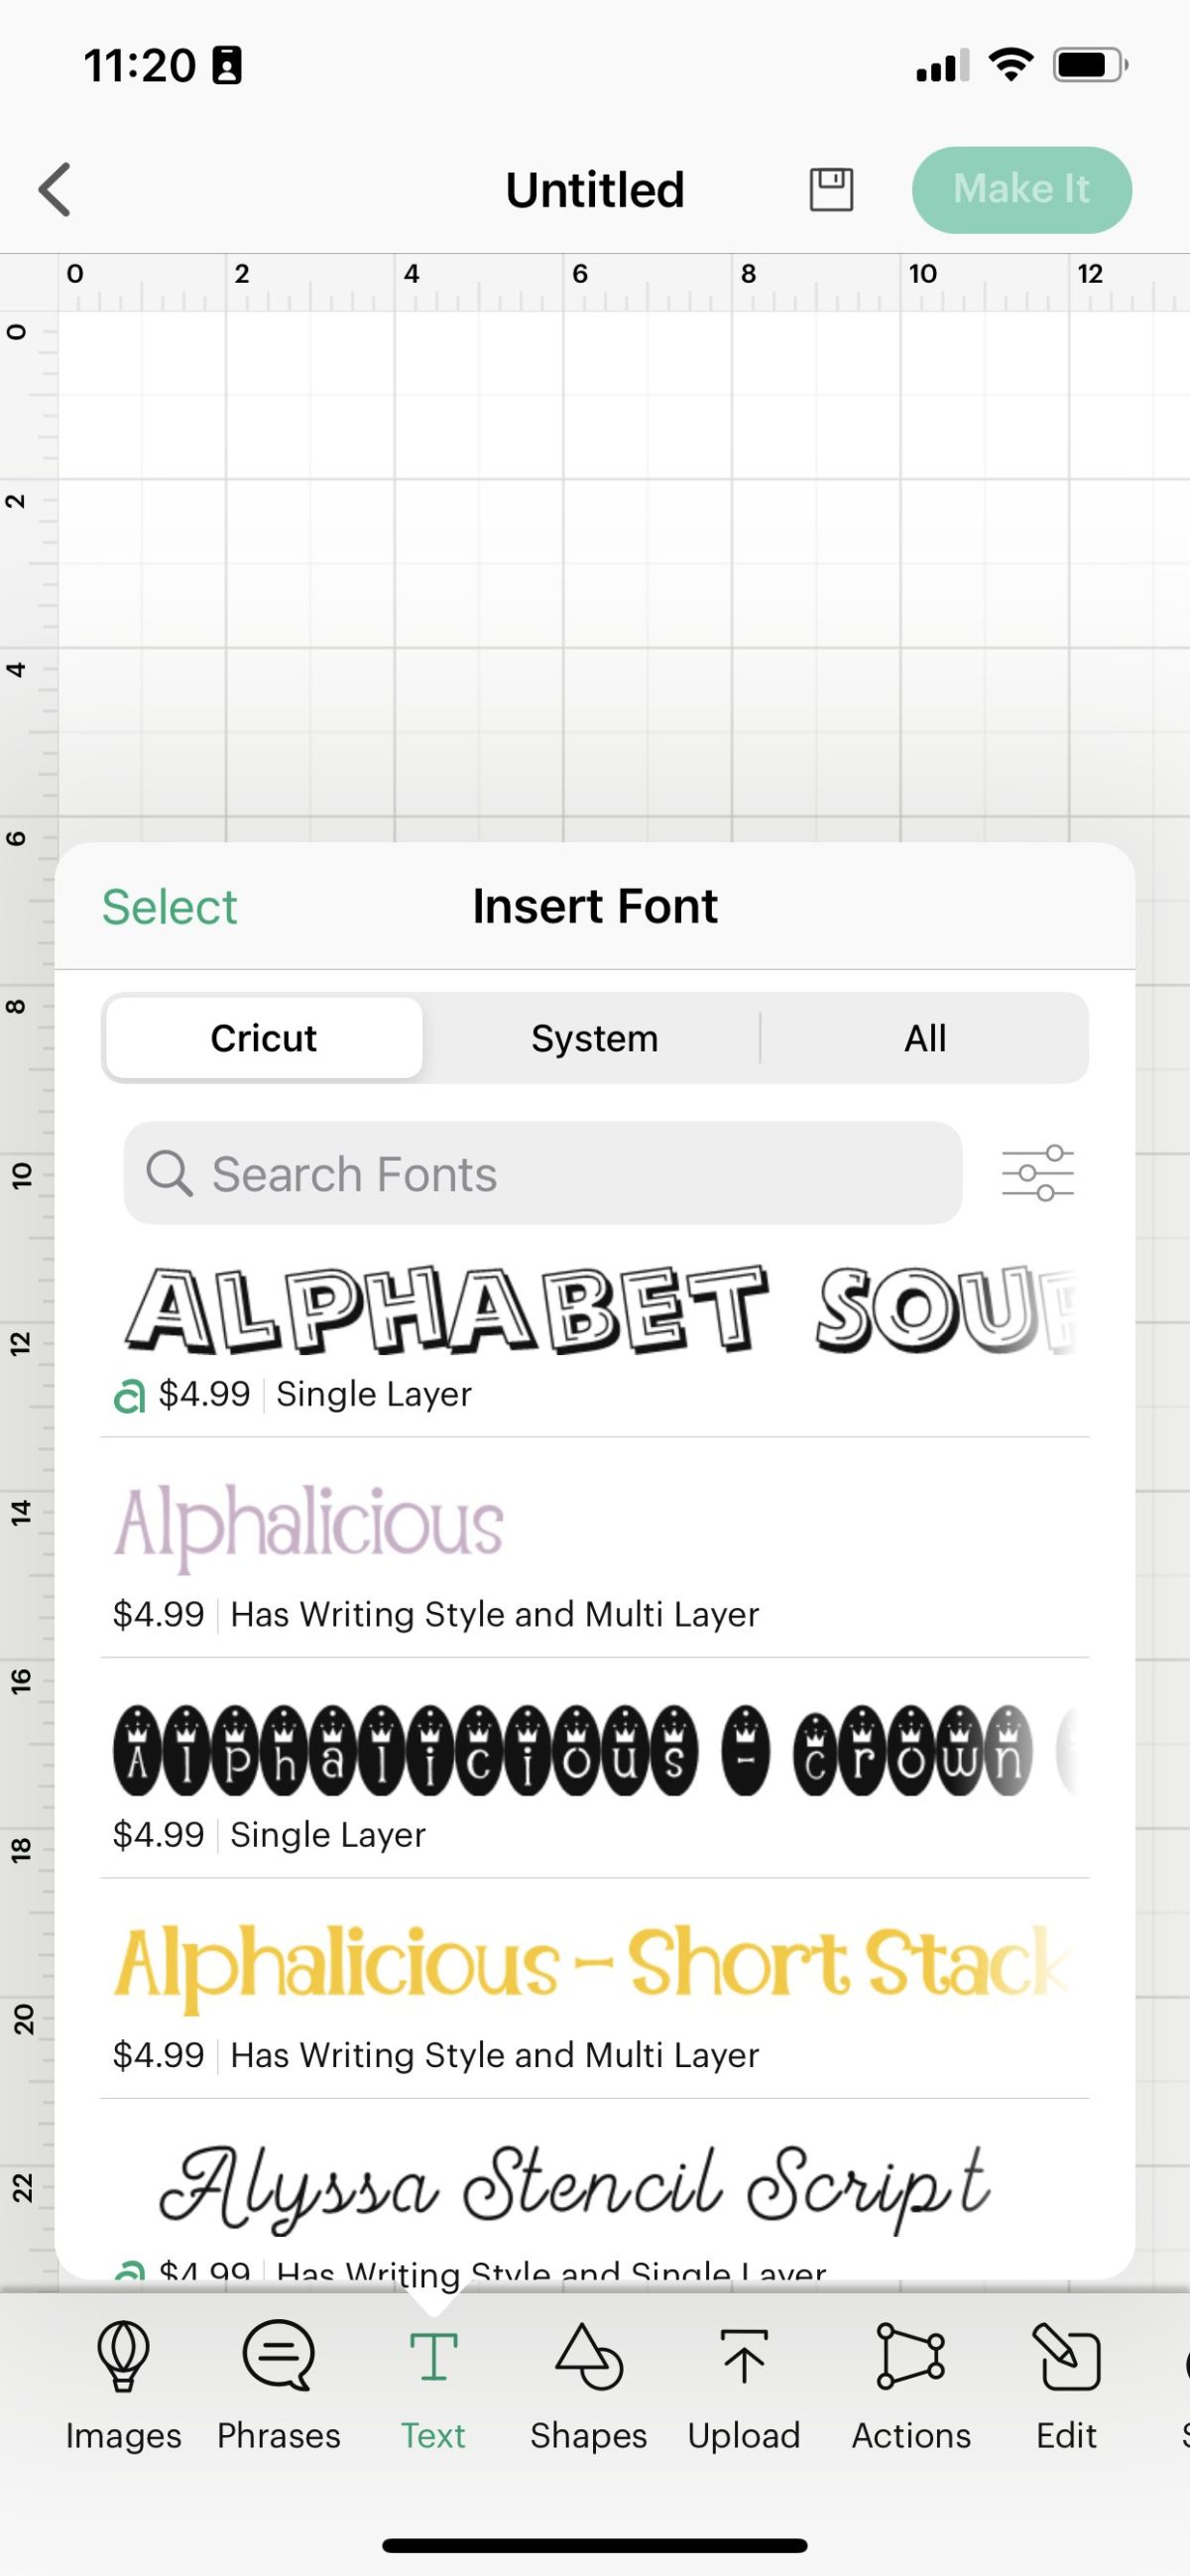
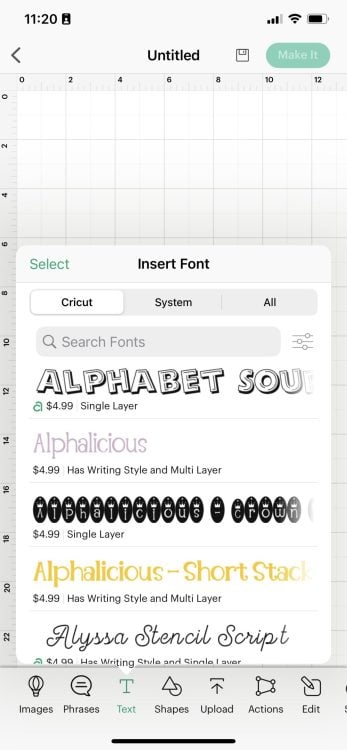
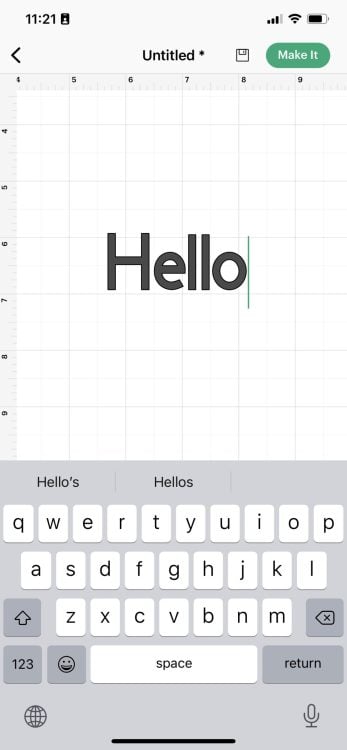
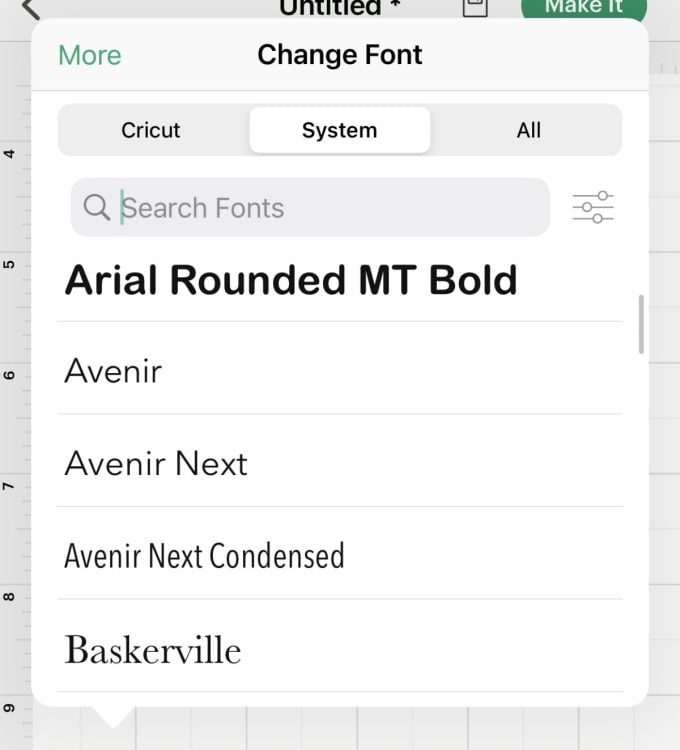
MOBILE: Mobile is a bit different. Tap Text at the bottom of the screen. The Insert Font menu will appear—you need to select your font before you can type text (don’t worry, you can change it later). Then you can type your text.
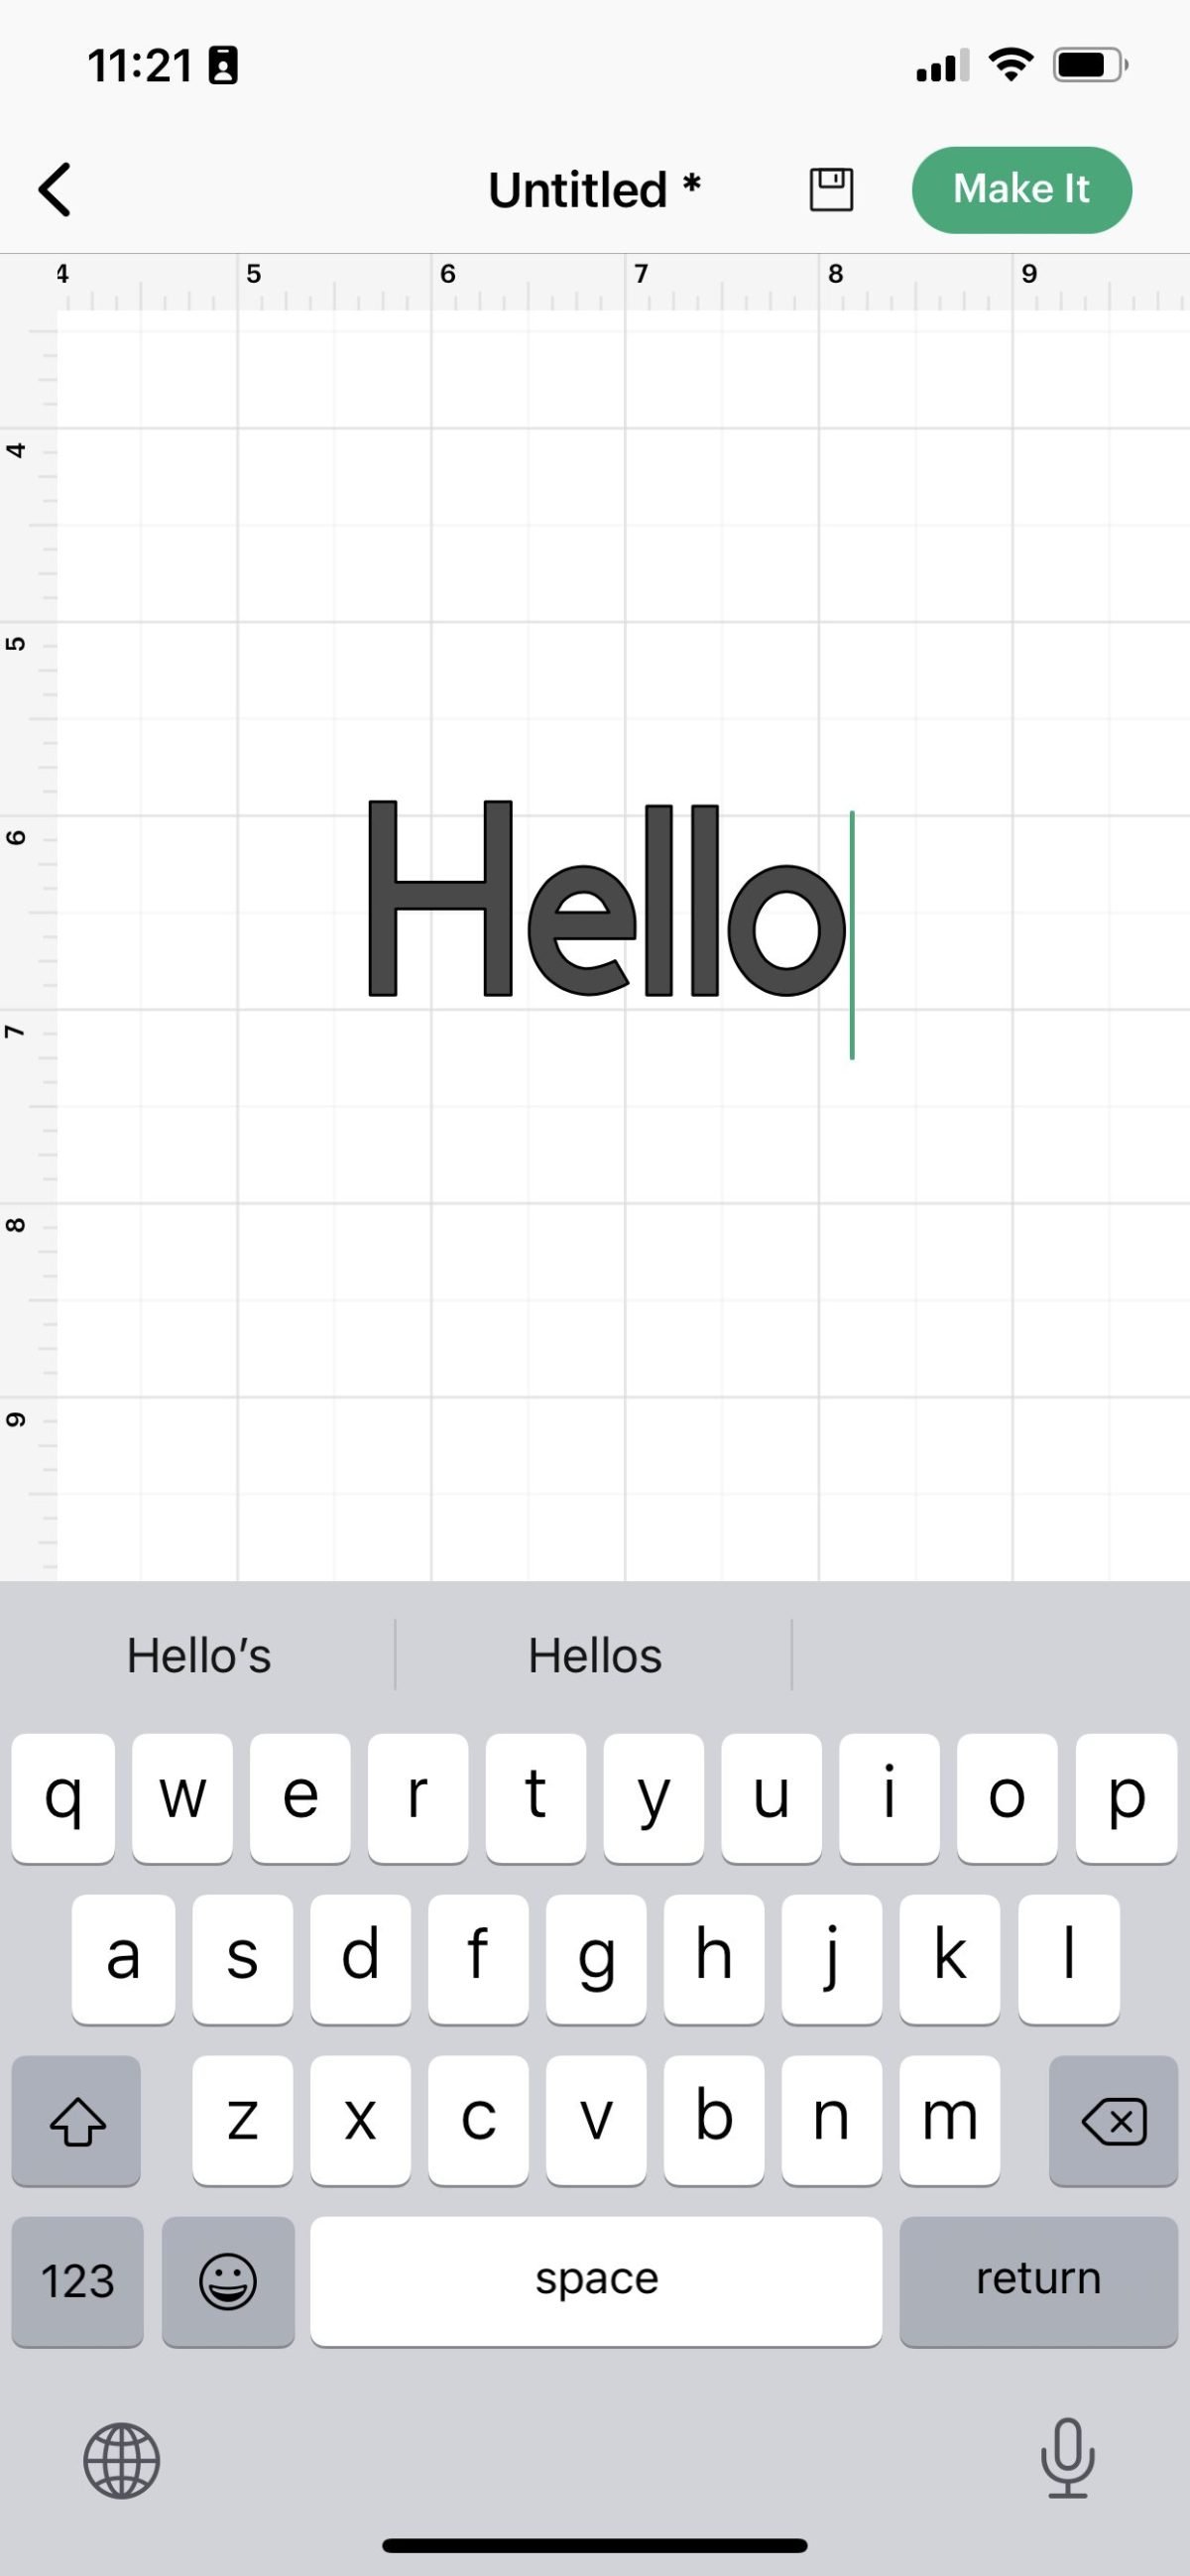
The text tools on mobile are in two places. First, select your typed word (in this case “hello”) and click Edit at the bottom of the screen. Here you can see the tools for:

- Font
- Style
- Alignment
- Font Size
- Letter Space
- Line Space
And then, if you go to the Action Menu at the bottom, you’ll find more tools:
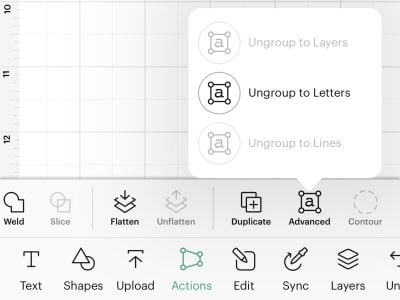
Under Advanced, you’ll find the Ungroup to Layers, Ungroup to Letters, and Ungroup to Lines tools.
NOTE: Mobile does not support the text curving tool at this time.
Types of Cricut Fonts
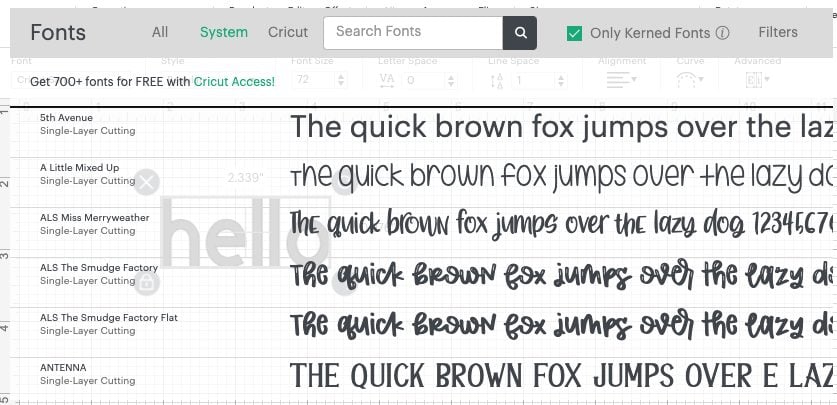
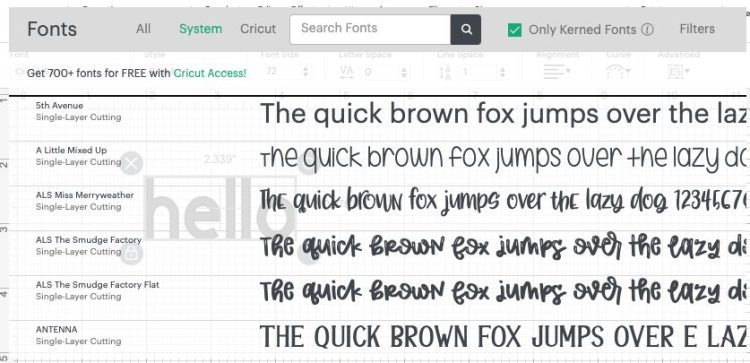
For both Desktop and Mobile, use the font menu to select different fonts for your project. Both Cricut fonts and your system fonts are listed here. (We will learn more about kerned fonts later in this post.)
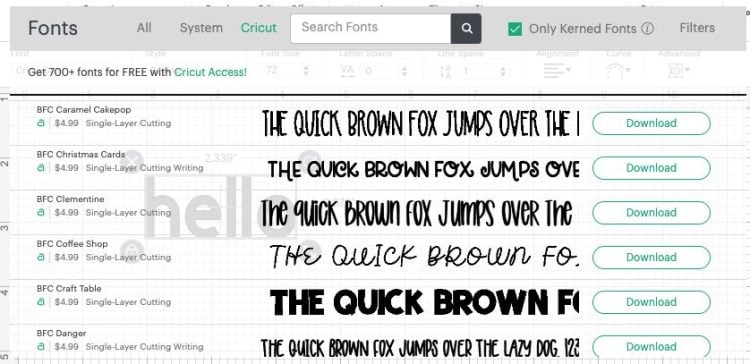
Cricut Fonts
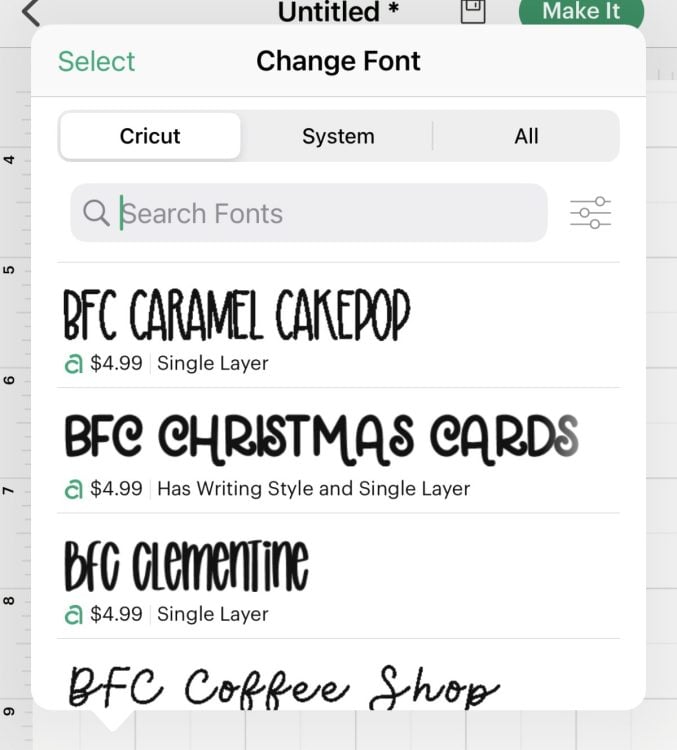
Cricut fonts are designed by Cricut and loaded into Design Space. They exist on both the desktop and mobile apps. They may or may not have a fee associated with them depending on your Cricut Access subscription. You can also use the search bar here if you know the name of the particular font.
DESKTOP:
MOBILE:

Cricut fonts are easily cut on your Cricut. You should always get a good clean cut result when using Cricut Fonts, even ones that look distressed or have narrow or small pieces.
If you click the download button, it will save that font for you for offline use. It will NOT download to your computer to use in other programs.
System Fonts
System fonts are fonts on your device—those that came with your device or you’ve uploaded yourself. To add a system font to Cricut Design Space, you just need to make sure you’ve added the font to your computer or device and that the installation is complete. Check out How to Upload Fonts to Cricut Design Space for more detailed instructions. Also note you can upload both OpenType and TrueType fonts to Cricut Design Space.
Using a system font that you have on your computer is no different than using a Cricut font as above, though there is one big pitfall I want to mention here.
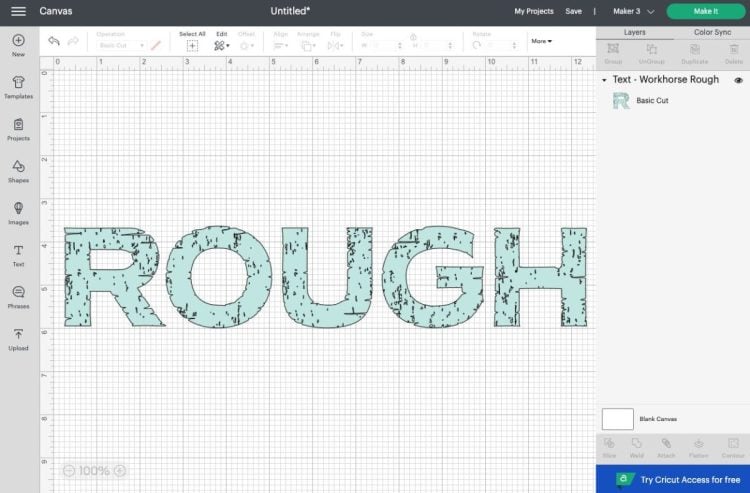
The Cricut cuts mathematically simple files better than it does mathematically complicated files. Cricut fonts are designed to be mathematically simple, so they cut easily. Your system fonts, however, might not be as simple. Take a look at Workhorse Rough. It’s a great grungy font. And there’s a good chance it will destroy your material.
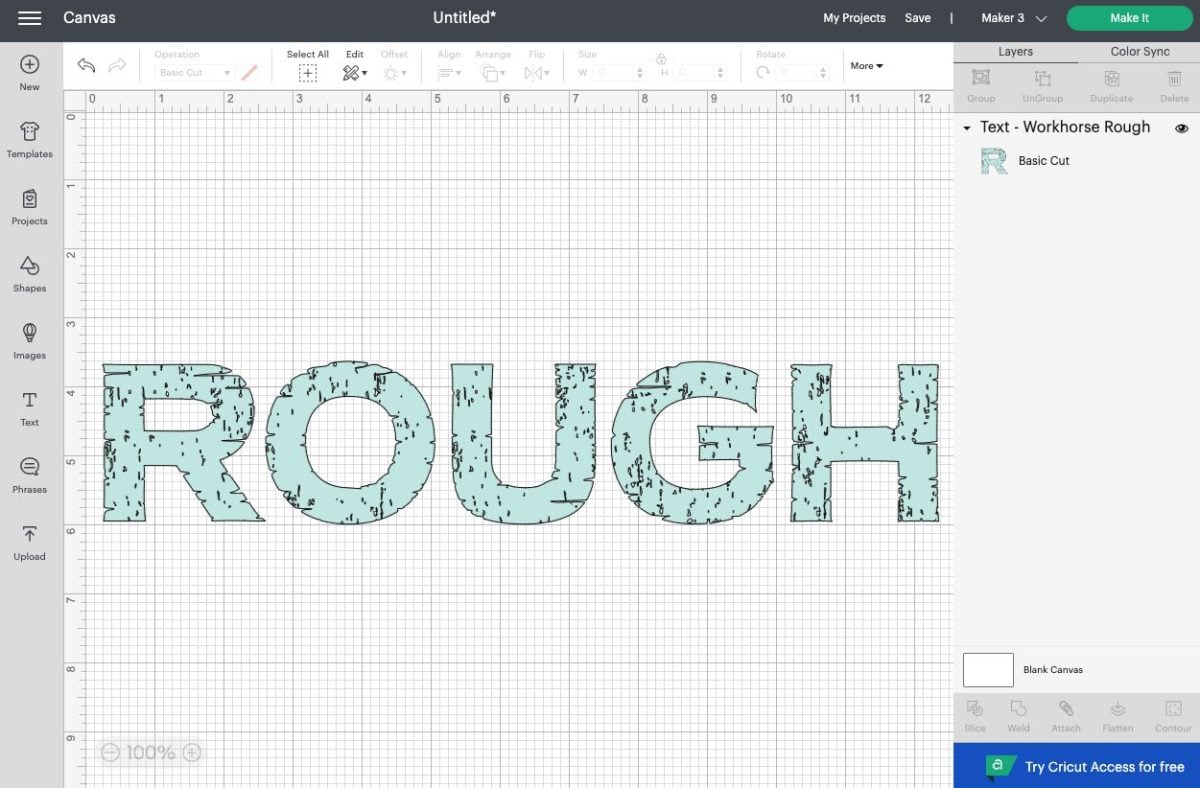
Look at all those little angles and cutouts! Every time, the Cricut has to adjust the blade and mat direction. The Cricut is an amazing machine, but that’s impossible to cut neatly.
The best fonts for cutting on the Cricut have smooth edges. Keep this in mind when choosing one of your system fonts to cut on the Cricut!
DESKTOP:
MOBILE:
Note that if you are using a system font installed on one device (like your laptop), your font may not show properly if opened on another device that does not have that font (like your phone). Most often, you’ll have a lot more system fonts on a desktop device than a mobile device.
You can also use the search bar here if you know the name of the particular font.
If you’re looking for the best free fonts for your Cricut, check out my post Where to Find Cheap and Free Fonts for the Cricut. That post goes over where to find and download free fonts, where to buy premium fonts, the difference between a personal and commercial license, where to find discounts, and more. It’s a great post for finding personal use and commercial use fonts for all of your projects.
Font Filters
In the Font menu, there is also an option to filter. Font filtering varies depending on whether or not you’re using desktop or mobile. There are more filters on mobile than desktop.
DESKTOP: When the font dropdown is open, click Filters.
MOBILE: When the font selection menu is open, click the tiny filter symbol.
My Fonts (Desktop) / Purchased (Mobile)
This filter includes both your system fonts and any fonts you’ve purchased from Design Space.
Multi-Layer Fonts
Multi-layer fonts have more than one layer. Additional layers may be hidden—you can turn them on and off using the “eye” in the Layers Panel.
Single-Layer Fonts
Single-layer fonts only have one layer. System fonts are automatically single-layer fonts. Single-Layer fonts tend to be simpler and easier to cut and are particularly good for iron-on and adhesive vinyl projects where you don’t want to layer a bunch.
Free Fonts (Mobile)
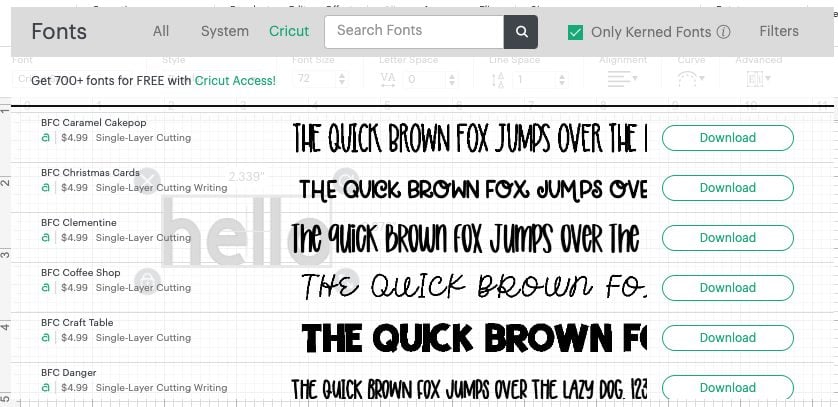
These are free Cricut fonts. Desktop HAS these fonts, there’s just no filter for them. If you are trying to find these free fonts, make sure to uncheck the “Only Kerned Fonts” option. A lot of these free fonts are old, un-kerned fonts.
Language (Mobile)
This filter sorts Cricut fonts with characters specific to different languages. Your foreign language system fonts will not show with this filter.
Stencil (Mobile)
These Cricut fonts are specifically designed to be used with a stencil because they have connected letters. Your stencil system fonts will not show with this filter.
Writing Fonts
Writing fonts are Cricut fonts that have been specifically designed to be used with the Cricut pen or foil tool. We’ll cover more about these later in this post.
Technically, you can use Cricut pen to write any font by changing the Operation of your text to Draw instead of Cut. Most fonts, however, will trace the outside of the letters like this:
Writing fonts feature letters that look the most like hand-written text. By filtering to writing fonts, you’ll narrow it down to only the Cricut fonts that already have a writing style built into the font.

Make sure to Attach your writing font layer to the material layer you want to cut on. So if you are writing food labels, for example, make sure that the text is attached to the card that it’s being written on. If not, it will be on its own layer and write on your mat. Learn more about Using Attach in Cricut Design Space and check out my Ultimate Guide to Cricut Pens for more information about using the Cricut pens in general.
Kerned Fonts
I have an entire post on Cricut Design Space Kerning and Letter Spacing for Fonts, but here’s a quick overview of how text in Cricut Design Space works with Kerned fonts.
To start, Cricut’s use of the word “kerning” is a little misleading. Instead of being able to adjust the spacing between individual letters, the letters are just spaced better than they used to be. Cricut’s letter spacing was notoriously bad, and basically, “kerned fonts” just means letter spacing.
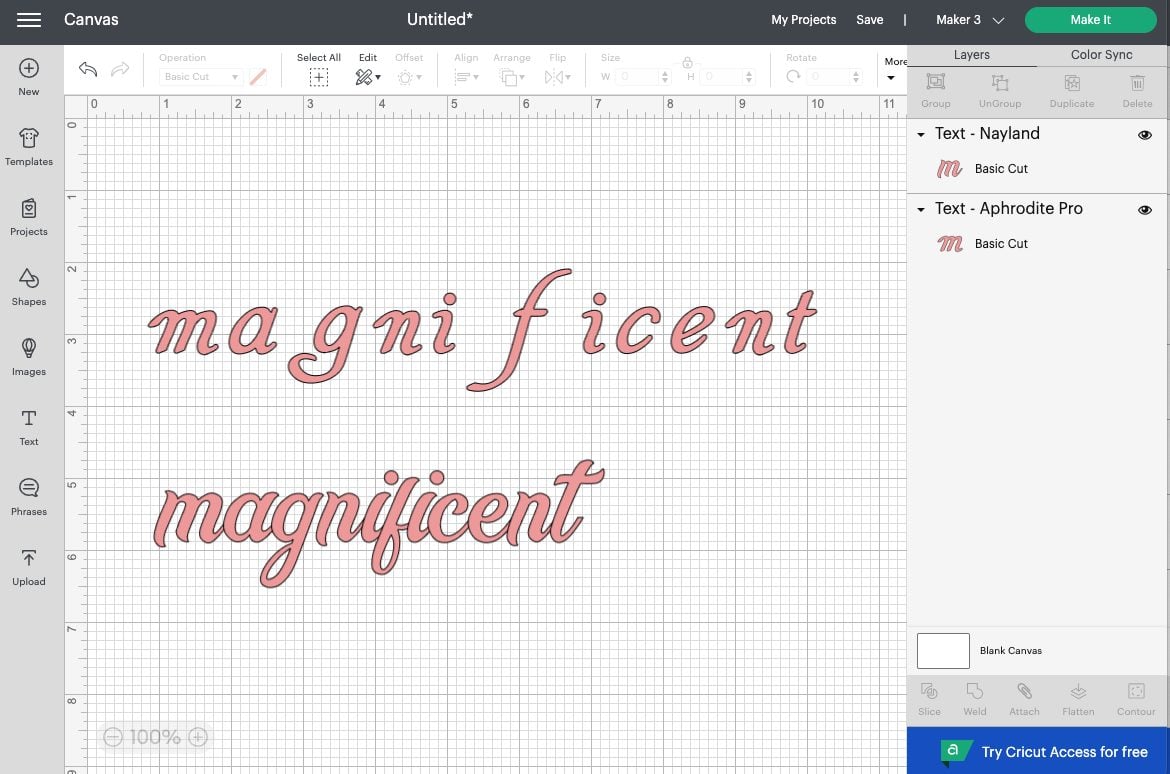
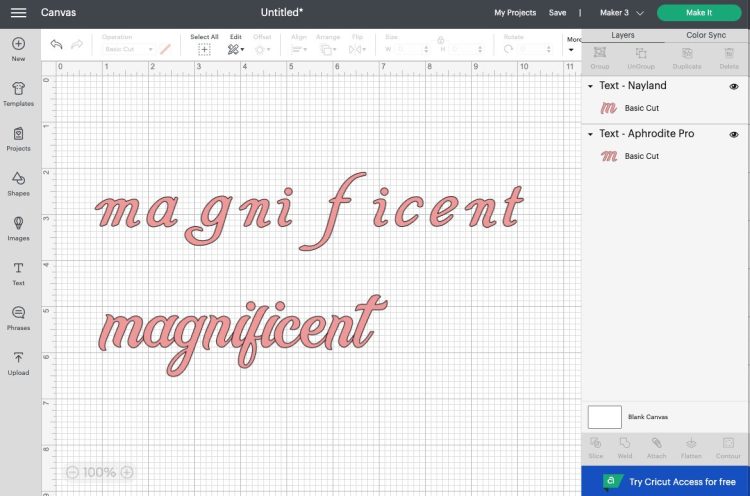
Before kerned fonts, Cricut had notoriously bad letter spacing. You’d type a word into Design Space and select a font (this one is Aphrodite Pro) and it would look something like this:
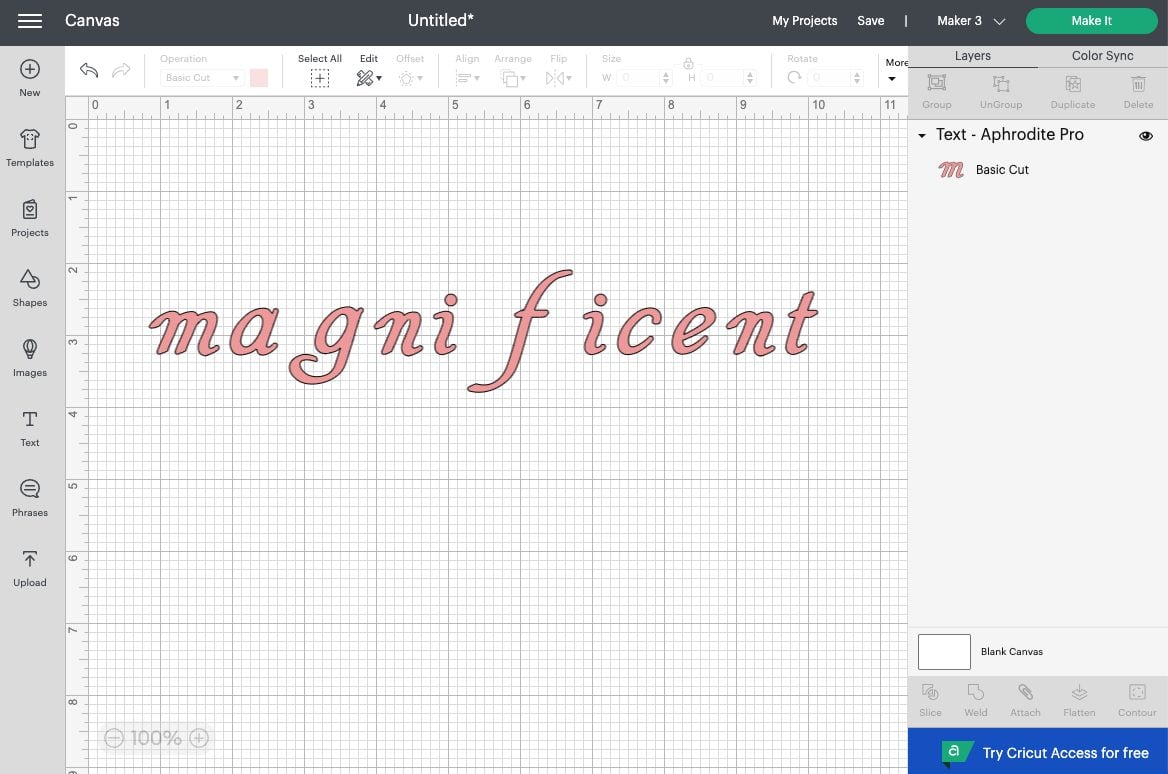
Not magnificent! This is because Design Space reads each letter as a separate image and the software cannot overlap them. The time-consuming fix before the kerned fonts was to ungroup to letters and space them individually, which we’ll talk about later in this post.
Now, Cricut has basically fixed the no-overlap issue on a bunch of their fonts and called them “kerned fonts,” even though they have nothing to do with actual kerning. Nayland is a kerned font and you can see that the spacing between the letters is much better.
Some of these kerned fonts still aren’t perfect. We’ll go into fixing them in just a bit.
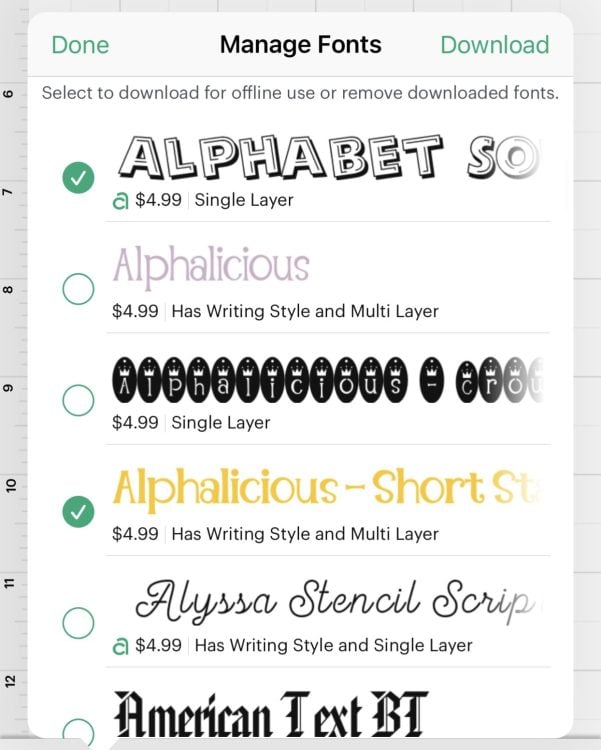
Saving Cricut Fonts for Offline Use
On both Desktop and Mobile, you can save Cricut fonts for offline use. This means if you want to craft without internet, you’ll still have access to your Cricut fonts (not system fonts).
DESKTOP: Click the font selection dropdown, find your font, and click “Download” next to the font name.

MOBILE: Open the font selection. Tap “Select” in the upper left corner of the font selection. Then you can tap the circle next to the font you want to save, and then tap Download in the upper right.
Changing the Cricut Font Size
There are three ways to change the size of your text:
- Using the arrow in the bottom right of your text box to drag the text box larger or smaller.
- Using the Font Size tool in the Text Toolbar
- Using the Size tool in the Edit toolbar (for example, if you want your text exactly 3″ wide)
Note: if you don’t see the Font Toolbar, make sure you have your text selected—remember, it only appears if you are actually manipulating your text.
Changing the Cricut Font Letter Spacing
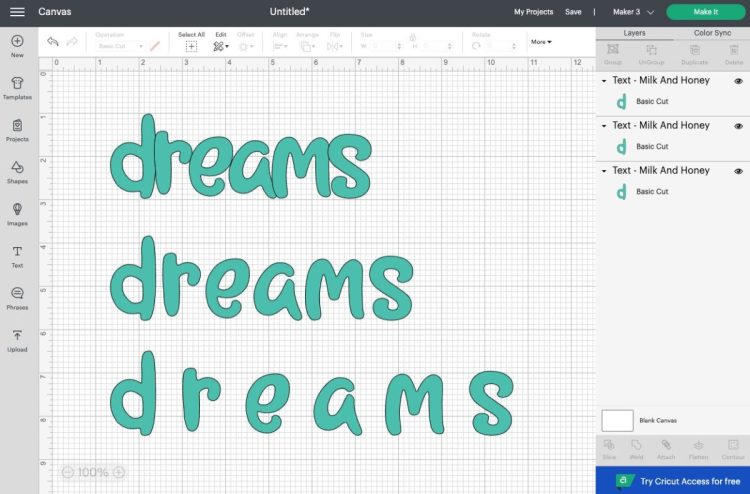
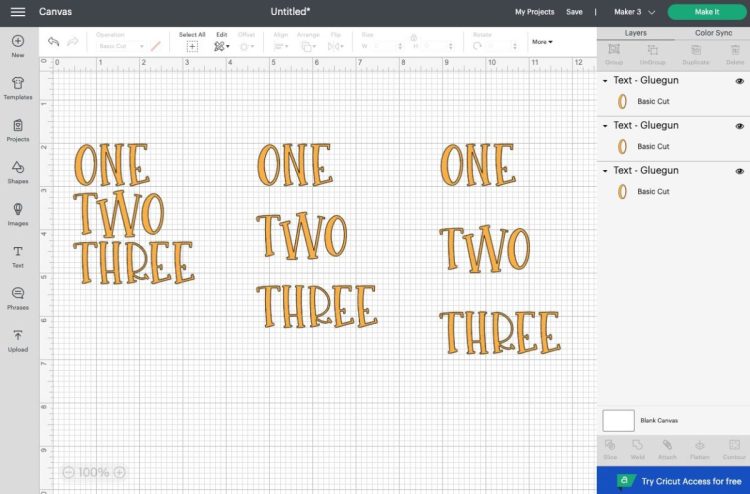
Like I said above, Cricut’s letter spacing using to be notoriously bad. Thankfully it’s a lot better. You can still use the Letter Spacing tool, however, to make your text more or less dense—it will move each letter closer or farther from the one next to it across the entire word. You can type in your own numbers or use the stepper arrows to adjust incrementally.
Here is -1 letter spacing, 0 letter spacing, and +2.4 letter spacing:

Changing Cricut Line Spacing
The line spacing tool works with text boxes of more than one line. The default is “1” and often that’s too much. You can type in your own numbers or use the stepper arrows to adjust incrementally.
Here is -1 letter spacing, 0 letter spacing, and +2.4 letter spacing:

Changing Cricut Font Alignment
Alignment is different from the Align tools in the Edit Toolbar. Text alignment refers to your text only. You can align your text with the left margin of your text box, the right margin of your text box, or centered in the middle of your text box. It only works with more than one line of text.
Here is left, center, and right alignment:
Curving Text in Cricut Design Space (Desktop Only)
I have a longer post about Curving Text in Design Space, but the concept is simple. The Curve tool is basically a slider that allows you to curve text from a slight bend all the way to a complete circle. Type your text and use the slider to see how it works.

Note you can only curve a single line of text at a time. And if you copy that text, for some reason the tool won’t work on your copied text. You need to re-type it from scratch.
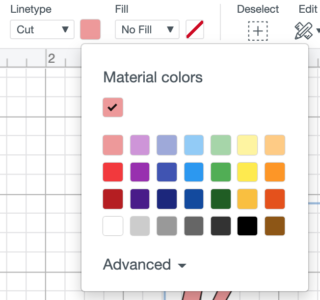
Changing Your Font Color
You can then change the color the same way you would any other object in Cricut Design Space. This is done in the Edit Toolbar at the top. You can select more than one text box and change the color at the same time.

Advanced Font Tools
If you want even more granular control over your fonts and text, click “Advanced” for three more options
Ungroup to Letters
This turns each letter into its own text box. You can then move each letter individually so that you can fine-tune your letter adjustments. Each letter still remains a text box, so you can change the text of each if you’d like. This is great for getting letters exactly where you want them.
A lot of times I forgo all of the other tools I mentioned above and start by just ungrouping my letters and making it perfect from the start.
Ungroup to Lines
Ungroup to Lines only works if you have more than one line of text in a single text box. This tool takes each line and separates it into its own text box.
Ungroup to Layers
Some Cricut fonts have more than one layer. Often, the second layer is hidden—click on the eye in the Layers Panel to show it. For example, Varsity Letter has two layers. But you’ll see that they are actually attached—you cannot move each font layer individually.
But if you click Ungroup to Layers, each layer of your font now has its own layer in the Layers Panel. You can now manipulate the pieces of your font separately.
Attaching Text
After you have your text exactly how you want it, you want to Attach all of your letters together. This keeps them from cutting separately on your Cricut (unless, of course, that’s what you want!). Attach is an important tool for using with text, so read more about it in my post Using Attach in Cricut Design Space. You can also weld your letters, as shown in the next section.
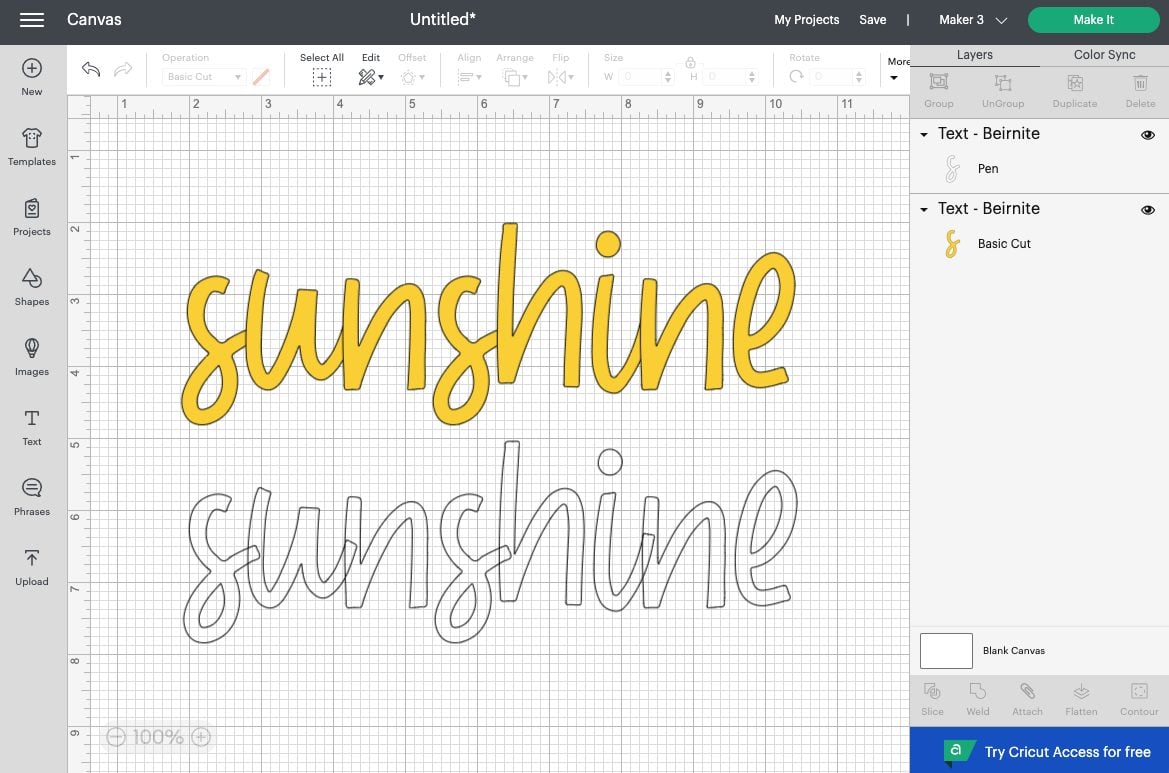
Welding Text
If you have text with overlapping letters (most often script fonts, but other fonts might apply), you’ll want to Weld your letters together so they cut in one piece. This is KEY for cutting overlapping text, so make sure to read more about welding in my post Using Weld in Cricut Design Space for more information.
Beyond Text
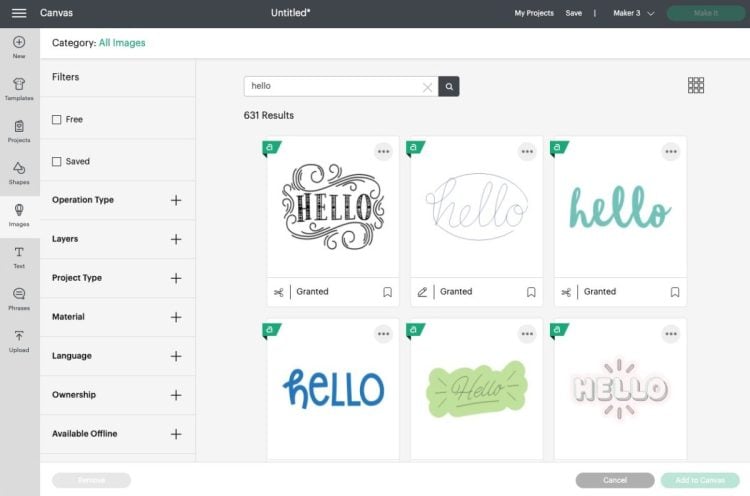
If you’re really stuck you can always check out the extensive library of files in the Cricut Image Library (click Images on the left in the Design Panel). There are so many cool words and quotes in there to create any project you can imagine!

I hope you’ve found some helpful tips about working with text in Cricut Design Space! Have questions? Let me know!
More Cricut Font Tutorials
- How to Use Font and Text in Cricut Design Space
- How to Upload Fonts to Cricut Design Space
- Working with Script Fonts in Cricut Design Space
- How to Curve Text in Cricut Design Space
- Cricut Design Space Kerning and Letter Spacing for Fonts
- Where to Find Cheap and Free Fonts for the Cricut
- 101 Fonts for Cutting Machines
Get a Cricut
USING FONTS AND TEXT IN DESIGN SPACE
Instructions
- Creating Text with the Cricut Text ToolNote: text boxes can only contain one font. However, you can add as many text boxes to a project as you’d like. DESKTOP: To create text, click Text in the Design Panel on the left and a text box labeled "Text" will appear on your Canvas. Double click the text box and start typing.

- Once you have a text box, you'll also see a new menu appear at the top of Design Space. This is the Text Toolbar. This only appears when you have text on your Canvas selected.From left to right, you have:FontStyleFont SizeLetter SpaceLine SpaceAlignmentCurveAdvanced (includes Ungroup to Letters, Ungroup to Lines, Ungroup to Layers)

- MOBILE: Mobile is a bit different. Tap Text at the bottom of the screen. The Insert Font menu will appear—you need to select your font before you can type text (don't worry, you can change it later). Then you can type your text.

- The text tools on mobile are in two places. First, select your typed word (in this case "hello") and click Edit at the bottom of the screen. Here you can see the tools for:FontStyleAlignmentFont SizeLetter SpaceLine Space

- And then, if you go to the Action Menu at the bottom, you'll find more tools:NOTE: Mobile does not support the text curving tool at this time.

- Types of Cricut FontsFor both Desktop and Mobile, use the font menu to select different fonts for your project. Both Cricut fonts and your system fonts are listed here. Cricut FontsCricut fonts are designed by Cricut and loaded into Design Space. They exist on both the desktop and mobile apps. They may or may not have a fee associated with them depending on your Cricut Access subscription. You can also use the search bar here if you know the name of the particular font.DESKTOP:

- MOBILE:Cricut fonts are easily cut on your Cricut. You should always get a good clean cut result when using Cricut Fonts, even ones that look distressed or have narrow or small pieces. If you click the download button, it will save that font for you for offline use. It will NOT download to your computer to use in other programs.

- System FontsSystem fonts are fonts on your device—those that came with your device or you’ve uploaded yourself. To add a system font to Cricut Design Space, you just need to make sure you've added the font to your computer or device and that the installation is complete. Check out How to Upload Fonts to Cricut Design Space for more detailed instructions. Also note you can upload both OpenType and TrueType fonts to Cricut Design Space.Using a system font that you have on your computer is no different than using a Cricut font as above, though there is one big pitfall I want to mention here.The Cricut cuts mathematically simple files better than it does mathematically complicated files. Cricut fonts are designed to be mathematically simple, so they cut easily. Your system fonts, however, might not be as simple. Take a look at Workhorse Rough. It’s a great grungy font. And there’s a good chance it will destroy your material.Look at all those little angles and cutouts! Every time, the Cricut has to adjust the blade and mat direction. The Cricut is an amazing machine, but that’s impossible to cut neatly.The best fonts for cutting on the Cricut have smooth edges. Keep this in mind when choosing one of your system fonts to cut on the Cricut!

- DESKTOP:

- MOBILE:Note that if you are using a system font installed on one device (like your laptop), your font may not show properly if opened on another device that does not have that font (like your phone). Most often, you'll have a lot more system fonts on a desktop device than a mobile device.You can also use the search bar here if you know the name of the particular font.If you're looking for the best free fonts for your Cricut, check out this post Where to Find Cheap and Free Fonts for the Cricut. That post goes over where to find and download free fonts, where to buy premium fonts, the difference between a personal and commercial license, where to find discounts, and more. It's a great post for finding personal use and commercial use fonts for all of your projects.

- Font FiltersIn the Font menu, there is also an option to filter. Font filtering varies depending on whether or not you’re using desktop or mobile. There are more filters on mobile than desktop.DESKTOP: When the font dropdown is open, click Filters. MOBILE: When the font selection menu is open, click the tiny filter symbol.
- My Fonts (Desktop) / Purchased (Mobile)This filter includes both your system fonts and any fonts you’ve purchased from Design Space.
- Multi-Layer FontsMulti-layer fonts have more than one layer. Additional layers may be hidden—you can turn them on and off using the “eye” in the Layers Panel.
- Single-Layer FontsSingle-layer fonts only have one layer. System fonts are automatically single-layer fonts. Single-Layer fonts tend to be simpler and easier to cut and are particularly good for iron-on and adhesive vinyl projects where you don't want to layer a bunch.
- Free Fonts (Mobile)These are free Cricut fonts. Desktop HAS these fonts, there's just no filter for them. If you are trying to find these free fonts, make sure to uncheck the "Only Kerned Fonts" option. A lot of these free fonts are old, un-kerned fonts.
- Language (Mobile)This filter sorts Cricut fonts with characters specific to different languages. Your foreign language system fonts will not show with this filter.
- Stencil (Mobile)These Cricut fonts are specifically designed to be used with a stencil because they have connected letters. Your stencil system fonts will not show with this filter.
- Writing FontsWriting fonts are Cricut fonts that have been specifically designed to be used with the Cricut pen or foil tool. We'll cover more about these later in this post. Technically, you can use Cricut pen to write any font by changing the Operation of your text to Draw instead of Cut. Most fonts, however, will trace the outside of the letters like this:

- Writing fonts feature letters that look the most like hand-written text. By filtering to writing fonts, you’ll narrow it down to only the Cricut fonts that already have a writing style built into the font.Make sure to Attach your writing font layer to the material layer you want to cut on. So if you are writing food labels, for example, make sure that the text is attached to the card that it’s being written on. If not, it will be on its own layer and write on your mat. Learn more about Using Attach in Cricut Design Space and check out my Ultimate Guide to Cricut Pens for more information about using the Cricut pens in general.

- Kerned FontsThere is an entire post on Cricut Design Space Kerning and Letter Spacing for Fonts, but here's a quick overview of how text in Cricut Design Space works with Kerned fonts.To start, Cricut’s use of the word “kerning” is a little misleading. Instead of being able to adjust the spacing between individual letters, the letters are just spaced better than they used to be. Cricut's letter spacing was notoriously bad, and basically, "kerned fonts" just means letter spacing.Before kerned fonts, Cricut had notoriously bad letter spacing. You’d type a word into Design Space and select a font (this one is Aphrodite Pro) and it would look something like this:
- Not magnificent! This is because Design Space reads each letter as a separate image and the software cannot overlap them. The time-consuming fix before the kerned fonts was to ungroup to letters and space them individually, which we’ll talk about later in this post.Now, Cricut has basically fixed the no-overlap issue on a bunch of their fonts and called them "kerned fonts," even though they have nothing to do with actual kerning. Nayland is a kerned font and you can see that the spacing between the letters is much better.Some of these kerned fonts still aren’t perfect. We’ll go into fixing them in just a bit.
- Saving Cricut Fonts for Offline UseOn both Desktop and Mobile, you can save Cricut fonts for offline use. This means if you want to craft without internet, you'll still have access to your Cricut fonts (not system fonts). DESKTOP: Click the font selection dropdown, find your font, and click "Download" next to the font name.

- MOBILE: Open the font selection. Tap "Select" in the upper left corner of the font selection. Then you can tap the circle next to the font you want to save, and then tap Download in the upper right.

- Changing the Cricut Font SizeThere are three ways to change the size of your text:Note: if you don't see the Font Toolbar, make sure youUsing the arrow in the bottom right of your text box to drag the text box larger or smaller.Using the Font Size tool in the Text Toolbar Using the Size tool in the Edit toolbar (for example, if you want your text exactly 3" wide)
- Changing the Cricut Font Letter SpacingCricut's letter spacing using to be notoriously bad. Thankfully it's a lot better. You can still use the Letter Spacing tool, however, to make your text more or less dense—it will move each letter closer or farther from the one next to it across the entire word. You can type in your own numbers or use the stepper arrows to adjust incrementally. Here is -1 letter spacing, 0 letter spacing, and +2.4 letter spacing:

- Changing Cricut Line SpacingThe line spacing tool works with text boxes of more than one line. The default is "1" and often that's too much. You can type in your own numbers or use the stepper arrows to adjust incrementally. Here is -1 letter spacing, 0 letter spacing, and +2.4 letter spacing:
- Changing Cricut Font AlignmentAlignment is different from the Align tools in the Edit Toolbar. Text alignment refers to your text only. You can align your text with the left margin of your text box, the right margin of your text box, or centered in the middle of your text box. It only works with more than one line of text. Here is left, center, and right alignment:
- Curving Text in Cricut Design Space (Desktop Only)There is a longer post about Curving Text in Design Space, but the concept is simple. The Curve tool is basically a slider that allows you to curve text from a slight bend all the way to a complete circle. Type your text and use the slider to see how it works.Note you can only curve a single line of text at a time. And if you copy that text, for some reason the tool won’t work on your copied text. You need to re-type it from scratch.
- Changing Your Font ColorYou can then change the color the same way you would any other object in Cricut Design Space. This is done in the Edit Toolbar at the top. You can select more than one text box and change the color at the same time.

- Advanced Font ToolsIf you want even more granular control over your fonts and text, click "Advanced" for three more optionsUngroup to LettersThis turns each letter into its own text box. You can then move each letter individually so that you can fine-tune your letter adjustments. Each letter still remains a text box, so you can change the text of each if you'd like. This is great for getting letters exactly where you want them. A lot of times I forgo all of the other tools I mentioned above and start by just ungrouping my letters and making it perfect from the start.
- Ungroup to LinesUngroup to Lines only works if you have more than one line of text in a single text box. This tool takes each line and separates it into its own text box.
- Ungroup to LayersSome Cricut fonts have more than one layer. Often, the second layer is hidden—click on the eye in the Layers Panel to show it. For example, Varsity Letter has two layers. But you’ll see that they are actually attached—you cannot move each font layer individually. But if you click Ungroup to Layers, each layer of your font now has its own layer in the Layers Panel. You can now manipulate the pieces of your font separately.
- Attaching TextAfter you have your text exactly how you want it, you want to Attach all of your letters together. This keeps them from cutting separately on your Cricut (unless, of course, that's what you want!). Attach is an important tool for using with text, so read more about it in my post Using Attach in Cricut Design Space. You can also weld your letters, as shown in the next section.
- Welding TextIf you have text with overlapping letters (most often script fonts, but other fonts might apply), you'll want to Weld your letters together so they cut in one piece. This is KEY for cutting overlapping text, so make sure to read more about welding in my post Using Weld in Cricut Design Space for more information.
- Beyond TextIf you’re really stuck you can always check out the extensive library of files in the Cricut Image Library (click Images on the left in the Design Panel). There are so many cool words and quotes in there to create any project you can imagine!


Comments & Reviews
Catherine says
What is the smallest font size that can be printed on the Circuit and still be reasonable readable? Can it manage printing 4 or 5 point font size? Does anyone know the minimum?
Crystal Summers says
Hi Catherine,
I’m not sure there is a minimum that is recommended across the board. It really depends on the font. If it’s a thin, script font you’ll need to but larger than a thicker, more blocky font. I hope that makes sense. It truly depends on many factors and comes down to how tricky it will be to weed.
Hope this helps,
Crystal, HLMS Community Manager
Rita says
Can I make product lables with writing with the crisuit joy?
Crystal Summers says
Hi Rita,
Yes, you can create labels using the Cricut pen. Here’s a post that may be useful: https://heyletsmakestuff.com/the-ultimate-guide-to-cricut-pens/
Hope this helps!
Crystal, HLMS Community Manager
Jenna says
I just got a cricut and have been trying to figure it out since Christmas, I wish I had found you sooner!
I’m playing with a cursive font and have ungrouped by line (it’s a 3 line paragraph) and then letter so it’s spaced properly but now the lines aren’t aligned properly… how do I get them grouped together again?
I tried “Group” on the right hand “layer” menu but it still isn’t giving me most of the editing options
Crystal Summers says
Hi Jenna,
Thanks for following! Glad it’s been helpful.
So, I would begin by ungrouping by line. Go line by line. So ungroup lines, and then ungroup to letters in 1 line. Once you’ve arranged the spacing, reattach and weld that line together. Then, move onto the next line.
I hope this helps!
Crystal, HLMS Community Manager
Megan says
Since you can’t edit a font schedule in a design space image, do you know how to determine which font was used in the first place? I found one I like, but I want to type different words and have no clue which font the used!
Amy Motroni says
Hi Megan,
You could try making a copy of the font you’re using before you weld it and hide it with the eye before you cut.
You might also consider keeping a word doc with your favorite fonts and what you’ve used them on in the past.
Happy Crafting!
Amy, HLMS Reader Support
Judy Garrelts says
I’m trying to paper piece a font. I want the letters to be filled with a pattern, but still maintain the color outline. Do you know how to do this? When I use the fill option, I lose the colored border. Thanks for any help.
Amy Motroni says
Hi Judy,
This post might help:https://heyletsmakestuff.com/cricut-shadow-cricut/
Happy Crafting!
Amy, HLMS Reader Support
Victoria DeLeon says
Design Space is not acknowledging ANY of my system fonts. I’ve tried loading them both ways, TTF and Open Type and zip. What do I do? I need to make a monogram.
Cori George says
That is SO strange Victoria! It’s not often that I come across a problem I haven’t seen before. Have you tried contacting Cricut customer service?