Want to use your Cricut to make vinyl decals? This tutorial will teach you all about Cricut decals, including the best types of images to use, vinyl options, weeding tips, using transfer tape, and more!
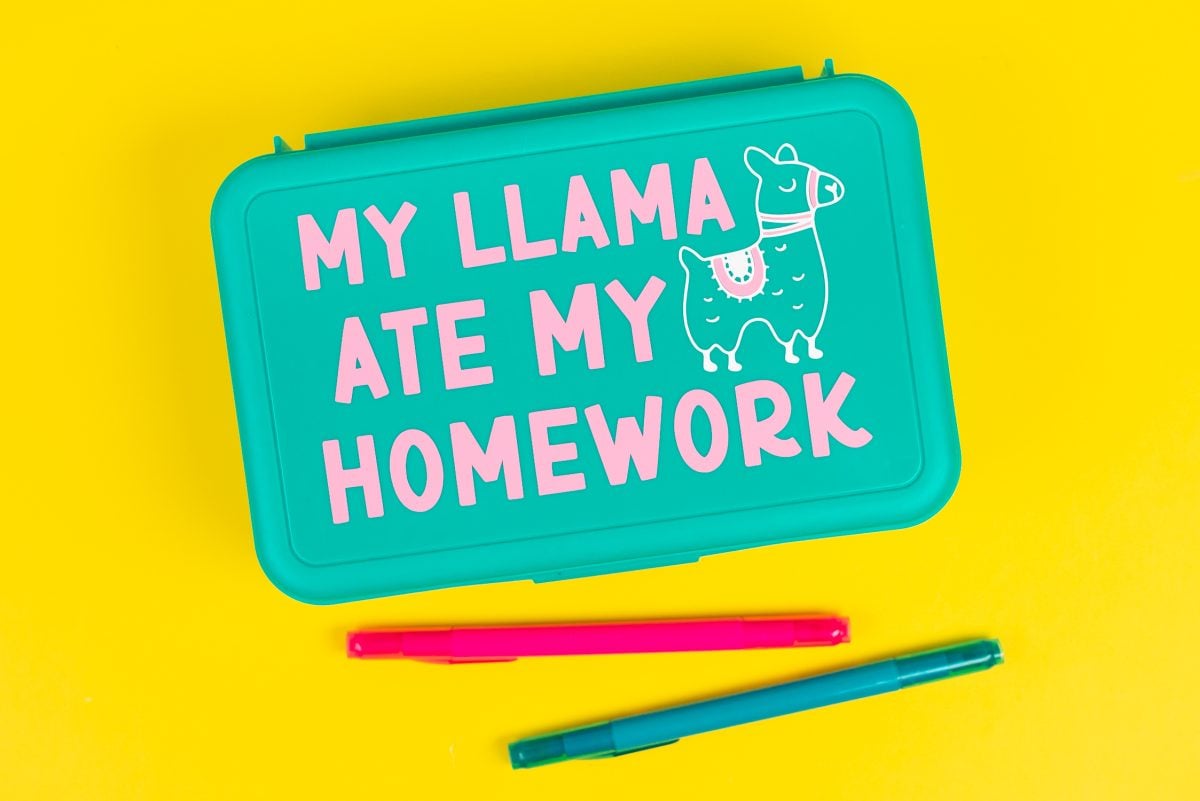
Today we’re talking about one of the most basic projects to make using your Cricut: vinyl decals! Decals are the perfect beginner project with your Cricut, though experienced users often make decals all the time as well.
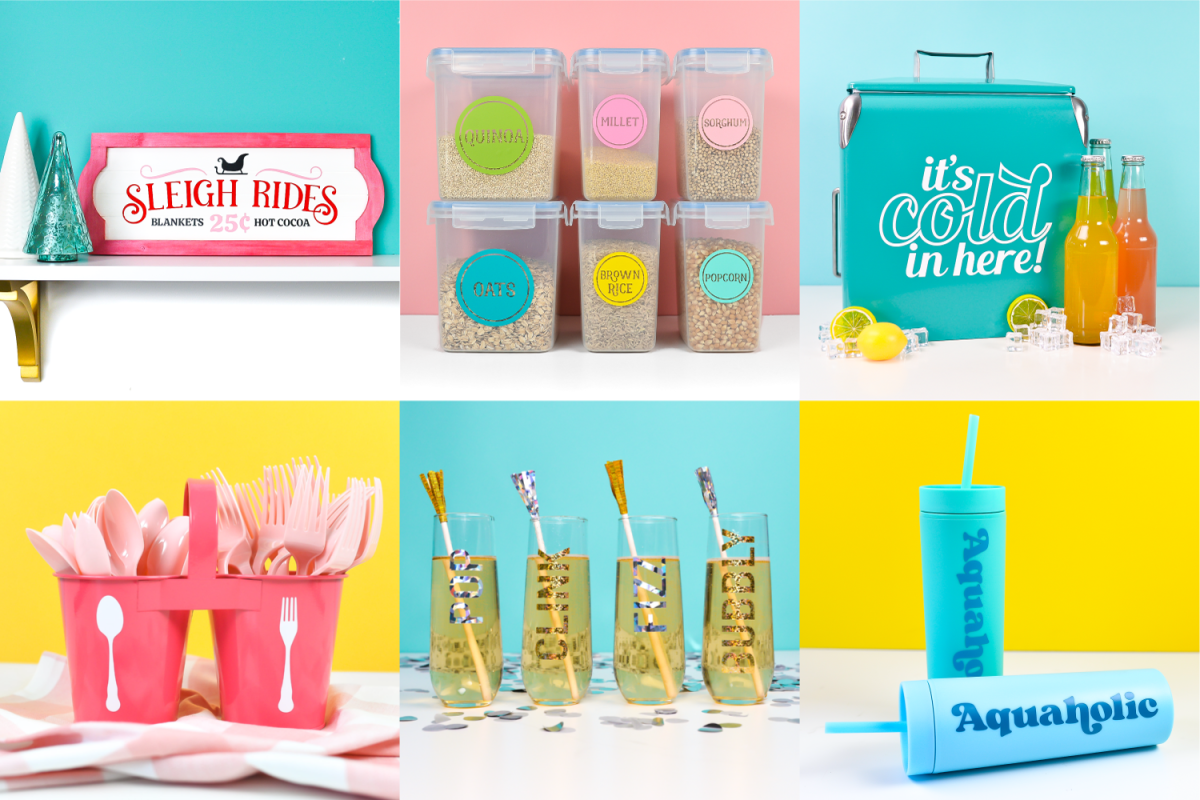
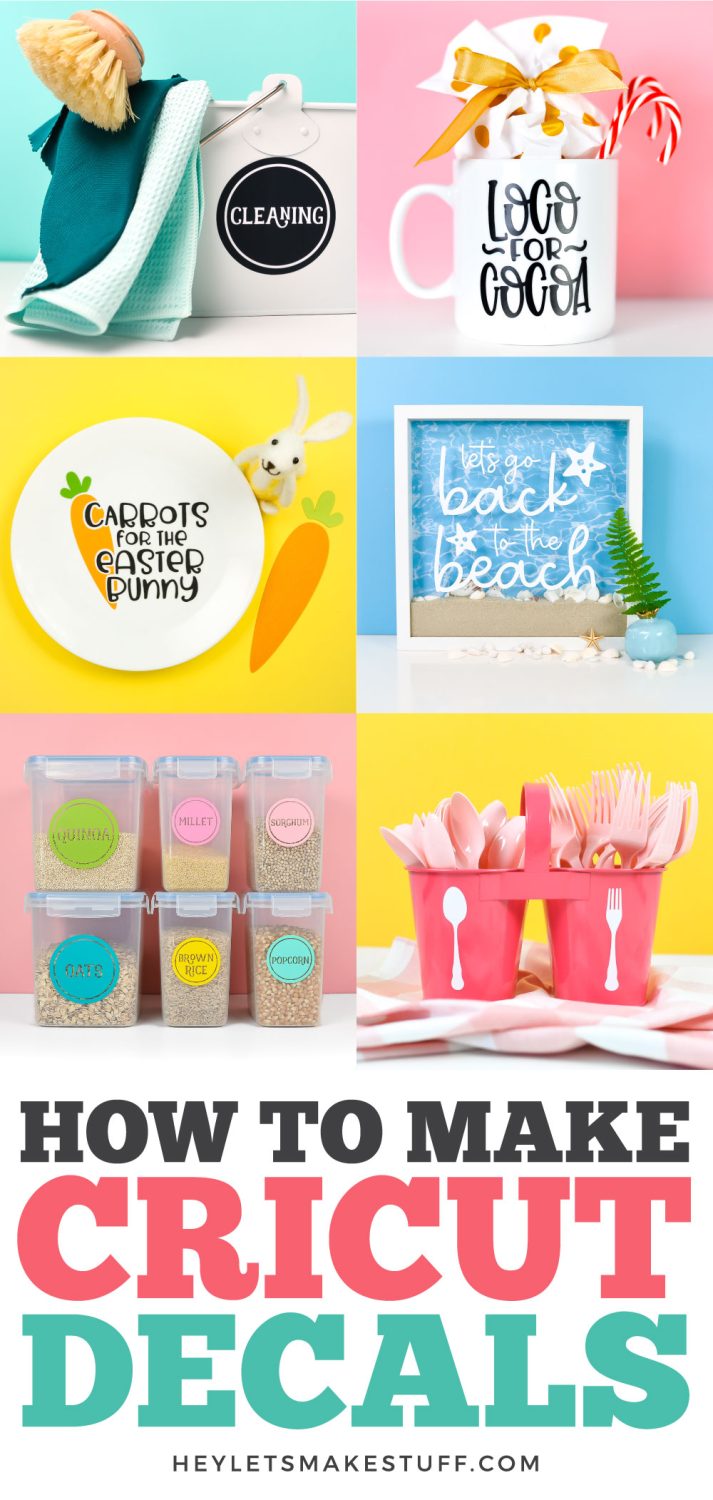
Decals can be used in so many ways and the term “decal” in itself can be a bit confusing. I like to think of a decal as a sticker made of vinyl. That being said, you may hear decals called images, transfers, stickers, and more. Here are just a few examples of the sort of vinyl decals I’m talking about:
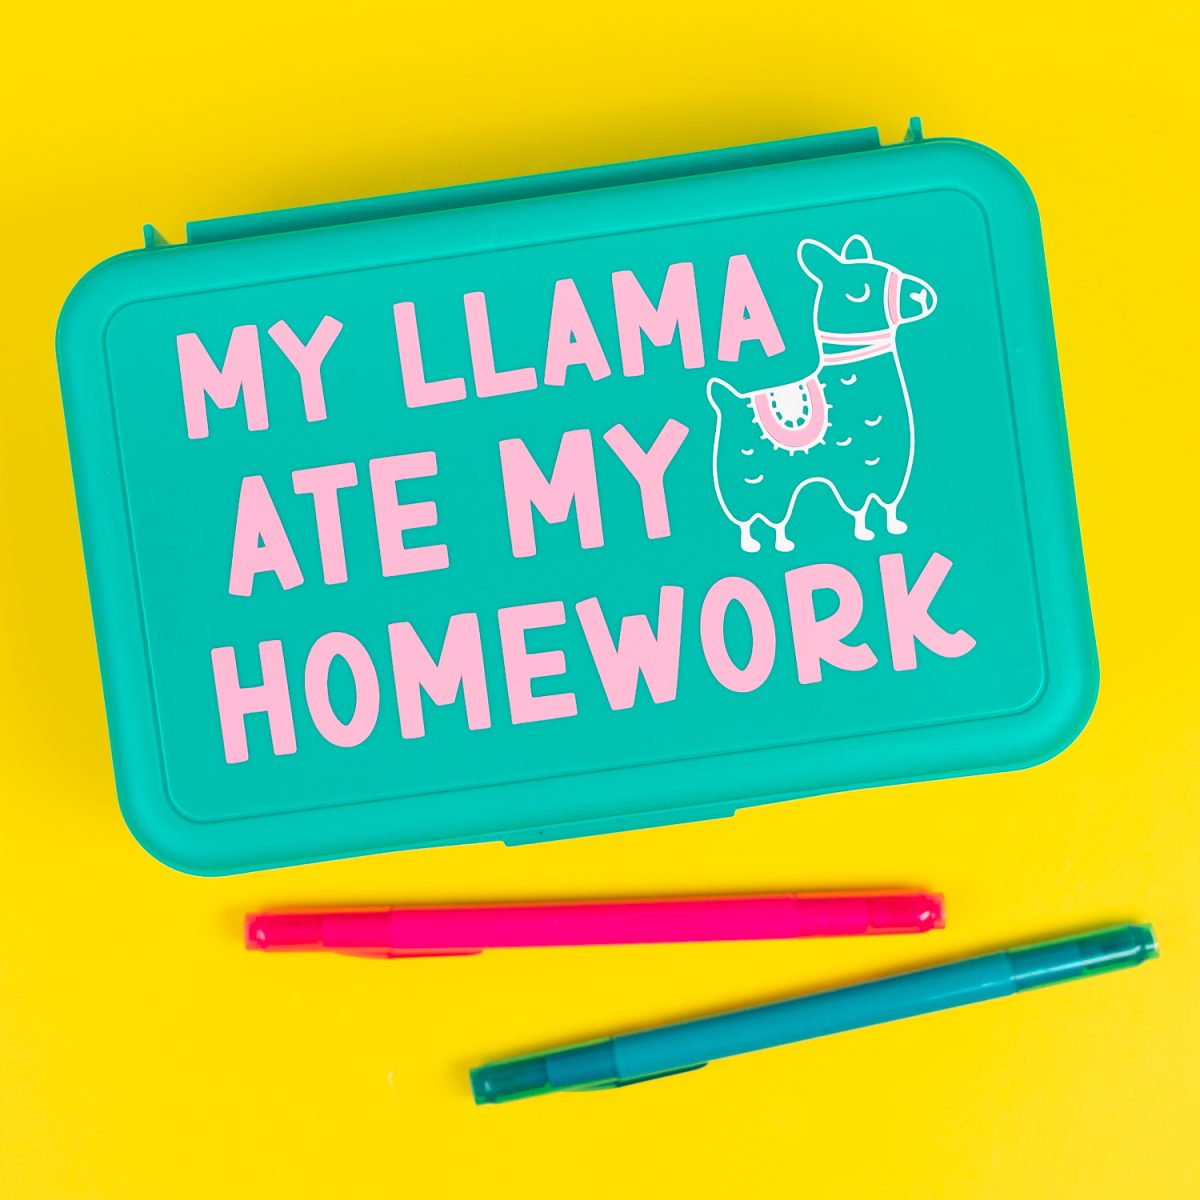
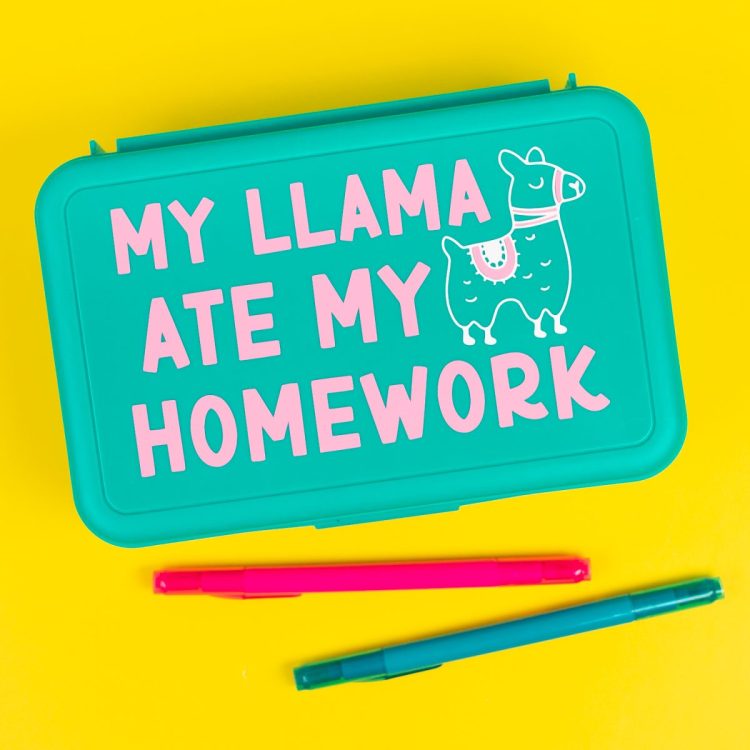
Today we’ll talk about all sorts of best practices when it comes to Cricut decals, and at the end we’ll cut a two-color decal from vinyl and apply it to a pencil box using transfer tape!
If you’re looking at making printable stickers, check out my post Make Cricut Stickers using Clip Art, SVGs, Photos, and More! These type of stickers use Cricut’s Print then Cut feature, whereas this post is all about vinyl decals.
Get everything you need to make vinyl decals with you Cricut on my Amazon shopping list!
In this post:
- Which Cricut can I use?
- What types of decals can I make?
- Best types of images for decals
- Vinyl options
- Blade and cutting mat suggestions
- Weeding tips
- Using transfer tape
- Removing air bubbles
- Caring for your decals
- Pencil box decal project
Which Cricut Can I Use?
You can make your own vinyl decals using all of the current Cricut machines, including Cricut Maker 3, Cricut Explore 3, Cricut Maker, Cricut Explore Air 2, and Cricut Joy.
Note that you’ll be more limited on your size with Cricut Joy, but it’s the perfect machine for making all sorts of smaller decals, like on my DIY Utensil Caddy or Phone Case.
What Types of Decals Can I Make?
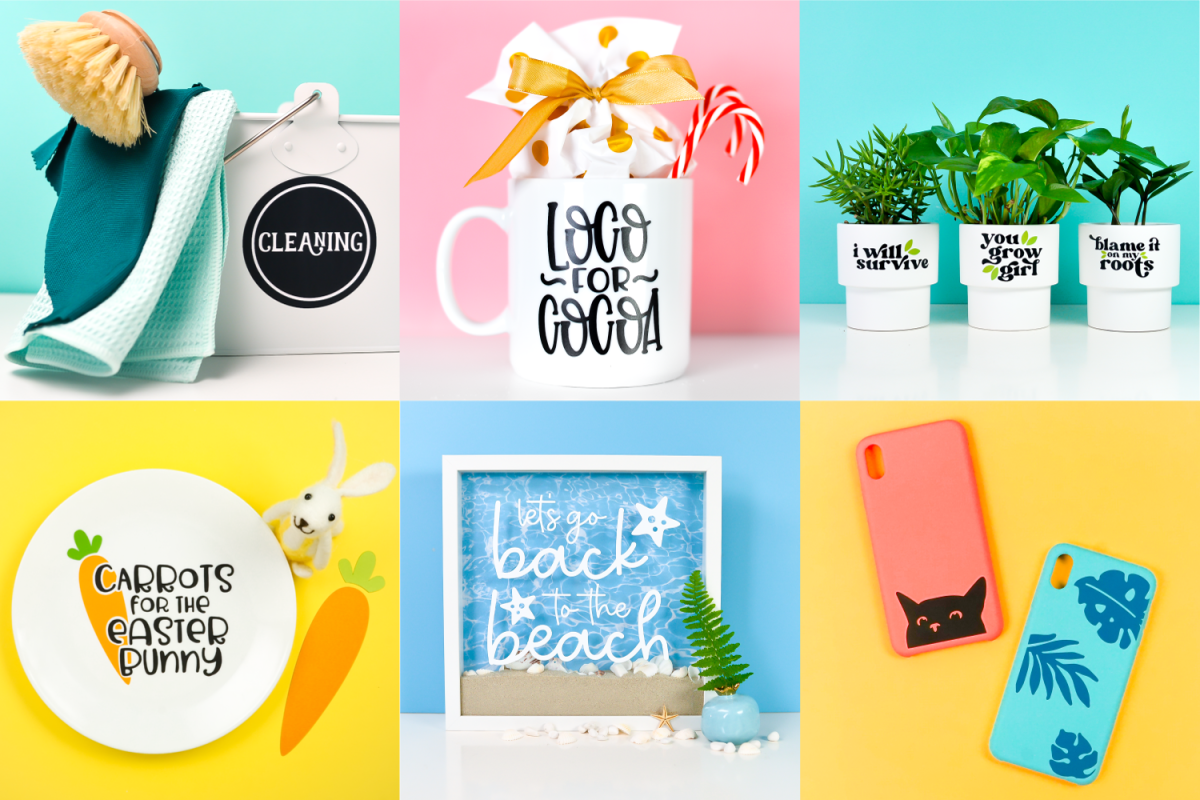
You can make all sorts of decals using your Cricut! Here are some ideas to get your creative wheels turning:
- Wall decals
- Car decals
- Laptop decals
- Notebook stickers
- Clipboards, lunch boxes, and other school decals
- Glass decals
- Home decor signs
- Plates and other homeware decals
- Appliance decals
- Tumbler, mug, and water bottle decals
- Window decals
- Flower pot decals
- Ornament and holiday decals
- Phone case decals
- Nail decals
- Jars, bins, and other organizational labels
- And so much more!
The Best Types of Files for Decals
While the Cricut can cut vinyl very intricately, you want to be aware of how complex your file is and what you’re putting it onto.
Beginners may want to start with a single color decal. This means just one cut, one thing to weed, and one transfer tape application.
Once you’re comfortable with a single color, you may want to layer more than one color. My tutorial for How to Layer Adhesive Vinyl will be helpful! We will do a two-layer decal toward the end of this tutorial.
Sometimes transfer tape can be a bit finicky, and the more small pieces and thin lines you have in your image, the tougher the transferring process can be. So keep that in mind as well when you’re choosing your images. For example, the image on the left will be much harder to make into a decal than the one on the right because of all the tiny pieces:
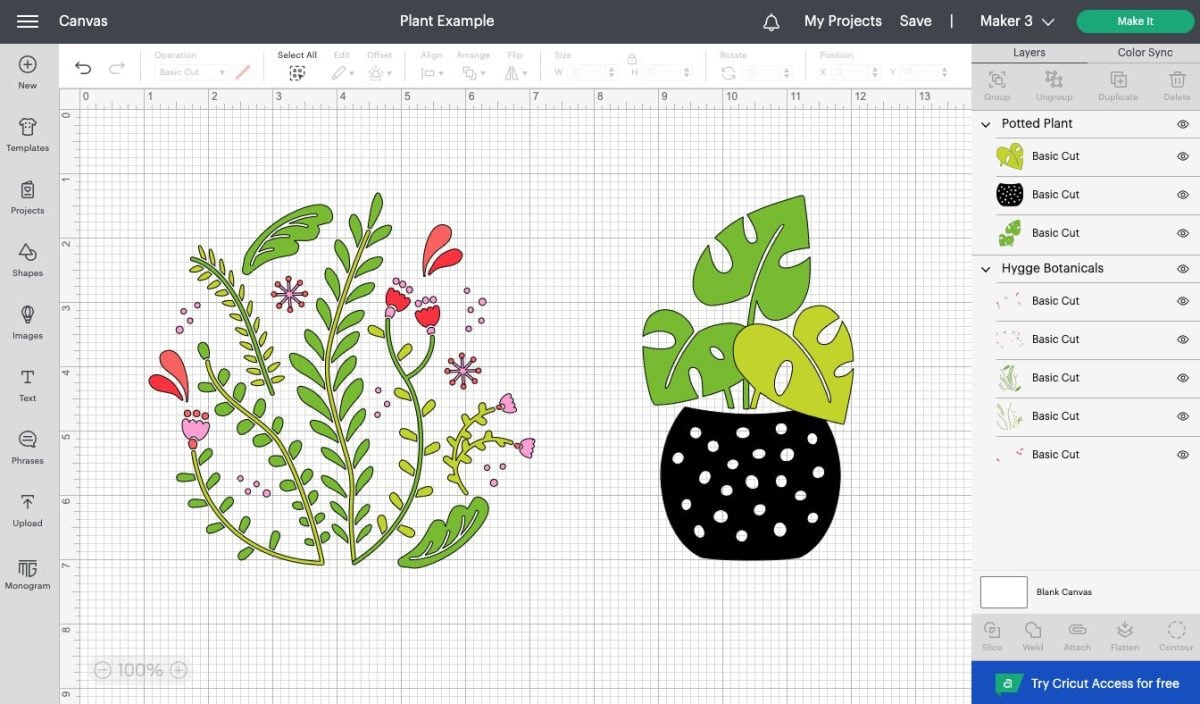
It’s totally possible to do complex decals, there’s just more places for your project to become frustrating, especially if you’re newer to using these materials.
Vinyl Options
When you are trying to decide which vinyl to use for a decal, take into account the type of decal you are making.
If you’re using Cricut brand vinyl and are unsure whether it’s permanent or removable, there’s a way to tell! If it has a green grid on the back, it’s permanent; grey grid, it’s removable!
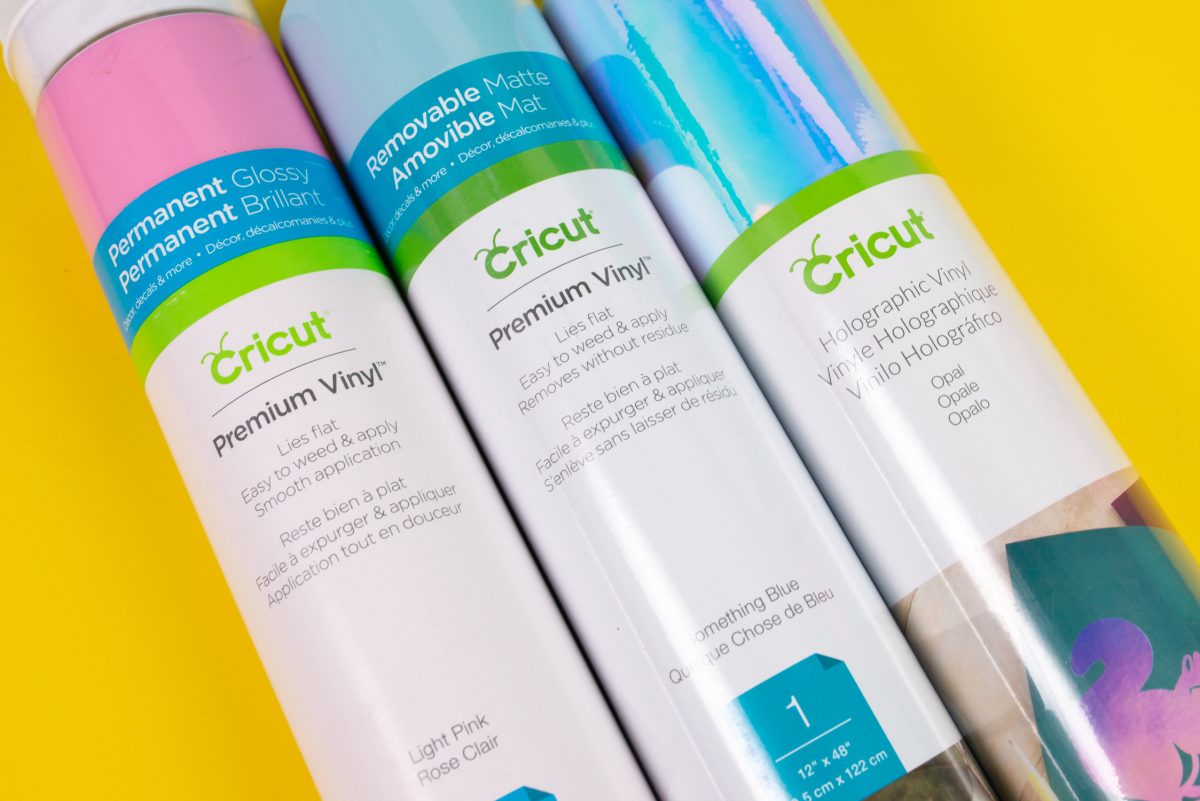
Also check out my Ultimate Guide to Cricut Adhesive Vinyl!
Permanent / Outdoor Vinyl
Permanent vinyl is great when you want a lasting “stick.” For example, car windows, mugs and tumblers that will be washed, and outdoor projects. In many cases, permanent vinyl will need a solvent to remove the adhesive and it may leave a residue.
Removable / Indoor Vinyl
Removable vinyl is ideal for applications where you may want to remove the vinyl in the future. Think removable decals, wall art, temporary signs and decorations, etc. Most removable vinyl adhesive can be removed by just peeling it up.
Specialty Adhesive Vinyl
There are other kinds of adhesive vinyl as well! Many of these aren’t rated for long-term outdoor use, so check the label and make sure you’re not trying to create a permanent decal with removable vinyl. Here are a few types of specialty adhesive vinyl:
- Holographic
- Glitter
- Metallic
- Foil
- Chalkboard
- Dry Erase
- Glow in the Dark
- Patterned
- Printable
- Fluorescent / Neon
- Window Cling
Note that for layering, most specialty vinyls should only be the top layer. You don’t want to layer regular adhesive vinyl on top of glitter vinyl, for example.
Blade and Cutting Mat Suggestions
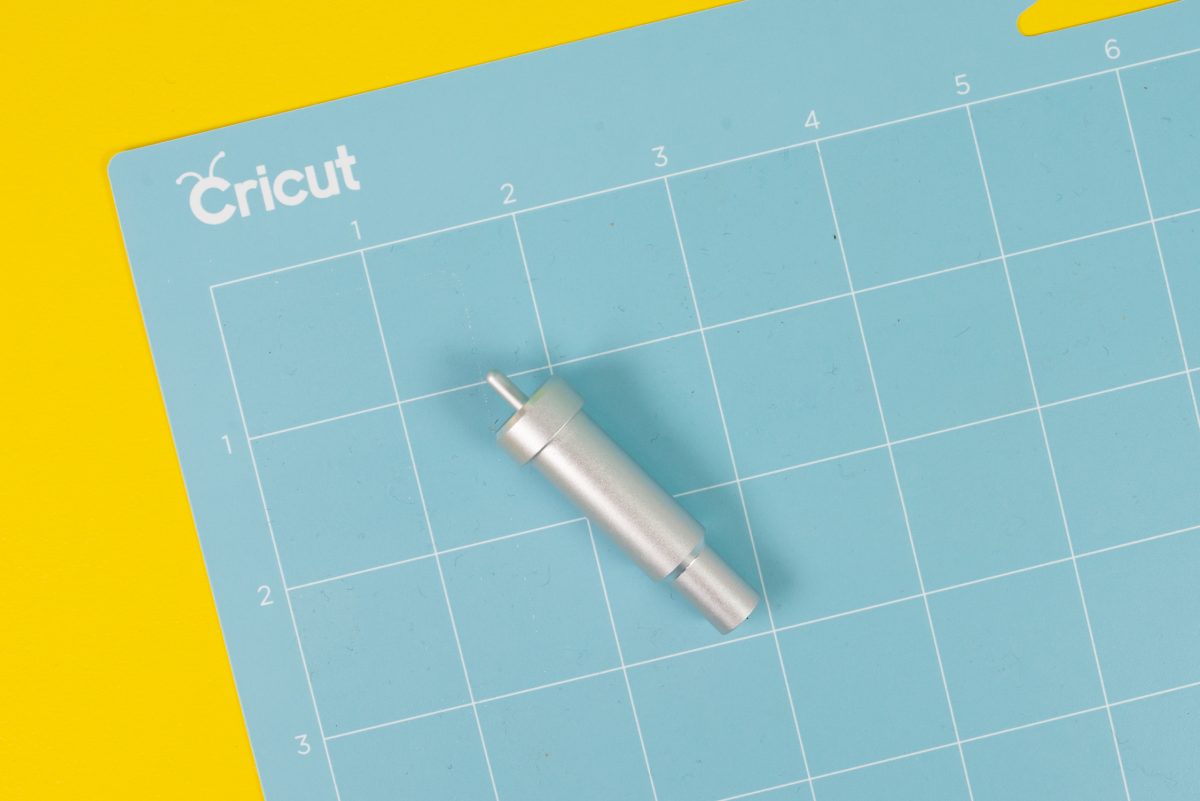
No matter what type of decal you are making or what kind of vinyl you are using, you’ll always want to use the Fine Point Blade, and either the green StandardGrip mat or the blue LightGrip mat.
Weeding Tips
Weeding vinyl is the process of removing the excess material that you do not want on your project. I have a full post on Weeding Adhesive Vinyl, but a few of my favorite tips are:
- Try a weeding box: if you’re weeding something large, weeding boxes can be your best friend!
- Find a weeding hook that works for you: the straight weeding hook and the curved weeding hook are great options.
- Print out your design: if your design is intricate, print out your design so you can see what needs to be weeded and what needs to remain on the backing sheet.
- Weed with the material on your mat: I find it easier to weed with the backing sheet still stuck to my cutting mat.
- Use a light box: Use the Cricut BrightPad or other light box when weeding difficult materials. It makes it easier to see the edges of your cuts.
- Always double check: hold your design up to a bright light. This will help you see if you’ve missed any pieces in the weeding process.
Using Transfer Tape
Transfer tape is a sticky-backed piece of material that helps you transfer vinyl from the backing paper to your final project. It can be one of the most frustrating aspects of making decals, but there are ways to make it easier.
We’ll be using transfer tape for the project below, but here’s the basic process:
- Cut and weed your vinyl decal so just the decal remains on the backing paper.
- Cut a piece of transfer tape slightly larger than your decal.
- Peel the backing paper off the transfer tape
- Place your transfer tape sticky-side down on your decal
- Use the scraper to burnish the transfer tape onto your vinyl
- Then peel off the transfer tape you just laid down—it should peel up your vinyl with it.
- If it doesn’t peel up, burnish again. You can also use your fingernails to guide the vinyl onto the transfer tape.
- Clean your blank using rubbing alcohol and allow to dry.
- Place your decal on the transfer tape onto your blank (mug, car window, etc.) and press down from the center, to avoid bubbles.
- Burnish the vinyl onto the surface using the scraper.
- Peel back the transfer tape and your vinyl should stick to your project.
Note that some things make transfer tape trickier to use. First is a porous surface. The more porous your blank (a wood blank, for example), the harder it may be to get your vinyl to stick. Second, the type of vinyl you are using can affect how well it sticks to the transfer tape. Vinyl with more texture (like glitter vinyl) may have a harder time sticking. You can use the Strong Transfer Tape for those sorts of vinyl.
Removing Air Bubbles
After you apply your vinyl, you may find that there are air bubbles. Here are a few things to try:
- Just let it sit for a bit: often air bubbles will work their way through the vinyl and you’ll come back to your project in a day and they’ll be gone. Don’t let it sit too long, however, because if the air doesn’t escape, the vinyl will be less pliable and it’ll be harder to use the other methods.
- Use your thumb: just use your thumb or fingers to gently push on the air bubbles to guide them to the edge of your project so the air can escape. You can also use a scraper, but be careful not to damage the edges of your vinyl.
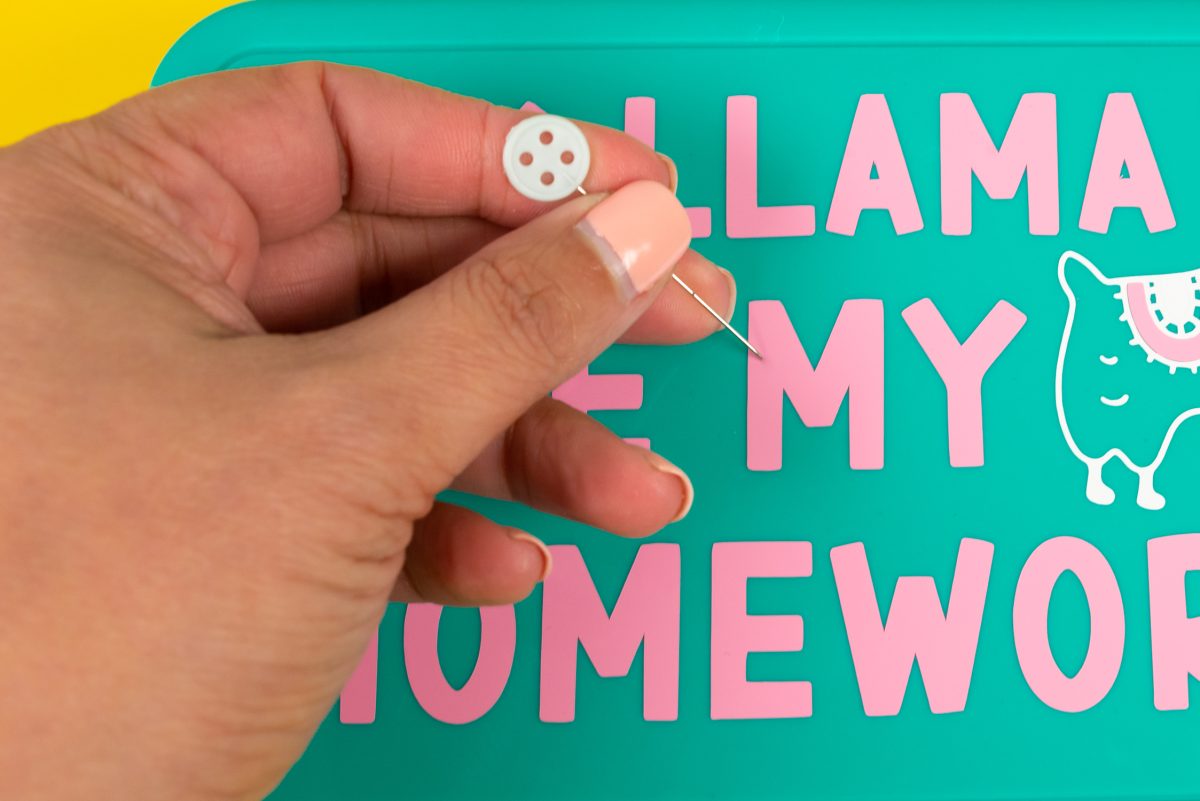
- Use a pin: Poke a very tiny hole (very tiny!) in your vinyl to let the air escape.
- Use a hair dryer: using a bit of heat on your project can help you work those air bubbles out.
Caring for Your Decals
If you want your permanent decals to last, make sure to care for them properly.
To start, use that rubbing alcohol on the surface before you apply that decal. Then you’ll have a clean surface for your decal and you won’t have dust or oils impeding the adhesive.
If possible, hand wash anything with a decal. Yes, it’s permanent vinyl, but a run through the hot dishwasher will bring up even the stickiest decals.
Pencil Box Cricut Decal Project
Supplies
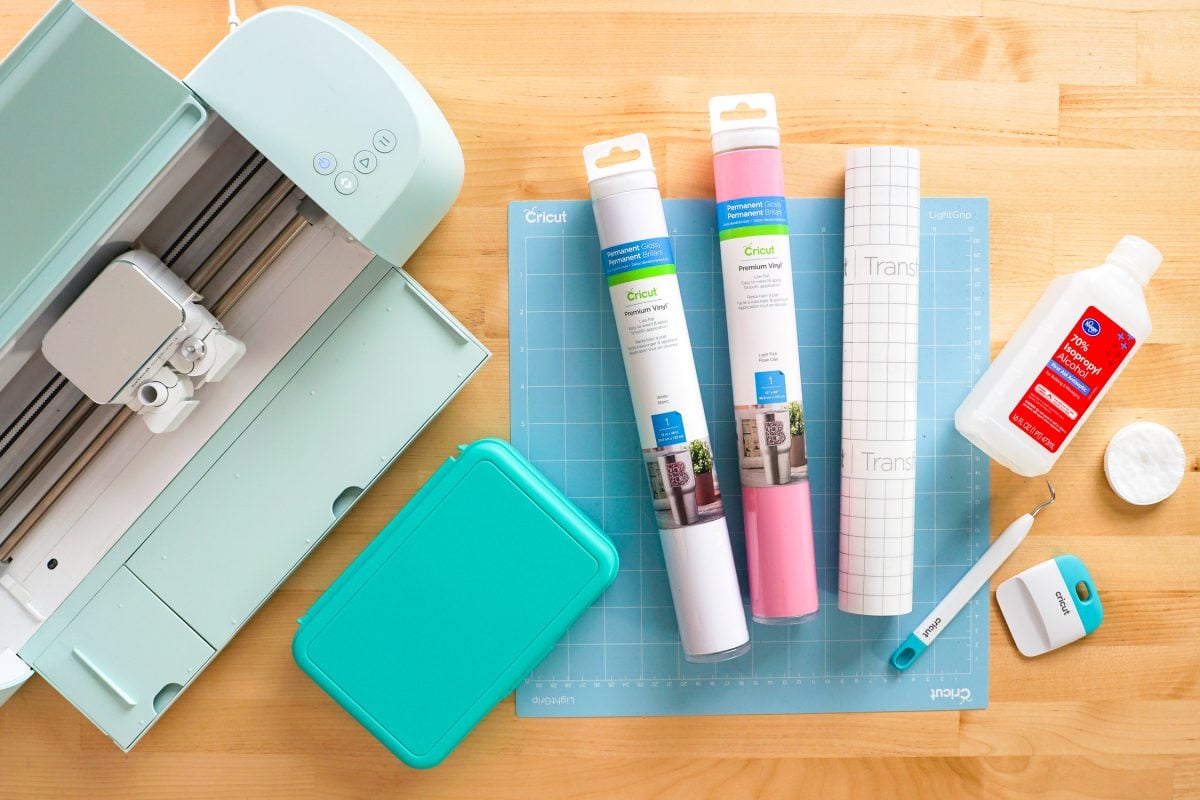
- Cricut Explore, Cricut Maker, or Cricut Joy
- Blue LightGrip mat or green StandardGrip mat
- Fine Point Blade
- Two colors of permanent adhesive vinyl
- Weeding tool
- Transfer tape
- Scraper
- Plastic pencil box
- Cricut Design Space file
Instructions
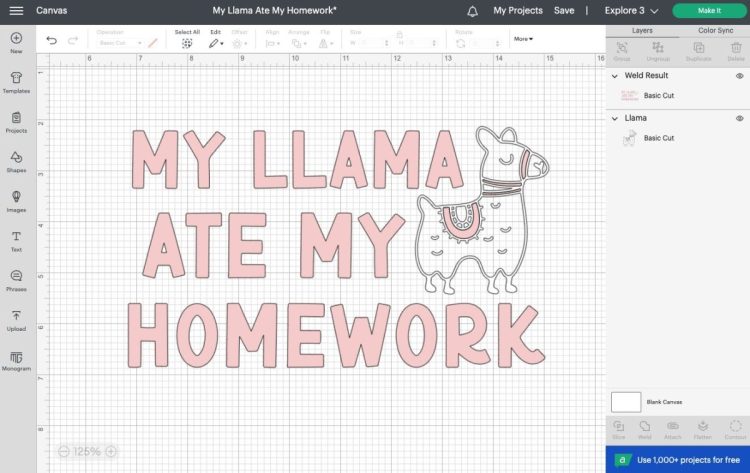
Before you begin, make sure you have the correct machine selected in the upper right of Cricut Design Space. I am using my Cricut Explore 3 for this project, so I selected Cricut Explore Family.
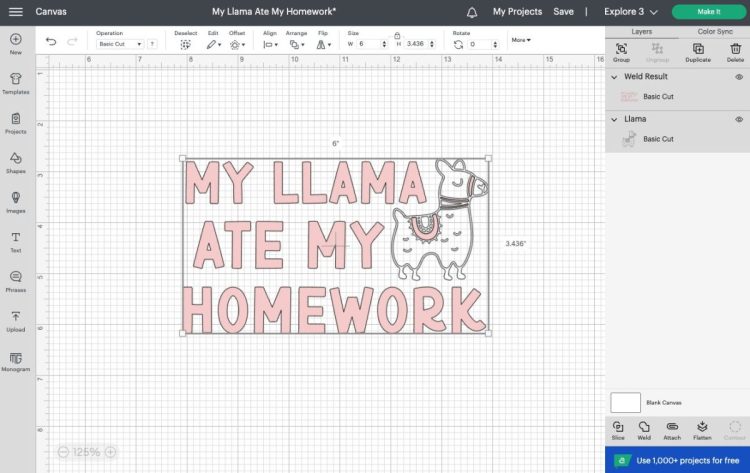
Start by opening the Cricut Design Space file. You can edit this file if you’d like, changing the colors or even choosing a different animal in the Image Library. I used the font BFC Birthday Party if you’d like to swap out the text.
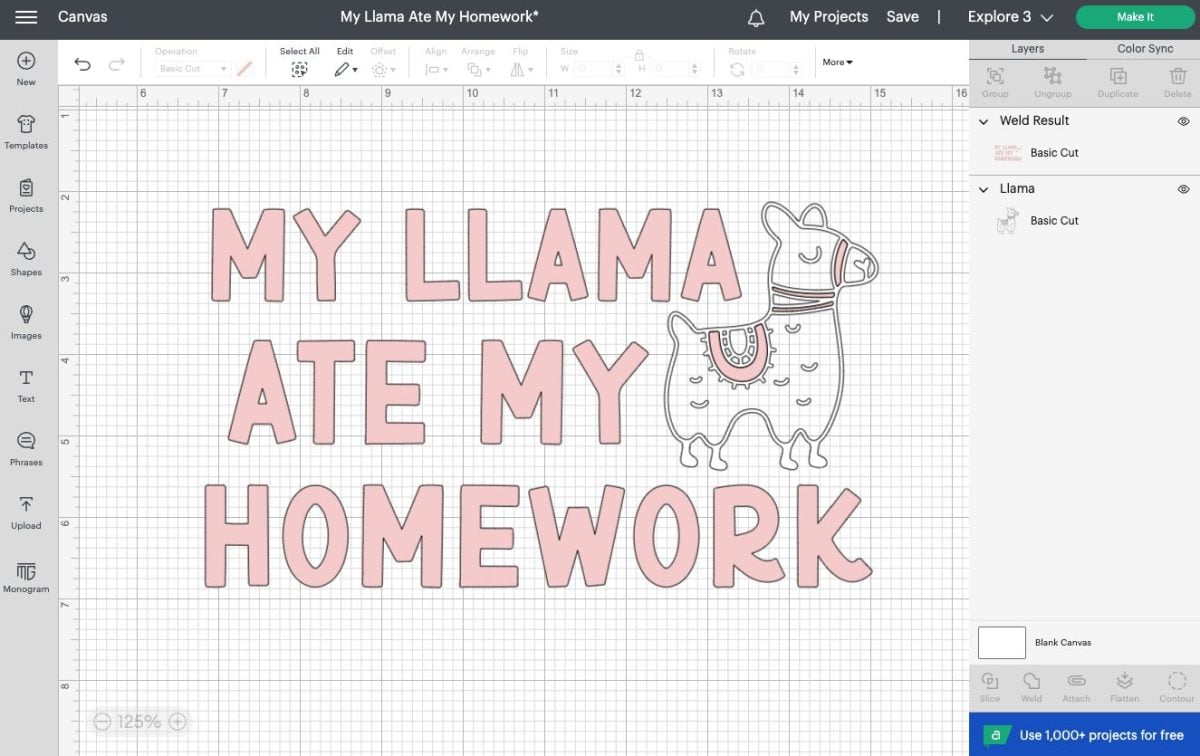
From there, re-size your utensils to fit on your pencil case using the Size tool in the edit bar at the top. Mine ended up being 3″ tall.
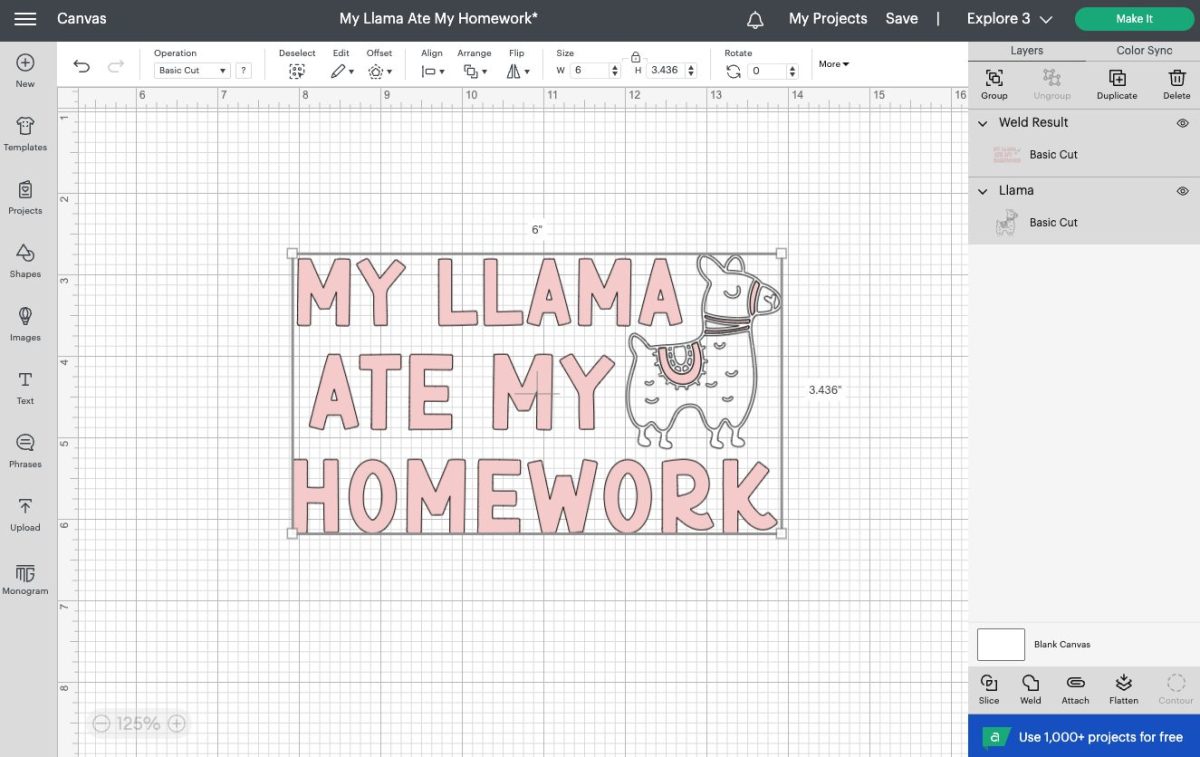
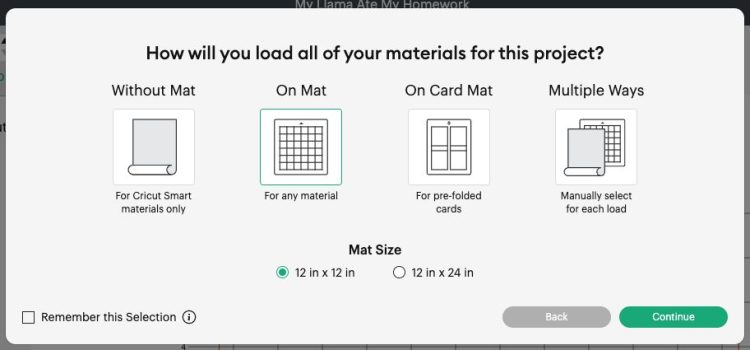
You will see a pop-up screen that asks for your mat load type. You can cut regular vinyl on a mat, or you can use Smart Vinyl, which doesn’t require a mat. I’m using regular vinyl, so I chose On Mat.
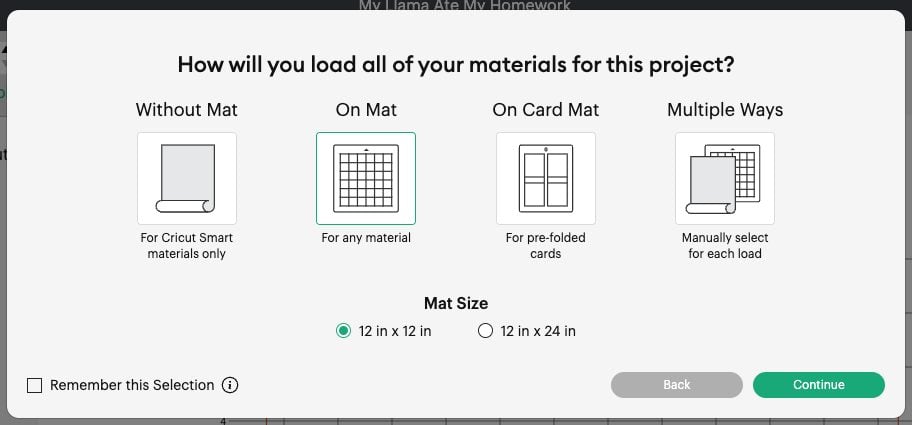
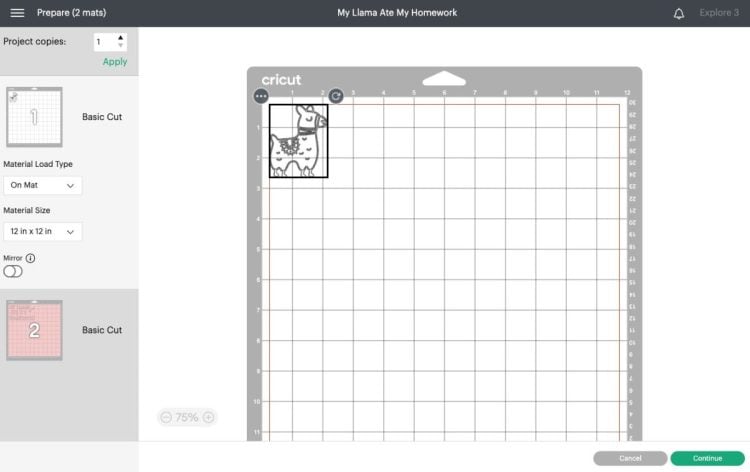
In the Prepare screen you’ll see all of your layers on the different Cricut mats.
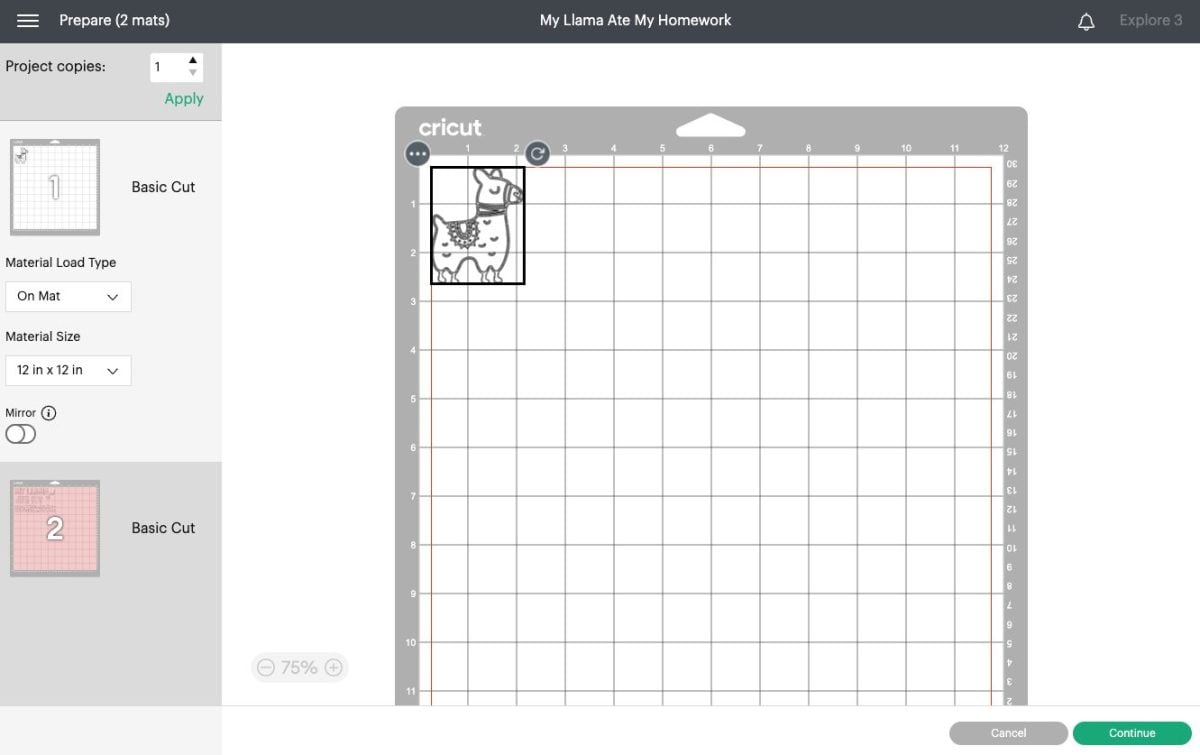
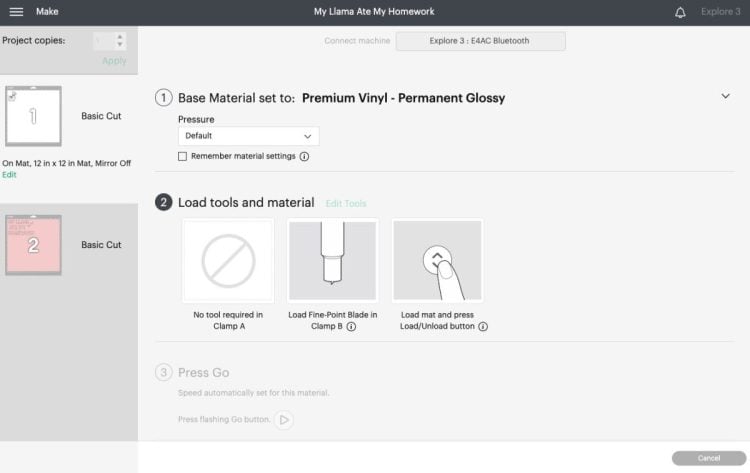
Make sure everything looks good and click Continue to go to the Make screen. In the Make Screen, set your material to Premium Vinyl – Permanent Glossy (if you are using permanent vinyl. If you are using something else, set the material accordingly).
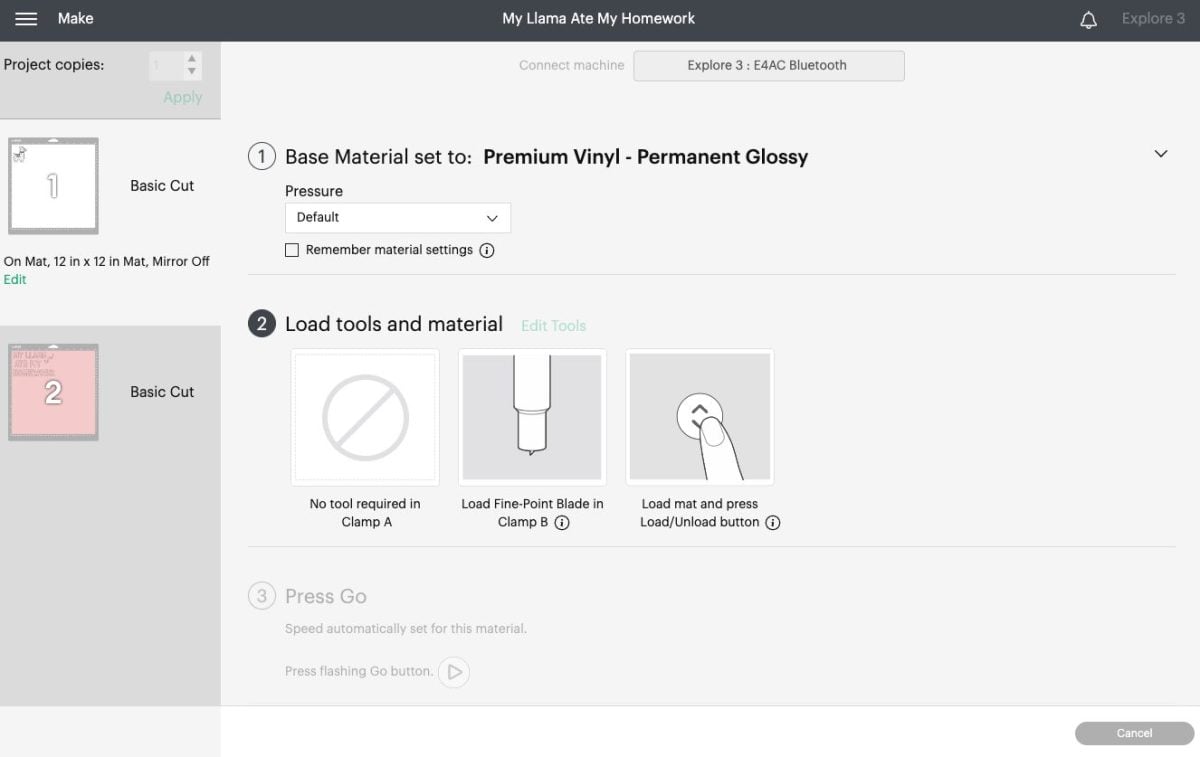
Once you select your material, you will be prompted to insert your blade into your machine if it’s not there already.
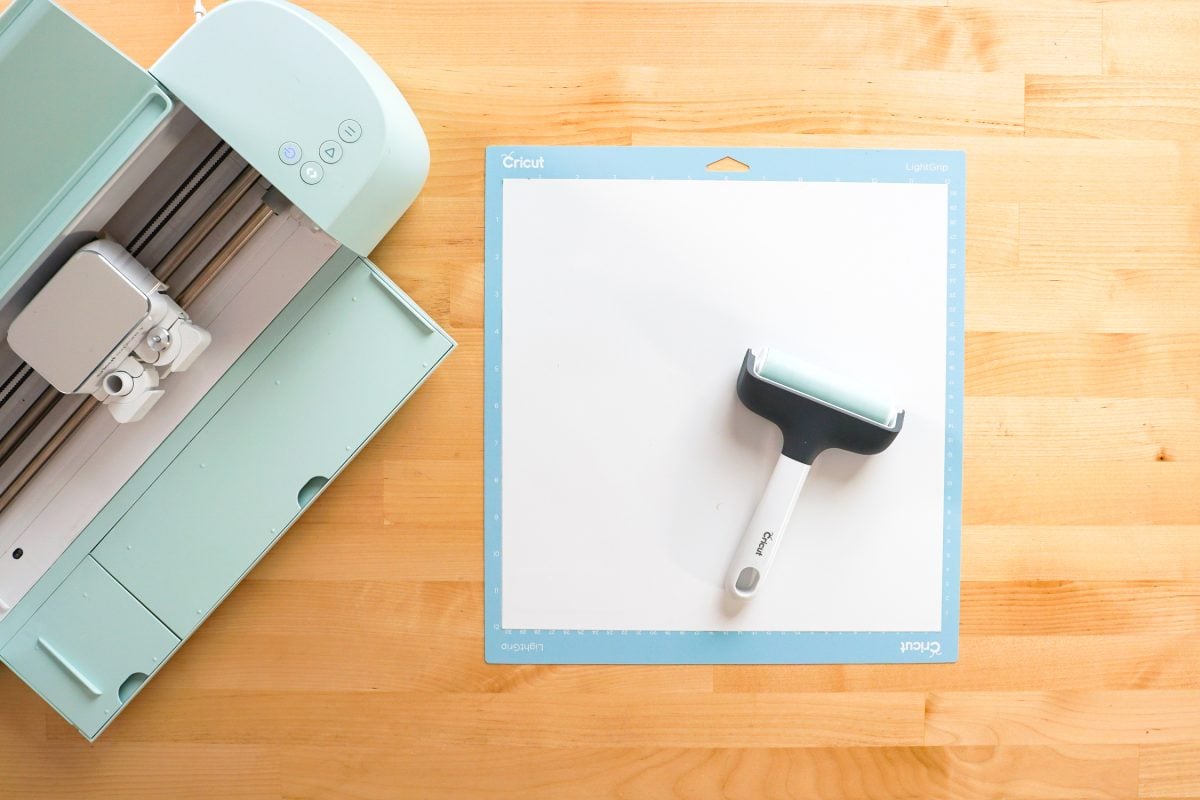
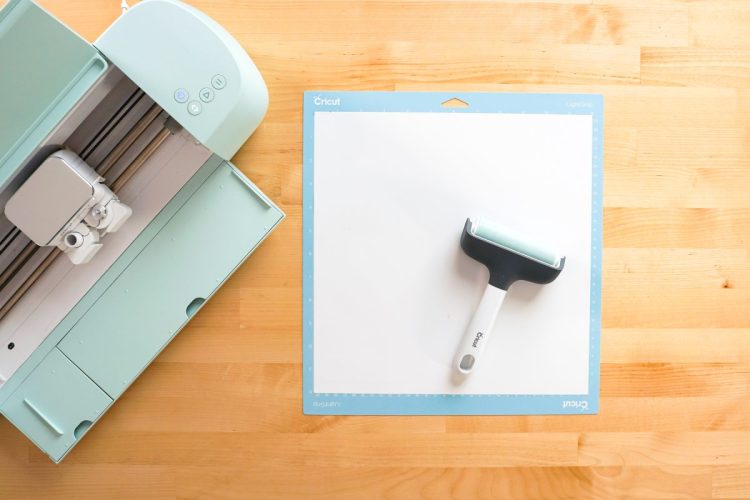
Place your vinyl on the mat, with the color side up. I find a brayer helps if you are having issues with the vinyl lying flat or having bubbles.
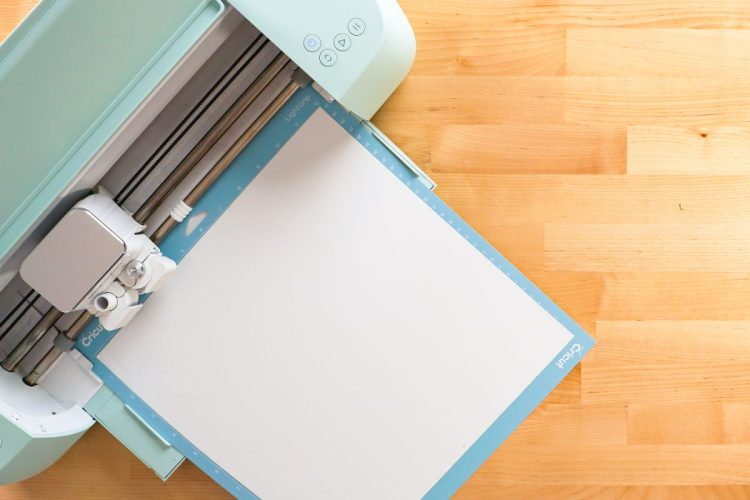
Insert your mat into your Cricut, and press the blinking button to cut your material!
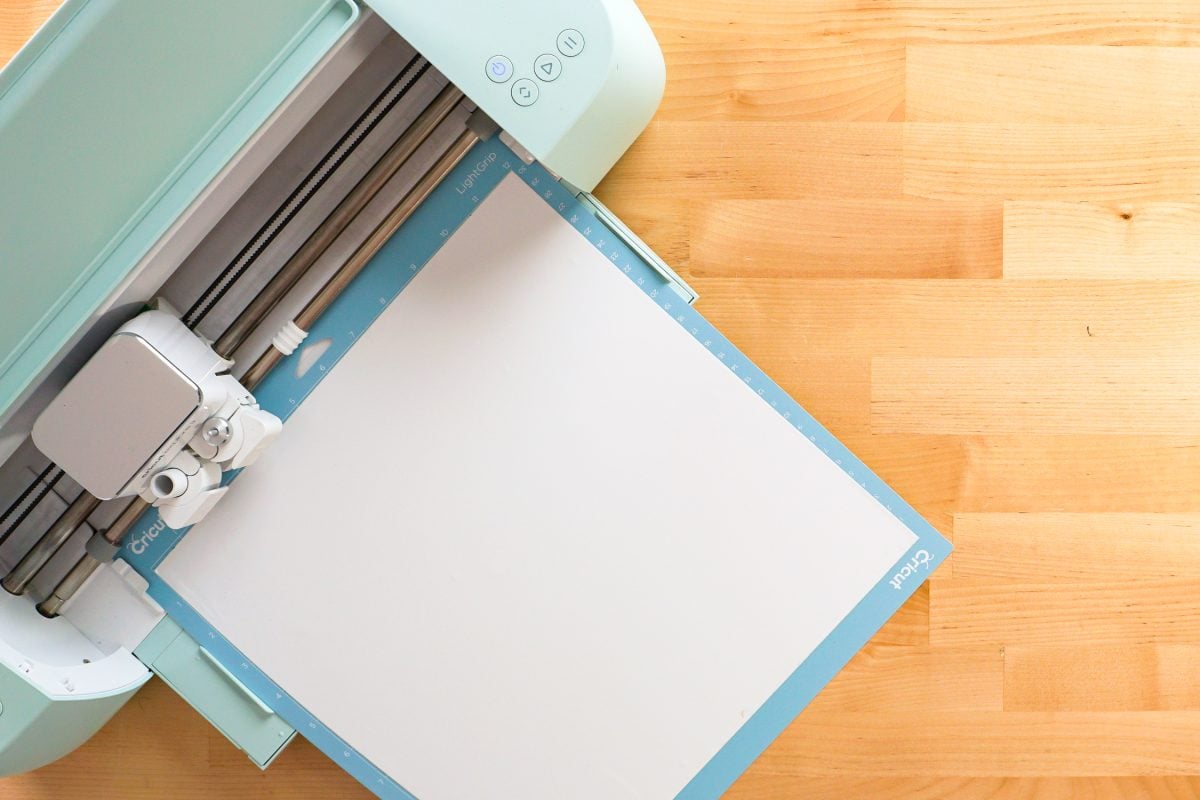
Then either click Go in Cricut Design Space (Cricut Joy) or the blinking C (Explore or Maker). Your Cricut will quickly cut your material!
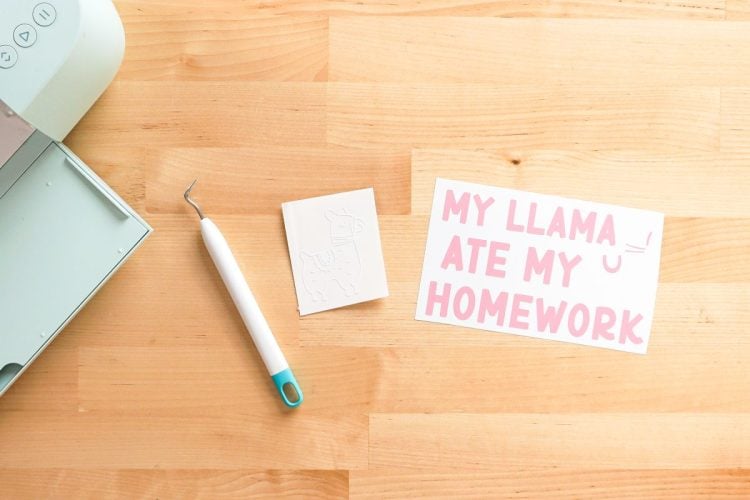
Now it’s time to put this newly cut decal on your pencil case. First you will weed away the extra vinyl around your llama and words. Again, read Weeding Adhesive Vinyl for tips and tricks!
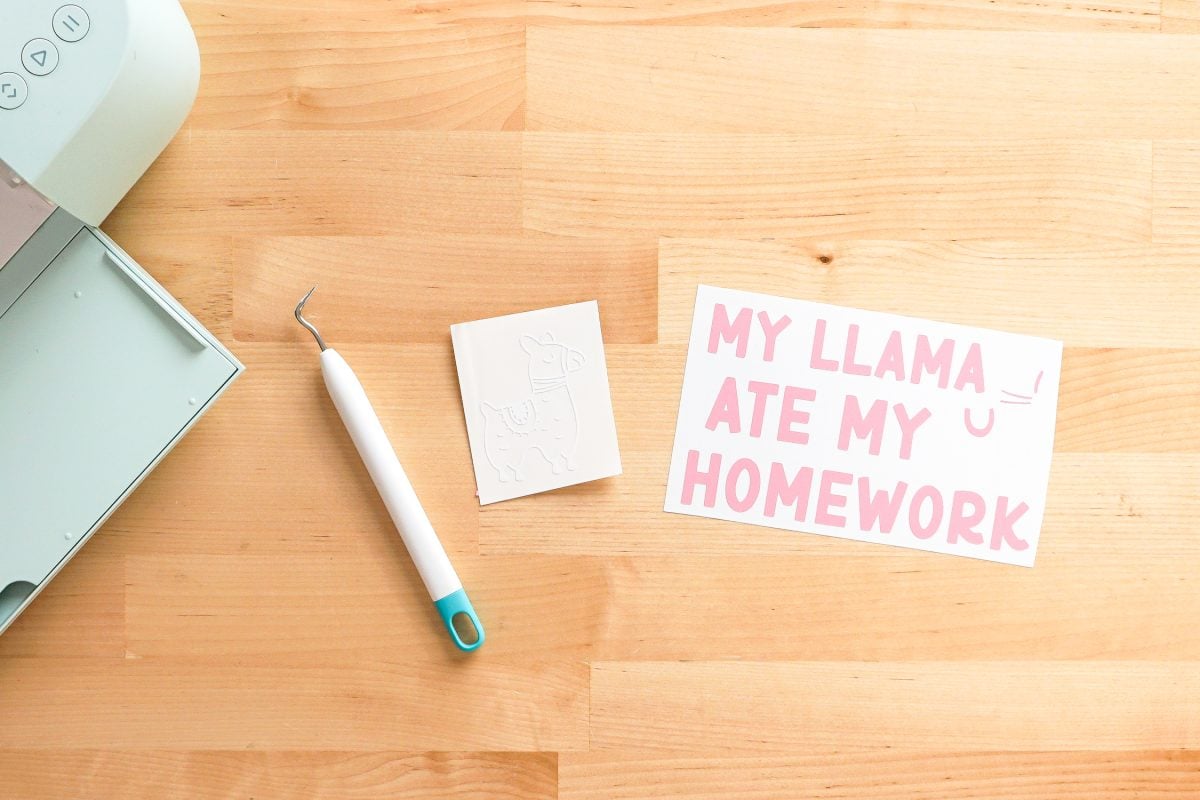
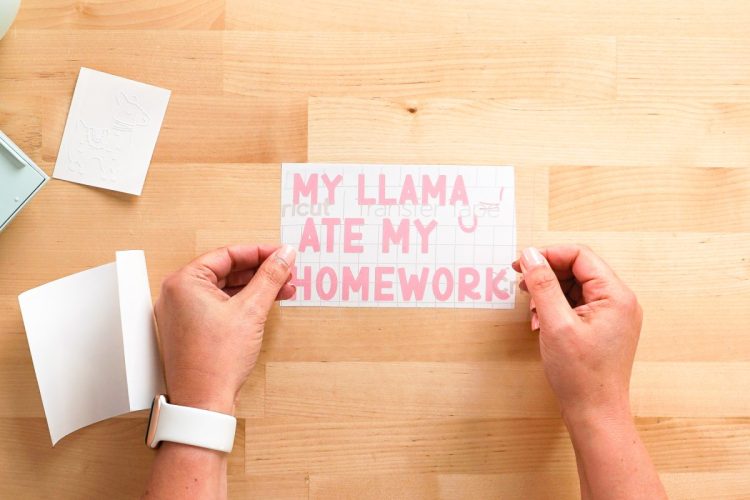
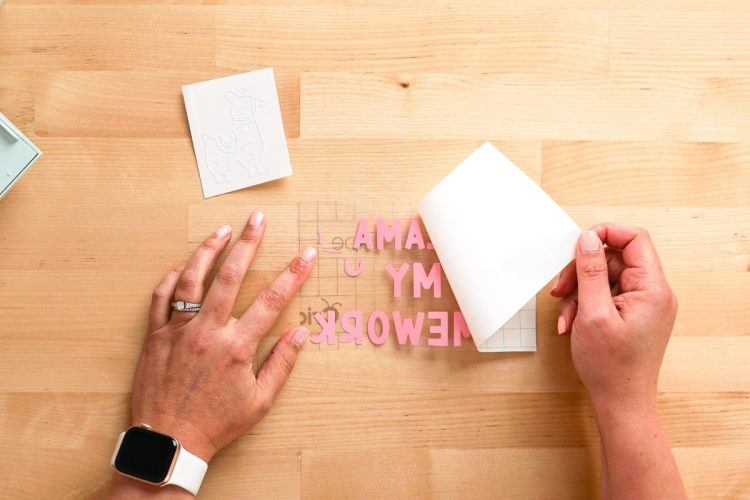
Cut a piece of transfer tape slightly larger than your final decal and peel off the backing paper. Then place it sticky-side down on top of your larger decal.
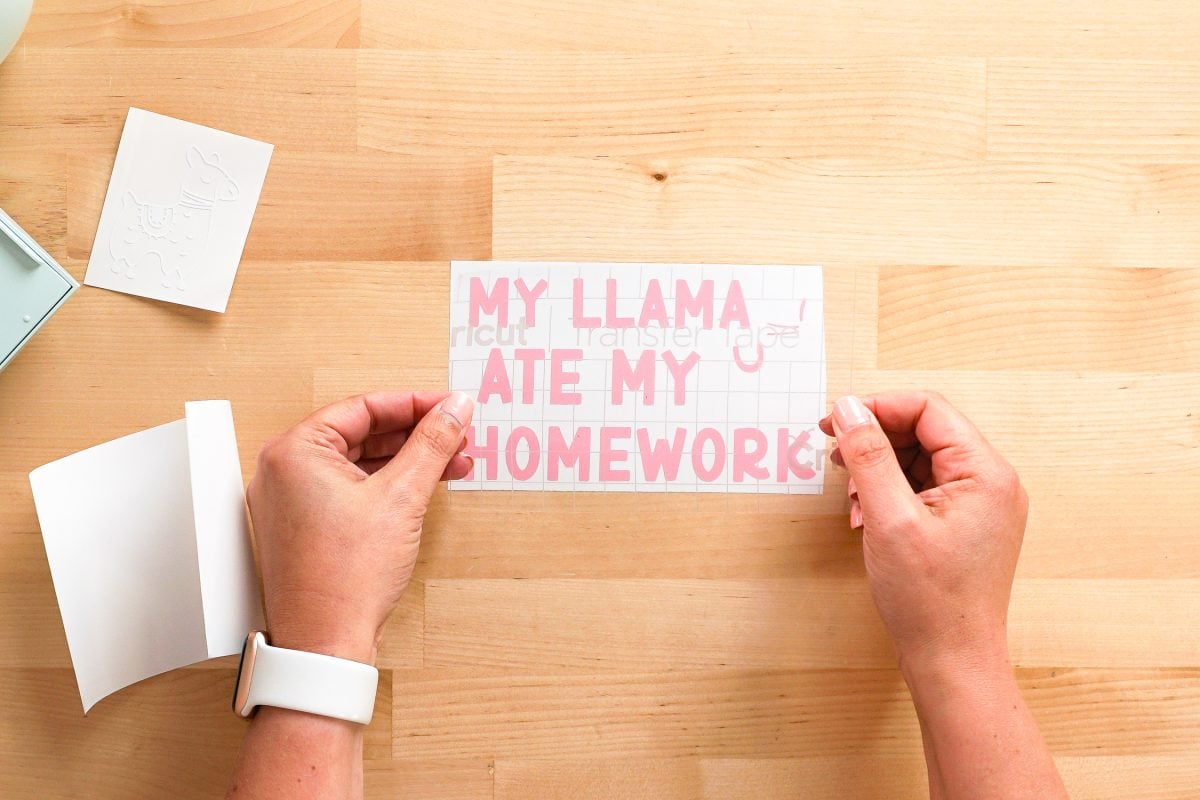
Use a scraper to burnish the transfer tape to your decal, and then peel back the backing sheet so your vinyl sticks to the transfer tape.
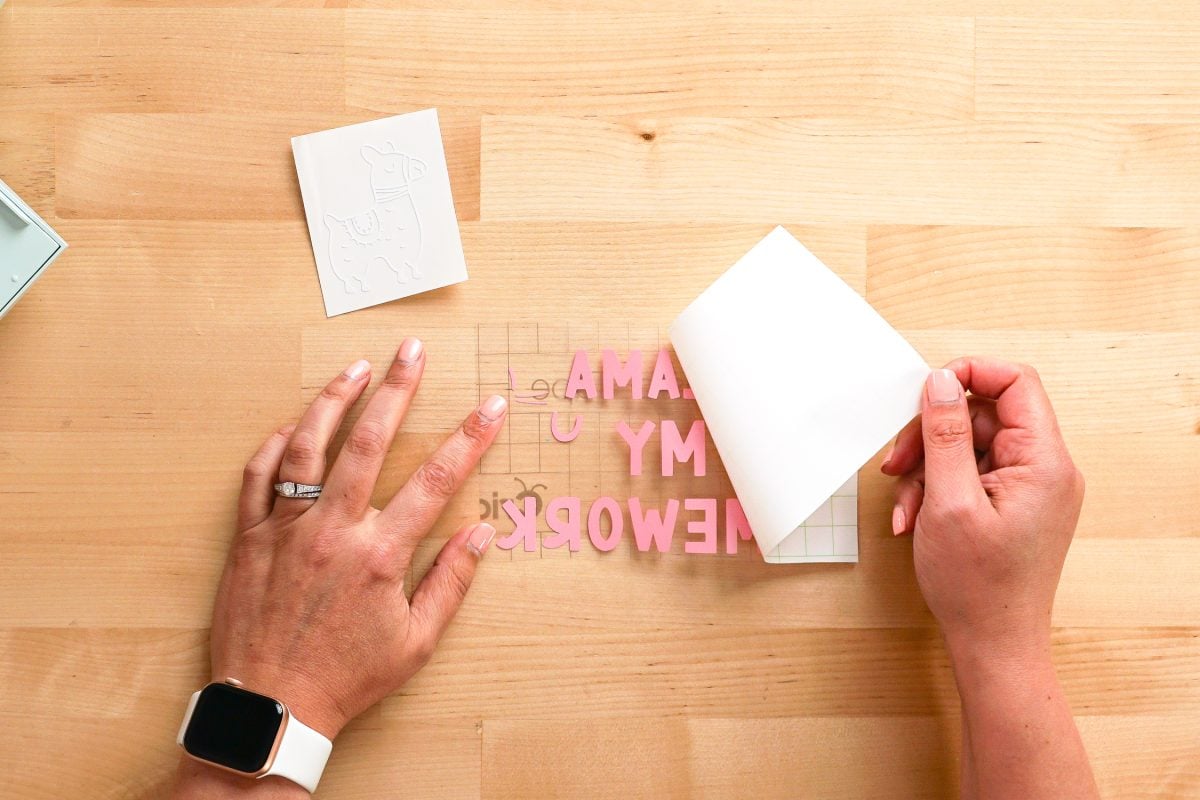
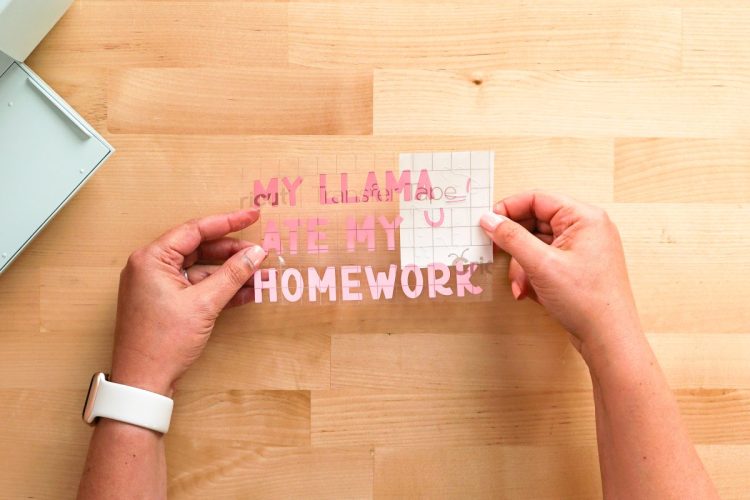
Then carefully place your transfer tape on the second decal, lining up the pieces on the llama so they align perfectly.
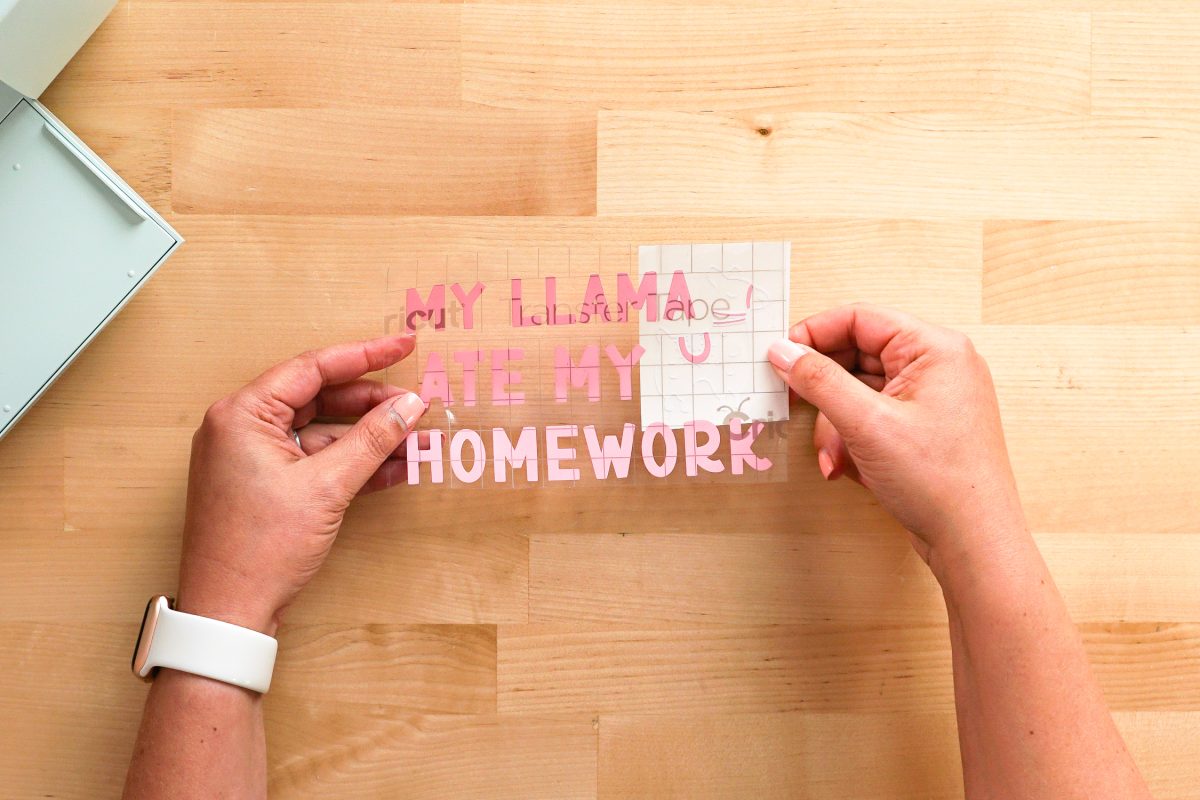
Again, burnish using your scraper and peel the backing off the transfer tape. You should have both images on a single piece of transfer tape now.
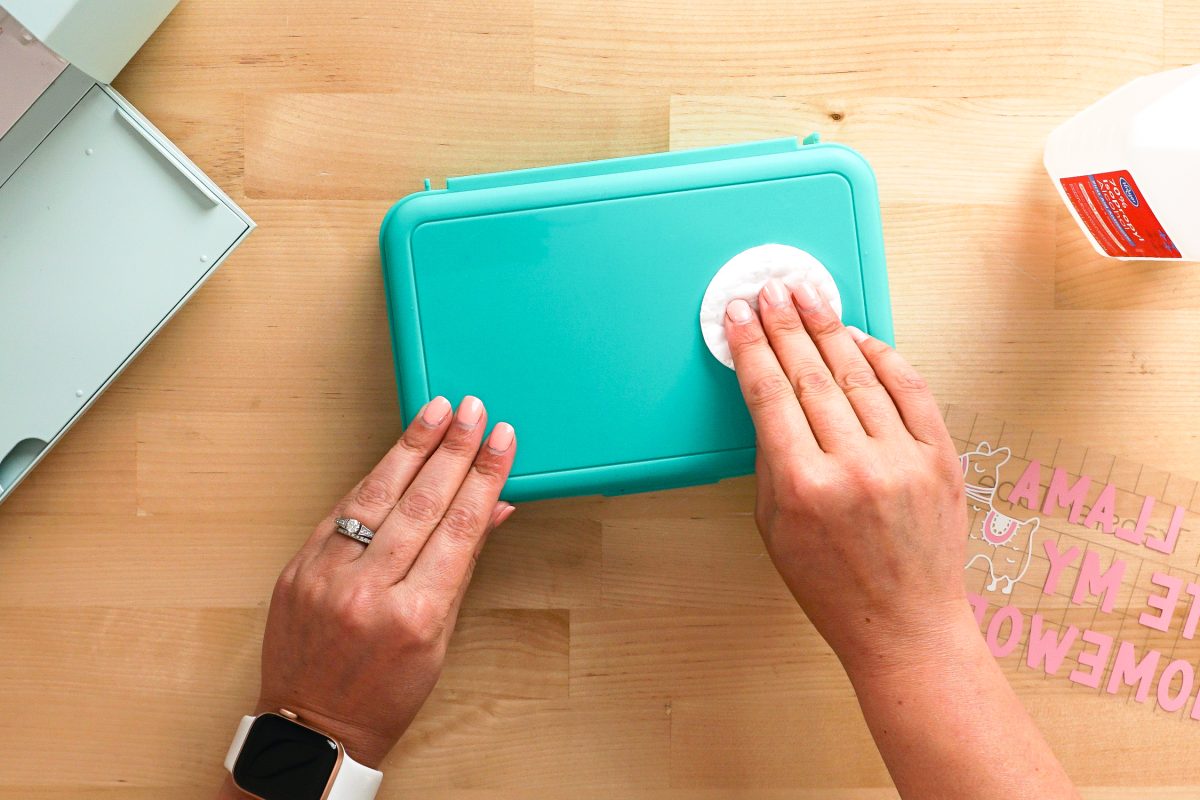
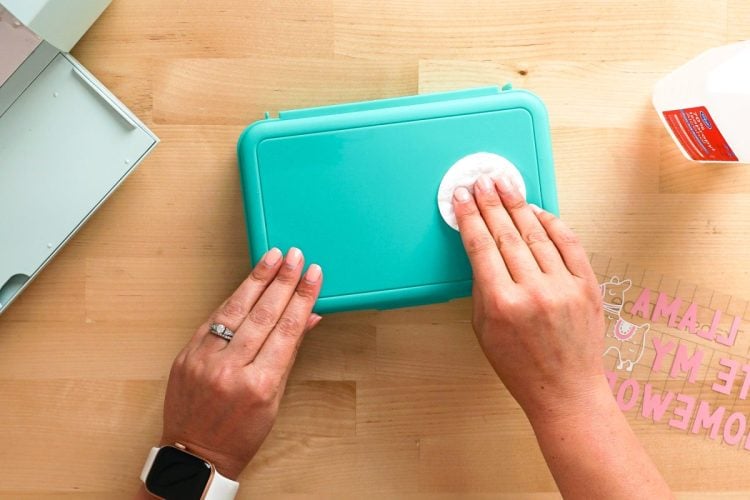
Clean your pencil case with rubbing alcohol. Make sure the case is completely dry before proceeding.
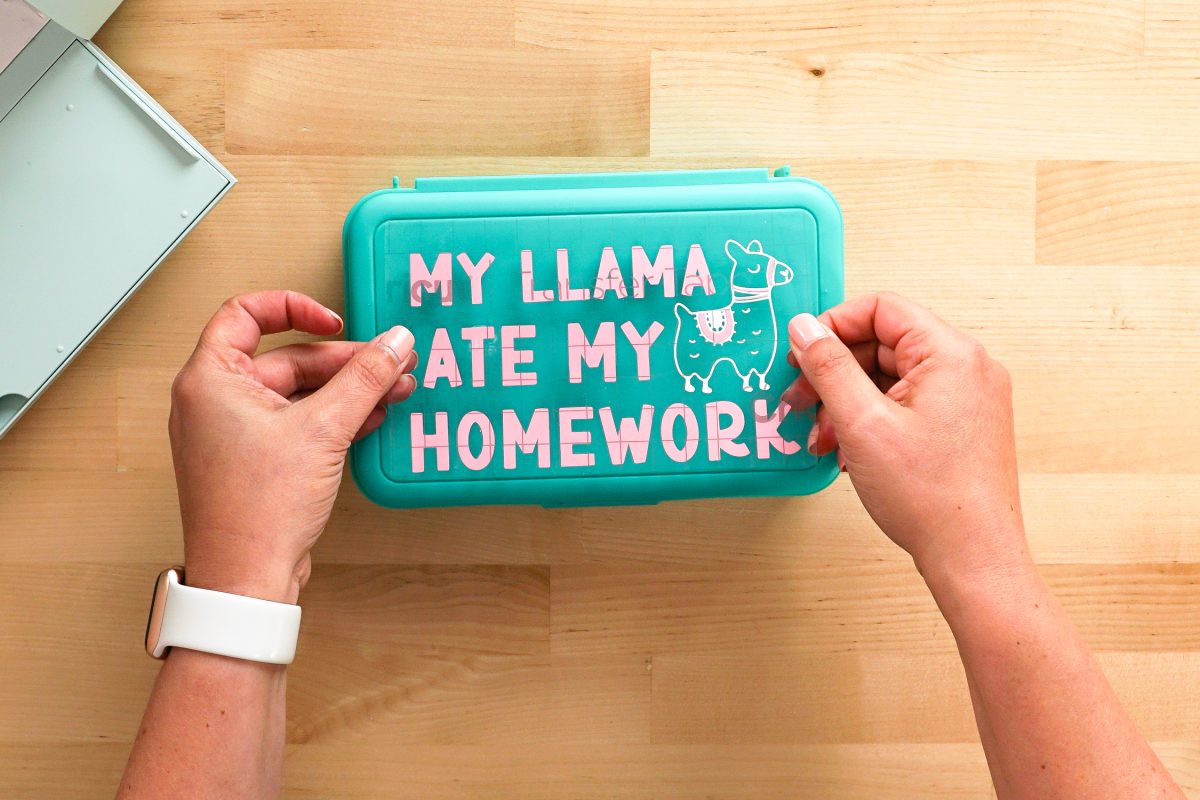
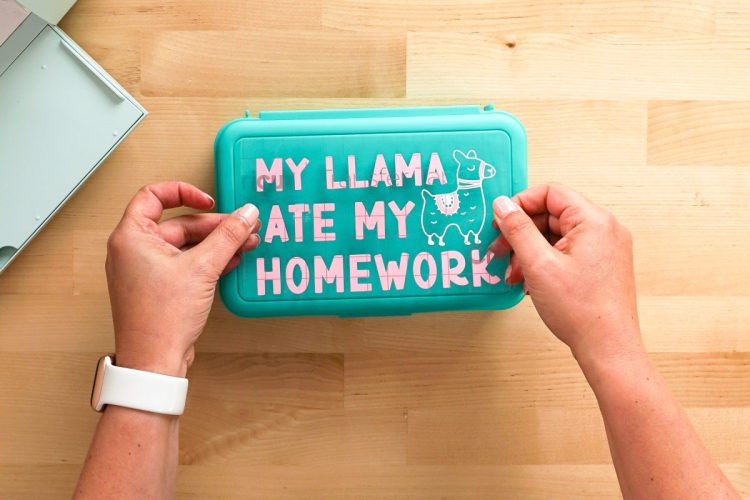
Carefully center the image on your pencil case and press down.
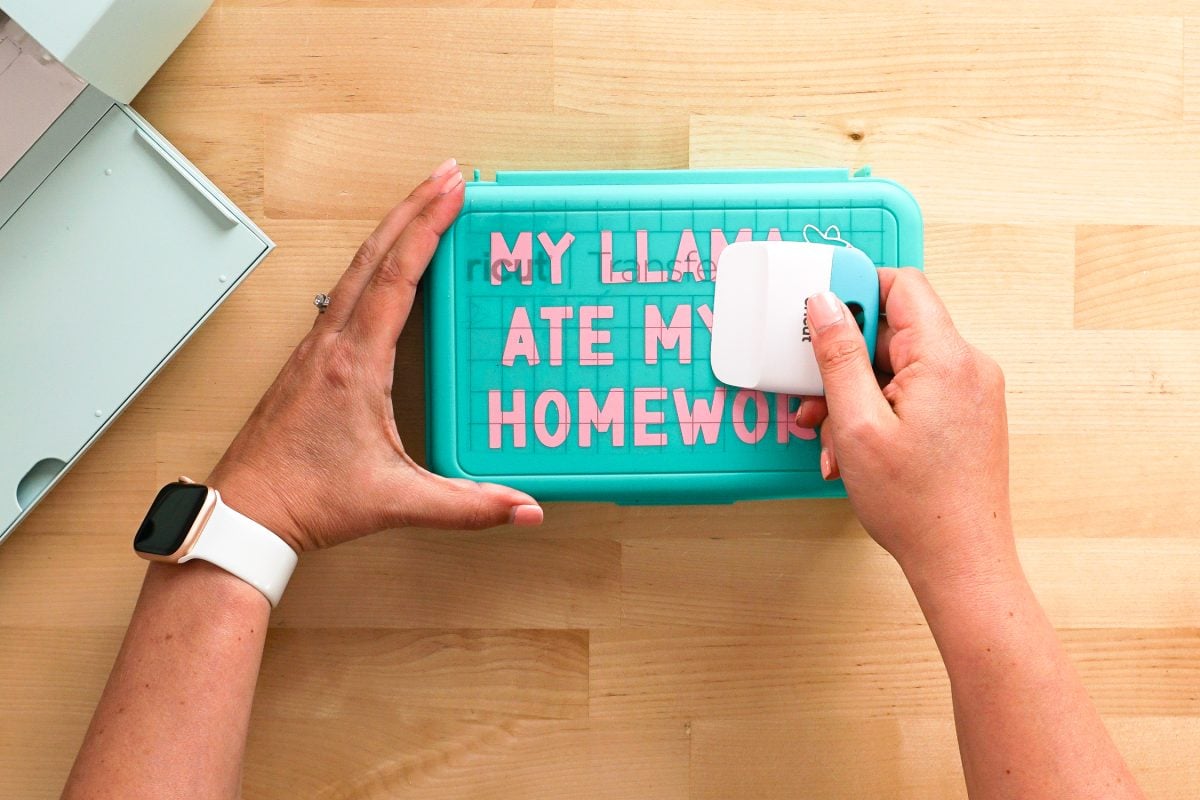
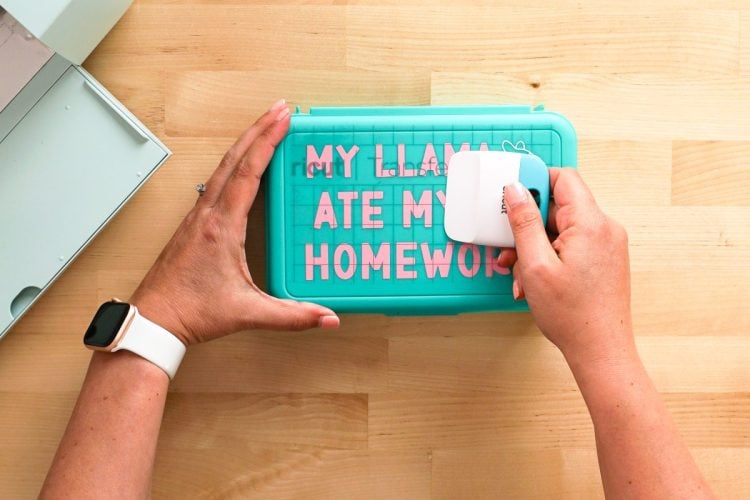
Use the scraper to burnish your image to the pencil case.
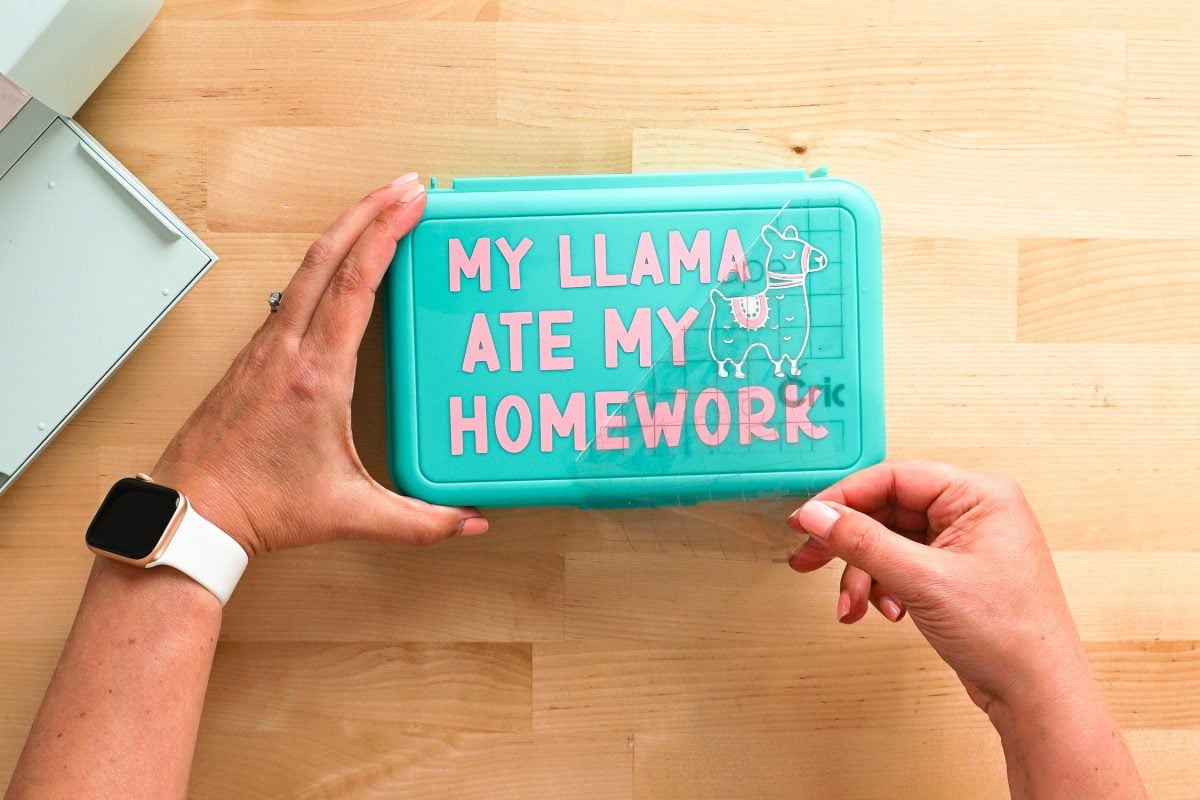
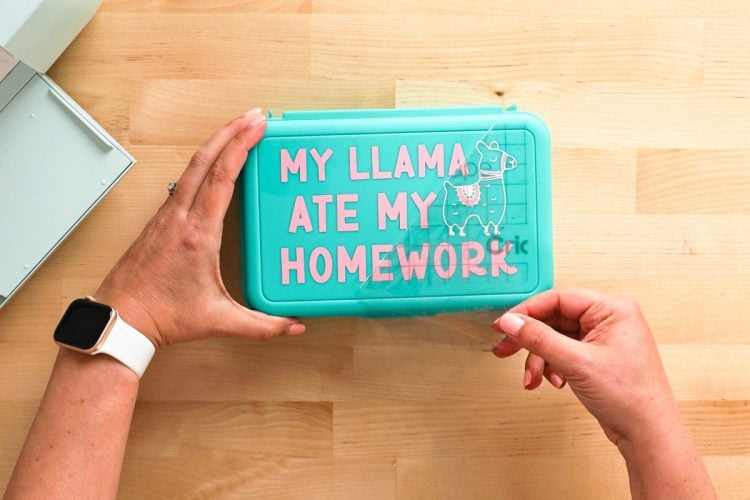
Then peel back the transfer tape. Your decal should stick to the pencil case!
I hope you found this post helpful for creating Cricut decals! If you have any questions or need help troubleshooting anything, just let me know in the comments!
PENCIL BOX CRICUT DECAL PROJECT
Supplies
Instructions
- Before you begin, make sure you have the correct machine selected in the upper right of Cricut Design Space. Cricut Explore 3 is being used for this project, so Cricut Explore Family was selected.Start by opening the Cricut Design Space file. You can edit this file if you'd like, changing the colors or even choosing a different animal in the Image Library. For this project the font BFC Birthday Party was used.

- From there, re-size your utensils to fit on your pencil case using the Size tool in the edit bar at the top. Mine ended up being 3″ tall.

- You will see a pop-up screen that asks for your mat load type. You can cut regular vinyl on a mat, or you can use Smart Vinyl, which doesn’t require a mat. For this project regular vinyl is being used, so On Mat was chosen.

- In the Prepare screen you'll see all of your layers on the different Cricut mats.

- Make sure everything looks good and click Continue to go to the Make screen. In the Make Screen, set your material to Premium Vinyl – Permanent Glossy (if you are using permanent vinyl. If you are using something else, set the material accordingly).

- Once you select your material, you will be prompted to insert your blade into your machine if it’s not there already.Place your vinyl on the mat, with the color side up. A brayer helps if you are having issues with the vinyl lying flat or having bubbles.

- Insert your mat into your Cricut, and press the blinking button to cut your material!

- Then either click Go in Cricut Design Space (Cricut Joy) or the blinking C (Explore or Maker). Your Cricut will quickly cut your material!Now it’s time to put this newly cut decal on your pencil case. First you will weed away the extra vinyl around your llama and words. Again, read Weeding Adhesive Vinyl for tips and tricks!

- Cut a piece of transfer tape slightly larger than your final decal and peel off the backing paper. Then place it sticky-side down on top of your larger decal.

- Use a scraper to burnish the transfer tape to your decal, and then peel back the backing sheet so your vinyl sticks to the transfer tape.

- Then carefully place your transfer tape on the second decal, lining up the pieces on the llama so they align perfectly.

- Again, burnish using your scraper and peel the backing off the transfer tape. You should have both images on a single piece of transfer tape now.Clean your pencil case with rubbing alcohol. Make sure the case is completely dry before proceeding.

- Carefully center the image on your pencil case and press down.

- Use the scraper to burnish your image to the pencil case.

- Then peel back the transfer tape.

- Your decal should stick to the pencil case!




Leave A Reply!