If you think the Cricut Explore is just a cutting machine, you’ll be excited to know that it can do so much more!

The number one thing I use my Cricut Explore for, by a long stretch, is cutting. Cutting paper is my particular favorite, but as I talked about in a previous post in this series, you can cut more than 100 different materials.
But the Cricut Explore can do a handful of other really cool things outside of its main cutting feature. Let’s take a look at a few of them so you can get an idea of what else you can do with your Cricut besides cut.
Drawing & Writing
Because the Cricut is such a precise machine, it can draw and write very accurately too! It has a specific housing for holding a pen, so you can actually draw your project and then cut it out all in one go. You can use Cricut Pens (my favorite is .03 Black) in your project, but there are also a range of other pens that fit in the housing that you can try. There are even adapters you can buy to fit an even larger assortment of pens.
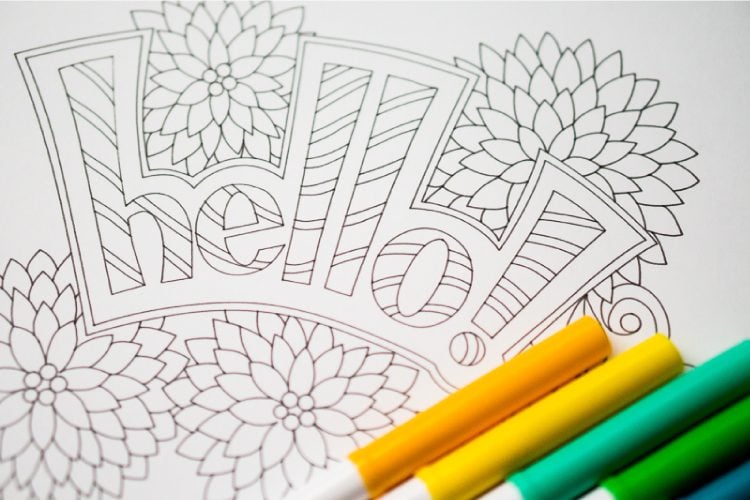
The Cricut Design Space library has a ton of files that can be drawn, including full coloring pages. It also has a lot of cute individual images for your projects, like this adorable hedgehog. When this image was uploaded into Design Space it loaded as a cut file. In order to draw this image, the “Pen” option was chosen under the Operation menu drop down list. You’ll notice in the layers panel on the right, that each section of the image is now set to draw.

Or there’s always the option to design something yourself in a program like Illustrator, Photoshop, or on a tablet. If you want a hand-drawn element to your project, you can scan in a drawing on you’ve done on scratch paper and your Cricut will draw it for you on your final project material. I’ve even had it address my Christmas cards and birthday invitations!
A few tips when drawing:
- Make sure your pen is snapped into the housing — it won’t draw unless you hear that click!
- Make sure to remove your pen after you’re done drawing, so your pen doesn’t dry out.
- If you are drawing with more than one color, start with the lightest color first, so that the dark ink doesn’t bleed into the lighter ink.
- The more detailed your project, the smaller your pen tip needs to be.
- Always do a practice run on a piece of scratch paper before using your final project material so you can make sure your drawing/writing is clear and legible.
Scoring
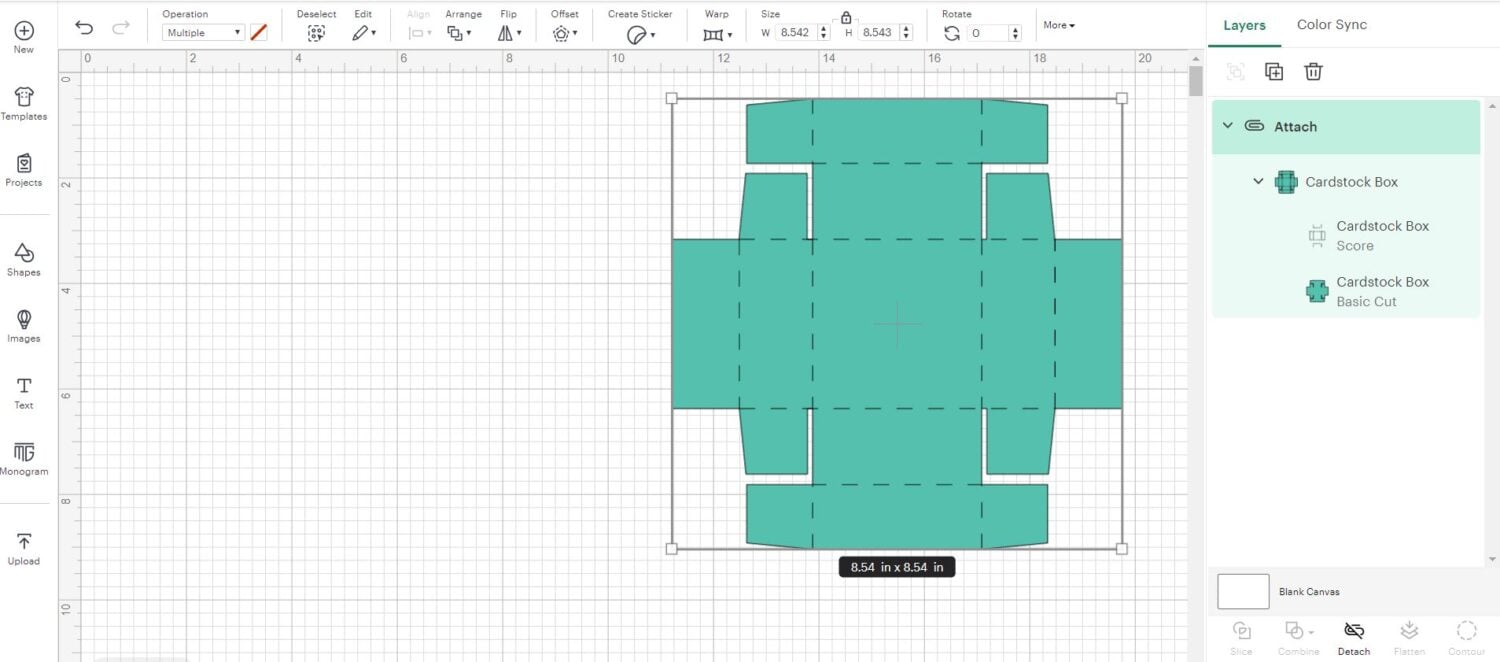
Scoring is one of those things you may not use a ton, but when you do, it’s genius! The scoring stylus fits in the secondary housing (the same as the pen tool), but instead of writing, the scoring stylus has a dull metal tip, which scores your projects for you so you know where to fold. This is particularly helpful when making 3D projects, like small gift boxes or place cards. Anything where you need an accurate fold. These scoring lines are built into files in the Cricut Design Space, so the system will tell you when you need to use it.
You’ll notice in the Layers panel of this box image, the “scoring” icon, which indicates that the scoring stylus will be used for this project. This tells the Cricut to score these so you can easily fold this box into, well, a box, and not a scary geometry problem. The scoring areas are shown in the image as dotted lines.

If you’re having trouble with your score lines not being deep enough, you can use the “duplicate” function in the Cricut Design Space to add another scoring layer right on top of the first one. This will tell the Cricut to score twice, making your score line a little deeper than just one pass.
I also use this scoring tool outside my cricut, whenever I need a fold line. It’s a handy thing to have around!
Embossing
Embossing is actually something I haven’t tried on my Cricut yet, though it’s on my list. Embossing adds a raised surface to your projects. There are two main ways to emboss using the Cricut — the first is using the scoring stylus to basically score a design (instead of straight fold lines). This can add a little depth to your projects. The second way is to use an embossing pen in the pen tool, which writes with a special ink. Then you cover the wet “ink” with embossing powder. Using a heat gun, you’ll basically melt the powder to the material and that will create the raised effect.
These are three fun and useful ways you can use your Cricut Explore beyond the cut feature. What will you make?


Comments & Reviews
Monique says
Could I write on a precut 8″ x 10″ photo mat with a cricut machine? Would it have clear, crisp edges?
Cori George says
It depends on how thick the photo mat is—the Explore can fit a max depth of 2.0mm and the Maker 2.4mm.
My friend Jen has an amazing post all about the Cricut pens that might help you decide if the writing is crisp enough :)
https://www.100directions.com/drawing-cricut-choosing-right-pen-project/
Liz, HLMS Reader Support says
You absolutely can!! You’ll just need to convert your file to a .PNG or .SVG before importing into Design Space.
Peggy says
Can I take a banner or fluer de lid type border that I have created to use as a photoshop photo border or frame and cut it out with crocus? I can scan in and cut or print any design I have created?
Marietta says
In order to put a photograph on a glass do I need to use print vinyl?
Liz, HLMS Reader Support says
There are a lot of different options for transferring a photo onto glass depending on what materials you want to use. I’ve seen everything from using packing tape to contact paper. I suggest doing a quick Google search for ‘transfer photo to glass diy’ and you can choose from any of those ideas.
As far as print then cut vinyl, you can use it, but you will have a white background instead of a transparent result. There are also clear labels that you can print on and affix to the glass, but you may have bubbles that will show through versus a transfer method that will give you a more finished look.
Happy Crafting!!
Liz, HLMS Reader Support
Liz, HLMS Reader Support says
Lucky for you the Maker can cut, draw, score and more as well as the other machines!!
Here is one of my posts talking about drawing with multiple colors:
https://heyletsmakestuff.com/multiple-colors-cricut/
I’ve also listed a helpful help page on Cricut’s support site:
https://help.cricut.com/help/writing-and-cutting-in-one-step
Have a great weekend and happy crafting!!
Liz, HLMS Reader Support
Rhonda Lord says
I am working on a baby shower for my daughter and I am wanting to do baby bingo. I was hoping to draw on the cards rather than cut everything out. How do I do that? I have the maker. I only seem to be able to cut not draw or color.
Sally says
Do u need to by cartridges for this cricut
Cori George says
You do not need cartridges for the Cricut Explore or Cricut Maker. You can learn more here: https://heyletsmakestuff.com/cricut-explore-require-cartridges/
Gemma says
Can the Maker etch onto leather?
Cori George says
Etching isn’t something the Cricut Maker can currently do. It can cut leather, and whenever the knife blade is released, it will be able to cut much thicker leather. I’m hoping that some day they will have some sort of etching tools — the Maker has the adaptive tool system so they can create more tools for it (The Explore is basically going to always be just a blade, scoring, and pen).
C says
There is a tool that you can buy on Amazon that will etch metal.
I think it is supposed to work with the Explore and Maker.
https://www.amazon.com/gp/product/B0767QKXJH/ref=ox_sc_act_title_1?smid=A2ZMZXMBIVOYBY&psc=1
I have not used it and know next to nothing about it other than I ran across it on Amazon today.
Jennifer S says
Can it make rhinestone iron-on transfers? Thanks
Cori George says
Hi Jennifer — no, that’s one thing that Silhouette does that Cricut does not do.
Sharon Kennedy says
Can you use the cricut explore like other die cutters to cut out shapes from old Christmas cards to repurpose them.
Cori George says
Yes! You can cut more than 100 materials, including old Christmas cards :)