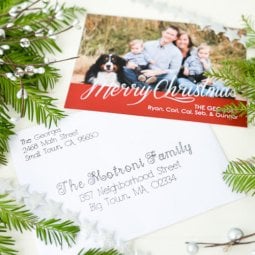
Put your Cricut Explore to work—have it address Christmas cards! Using the pen tool, the Cricut Explore can beautifully “hand letter” your Christmas cards for you.
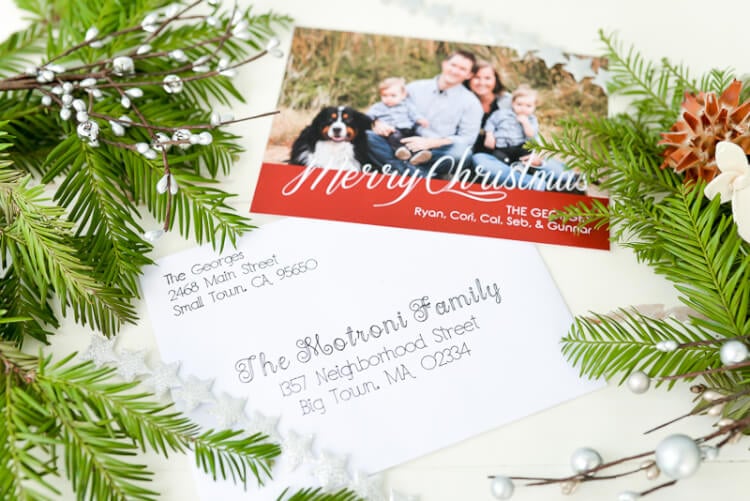
So, I’m a bit late getting my Christmas cards out this year. Life just happened and then all of a sudden, I was like, “how is it the middle of December already?!” And I still have a to-do list a mile long before Christmas this weekend, so I’ve handed over one of my tasks to my Cricut Explore: addressing my Christmas cards using the Pen Tool. While you may have already sent out your cards this year, pin this idea for next year!
If you haven’t used a pen in your Cricut Explore yet, you’re missing out. You probably already know how amazing the Cricut is with intricate cuts on paper and vinyl, but that intricacy also translates to using the pen tool. You can draw and write all sorts of things using your Cricut Explore—Christmas cards are just one example.
While it’s not the fastest process out there (each card takes about 4 minutes, depending on the fonts you use), it is one of those things you can just set moving while you’re working on other things — I’m addressing my cards in between working and wrangling the twins.
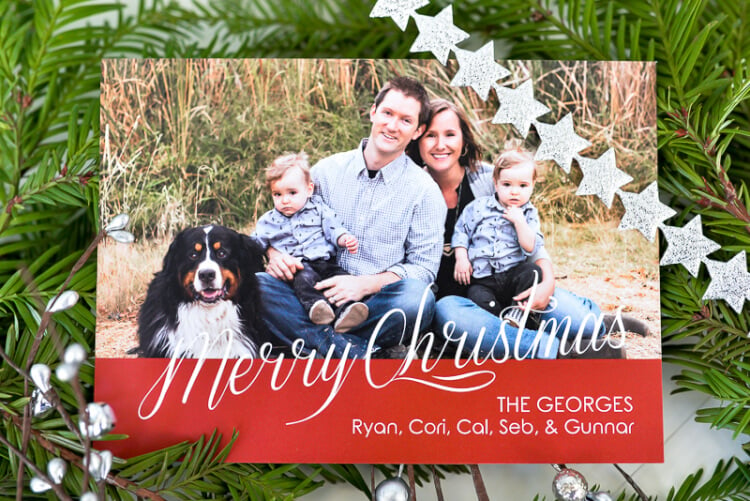
Also, can we talk about how cute our Christmas cards turned out this year? Our photographer, Jessica, got all five of us looking at the camera, even the dog! I think she deserves an award for that. Sebastian is doing his best Blue Steel, and Callum really just wants to be petting Gunnar.
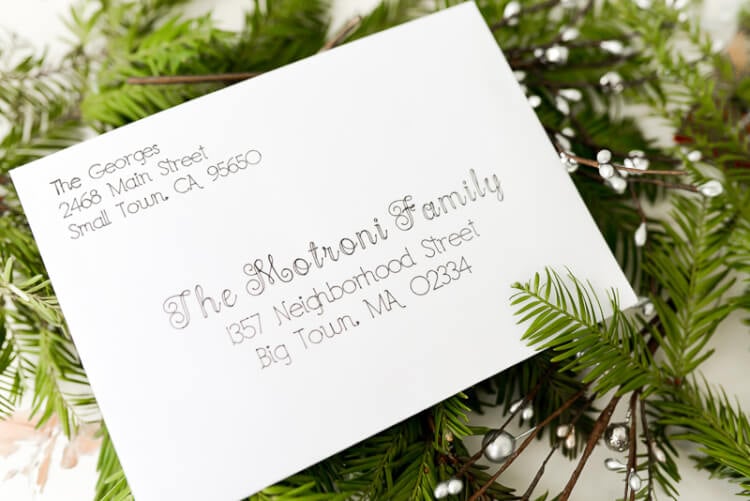
Address Christmas Cards using the Cricut Explore
This post has been updated for the January 2019 Design Space changes!
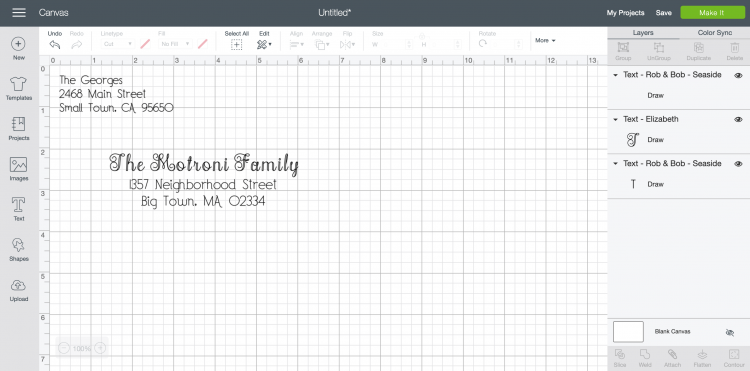
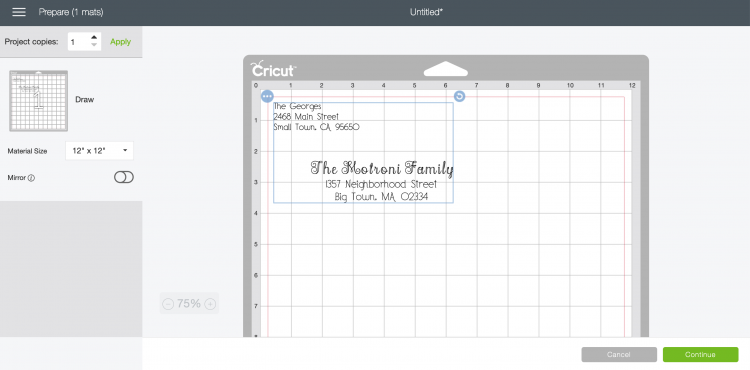
Open the Cricut Design Space. You can use the Type Tool to create your addresses. I have three text boxes—a simple font (Rob and Bob Seaside) for our return address that doesn’t change from envelope to envelope, one for the family name in a fancier font (Elizabeth), and the same simple font for the family name address. I just copy and paste from a Google spreadsheet of addresses I use every year.
My envelopes are 5×7, so I used the grid in the Cricut Design Space to approximate the envelope.
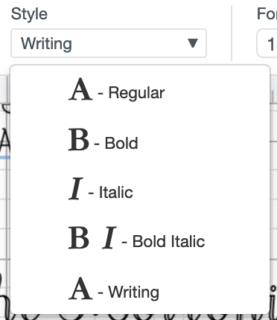
You will notice that ALL your fonts load into the Cricut Design Space, but you’ll want to select “Writing” from the Style dropdown menu on the left-hand side – (make sure you have your text selected—the Text Editing toolbar only appears if you have text selected).
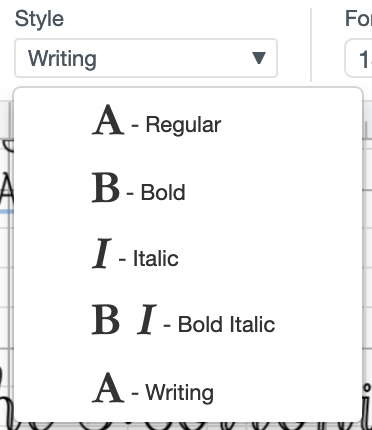
This will limit the fonts to ones that the Cricut Explore can write easily. It can write any font, but it will outline any that doesn’t have a designated writing style, which isn’t as neat as the single-line writing of fonts that have a writing style.

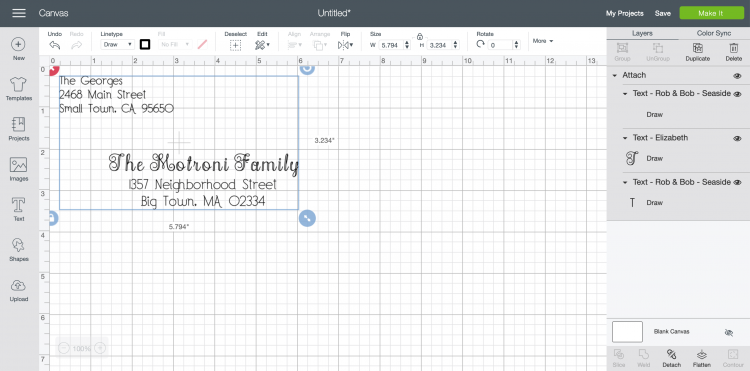
Once you have all of your text boxes ready to go, you’ll want to “Attach” everything (in the bottom of the Layers Panel on the right) so that it appears as you’ve laid it out when the Cricut goes to write it. Then click Make It!

Once you are in the layout screen, nudge your whole project in 1/4″ so that it doesn’t write the return address right at the edge of your envelope.

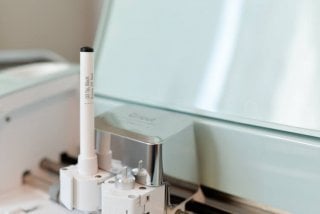
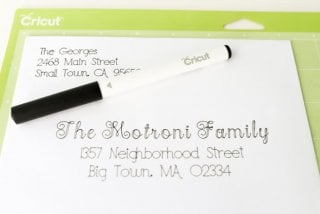
Put the pen in the auxiliary holder, making sure to press it in all the way, place your envelope in the upper left corner of your cutting mat. I like using the finest .03 tip black pen for the most legible writing.
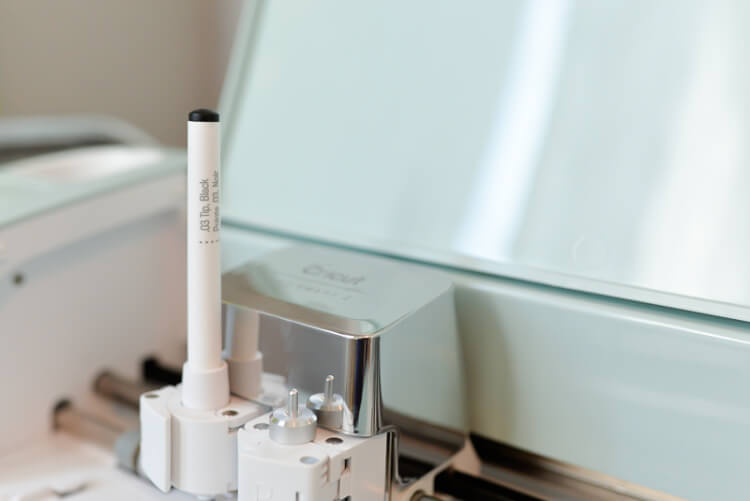
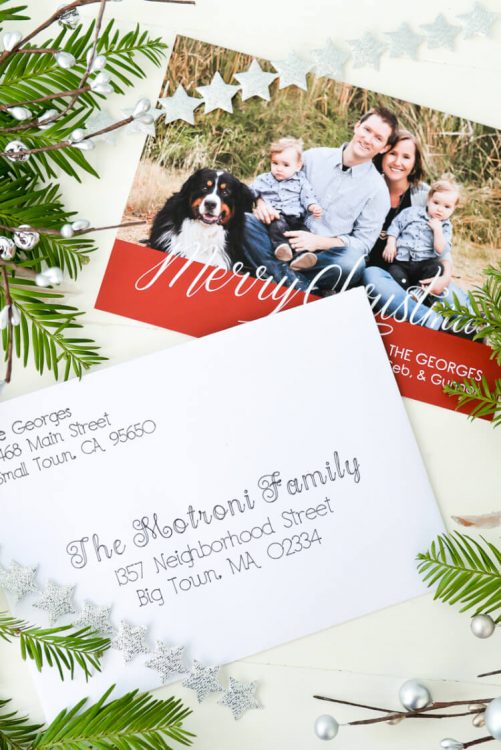
The Cricut will address your Christmas cards for you. Win!
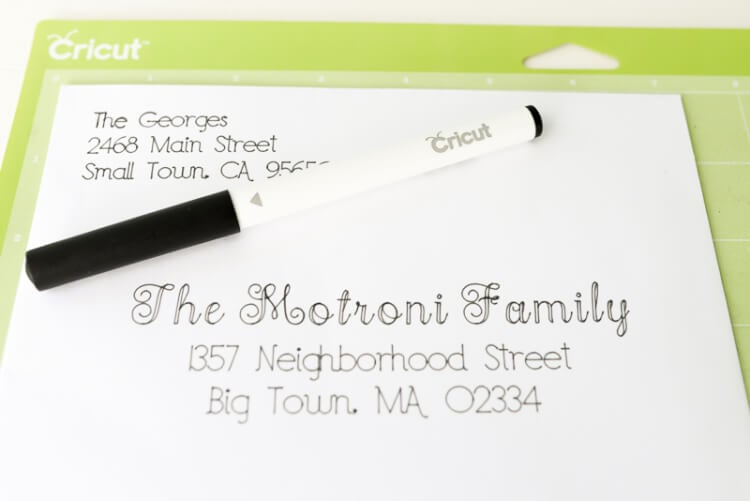
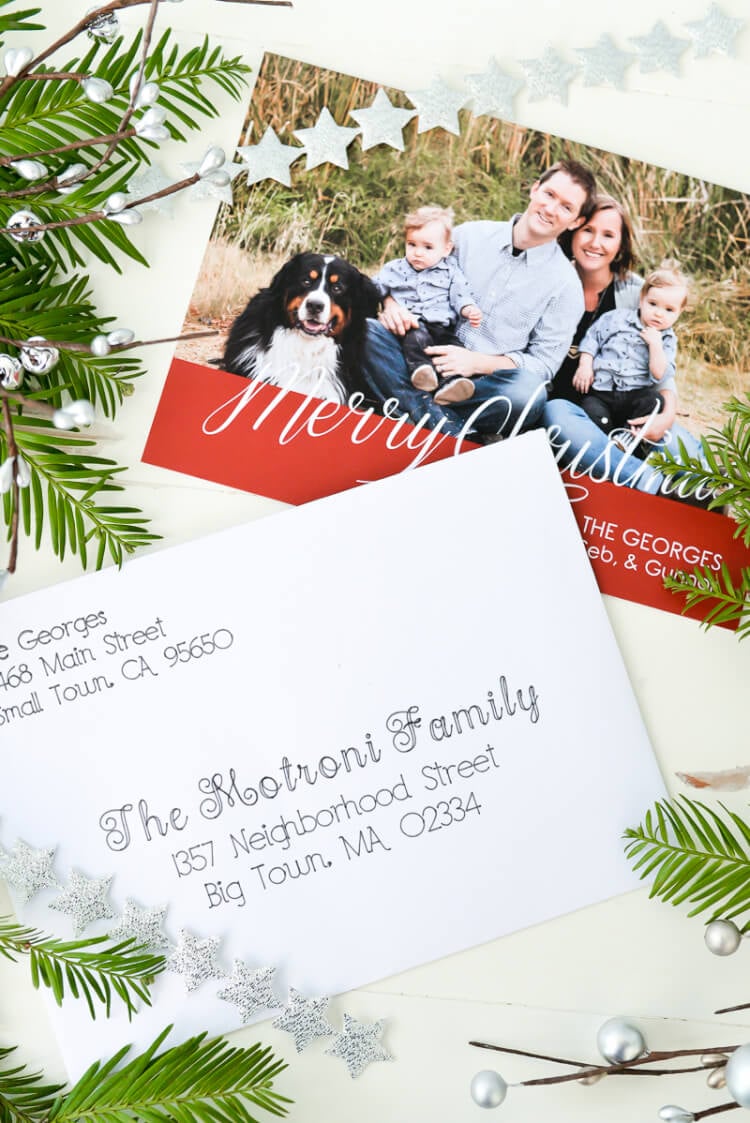
Fabulous, eh? This would also be awesome for addressing wedding or party invitations. Let me know what you think of this idea in the comments!
ADDRESS CHRISTMAS CARDS USING YOUR CRICUT
Equipment
- Cricut Maker or
Supplies
- Christmas Card Envelopes
Instructions
- Open the Cricut Design Space. You can use the Type Tool to create your addresses. For this project there are three text boxes—a simple font (Rob and Bob Seaside) for the return address that doesn't change from envelope to envelope, one for the family name in a fancier font (Elizabeth), and the same simple font for the family name address. For this project copy and paste was used from a Google spreadsheet of addresses that is used every year.The envelopes are 5×7, so the grid in the Cricut Design Space was used to approximate the envelope.You will notice that ALL your fonts load into the Cricut Design Space, but you'll want to select "Has a Writing Style" from the dropdown menu in the Text Edit toolbar at the top (make sure you have your text selected—the Text Edit toolbar only appears if you have text selected).

- This will limit the fonts to ones that the Cricut Explore can write easily. It can write any font, but it will outline any that doesn't have a designated writing style, which isn't as neat as the single-line writing of fonts that have a writing style.

- Once you have all of your text boxes ready to go, you'll want to "Attach" everything (in the bottom of the Layers Panel on the right) so that it appears as you've laid it out when the Cricut goes to write it. Then click Make It!

- Once you are in the layout screen, nudge your whole project in 1/4" so that it doesn't write the return address right at the edge of your envelope.

- Put the pen in the auxiliary holder, making sure to press it in all the way, place your envelope in the upper left corner of your cutting mat. For this project the finest .03 tip black pen was used for the most legible writing.

- The Cricut will address your Christmas cards for you. Win!

- Fabulous, eh? This would also be awesome for addressing wedding or party invitations.



Comments & Reviews
Marisa Maldonado says
Did you only put the envelope on the mat or did you put a cardstock paper inside to prevent the pen from hitting the ends of the other side of the envelope.
Cori George says
I just put the envelope on — you could try it both ways, though! :)
Jamie says
I have everything set up to print but when I hit the Make button it shows up where the return address and mailing address are not lined up correctly. It’s like it’s going to write to where it saves space. How do I fix this?
Cori George says
Click “attach” to keep the name and address where you need them to be. I also offset my envelope a bit on the cutting mat so that it doesn’t write right at the edge.
Kimberly Catherine says
I’m having the same problem and attach will not work :(
Liz, HLMS Reader Support says
Check to make sure you have the rectangle image and the writing selected at the same time (highlight it with your mouse on the canvas), then click attach.
If this doesn’t work, then you can manually move the image when you get to the cut page by clicking on green Edit words by the mat preview and move the image to the spot you want.
Hope this helps!
Liz, HLMS Reader Support
Cherylanne L Levy says
I would love to try this! Does anyone have any feedback on how many pens you might go through for a certain number of envelopes?
Cori George says
That’s a great question! I did about 20 for my boys’ birthday party and never saw a decrease in ink. Haven’t done more than that at a time!
Linda C Hulen says
Love what you’ve been doing.
I just got a Cricut Explore2 a couple of days ago to use at school. I figured out the “attach” command with cut but I can’t seem to get text boxes to attach where I want them to be on the card stock. Any suggestions as to what I might be missing? Thanks.
Shannon says
First group your items todether then attach. Once you are in Make It you can choose edit in your mats on the left of the screen and rearrange where you want your items to cut or write in your mat.
Michelle says
What font did you use for the family address and return address?
Brandi says
I know the font used for the names is “Elizabeth”. I only know because I purchased it from DS to use on my wedding invitations.
Teresa McSwain says
I have some blank one sided party invitations that I thought about using my Cricut to write on. Have you ever done an invitation or just the envelopes? What are your thoughts on it? Thanks.
Cori George says
I don’t see why it wouldn’t work! I am working on an invitation post for later this month but it will be similar to this post — writing on the envelope. Perhaps i’ll do one for addressing post cards as well! I’ll put it on my calendar. Thanks!
Kim says
Hi!
I am new with my cricut, love it so far. When doing the envelopes I get spaces where the pen seems to be writing but it come out blank. Is there a trick to getting the envelope to stay flat enough?
Cori George says
Hi Kim — I didn’t have that problem at all. Are you sure your pen is pushed in far enough? I didn’t do that the first time and missed the paper entirely.
Alicia says
How do you set up a spreadsheet with addresses and then import the addresses to address envelope on cricut?
Crystal Summers says
Hi Alicia,
Honestly, copying and pasting from a spreadsheet into Design Space is the best way to do this. There is no mail merge function built into DS.
Happy crafting!
Crystal, HLMS Community Manager
Tracy Webb says
Thanks for this idea. My daughter is getting married in June and I will enjoy addressing her announcements and invitations.
I just got my Cricut and trying to learn how it works, it is different from the model that I used at work. I’m looking forward to making all kinds of projects for my home and classroom. Thanks again, looking forward to new ideas.
Luanne says
So are you typing in every address one by one or do you have a trick you do for the addresses to get them in. I always do mail merge from excel to word and print them that way (80+ cards) but would love the handwritten look just think it would take a lot of time to one by one set this up. Just thought I would ask how you did for more than one card. Thanks for you help in advance.
Cherylanne L Levy says
I’ve done a cheap and easy version of this where I will copy all my addresses and then paste them into a small text box. Too small for all the addresses but one. When I’m done printing that one, I select it and delete it and the next address moves up into the space. I haven’t tried this in the Cricut, but I’m guessing there text boxes work a similar way.
Cori George says
This is a great idea!
Birdie says
Thanks for this. I have used the pen feature for addressing envelopes but always have the double line. Thanks for the hint “has a writing style”. Will try this out. Some other brands of pens work well in the pen holder. Found many postings on Pintrest. Used the pen feature to make all the escort cards for my dauther’s wedding.