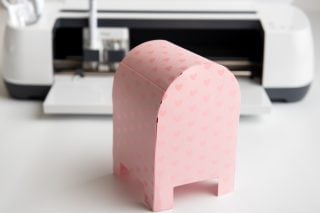
Use your Cricut to craft this cute Valentine’s Day box! Use the free SVG files and tutorial to make this adorable mailbox—perfect for storing valentines or as Valentine’s Day decor!

I love making 3D designs with my Cricut—there’s something about watching a few pieces of flat card stock grow into a standing object that makes me really marvel at all we can do with a Cricut. This Valentine’s Day mailbox is one of those projects—the pieces don’t look like much after they are cut, but with a little bit of glue, you have an adorable mailbox, ready for valentines!
Valentine’s Day Box Supplies

Get everything you need to make this Valentine’s Day Box in my Amazon Store!
- Cricut Explore or Cricut Maker
- Blue LightGrip mat or green StandardGrip mat
- Scoring Stylus or Scoring Wheel (Maker only)
- Two pieces of light pink cardstock
- One smaller piece of pink cardstock
- Tacky glue
- SVG Files (see below)
Get the Free File
Want access to this free file? Join my FREE craft library! All you need is the password to get in, which you can get by filling out the form below. The file number is: C263.
Valentine’s Day Box Instructions
Set Up Your File in Design Space
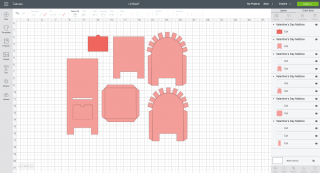
Start by uploading the SVG file to Cricut Design Space (for more information, see Uploading an SVG to Design Space). When you import the file, all of the pieces will be stacked on top of one another.

Select the group and click “Ungroup” at the top of the Layers Panel on the left. This will separate your different pieces—you’ll see this reflected in the Layers Panel as well.

Now you can move those pieces individually.
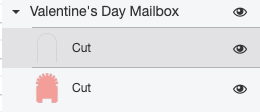
Separate them out so you can see each piece. Use the Zoom feature in the bottom right to zoom out if needed. You will see a total of six pieces: Two sides, front, back, bottom, and door.

Before we can cut our project, we need to change most of those black lines to score lines. Start with the side pieces. In the Layers Panel, click just the black arch to select just that line.
Then go to the Linetype dropdown at the top in the Edit Toolbar and change the linetype from Cut to Score.

Now the line will be dashed—this indicates that this line will be scored instead of cut.
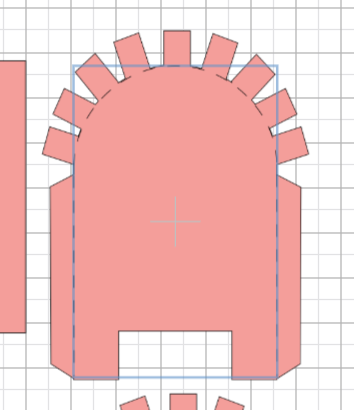
Do this with the remaining lines. First the other side, then the bottom, and then JUST the straight flat line on the front of the mailbox. You want to leave the other three sides of that as a cut line—this will create the slot for your valentines. See the below image as a reference—remember dashed = score, solid = cut.

Now we need to attach each of the pieces to their score lines so they score and cut properly. Select both the side piece and its score line and click Attach at the bottom of the Layers Panel.

You’ll see the two pieces are now nested under an Attach heading in the Layers Panel. Now your score line and the side piece of the mailbox will score and cut properly.

Do the same with the other pieces. Then click Make It in the upper left!
Cutting Your Valentine’s Day Box
From here, you’ll see all of your pieces laid out on their mats. If any of your score lines are on their own mat, click Cancel and go back and attach them to their pieces properly.

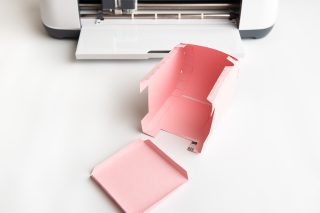
Then hit continue. Insert your scoring stylus or scoring wheel into your machine, and score and cut out your pieces! Check out these posts if you need help scoring:
Remember to choose the correct material setting for your material—glitter card stock is different than regular card stock for instance.


Assembling Your Valentine’s Day Box
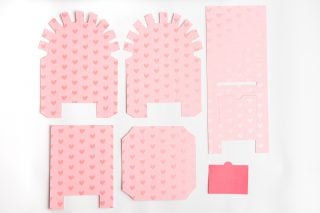
Once you have all of your pieces cut, fold along all of the score lines and begin to assemble your Valentine’s Day box. As you are assembling, let the glue dry between steps so your mailbox remains solid as you build it.
Refer to the assembly guide below. By matching up the numbers, you can see how this mailbox will come together.

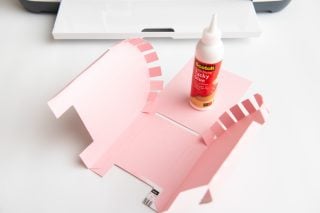
Start by gluing the tabs of the side pieces to the front panel, matching up 1L to 1L, 1R to 1R, and the top 2 tabs to the sides of the front panel as shown here:

To do the arches, begin gluing them to the front panel. Glue a few at a time and let the glue set, do the opposite side, and let those set, and then repeat until all the tabs are glued and dry. This will form the rounded top of the mailbox.

You will have one tab left, and this will be used to glue the back on in a bit.

Next, glue the bottom panel tabs (3) to the front and sides of the mailbox.


Now you’re ready to glue the back panel to the bag tabs of the arch and sides that were left from earlier, including the bottom piece. Once glued, the box will officially be closed off with the bottom attached.

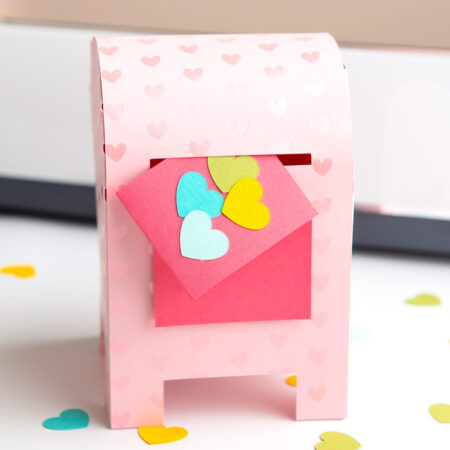
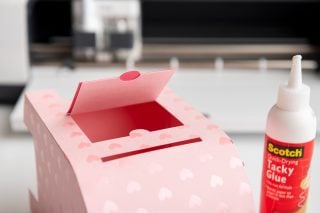
Finally, attach the darker door piece to the cut out slot on the front panel. Make sure to line up the tops of both door panels so they are even. Valentines go in the slot above the door, and the door will work to retrieve your valentines!

Then you’re done! You can make this size for small valentines, or increase the size in Design Space for larger valentines! Decorate even further if you’d like—and then collect valentines from classmates and friends!

If you have any questions about this mailbox or how to assemble it, let me know in the comments. Happy Valentine’s Day!
VALENTINE’S DAY BOX
Supplies
- 2 pieces light pink cardstock
- 1 piece Dark pink cardstock
- Tacky Glue
Instructions
- Set up your file in Cricut Design Space, changing the lines to score where necessary.

- Cut and score all of the pieces on your Cricut.

- Carefully glue the top and side pieces using the tabs.
- Glue the bottom piece onto the mailbox.
- Glue the back piece onto the mailbox.
- Glue the flap onto the mailbox and you're done!


Comments & Reviews
Gretchen says
How do I access the free SVG file?? there is no link and nothing happened when I put my email address in. I have already signed up for the newsletter, so why do I need to Sign up again?
adam says
This DIY Valentine’s Day box idea using a Cricut sounds so fun and creative! It’s the perfect way to add a personal touch to Valentine’s gifts while showing off your crafting skills. https://topfreisen.at/
Karen Funk says
I love this little mailbox! Perfect for my granddaughter’s doll. They can mail each other Valentines. Thank you. I was looking online for mailboxes and some of the premade ones were $20.00 or more. This fills the bill perfectly.
Sabrina B says
How do I create this mailbox to accommodate the store bought valentine’s? I am aware that I need to increase the size of the pieces, but I’m not comfortable with making the incrases. I looked at a store bought valentine and it was 2.75″ x 4.25″.
To me this means the slot to receive should be bigger and the door to accept would be bigger, but I do not want to ruin it’s cuteness, but it just seems to me that a working mailbox for Valentine’s would be more appropriate for my granddaughter. Do I just increase the pieces in width or both width and length? Say I wanted the mailbox to be 3 W x 5″L. should I just be able to put those measurements into the boxes before I ungroup?
Taylor Safinuk says
Where is the SVG????? PLEASE REPLY TO COMMENTS EVERYONE IS LOOKING FOR IT
Cori says
Hi Taylor,
Please scroll down in the post and look for a box with a picture of the project with the title: Get the Free Mailbox SVG! Fill out your information and an email will be sent to you with a link to download the file :)
Sabrina B says
You get it via email when you sign up via the link.
Chris Pecherzewski says
Hi How can I get the download for this cute mailbox/
Courtney Kalapinski says
Hey Chris! When I tried it, there was no SVG file with the download, so it never worked for me :(
Chris Pecherzewski says
oooh The valentine’s mail box is not free anymore??
Courtney Kalapinski says
Hey Cori! I wasn’t able to download the file to make the mailbox! Any idea what is going on?
Jennifer says
Thank you for this great information!!! I made my first one this weekend and it is so adorable!!!