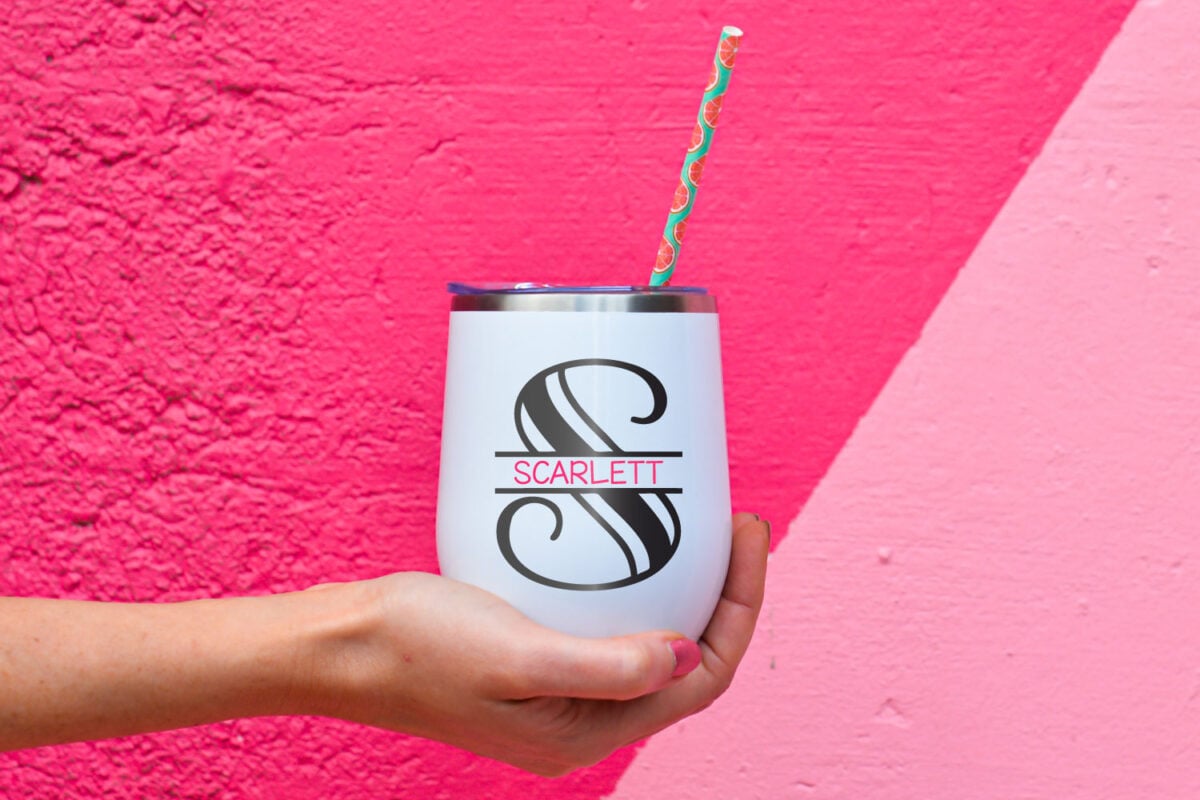
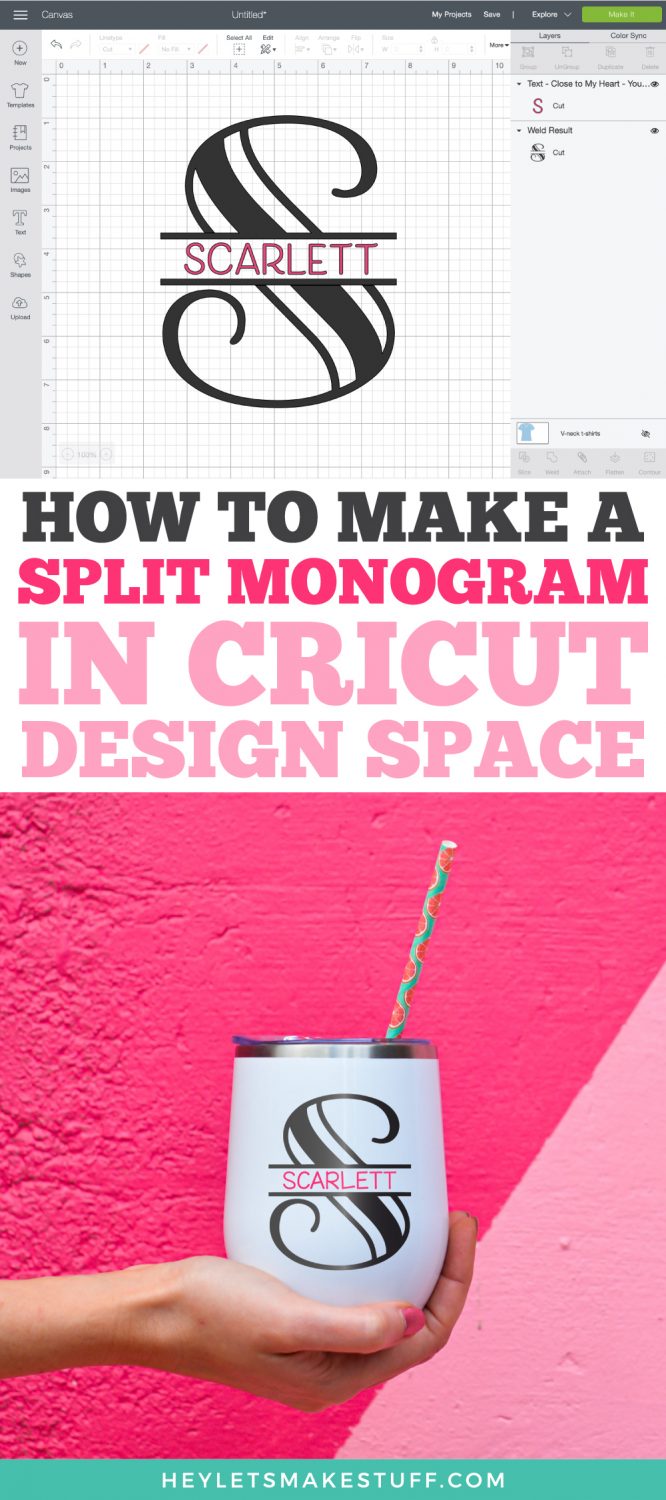
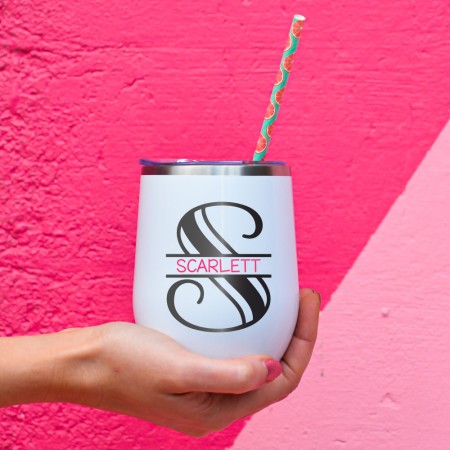
A split monogram is a classic way to personalize just about anything, from totes to tees to tumblers! This tutorial shows you how to create a split monogram in Cricut Design Space with any font—it’s easy!
Growing up in California, I didn’t realize monograms are a THING. We just don’t monogram much here. But once I went to college and graduate school and started making friends in other states, particularly the south, I realized that some people monogram just about anything they can get hands on. And your Cricut is the perfect monogram machine!
Stop pulling your hair out and start creating confidently with your Cricut! Finally understand how to use your Cricut with my Learn Your Cricut eBooks!
Today I’m showing you how to make an easy “split monogram” right inside Cricut Design Space—no extra software needed. A split monogram basically a large initial (usually the first letter of your first or last name) with a space in the middle to write that whole first or last name in the center of the letter. A split monogram is a classic way to have both an initial and a full name within a single monogram!
Creating this monogram in Cricut Design Space is easy. Here’s how to do it!
Creating a Split Monogram in Cricut Design Space
1. Create the Single Initial
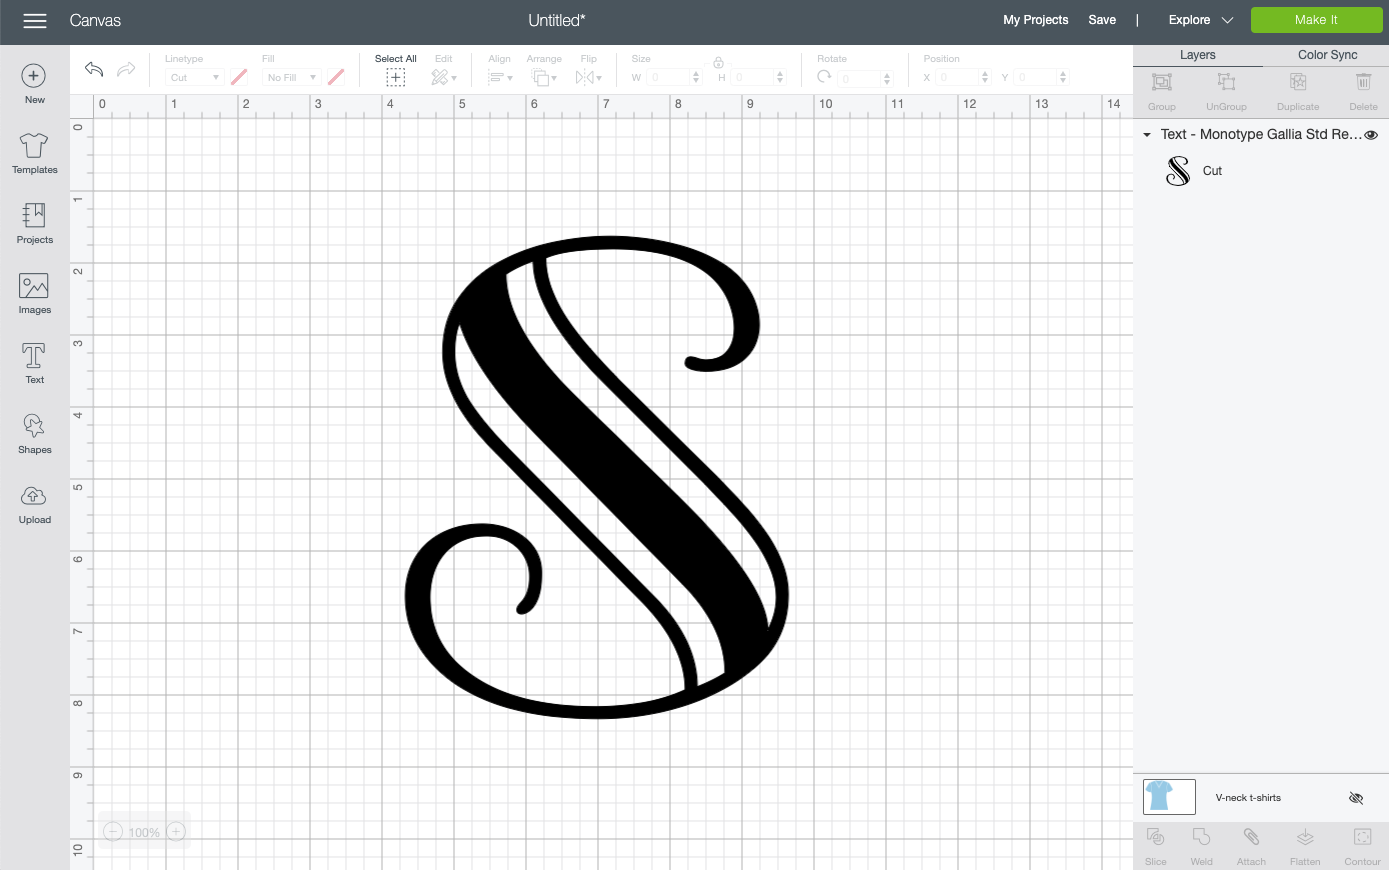
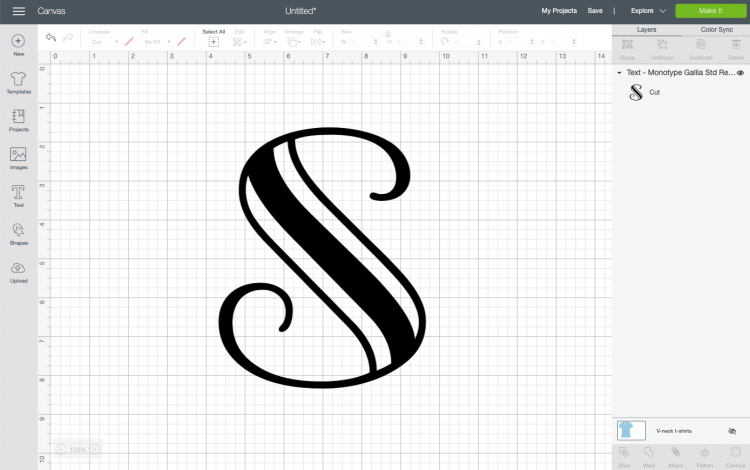
You’ll start with your large single initial first. You can either use the letter from a font (Cricut or System fonts—read more about Fonts in Cricut Design Space), or you can search in the Cricut Image Library by letter to find a letter image to use. I always like using a more interesting “chunkier” letter for the single initial. You can even use just an image, like a heart or star. My Easter Monogram bundle has a similar split bunny monogram.
For this example, I’m using the Cricut font Monotype Gallia Std. I made it quite large to make it easier to work with—you can resize it at the end to fit on whatever blank you are using.
Now let’s make it a split monogram.
2. Create the Split in the Monogram
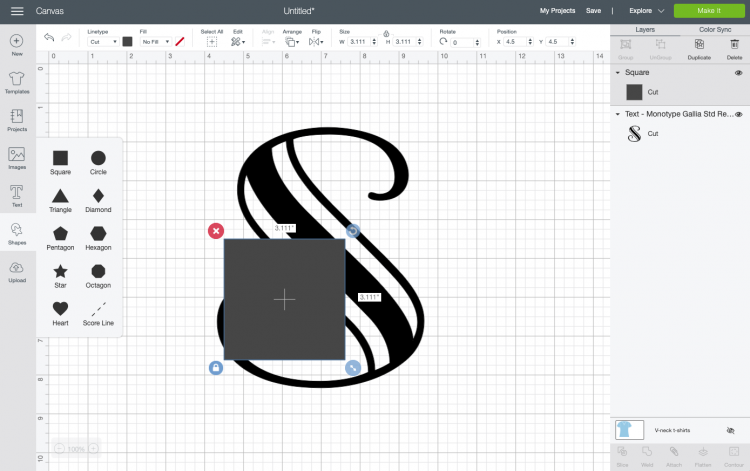
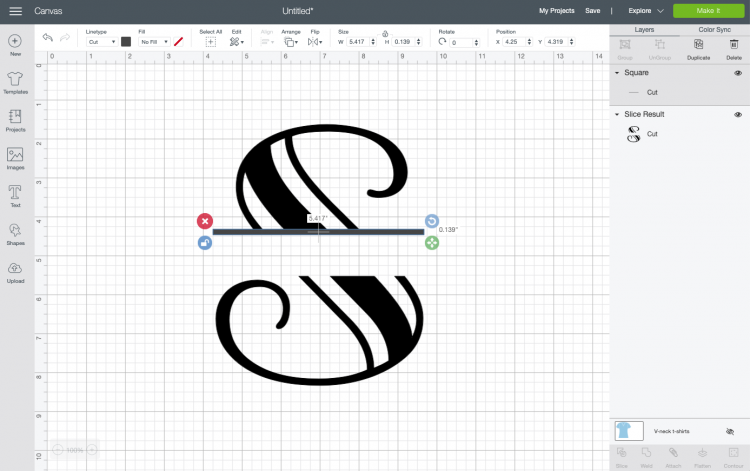
Create a square using the Shapes tool from the Design Panel on the left.
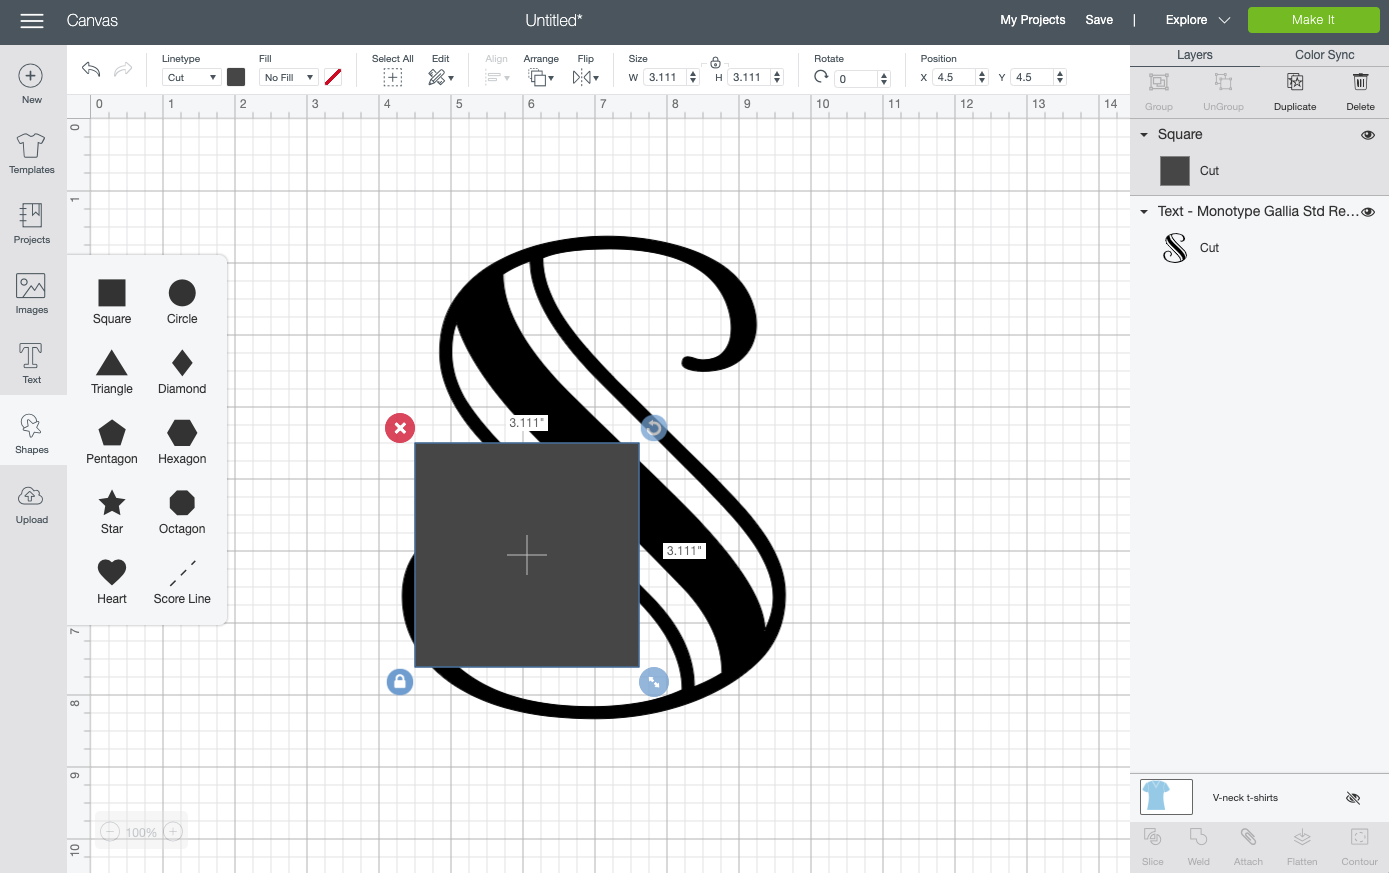
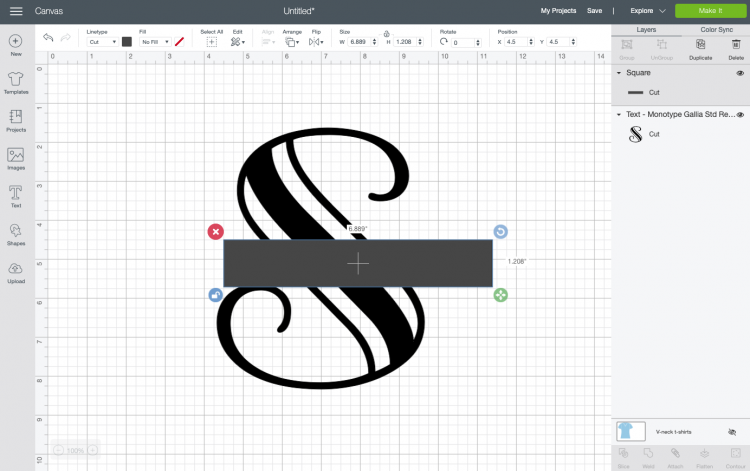
Click on the little lock icon at the bottom left of the square. This allows you to change the dimensions of your square, instead of it maintaining its square shape. Change your square into a rectangle and place over your letter. Where you place your rectangle depends on the initial you are using and personal preference.
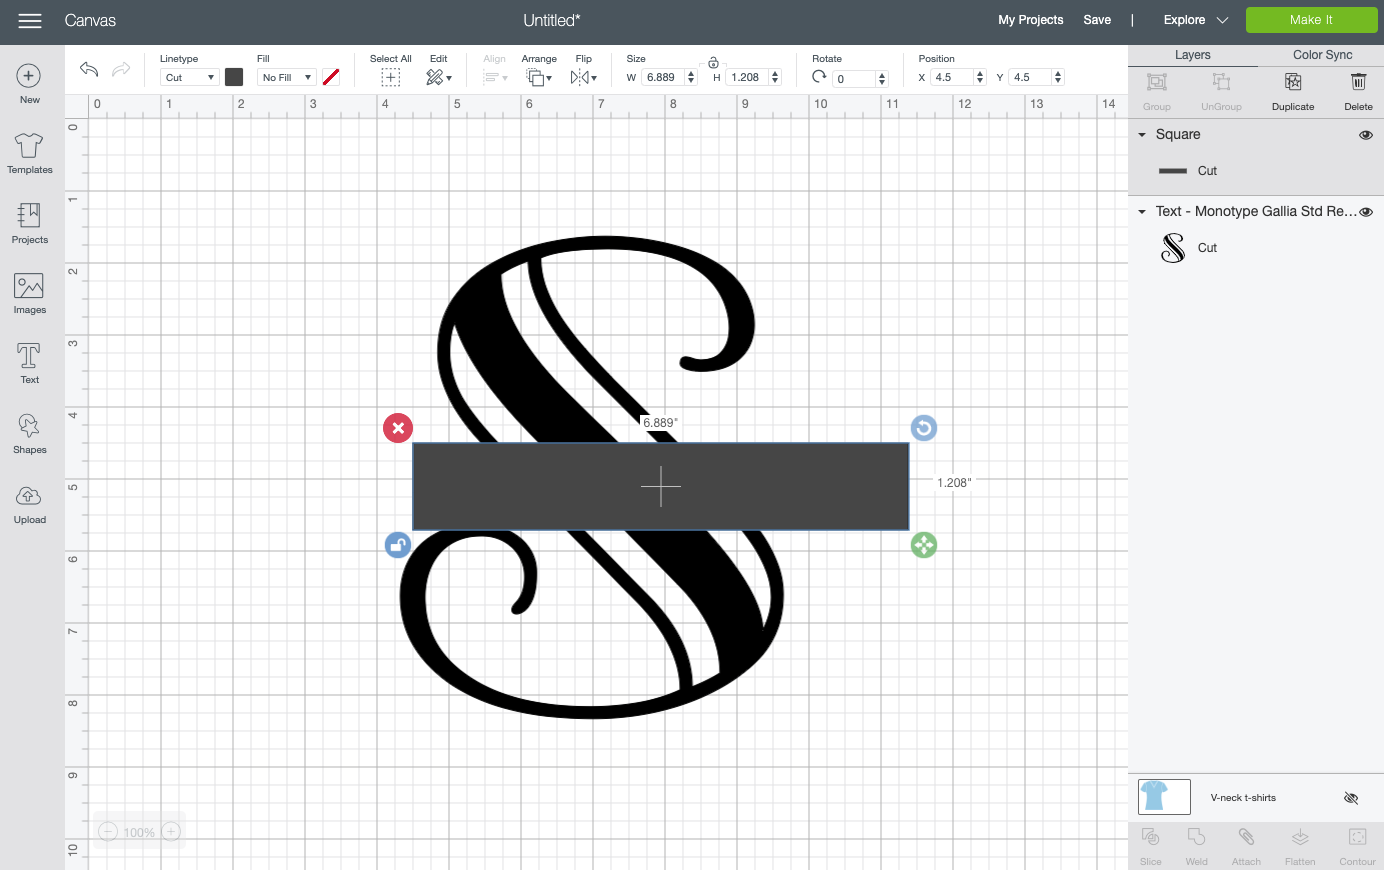
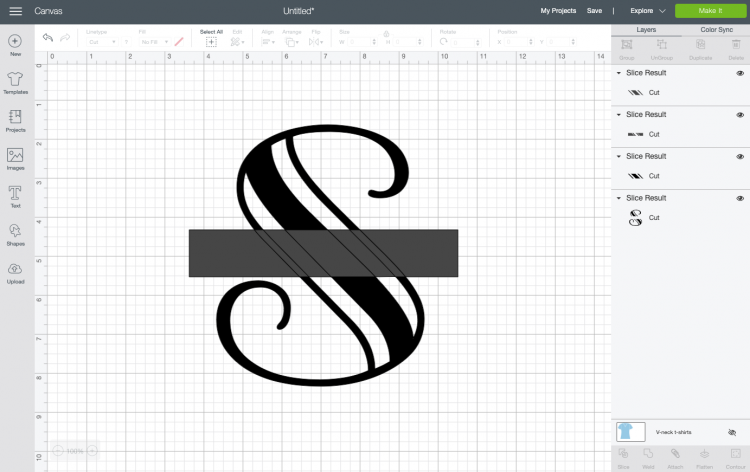
Select both your initial and your box and click Slice in the lower right of the Layers Panel. You’ll end up with a bunch of pieces!
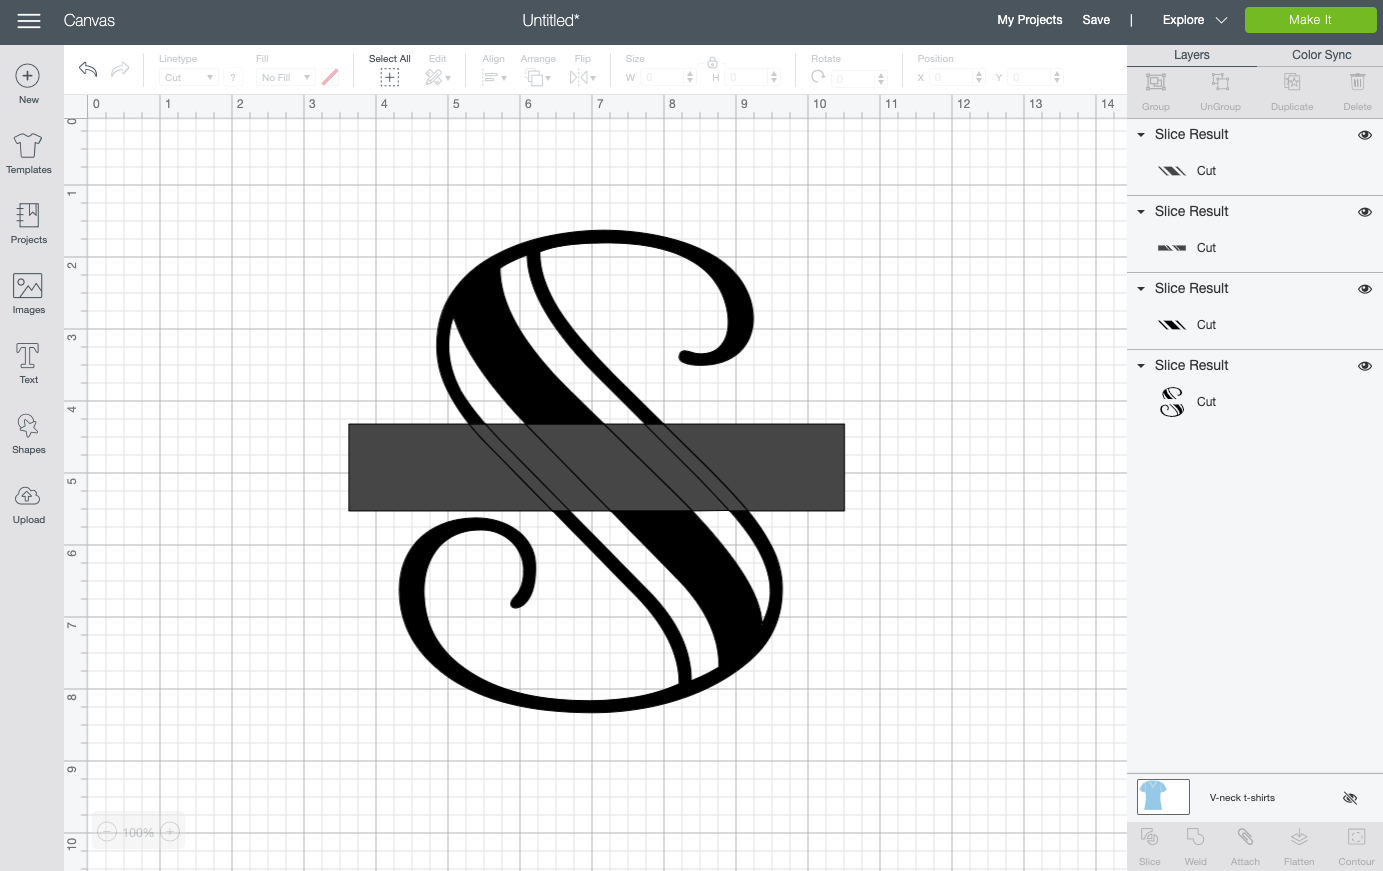
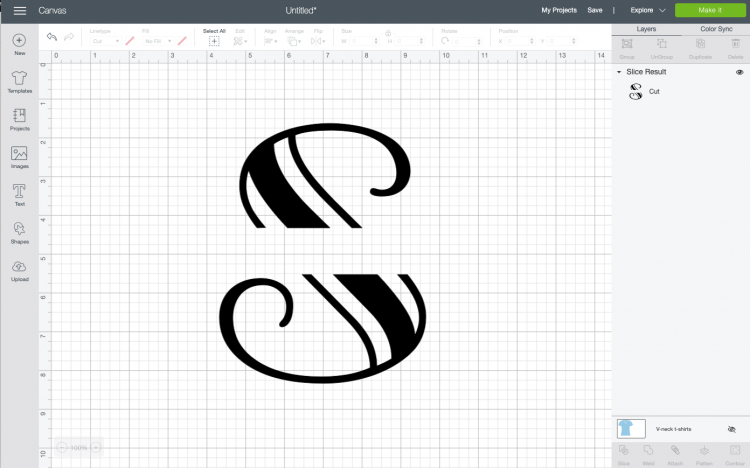
Delete all the pieces so you are left with a break in your initial.
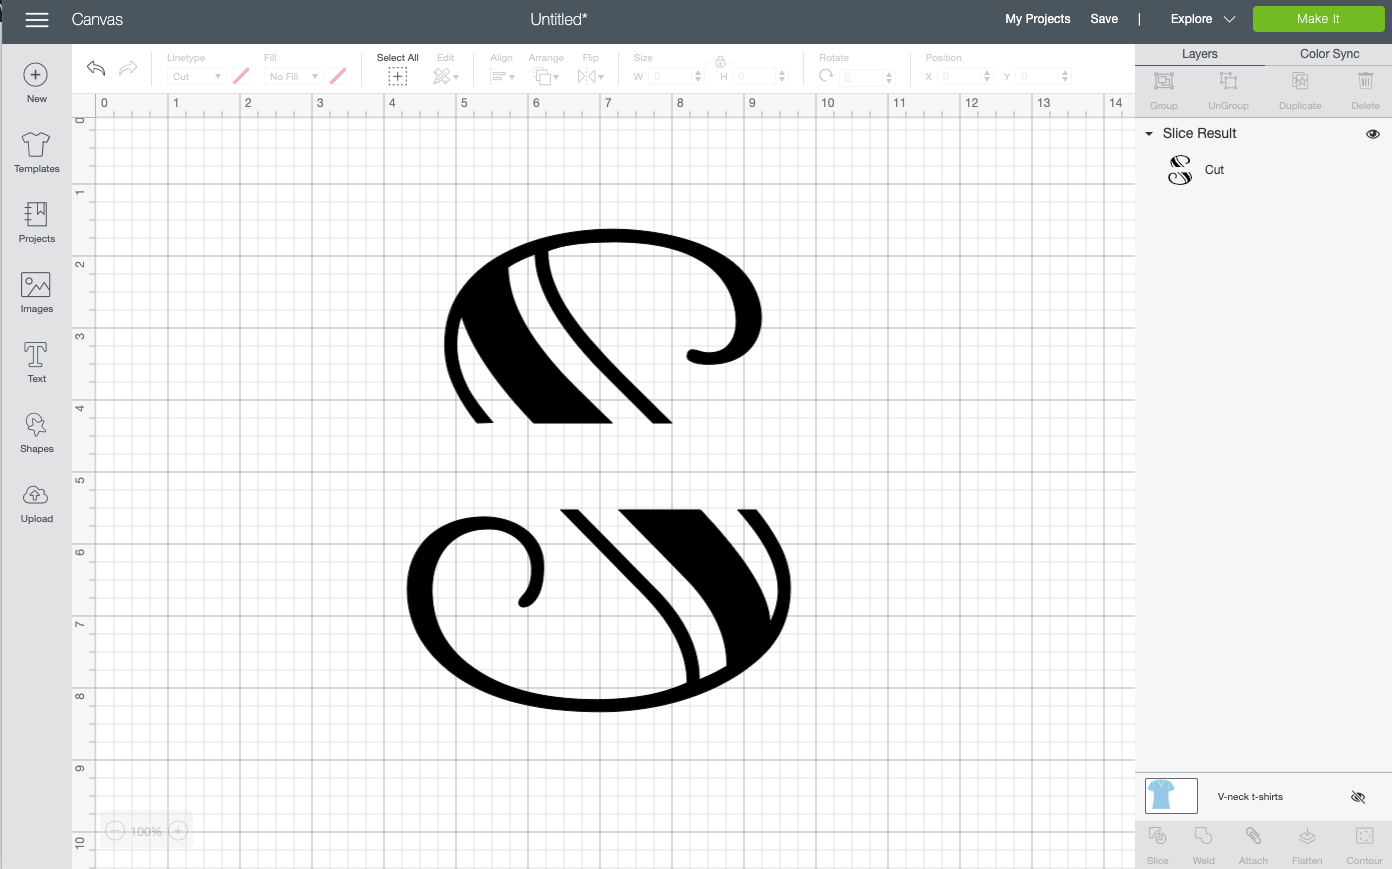
3. Framing the Split in the Monogram
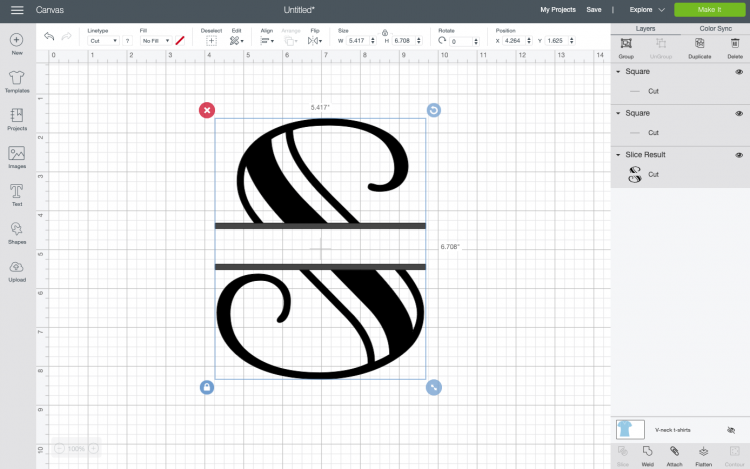
Next, we will create two lines that will help “frame” our name in the space. Create another square using the Shapes tool, click the lock to unlock the dimensions, and create a long thin rectangle. Place it at the top of your initial break, and resize until you have it how you like it. For this one, I decided to sort of mirror the size of the smaller lines in the S to make it more cohesive.
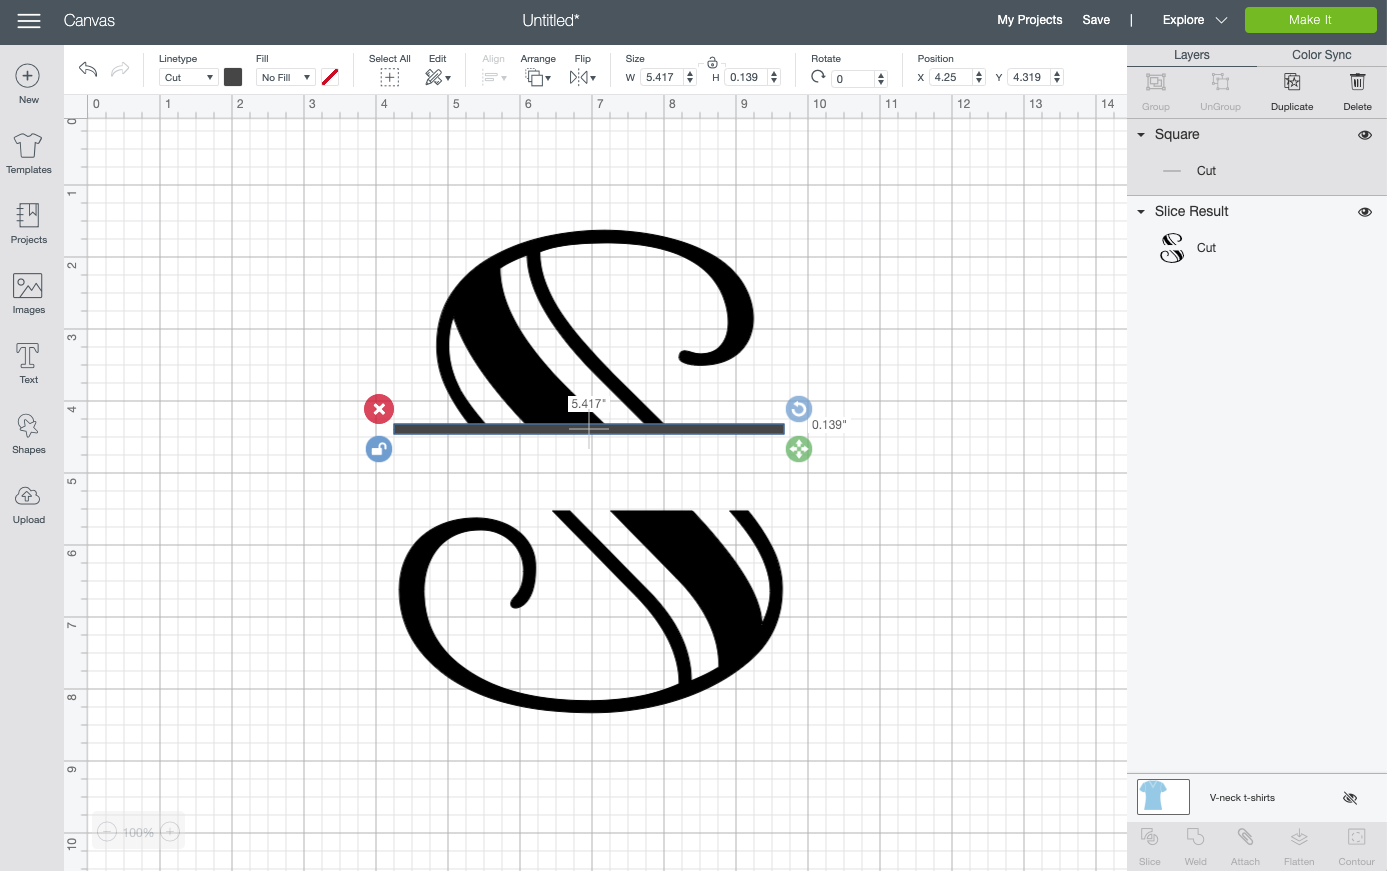
Then duplicate (using Duplicate in the Layers Panel or copy/paste) the line and put it at the bottom of the letter. You can use Align > Center Horizontally to make sure your lines are perfectly aligned.
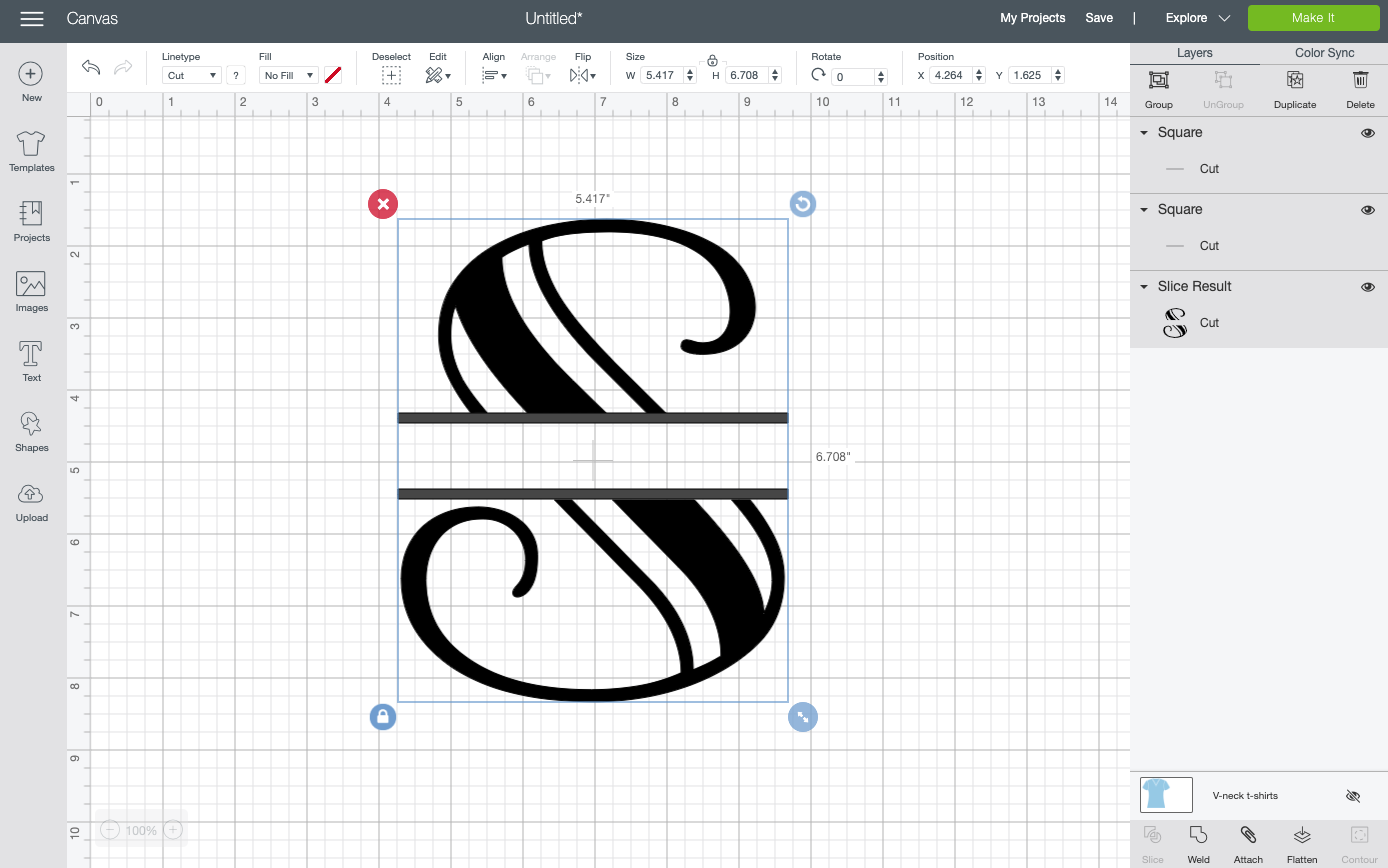
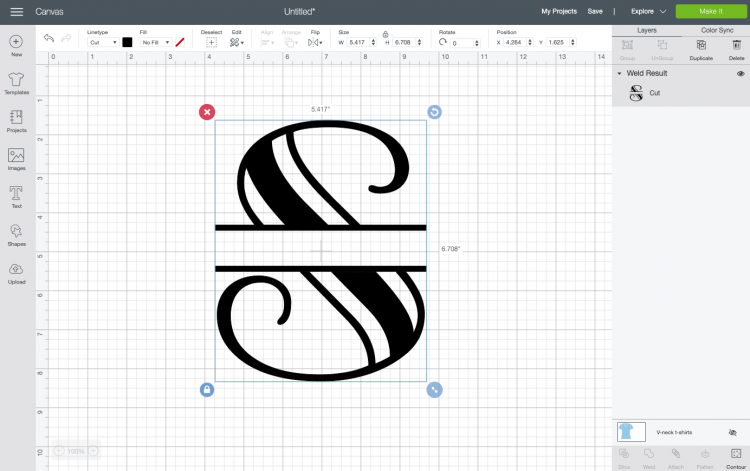
Then select your two lines and your letter and click “Weld” in the lower right of the Layers Panel. This will weld your lines and your letter, creating a single piece to cut.
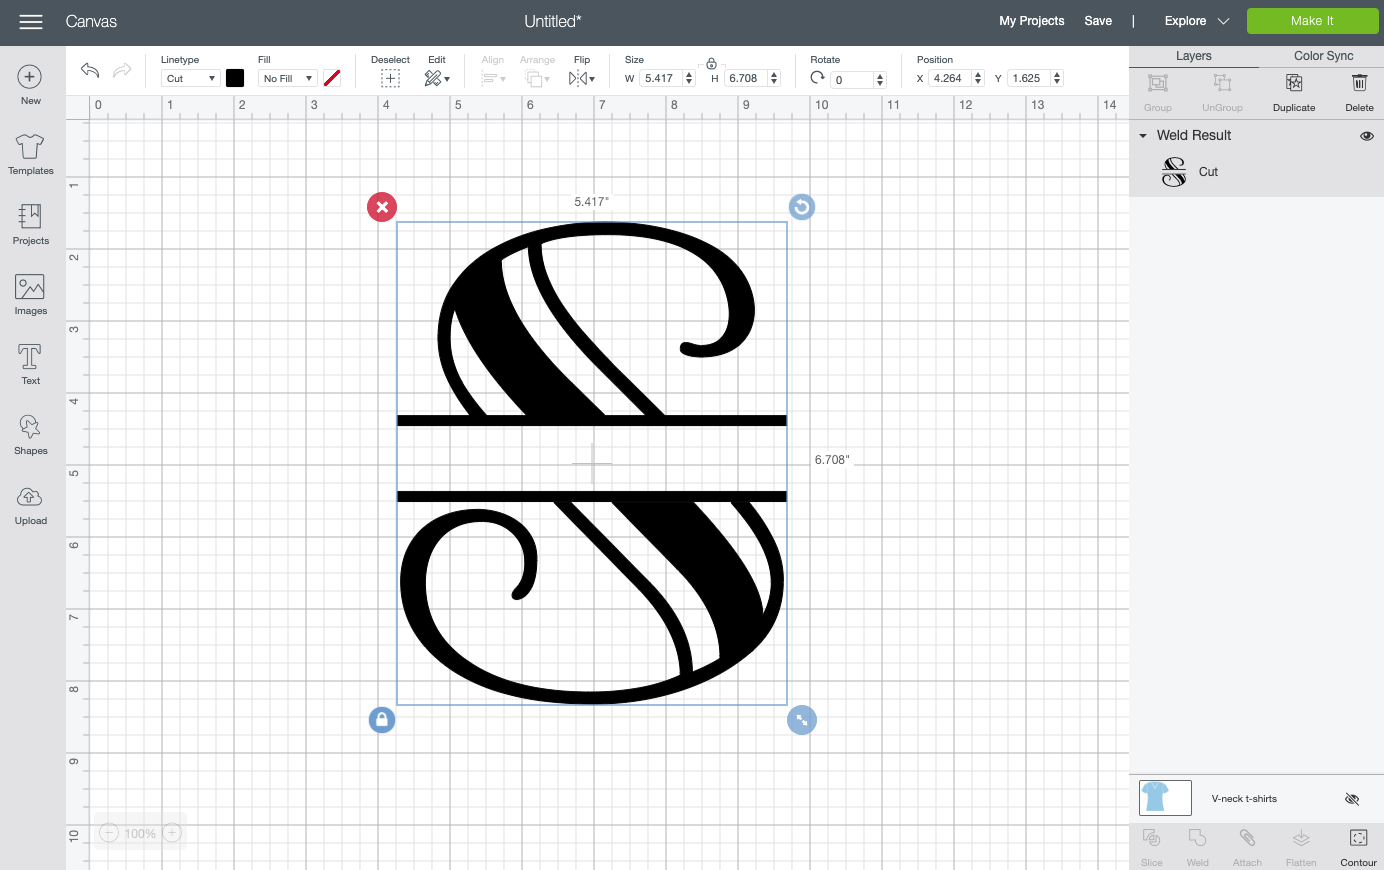
Adding Your Name to the Initial
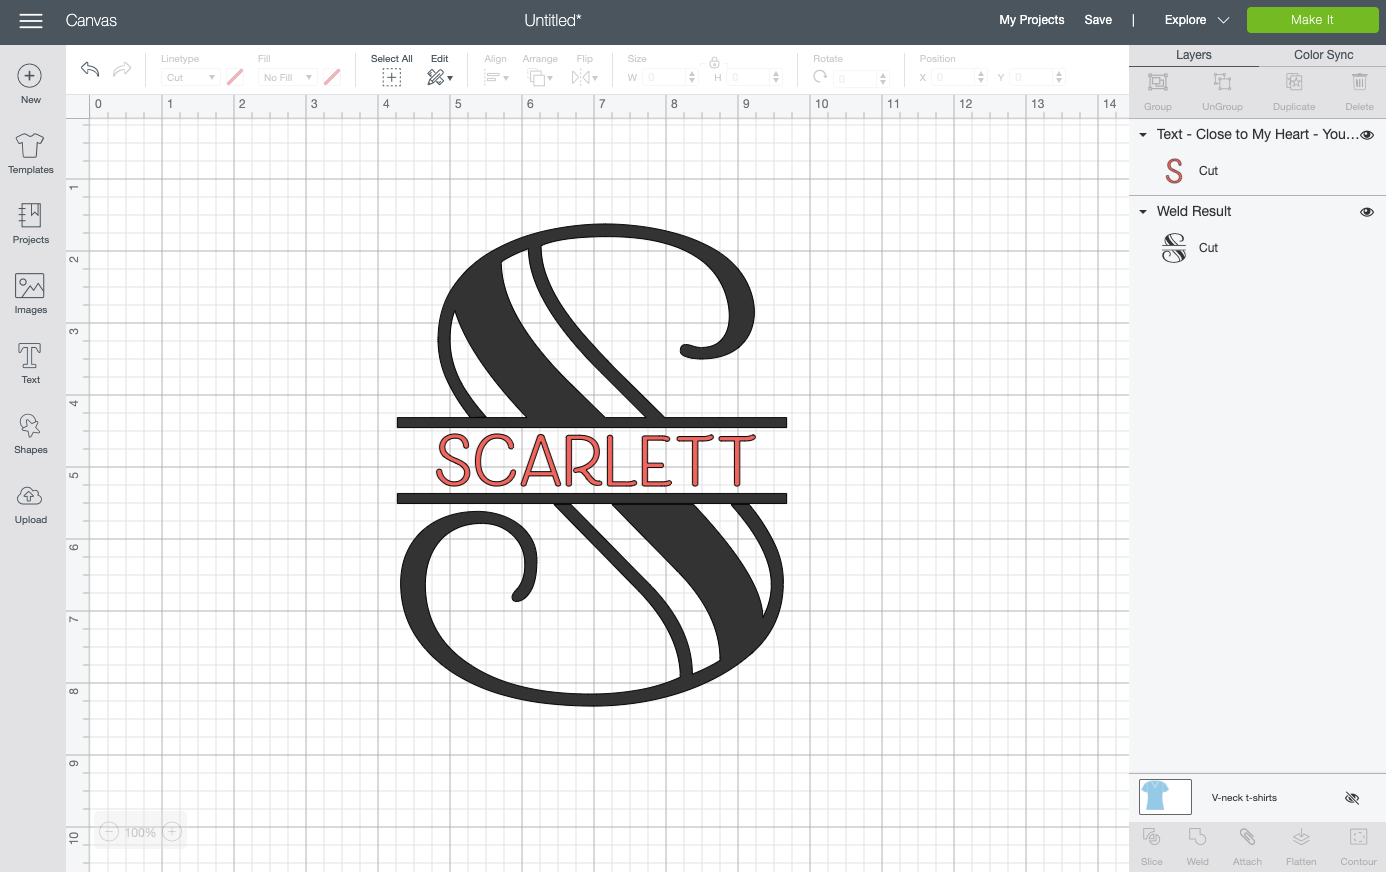
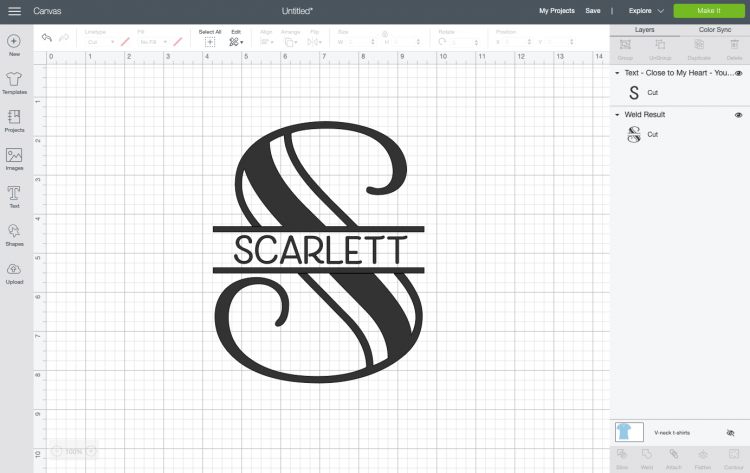
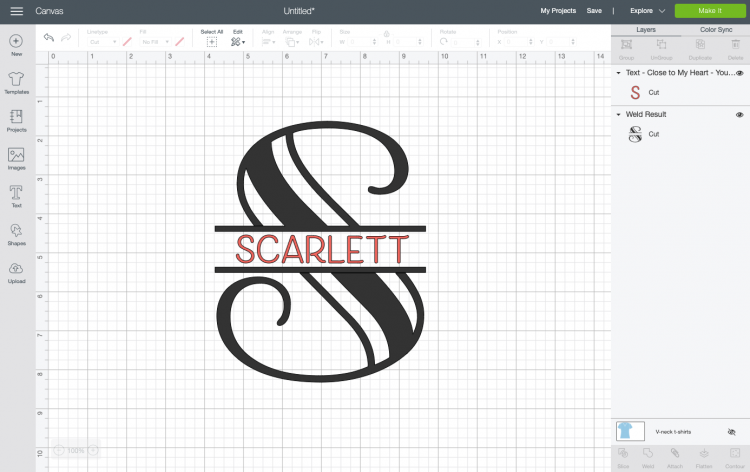
Finally, you can add your name to the break-in your initial. I used the Cricut font Close To My Heart for the name.
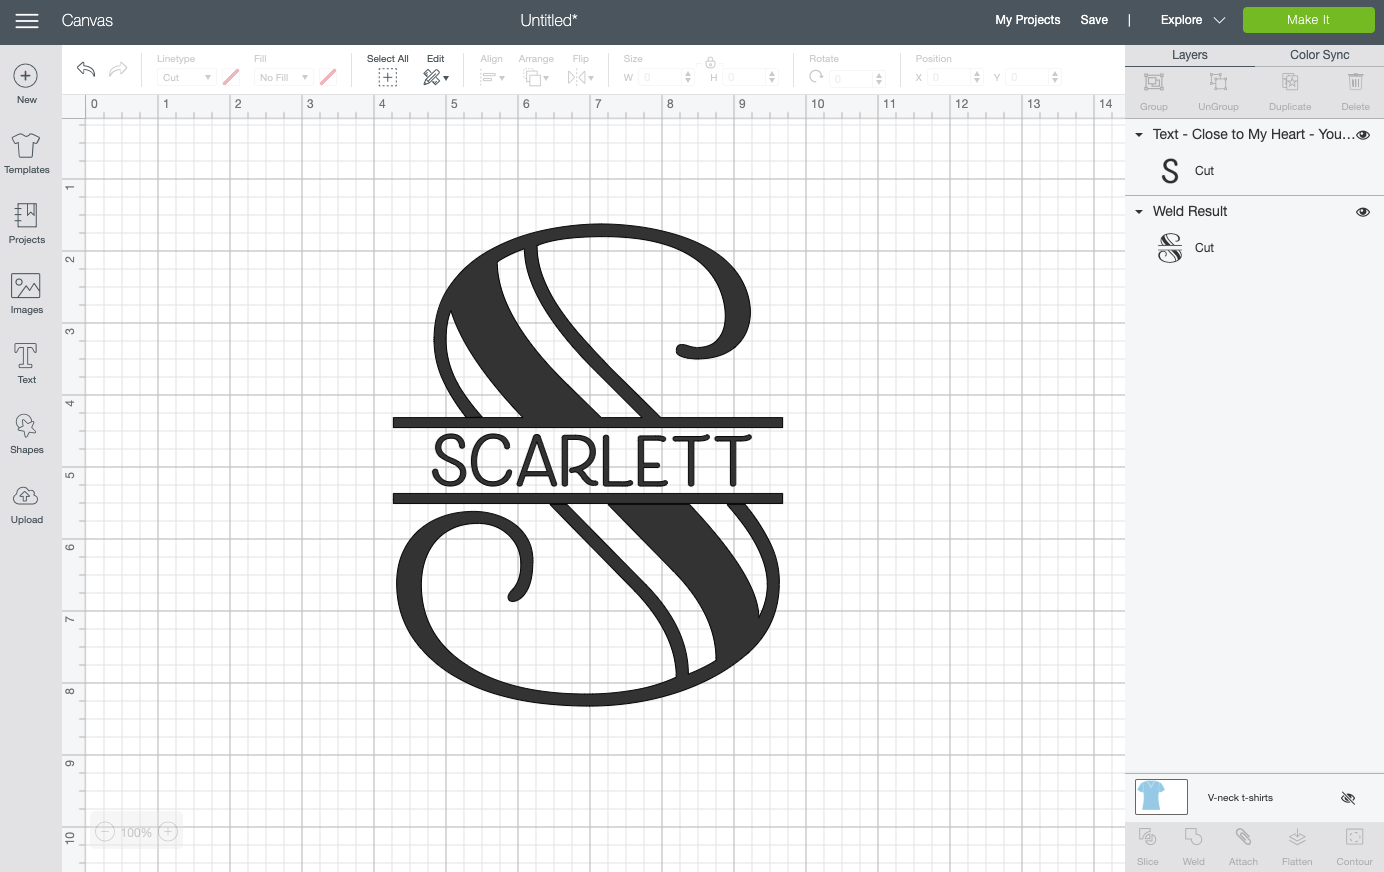
If you’d like, you can Weld or Attach the name to the large initial, or you can change the color and cut them in two separate materials.
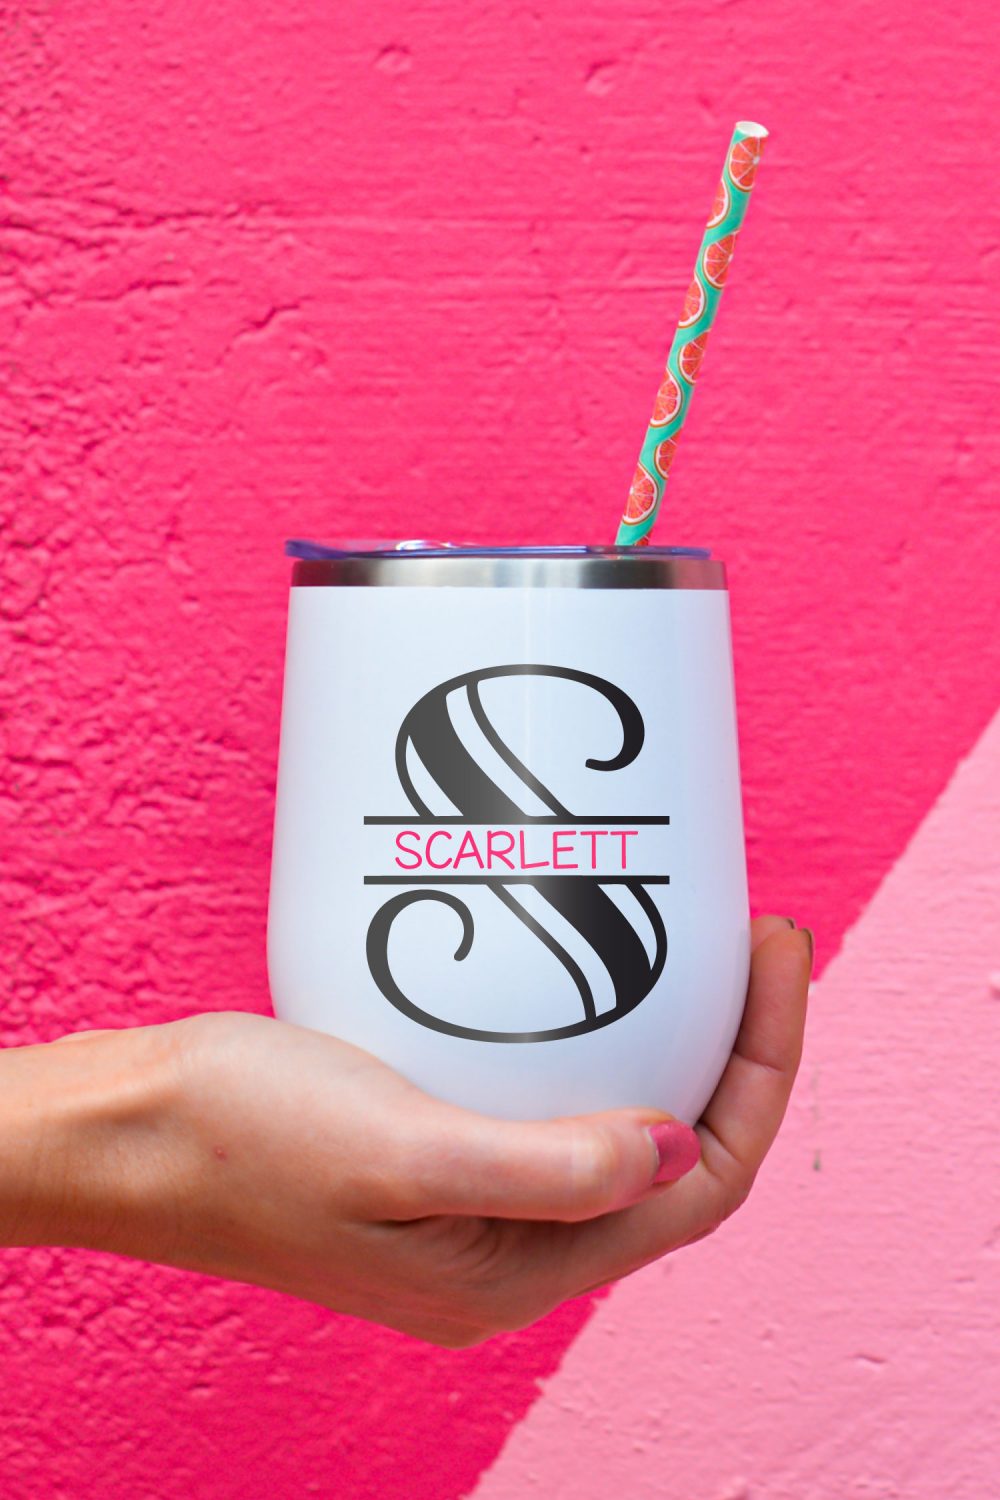
What to Monogram?
You can monogram just about anything, but here are ten popular ideas!
- Phone cases
- Tote bags
- Wine glasses
- Rain boots
- Kitchen towels
- Wallet
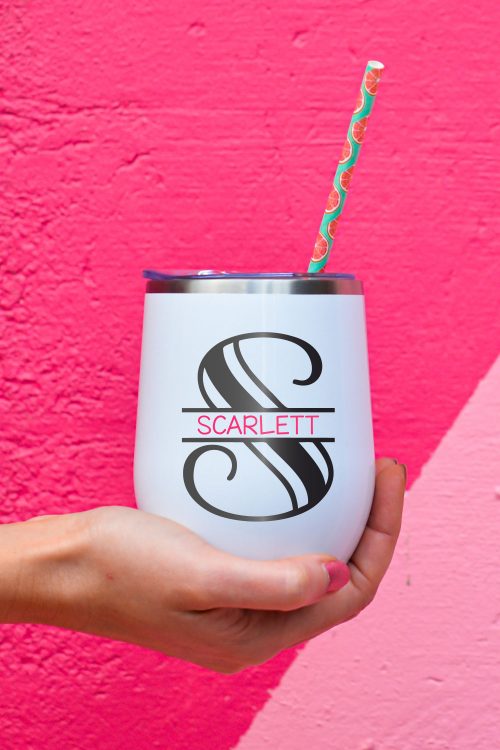
- Tumblers
- Napkins
- Notebooks
- Zip pouches
Ready to try another fun Cricut Design Space tutorial? Check out how to create a block knockout design!
Get a Cricut!
HOW TO CREATE A SPLIT MONOGRAM IN CRICUT DESIGN SPACE
Instructions
- 1. Create the Single InitialYou'll start with your large single initial first. You can either use the letter from a font (Cricut or System fonts—read more about Fonts in Cricut Design Space), or you can search in the Cricut Image Library by letter to find a letter image to use. Use a more interesting "chunkier" letter for the single initial. You can even use just an image, like a heart or star.For this example, the Cricut font Monotype Gallia Std. is being used. Make it larger to make it easier to work with—you can resize it at the end to fit on whatever blank you are using.

- 2. Create the Split in the MonogramCreate a square using the Shapes tool from the Design Panel on the left.

- Click on the little lock icon at the bottom left of the square. This allows you to change the dimensions of your square, instead of it maintaining its square shape. Change your square into a rectangle and place over your letter. Where you place your rectangle depends on the initial you are using and personal preference.

- Select both your initial and your box and click Slice in the lower right of the Layers Panel. You'll end up with a bunch of pieces!

- Delete all the pieces so you are left with a break in your initial.

- 3. Framing the Split in the MonogramNext, we will create two lines that will help "frame" our name in the space. Create another square using the Shapes tool, click the lock to unlock the dimensions, and create a long thin rectangle. Place it at the top of your initial break, and resize until you have it how you like it.

- Then duplicate (using Duplicate in the Layers Panel or copy/paste) the line and put it at the bottom of the letter. You can use Align > Center Horizontally to make sure your lines are perfectly aligned.

- Then select your two lines and your letter and click "Weld" in the lower right of the Layers Panel. This will weld your lines and your letter, creating a single piece to cut.

- Adding Your Name to the InitialFinally, you can add your name to the break-in your initial. The Cricut font Close To My Heart was used here for the name.

- If you'd like, you can Weld or Attach the name to the large initial, or you can change the color and cut them in two separate materials.

- You can monogram just about anything, but here are ten popular ideas!Phone cases – Tote bags – Wine glasses – Rain boots – Kitchen towels – Wallet – Tumblers –Napkins – Notebooks – Zip pouches



Comments & Reviews
Michele Hegedus says
How do I delete the pieces in my rectangle?
Crystal Summers says
Hi Michele,
You click on each piece and use the “delete” button on your keyboard or the little trashcan icon in Design Space. You can also select the layer from the layers tab of Design Space.
Hope this helps!
Crystal, HLMS Community Manager
Kim says
Thank you so much for this!!! This was super helpful and easy to follow!