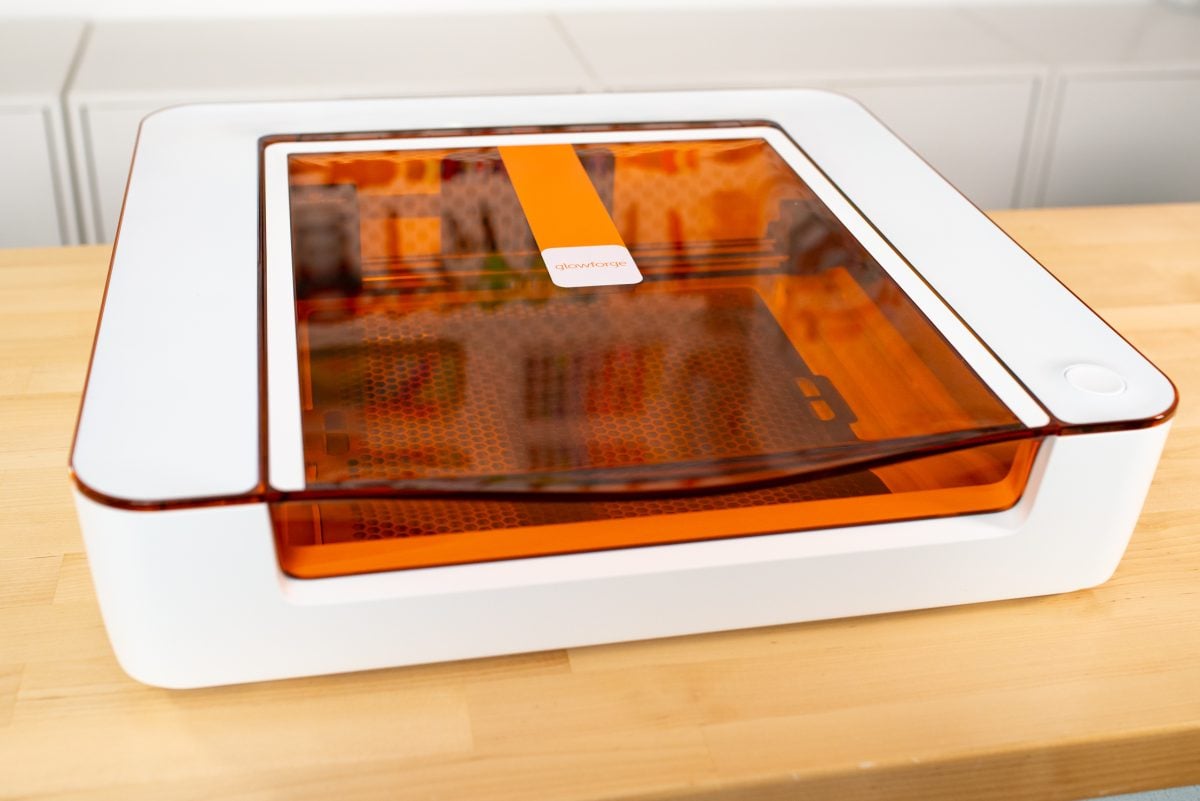
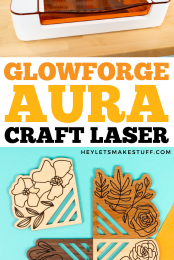
Want a Glowforge but not thrilled with the price tag? Check out the new Glowforge Aura! This compact laser can cut everything from wood to acrylic to iron on to cardstock. Here’s my full review of this small but mighty laser.
Recently I shared Cricut’s newest 24″ inch cutter Cricut Venture. While it’s a great machine that many people were looking forward to, there were some Cricut fans who were disappointed that it wasn’t some sort of Cricut laser.
But I have good news! If you’re looking for a more affordable laser cutter, Glowforge just launched the Glowforge Aura. They are calling it a “craft laser” and are marketing it to a wider crafting audience because the price point is much lower and is therefore more accessible to a larger number of people
I love having a laser because files are similar to a Cricut’s files (they both cut SVG digital files) and that there is a lot of crossover between Cricut and Glowforge crafters. Laser cutters allow me to expand the types of crafts I make while staying in the “cutting machine” category I love.
In this post, I’m going to share all the details about this compact laser machine, including how to use it, tips and tricks, and the pros and cons of buying. That way you can make the right choice for your budget and needs.
Visit my Amazon shopping list for everything you need to get started with a Glowforge Aura!
I’ll also be doing mini comparisons of the Aura to other machines I have—the flagship Glowforge laser, the xTool M1, and a Cricut cutting machine. Stay tuned for more in-depth comparisons coming soon!
Watch my Glowforge Aura Video
What is the Glowforge Aura?
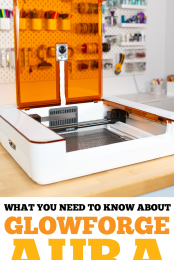
The Glowforge Aura is a compact laser cutting machine designed to be an entry-level laser for everyday crafters. Using a laser, you can cut, engrave, and score a huge variety of materials. This means not only can you cut around the edge of your materials, but you can also engrave materials, including with photos, logos, or other artwork.
Note: Glowforge calls anything you make within your machine a “print,” which I find a bit confusing since there is no actual printing involved. Just be aware that you’ll see that term used quite a bit.
Because the Aura cuts with a laser instead of a blade, you will never experience the “drag” of a blade, meaning that your cuts should always be precise and you can cut very fine details. You can also cut much thicker materials that are not possible to cut with a blade.
What is the Glowforge Aura Personal Filter?
In addition to the Glowforge machine, you can get a desktop filter to go with your machine. The filter is designed to pull all of the fumes and smoke created by the machine into the filter instead of letting it out into the air. You can also vent your Glowforge Aura out of a window if you’d like (I actually do this with my Glowforge Pro). Just make sure you are able to seal around the filter so the fumes aren’t coming back through the window.
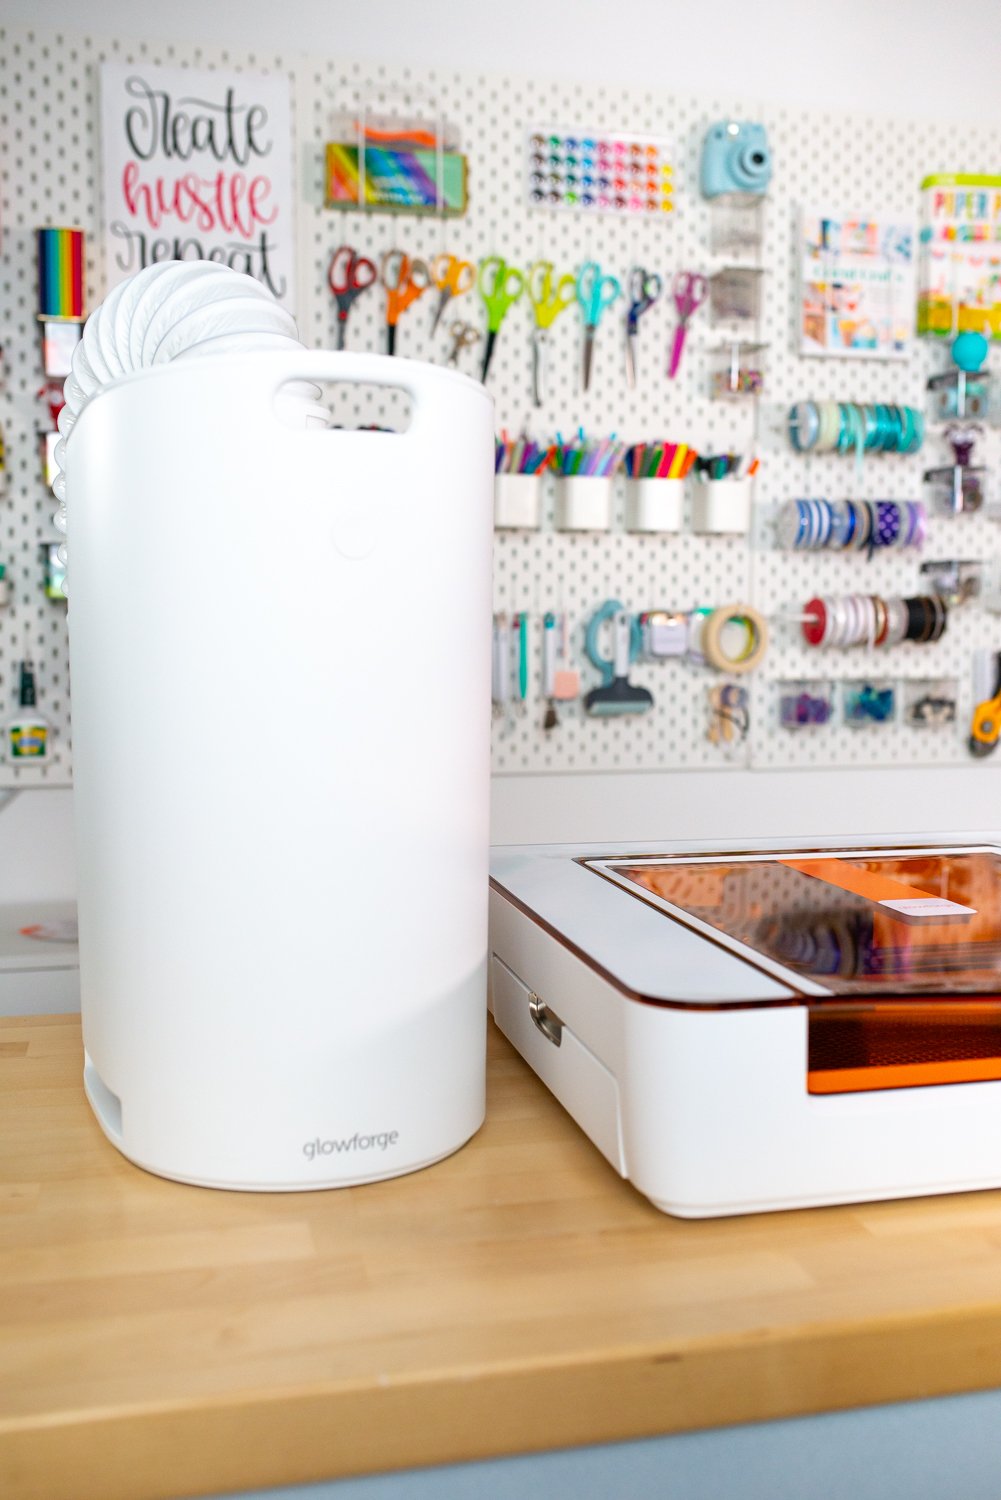
The air filter is WiFi connected to the Aura, which means it turns on automatically when the machine starts cutting and turns off when the project is over.
While it’s an extra expense, I really like the filter. It means I don’t need to keep my Glowforge Aura by a window and I think it does a great job of keeping the fumes down while I’m running the machine. It’s definitely the least stinky of all my laser machines.
You may find that there are still fumes and smells associated with using the machine that you find unpleasant. Using the machine outside and/or wearing a respirator can help. I also run an air purifier.
Machine Cost
The Glowforge Aura costs $1199 and the optional personal filter is $399. This is comparable to other diode lasers on the market.
Diode vs. CO2 Lasers
Let’s start by talking lasers! I’m not going to go into all the technical details behind diode and CO2 lasers, but I will talk a bit about the difference since it may affect your buying decisions. For your reference, other Glowforge lasers are CO2 lasers, while the Glowforge Aura and the xTool M1 are diode lasers.
Price
A diode is a more economical laser than the CO2, making it perfect for hobbyists and everyday crafters.
Lifespan
It’s also more durable than a CO2 laser and has a longer lifespan.
Power
While it lasts longer and costs less, it is considerably less powerful than a CO2 laser. For example, my Glowforge Aura is a 6W diode laser, while my larger Glowforge is a 45W CO2 laser.
Speed
A diode laser can also be significantly slower than a CO2 laser and may require more passes at slower speeds to cut through certain materials. While I love the price of a diode laser, the slower speed is definitely something to consider.
Precision
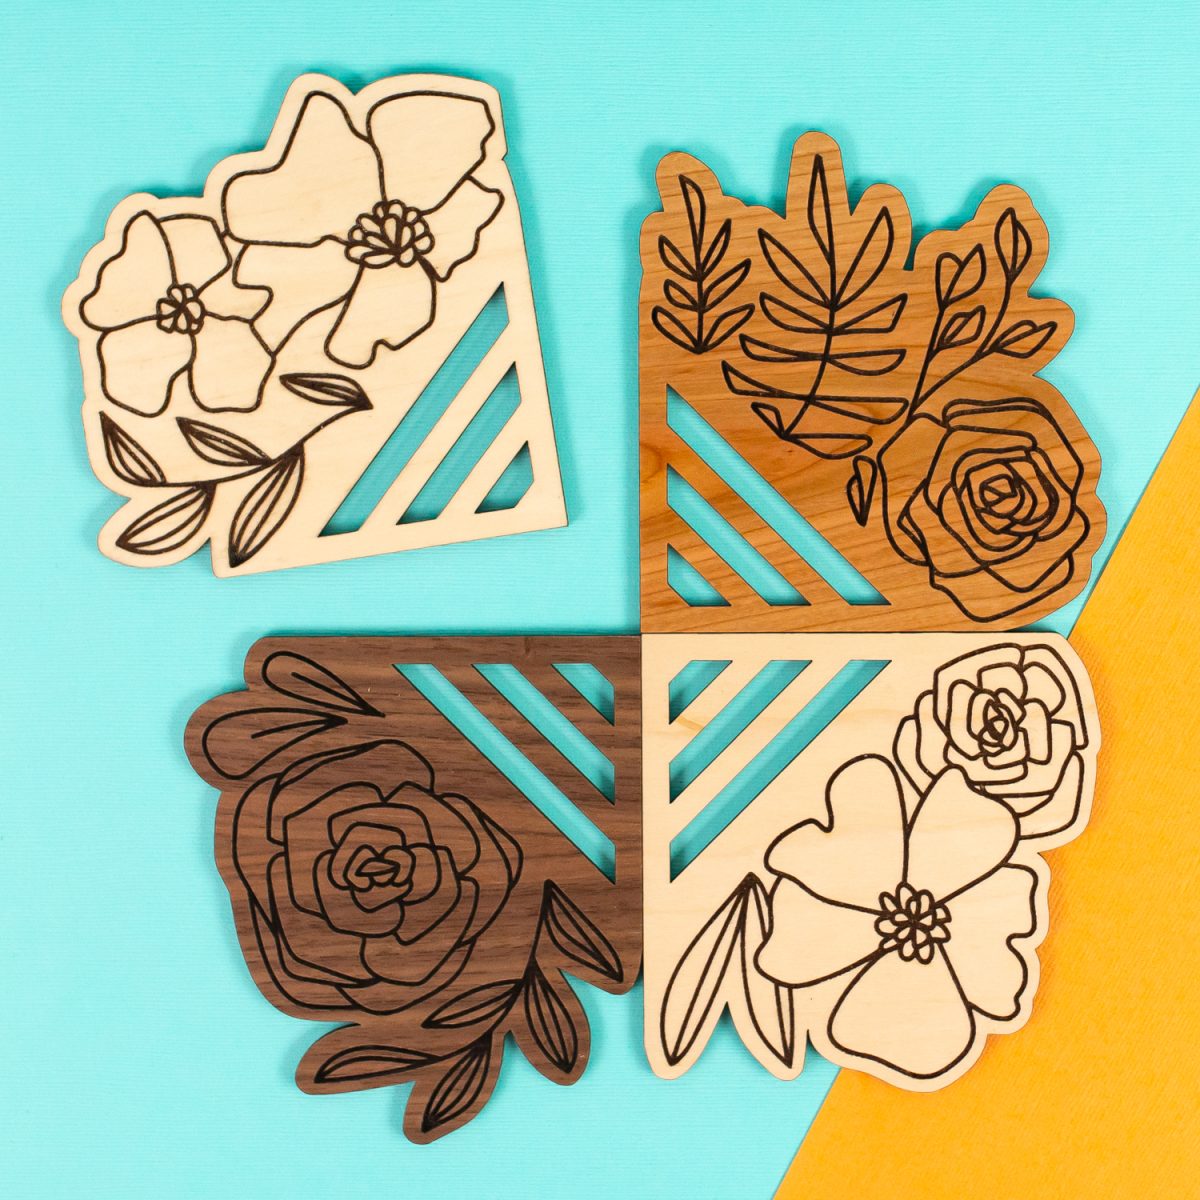
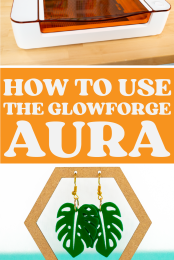
The cutting and engraving precision is also key here. The higher the wattage, the more accurate the cut and engrave. A CO2 laser can generally create a much more detailed cutting or engraving than a lower watt diode laser. I notice this the most in two ways: detailed projects (like the small holes I used in the earrings featured in this post) are just not as clean. And then sometimes and engraving may look a bit rougher.
But the real thing that matters is…will the diode laser cut the different materials you want it to cut and engrave the things you want to engrave at a more affordable price? Or do you want to save up your money for a higher-watt CO2 laser for more cutting and engraving power?
Hopefully I’ll be able to help you make that decision in this post!
Glowforge Aura Set Up
The box is packed really well, but still use caution when opening it.
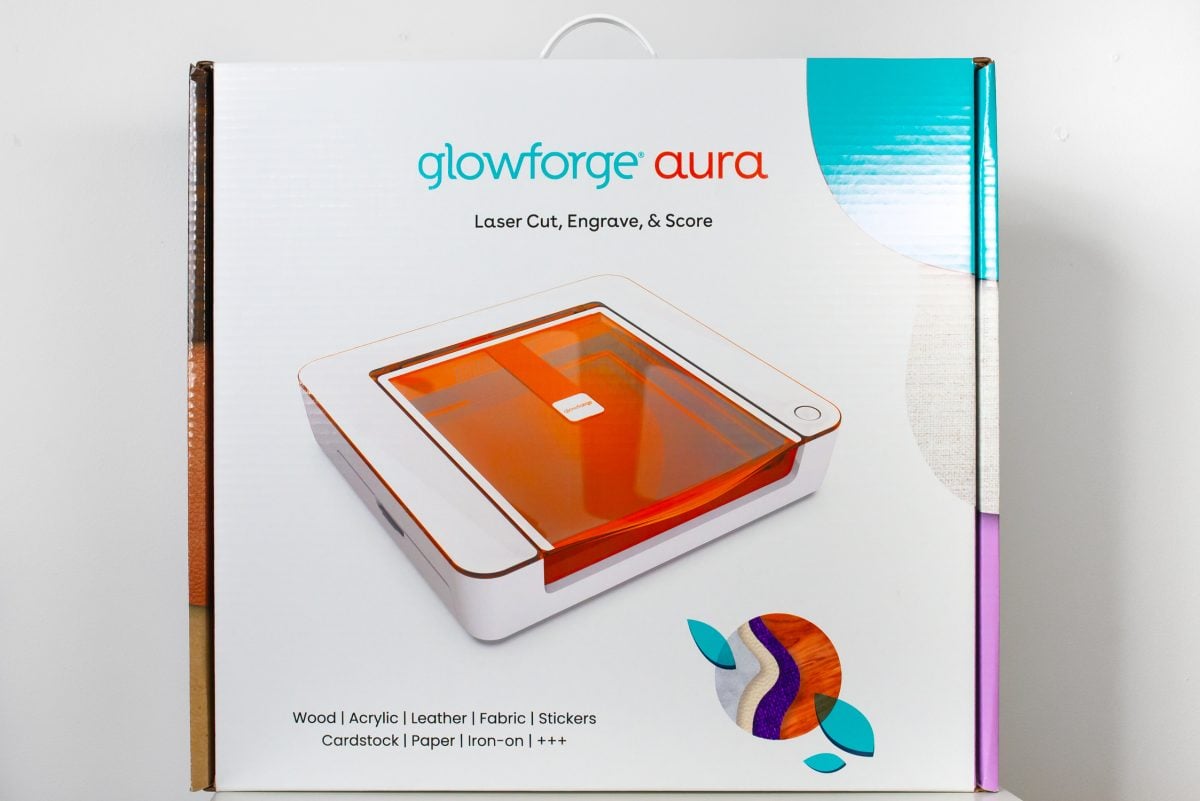
Here’s what you’ll find inside:
- The Glowforge Aura
- A box with the metal crumb tray and a piece of basswood to practice on
- The vent pipe
- The power cord
Head to setup.glowforge.com for all of the instructions for getting your machine up and running.
Note: I’ve struggled a bit with getting both of my Glowforge machines connected to WiFi. If you have an issues, check out this article. I also find it helpful to run through the set-up again. You’ll need a 2.4GHz WiFi connection—make sure you aren’t on 5G. If all else fails, reach out to their support team.
If you also purchased the Personal Filter, you’ll walk through the setup for that as well.
Size and Dimensions
The Aura was actually smaller and lighter than I expected! My Glowforge Pro is a beast, but I was easily able to lift and place the Aura on my table—it’s only 19 pounds.
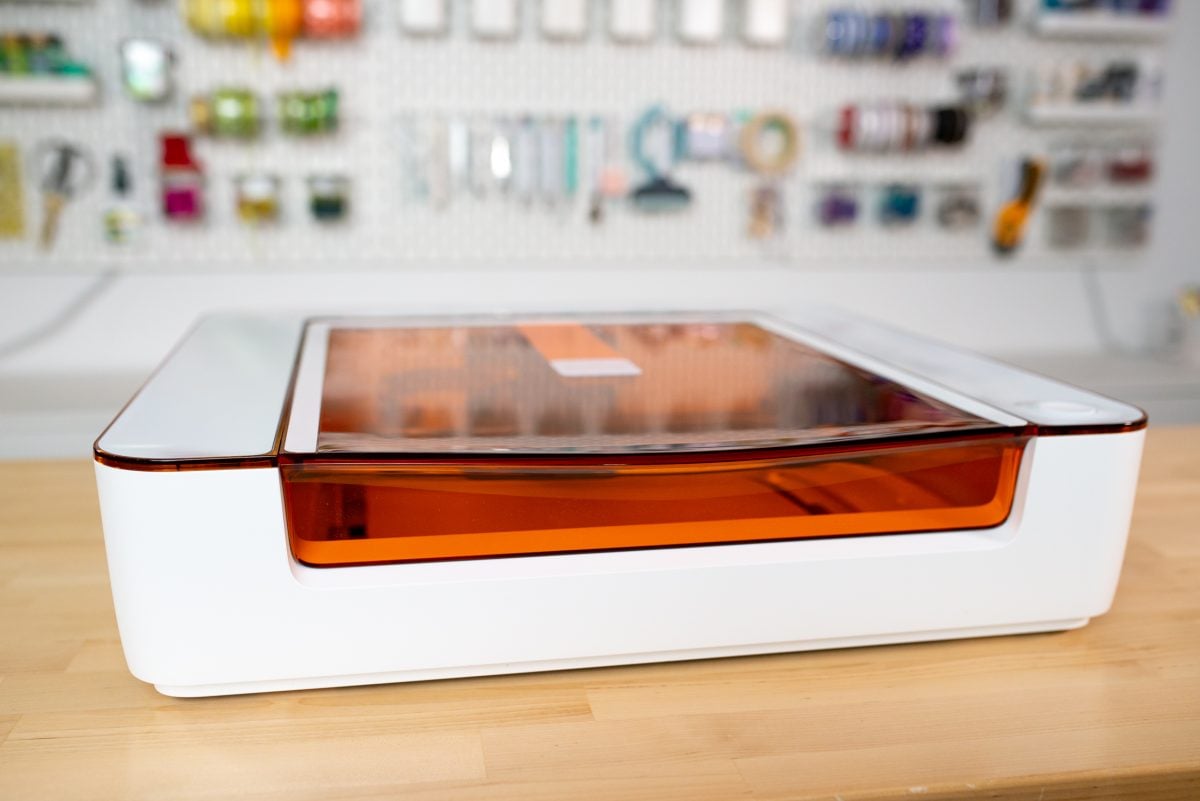
It’s about 22 wide and 21 inches deep, but you will need some extra space in the back for the vent pipe (at least 6″). You will also need 18″ above the machine to open the lid and place your materials.
While I have it on my workbench for photography, it fits really nicely on my Alex cart from IKEA. That being said, I am probably going to end up getting a second Husky workbench for mine. You can see all of my Sturdy Glowforge Table and Work Bench Ideas if you need some other options.
Anatomy of the Machine
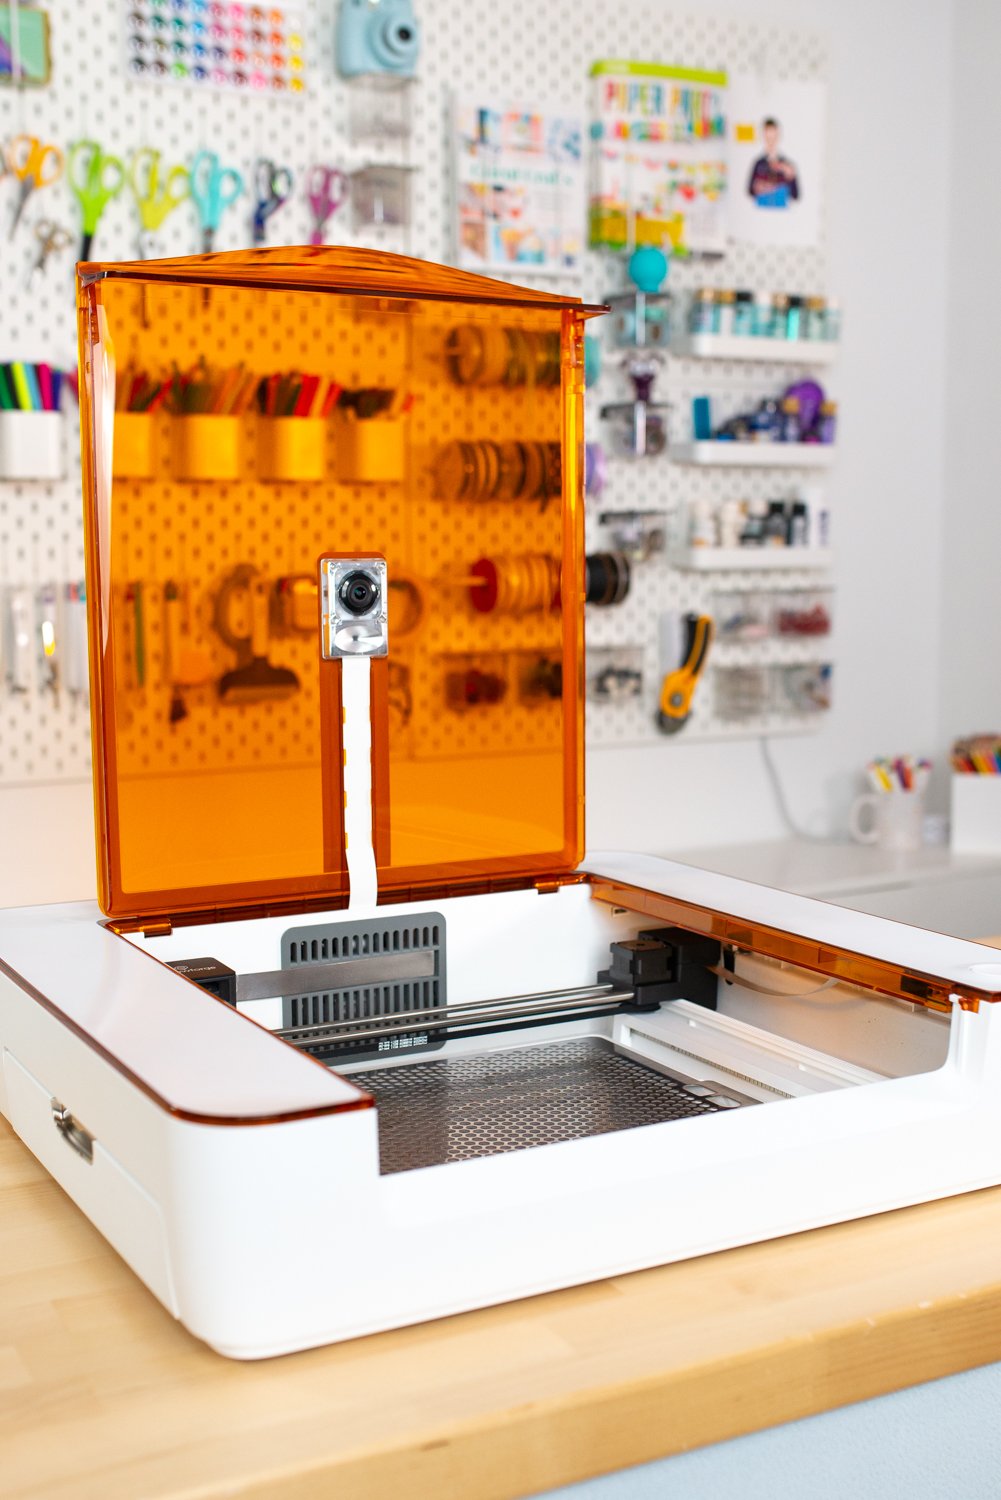
Now let’s look at the actual machine itself. The white enclosure houses an empty bed where you’ll place your materials.
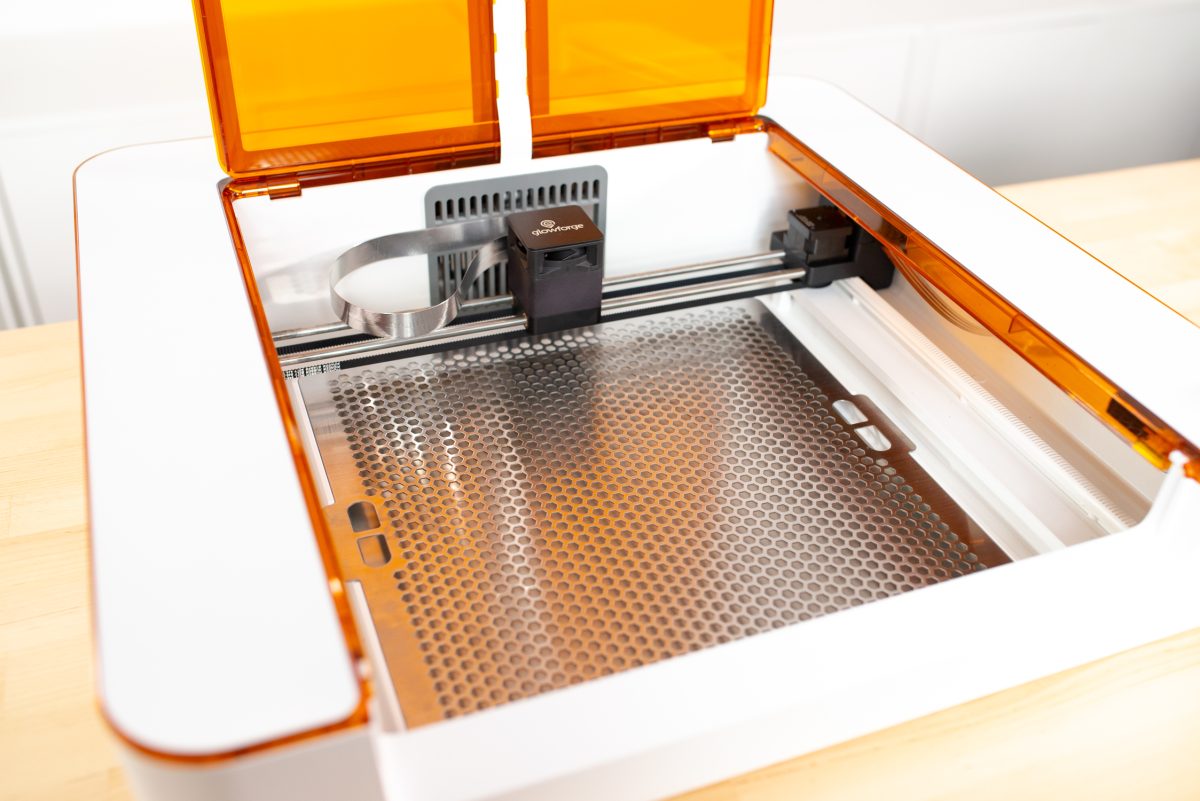
In the bed there’s a silver “crumb tray.” This removable tray both adds air circulation while cutting (vital) and allows the small pieces from your project to fall through. I end up vacuuming up the crumbs using my handheld vacuum.
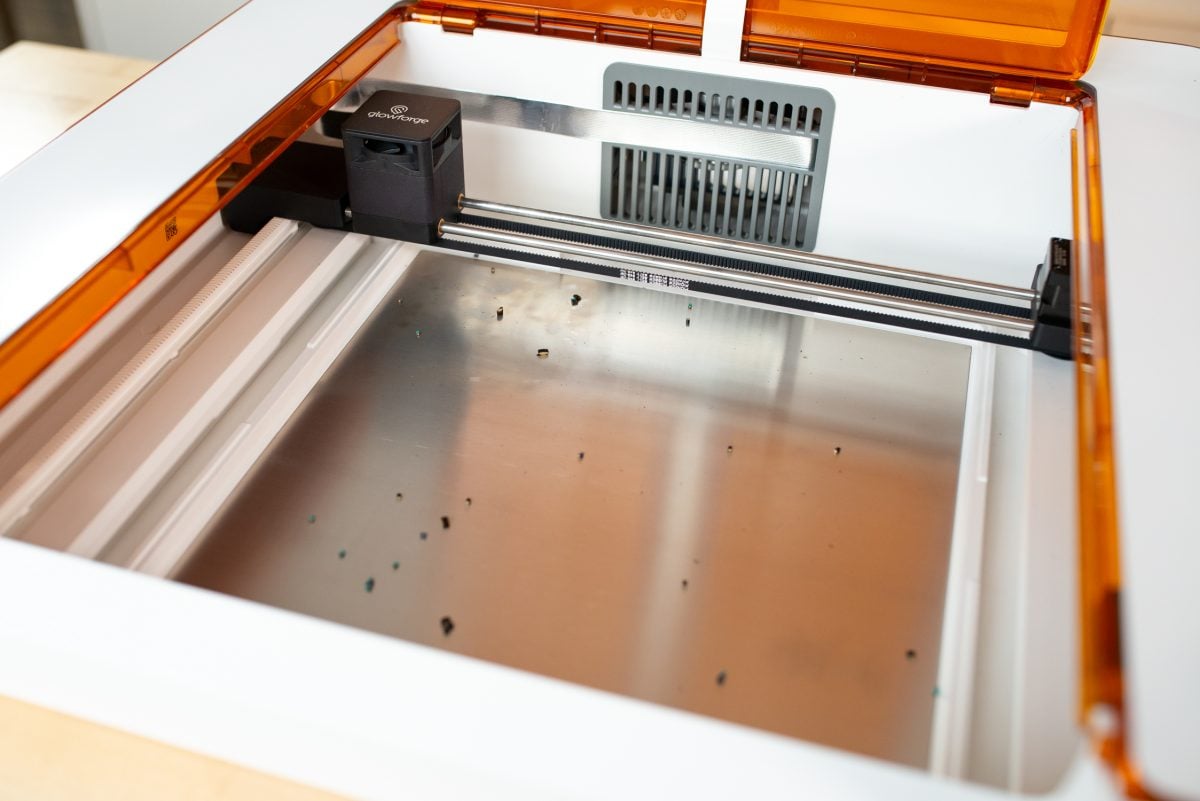
The lid is like a welder’s helmet, tinted orange so you won’t damage your eyes when looking at the laser. I really like this feature because I’m constantly having to tell my boys not to look directly at the laser in my Glowforge Pro.
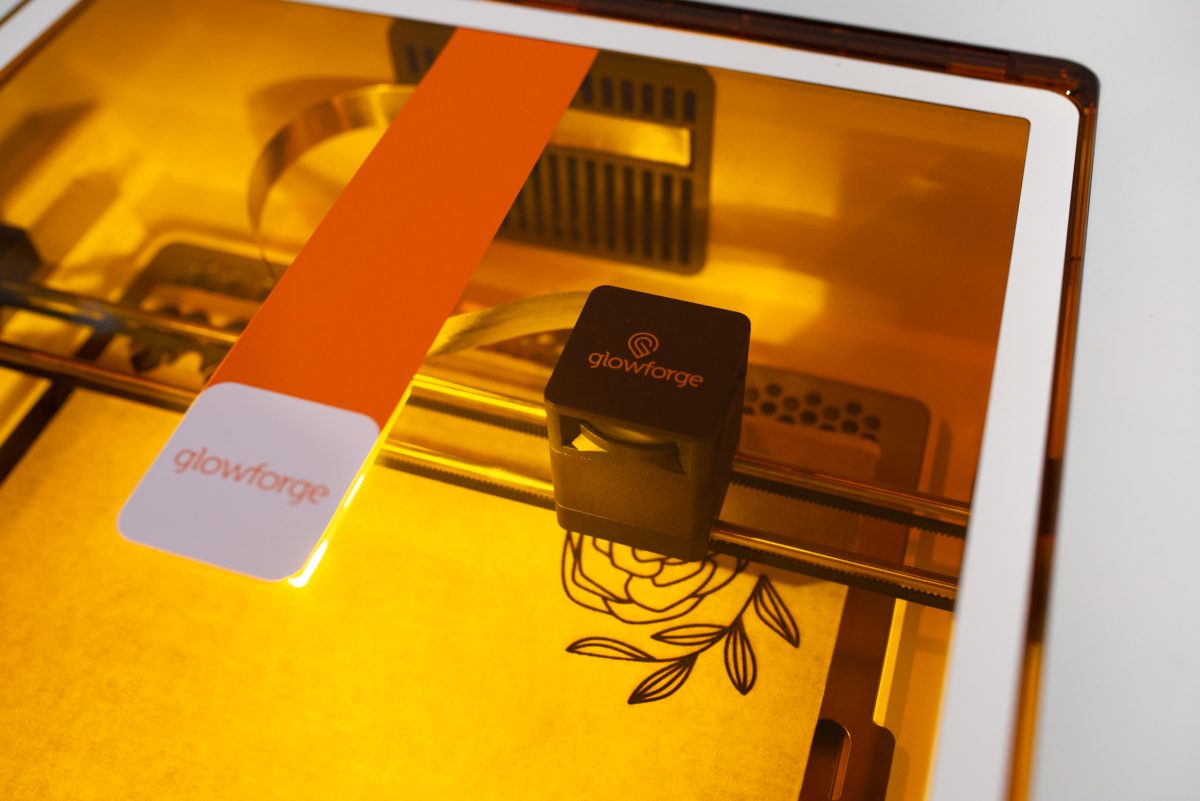
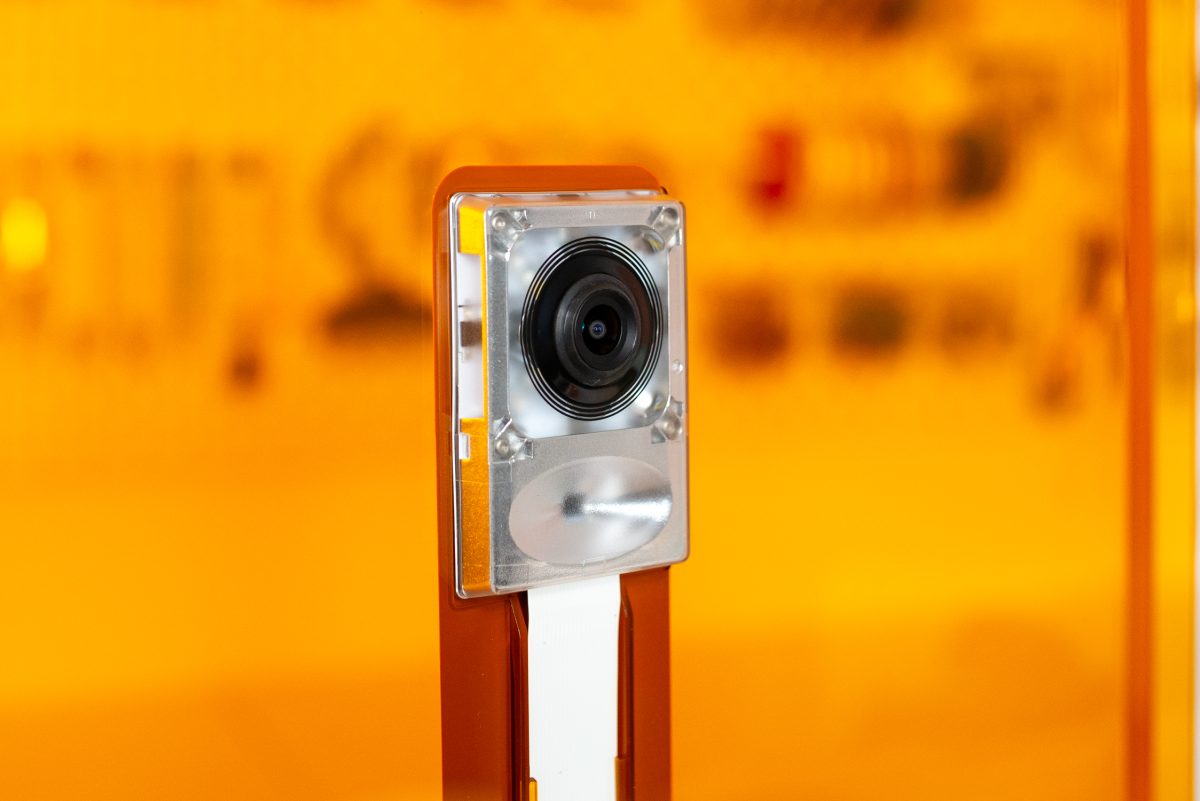
In the lid there is an 8MP camera, which takes a photo of your material before you cut it, allowing you to easily line up your materials and images before making your project.
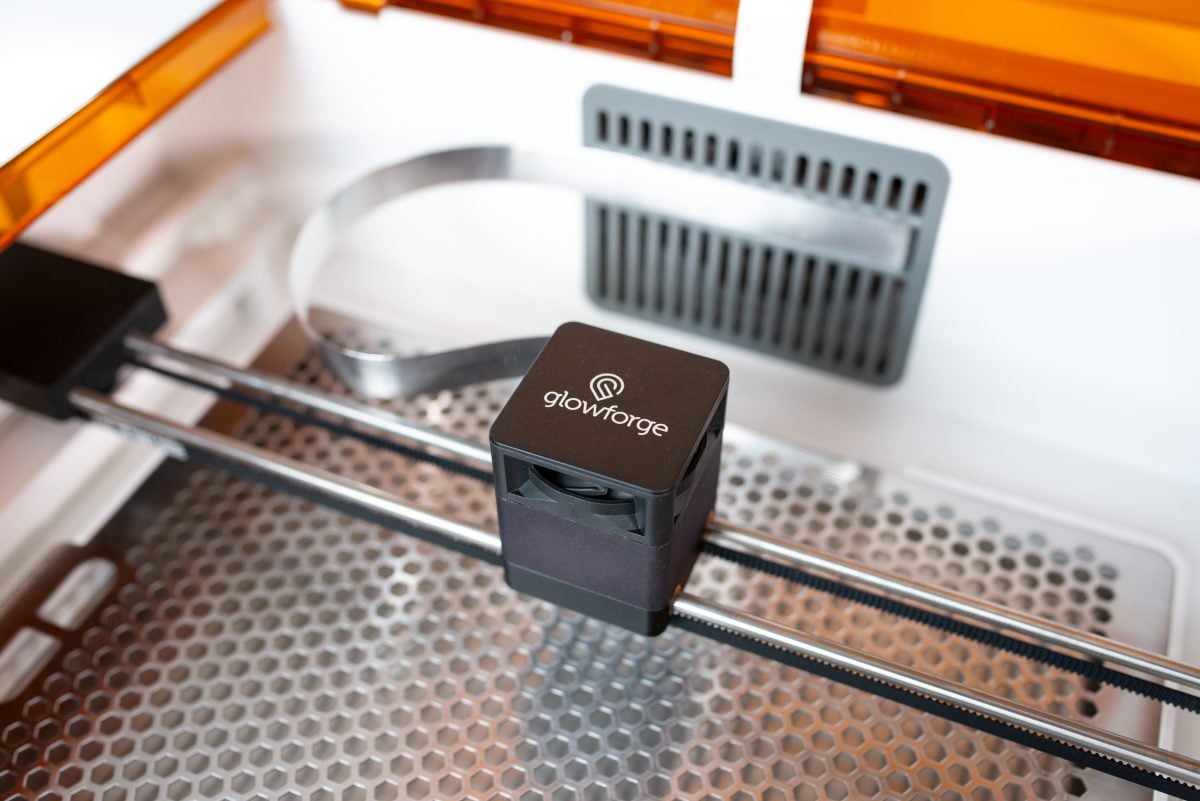
There is the laser module that sits on metal bars that span the width of the machine, and is attached to the machine by a silver ribbon cable. These metal bars move the module back and forth while it’s completing your project.
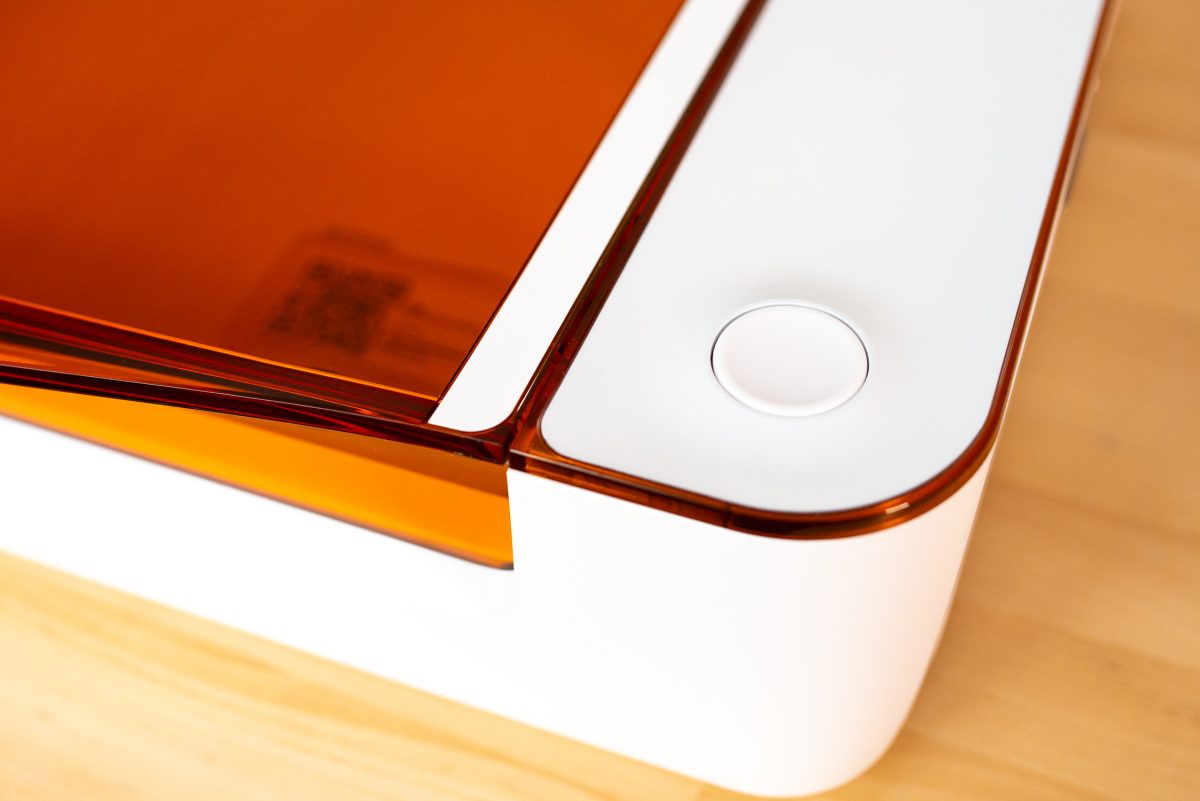
On the outside, there is a single button on the top, which you’ll press to start the machine.
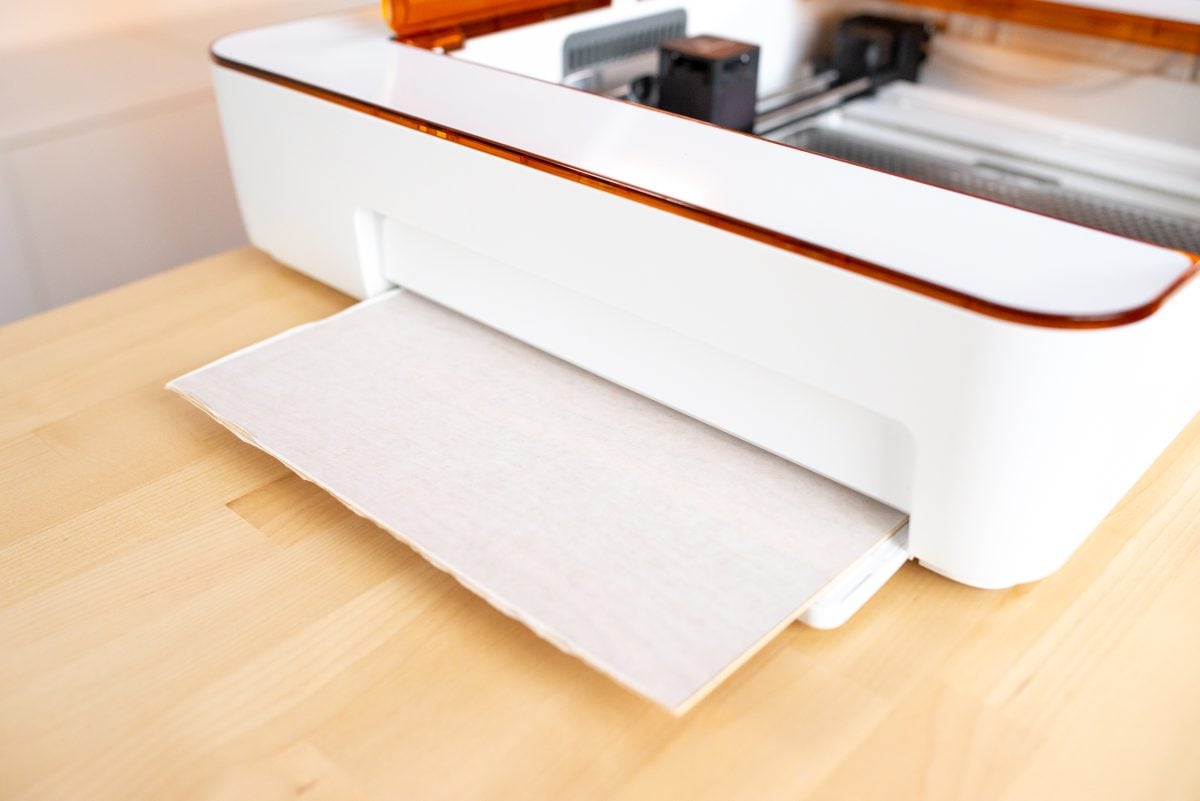
And then on both sides there are doors for the passthrough slots, which allow you to use materials larger than the bed of the machine.
Then on the back is the vent.
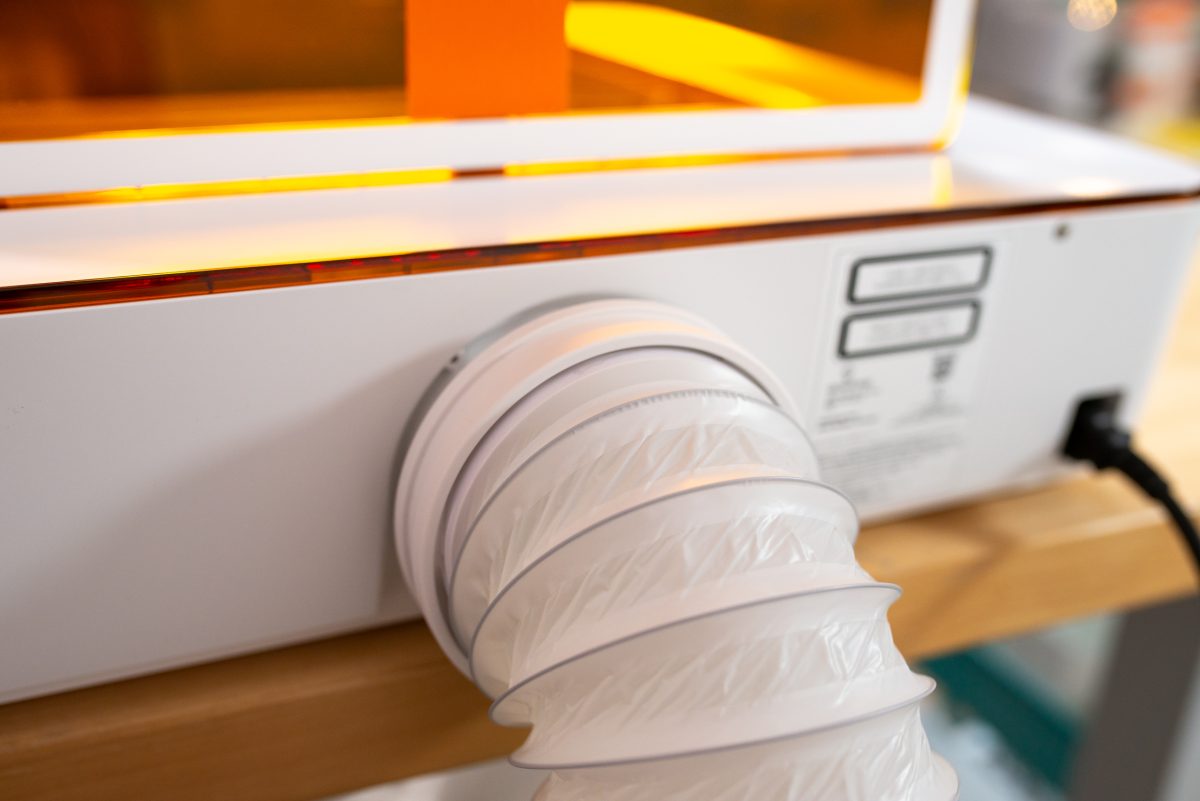
Note there is no power button on the Glowforge Aura. You just plug the machine in and it turns on. After a period of inactivity, the machine will go to sleep.
Glowforge Aura Material Sizes
Materials can be up to 12″ deep (from the front of the machine to the back). As far as width goes, you can use any width using the passthrough.
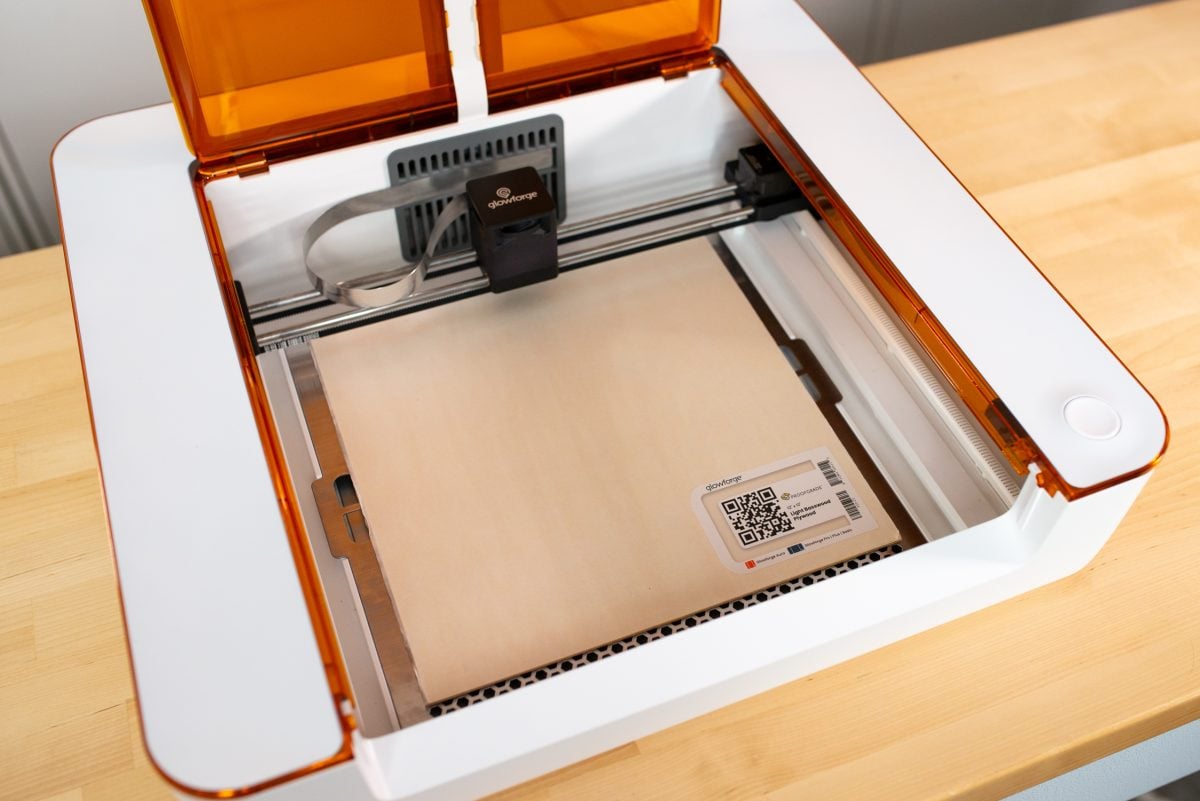
Materials can be up to 1/4″ thick when using the crumb tray, or up to 3/4″ thick if using it with the crumb tray removed (for engraving only).
How Loud is the Aura?
The Aura does makes some sound while running, but’s actually the filter that’s louder, pulling all of the fumes and soot into the bin. It’s nice, however, that the air filter turns off automatically when your project is finished, so it’s not running when you don’t need it.
Glowforge Aura Materials
Proofgrade Materials
At launch, Glowforge has quite a few “proofgrade” materials available. Proofgrade materials have been tested with the Aura and have presets within the Glowforge app. They are particularly great for beginners or for users that don’t want to spend time figuring out their settings manually.
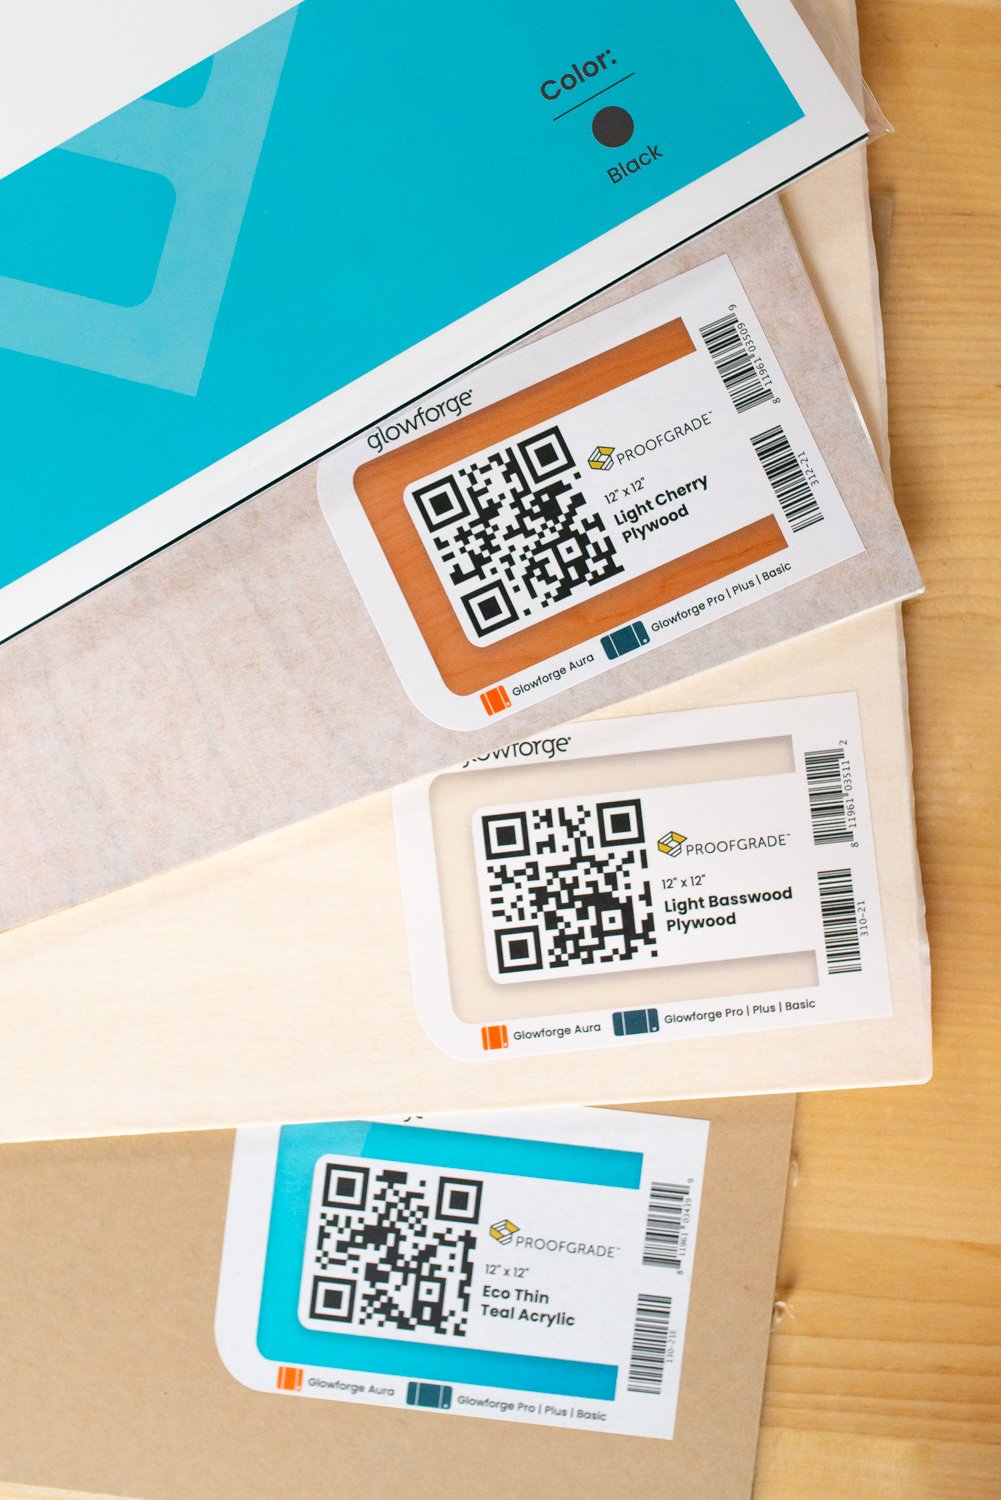
Here’s what I received and I’ve tested (I’m sure there will be more released soon as well!):
- Light walnut, basswood, cherry, and maple plywood
- Medium walnut and basswood plywood
- Walnut, cherry, and maple veneer
- Thin acrylic in red, orange, green, teal, purple, and black
- Glowforge iron-on in a variety of colors (see my note below on cutting iron-on)
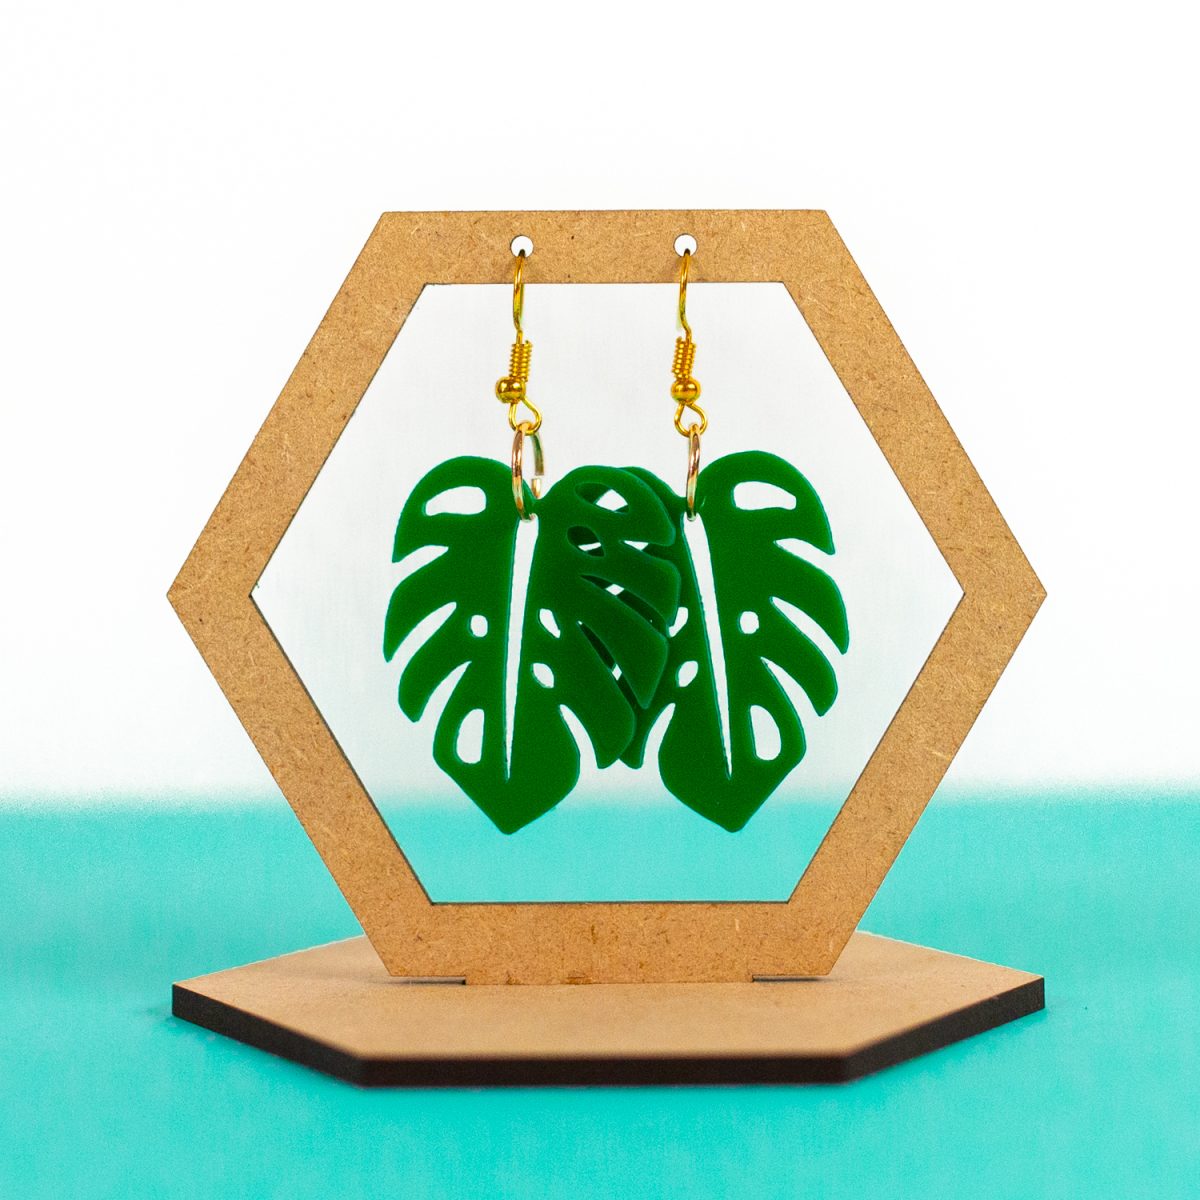
All of these materials cut really nicely with the settings in the Glowforge app.
Non-Proofgrade Materials
Of course you may want to use other non-proofgrade materials in your Aura. I tried a handful of materials and was able to make some of them work. For instance I had a darker, medium teal acrylic that I was able to cut at 10 speed / 10 power / 6 passes. But this took some testing and it was a lot of passes so it’s not quite as clean as some of the other materials I cut, and I wasn’t able to do the intricate holes on the earrings I was cutting below.
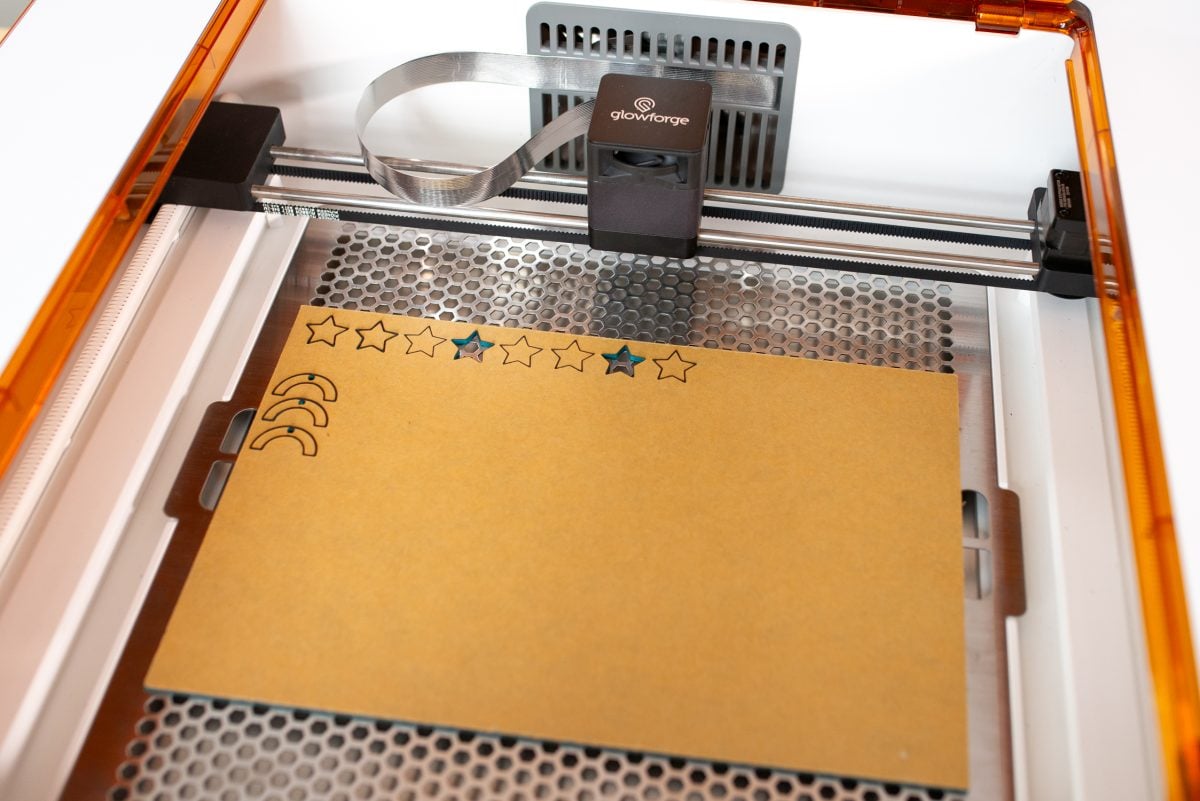
So you can definitely test materials as long as they are laser-safe. If your cut isn’t going all the way through or your engraving isn’t as deep as you’d like, use more power and/or a slower speed. Then track all of your progress in a notebook or spreadsheet. I have a post coming soon all about testing your materials.
Materials it Won’t Cut
IMPORTANT: Because you can cut Glowforge’s HTV in the Aura, you may think you’d be able to cut other types of HTV or vinyl as well. But do NOT use these types of products unless they come from Glowforge. Their products are vinyl-free, but anything with vinyl will ruin your Glowforge and cause toxic fumes. You should never cut any plastic products in a laser machine.
Additionally, at this time, the Glowforge Aura can’t cut clear acrylic and other lighter colored acrylic. I know this is a bummer since clear is a very popular material. I do know there are some hacks out there to engrave it (not cut it), but I haven’t tried them. If you have, I’d love to hear how they went for you!
See my post How to Cut Acrylic with a Diode Laser for more information.
Masking Your Materials
A mask is basically a layer of sticky material (often wide rolls of masking tape) that helps prevent burn or char marks on your projects. Glowforge proofgrade materials come pre-masked.
Because the diode laser has so much less power, there may be materials that do not require masking. Again, it’s something you can test!
Speaking of testing…
Test, Test, Test
If you’re going to use non-proofgrade materials, know that it will require testing. This is the same as with so many types of machine crafts these days, from laser cutting to sublimation printing. There are no settings that will work in 100% of the cases. So you’ll have to test. It will cost you time and materials, so you have to decide if that’s worth it for you.
My suggestion is using a simple shape to test, like 1″ stars. Start with the recommended cut settings and go from there. Then once you have that dialed in, try your more complex project.
Users are testing new materials all the time—I suggest checking out the Glowforge Community forums if your curious about cutting and engraving results! I have found them incredibly helpful as I’ve gotten started to find perfect settings and help troubleshooting. People in the forums are always willing to provide fast answers to your questions!
Then, when you find settings that work, write them down. That way you won’t have to spend so much time and materials testing when you use the same material in the future.
Glowforge App Overview
You’ll need to download the Glowforge App (which is a desktop or mobile app), which is Glowforge’s graphic design software. You need the internet to access it. I’m going to do a more detailed post on using this software soon, because there’s a lot to cover.
The software is very basic but it gets the job done. More than likely, you won’t be doing heavy design work within the Glowforge app. It’s more to either cut simple shapes or text, or to upload designs you’ve made or purchased elsewhere. I highly recommend Adobe Illustrator if you are looking for a robust design program that can create the types of files that work best in a Glowforge.
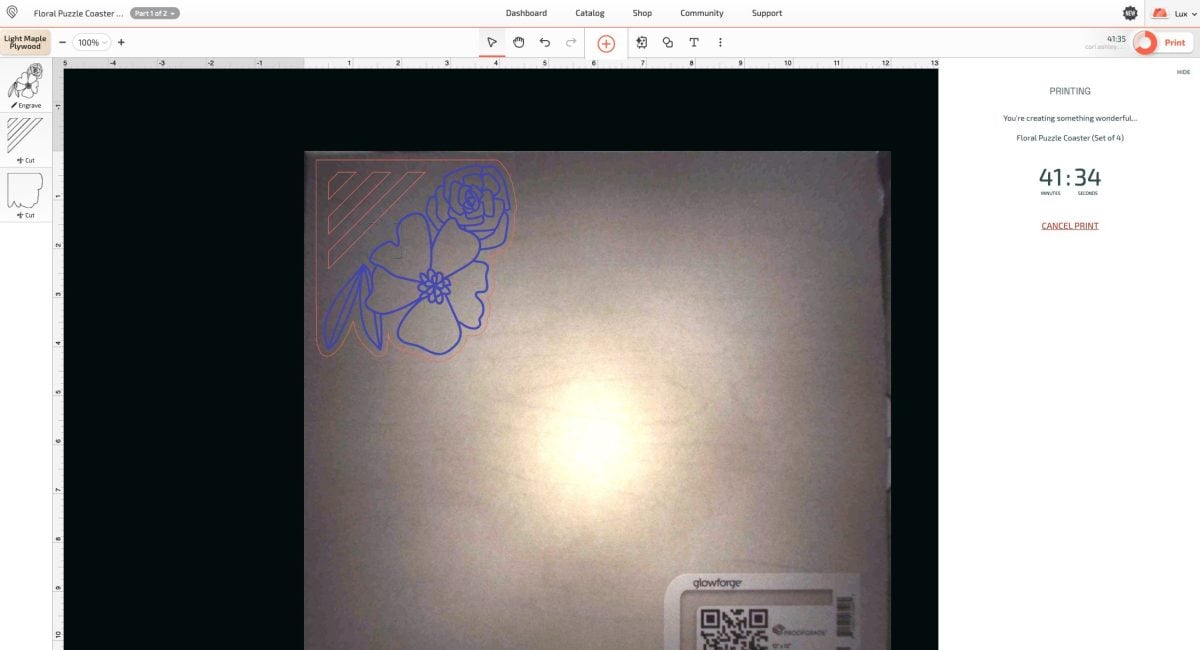
Create or upload a project. Then, select each part of your project and change each of the contours (the outlines) to score, engrave, or cut.
- Scoring: a single line of engraving, good for creating outlines for painting or assembling or for decorative outlines
- Engraving: an entire field of engraving, like a photo, logos, text, or other image.
- Cutting: cutting all the way through the material.
Insert your material into the bed of the machine and rearrange your images so they fit on your material. Like I said, Glowforge has built-in settings for proofgrade materials, but if you’re using a non-proofgrade material you can play around with the power, speed, and number of passes in the sidebar on the left.
When you go to make your project, click Print in the top right and the app will process your file and give you a cut time. Press the glowing teal button on your machine to make your project!
Pros and Cons for the Glowforge Aura
There’s been a lot in this post, so I thought I’d talk about some of the pros and cons of the Glowforge Aura so you can weigh whether or not this is a good purchase for you.
Pros
- More affordable than a CO2 laser
- Nice size for hobbyists and crafters
- Small learning curve and easy to use
- Proofgrade materials make dialing in settings easy
- Machine stops when lid is open
- Passthrough allows for wider materials
- Light and easy to move around
Cons
- Slower cut and engrave speed than a CO2 laser
- Less precision than a CO2 laser
- Can’t cut all acrylic colors or thicker materials
- Base is not removable for larger projects
- Limited number of proofgrade materials

Machine Comparisons
Glowforge Aura vs Glowforge Basic/Plus/Pro
Here are some basic differences between the Glowforge Aura and Glowforge’s other flagship machines. There are some big differences here.
- Power: the Aura is only 6W while the larger Glowforge machines start at 40W.
- Speed: The Aura is much slower than the other Glowforge machines and often requires more passes.
- Volume: both machines are on the loud side, but the Aura is not as loud as the other machines.
- Size: The Aura is much smaller and lighter.
- Precision: Because the larger Glowforge machines have more power, they can be more precise than the Glowforge Aura because they require fewer passes to engrave or cut.
- Materials: The Aura has a more limited number of materials than the larger Glowforge machines, but both machines have proofgrade materials available.
- Project Size: the Aura is limited to 12″ from front to back though you can use longer materials using the passthrough. The other Glowforge machines are limited to 11″ x 19″ in the bed though you can use longer materials using the passthrough if you have a Glowforge pro.
- Price: The Aura is only $1200 whereas the larger machines start around $5000.
Glowforge Aura vs xTool M1
Here are some basic differences between the Glowforge Aura and the xTool M1 other flagship machines. The differences here are much smaller, so definitely read up on both machines to decide what’s best for you.
- Power: the Aura is 6W while xTool comes in 10W and 5W.
- Speed: Both of the machines have a similar speed.
- Volume: The Aura is louder than the xTool M1.
- Size: The footprint is similar (the xTool M1 is a few inches less deep), but the xTool is taller by several inches, and even more if you add the riser base.
- Precision: Even though these two machines are similar in power, I think the Glowforge Aura is more precise than the xTool M1. I found that the edges of my cuts, particularly in acrylic, are smoother with the Aura than with the M1.
- Materials: The machines can cut similar materials, but having the Glowforge proofgrade settings dialed in is particularly helpful with the Aura. xTool has qualified materials but I find they require more testing.
- Other: The xTool M1 has a blade for cutting materials on a mat. The Aura, however, can cut many of those materials with a laser.
- Project Size: the Aura is limited to 12″ from front to back though you can use longer materials using the passthrough. The xTool M1 is limited to 12″ x 15″ in the bed and there is no passthrough. You can, however, remove the base to engrave thicker projects (like water bottles or wood boxes), which you cannot do on the Aura.
- Price: The price of the machines is similar.
Glowforge Aura vs. Cricut or Other Cutting Machine
The Glowforge Aura is very different than an electronic cutting machine, but there are some similarities so let’s look at those here.
- Power: Power is not really applicable to a cutting machine. Some machines offer more force than others (like Cricut Maker vs. a Cricut Joy), but it doesn’t have a wattage in the same way as a cutting machine.
- Speed: Depending on your material, either could be faster. A Cricut will cut iron on faster, for instance, but an Aura will cut wood faster.
- Volume: The Aura is significantly louder than most Cricut machines, though Cricut Venture is also louder than the other Cricut machines because of its vacuum sealing feature.
- Size: The Aura is larger back to front than all Cricut machines. It’s about the same width as most Cricut machines, except Cricut Venture which is twice as wide as the Aura.
- Precision: This is a hard one because the processes are so different. Aura is pretty accurate when it comes to cutting and engraving, but the flagship Glowforge machines are even more so. A Cricut is very precise at cutting intricate designs.
- Materials: There is some overlap on materials between the two machines, including iron on and cardstock. But there are things you can cut on an Aura that you can’t cut on a Cricut (acrylic, thicker wood, etc.) and things you can cut on a Cricut but not on an Aura (a wide variety of vinyl and vinyl-based HTV, bonded fabric, craft foam, etc.)
- Project Size: Sizes are all over the place. The Aura is limited to 12″ from front to back though you can use longer materials using the passthrough. But depending on which Cricut you have, you can cut things like vinyl and iron on at 24″ x 75′ (that’s on Cricut Venture). This one is a tough comparison.
- Price: The Aura is 1200, which is close to being comparable to Cricut Venture with its docking stand. Other Cricut machines are much less expensive, closer to $400 and as cheap as $150 for Cricut Joy.
Is a Glowforge Aura worth it?

So far, it’s a yes from me! While it isn’t as powerful as my larger Glowforge Pro, I do think this is a great entry machine that is way more accessible in price and size for many crafters. I found it easy to use and because Glowforge has their settings dialed in, I spent a lot less time testing than I did with my xTool M1.
Have any questions about the Glowforge Aura or other laser machines? I’d be happy to answer them!


Comments & Reviews
Katie says
“You should never cut any plastic products in a laser machine.” Acrylic is a plastic product. There are many, many laser-safe plastic products that we can cut and engrave in a Glowforge. Using the term “plastic” as a blanket term to avoid is confusing for new users and causes unnecessary panic. It’s like making a statement about all dogs vs. a specific breed. Yes, absolutely avoid vinyl. But “plastic” is nothing to be afraid of.