No glue is necessary with Cricut’s Adhesive Backed Paper! Here’s how to cut Adhesive Backed Paper using your Cricut Joy—and it works with Cricut Explore and Cricut Maker, too!

With the launch of Cricut Joy, Cricut also launched a handful of new materials. One of these new materials, Adhesive Backed Paper, is not just for Cricut Joy—it can be used in any Cricut machine!
Just getting your Cricut Joy out of the box? Check out my Ultimate Guide to Cricut Joy! Also check out these other Cricut Joy posts if you’re curious about Cricut’s tiniest cutting machine!
- What is Cricut Joy and What Can It Do?
- How to Cut Cards with Cricut Joy Card Mat
- Matless Cutting with Cricut Joy
- Writable Labels with Cricut Joy
- 5 Ways to Make Labels with Cricut Joy
- Cutting Adhesive Paper with Cricut Joy
- Must-Have Cricut Joy Accessories
Now let’s take a look at this fun new material and then make a set of party pennants!
What is Adhesive Backed Paper?
Adhesive Backed Paper is basically sticker paper. You cut your shape and peel it off the backing paper like a sticker—no glue required (can I get a “woo!”). It comes in a range of patterns and colors. There are even solid versions that you can easily write on using the Cricut pen.
What Can I Make With Adhesive Backed Paper?
Here are a few ideas for using this material:
How to Use Adhesive Backed Paper
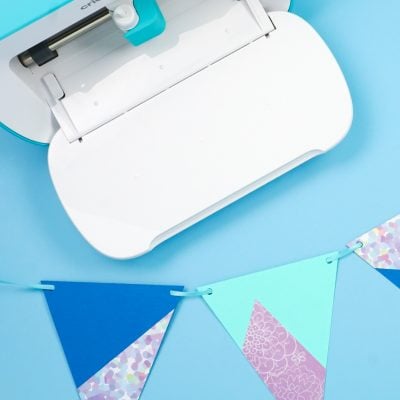
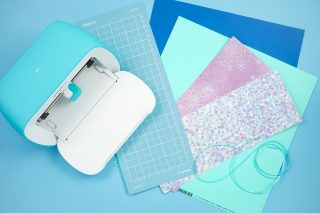
To show how it works, I’m going to pair this sticky paper with regular cardstock to make fun set of party pennants! Here’s what you’ll need.
Party Pennants Supplies

- Cricut Joy or other Cricut machine
- Cricut Adhesive Backed Paper
- Coordinating cardstock
- Ribbon
- Cricut Design Space project
Party Pennants Instructions
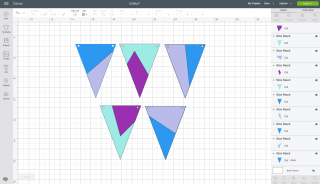
Open Cricut Design Space and navigate to the party pennant file I’ve designed for you.

If you’d like, recolor the project. I’m using my fabulous friend Jen Goode‘s Adhesive Backed Paper collection. I always love when my friends do amazing things (and Jen is always doing amazing things!).
I used two different shades of purple in the Cricut Design Space image to stand in for the patterned paper.
Once you’ve got your file ready to go, hit Make It in the upper right. You’ll be asked to choose a type of mat—both cardstock and adhesive-backed paper require a Cricut Mat, so choose On Mat. I have the longer 4.5″ x 12″ mat, but this project will also fit on the smaller 4.5″ x 6″ mat that comes with Cricut Joy. You can also cut these on a Cricut Explore or Maker!
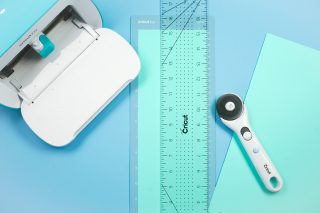
To fit my cardstock on my sheet, I find a quick way to trim it down is to stick it to the mat and then use my rotary cutter and acrylic ruler to cut it straight down the edge of the mat surface.

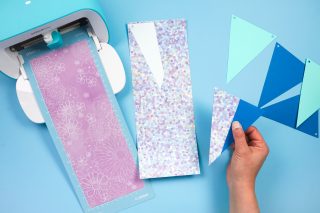
Choose Medium Cardstock as your material and Design Space will prompt you to insert your mat. Click Go and it will cut your pennants! Continue with the other pennant mats and the adhesive paper (place it grid-side down on the mat), making sure to change your material type before cutting the adhesive paper.
Once you’re done, simply pick up the adhesive-backed paper pieces and apply them to your pennants like a sticker!

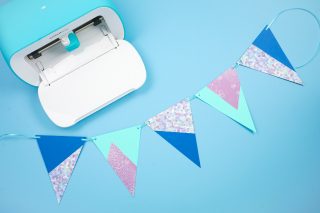
Then string together with ribbon, using the pre-cut holes in the pennants. Super easy! You can make a bunch of these paper pennants using all sorts of colors and patterns for any party you might have!

What will you make with this fun sticky-backed paper and your Cricut?

Get a Cricut Joy on Amazon
HOW TO CUT ADHESIVE BACKED PAPER WITH YOUR CRICUT
Equipment
- Cricut Joy or other Cricut machine
Instructions
- How to Use Adhesive Backed PaperTo show how it works we're going to pair this sticky paper with regular cardstock to make fun set of party pennants!

- Open Cricut Design Space and navigate to the party pennant file.If you'd like, recolor the project. Here, two different shades of purple were used in the Cricut Design Space image to stand in for the patterned paper.Once you've got your file ready to go, hit Make It in the upper right. You'll be asked to choose a type of mat—both cardstock and adhesive-backed paper require a Cricut Mat, so choose On Mat.

- To fit the cardstock on the sheet, trim it down to stick to the mat and then use a rotary cutter and acrylic ruler to cut it straight down the edge of the mat surface.

- Choose Medium Cardstock as your material and Design Space will prompt you to insert your mat. Click Go and it will cut your pennants! Continue with the other pennant mats and the adhesive paper (place it grid-side down on the mat), making sure to change your material type before cutting the adhesive paper.Once you're done, simply pick up the adhesive-backed paper pieces and apply them to your pennants like a sticker!

- Then string together with ribbon, using the pre-cut holes in the pennants. Super easy! You can make a bunch of these paper pennants using all sorts of colors and patterns for any party you might have!



Comments & Reviews
selena says
do you know of a double sided adhesive sheet that has a paper backing that will stay on mat for cutting. The ones I have tries all have a slick backing material.
thanks
Cheryl Redman says
I set my Maker 2 for medium cardstock and it cut the paper layer, leaving the shiny liner intact. Great way to make bulletin board letters or components for greeting cards.
Amber says
Hey! Great info!
In design space it will tell me that my device isn’t supported. Can Cricut joy not cut everything?
Trying to cut layers and it won’t let me. Help!!!