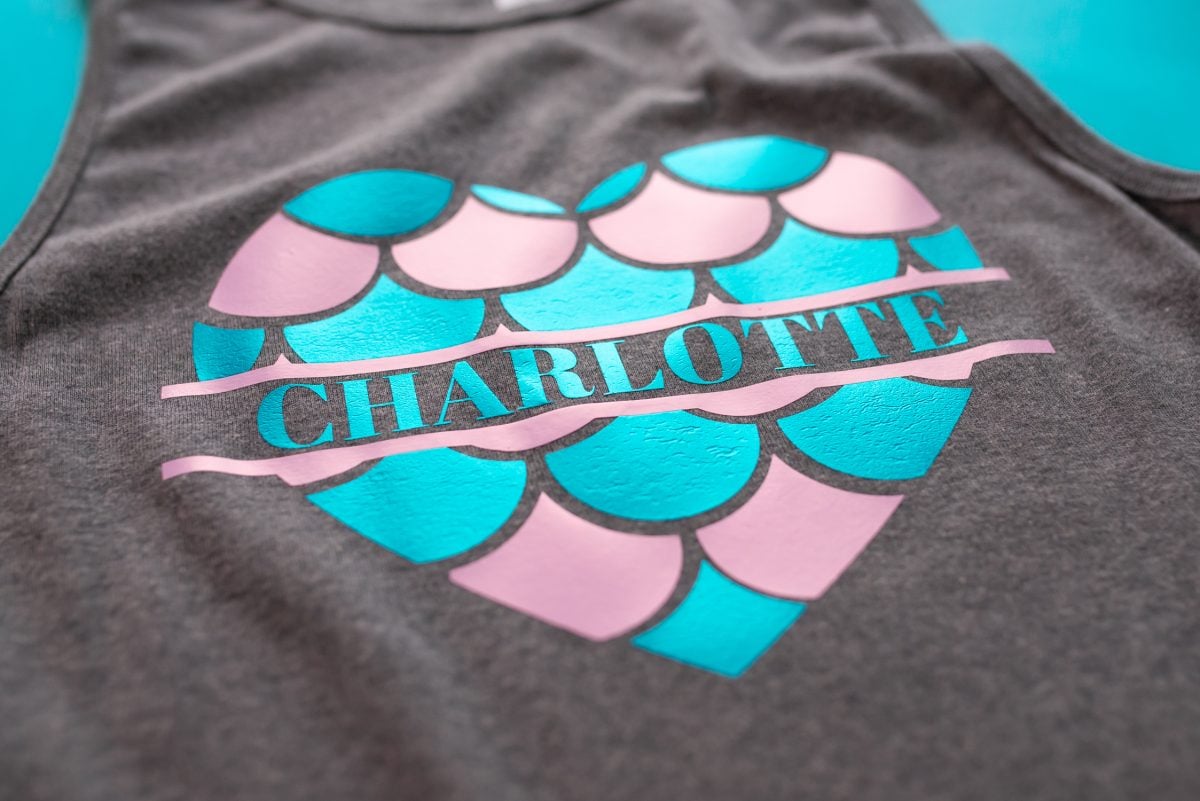
Who doesn’t love a little shimmer? Siser Electric EasyWeed is a fun way to add a bit of shine to any garment! Get the free mermaid file and make your own cute BELLA+CANVAS tank top!
This post is sponsored by my favorite apparel brand, BELLA+CANVAS.
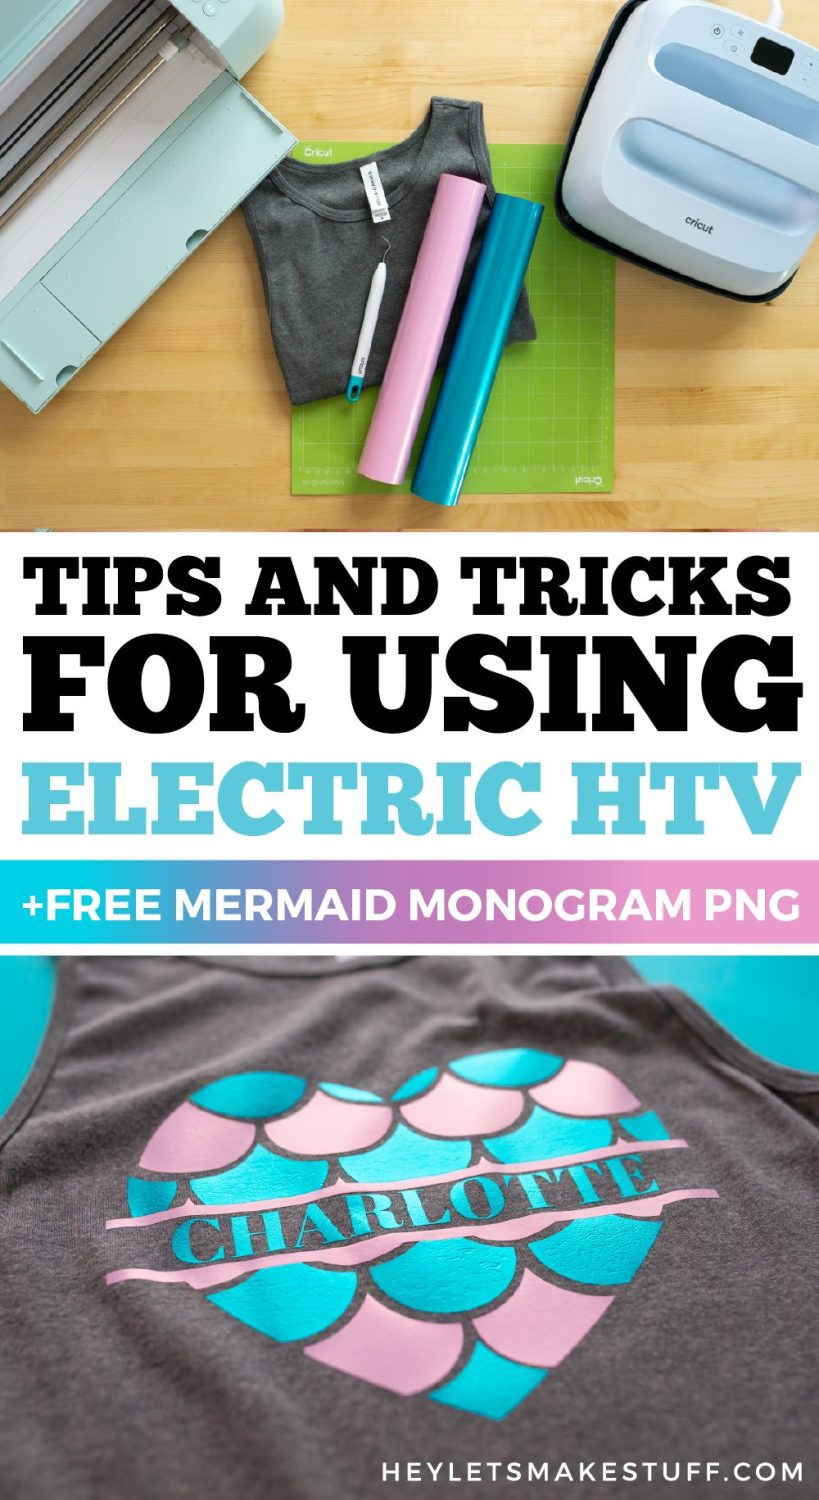
I’m always on the lookout for fun types of HTV and recently I saw this Siser Electric EasyWeed and I knew I had to try it for a project! While you can use it no matter your age, I love it for kids projects like this mermaid tank top.
I think it would also be great with theme park images, sports team shirts, and flowery cut files, since Electric EasyWeed comes in a wide array of colors from Heat Transfer Warehouse. For this project, I’m using the colors mermaid and pink!
To start, I grabbed a soft gray BELLA+CANVAS woman’s tank top for a friend’s daughter who is taller than average—I knew she’d be more comfortable in a woman’s tank. At this point I have a bin of BELLA+CANVAS tees and tanks because my whole family just loves them since they soft and fit really well. I also love that they have an eco-friendly dying process and sustainably recycle their scraps. They have more than 300 colors to choose from across their various styles, and this Electric EasyWeed POPS even on the darkest colors!
Did you know you can buy BELLA+CANVAS garments at wholesale pricing without a reseller license? Get a BELLA+CANVAS Maker’s Account! This account allows you access to the wholesale side of their business without the need for any permits or licenses. Even better? It’s free! Learn more in my post Buying Wholesale Blanks without a Resale License!
What is Siser Electric EasyWeed HTV?
Siser Electric EasyWeed HTV is the same as their regular EasyWeed, but it shimmers! It comes in a wide variety of colors and can be applied to basically any surface that works with regular HTV, including garments, wood, canvas, neoprene, and more.
Tips for Using Siser Electric EasyWeed HTV
- The process for using Electric EasyWeed is similar to other basic HTV products. Place the material with the shiny carrier sheet face-down on your mat, cut your project, weed the excess, and apply it to your project with a heat press.
- You can layer Electric EasyWeed both under other types of HTV or on top of certain types of HTV that allow you to layer on top of them, including regular HTV.
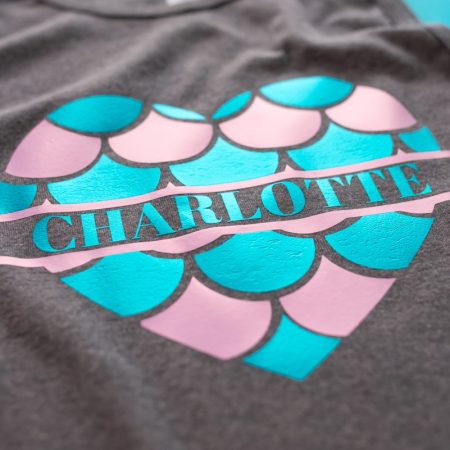
- The more times you layer, however, the more “texture” you’ll get in your bottom layers. So for instance, I did the teal first and the pink second, and the teal has a bit more texture from being pressed twice.
- I found that using a teflon sheet or other protective paper between your decal and your press helps reduce that “texture.”
- Combine Electric EasyWeed and regular HTV for an even wider range of color combinations and designs.
Electric EasyWeed Mermaid Shirt Supplies
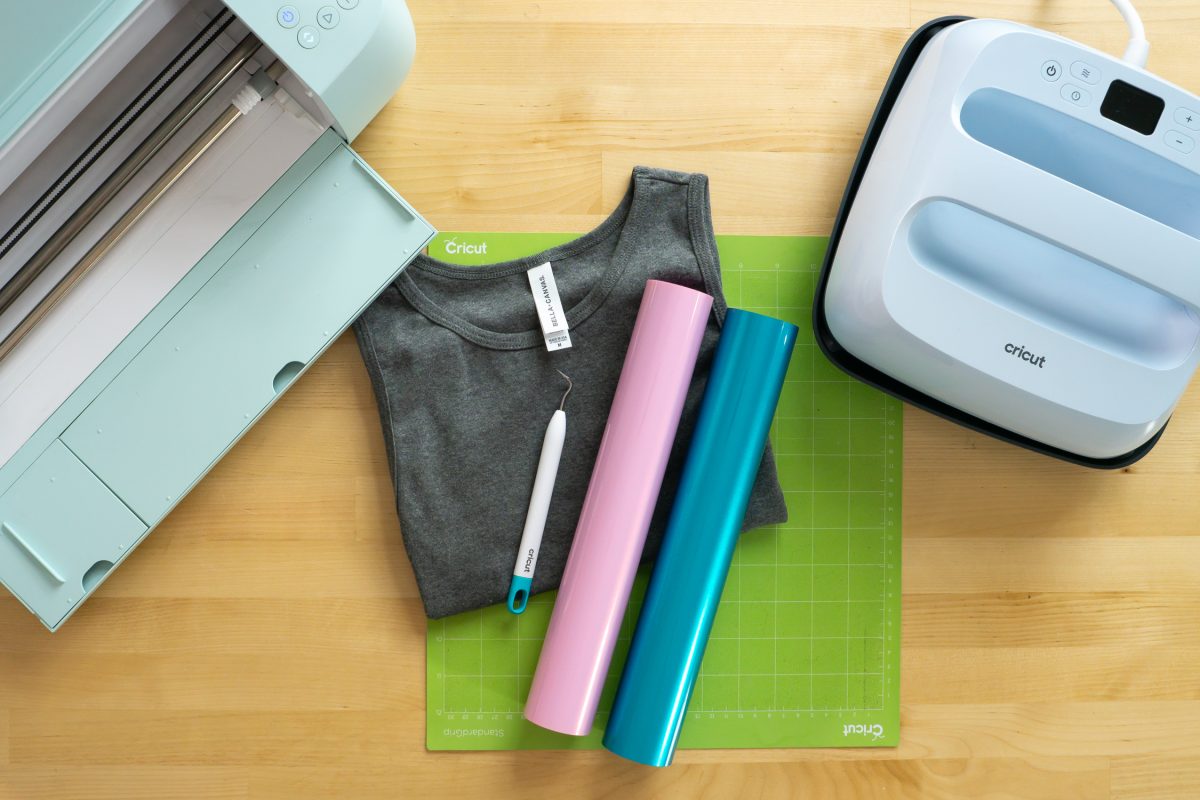
Visit my Amazon shopping list to get everything you need to make this project in one place!
- Tank top (I’m using a BELLA+CANVAS tank top)
- Cricut Maker, Cricut Explore, or Cricut Joy
- Green cutting mat
- Siser Electric EasyWeed HTV
- Cricut EasyPress or other heat press
- Teflon sheet or other protective paper
- Heat-resistant mat or EasyPress mat
- SVG file (see below)
Get the Free File
Want access to this free file? Join my FREE craft library! All you need is the password to get in, which you can get by filling out the form below. The file number is: C469.
Electric EasyWeed Mermaid Shirt Instructions
Set up the file in Cricut Design Space
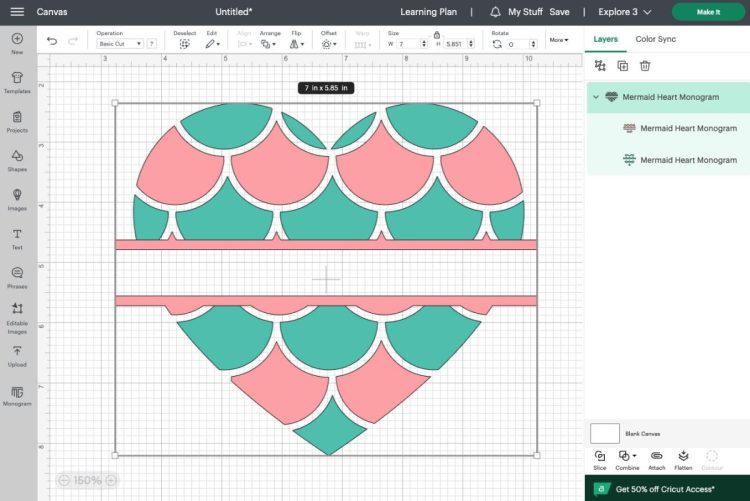
Upload the mermaid file to Cricut Design Space (see my post How to Upload SVG Files to Cricut Design Space for more information). The monogram will be very large. Resize your SVG to fit your shirt.
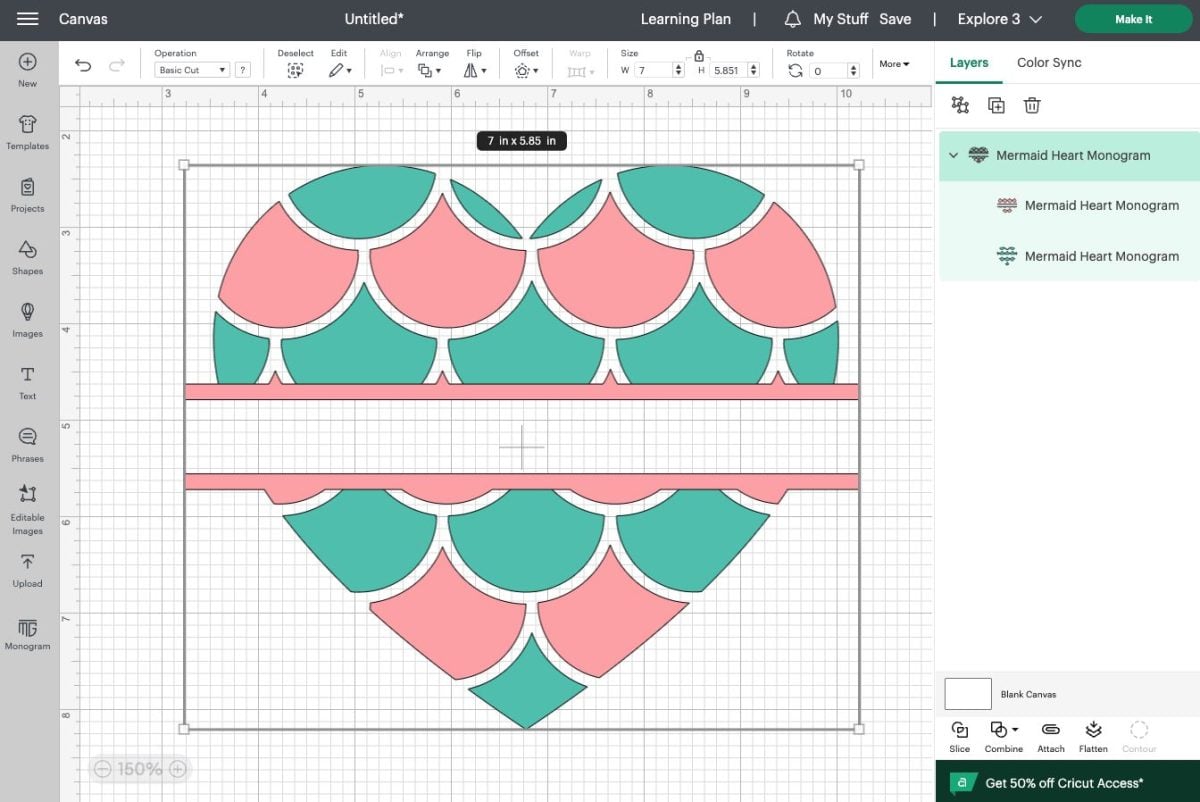
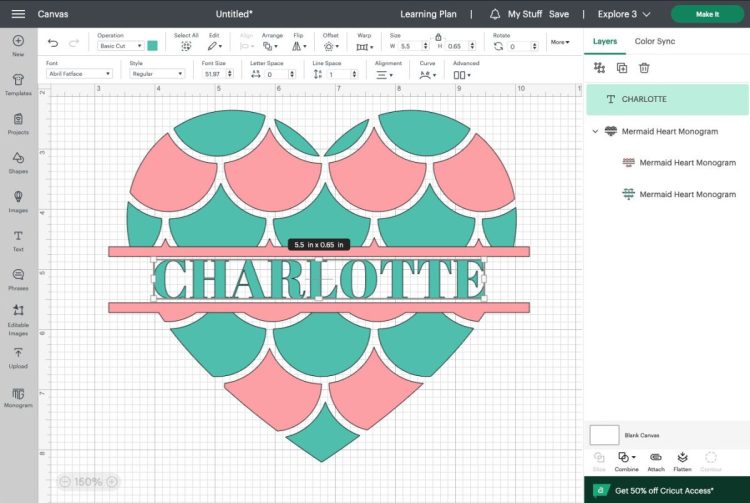
Use the text tool to add a name to your shirt. I’m using the font Abril Fatface.
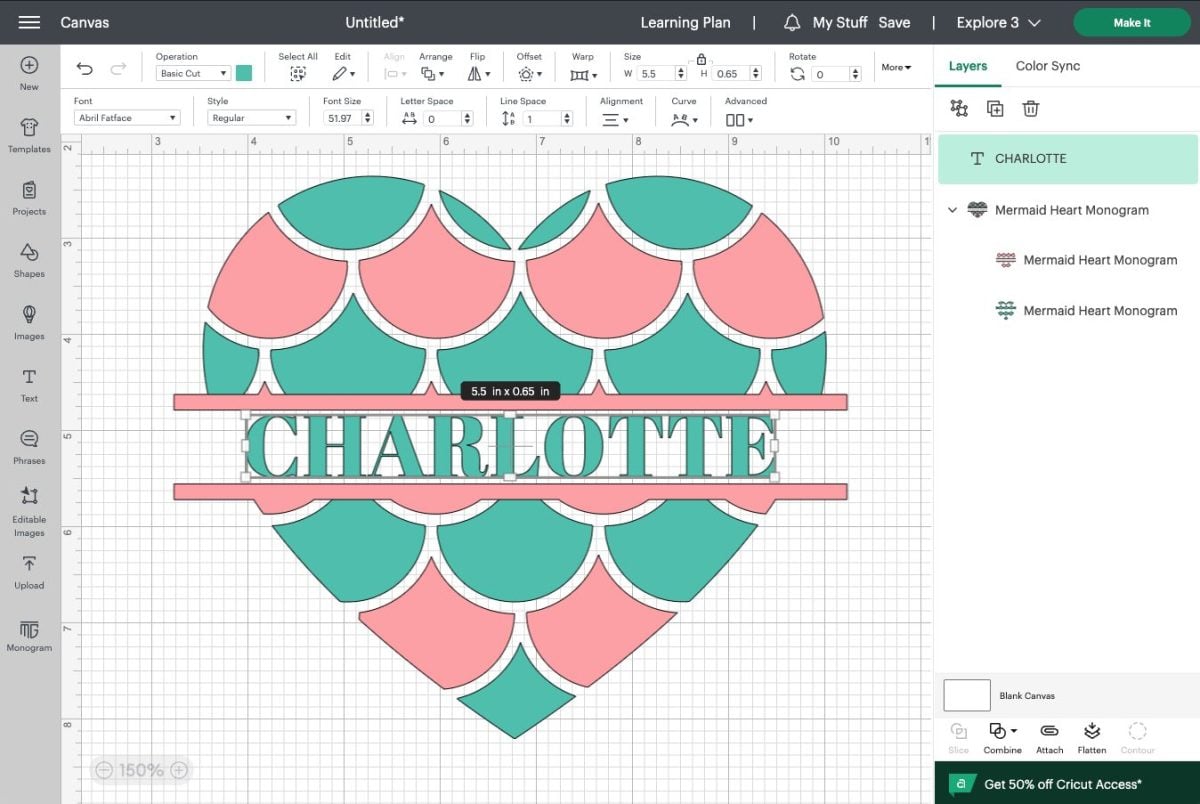
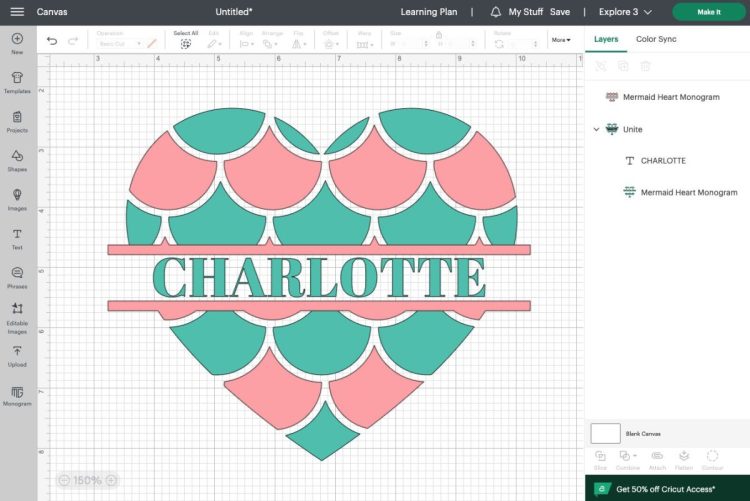
To make assembling your project easier, select the name and the teal layer and click Combine > Unite so they will cut as a single piece. You can see in the Layers Panel on the left that the name and the teal layer are under a single Unite heading.
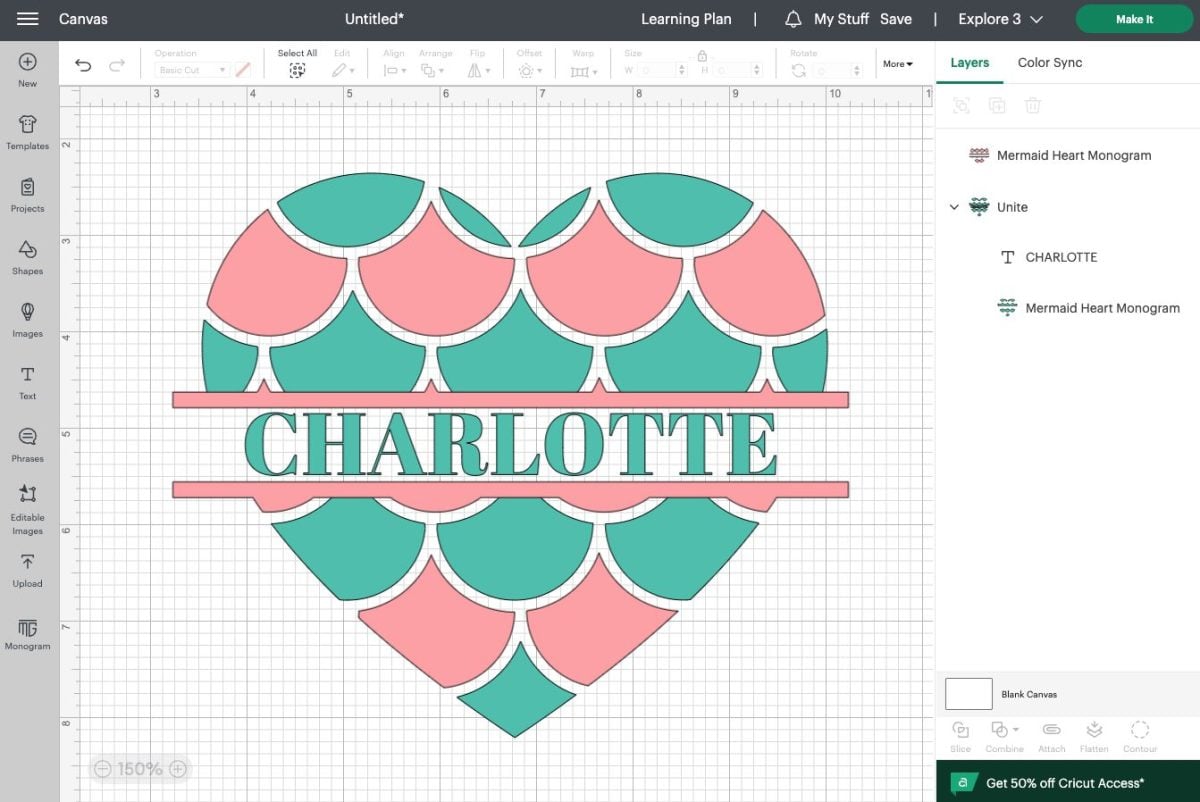
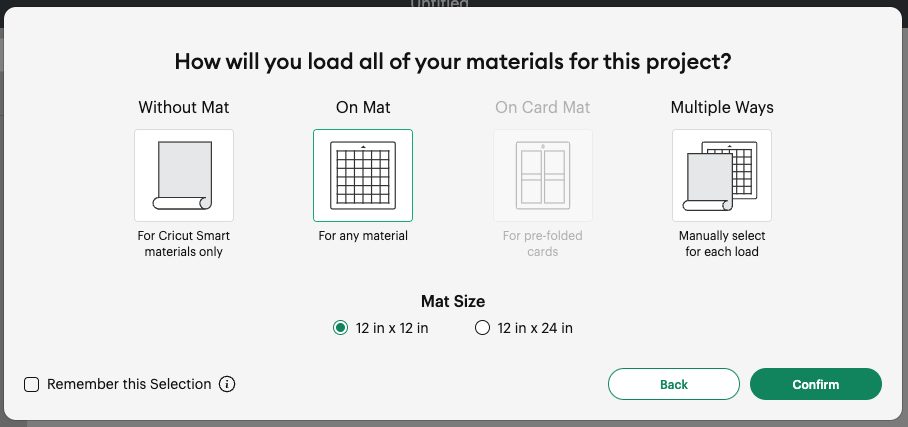
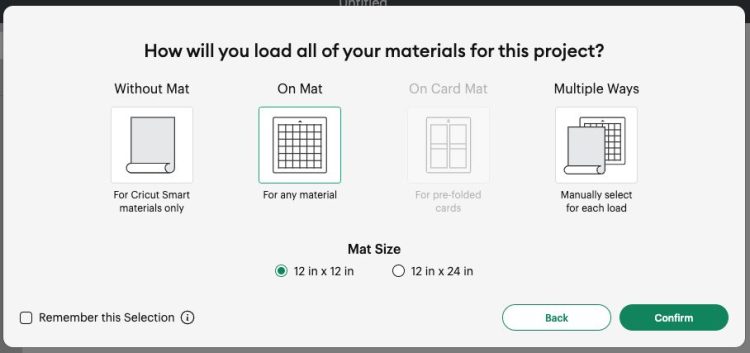
Then hit Make It in the upper right to make your project. You’ll first be asked how you want to load your material. In this case, we’ll be putting it on a Cricut mat, so choose On Mat.
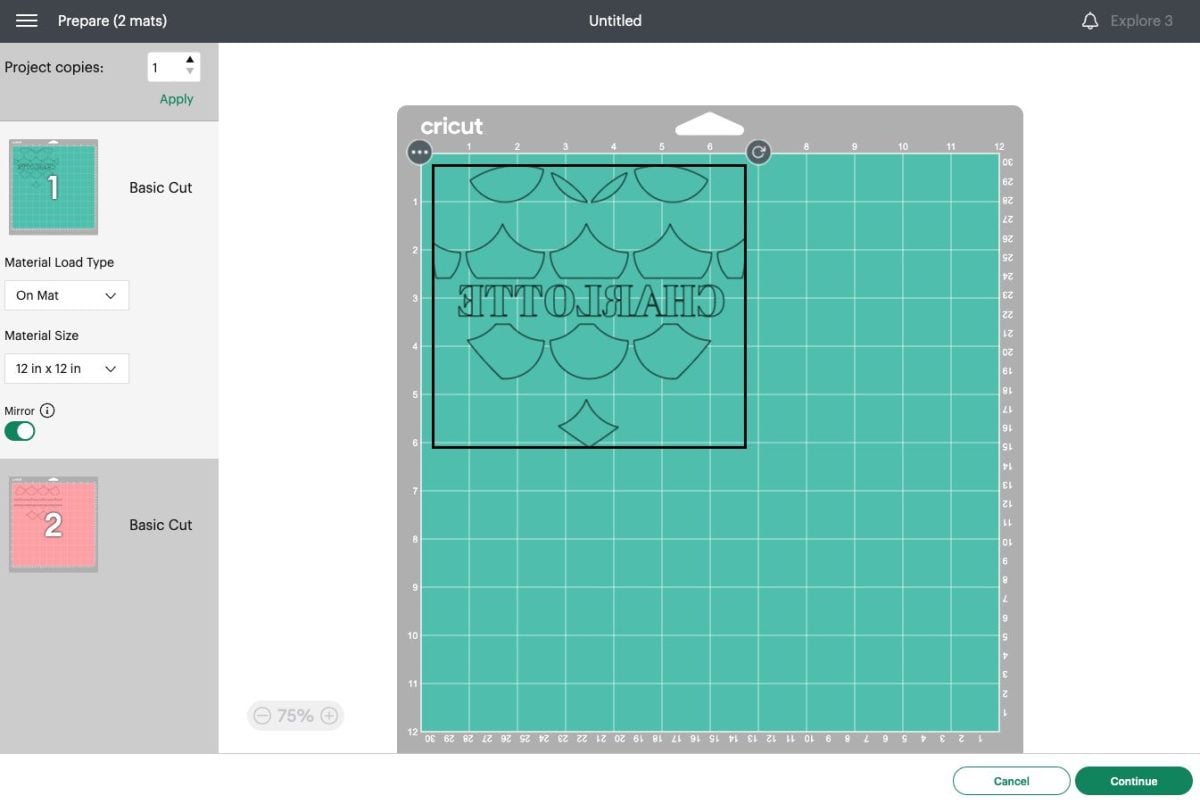
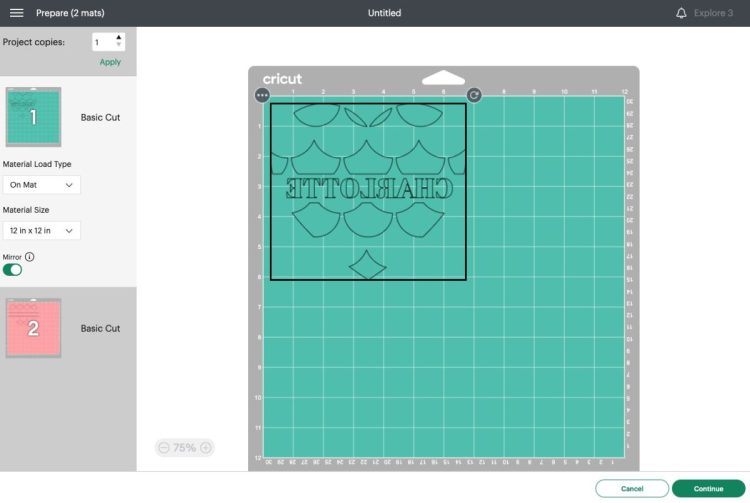
Cricut Design Space will lay out all of your mermaid pieces on the mats. Important: for each layer, click the mirror slider.
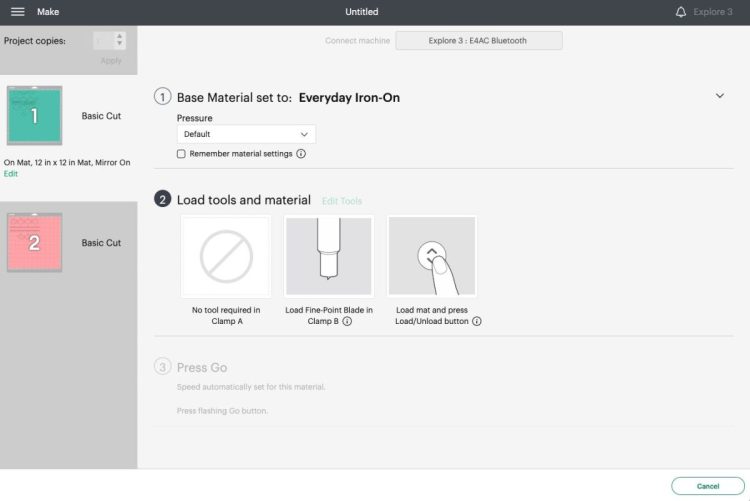
Click Continue. In the Make Screen, choose Everyday Iron On for your material cut settings.
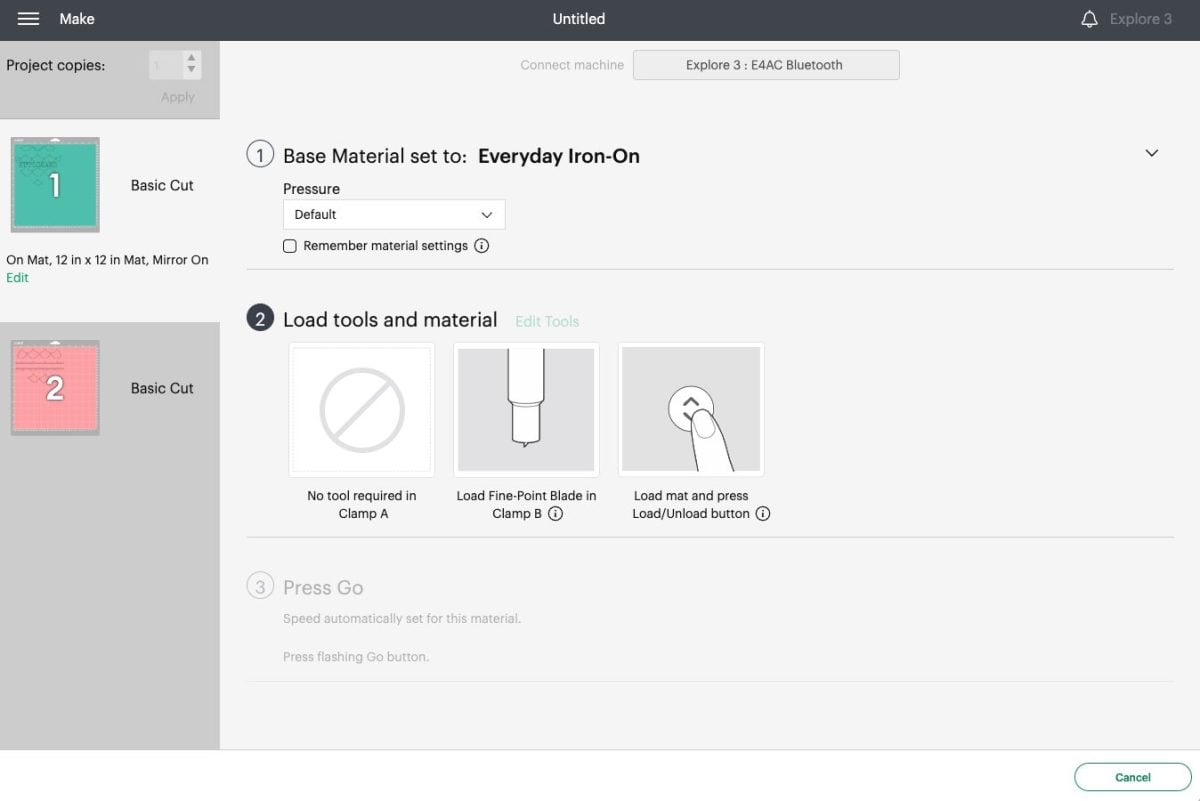
Cut Your Mermaid Monogram
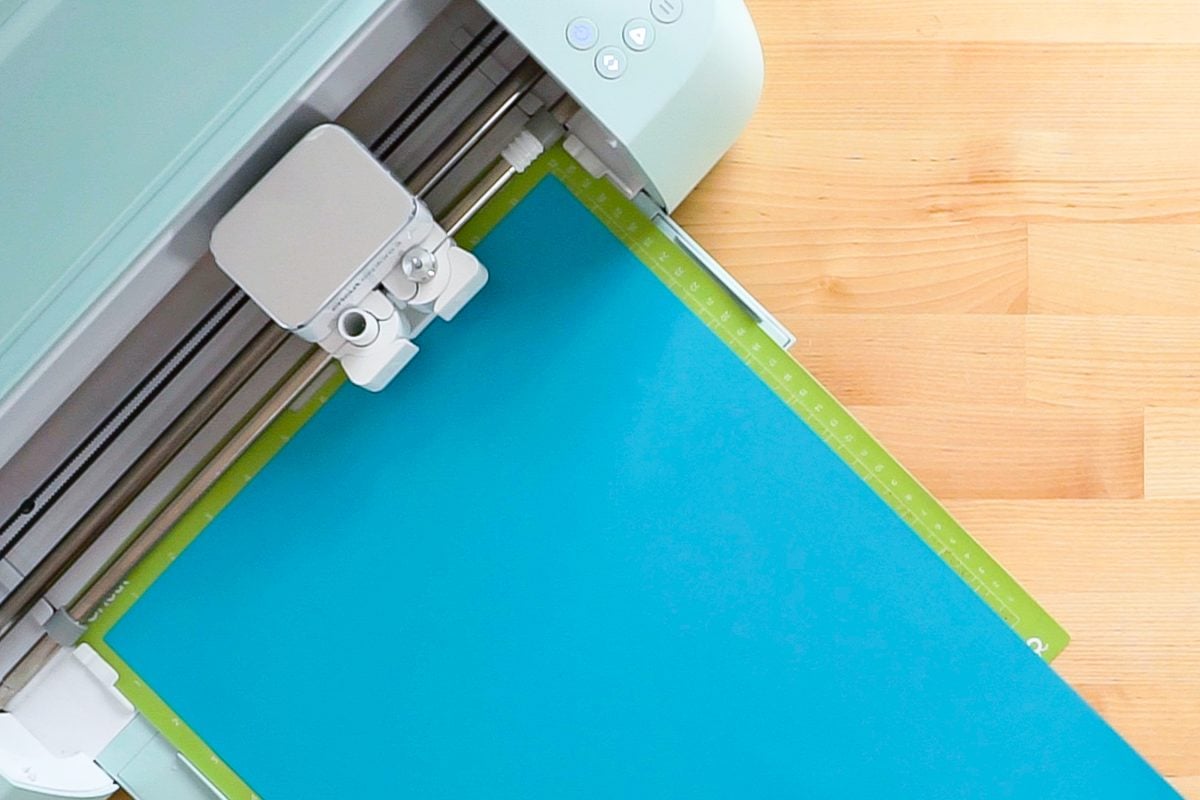
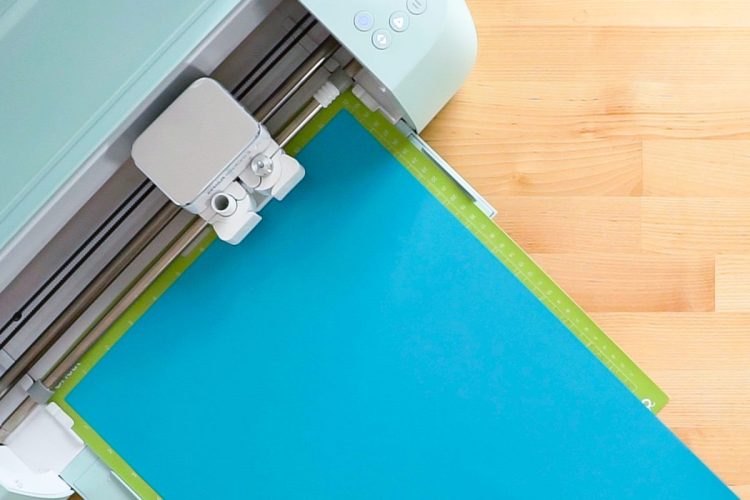
Place your material on your mat with the shiny carrier sheet side down.
Place your mat into your machine and press the blinking Go button. Your Cricut will cut your mermaid pieces.
Weed Your Mermaid Monogram
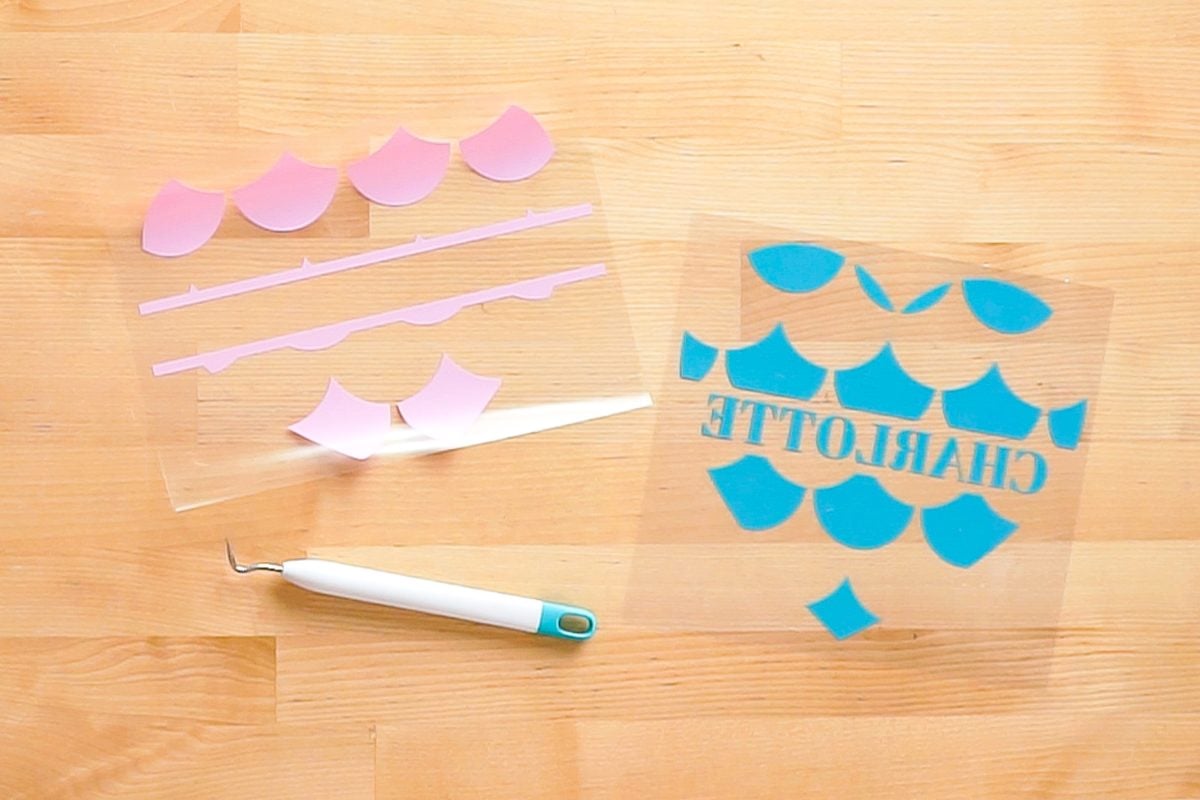
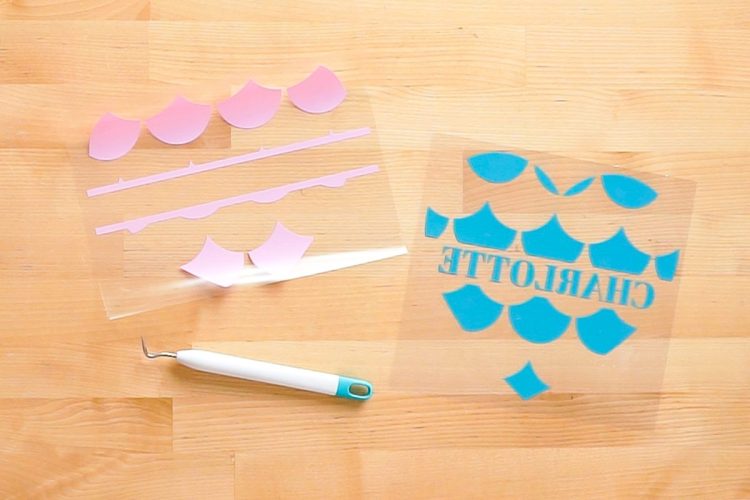
Use a weeding hook to pull up all of the excess vinyl around your design. Make sure you have all of the pieces weeded, including the inside of your letters.
Press Your Mermaid Monogram
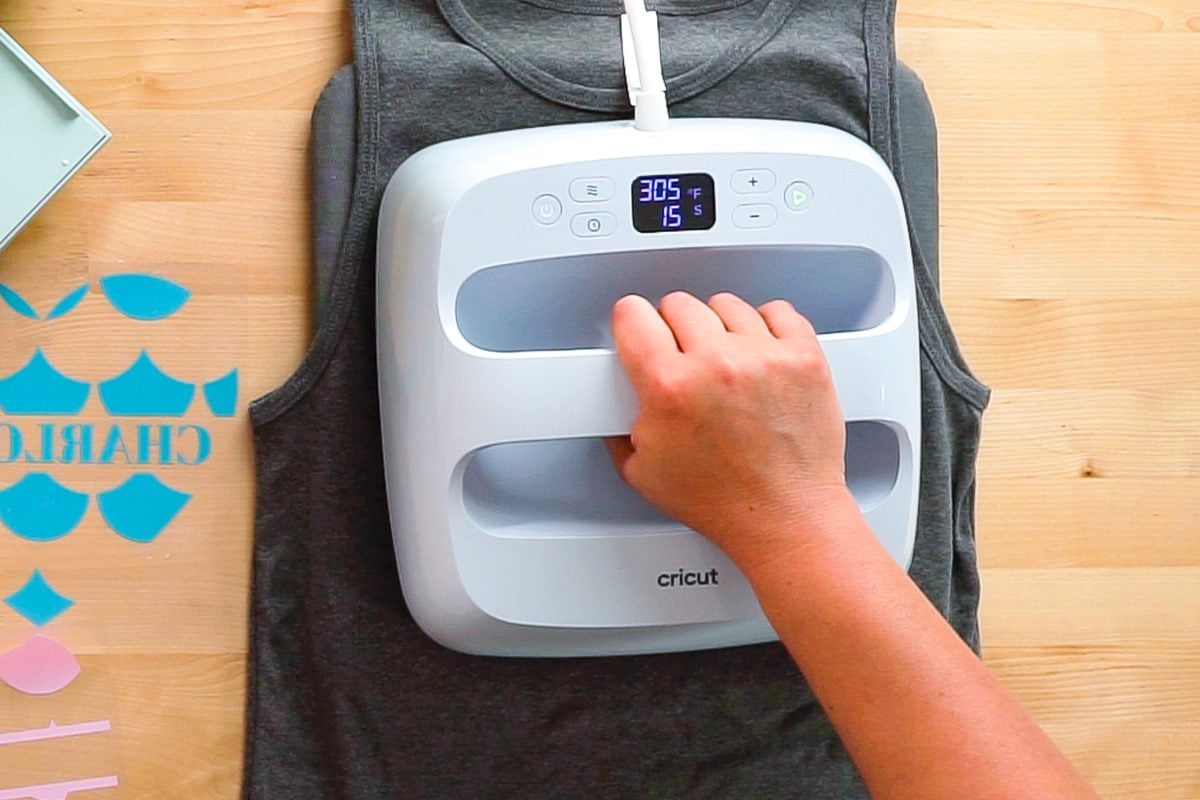
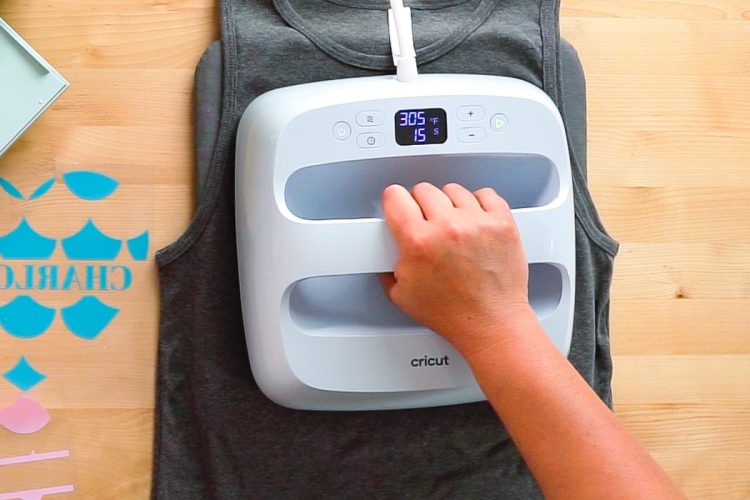
Set your EasyPress or other heat press to 305°.
Prepress your shirt for 15 seconds to remove any moisture and wrinkles. Allow your shirt to cool.
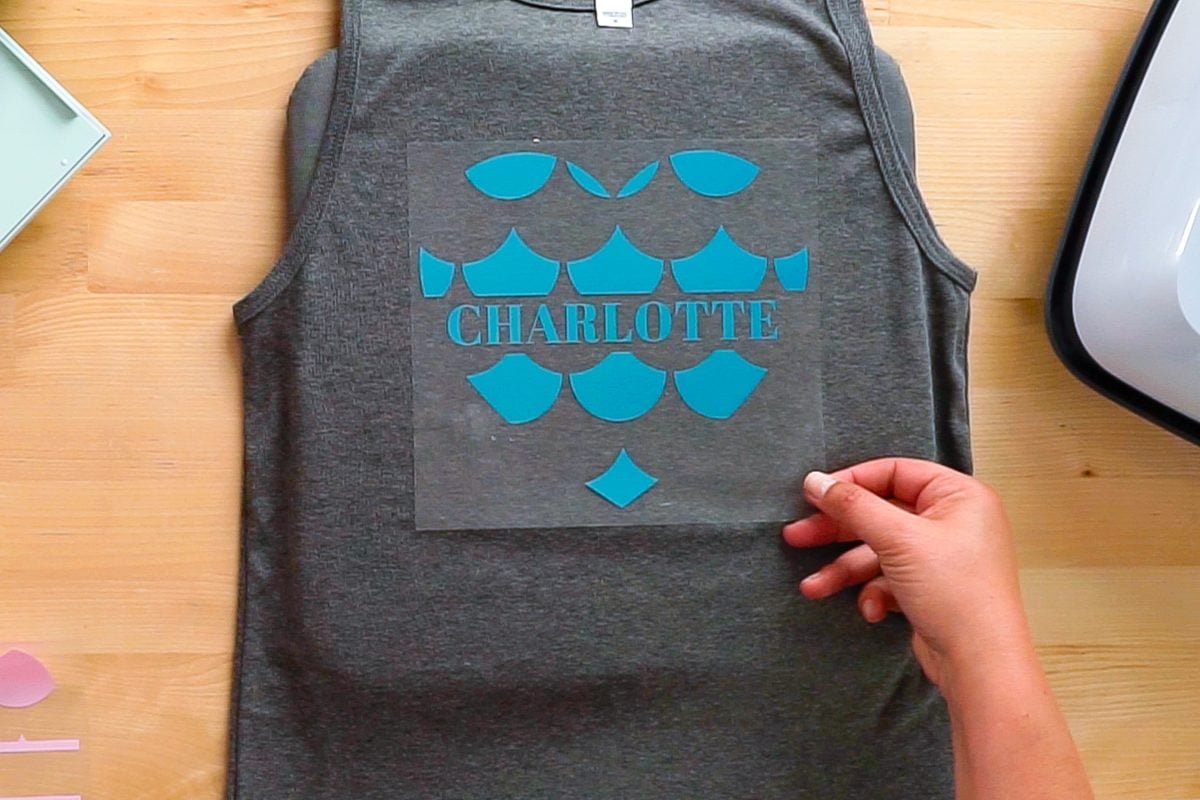
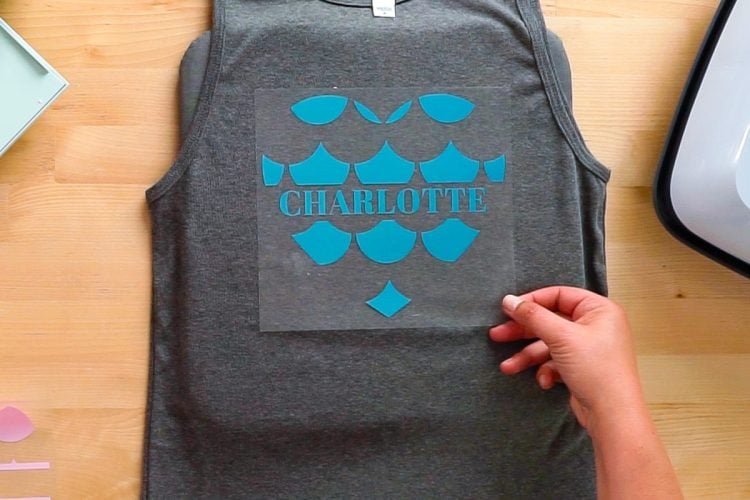
Place the teal layer down on your shirt. If you’d like, use a t-shirt ruler or tape measure to make sure you have it centered and straight on your shirt.
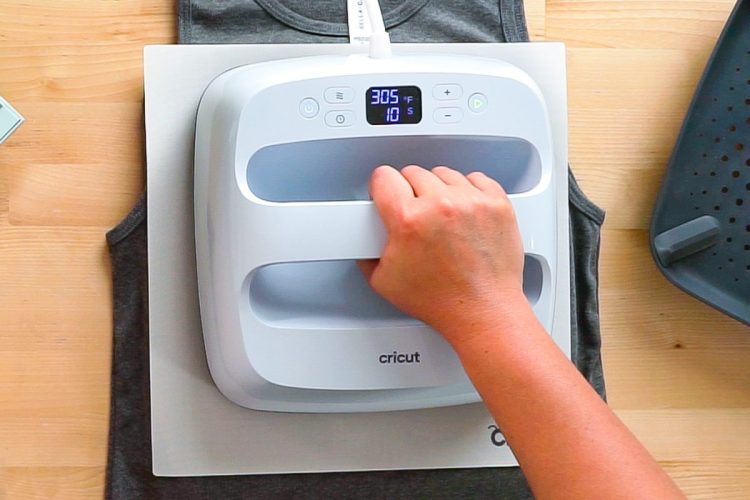
Cover with a teflon sheet or other protective paper. Use your EasyPress to press the first layer for 10 seconds.
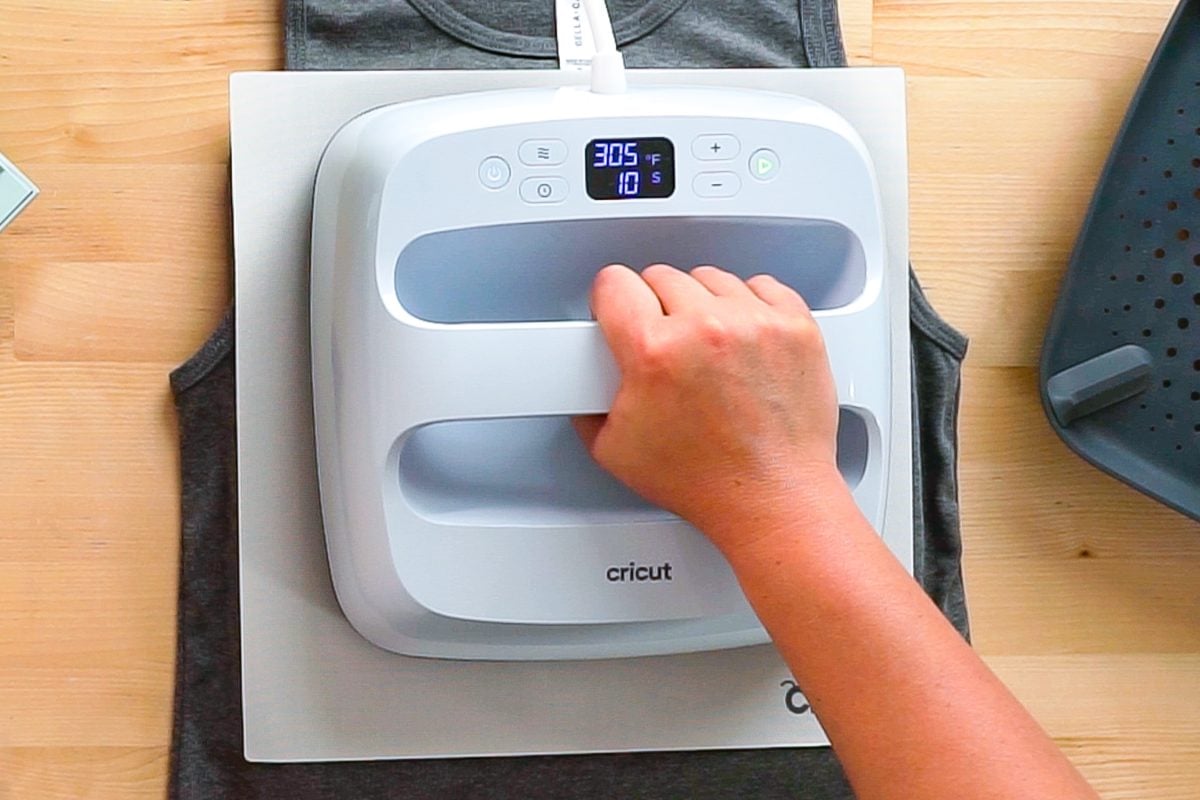
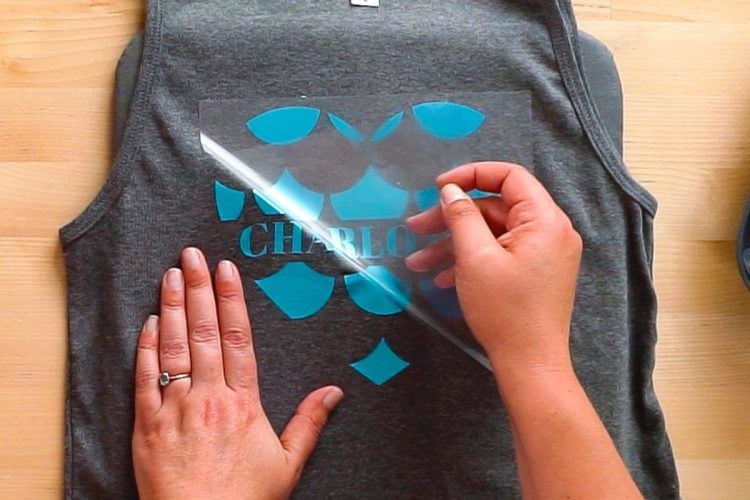
Electric EasyWeed can be peeled warm or cool, so remove the carrier sheet once it’s cool enough to touch.
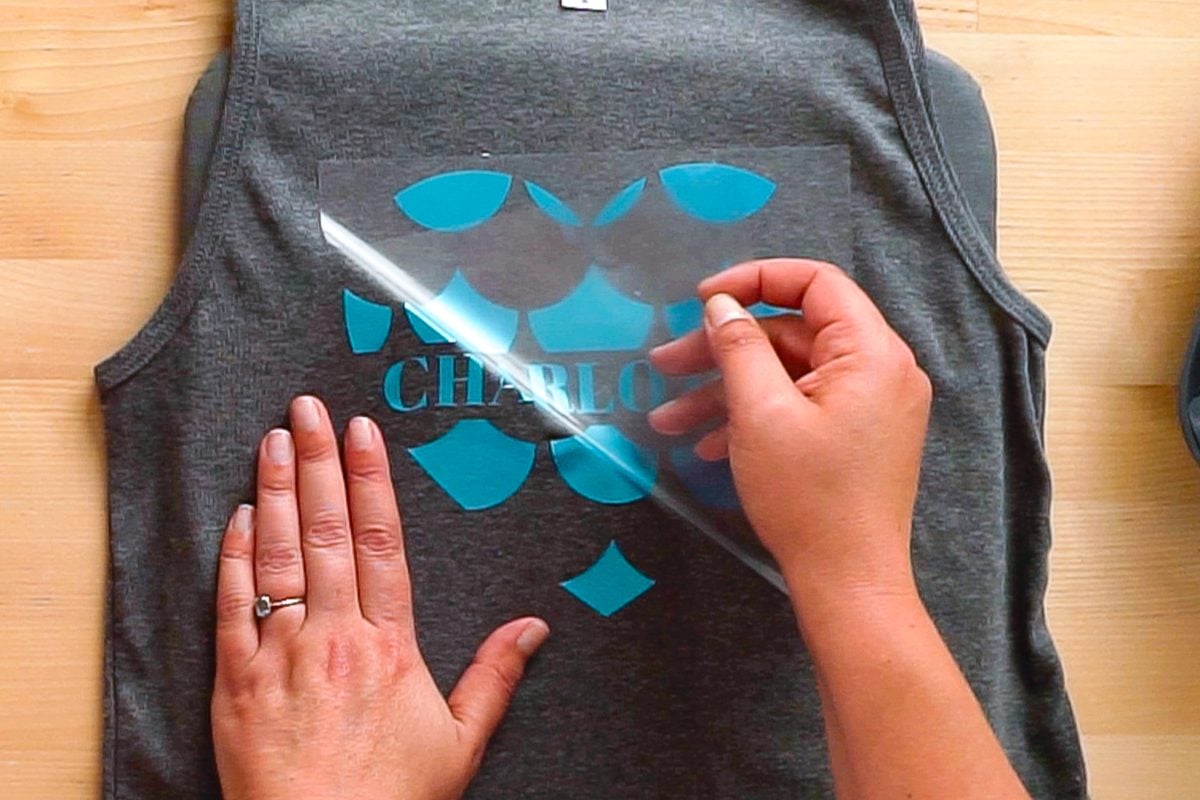
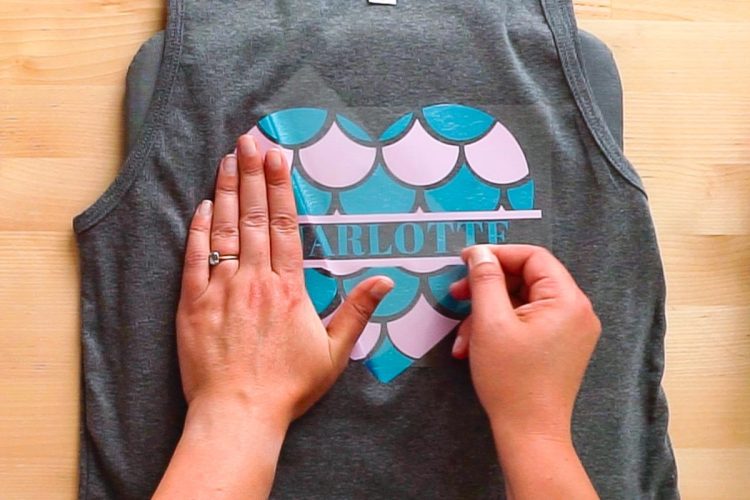
Place the second layer on your shirt, lining it up with the first layer. Use your EasyPress to press the second layer for 15 seconds.

Remove the carrier sheet once it’s cool enough to touch and reveal your final design!
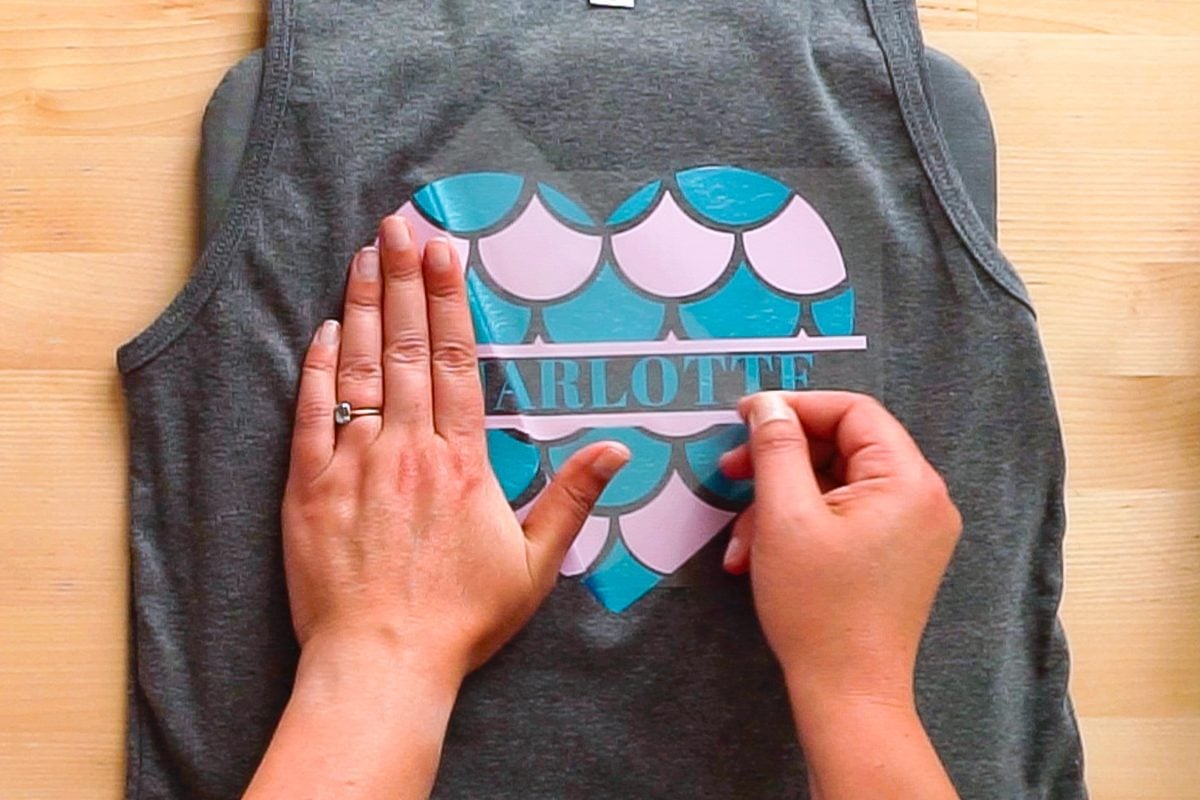
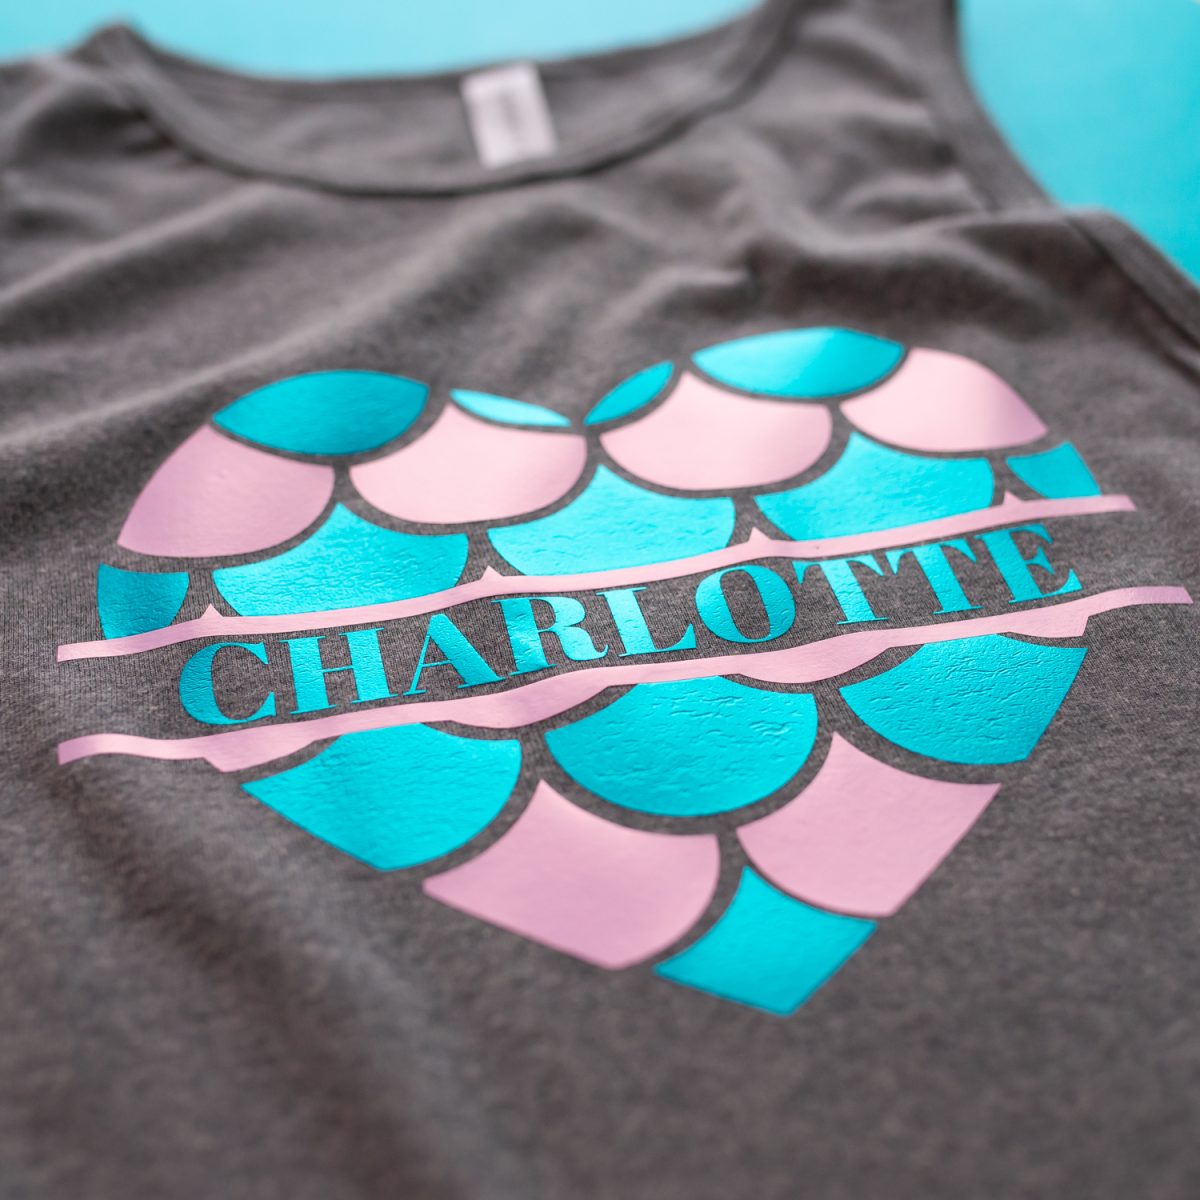
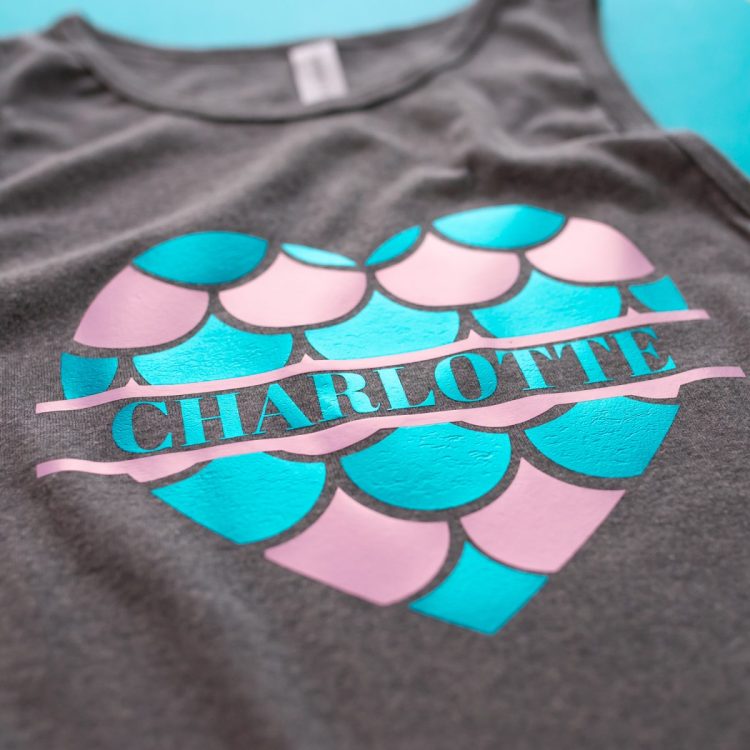
Look how shimmery and reflective this Siser Electric EasyWeed is! It really catches the light.
Caring for your Siser Electric EasyWeed Garment
To make your Electric EasyWeed shirt last as long as possible, I suggest a hand wash or delicate wash in the machine with a mild detergent. Let air dry.
If you want to make this project, make sure to grab a soft and comfortable BELLA+CANVAS tee!
SISER ELECTRIC EASYWEED HTV
Equipment
- Cricut Maker or
- Cricut EasyPress or other heat press
- Teflon sheet or other
Supplies
- Siser Electric EasyWeed HTV
- BELLA+CANVAS tank top or top of your choice
- Free Mermaid Heart Monogram File #C469
Instructions
- Electric EasyWeed Mermaid Shirt InstructionsSet up the file in Cricut Design Space Upload the mermaid file to Cricut Design Space (see my post How to Upload SVG Files to Cricut Design Space for more information). The monogram will be very large. Resize your SVG to fit your shirt.

- Use the text tool to add a name to your shirt. For this project the font named Abril Fatface is being used.

- To make assembling your project easier, select the name and the teal layer and click Combine > Unite so they will cut as a single piece. You can see in the Layers Panel on the left that the name and the teal layer are under a single Unite heading.

- Then hit Make It in the upper right to make your project. You'll first be asked how you want to load your material. In this case, you'll be putting it on a Cricut mat, so choose On Mat.

- Cricut Design Space will lay out all of your mermaid pieces on the mats. Important: for each layer, click the mirror slider.

- Click Continue. In the Make Screen, choose Everyday Iron On for your material cut settings.

- Cut Your Mermaid MonogramPlace your material on your mat with the shiny carrier sheet side down.Place your mat into your machine and press the blinking Go button. Your Cricut will cut your mermaid pieces.

- Weed Your Mermaid MonogramUse a weeding hook to pull up all of the excess vinyl around your design. Make sure you have all of the pieces weeded, including the inside of your letters.

- Press Your Mermaid MonogramSet your EasyPress or other heat press to 305°.Prepress your shirt for 15 seconds to remove any moisture and wrinkles. Allow your shirt to cool.

- Place the teal layer down on your shirt. If you'd like, use a t-shirt ruler or tape measure to make sure you have it centered and straight on your shirt.

- Cover with a teflon sheet or other protective paper. Use your EasyPress to press the first layer for 10 seconds.

- Electric EasyWeed can be peeled warm or cool, so remove the carrier sheet once it's cool enough to touch.

- Place the second layer on your shirt, lining it up with the first layer. Use your EasyPress to press the second layer for 15 seconds.

- Remove the carrier sheet once it's cool enough to touch and reveal your final design!

- Look how shimmery and reflective this Siser Electric EasyWeed is! It really catches the light.

- Caring for your Siser Electric EasyWeed GarmentTo make your Electric EasyWeed shirt last as long as possible, Hand washing or delicate wash in the machine with a mild detergent is suggested. Let air dry.If you want to make this project, make sure to grab a soft and comfortable BELLA+CANVAS tee!



Leave A Reply!