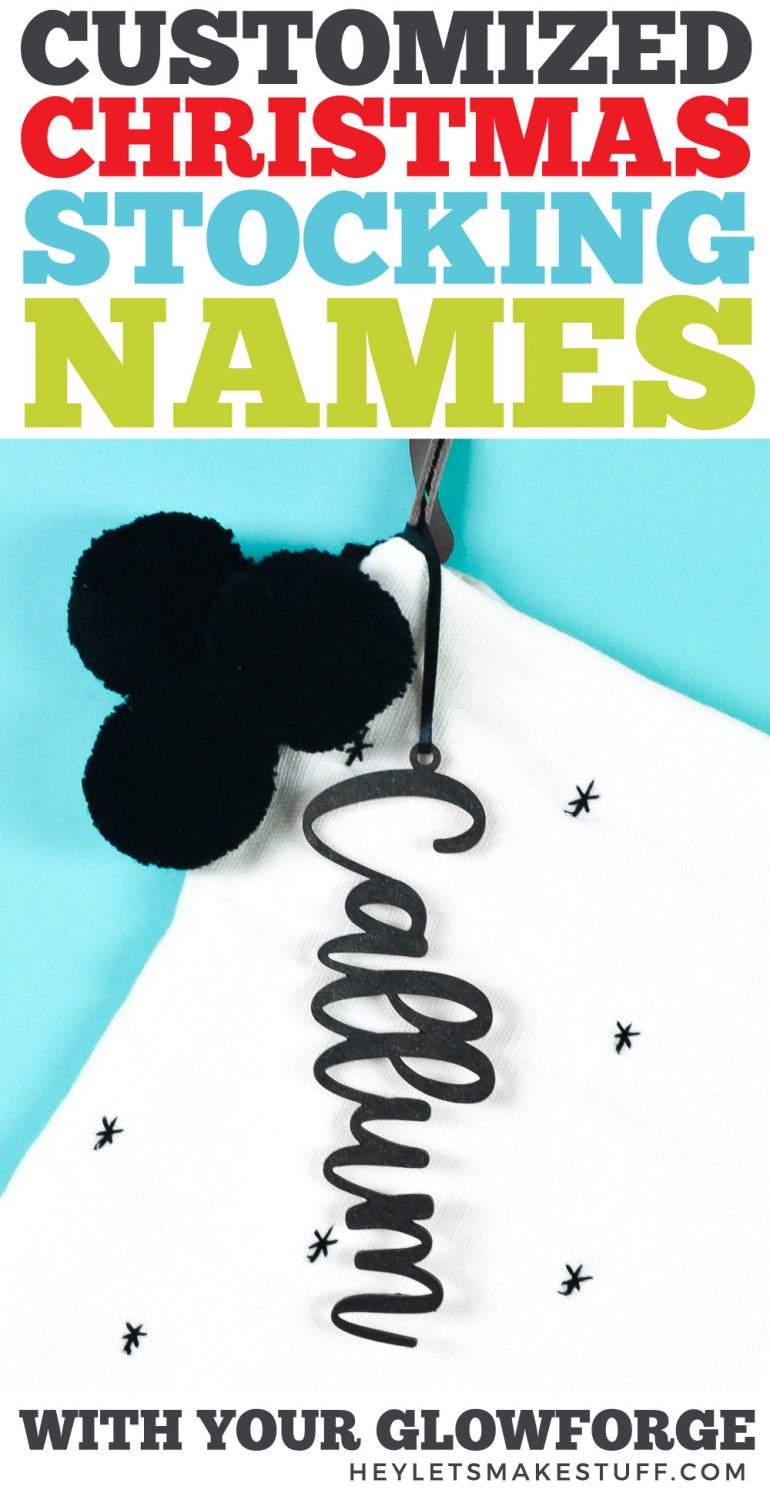
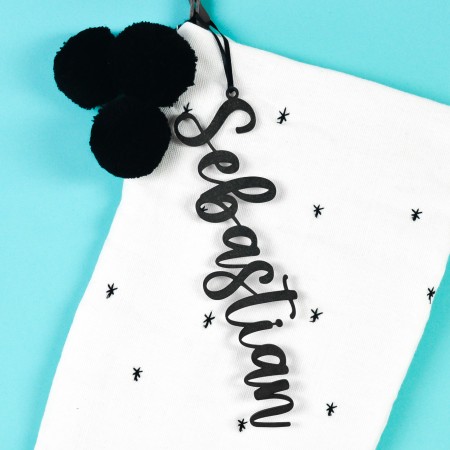
Add personality to your Christmas mantel with these custom stocking names, made with your Glowforge! These personalized Christmas stocking tags help make sure everyone know which stocking is theirs!
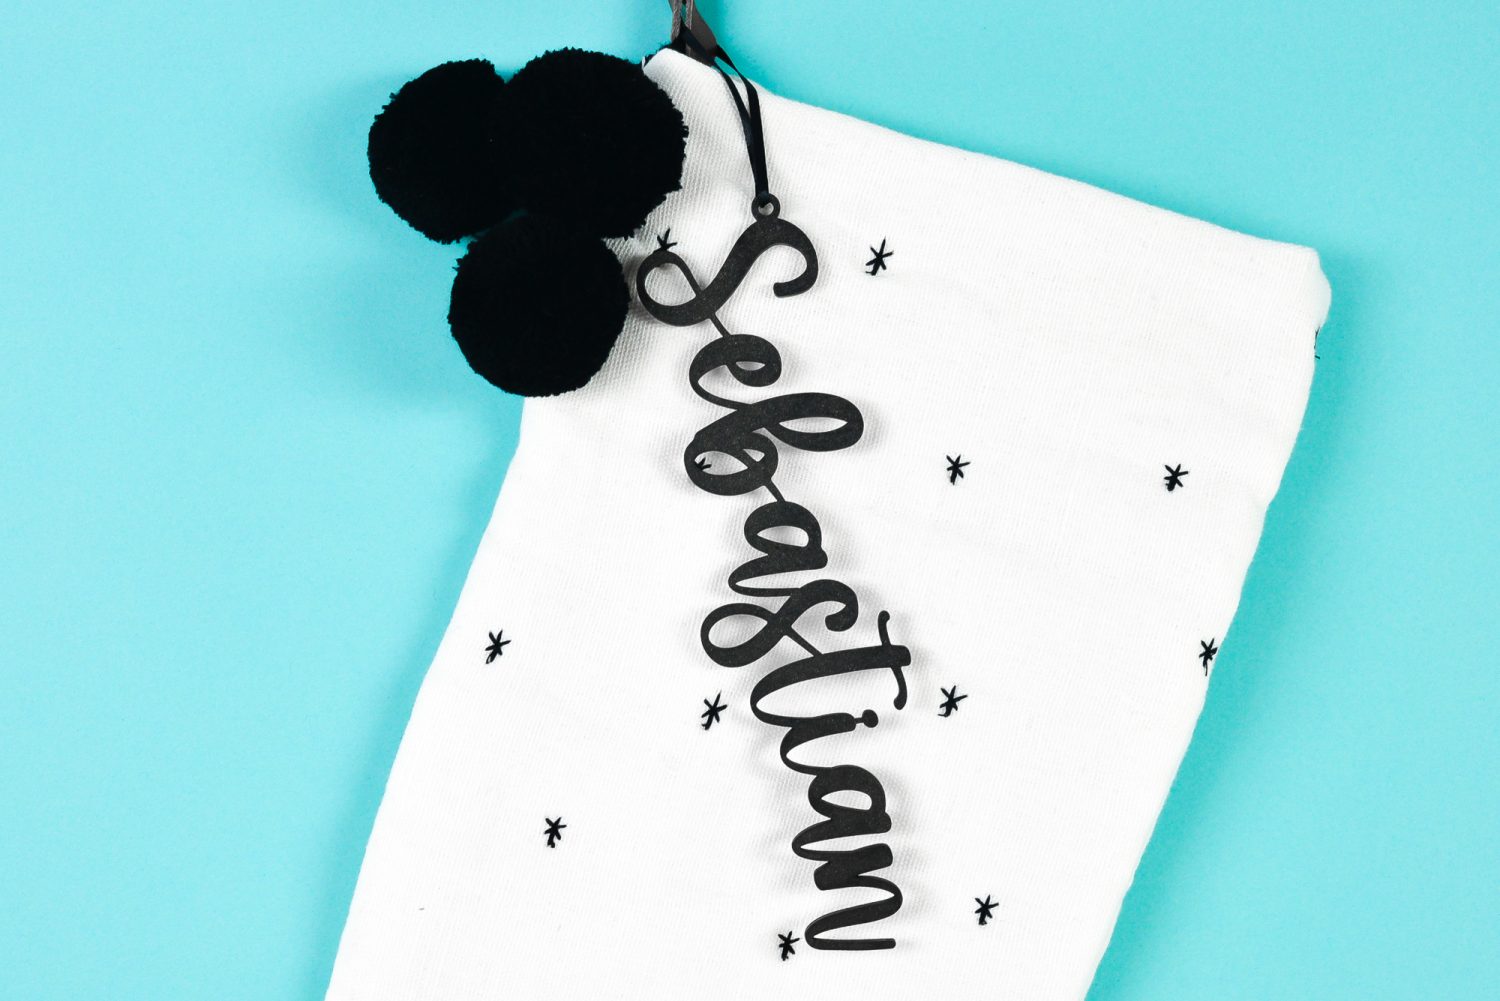
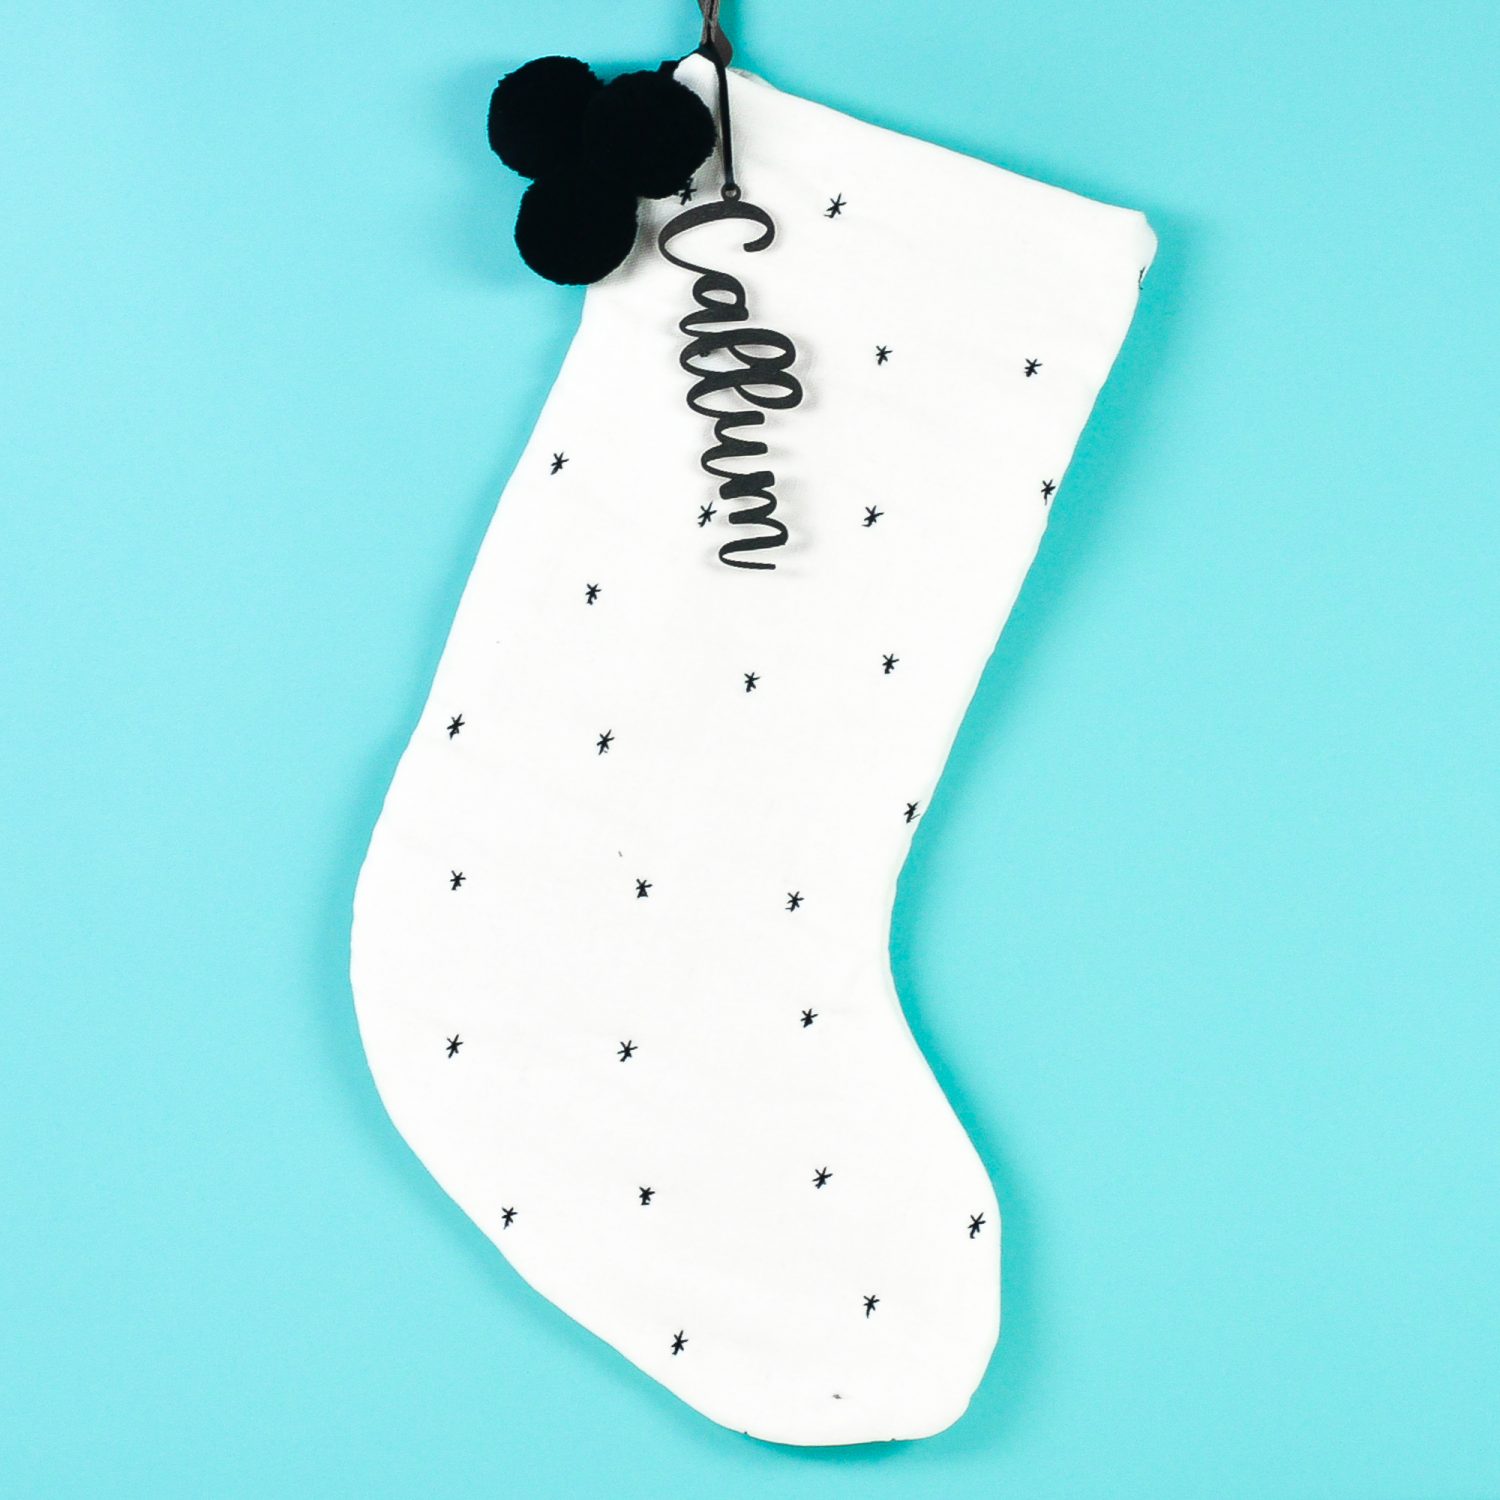
Now that we’ve decorated for Christmas, my boys keep asking me which stocking is theirs (ours are from Target—no fancy personalized stockings over here!). So this year I decided to create some custom Christmas stocking tags!
Today I’m going to show you how to make these personalized Christmas stocking names using your Glowforge or other laser cutter. Learn more about laser cutting in my Glowforge Overview. These are also great as tags for presents and can be used year after year.
First I’ll share a few fonts that I love for this project, plus tips for making fonts work.
Then we’ll see how to create the file in Adobe Illustrator. The process is similar in other design programs, including InkScape and Silhouette Studio. Use the program you are most comfortable with!
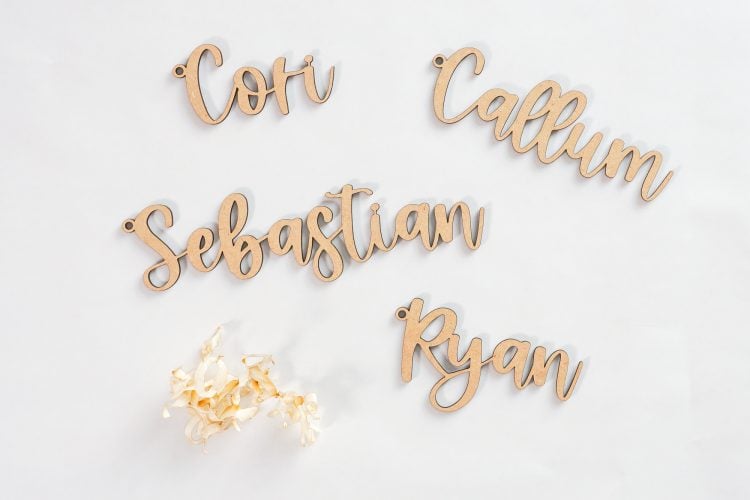
Finally we’ll cut the personalized Christmas stocking tags on the Glowforge. I cut mine from draft board and painted them black, but you can also cut them out of wood, acrylic, or another material if you prefer.
Let’s get started!
Favorite Fonts for Personalized Stocking Tags
For these tags, you’re going to want to use a script font where all of the letters are connected (so it will hang as one piece)—this will make it a lot easier to design your file without a lot of extra design work.
If a font has letters that are mostly connected, you can “nudge” the letters together so they touch. This is often the case with the first letter of a name, particularly if you are using a capital letter. You can also use a lowercase letter to start the name if you prefer.
Here are a few of my favorite fonts for stocking names cut on your Glowforge or other laser cutter.
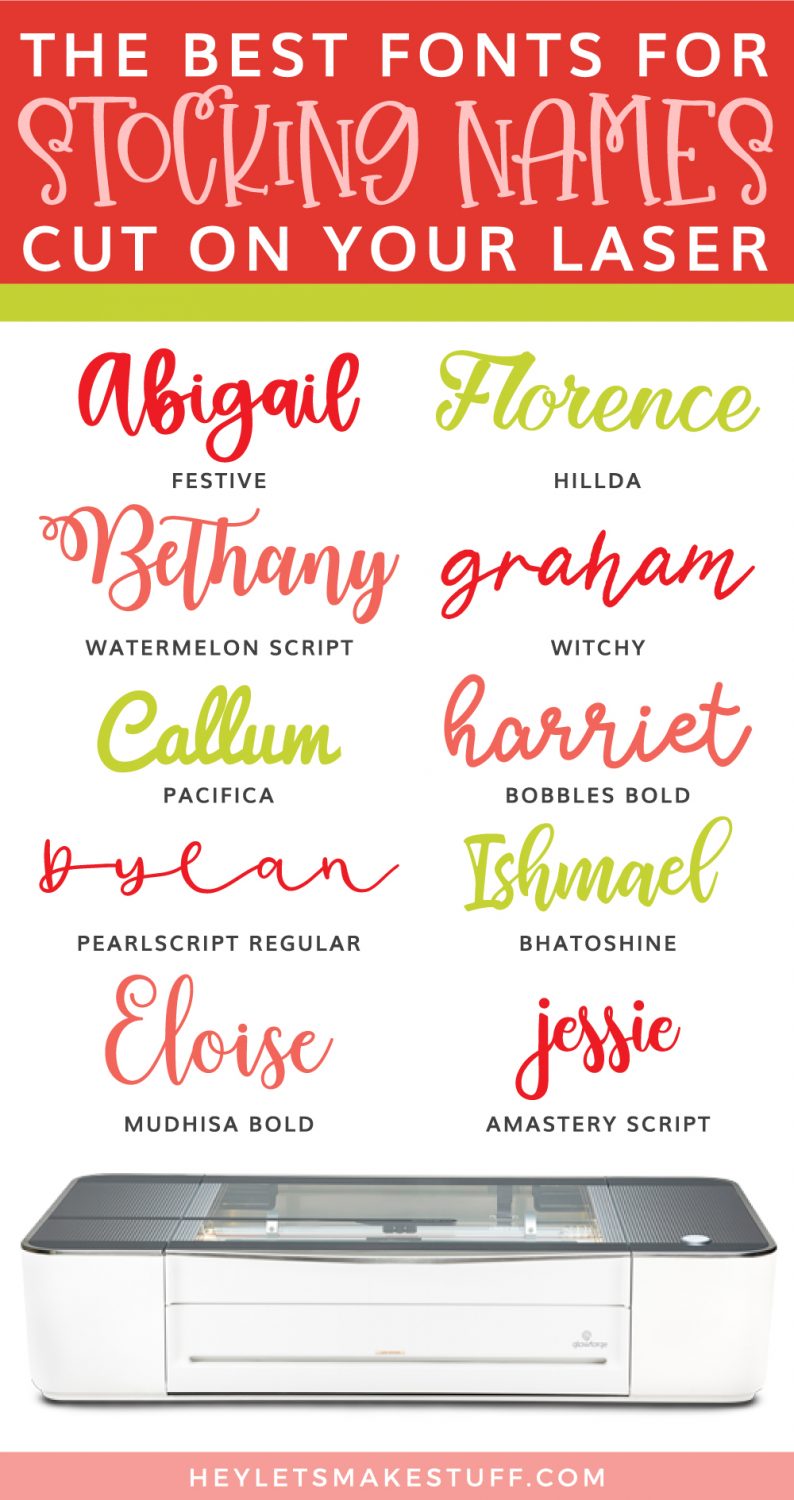
- Festive
- Watermelon Script
- Pacifico
- Pearlscript Regular
- Mudhisa Bold
- Hillda
- Witchy
- Bobbles Bold
- Bhatoshine
- Amastery Script
Setting up the Christmas Stocking Tag File in Adobe Illustrator
Start by creating a new Illustrator document.
Create Your Names
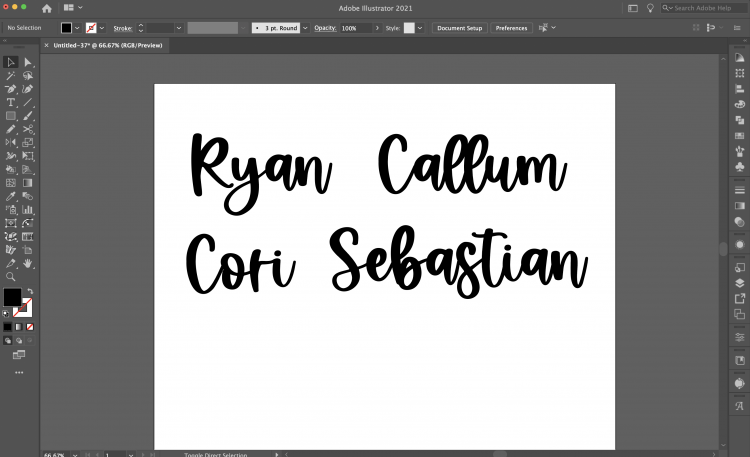
Then type your names and change the font to your preferred font for this project. I am using the font “Festive.” You can also resize your names.
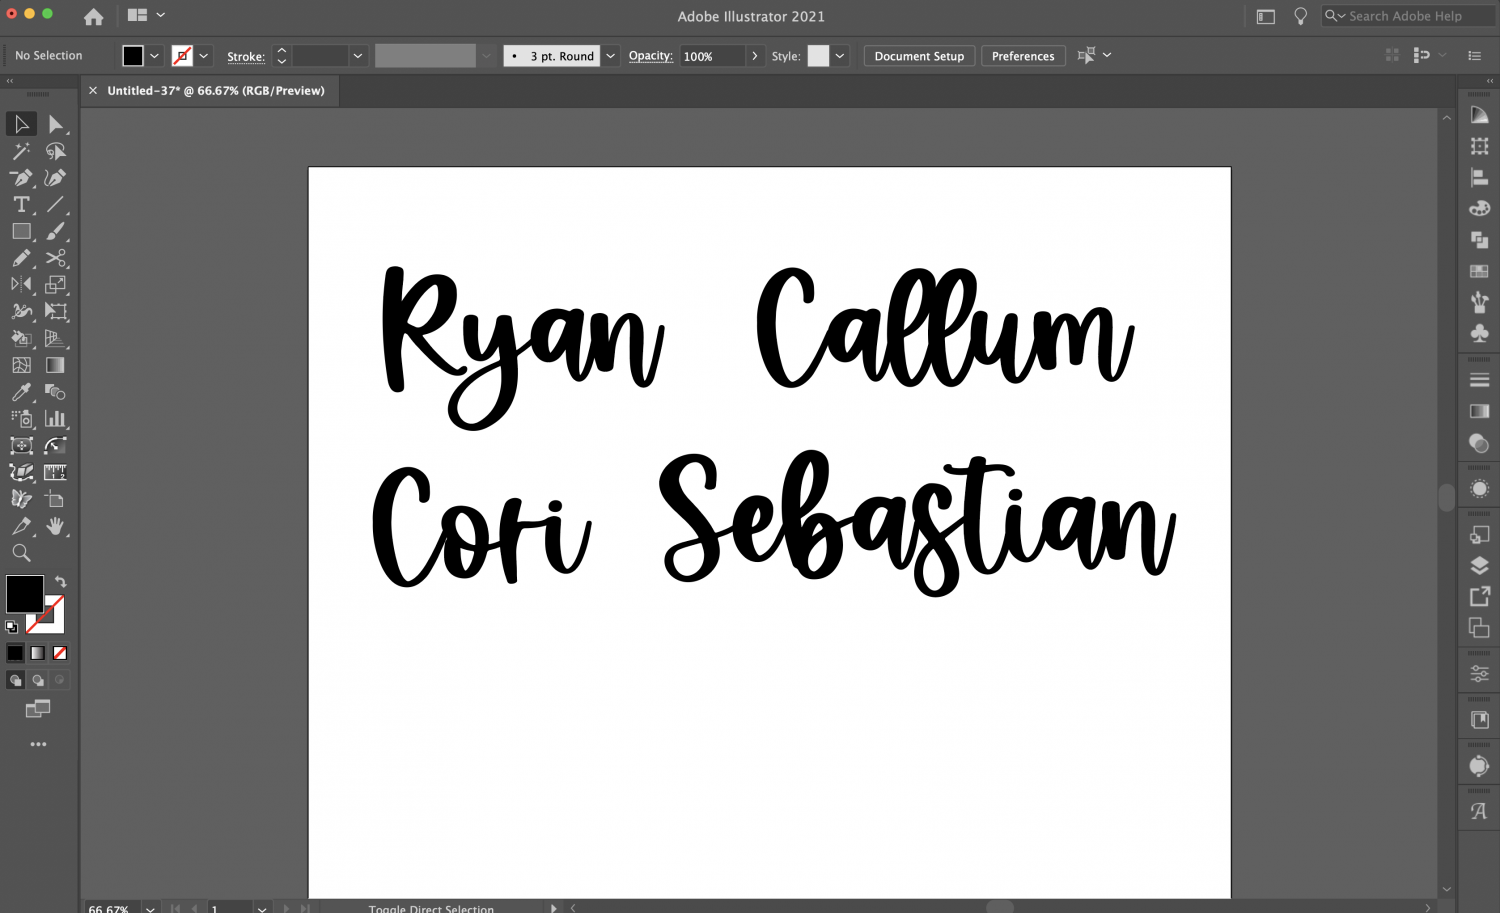
You’ll see two problems here. First, the “R” in “Ryan” doesn’t touch the rest of the letters. Second, two of the names have an “i”—we’ll have to do something about that dot.
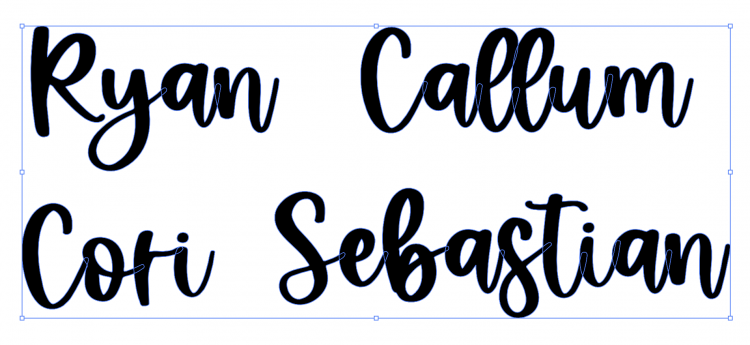
Select all of your text, and outline your fonts by going to the main menu and selecting Type > Create Outlines. You’ll see each letter has a thin line around it, and you can no longer edit as text.
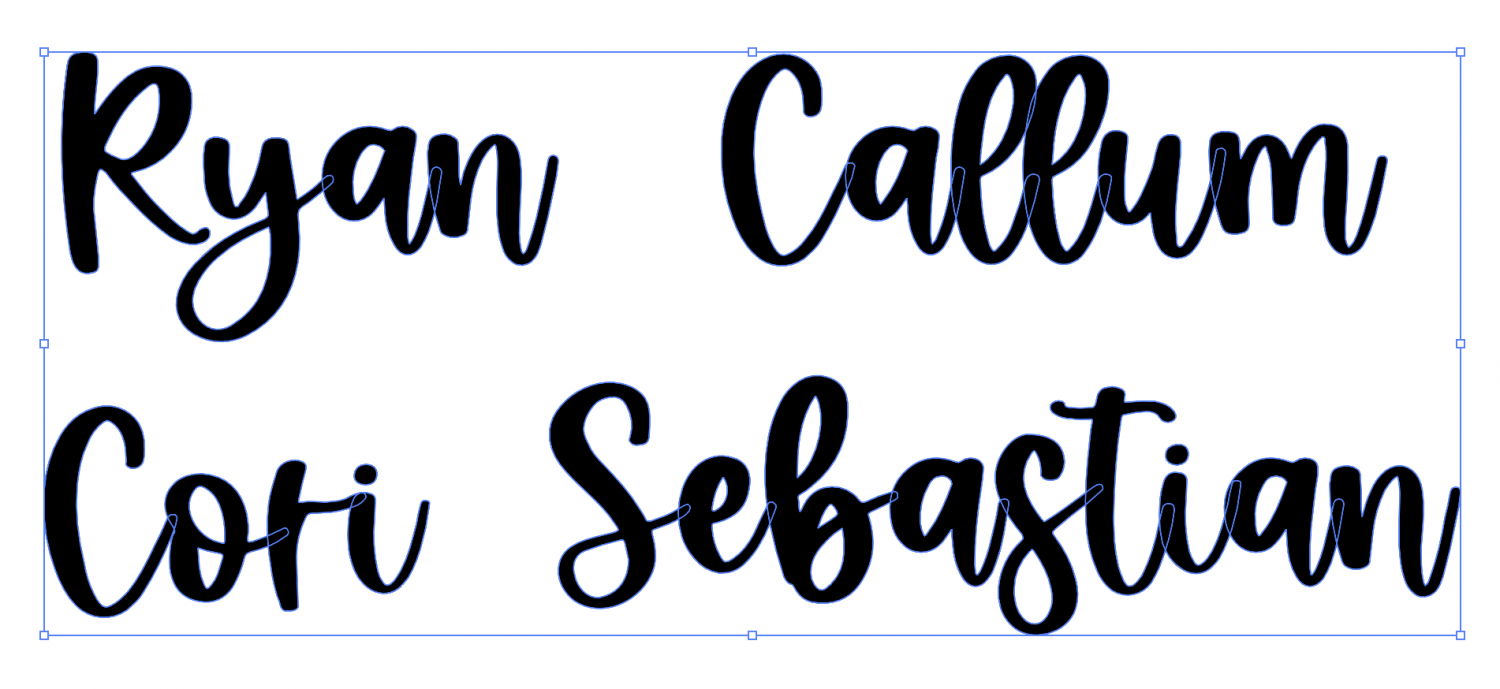
If you were thinking about cutting this project as is, your laser will cut around each individual letter. So we will need to make each of these a single piece before we send it to be cut. But first, let’s fix those two problems noted above.
Fixing Separate Letters
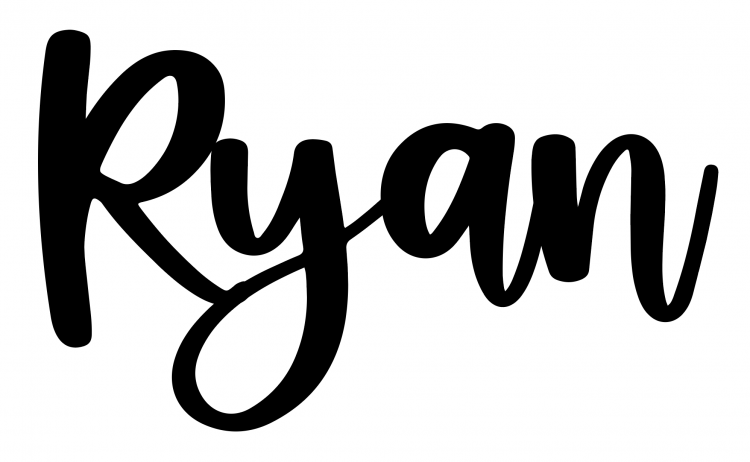
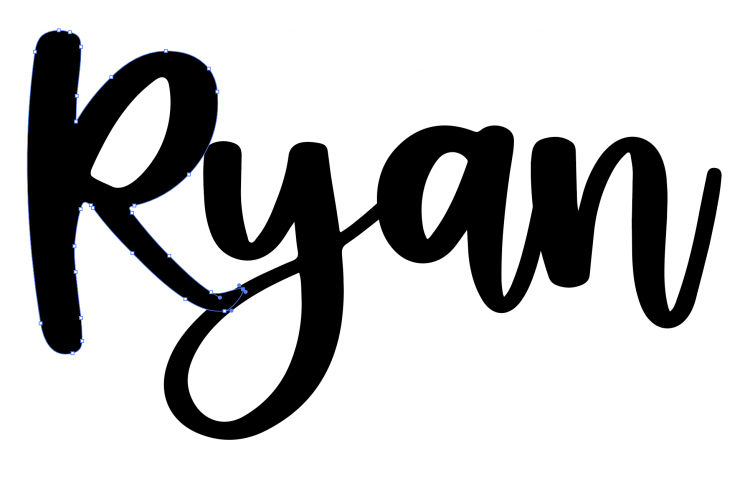
Double-click the “R” in “Ryan” to enter isolation mode. This means you can move the “R” independently. Move it to overlap the “y.”
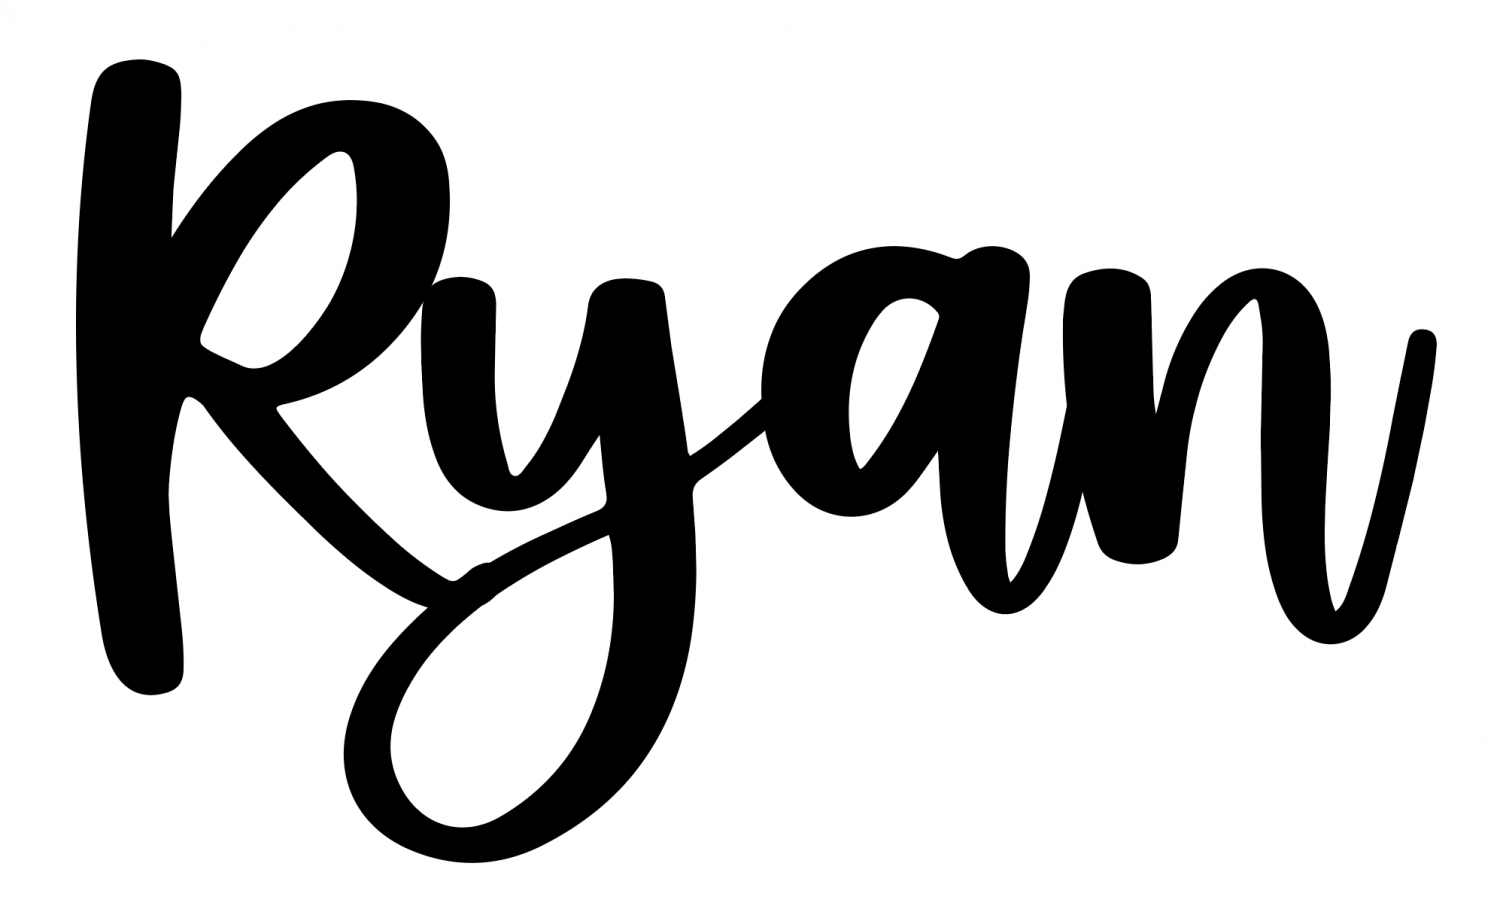
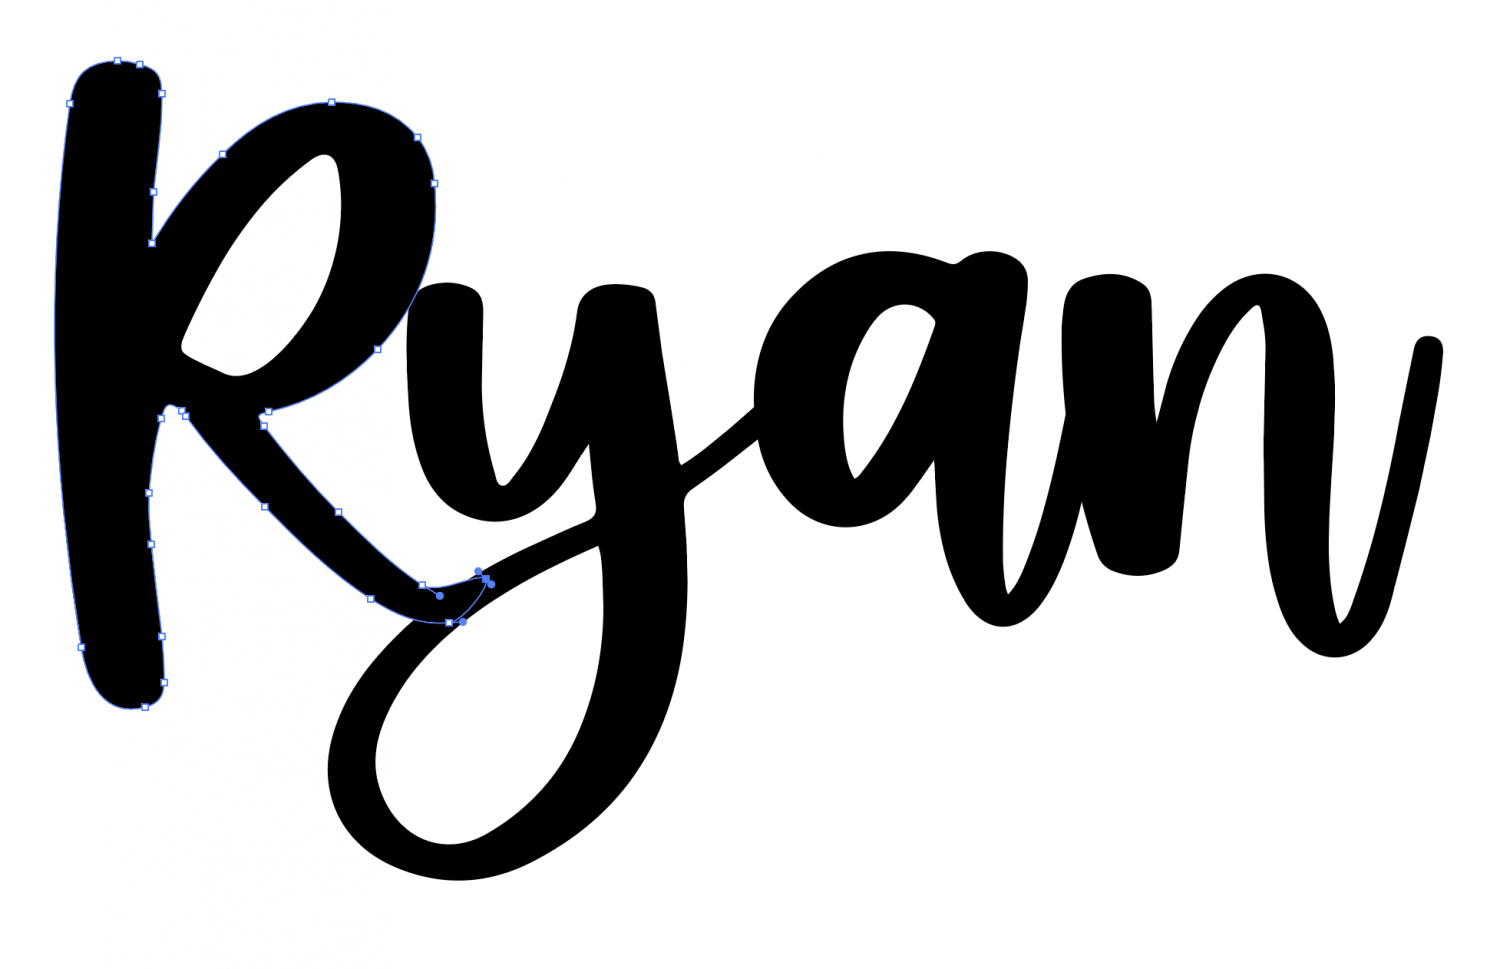
For this particular font, you’ll see that there is a bit of a bump where the tail of the “R” overlaps the “y.” You can leave this as is or you can use the anchor point tools to make it smoother. I just deleted a couple anchor points and it’s much better.
Fixing the “Dot” Over an “i” or “j”
For the dots, you have two options. The first is to just isolate the dot (double click until you have just the dot selected) and delete it.
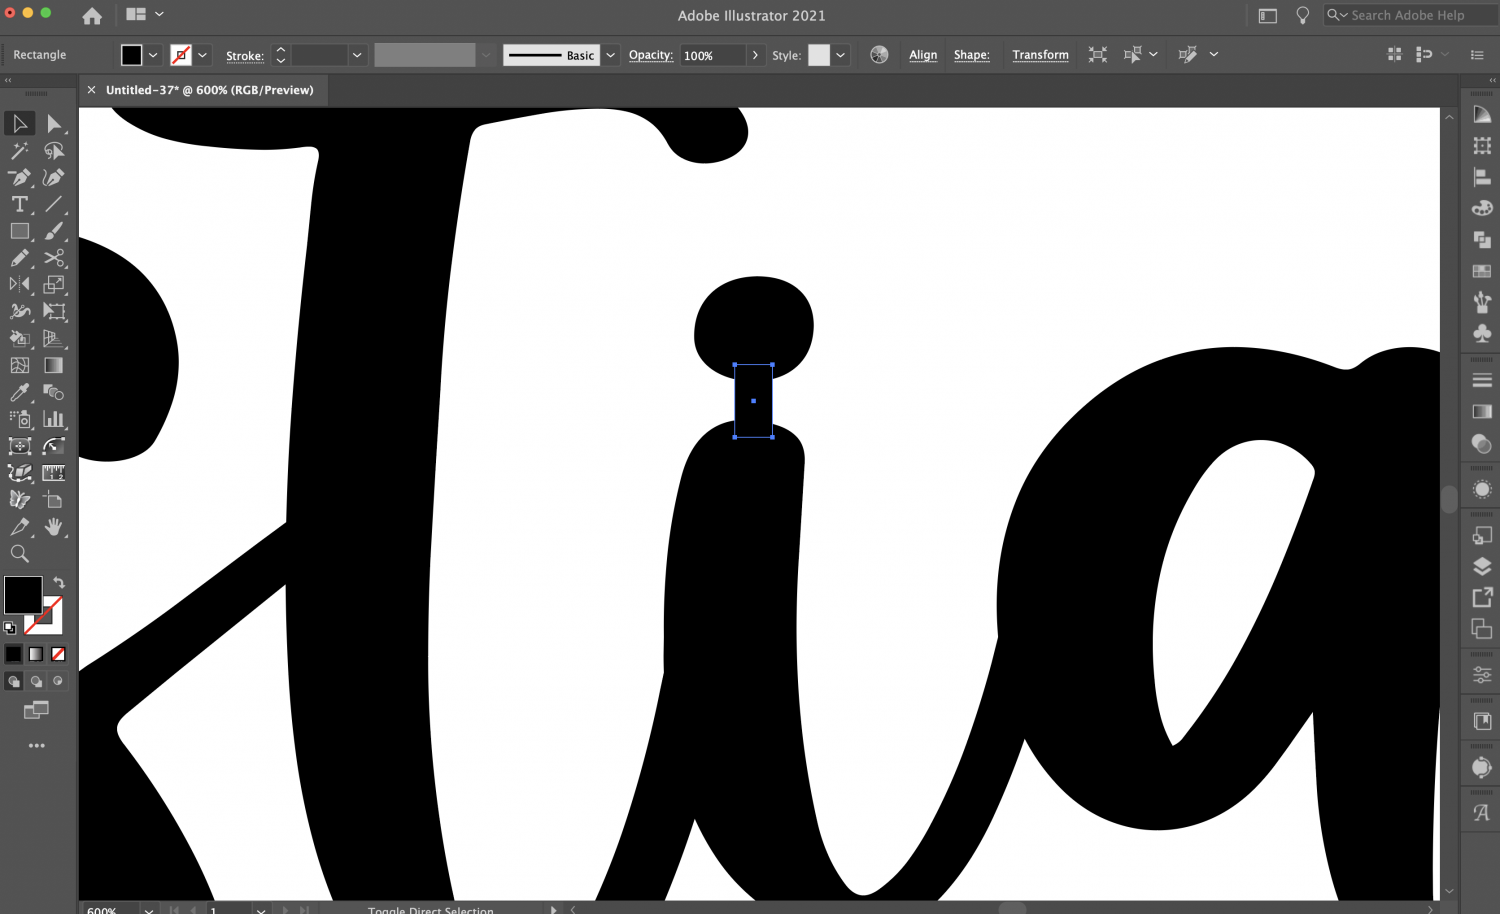
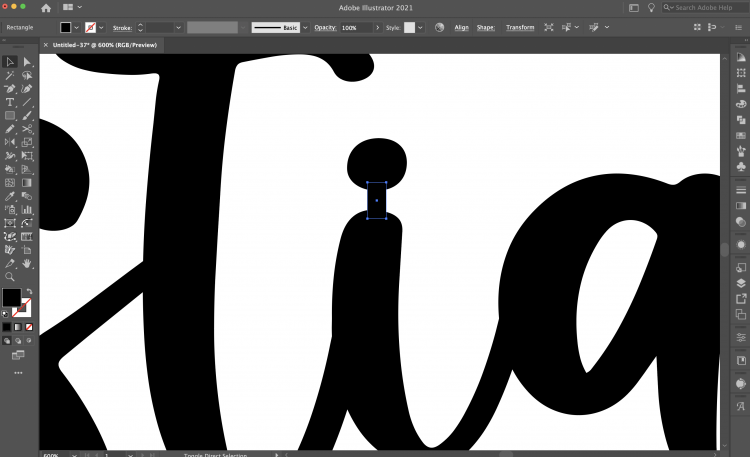
Or you can create a little “connector piece” in Illustrator so that the dot stays connected. Start by zooming in to your letter. Then create a tiny rectangle using the rectangle shape tool, making sure to overlap the two parts of the letter.
Creating the Ribbon Rings
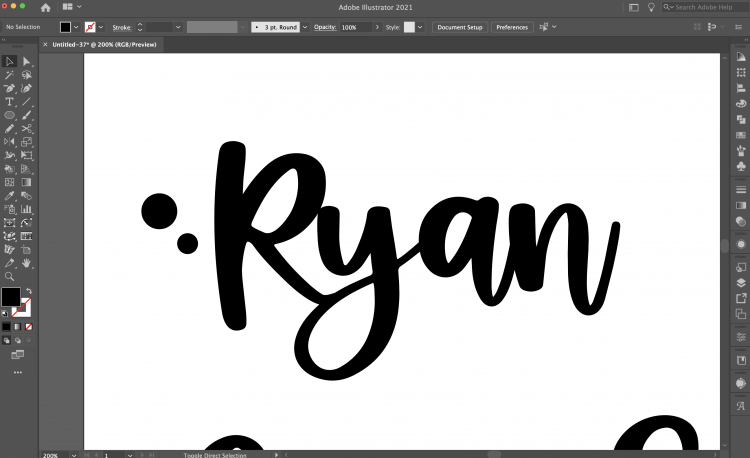
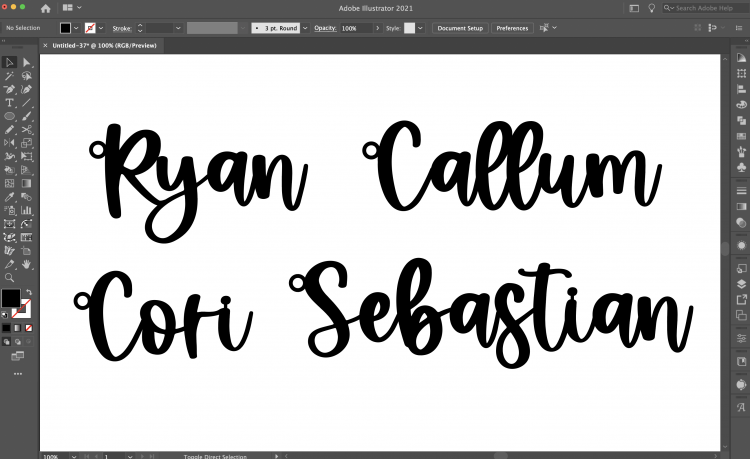
Many stocking hangers I’ve seen just tie a ribbon or twine around the first letter in the name, but I prefer to have a little ring for ribbon. If you’d like to do this as well, create two circles, one a bit smaller than the other.
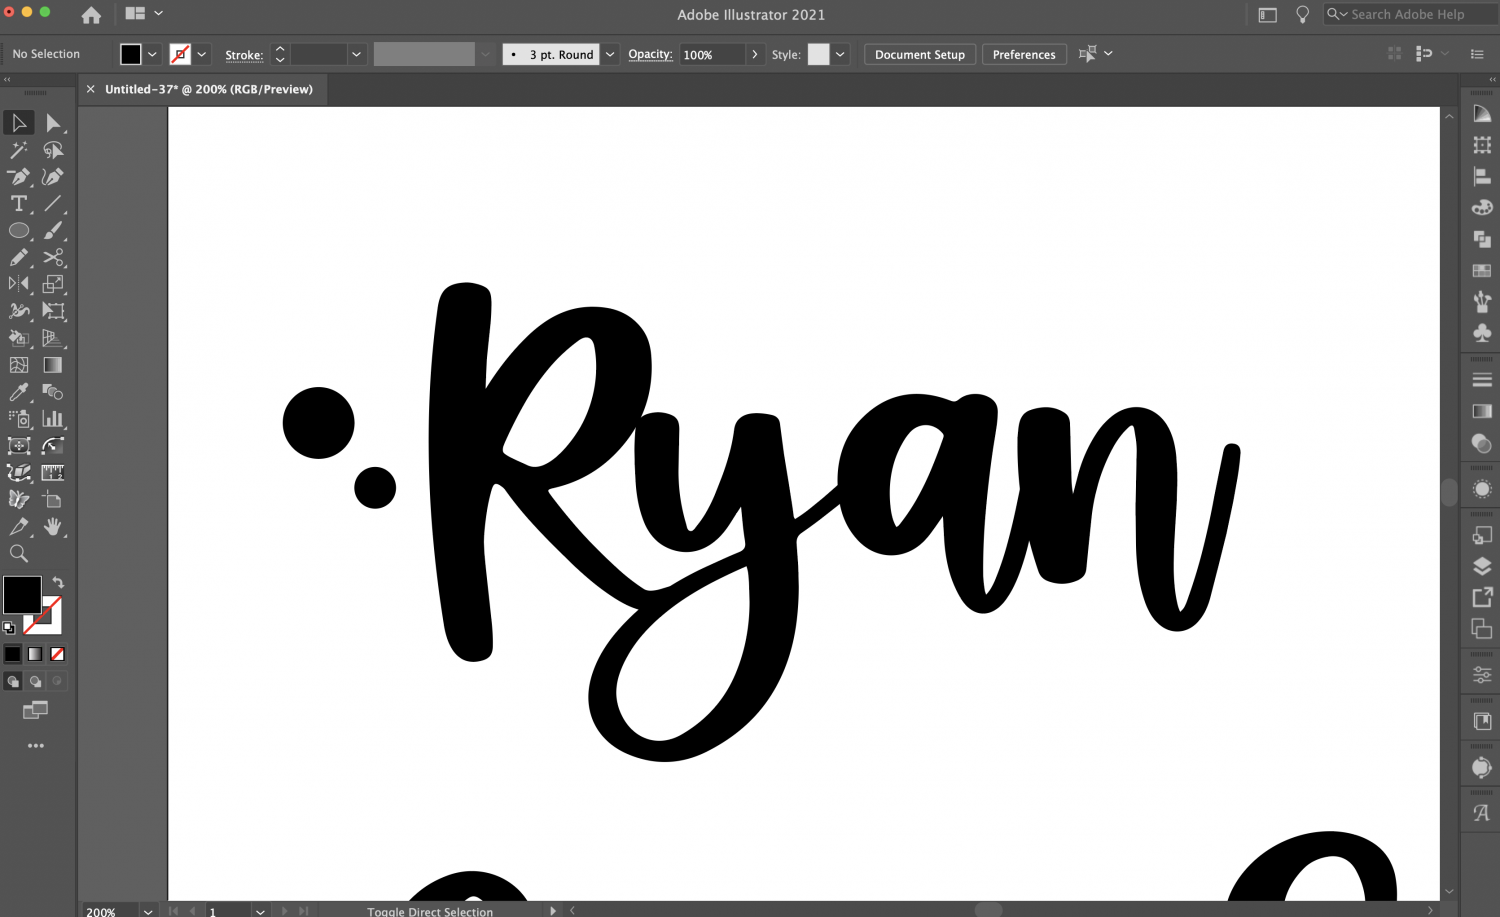
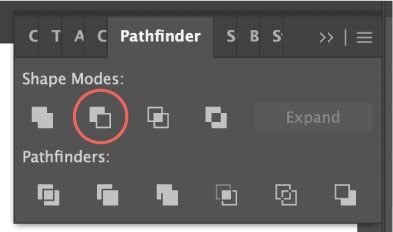
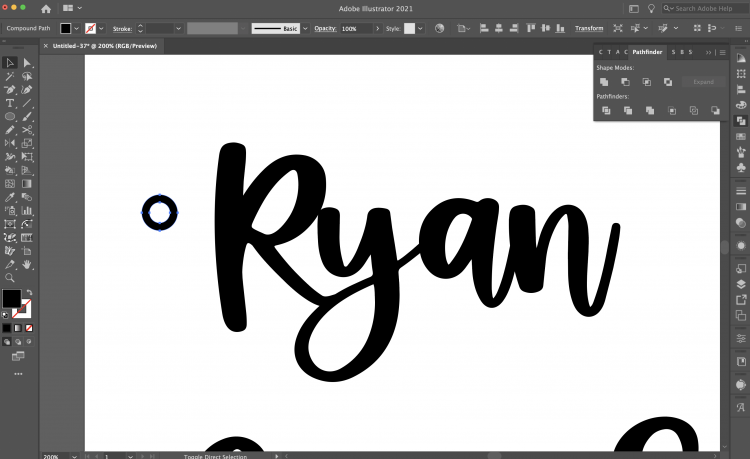
Overlap the two, so the smaller circle is on top of the larger circle. Then select both, and in the Window >Pathfinder tool click “Minus Front.” This will create a “ring” for your ribbon.
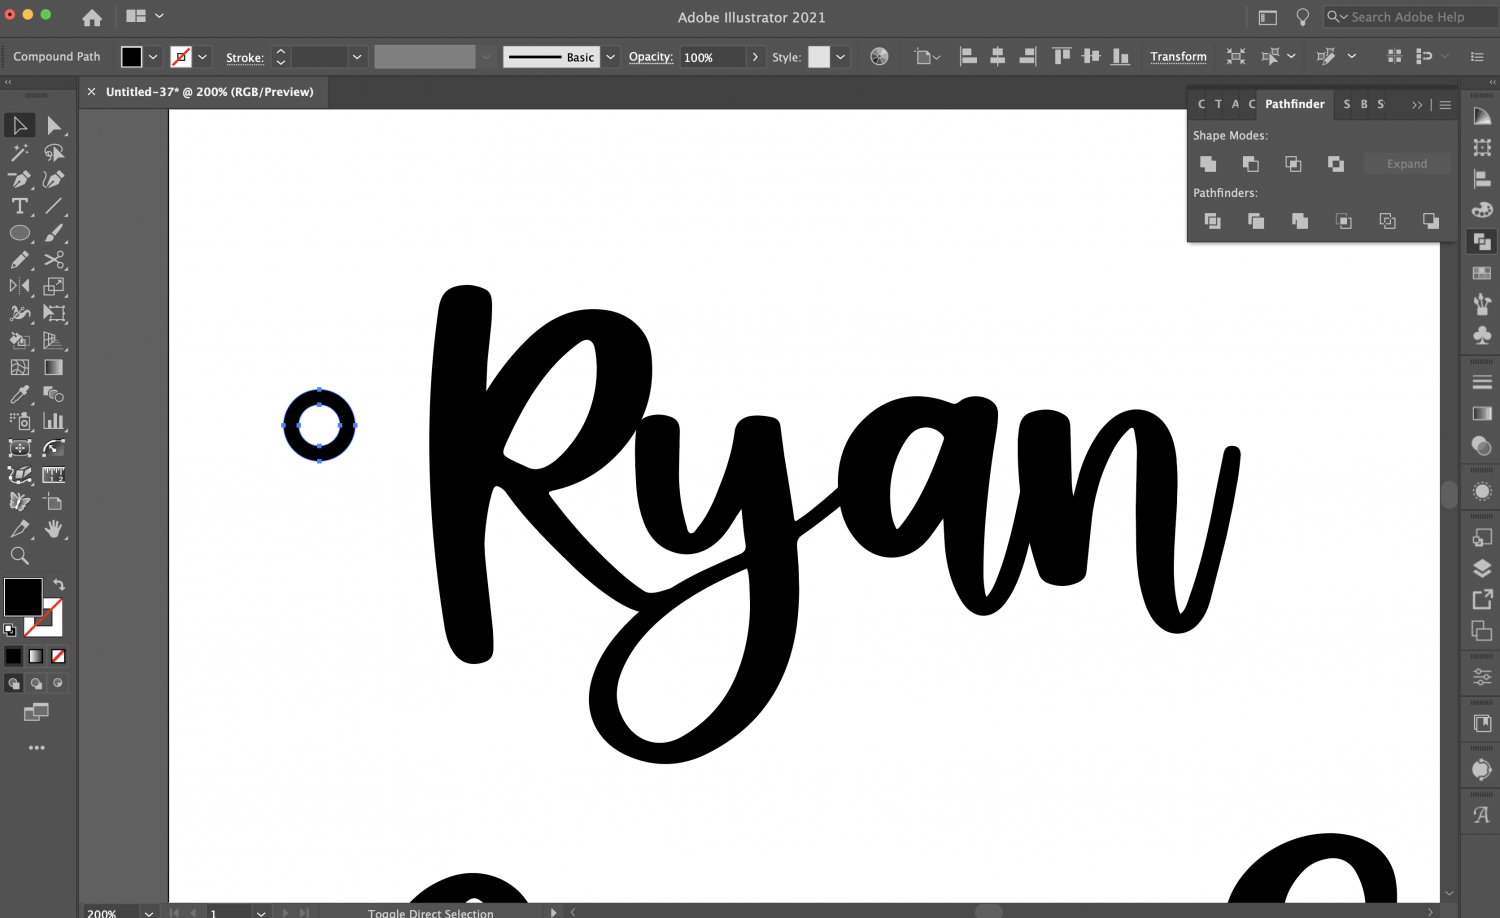
Then overlap the ring with your name. Duplicate the ring, and then add to the other names.
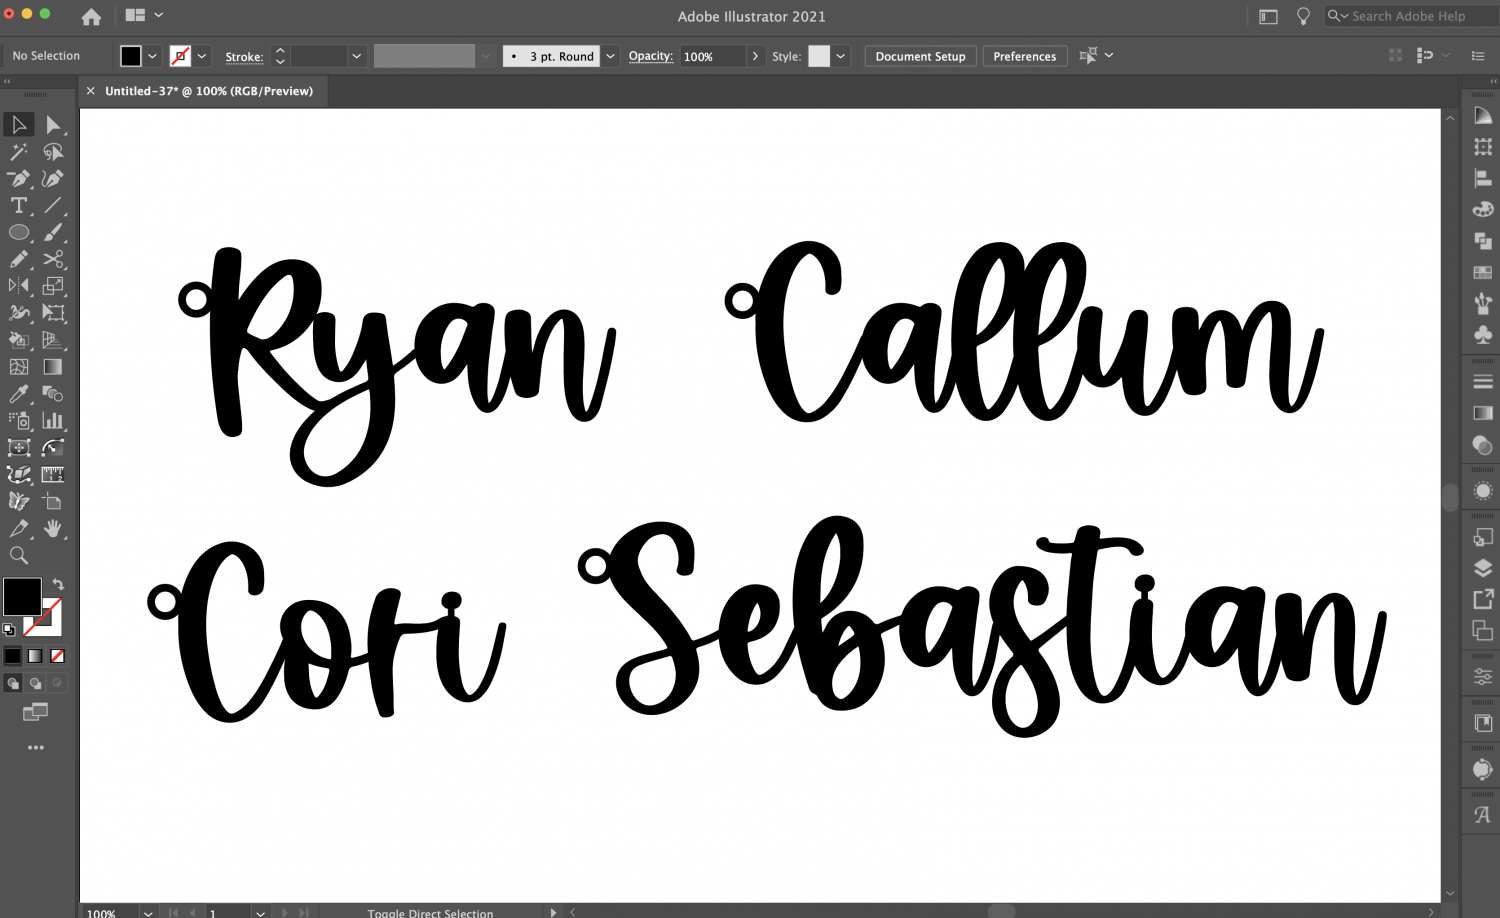
Now we need to make each name cut as a single piece. For each name, select the name itself, the ring, and that little connector piece if needed, and click “Unite” in Window > Pathfinder. This will make it cut as a single piece. Repeat for any other names you’ve done.
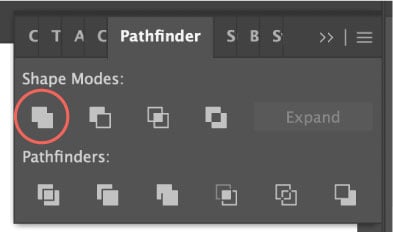
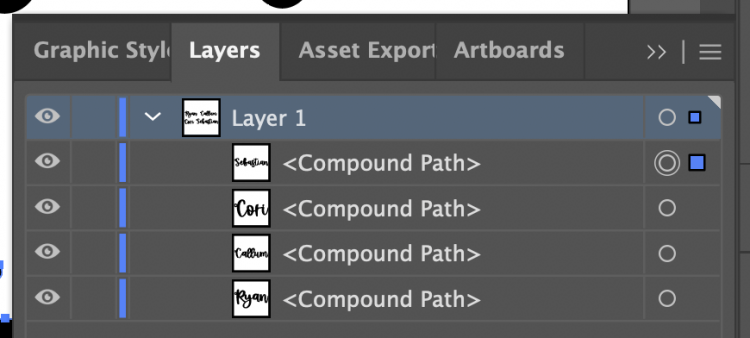
Once you’ve united each name, check the Window > Layers Panel to make sure that each piece is just that…a single piece. If you see extra bits or letters that are not connected, then rework your file so that each name cuts as a single piece.
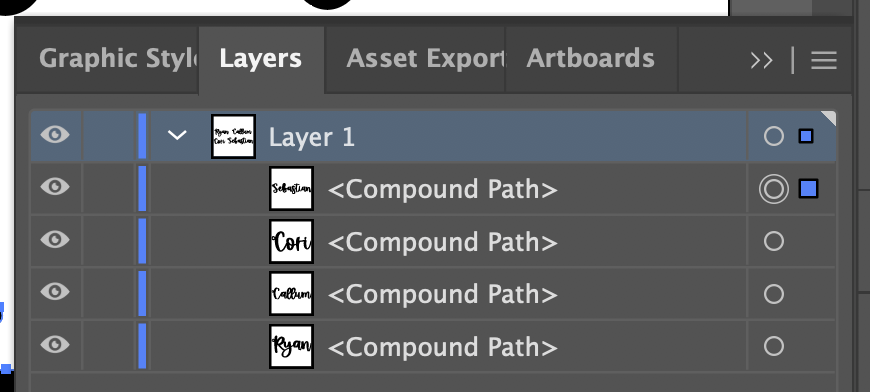
It’s always a good idea to check the Layers Panel before cutting any project—it’s a quick way to see if you may have trouble with your file, and save you a costly mistake!
Then save the file as an SVG and you’re ready to cut!
Cutting Personalized Christmas Stocking Tags with your Glowforge
Go to app.glowforge.com to cut your project.
Place your material in the Glowforge. For this project, I am using Glowforge proofgrade draft board—it’s my favorite material to paint. You can also use wood or acrylic or whatever material best fits your style.
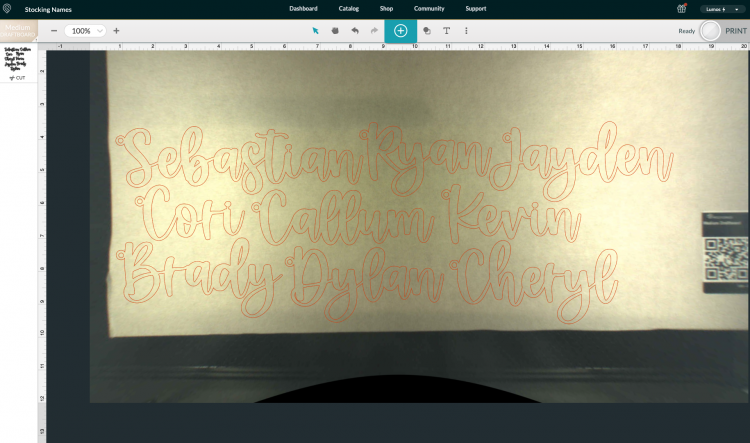
Then import your SVG into the Glowforge app. You can move the image as close to the edge as possible, as well as move the names even closer together.
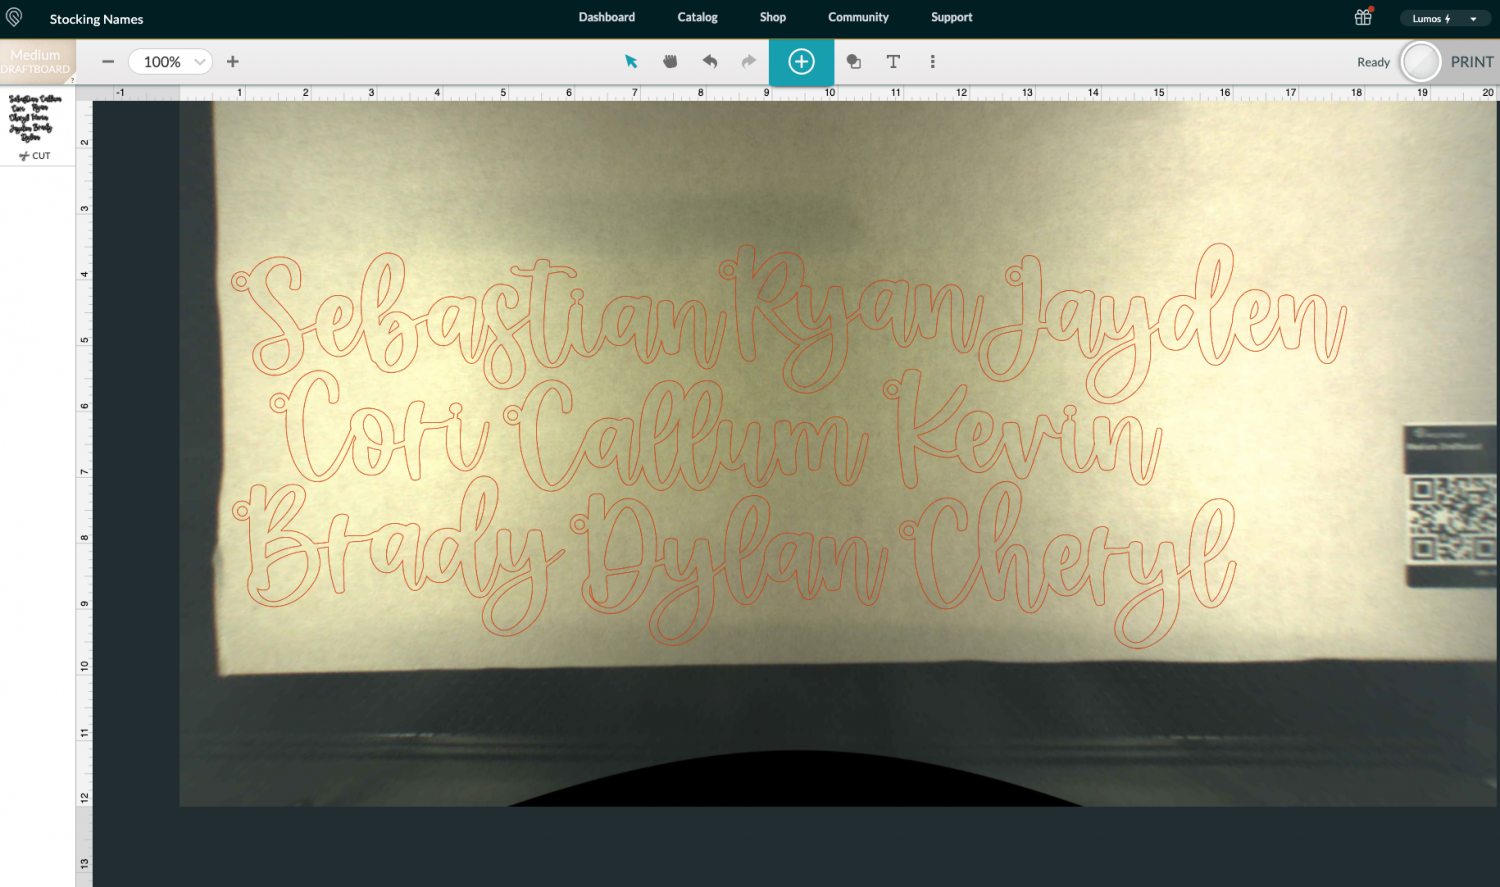
Make sure your material is set to the material you are using in the upper left, and that you have “cut” selected.
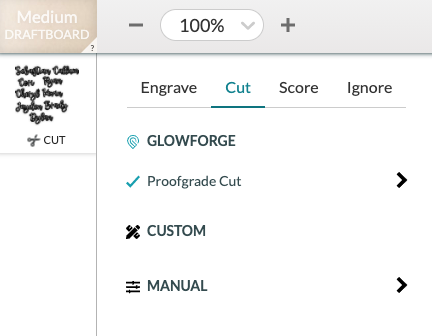
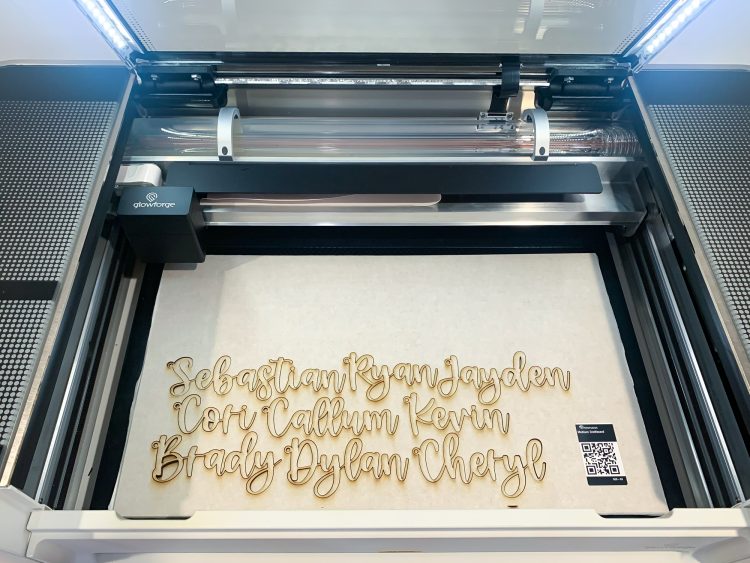
Then click PRINT in the upper right and your Glowforge will prepare your project. Once it’s ready to go, hit the glowing button on your Glowforge and watch it make magic (but don’t stare directly at the laser!).
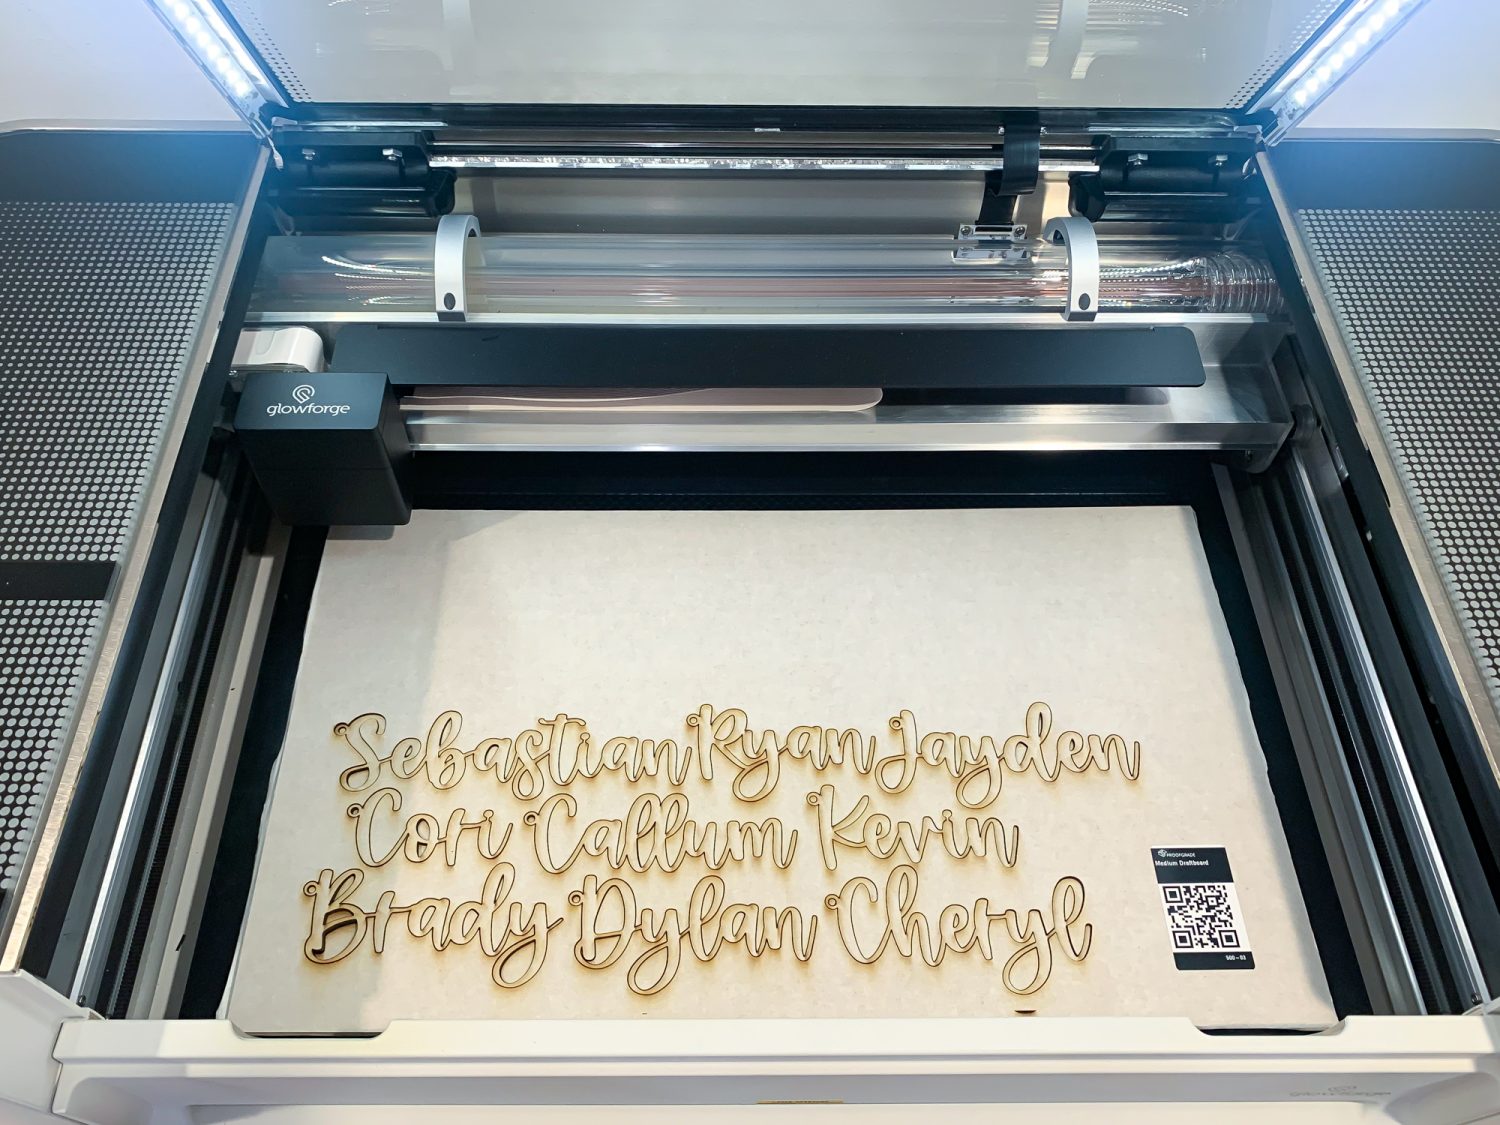
When the cut is finished, open the lid and remove the cut pieces. Separate them from the rest of the board and all of the little interior pieces in the letters (the Cricut piercing tool works really well for this).
Finish Your Personalized Christmas Stocking Tags
If you’ve used a material that you’ve masked (proofgrade draft board is pre-masked), your next step is to peel the masking away from your project. Make sure to unmask both sides.
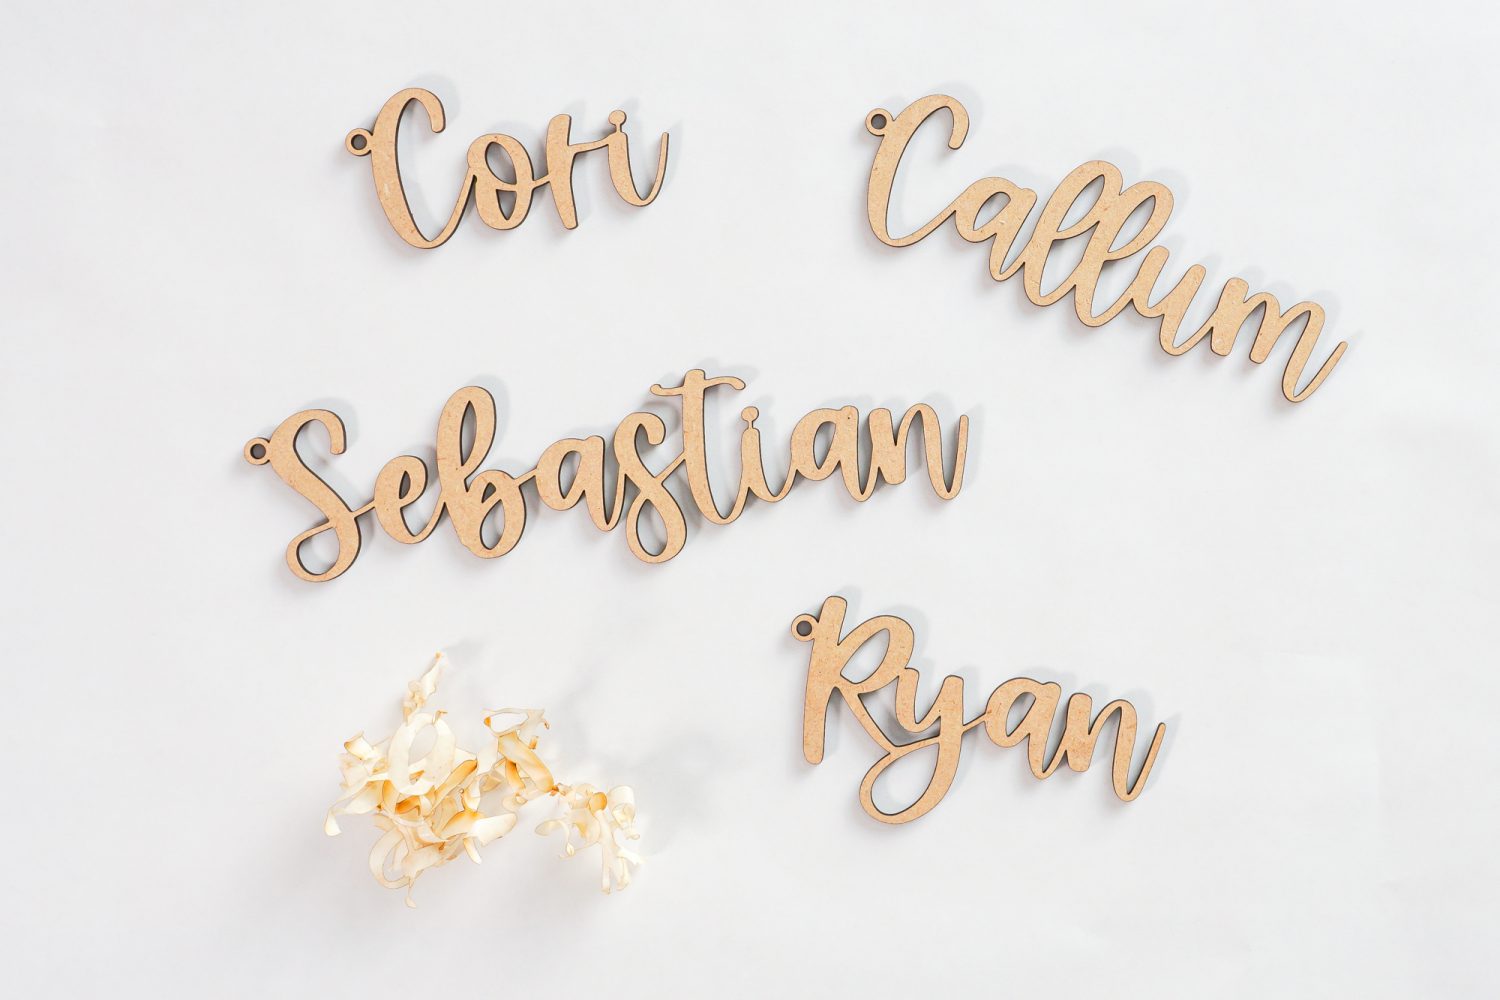
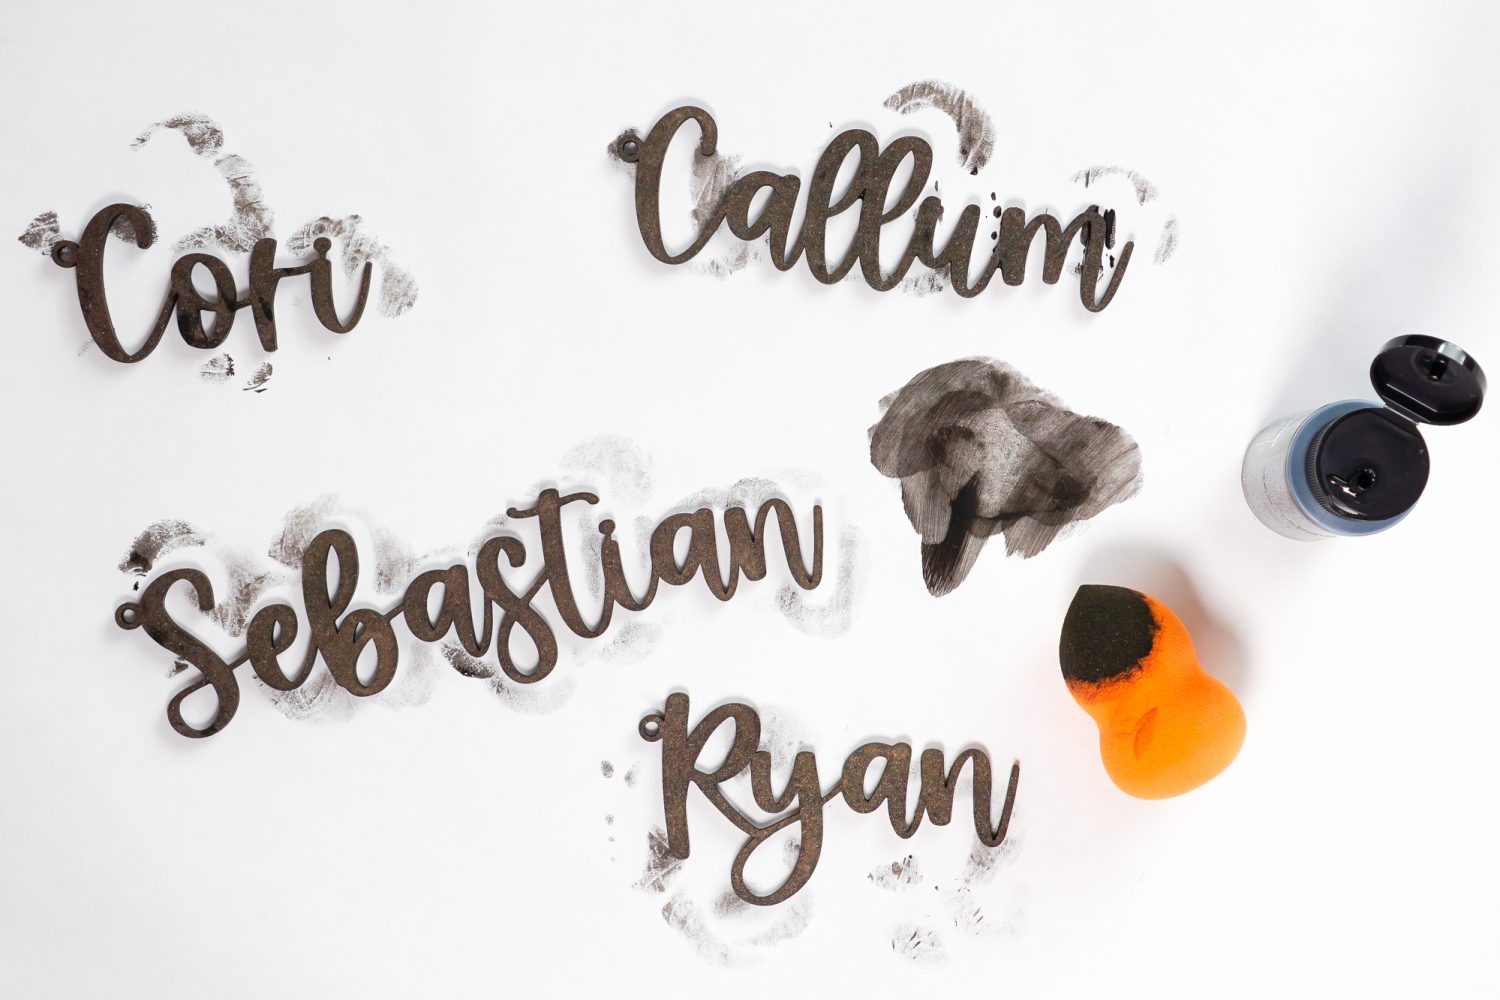
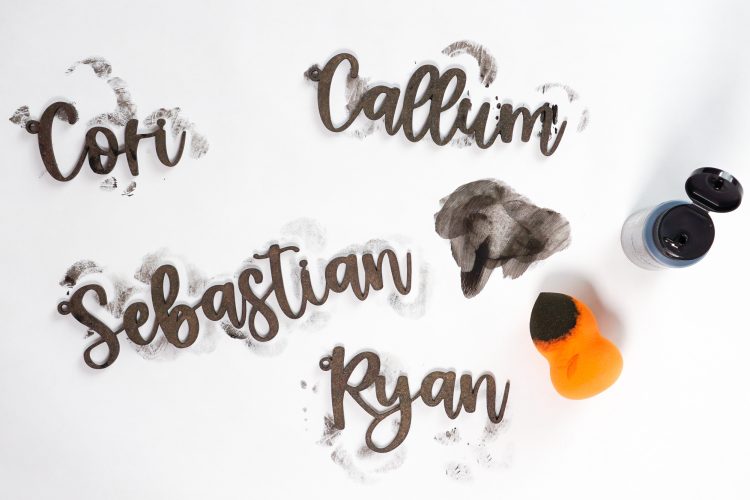
Then, if desired, you can paint your names. I like using a makeup sponge because it doesn’t leave streaks. I usually do 2-3 light coats of craft paint.
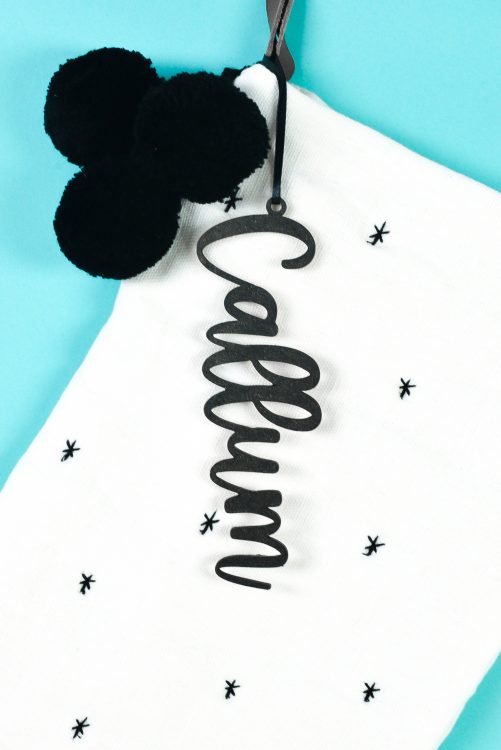
Once they’ve fully dried, use ribbon or twine to hang them on your stocking!
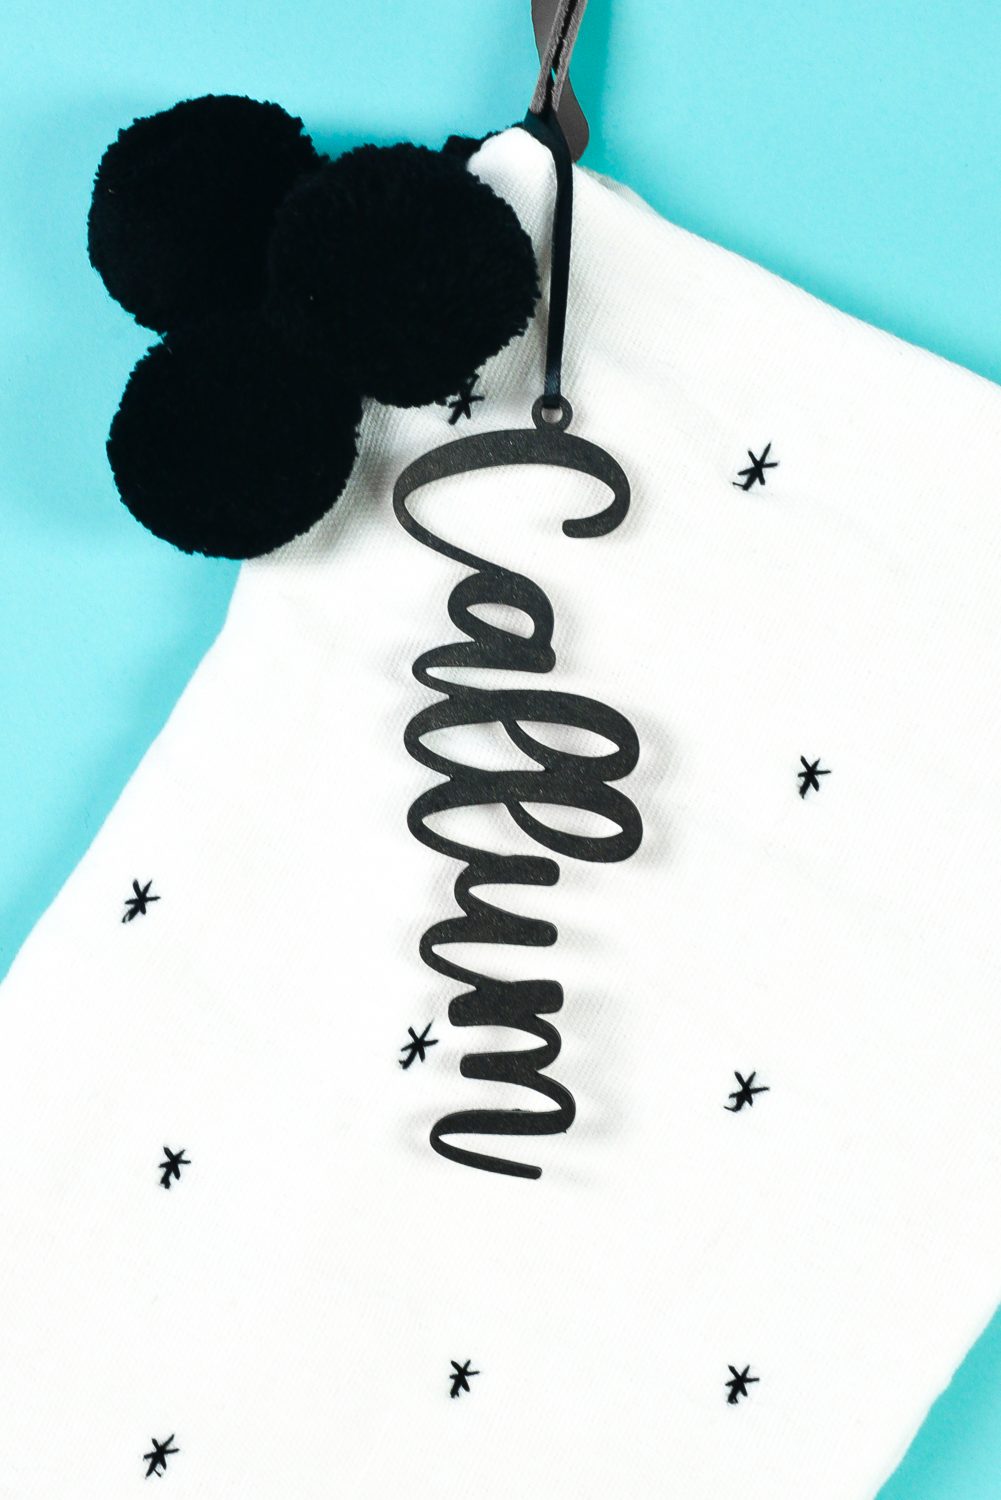
Merry Christmas! Do you think Santa could fit a Glowforge in your stocking? I hope so!
Want more Glowforge Christmas ideas? Check out my blog for Fun and Festive Christmas Glowforge Projects and Files!
GLOWFORGE PERSONALIZED CHRISTMAS STOCKING TAGS
Instructions
- Setting up the Christmas Stocking Tag File in Adobe IllustratorCreate Your NamesStart by creating a new Illustrator document. Then type your names and change the font to your preferred font for this project. For this project the font "Festive" is being used. You can also resize your names.

- You'll see two problems here. First, the "R" in "Ryan" doesn't touch the rest of the letters. Second, two of the names have an "i"—we'll have to do something about that dot. Select all of your text, and outline your fonts by going to the main menu and selecting Type > Create Outlines. You'll see each letter has a thin line around it, and you can no longer edit as text.If you were thinking about cutting this project as is, your laser will cut around each individual letter. So we will need to make each of these a single piece before we send it to be cut. But first, let's fix those two problems noted above.

- Fixing Separate LettersDouble-click the "R" in "Ryan" to enter isolation mode. This means you can move the "R" independently. Move it to overlap the "y."

- For this particular font, you'll see that there is a bit of a bump where the tail of the "R" overlaps the "y." You can leave this as is or you can use the anchor point tools to make it smoother. A couple anchor points were deleted and it's much better.

- Fixing the "Dot" Over an "i" or "j"For the dots, you have two options. The first is to just isolate the dot (double click until you have just the dot selected) and delete it. Or you can create a little "connector piece" in Illustrator so that the dot stays connected. Start by zooming in to your letter. Then create a tiny rectangle using the rectangle shape tool, making sure to overlap the two parts of the letter.

- Creating the Ribbon RingsMany stocking hangers just tie a ribbon or twine around the first letter in the name, but for this project we are making a little ring for the ribbon. If you'd like to do this as well, create two circles, one a bit smaller than the other.

- Overlap the two, so the smaller circle is on top of the larger circle. Then select both, and in the Window >Pathfinder tool click "Minus Front." This will create a "ring" for your ribbon.


- Then overlap the ring with your name. Duplicate the ring, and then add to the other names.

- Now we need to make each name cut as a single piece. For each name, select the name itself, the ring, and that little connector piece if needed, and click "Unite" in Window > Pathfinder. This will make it cut as a single piece. Repeat for any other names you've done.

- Once you've united each name, check the Window > Layers Panel to make sure that each piece is just that…a single piece. If you see extra bits or letters that are not connected, then rework your file so that each name cuts as a single piece.It's always a good idea to check the Layers Panel before cutting any project—it's a quick way to see if you may have trouble with your file, and save you a costly mistake!Then save the file as an SVG and you're ready to cut!

- Cutting Personalized Christmas Stocking Tags with your GlowforgeGo to app.glowforge.com to cut your project.Place your material in the Glowforge. For this project, I am using Glowforge proofgrade draft board—it's my favorite material to paint. You can also use wood or acrylic or whatever material best fits your style.Then import your SVG into the Glowforge app. You can move the image as close to the edge as possible, as well as move the names even closer together.

- Make sure your material is set to the material you are using in the upper left, and that you have "cut" selected.

- Then click PRINT in the upper right and your Glowforge will prepare your project. Once it's ready to go, hit the glowing button on your Glowforge and watch it make magic (but don't stare directly at the laser!).When the cut is finished, open the lid and remove the cut pieces. Separate them from the rest of the board and all of the little interior pieces in the letters (the Cricut piercing tool works really well for this).

- Finish Your Personalized Christmas Stocking TagsIf you've used a material that you've masked (proofgrade draft board is pre-masked), your next step is to peel the masking away from your project. Make sure to unmask both sides.

- Then, if desired, you can paint your names. Using a makeup sponge doesn't leave streaks. Do 2-3 light coats of craft paint.

- Once they've fully dried, use ribbon or twine to hang them on your stocking!



Leave A Reply!