Easily foil your Cricut projects using the new Cricut Foil Transfer system! Learn all about this foiling process, including tips and tricks for getting your foiled projects right, the first time!
This is a sponsored post written by me on behalf of Cricut. All opinions are 100% mine.
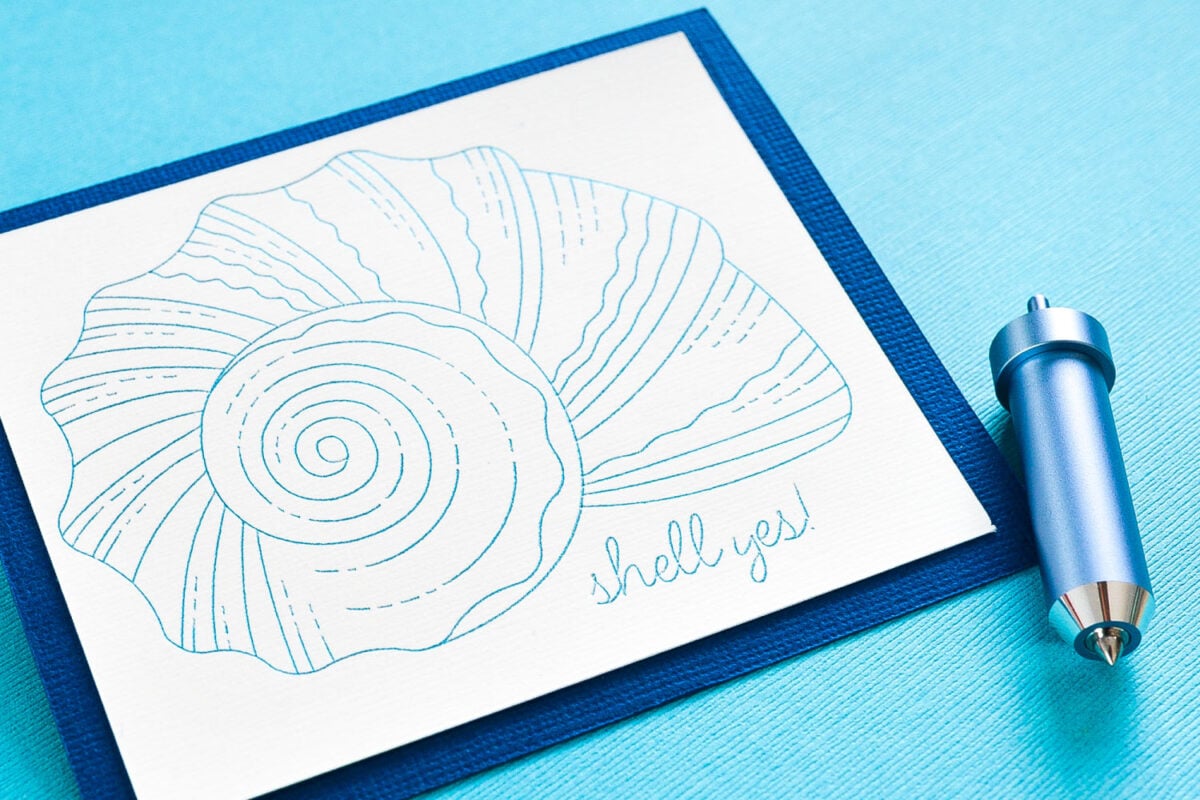
It’s always fun when I get to share a new Cricut product here on my blog! Today is the release day for the new Cricut Foil Transfer System. I got my hands on this new tool back in August from the team at Cricut and I’m really excited to share it with you today. This new product from Cricut is an easy way to foil your projects, including cards, artwork, gift boxes, and more!
As usual, I’ll be writing a number of posts on this new tool in the coming weeks, so make sure to check them all out as I write them!
- The Ultimate Guide to the Cricut Foil Transfer System
- Foiling with the Cricut Foil Transfer System
- Fonts for Writing, Foiling, Engraving and More
- What Foils Work with the Cricut Foil Transfer System
Stop pulling your hair out and start creating confidently with your Cricut! Finally understand how to use your Cricut with my Learn Your Cricut eBooks!
The Cricut Foil Transfer System
To start with, I wanted to give you a broad overview to the Cricut Foil Transfer System. This post is the place where you can get all of the information about the Cricut Foil Transfer System so you can decide if this is something you want to use in your own crafting. Here’s what I’ll be going over in this post:
- What is the Cricut Foil Transfer System
- What comes in the Cricut Foil Transfer System pack?
- Which Cricut machines work with the Foil Transfer System?
- Can I use the Cricut Design Space App?
- What types of materials can I foil?
- What types of images are best for foiling?
- What is the difference between the three foil tips?
- How do you change the foil tip?
- What sizes and colors of foil does Cricut offer?
- Can I use other foil brands?
- How does do the tape strips work?
- Overall impressions
Then make sure to head over to my Foiling with the Cricut Foil Transfer System post to learn how to make two beautiful projects, start to finish.
What is the Cricut Foil Transfer System?
The Cricut Foil Transfer System is the combination of a new tool and material that allows you to create gorgeous foil accents on your Cricut projects. The tool itself looks like a standard Cricut blade housing, but has three interchangeable metal tips that use pressure run across a foil sheet to transfer the foil to your project. This tool is light blue, to help you distinguish it from other tools in your Cricut toolbox.
Unlike other tools, the Cricut Foil Transfer System doesn’t use any heat—just the pressure from the tool against the foil.
What comes in the Cricut Foil Transfer System Pack?
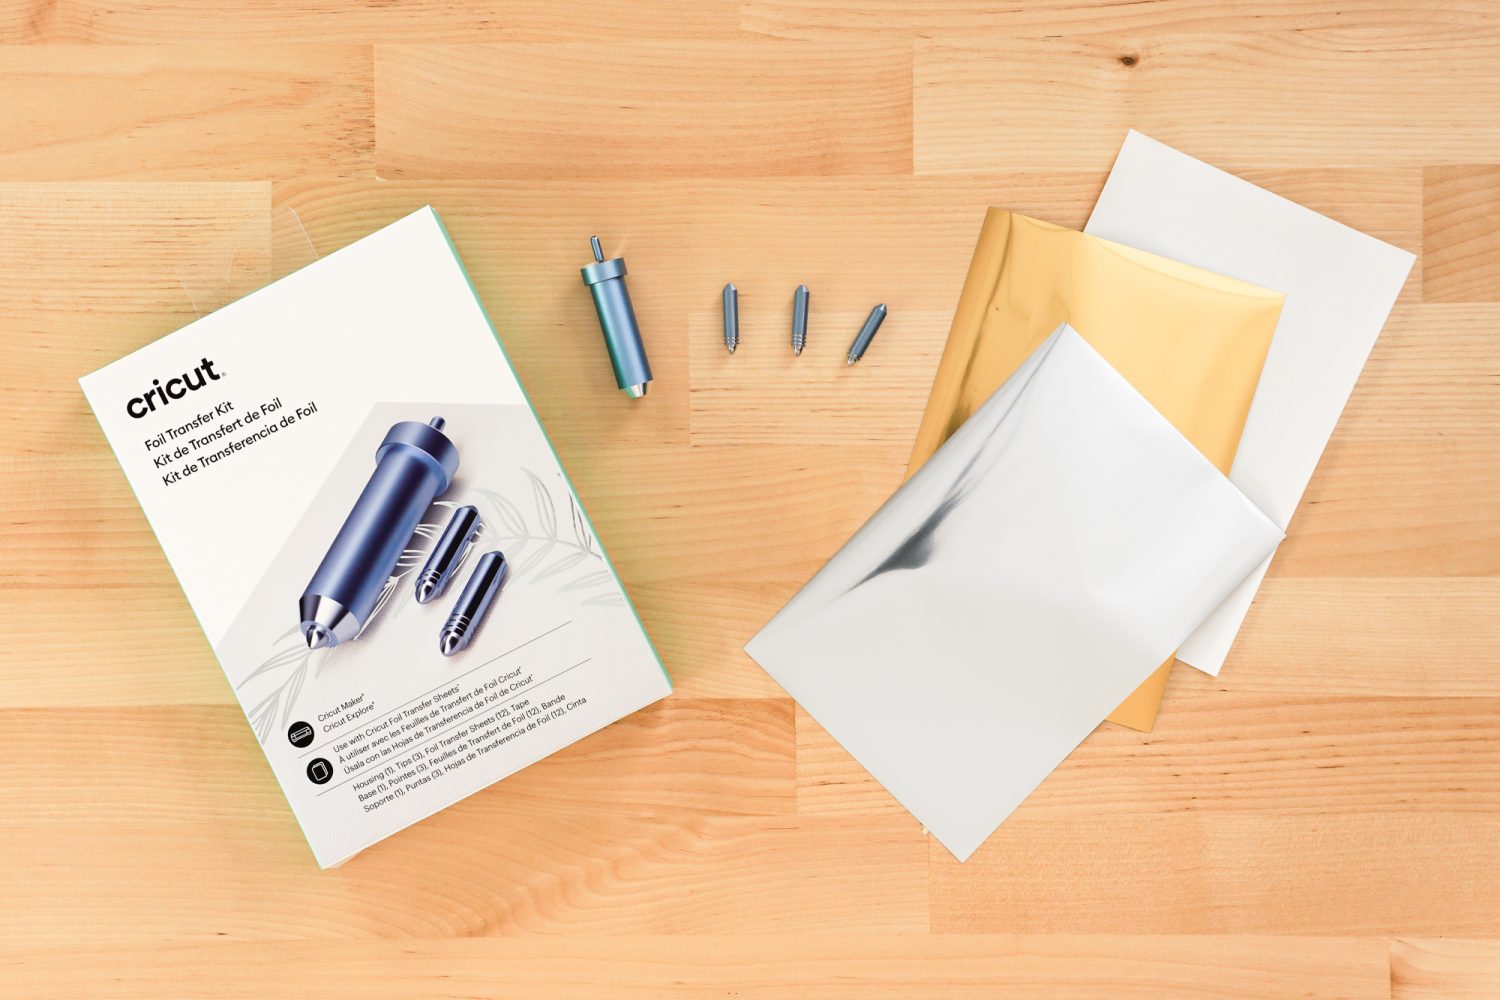
When you buy the Cricut Foil Transfer System, your pack will include:
- The foil tip housing (light blue)
- A fine tip
- A medium tip
- A bold tip
- Six 4″ x 6″ gold foil sheets
- Six 4″ x 6″ silver foil sheets
- Tape strips
Which Cricut machines work with the Foil Transfer System?
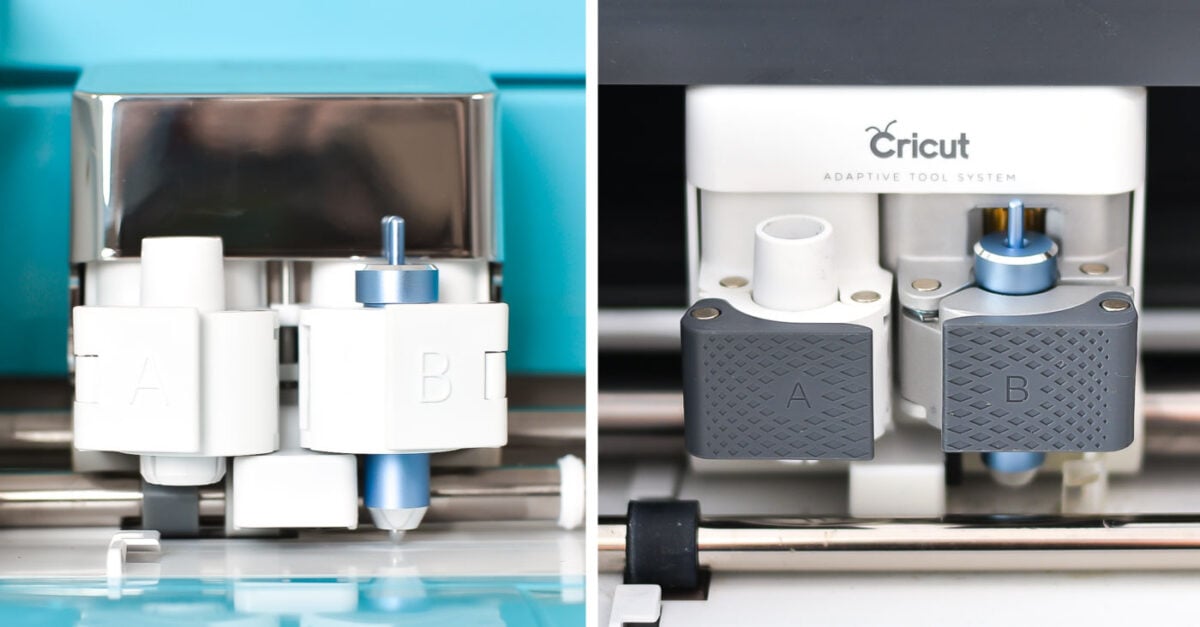
Cricut Explore owners rejoice! In addition to working in Cricut Maker, the Cricut Foil Transfer System is compatible with Cricut Explore! This is the first time since 2014 that a new tool has been released for Cricut Explore users and I know you all are going to be super excited to be able to expand the crafts you’re making using this tool.
Can I use the Cricut Design Space App?
Right now, the Cricut Foil Transfer System only works with the desktop version of Cricut Design Space. The iOS and Android apps are not supported yet.
What types of materials can I foil?
At it’s release, Cricut has qualified the following materials will work with the Cricut Foil Transfer System:
- Adhesive-backed cardstock
- Cardstock: light, medium, heavy
- Deluxe paper
- Faux leather
- Kraftboard
- Pearl paper
- Printable vinyl
- Vellum
- Watercolor paper
While those materials have been tested and approved by Cricut, you are always free to try other materials! Some may work better than others—I’d love to know in the comments if you try anything and find it particularly awesome!
What types of images are best for foiling?
Cricut Design Space is LOADED with images designed for foiling (and drawing, debossing, and engraving!). These are generally labeled “draw” images and can be filtered when you search for a design.
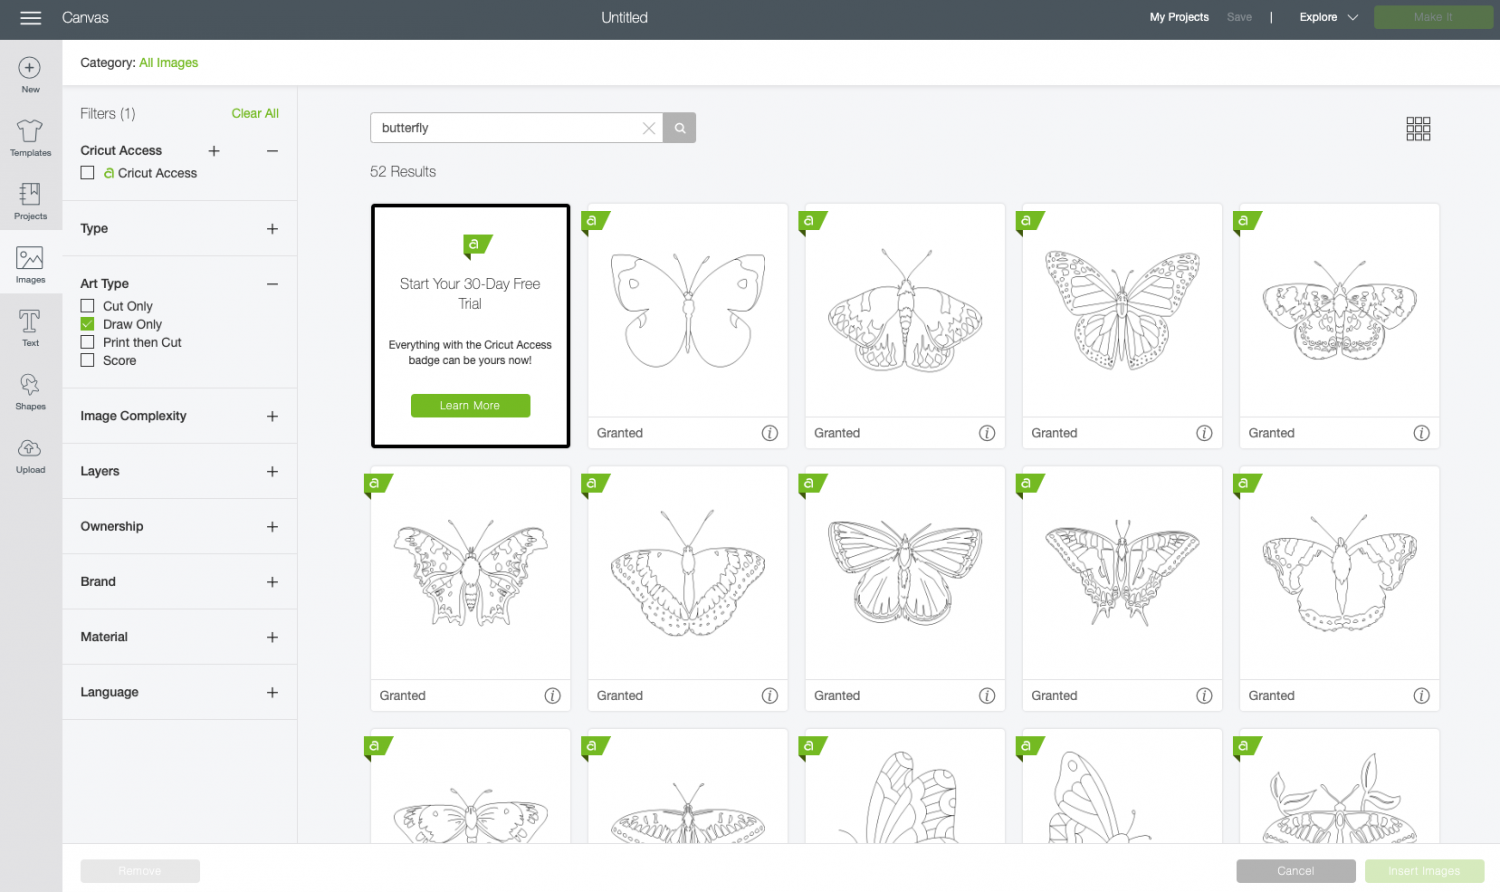
For example, if you search for “butterfly” in the Cricut Image Library, and then select the Draw Only checkbox under Art Type in the column on the left. The images that are filtered are all perfect for foiling with this system.
What is the difference between the three foil tips?
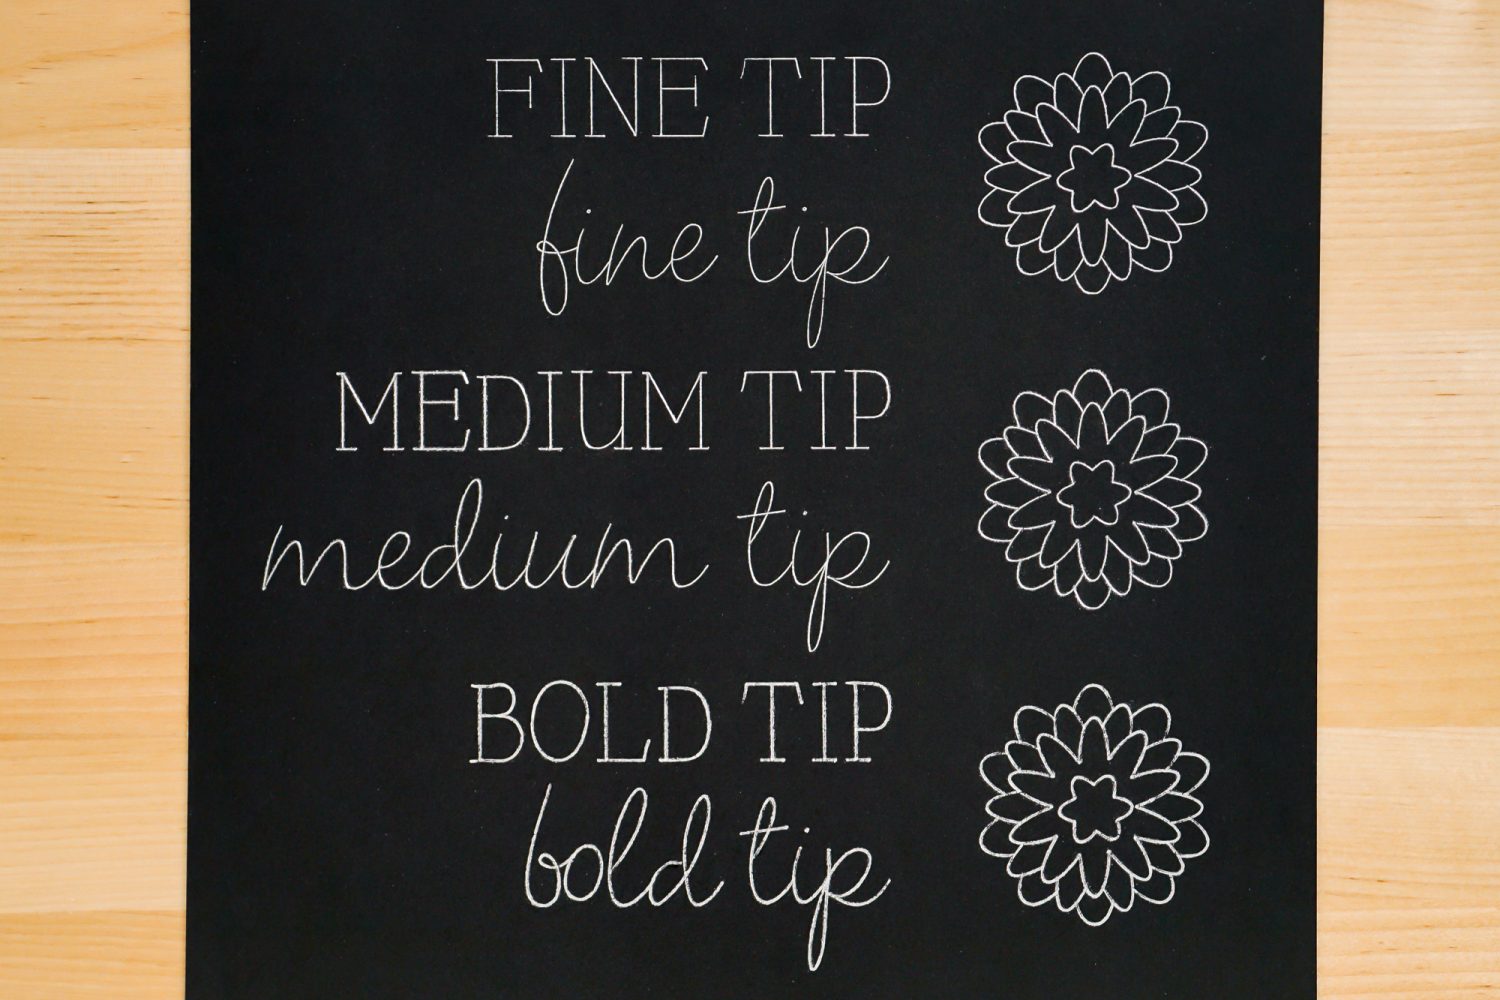
There are three tips that come with the Cricut Foil Transfer System: fine, medium, and bold. These three tips have a varying degree of “thickness.” You can tell the difference between the three tips by counting the number of engraved rings the tip has—the fine has one right, the medium has two, and the bold has three.
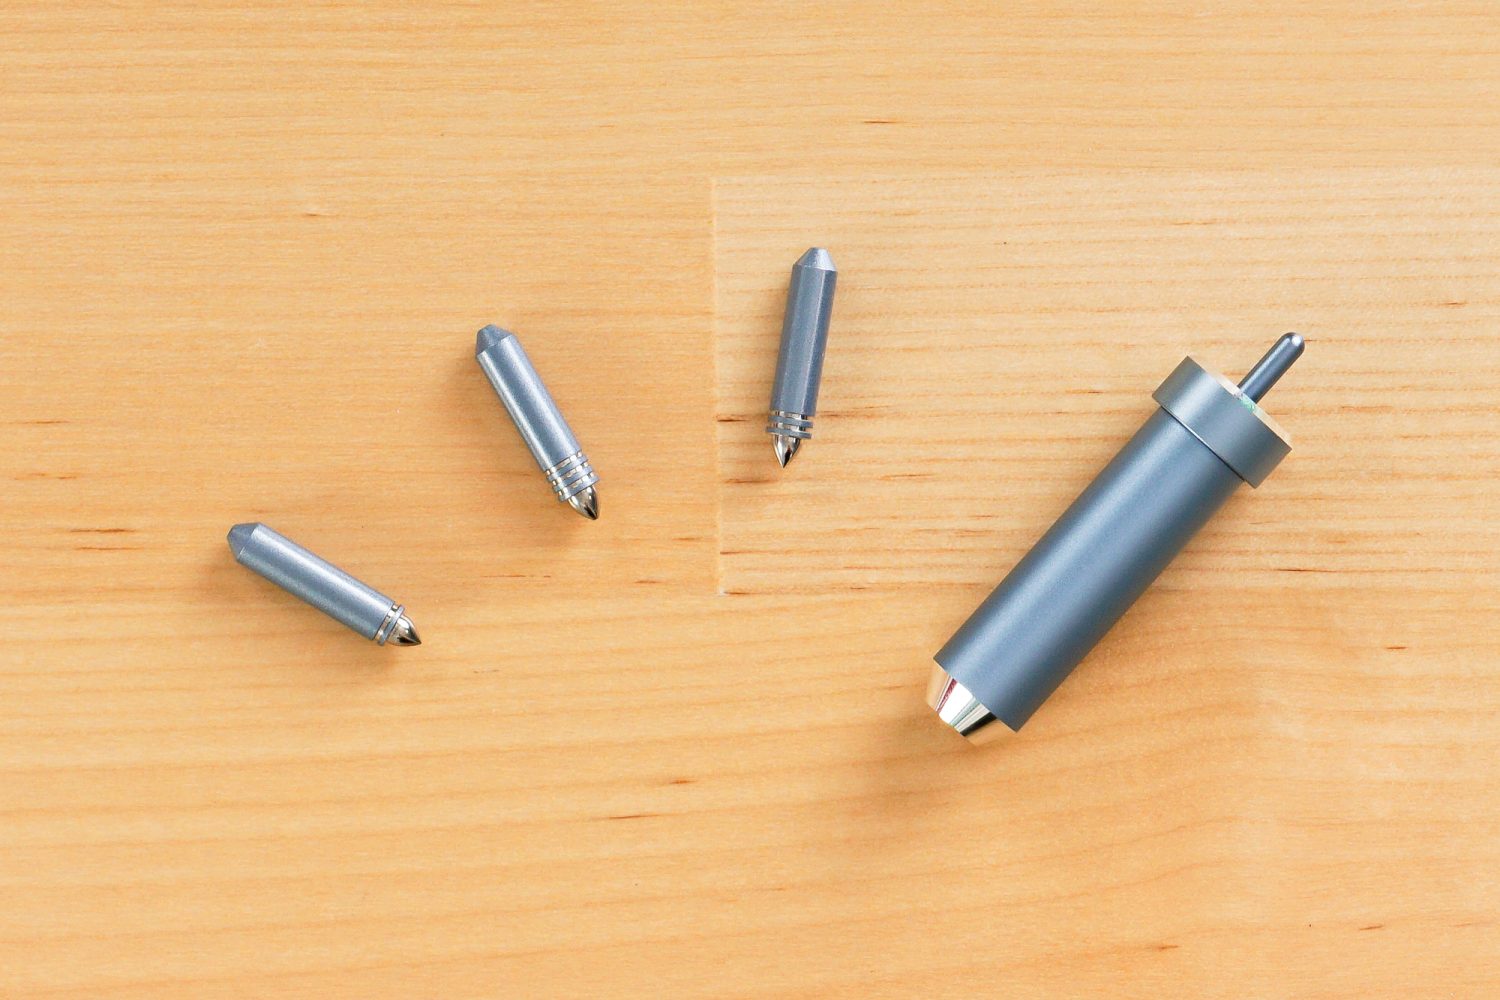
You can use them alone, or combine the different tips to create dimension. I have found the fine and medium tip work best on intricate projects and works particularly well on both textured and smooth cardstock, while the bold tip is better for simpler projects and smoother materials.
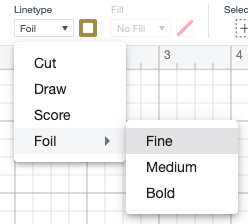
Cricut Design Space has been updated so that you can now select Foil as an option in the Linetype menu at the top. You can see here that you can select both the thickness of your foiling as well as the color. You’ll want to select the correct thickness for the tip you are using—each setting is specifically calibrated to the tip.
How do you change the foil tip?
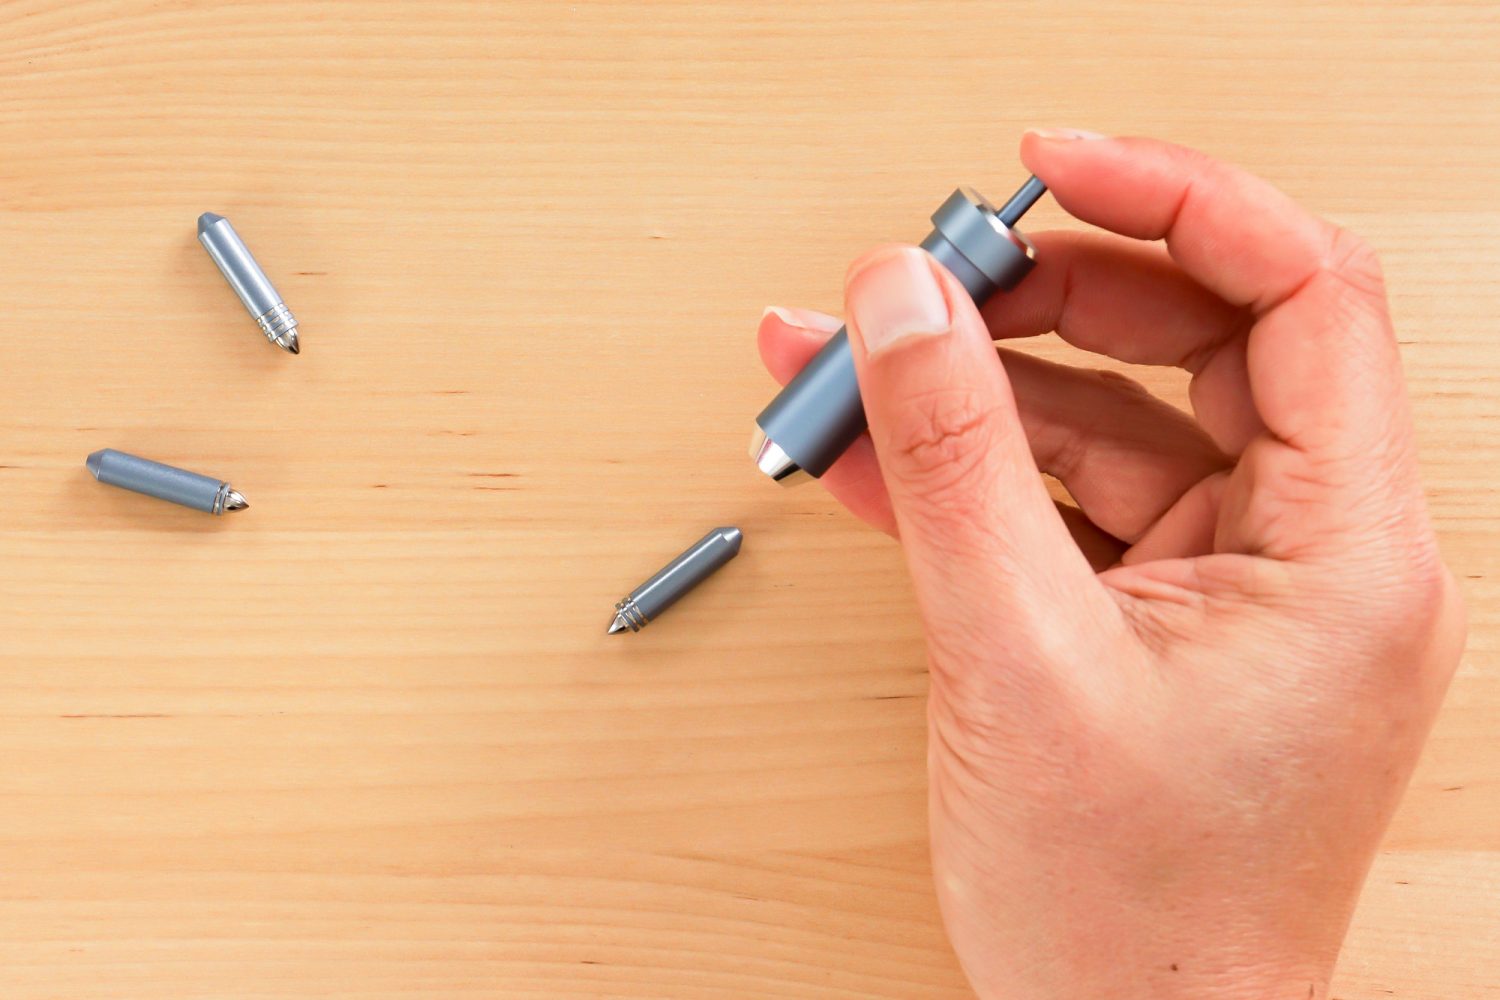
Changing the foil tip is super simple. All you have to do to remove the foil tip is to push down the plunger at the top of the housing and the tip will fall out. Swap it out and the new one will snap into place with the internal magnet.
What sizes and colors of foil does Cricut offer?
Cricut has foil in two sizes:
- 4″ x 6″, which is perfect for cards and other smaller projects.
- 12″ x 12″, which is great for big projects, like artwork or give boxes with all-over foiling.
At launch, you’ll find gold foil and silver foil in the large sizes, as well as a jewel sampler pack with emerald, purple, and aqua in the smaller size. The foil itself is really pretty—it reflects light beautifully and has a lovely shimmer.
Can I use other foil brands?
This is a great question that I don’t have a complete answer for yet! Most other foil brands are heat activated, meaning they aren’t designed for a pressure transfer. That being said, I have a bunch of foils sitting here from a previous foil tool test, so I’ll be testing them all and reporting back in a separate post!
How do the tape strips work?
When you buy the entire Cricut Foil Transfer Kit or any of the foil packs, you’ll find a white sheet of tape strips.
The foil sheet itself will not stick to your project as it’s foiling, so you’ll need to secure it to your material. Cricut provides strips of tape to do this within each foil pack. Just use it around all four edges of your project to hold the foil down. The foil doesn’t need to be perfectly flat—just get it as flat as you can.
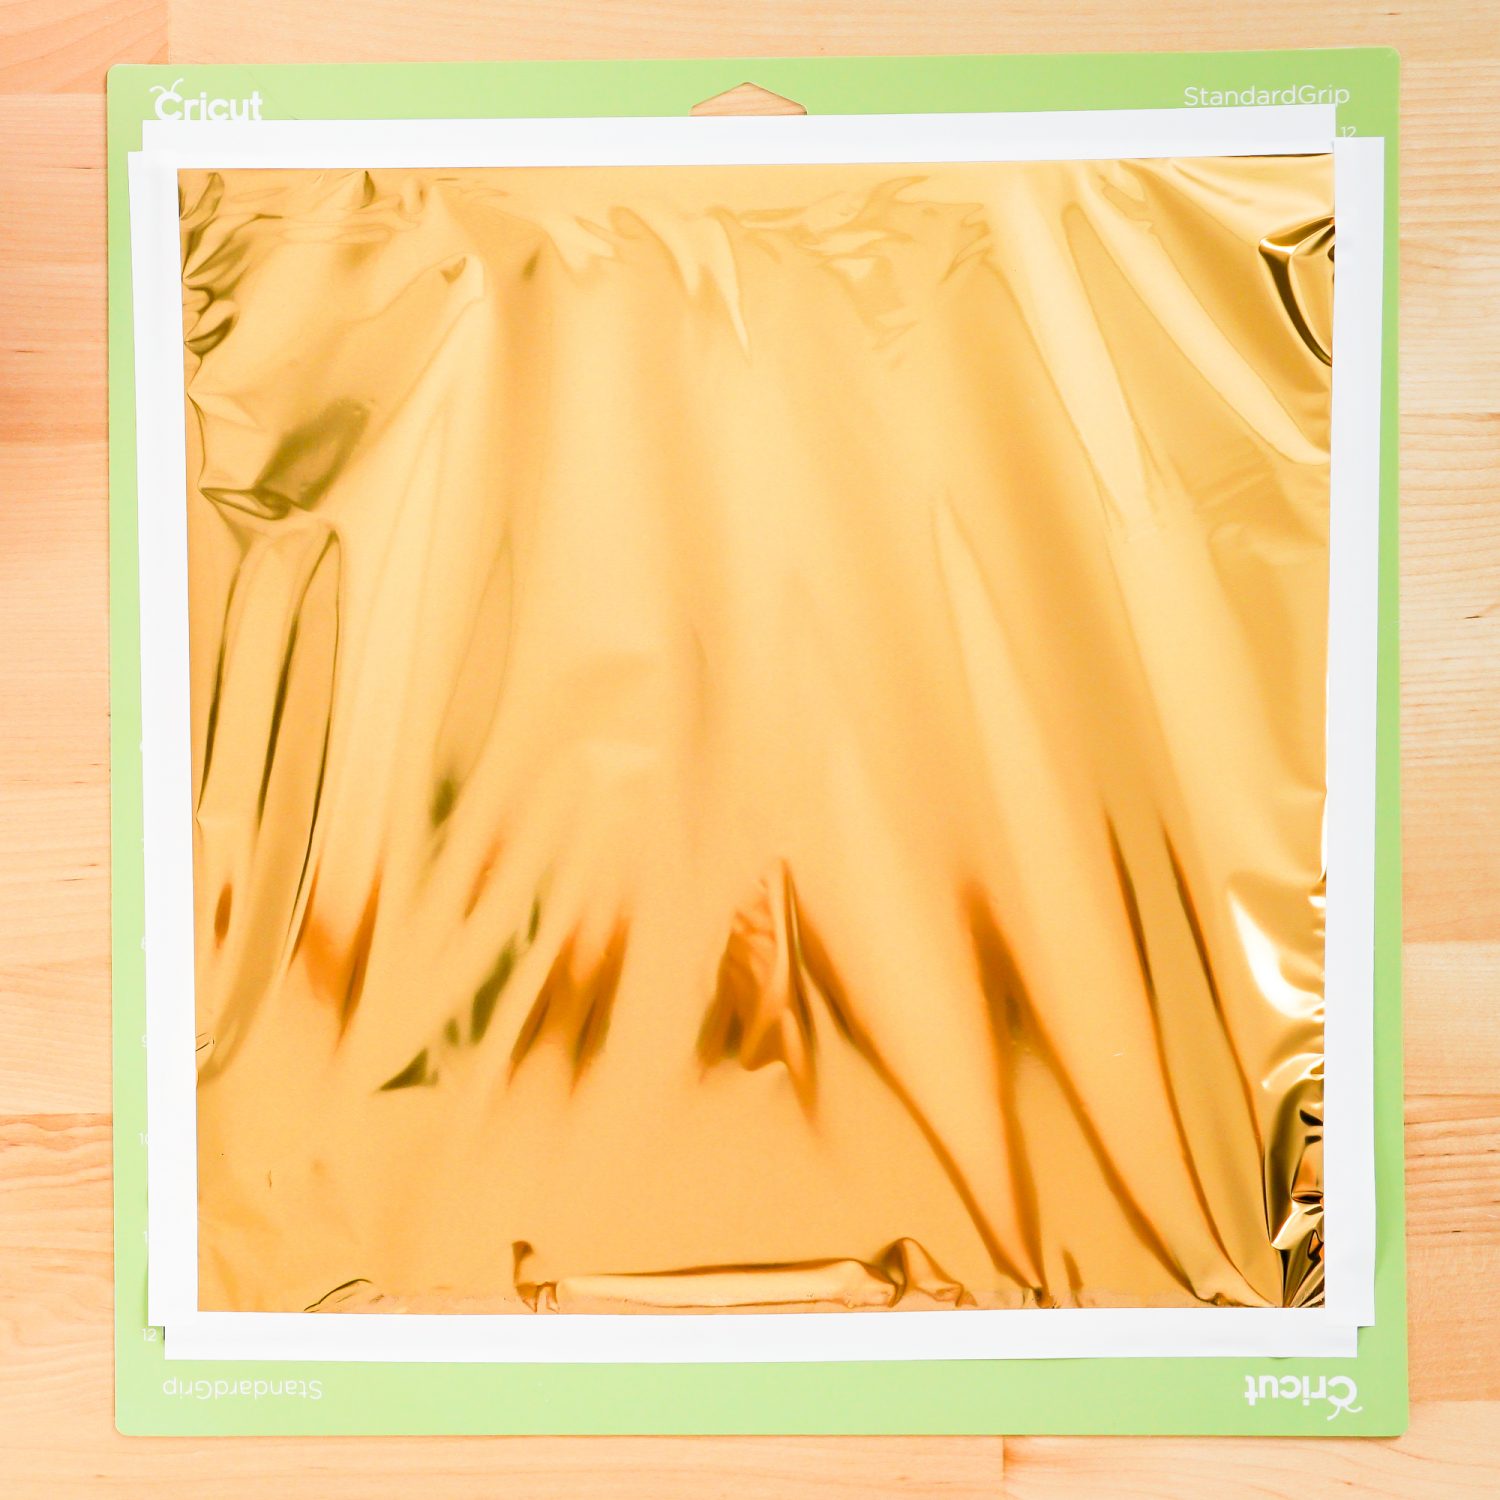
I’ve found this tape to be a little sticky and a few times it’s pulled up a bit of cardstock or kraft board as I’ve removed it. My friend Charynn from Pineapple Paper Co suggested pressing the tape against your shirt a few times to lessen the “stick” (much like priming a Cricut mat) and I have found this helps a lot!
If you run out of tape, you can try masking tape or washi. You may want to do a small test before your final project to 1) make sure the tape actually sticks to your material while foiling and 2) that it doesn’t peel up your material when removing it.
I’ll go more into using the tape in upcoming projects!
Overall Impressions
After working with the Cricut Foil Transfer System for a while, I’m pretty impressed with its foiling capabilities. Here are a few of my key takeaways:
- I like that it’s an all-in-one system that has the tool, the foil, and the tape all in one. It makes it really easy to begin, right out of the box.
- I love that Cricut Explore users can use this tool. So many awesome tools have been released for Cricut Maker over the years—I’m happy that Cricut Explore users get something new now, too!
- I’ve had good success with the foil transferring on almost all paper materials. I find the fine and medium points are my go-to tips.
- I like that the Cricut Foil Transfer System doesn’t require heat. I haven’t had trouble with the competitor heat foiling system being a problem. BUT I have left it plugged in far longer than I probably should have—which makes me nervous.
- The coverage is pretty good overall, though the smoother the cardstock, the better the transfer in my experience.
Whew! That was a lot of information about the Cricut Foil Transfer System! Head on over to my first project post using the tool, where I’ve made some gorgeous foiled artwork and a little foiled paper plant!

I’ll walk you through, step by step, how to use this system so you get gorgeous results. You’re going to love it!


Comments & Reviews
Shannon M says
I don’t own a cricut, but am interested in purchasing one specifically for die cut and now foil transfer. I’m looking to use this tool to design and print my own wedding invitations. I’m doing my design in adobe illustrator and am curious if I’m able to use SVG files exported from AI for the foiling? I’m doing some linework and some text that would all be vector-based objects.
Crystal Summers says
Hi Shannon,
Yes! The Cricut would be perfect for that. AI is a great program to make and export SVGs from. It’ll look great!
Happy crafting,
Crystal, HLMS Community Manager
Joanne says
Silhouette make a pressure-based foil transfer as well, in 8.5 x 11 sheets. I’d be curious if they work with the Cricut foil tool, mostly because the copper foil they offer looks gorgeous. Otherwise pricing seems pretty comparable.
Angela Girard says
Does this housing took work with other tips? I have the engraving tip and still need a housing tool, so wondering if i could swap into this tool tool.
Crystal Summers says
Hi Angela,
Unfortunately, the Cricut foil tool is its own system. The engraving tool works best with the quickswap housing. Here’s a link to the post Cori wrote about the engraving tool.
https://heyletsmakestuff.com/cricut-maker-engraving-tool/
Let us know if you have any other questions.
Happy crafting!
Crystal, HLMS Community Manager
Lisa Chivers says
I am keen to know how are you went testing the tool with other brands of foils.
Jenny Trochez says
Hi Cori, thanks for this, quite helpful. Please let us know how are you going testing the tool with other brands of foils.
Stephanie Logan says
I’m curious, do you prefer this method of filing to the heat method? Which makes the better image?
Crystal Summers says
Hi Stephanie,
As far as transfer goes, the foil quill works well. Cori actually has a few posts about it if you search the blog. But as far as price and ease, the Cricut Foil tool is easier and cheaper. Hope this helps.
Happy crafting!
Crystal, HLMS Community Manager