DIY felt crafts, decor, and gifts are super trendy. I’ll show you how to cut felt with the Cricut Explore and Maker to make working with this fibrous material a little easier!

Thank you to Benzie Designs for providing some of the felt for this post!
Felt is a popular material for Cricut users to want to cut…but the second you put it on your mat you find out it can be really tricky! Today I’m cutting three different types of felt using two different Cricut blades—the fine point blade with the Cricut Explore and the Rotary Blade with the Cricut Maker.
Note in this post that the Cricut Explore includes: the Cricut Explore, the Cricut Explore One, the Cricut Explore Air, and the Cricut Explore Air 2.
What Types of Felt Can You Cut on a Cricut?
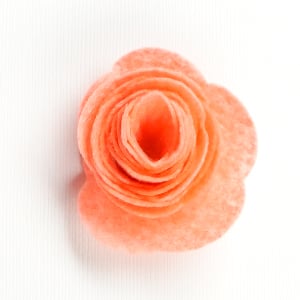
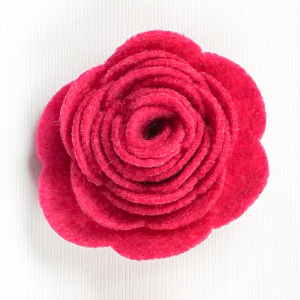
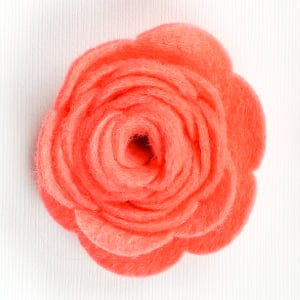
For this tutorial, I cut identical flowers (Cricut Design Space #M64E1075) out of three different felts:
- Cricut Felt
- An inexpensive acrylic craft felt
- Wool/rayon blend felt from Benzie Designs
Let’s take a look at the pros and cons of each:
Cricut Felt

Cricut makes its own line of felt that is purpose-built for cutting with the Cricut Fine Point Blade.
Pros: Cricut Felt cuts the best out of the three felts I tried, and it was the only felt that cut almost completely through with my Fine Point Blade on my Explore. It also doesn’t leave much lint on your mat. It comes in a 12×12 size, perfect for cutting on your Cricut.
Cons: Cricut felt isn’t exactly soft and luxurious. It’s stiff, and folds awkwardly instead of bending nicely. It doesn’t…feel like felt. It only comes in a handful of colors—and only in combo packs. So you can spend a pretty penny if you want more than one sheet of a certain color. On a price-per-sheet basis, it’s the most expensive (though the sheets are bigger).
Because it is so thin, I don’t find the flowers are as pretty as with the other types of felt. This is the wool blend felt vs. the Cricut felt:

The pattern for those is the same size—the Cricut flower turns out much smaller. Whomp-whomp.
Acrylic Craft Felt

Next I tried cutting the inexpensive acrylic craft felt that you might buy at your local craft store for less than a quarter a sheet.
Pros: It’s inexpensive and comes in a variety of colors. It folds a lot better than the Cricut felt and overall felt softer and a bit fluffier.
Cons: It’s messy and left chunks of lint on my mat. It still feels cheap—it’s like you can feel the plastic in the fibers. The acrylic felt also didn’t hold its shape super well—it was inclined to stretch and fray when pulling it from the mat. It only cuts with the Rotary Blade on the Cricut Maker, as you’ll see below.
Wool-Rayon Blend Felt

Last I tried cutting an merino wool-rayon blend I got from Benzie Design. Prices start at $.60 for a 6×12 sheet and $1.10 for a 9×12 sheet, plus shipping. You can even buy it by the bolt (for $94.50) if you are making a LOT of felt crafts.
Pros: So many colors!! I like the feel of this blended felt the most. It feels more luxe than either the Cricut Felt or the acrylic felt and it holds its shape nicely. The merino wool gives it a very organic feel—it doesn’t feel like it came off the factory line like the other two options do. You can also order it in various sizes, making it versatile.
Cons: It leaves a moderate number of fibers on the mat—messier than the Cricut felt but not as bad as the acrylic.
So now let’s see how to actually cut them!
How to Cut Felt on the Cricut Maker
Let’s start with the easier machine. My Cricut Maker is my go-to machine for cutting felt, using the Rotary Blade. The Rotary Blade comes with the Maker and cuts the felt like a pizza cutter, vs. dragging a blade across the felt to cut it. I find this works MUCH better than the fine point blade.
Here’s how everything cut, using the felt material setting. You will need to go to the “Edit Tools” menu to select the Rotary Blade.

I was happy with all three results.

And here is how my mat fared. The Cricut felt left the least amount of lint. The wool blend left a consistent small amount of lint and the acrylic left some larger pieces.

How to Cut Felt on the Cricut Explore
The Maker? Easy. Now let’s tackle the Fine Point Blade (which works in either the Maker or the Explore, though if you have the Maker…use the Rotary Blade!).

Cutting Cricut Felt with the Fine Point Blade
At first I tried the Cricut “Felt” setting and it wasn’t enough to cut through my felt. I’ve had some issues with thicker materials lately, so in the material settings, I bumped up the cut pressure to 185 and set the multi-cut to 3x. It cut pretty well! Just a few small places that it didn’t cut all the way through that I easily snipped with scissors.
Cutting Acrylic Felt with the Fine Point Blade
This was an absolute hot mess. On the “Felt” setting, even with a new blade, increased pressure, and the multi-cut x3 turned on, my Fine Point blade couldn’t cut all the way through the felt. My Deep Cut blade wasn’t much better. Mostly it just dragged at the felt but didn’t cut through. I couldn’t even make a decent flower to use in my comparison photo!

Cutting a Felt Blend with the Fine Point Blade
The wool blend felt fell somewhere between the Cricut felt and the acrylic felt. The Fine Point Blade and the Deep Point blade gave me a similar result—it cut about 80% of it. The rest I was easily able to snip through with scissors, which meant that I could still make my flower.

So…What is the Best Felt to Use with the Cricut?
So which was my favorite? No shock here, it was the felt blend from Benzie Design. Even with the little bit of trouble I had cutting it with the Fine Point Blade, the quality of the felt was just so much better and created such a prettier result versus the Cricut felt and the acrylic. So much depth and color, plus it was relatively easy to cut with both the Maker and the Explore.

What Mat Should You Use to Cut Felt?
Honestly, I’ve cut felt on the pink FabricGrip mat, the green StandardGrip mat, and the purple StrongGrip mat and had success with each. As long as there’s enough stick to the mat, it seems that any mat will work with felt. That being said, if you’re finding your felt shifting, make sure to use a brayer to help adhere it to the mat and move up to the purple mat if necessary.
Keeping Your Mat Clean(ish)
You have a couple options that will help keep you from destroying your mat with fuzz.
First, you can use Cricut Felt—it basically left no lint on my mat.
If you want to use acrylic craft felt or a wool blend, you can use an older mat that still has some stick rather than a new mat. I’d rather gunk up my old mats than gunk up a nice new mat.
You can also back your felt in transfer tape and stick that to the mat. You may need to add a multi-cut—play around with it! Then just peel it off after the cut! The downside to this is that you’re using transfer tape for every cut—it could get expensive depending on what you’re cutting! It is also harder to remove off more intricate cuts.
More Tips & Tricks for Cutting Felt
My biggest tip is to keep your felt shapes simple. The more intricate your shapes, the harder it is going to be for your Cricut to cut it nicely, even with the rotary blade.
If your mat is showing signs of age, use a brayer to really get your felt to stick to your mat.
If you’re struggling to remove your felt project from your mat, the spatula tool works really well.
Check out these felt projects for more inspiration!
- Beach Life Pennant
- Mermaid Stuffie
- Candy Corn Garland
- Felt Wreath
- Harry Potter Hedwig Ornaments
- USA Banner
- Felt and Fabric Bookmark
- Felt Bows
- Coffee Sleeves
- Baby Mobile
- Halloween Banner
- Felt Hair Clips
Did you like this tutorial? Enrollment to my Cricut course, Cricut Academy is closed, however, I now offer my Cricut Basics eBook, which is a great place to get started!


Comments & Reviews
Luci says
I haven’t tried it yet. But I watched a video where they used transfer tape on the mat and then applied the felt. It looks like a great idea to save the mat.
Amy U says
I have a new Maker and a brand new rotary blade. I can’t get them to cut Cricut felt at all. Which felt setting should I be using when I select the material in Design Space? I’ve tried both “felt” and the wool felt but neither works. I’m so frustrated.
Laura says
This was so helpful! Great information regarding the different felts available and the blades to use. Thanks very much.
Cori says
Hi Laura,
My pleasure! I’m thrilled you found the information helpful! :)
Nohealani says
I think I just ruined my small mats. I am going to try ironing freezer paper to one side THEN sticking it to my mat. Way cheaper than transfer tape. Lets see how that works.
Dawn says
Fantastic article! I’ve been wanting to try cutting felt flowers but felt a little intimidated. You’ve given me courage with these great tips! Thank you!
Crystal Summers says
Yay! Thanks for those kind words, Dawn!
Crystal, HLMS Community Manager
Moira says
Hello great info!! I purchased Benzie felt and it’s cutting through to my mat. Any tips on how to avoid that? Thanks in advance
Crystal Summers says
Hi Moira,
Are you using a Maker and rotary blade or a fine point blade? You likely need to adjust your settings so the pressure is a bit less, but still enough to cut through the felt. When Cori cut her felt with the fine point blade, she had to make a few modifications (which she mentions in the post). You may want to see if those work for you. If not, feel free to email us at hello@heyletsmakestuff.com and we can troubleshoot further!
Happy crafting,
Crystal, HLMS Community Manager