Painting cabinets might be a daunting process, but you can learn to do it right the first time by avoiding these five mistakes!
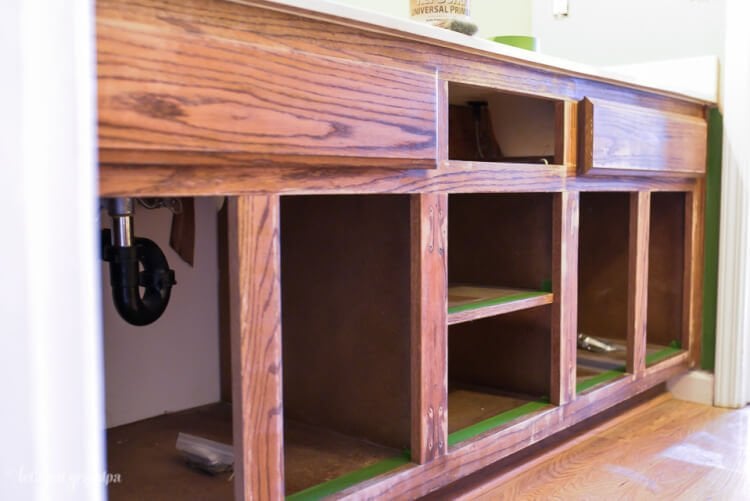
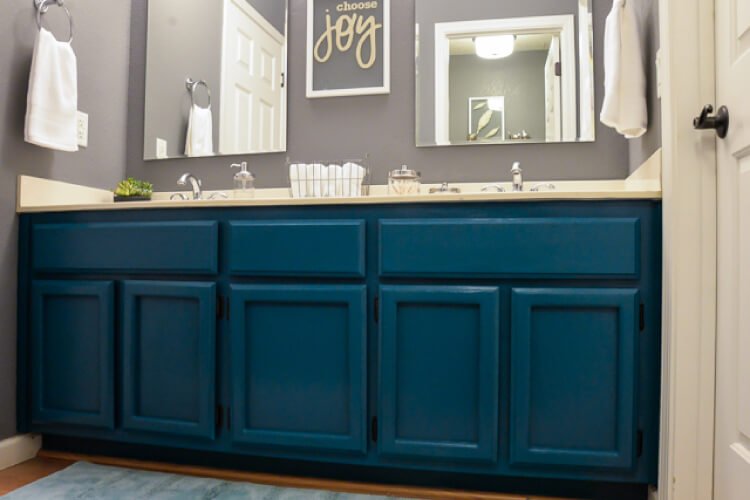
We recently renovated our guest bathroom. The biggest DIY project was painting the cabinets a deep teal. The cabinets were old oak and in rough cosmetic shape (though underneath they weren’t so bad). Clearly 25 years of use had taken their toll.
I read a few blogs on the best way to go about painting cabinets, so I thought it would be pretty easy. But it wasn’t. And I made a handful of mistakes that I’ll share here so you don’t have to make them yourself!
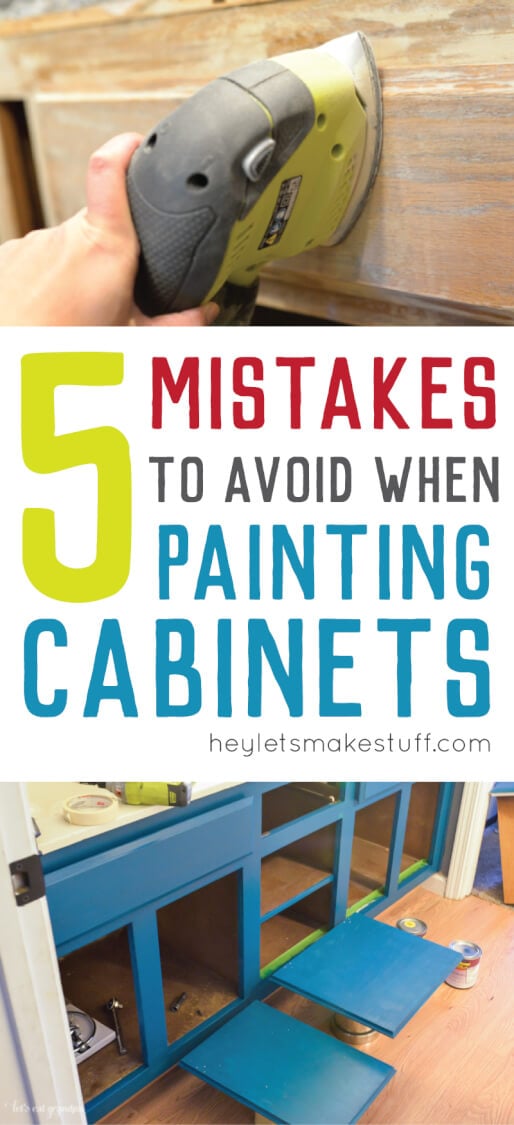
I started by sanding the cabinets, which led me to my first mistake.
Not Sanding Completely
I borrowed my cousin’s palm sander, which actually worked great for the most part. Of course our cabinet doors had some places the sander couldn’t get, and that’s where things got a little hairy. I gave them a rough hand sanding, but I should have spent more time on those nooks and crannies. The paint, even with primer, had a harder time sticking, leaving me with uneven spots, and requiring more paint.
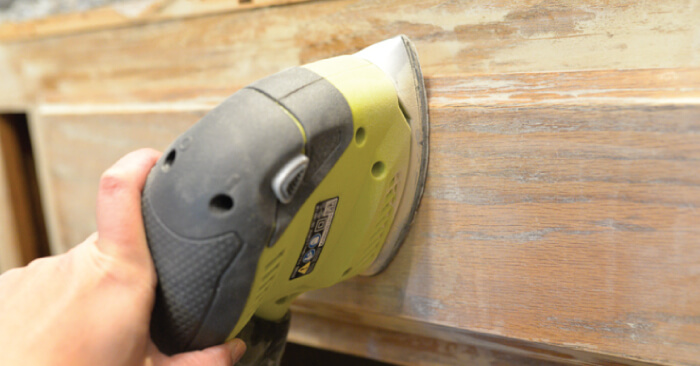
Solution: spend a little more time manually sanding those tight spaces. It’ll save you paint and time in the long run.
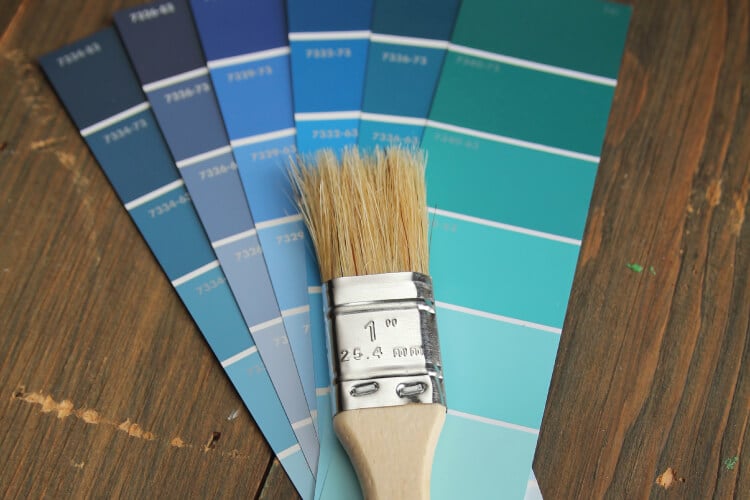
Not Tinting Your Primer
This isn’t something I thought to do, but Ryan’s friend (who’s a painter by trade) mentioned it when he stopped by…after I’d primed the cabinets. He said to add a bit of your paint color to the primer to tint it — and you can get away with fewer coats. White is one of the hardest colors to cover, so having your primer tinted will save you time and money!
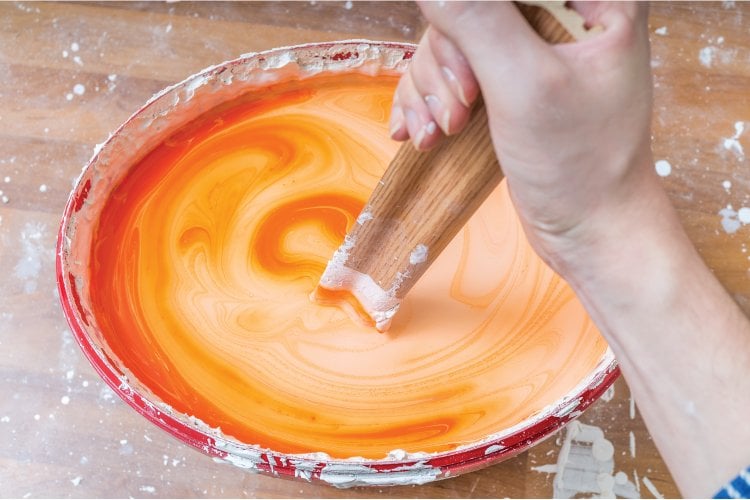
Solution: add a little paint color to your primer
Not Using the Right Paint
I made one other mistake that you’re not likely to make — my brother came over to help paint and I gave him the entirely wrong color. It was a darker teal that I had bought as a sample. Going on, it only looked a little off, so I didn’t really question it. But by the time it dried, it was clear it was a different color.
This wouldn’t have been that bad, except that the sample paint was a much lower quality than the final paint I had chosen, which was specifically formulated for cabinets. That meant that the brush and roller marks were much more visible in that layer. I ended up sanding down some of that layer to help get rid of the painting marks.
Solution: buy a high-quality paint meant for cabinets (and hide everything else!)
Getting the Hinges Mixed Up
I should have labeled. I read a dozen blogs that said to label my hinges so that they would all go back in the same places. But I figured all the hinges were the same, so why spend the time?
Huge mistake. The hinges had worn in specific ways in the last two decades and a half, so that after they were painted and I was putting the bathroom back together, none of the hinges worked quite right. I ended up sort of forcing everything into place, and while the doors work, they don’t work as well as they would have if I’d labeled them.
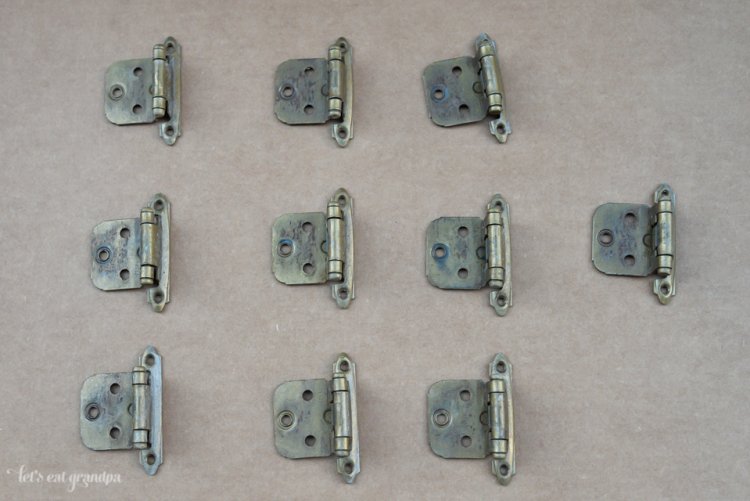
Solution: label the darn hinges!
Getting Your Doors Mixed Up
While you’re labeling your hinges, also label your doors. I thought I was doing a good job of keeping the doors in the right order when I was painting them, but nope. I went to re-install the doors, and they didn’t fit properly. Figured out later that two of them were switched—I have no idea how that happened during the process, but it wasn’t good to have a door that sat half an inch higher than the others, and wouldn’t shut all the way.
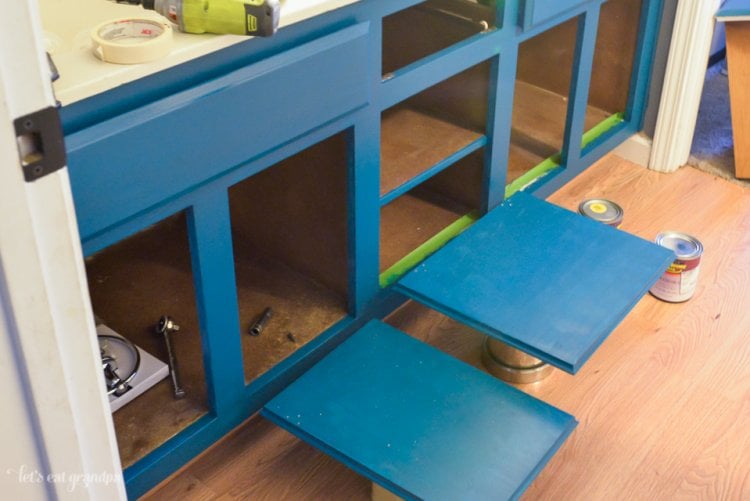
Solution: label the darn doors!
My Biggest Takeaway
While making these mistakes was frustrating, I tried not to let them get me down. I know that these are not our “forever”—someday we’ll pull these out and put in better cabinets with higher quality hardware. Knowing that made it much easier not to be totally frustrated with the process—I kept reminding myself it’s all a learning process!
And when all was said and done, I loved how they turned out. I’m so glad I took a risk on the teal and even though they aren’t perfect, they are definitely very “me.”
Get more teal inspiration: Teal Cabinet Paint Colors
You can also check out the full bathroom reveal, and learn how to make the DIY floating artwork and a shower curtain out of a flat sheet!
Comments & Reviews
Sami says
I was seriously almost panicking at the color as I was reading the post, but it looks amazing! I love that deep teal with the gray walls. And the mirrors are gorgeous with the curves on the top. Where did you get those?
Meg says
Absolutely love the way the bathroom turned out, and definitely grateful for the tips! While our master bathroom was in good shape when we got the house, the other bathrooms in our home are something of a mess. The cabinets in our guest bathroom upstairs are very worn and the color is not our taste at all . . . we’ve been talking about painting/staining them, but I’ve been nervous. Will have to chat with the handy husband and see what he thinks about tackling this job pre-baby!
Erica says
Thanks for these tips! I’m thinking about redoing the cabinets in both our bathroom and our kitchen, so I’m glad I read this first! Your end result is fabulous, even if it took a bit of trouble!
Natalie says
Thanks for the tips! I’ve been meaning to paint my kids bathroom this winter. I think I’ll take the plunge soon. Your advice is perfectly timed! And I love the color. It turned out so great!
khadija says
Your cabinets look very lovely! Cabinets are so hard to paint, thanks for the tips.
Michelle James says
I love these! The teal is unexpected and it really turned out great. Thanks for the cabinet painting tips! I am having fun looking around your blog. I have never been here before but will definitely be back!
Cori George says
Thanks Michelle! Hope you enjoy what you find here. :)
Jill Tees says
What a good idea to label hinges and doors. I’ve painted cupboards before but only worked with one at a time and often thought that I’d be quicker doing them all at once, but I’d never have thought of the hinges! Thanks for the tips.
Jane says
You made a terrific job…love the colour scheme- you obviously have a good eye for colour. Thanks for the tips…my thought processes would have made exactly the same “mistakes” as you
Sue Flaherty says
Beautiful job. I’ve done a kitchen. Beige over dark brown and they did have a tendency to chip a bit. I was so glad I did it though as it lightened up the whole area and made it look so much bigger. Just keep a little jar of your original color around for necessary repairs that won’t take a minute. Love the teal!
Sonia says
Thank you só much! We are thinking of pairing ours so this was very helpful!
Cori George says
You’re welcome!
Emme says
Love the color of the cabinets! Did you consider using chalk paint? We are remodeling a farmhouse and every cabinet is damaged. If you use chalk paint there is no need for sanding, especially primer or mixing. Paint it on and done or finish with a coat of wax if you prefer.
Matt says
How could you cover such beautiful timber with paint!!!
Ahmed says
Thanks for the tips! but its really hard to do painting by yourself. Its better ask someone to paint it for you, but keep an eye on the mistakes you mention above :)
Emma says
Thanks for these great tips. I really need to do spring cleaning but I’m waiting till hubby has time to help me!
Lizza says
Great post.
Laura says
Good post. It is a great idea to paint bathroom cabinets to refresh and update your bathroom. So all mistakes should be avoided when painting bathroom cabinets.
Kaitlyn says
Wow! Your blue cabinets turned out great!
Thanks for laying out some mistakes to avoid. I made the mistake of not sanding enough once and it just ending up being more work!
Cori George says
So much work! Better to sand more and paint less :)
Tracy says
Thank you so much for this helpful information. I am about to paint my kitchen cabinets. I am totally going to label the hardware as well as the doors!! Never would of thought of that!!! Also I was at a home improvement store and a representative turned me onto a primer paint for any wood surface you are not staining but painting. It does not require any sanding! It’s a bonding primer and she says this paint is a best seller especially for people that paint and sell furniture because it bonds even to Formica with no peeling! I’m going to start my project within the next two weeks! It’ll finally represent “me” in our kitchen!!
Cori George says
Let me know how the primer goes! I decided to sand and scrub mine because they were FILTHY. I don’t think any primer would have bonded to all the gunk on our cabinets! But I’m curious how it goes — I am doing to do our master bath cabinets soon and those are in much better shape than our kitchen cabinets were. Thanks!
Eliane says
Use simple green, it will wash all the dirty away before doing any prep work for painting. It’s amaizng than you prime and paint
Ivy Baker says
This is some really good information painting your cabinets. I liked that you talked about how it would be best to sand down the cabinets. It does seem like a good thing to be aware of when you want to do this yourself.
Margaret says
So, what did you do to make it right after not labeling the hinges? I labeled my doors and hinges, but when we stripped the paint off the hinges, they all got mixed up. The two doors that were in the center were hitting each other, and the two doors in my cabinet to the left had a 1/4 gap. So then, we traded two of the doors. That didn’t work because the latches now don’t work. Egad! Do we need to redo the hinges?
Cori George says
I played around with hinges and doors for hours until I got it as close as I could. They still aren’t perfect. New hinges are a good option!
Ivy Baker says
This is some really good information about what to not do when you are painting your cabinets. I liked that you pointed out that you shouldn’t mix up the doors. I wonder how professional cabinet makers keep the doors straight. I know that I would have for the doors to be put on wrong.
Katherine says
I never thought about the primer we would use! Thanks for that tip about prepping it before we apply. Like you said, that would save us a lot of time and money.
Renee says
I have 25 year old cabinets that have painted over over hinges too. We’re your hinges painted over and how did you get them off?
Cori George says
Our hinges were not painted over — the cabinets were wood before we painted them. My guess using a screwdriver to pry them off would be what I would try first!
Erin says
Put the hinges in a boiling pot of water and it takes the paint right off
Ste says
I would have thought the same thing about the hinges! Glad you wrote this!
Sarah Kite says
Great post and awesome results! Thank you for sharing!!
Dawson Burgman says
Your cabinets look awesome! Cabinets are so hard to paint, and have them look good.
Kimberly says
How do you label the doors and hinges?
Amy Motroni says
Just any system that works for you. It’s just a way to keep track of which hinges go with what doors so you can put everything back the right way. You can make piles and label it together like that to organize it all.
Hope that helps!
Amy, HLMS Reader Support
Sarah White says
Thanks for this post Cori ! I had my kitchen cabinets refinished by a local cabinet refinishing company and they did a great job, but I want to go the DIY route for my bathroom cabinets this year and I will definitely be referencing this post to make sure that I don’t make any mistakes! I would definitely be the one to lose track of which hinges go to which doors, so thanks for warning me ahead of time haha 🙂
Martina says
These are great tips Cori! I found every one of them to be true and then some in our recent cabinet painting adventure :) Thanks so much for sharing your insight!
Lori says
If you’re painting the cabinets how do you label them and paint them.
Marlon says
I’d like to find out more? I’d like to find out some additional information.
Arlene says
It is perfectly fit for my new cabinet. I will paint it with the tips you share to us.
Pamela Allen says
I just finished my lower cabinets in the kitchen. Even after several months they stuck together. I read what a professional painter said to fix this, petroleum jelly on all the areas that are sticking. It worked like a charm and he said it would still cure under the vaseline. I used semi-gloss and it takes forever to cure.
Mari Cris says
I am so excited to reface my cabinets now. I’ll just wait for theconcrete contractor to get done with their job outside then I’ll start working on repainting my stuff inside. Thanks for this article by the way. Now I know what has to be done!
Ned says
Have you tried to paint the laminate countertop? They say it can be done but I don’t know.
Marco says
Excellent advice, Cori! In our most recent cabinet painting experience, I discovered each and every one of them to be true and then some.
Cori says
Hi Marco,
Thank you! I’m thrilled you found the tips helpful! :)
Alice says
I should have labeled. I read a dozen blogs that said to label my hinges so that they would all go back in the same places. But I figured all the hinges were the same, so why spend the time? Flappy Bird