Looking for a larger, enclosed diode laser that’s faster than many on the market? Check out my xTool S1 review! This revolutionary laser offers a lot of features not seen with competitors.
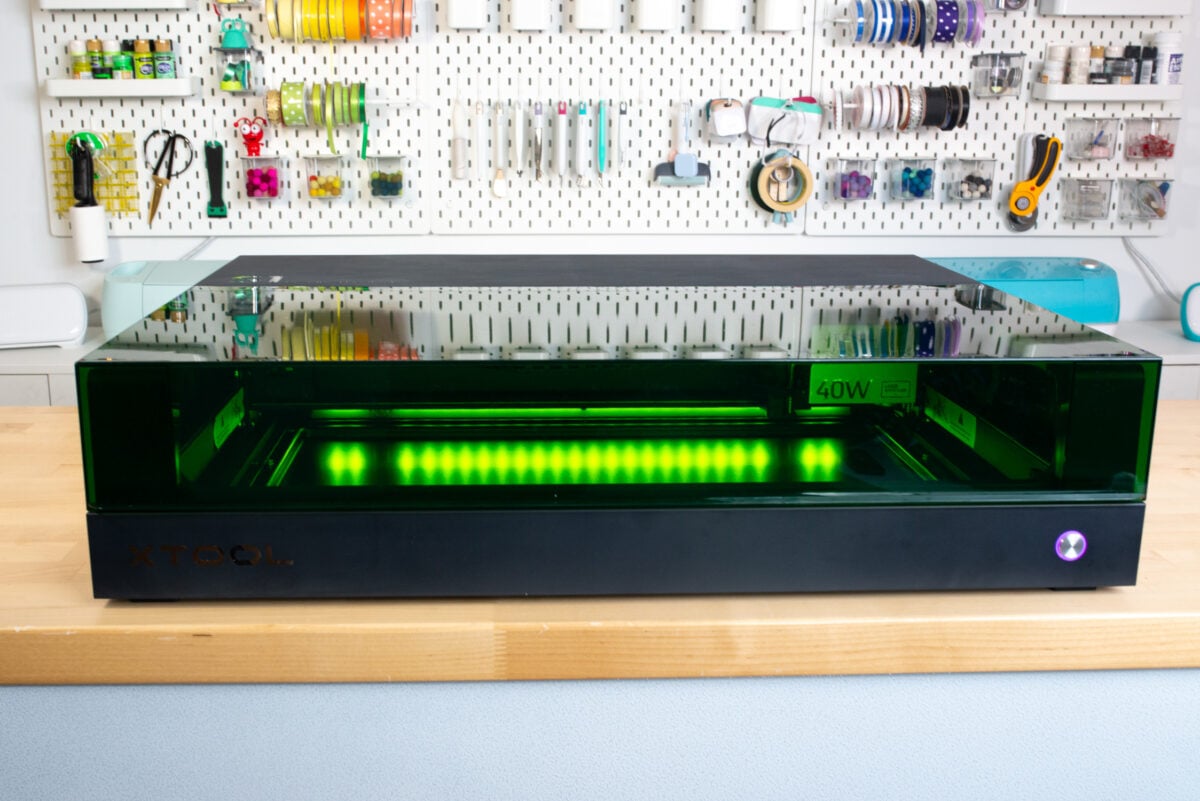
Machine was provided by xTool but all opinions are my own.
I’m really enjoying laser crafting lately so when xTool reached out and asked me to review their xTool S1 diode laser (now available in a white version), it was a quick yes!
This is my fourth laser and I think the xTool S1 has a lot of features that will appeal to my at-home crafter audience without the price tag of a larger CO2 laser like an xTool P2 or Glowforge Pro. I was most interested in reviewing it because it fills a niche somewhere between the lower-end diode lasers and the CO2 lasers.
In today’s post, we’re going to go over the basics of the xTool S1, including some of the specs, important safety features, and the materials it can cut. I’ll also give you my overall pros and cons and who might be the ideal user for this machine.
Let’s dive in to this xTool S1 review!
Video of My xTool S1 Review
Watch my full review video about the xTool S1! If you prefer to read, continue on below this video!
What is the xTool S1?
The xTool S1 is a high-wattage diode laser crafting machine. You can cut, score, and engrave using the xTool S1 to make all sorts of projects, like signs, jewelry, art, party decorations, home decor objects, and more!
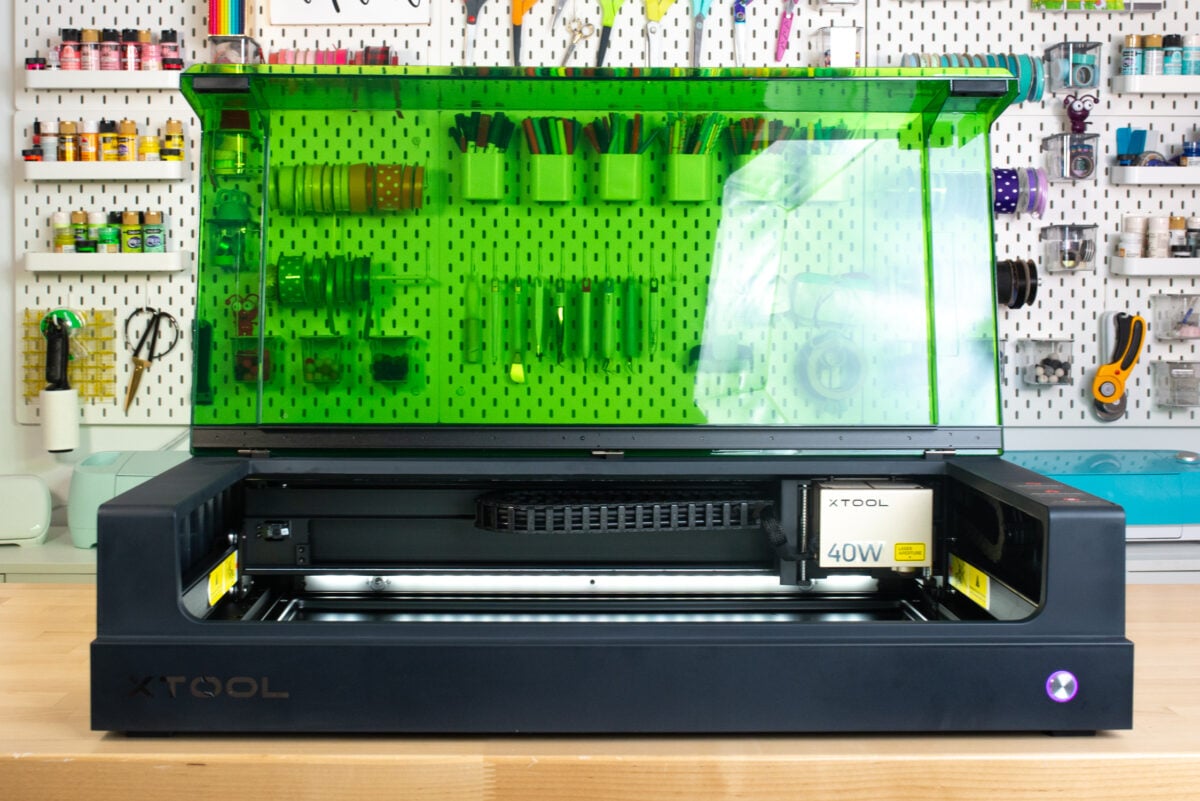
The S1 is currently the most powerful diode laser on the consumer market. Because it’s enclosed, it’s perfect for in-home use. It’s black with a green see-through lid, which gives it a futuristic feel. Overall it’s pretty easy to use and good for beginners, as you’ll see!
Machine Cost
The xTool S1 comes with one of three laser modules (the only difference is the wattage), and you can also get an infrared laser for specifically doing metal engraving. I go into more detail below.
- S1 with 20W laser – $1699 (available in both white and black)
- S1 with 40W laser – $2199
- S1 with 10W laser – $899 (available in white)
- Infrared laser module – $599
xTool is one of those companies that often has sales, so you should be able to find the machine you want for a bit less during one of their many sales. The cost of the S1 laser falls somewhere between the smaller diode lasers and a larger CO2 laser, as you’d expect.
What is a Diode Laser vs. a CO2 Laser?
The xTool S1 is a diode laser (the same type of laser as the xTool M1 and the Glowforge Aura), vs. something like the xTool P2 or Glowforge Plus/Pro, which are CO2 lasers. Let’s talk a bit about the difference.
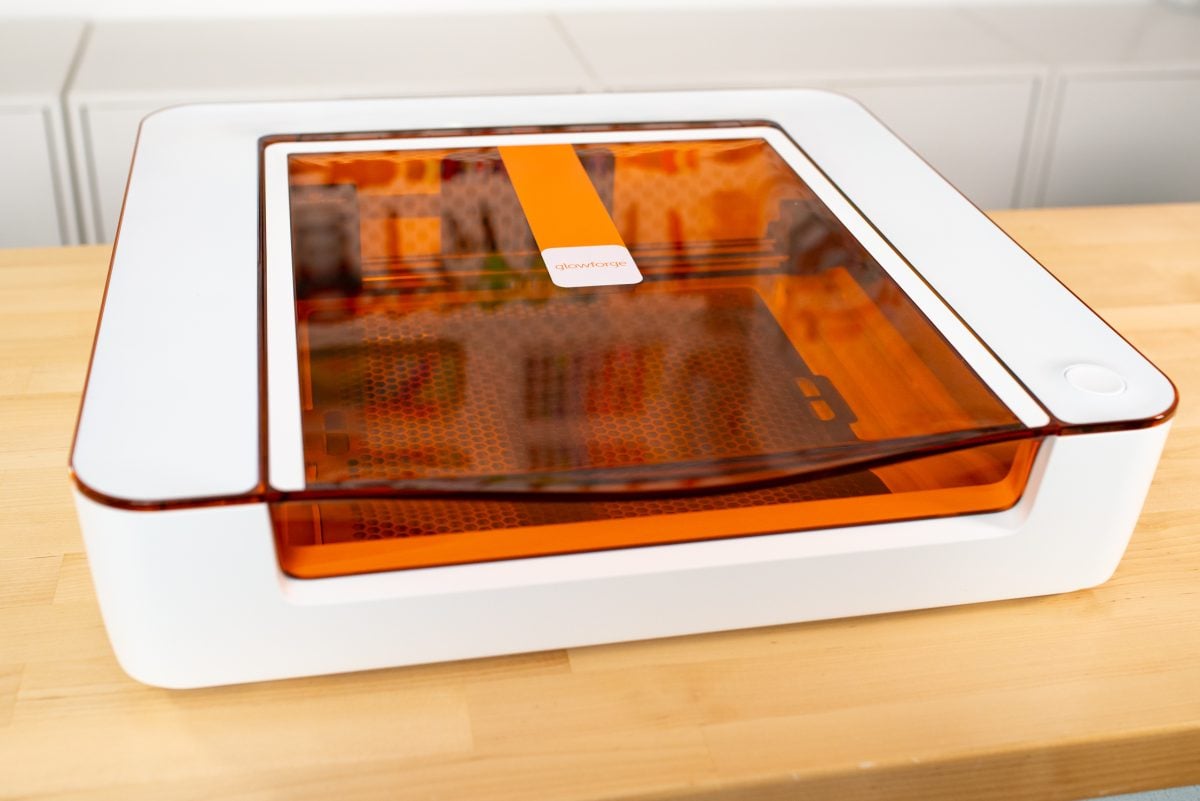
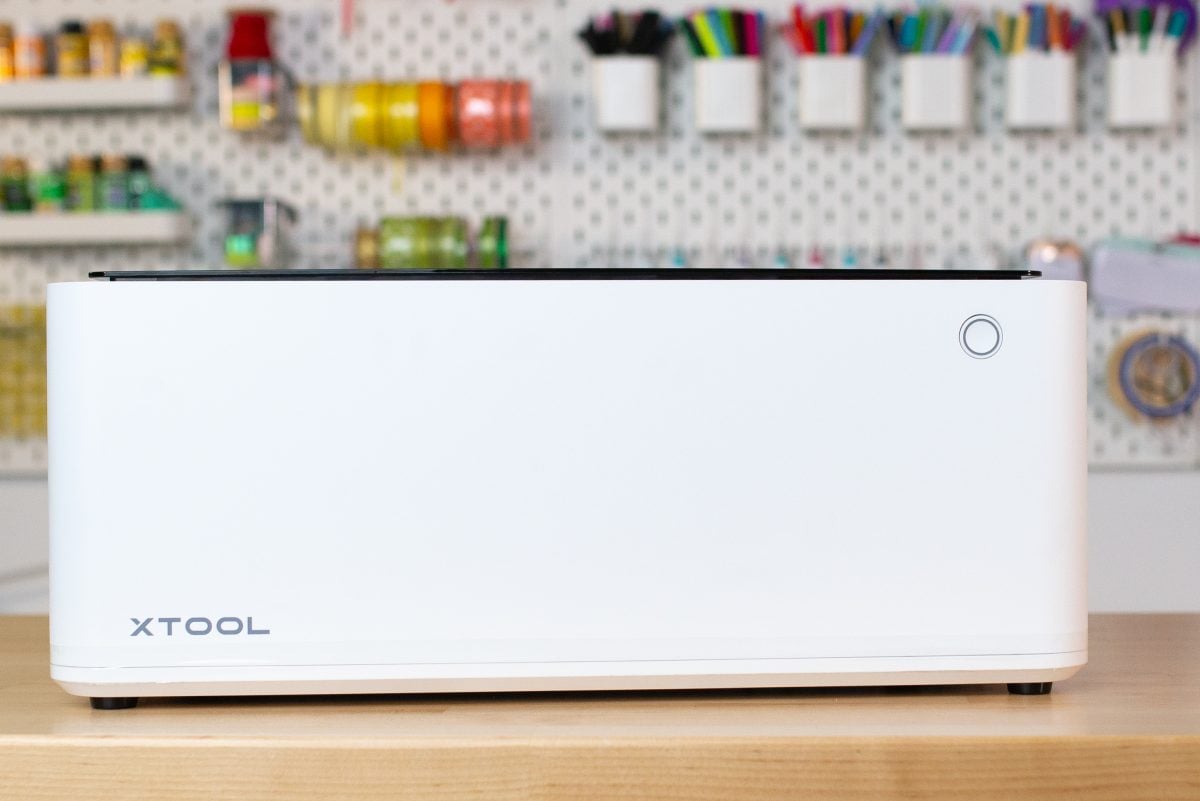

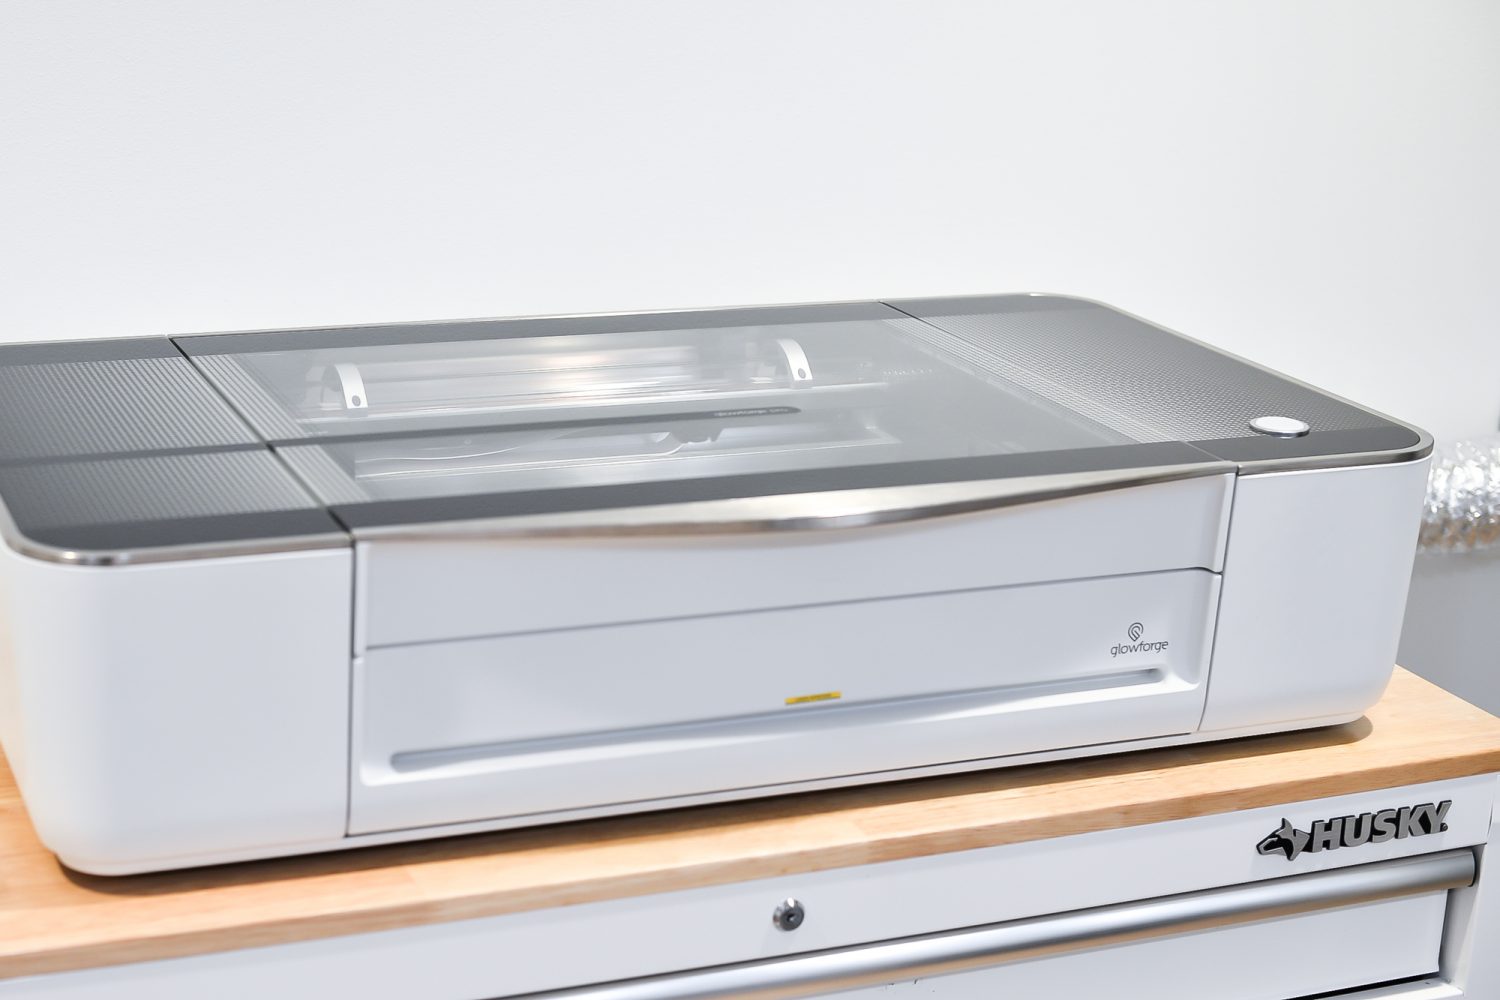
A diode is a more economical laser than the CO2, making it perfect for hobbyists and everyday crafters. It’s also more durable than a CO2 laser and has a longer lifespan.
While it lasts longer and costs less, diode lasers are most often less powerful than CO2 lasers. Diode lasers are generally 5W to 20W, whereas CO2 lasers are 40W to 300W. That being said, you can get that 40W power in this xTool S1, which is pretty incredible.
The other big difference is, to put it simply, the color of the laser. A diode laser is blue while a CO2 laser is is on the infrared spectrum.
Because a diode laser is blue, it will not cut clear, most blue, or other transparent colors of acrylic—the laser passes right through, no matter the wattage. A CO2 laser, however, can cut any color of acrylic. I know this is a big sticking point for many of my readers, so if you want to do the lighter colors of acrylic, you’ll probably want to invest in a CO2 laser. A diode laser is better for cutting organic materials, like wood and leather.
The xTool S1 Module Options
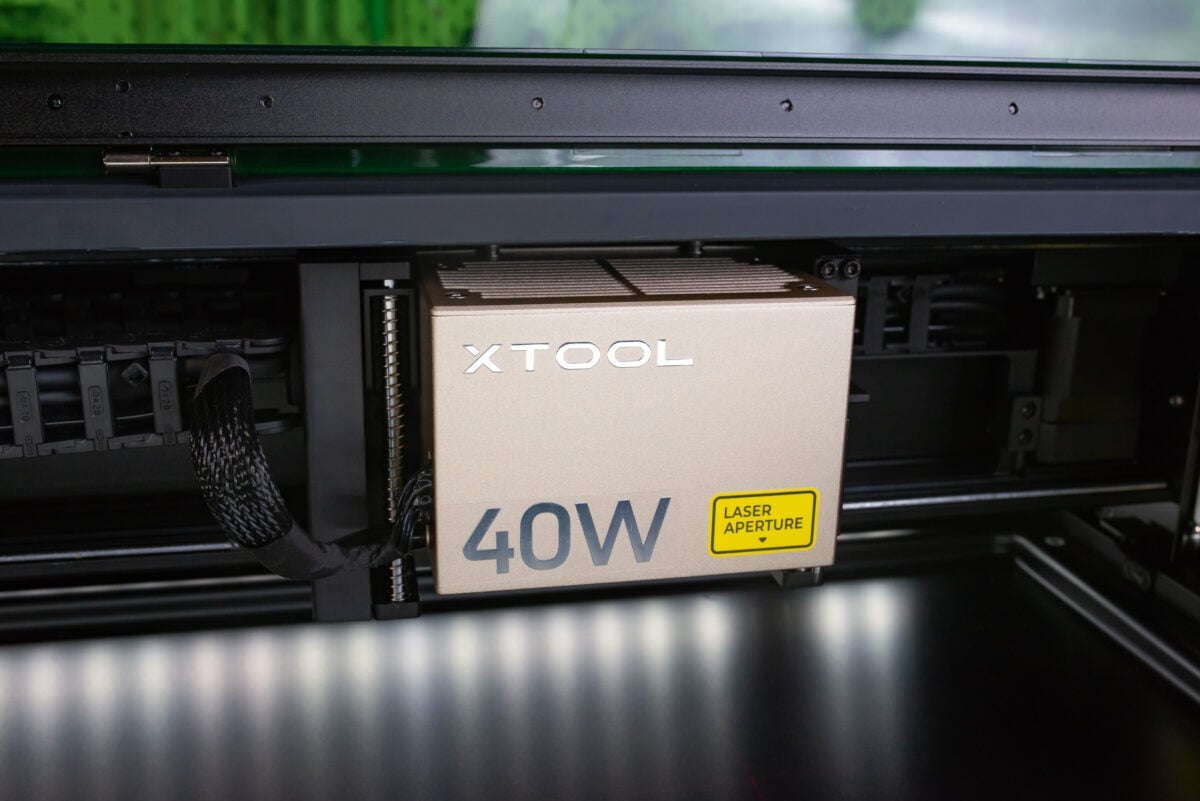
Like I said above, the xTool S1 comes with one of three laser modules—the 10W (most affordable option), 20W or the 40W. There is also an infrared laser module that is designed specifically for etching metal. All of the laser heads are swappable, so you do not need a separate laser box for each of these.
- S1 with 10W laser – an affordable option for hobby laser crafters
- S1 with 20W laser – better for engraving details at 420 DPI (dots per inch)
- S2 with 40W laser – better for cutting wood up to 25mm thick (certain types of wood), engraves at 254 DPI
- Infrared laser module – can’t cut but allows you to etch metal and other materials
I went with the 40W laser because I am more interested in cutting than I am in engraving. It still has high quality engraving, but the laser size is slightly larger so it can’t be quite as detailed. If you are more interested in engraving, then you might want to opt for the 20W. If you are looking for something to begin your hobby laser crafting journey, you may want to consider the 10W.
What’s in the Box?
The box is packed really well, but still use caution when opening it. It had two straps around the machine that made it easier to lift out of the box, which I appreciated. I was able to get it on my table on my own, but it was pretty heavy. You may want a partner or friend to help.
Here’s what you’ll find inside:
- xTool S1 machine
- Laser module + distance sensor
- Power cord and adapter
- Vent pipe
- Toolkit with hex screwdriver and extra screws
- USB cord
- Keys (this is a safety measure)
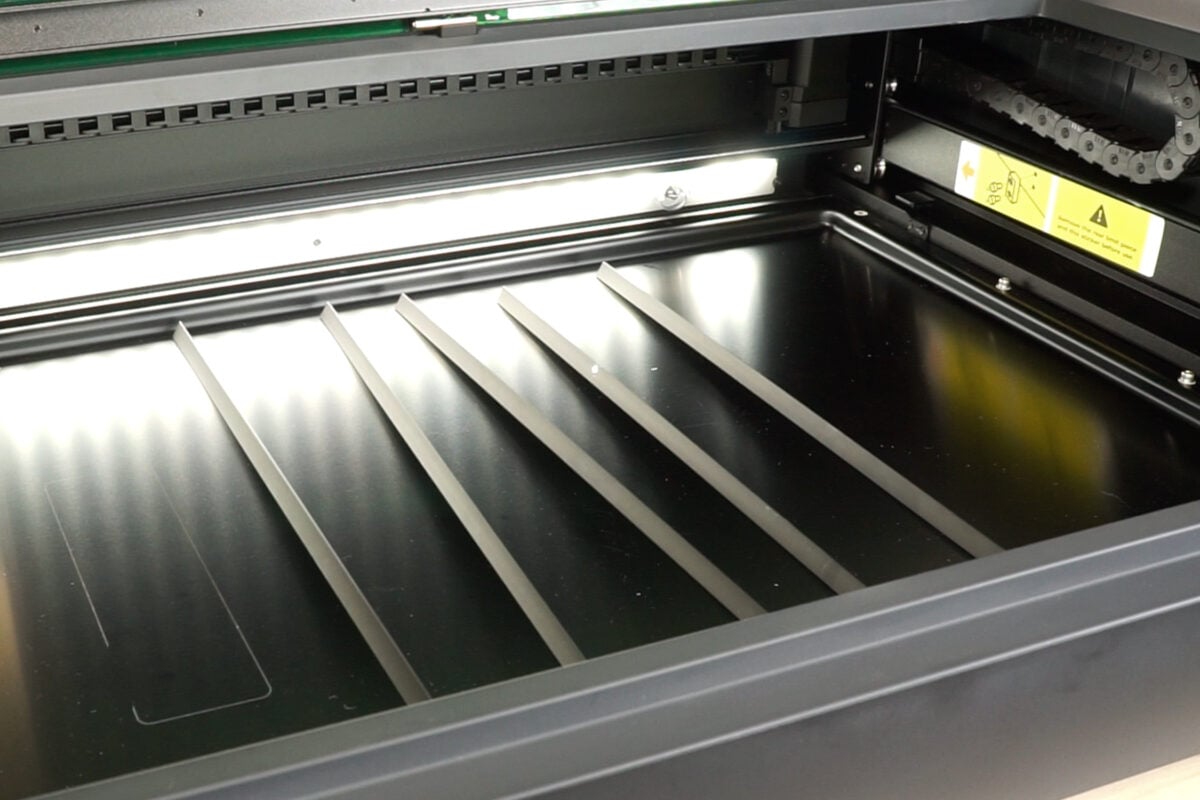
- Set of triangle prisms, used to lift your material off the bed of the machine when cutting
- Material pack with sample materials + materials brochure
- User manual
USB cord note: I have a newer MacBook Pro and I don’t have USB ports on my computer. I have an adapter to allow me to use the cord with my USB-C ports.
If you have purchased accessories with your xTool S1, you may have other parts not listed above. I do have some other accessories for this laser, but I’ll be sharing those in an upcoming post. I wanted this post to show you what you get with the most basic package.
Size and Dimensions
The xTool S1 is much larger than my other two diode lasers, the xTool M1 and the Glowforge Aura. But it’s smaller than my Glowforge Pro and the xTool P2. It weighs about 44 pounds, which means I was able to move it with the straps I mentioned above, but it’s too large and unwieldy for me to move just the machine itself. If you have longer arms, you might be able to do it, but really it’s comfortably a two-person job.
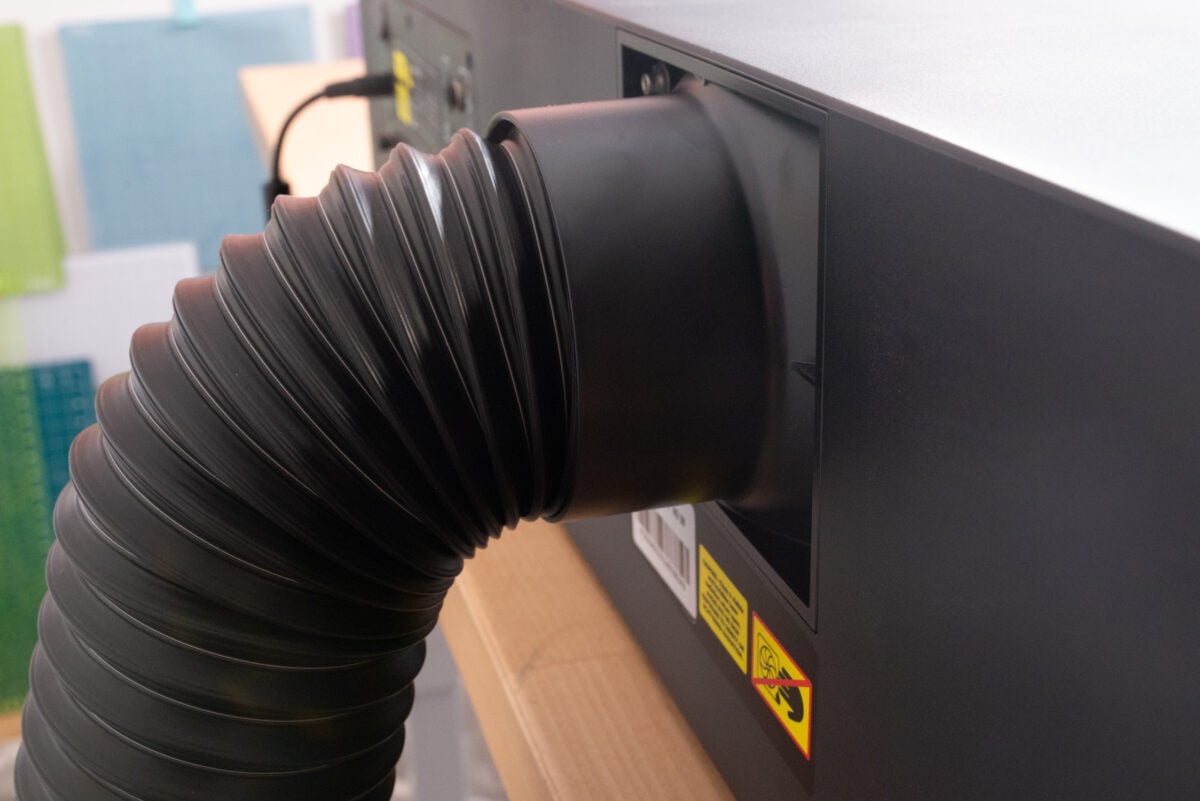
The machine comes almost entirely pre-assembled, which is great. I started by removing some screws from the interior of the machine to allow the laser arm to move. I set the laser module into place and screwed that in. And then I removed the panel off the back and added the exhaust tube with more screws, and finally I plugged it in. It probably took me a total of 15 minutes to set up.
The actual dimensions of the machine are:
- Machine dimensions: 30″ x 22″ x 7″
- Machine weight: 44 lbs
- Material area: 19.61″ x 12.56″ (40W) and 19.61″ x 13″ (20W)
You will need another 8″ or so of space behind the machine for the exhaust pipe. And you do need at least 21″ of vertical space to account for the lid being opened.
Safety
One of the number one things I look for in lasers right now is safety, and the xTool S1 is packed with safety features.
To start, it’s classified as a Class 1 Laser Product, meaning it is considered a safe laser under normal conditions. Here are a few ways that xTool has added safety to the S1:
- It’s fully enclosed with an eye-friendly cover. You do not need to wear special glasses to watch your project being created. Because of the way the cover is designed, you also get a nice side view of your project, not just top-down.
- You need a USB “key” to operate it. This is a small USB dongle that plugs into the back of the laser. If the key is not plugged in, the laser won’t work. Great if you have curious kids! Just put the key in a safe place and they won’t have access to the laser.
- There is a five-way fire detection system that will shut the machine down if a fire is detected.
- If you open the lid, the laser automatically stops.
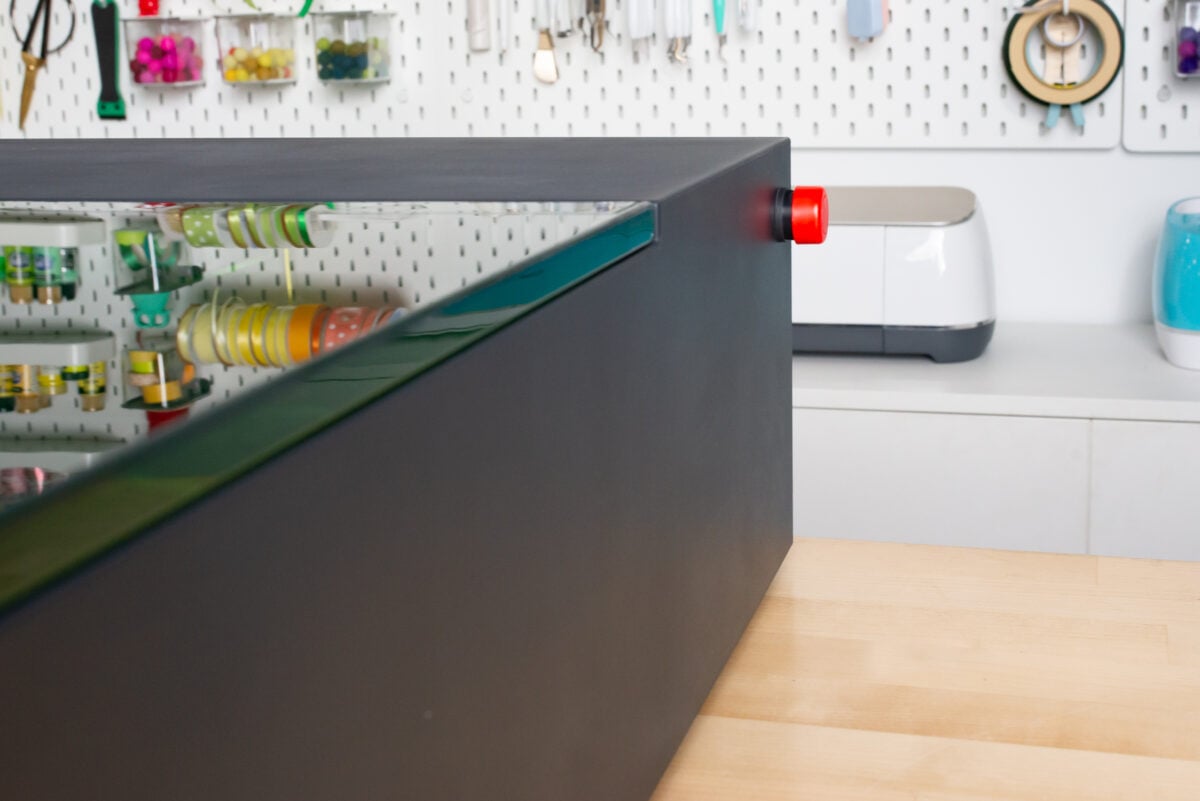
- There’s an emergency button you can hit in case of a problem. I do wish this button was more toward the front of the machine. I don’t love the idea of leaning over a laser that’s having a problem to hit that button.
All of these features make me more comfortable using a laser in our home. I also always have a fire extinguisher and fire blanket, just in case. You can read more about everything I have on hand when I’m using my laser in my post Must-Have Laser Supplies.
Venting
All lasers need to be vented. The scoring, engraving, and cutting processes create fumes and smoke and debris and you’ll need to vent your laser so all of that doesn’t end up in your craft room and lungs. I really like how this pipe attaches to the back of the machine, though if you need a longer pipe to vent out of a window or door, you may struggle to find something that connects to this pipe.

There are two options:
- Venting out of a window: you can run the vent pipe out of a window, making sure to seal up the window with an old blanket or piece of cardboard so the smoke doesn’t work its way back inside.
- Venting into a personal filter: if you don’t have access to a window, you can use the xTool personal filter to vent your machine. it’s more expensive and requires new filters occasionally, but it’s good for spaces without access to a window.
What can the xTool S1 Cut and Engrave?
So what can you make with the xTool S1? Lots of projects with lots of materials!
The xTool S1 40W, 20W and 10W cuts:
- Wood (including basswood, pine, cherry, walnut, birch, and more)
- Leather
- MDF
- Felt
- Paper
- Some dark opaque acrylic
The xTool S1 40W, 20W and 10W engraves:
- Wood (including basswood, pine, cherry, walnut, birch, bamboo, and more)
- Leather
- MDF
- Stainless steel, painted metal, plated metal
- Dark glass
- Ceramic
- Natural materials like shale, slate, jade, brick, and marble
- Some dark opaque acrylic
The Infrared Laser engraves:
- Metal (gold, silver, copper, platinum, stainless steel, and more)
- Plastic
- Black acrylic
This means you can make all sorts of projects, including signs, jewelry, coasters, paper projects, party decorations, dinnerware, home decor projects, games, and more!
What Software Works with the xTool S1?
You can use either xTool Creative Space or Light Burn with your xTool S1. I use xTool Creative Space, so that’s all I’m familiar with. But lots of more seasoned laser users use Light Burn and it’s nice that the S1 can be used with an outside software.
Setting up my S1 was very easy within xTool Creative Space. I did need a USB cord for the first connection, and the machine does come with one. But my Mac has only USB-C ports, so I had to grab my adapter (this is likely something you have on hand if you have a newer Mac computer). After that first connection, I had no trouble getting it to connect to my WiFi.
I’ll use xTool Creative Space when making a quick project toward the end of this post.
Special Features
Let’s talk about a few of the features that make the xTool S1 different than some of the other laser machines on the market.
Laser Positioning
In xTool Creative Space, there is a red crosshairs marking where the laser is at all times. This small addition helps you keep track of the laser when process marking and checking the height of your material (see below).

No Camera + Process Marking
Every other laser I have has a camera in the lid so you can see your material in the bed of the machine. Then you can place your design on top of the material within the software.
Instead of a camera, the xTool S1 has a “marking” system in xTool Creative Space that gives you twin point positioning (bear with me, it’s not as complicated as it sounds!).
It took me a bit of time to get the hang of how to use it, but it’s actually much more accurate than a camera. This is because a camera in the lid must be a fisheye lens to capture the entire bed of the machine. And because of the nature of a fisheye lens, you’re going to get some warping of your view, especially at the outer edges. This means your processing might not be accurate.
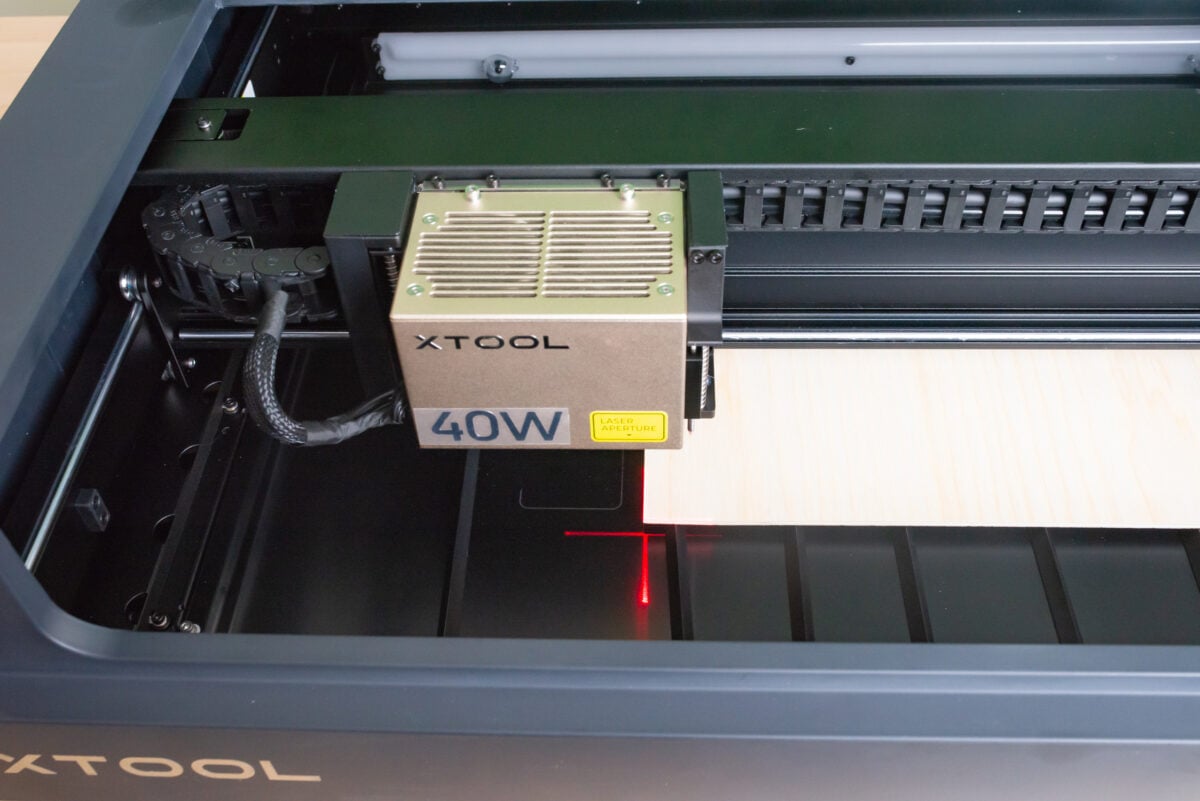
With the marking system, you physically move the laser head to the corners of your material (or the corners of where you want to cut/score/engrave) and the laser will show you crosshairs on your material. Push the button on the front of the machine to mark that first point. Then go to a second corner and do the same. With this method, the laser knows exactly where the material is and can cut accurately. You can mark rectangles, circles, polygons, and lines using the xTool Creative Space software.
Physical Focusing System
Additionally, other lasers use the camera to figure out the height of the material you are using. Instead of a camera, the xTool S1 using a physical focusing pin. It’s a small pin that is attacked to the right side of the laser. When you tell the software to measure the height of your material, the pin drops down and the machine records the physical height of the material. Again, this is much more accurate than the camera.
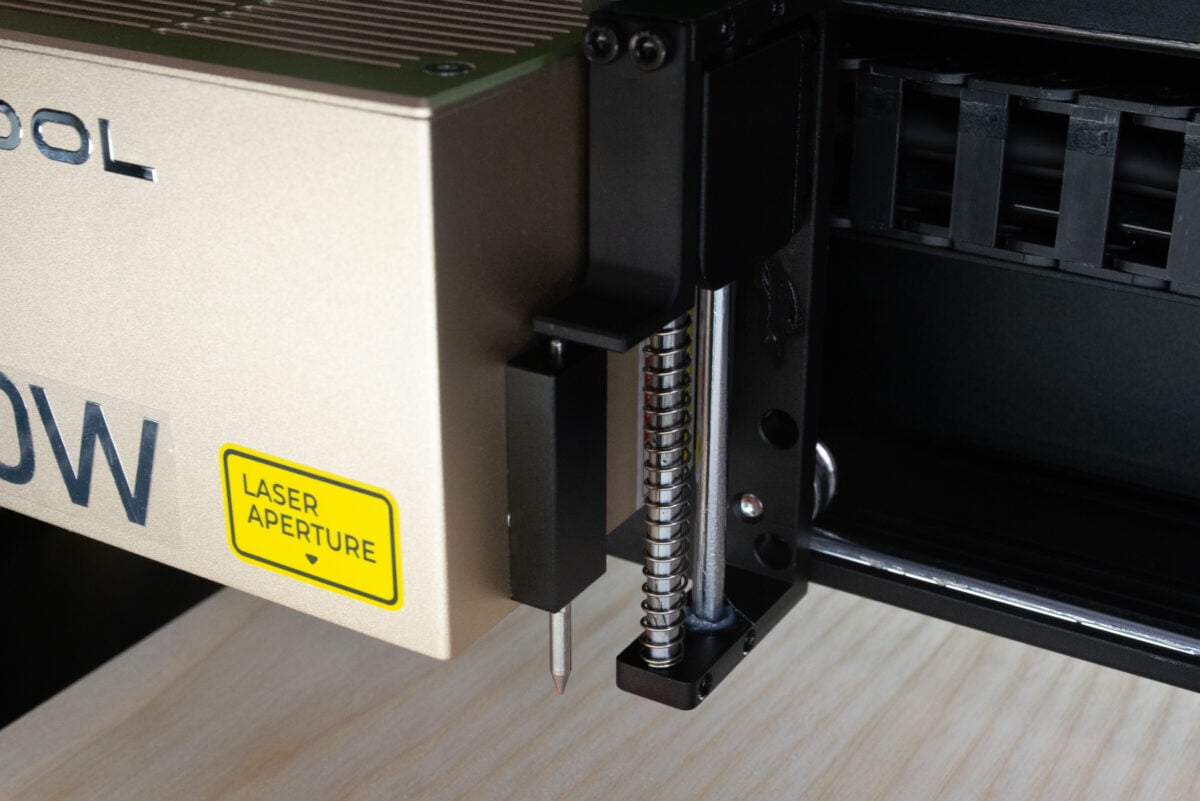
This system also allows the system to measure curved or uneven surfaces, making it more accurate with a wider number of projects.
Fast Processing
If you’ve used another diode laser like an xTool M1 or a Glowforge Aura, you’ll know that they can be pretty darn slow. I engraved and cut a set of coasters and each coaster took an hour. Because the xTool S1 has a 20W or 40W laser (vs. under 10W), it’s much faster than other diode lasers on the market at up 600mm/s.
Using the xTool S1
Let’s make a simple project using the xTool S1 so I can show you how this machine functions, including the special features I mentioned above.
Get the Free File
Want access to this free file? Join my FREE craft library! All you need is the password to get in, which you can get by filling out the form below. The file number is: L10.
Prepare the File in xTool Creative Space
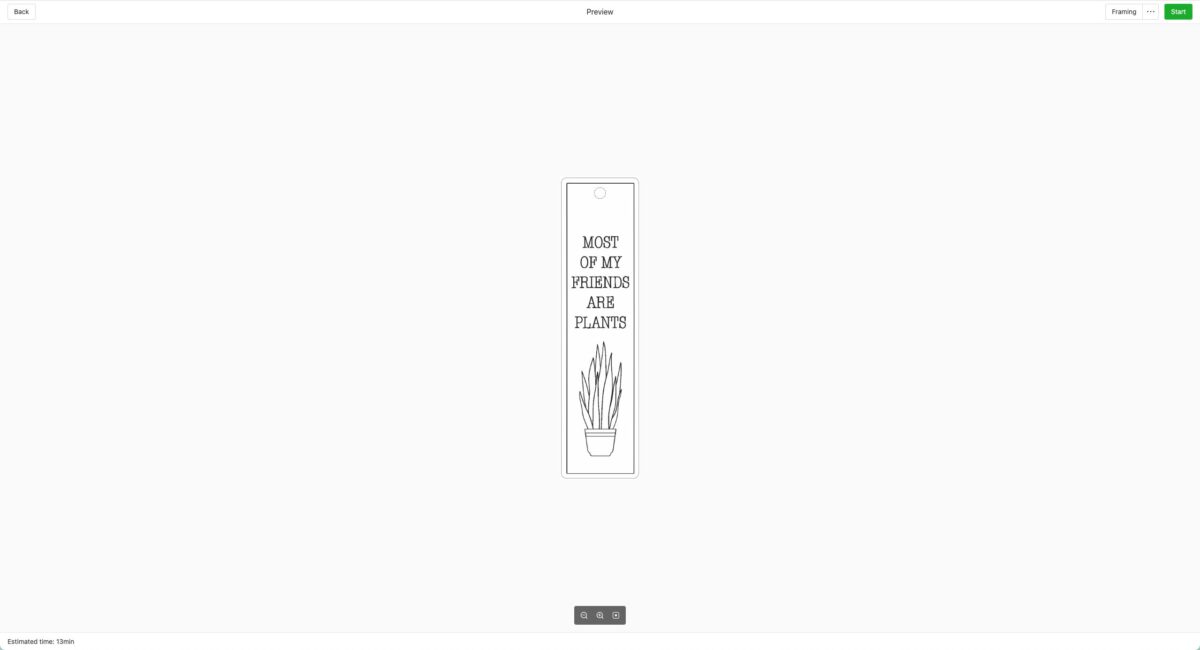
Upload the bookmark SVG to xTool Creative Space. You’ll see all four bookmarks.
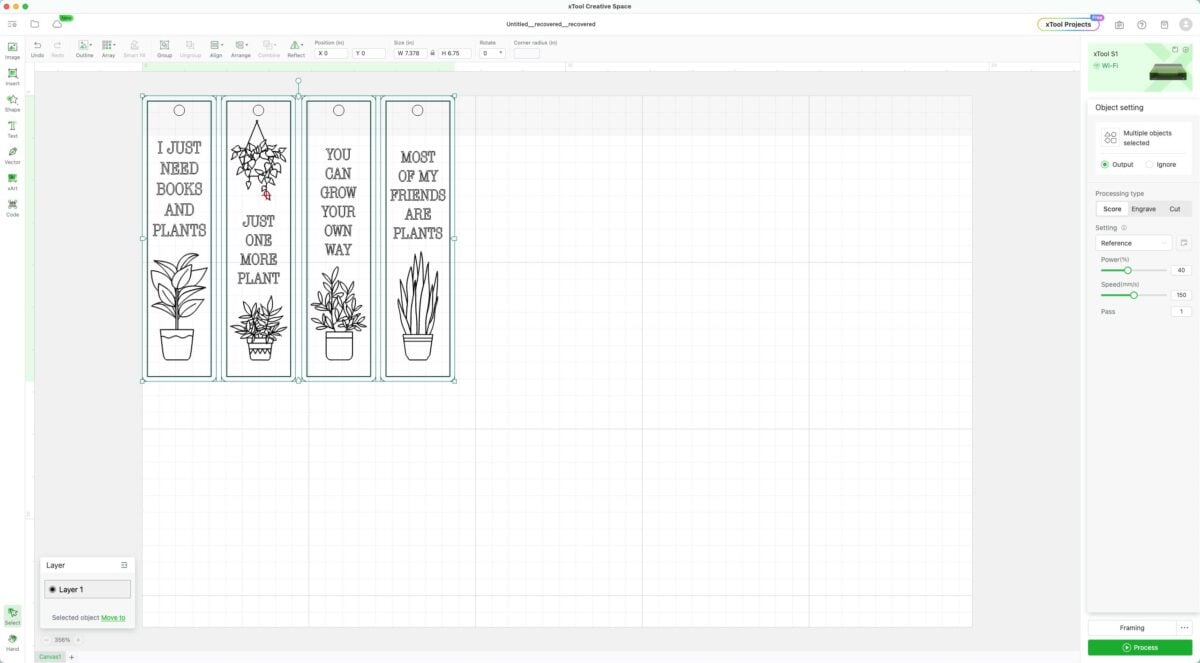
You can make all four or whichever ones you’d like. I deleted three of them to just make one for this tutorial.
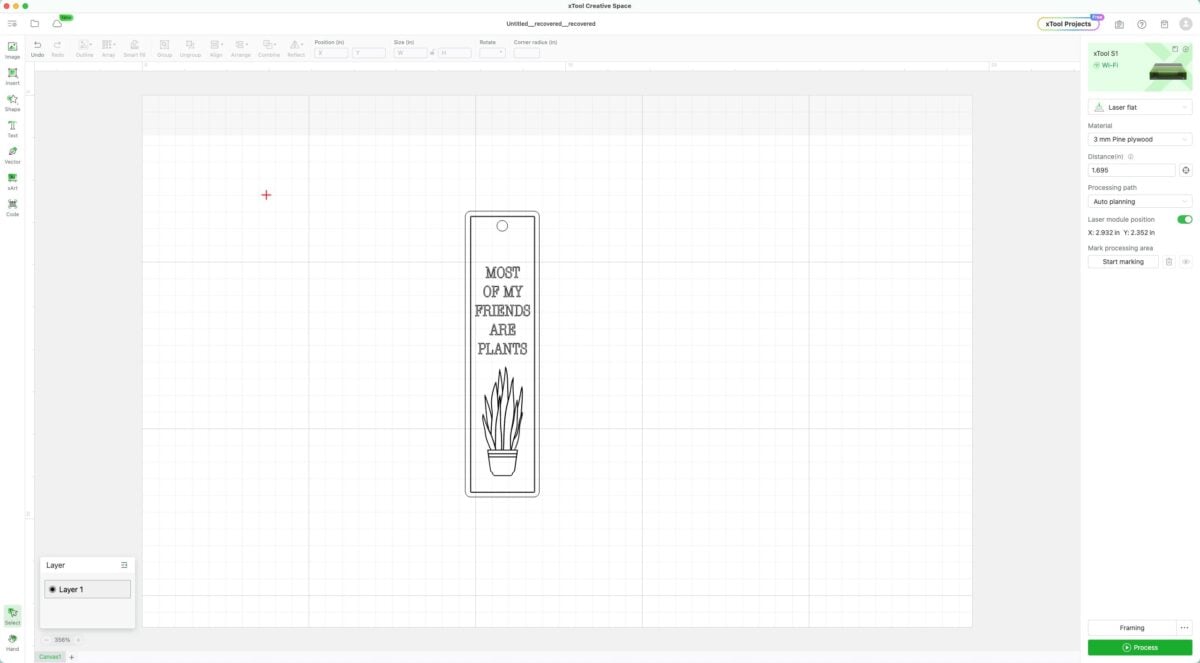
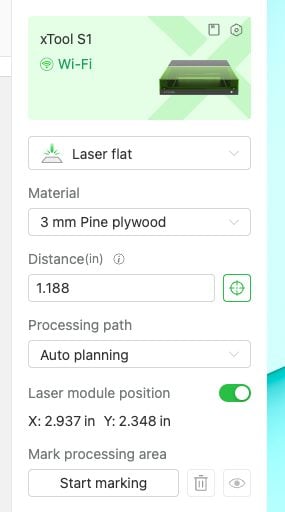
In the right-hand column, set your material. I chose 3mm pine plywood.
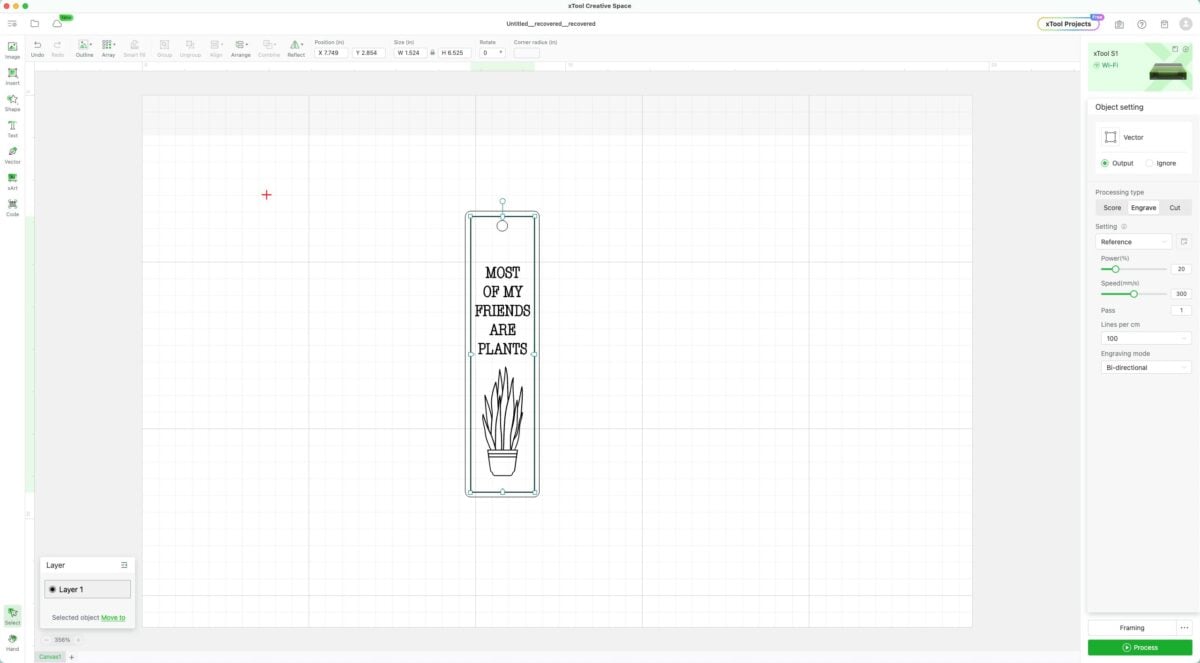
Then go to the file itself and set the process type. Select the interior image of the bookmark and change the process type on the right to engrave.
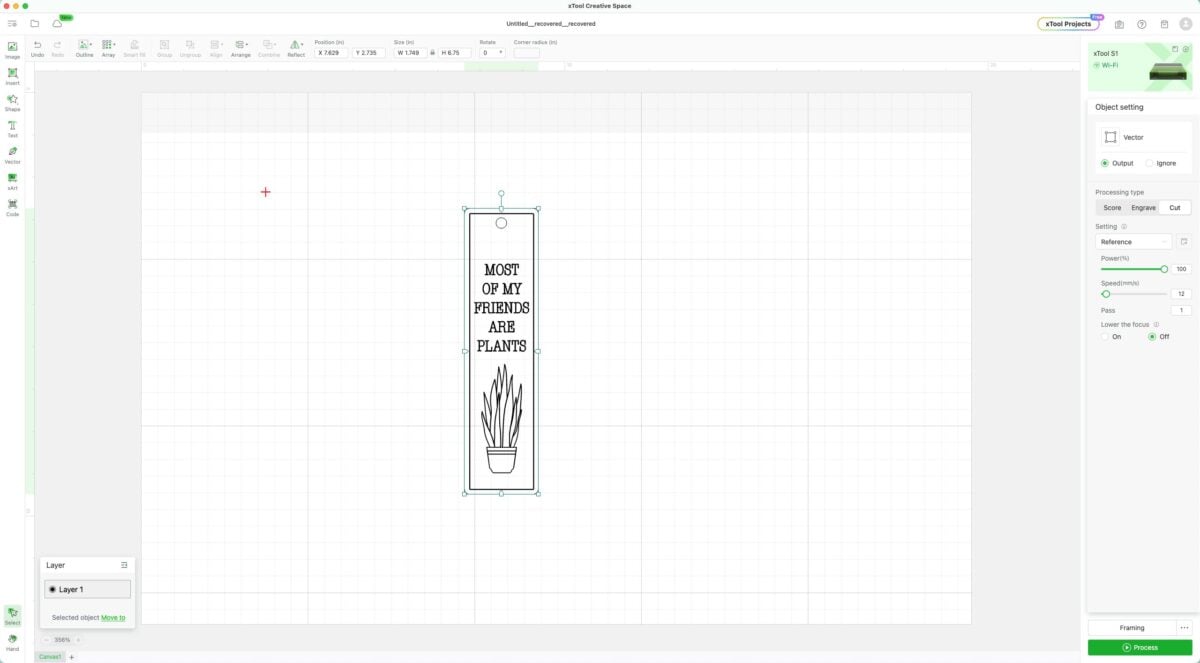
Choose the outer lines of the bookmark and choose cut as the process on the right. Now your bookmark will engrave and cut properly.
Set the Material Height
Then place your triangle prisms in the bottom of the machine and place your material on top of it. Then manually move the laser head over the material.
Go back to the right-hand column in Creative Space and click the targeting button next to Distance. The machine will use the pin to measure the distance between the top of your material and the laser head. You’ll see this reflected next to Distance in Creative Space.

Mark the Processing Area
Then go back to Creative Space and choose Start Marking in the right-hand column. Here you can choose what type of marking area you want. For this tutorial, let’s use a simple rectangle.
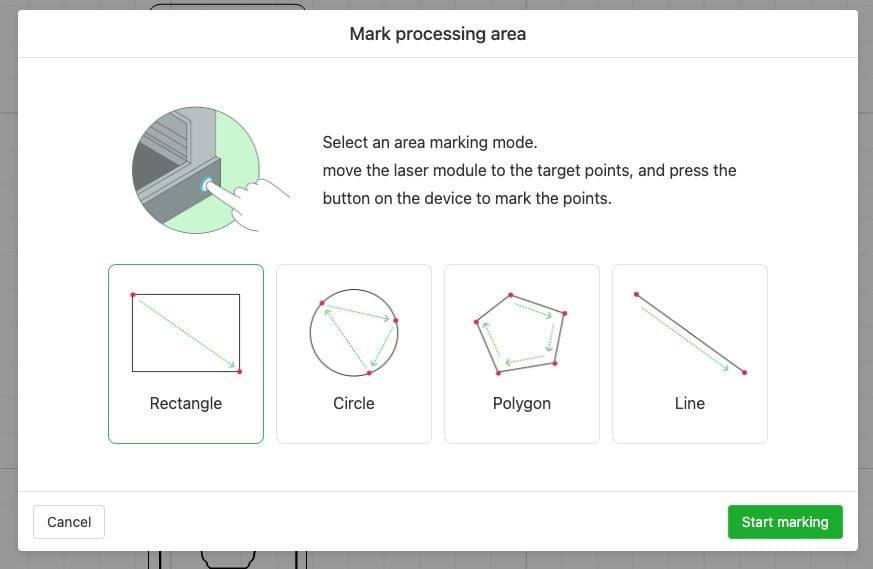
Then go to your laser and move the laser head so it is over one of the corners of your material.

Once you have the crosshairs lined up, click the button on the front of the machine to set the marking point.
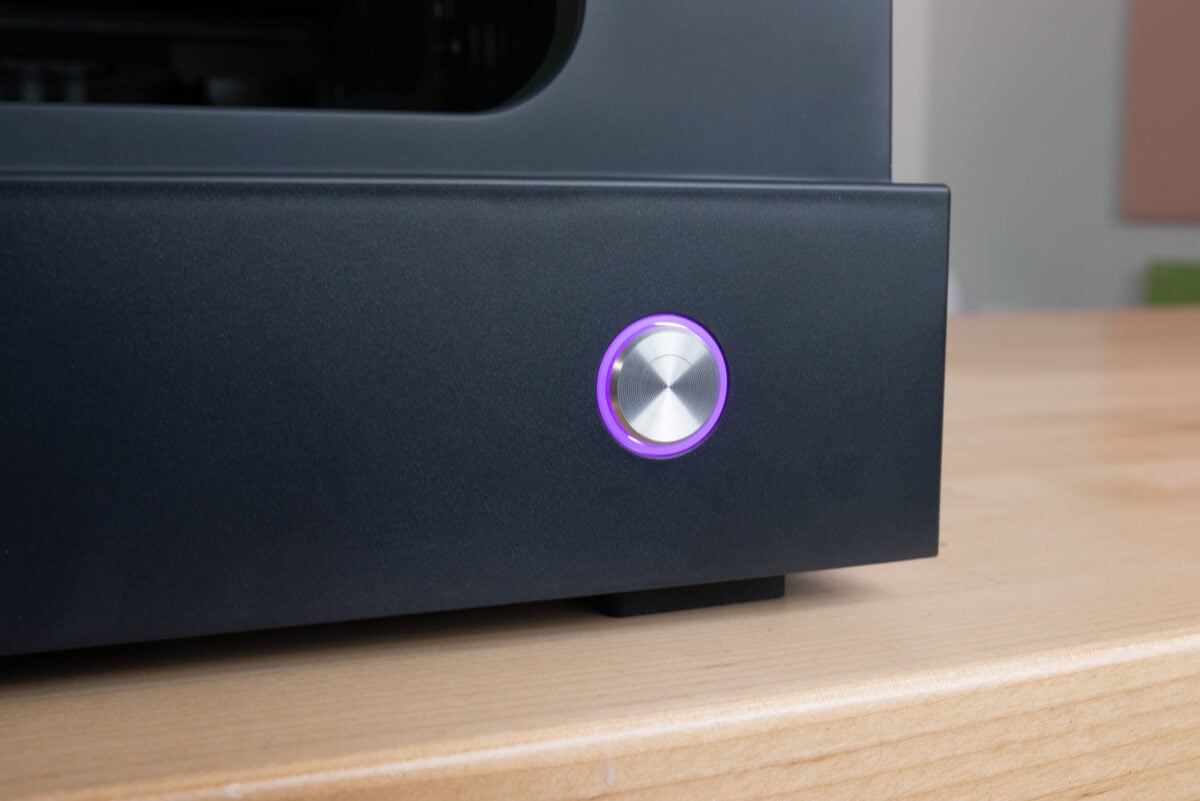
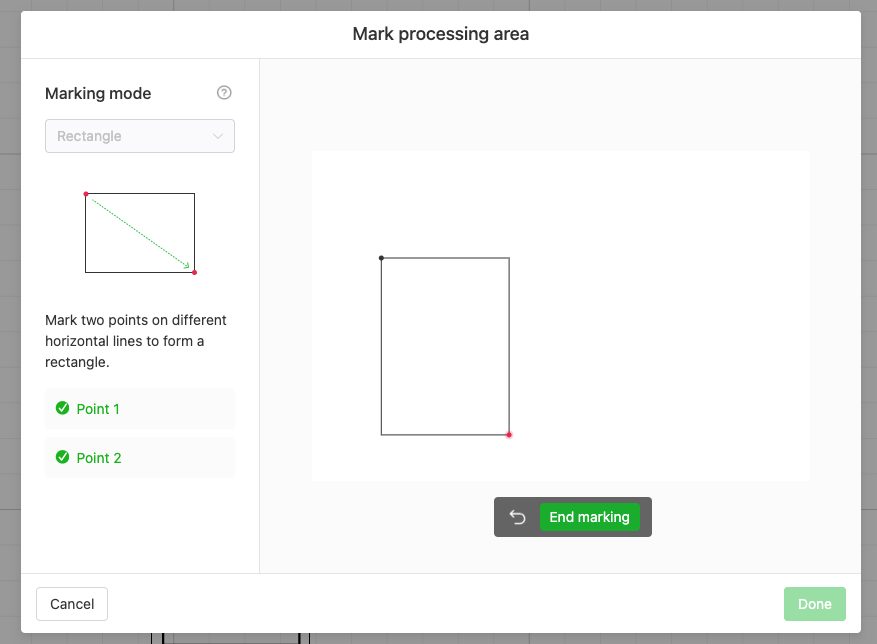
Move the laser to the opposite corner (so in this case, it would be the top right) and set the corner using the button on the laser. You could also set a smaller area within a piece of material; it doesn’t have to be the corners.
Click End Marking once you’ve set your two points. You can also click the “undo” arrow next to End Marking to start over.
Process Your Image
Once you’ve set the marking, your “material” will show up as a box in Creative Space. You can move your bookmark image into the area you’ve made to know you’ve got it exactly where your material is in the bed of the laser.
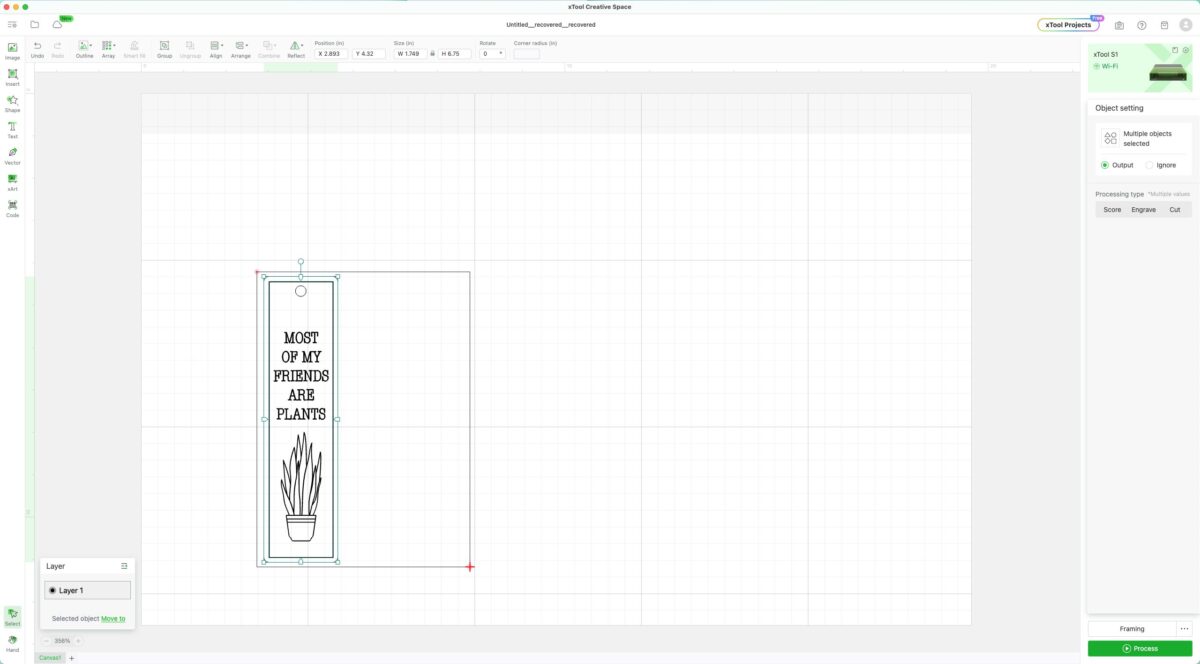
You’re ready to make your project! Click Process in the lower right. You’ll see a preview screen. Click Start and then you’ll click the button on the front of your machine to start your cutting!
Make sure to stay by your machine to keep an eye out for any problems. Never leave your laser unattended while it’s working!
When your project is complete, add a tassel and your bookmark is done!

xTool S1 Pros
The xTool S1 has a lot to like. Here are my pros for this laser:
- Nearly fully assembled and easy to set up
- Numerous safety features, including the fire detection system
- Smaller and lighter and quieter than a CO2 laser
- Large bed compared to diode lasers
- Swappable laser modules
- Good amount of power for much better speed over diode lasers
- Accurate image processing with marking and physical height measurement
- Plenty of accessories to help you make the most of your machine (stay tuned for a post about the accessories you can get!)
xTool S1 Cons
I only have a few things I don’t love about this laser:
- Can’t cut some acrylic colors, including clear, blue, and other transparent acrylics (this is true of all diode lasers)
- Emergency button is difficult to access on the back of the machine
- The triangle prisms are fussy and skitter around the bed of the laser
Is the xTool S1 Worth It?
Yes! I think this is a good step up from the smaller lasers like the xTool M1 and the Glowforge Aura. While both of those machines are great for beginners, this one isn’t much more difficult to use and it can do so much more so much faster.

If you’re looking at a diode laser, I’d definitely recommend saving up if possible to get the xTool S1 laser over one of the lower powered diode lasers.
Again, if you want to do primarily acrylic, especially if you want to cut something other than dark opaque acrylics, you’ll want to look at getting a CO2 laser.
I hope you enjoyed this xTool S1 review! If you have any questions about this laser or any of the lasers I mentioned in this post, please leave them down in the comments and I’ll be happy to answer them for you!


Comments & Reviews
Casandra's Stephenson says
You can engrave clear acrylic using erasable chalk paint you letbit dry for 2 hours then after lasered wash off using the s1 xtool 20w . we engraved the clear on a car dash today
It works great on glass I’ve heard white turns black and black turns white