Having trouble selecting an ICC profile on your Mac for your Epson EcoTank printer? Here’s how to use those sublimation ICC profiles if ColorSync no longer appears on your Mac!
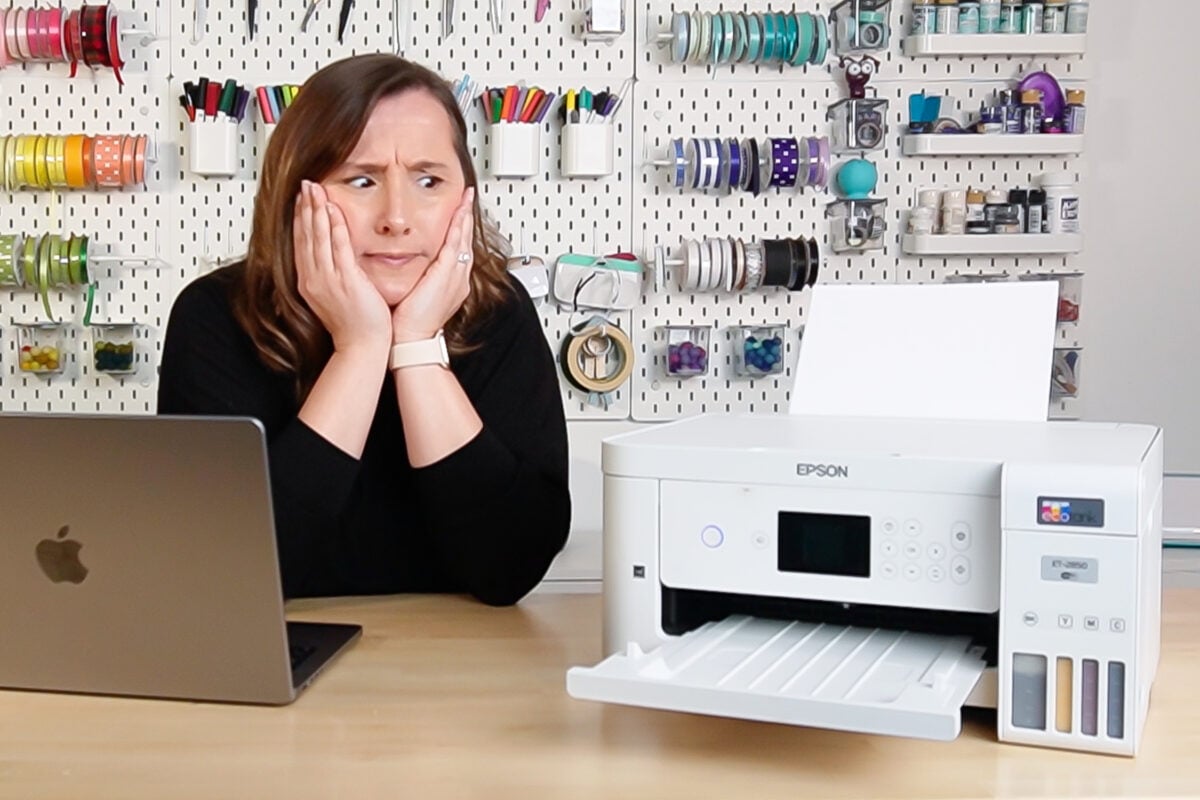
Sublimation color correction is one of those things that can be really difficult with Epson EcoTank printers that have been converted to sublimation. This is because the printer doesn’t know that it has sublimation ink in the tanks, so it tries to lay down the ink while printing as though it were normal pigment ink.
But pigment ink and sublimation ink are two very different things. Which means that many people will have issues with their sublimation color.
I originally wrote the post Sublimation ICC Profiles & Color Management for Beginners and it’s remained one of my top posts. I highly recommend you read that one first, because it goes into more detail about why we need color correction, what ICC profiles are and where to find them, plus other color correction tips.
Problem is, sometime in 2023 (maybe the Sonoma update, but it might have been Ventura before that), people started mentioning that there was no longer a way for Mac users to select their ICC color profile in the printer settings, which is one of the things I cover in that post. Apparently Apple removed the ability to select a ColorSync profile.
Why, Apple? WHY? *pulls hair out*
So in today’s post, I’m going to share some ways that you can correct your color using your Mac computer with the newer operating systems so you can stop being frustrated by your sublimation printer. This post is specifically about ICC profiles on Mac computers. If you want to read more about color correction in general, if you have a PC or an older Mac, or if you want manual color correction, there are tips and tricks at the bottom of this post.
A Caveat
My big caveat here is that changing a printer from a regular printer to a sublimation printer is a hack. Which means there are no guarantees that your color is going to be perfect. Most folks seem to be able to get to a color correction they are happy with, but some don’t! And that can be really frustrating. You may need to try many ICC Profiles to find the best color and occasionally you’ll find that one profile works better for a certain substrate and another works better on a different substrate. Sublimation is all about testing!
I know most of the people reading this post probably already have their Epson EcoTank, but if you have the extra money, I’d highly recommend getting a Brother sublimation printer or a Sawgrass sublimation printer. Yes, more expensive, but you shouldn’t have to worry about the color.
Watch the Video
Want to see a video overview of how to upload and use ICC profiles on your Mac? Click play below! Or keep reading for a written tutorial.
Mac Printer Driver Issue for ICC Profiles
Before you head into this post, I did run across an issue that is very specific to some Mac users. So double check you’ve done this correctly before proceeding.
There’s a chance if you have a Mac and you do NOT see “Color Matching” in the dropdown of the system dialog box, you need to completely uninstall your printer, download the correct drivers from Epson, and reinstall your printer.
You want to make sure you have the correct driver for your operating system. For some reason, the Epson site “detected” that I had the MacOS 10.5, when I actually have 12.4 right now. So when I used the 10.4 drivers thinking they were correct, I still didn’t get the Color Matching dropdown. I then had to manually choose the printer drivers for my correct 12.4 operating system, download them, and reinstall my printer. Then it worked properly.
This may work for you, depending on your operating system. But if not, let’s talk about how to do sublimation color correction on a Mac!
Using an ICC Profile on a Mac
Let’s upload an ICC to start, and then I’ll show you different ways to use it on your Mac.
How to Upload an ICC Profile
Download the ICC Profile and unzip from the zip file if needed. You should have a file name with an extension of .icc or .icm. ICC and ICM are the same type of file.
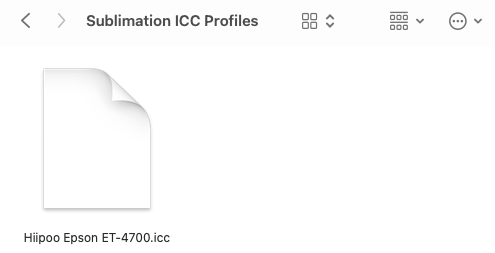
Open a second Finder window. Navigate to your Mac’s hard drive in the sidebar.
Note: if you do not see your Mac’s hard drive in the Finder sidebar, you can go to Finder > Preferences and click the Sidebar tab. Make sure that “Hard disks” is checked and your hard drive should show up in the sidebar in your Finder.
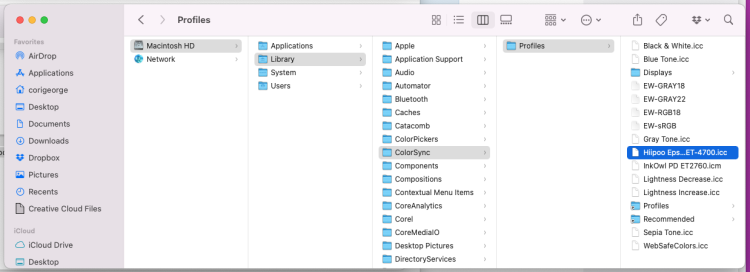
Then navigate from the Macintosh HD > Library > ColorSync > Profiles
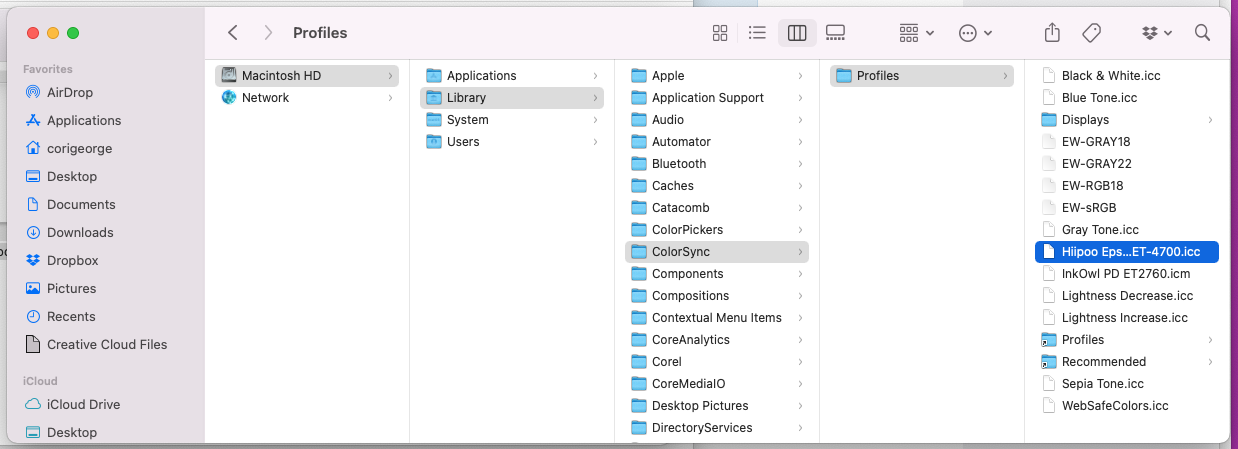
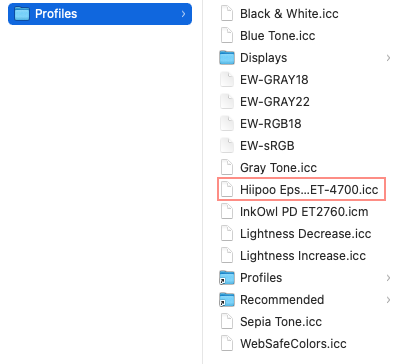
Drag and drop your ICC Profile file into the Profiles Folder—this will add it to all of the other standard ColorSync profiles that are on your computer.
Using an ICC Profile in the Print Dialog Box
One of the reasons that this update is so frustrating is that you can no longer select a color profile in the Print Dialog box. You used to be able to select this under Color Matching, but with the update, that’s no longer an option.
This is VERY frustrating because that means we can no longer use an ICC profile with a wide range of software programs, including:
- Cricut Design Space
- Silhouette Studio
- Google Docs
- CorelDRAW
- Affinity Designer
- Microsoft Word
If you happen to figure one of these out, PLEASE leave a comment so I can update this post!
Thankfully, I still do have a free and paid option for you!
Printing from Preview
One way to be able to select your ICC profile is to print from the Preview application on your Mac. This is a free program that comes on every Mac.
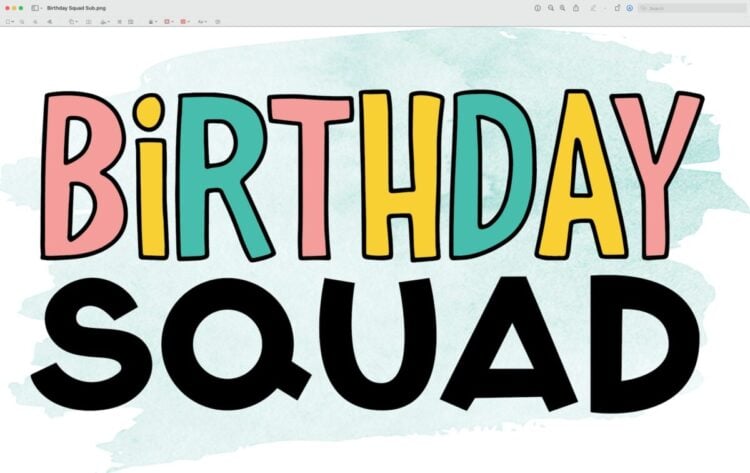
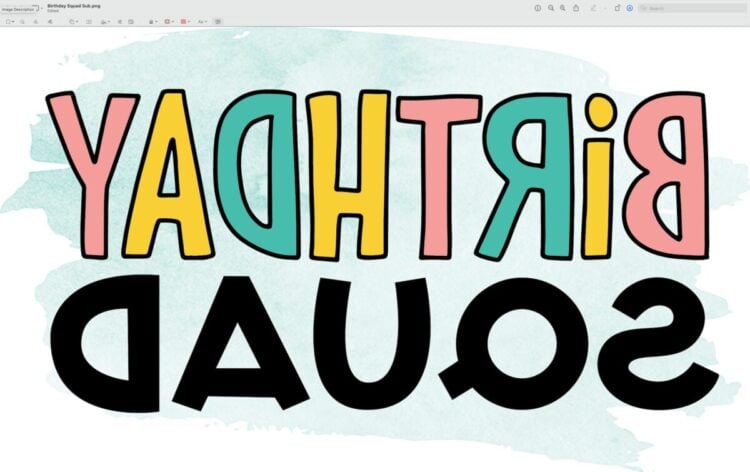
Right click on your file and make a copy (you don’t want to edit the original file because it will automatically save over the original). Double click your copied sublimation PNG image to open it in Preview. If it opens in another program, you may need to change the default program for your PNG file extension.
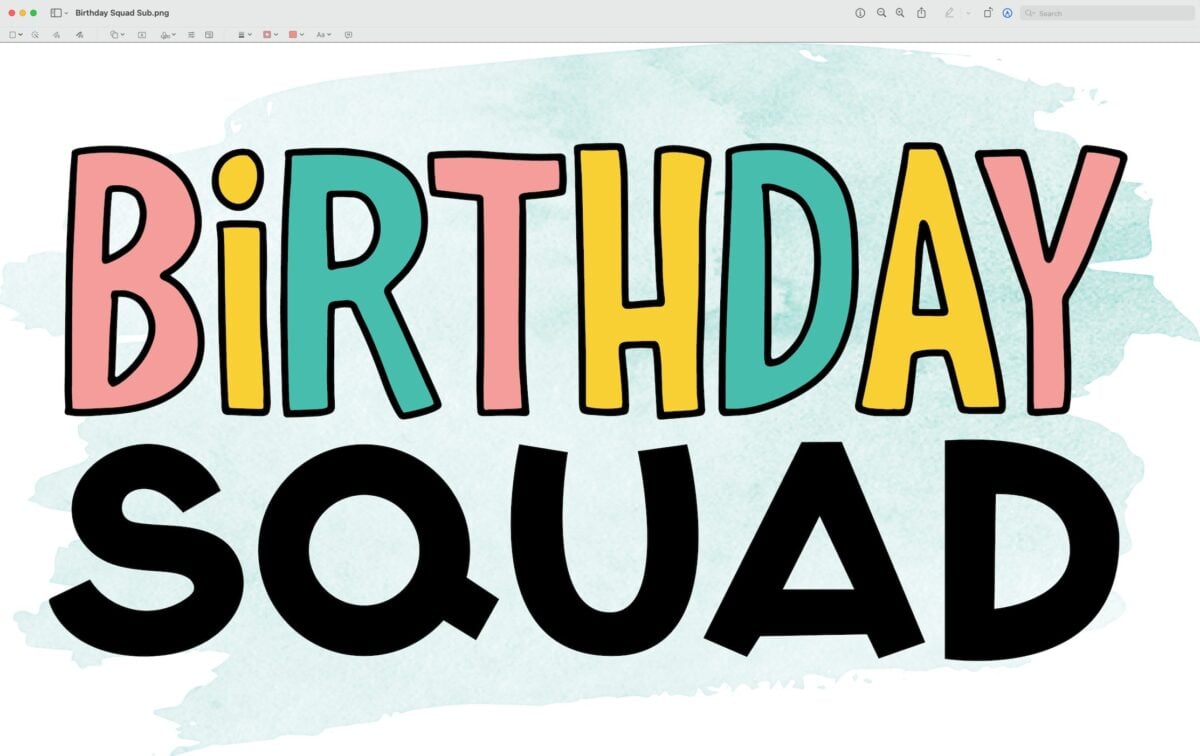
Then go to the menu and select Tools > Flip Horizontal to reverse your image (most sublimation projects need to be reversed, but if yours does not, like for sublimation cutting boards, then skip this step).
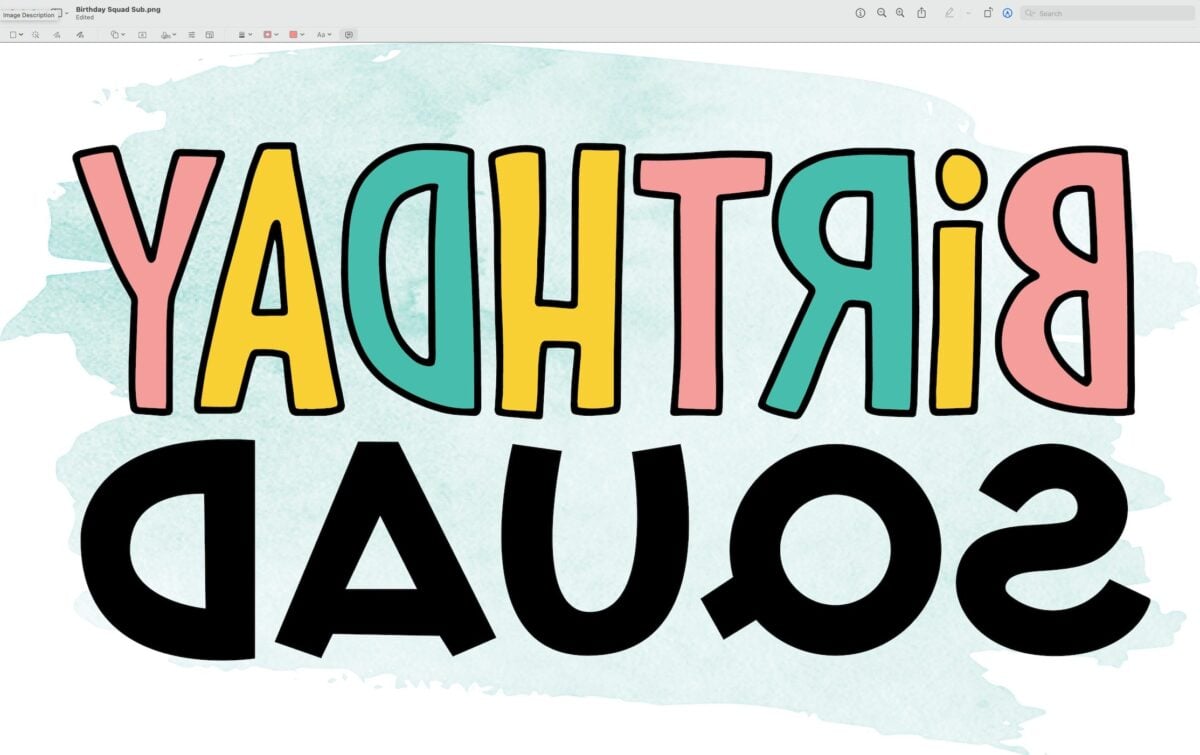
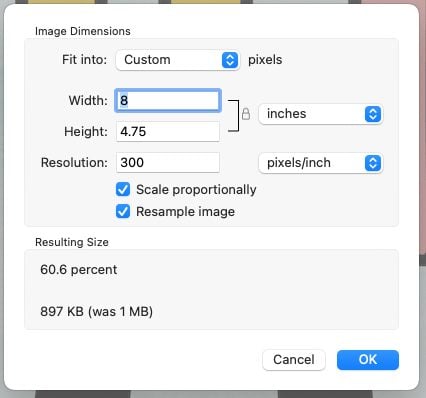
Now you can resize your image to fit on your blank. This image was 14″ wide, but I went to Tools > Resize Image and chose 8″ across instead. If your image is showing the pixel size, use the dropdown on the right to change the increment to inches.
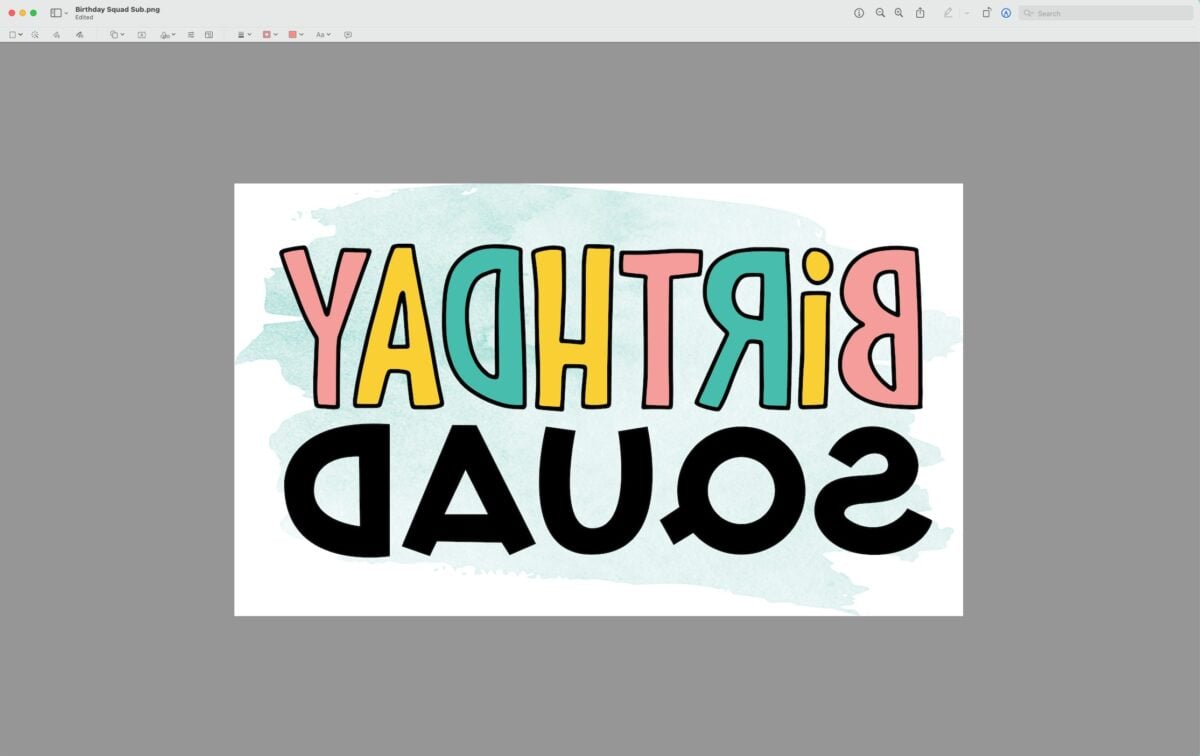
Now let’s assign the color profile. Normally we would do this in the Print Dialog box, but if Color Matching is not an option for you there, you can go up to Tools > Assign Profile. Then use the dropdown to find the ICC Profile you uploaded earlier.
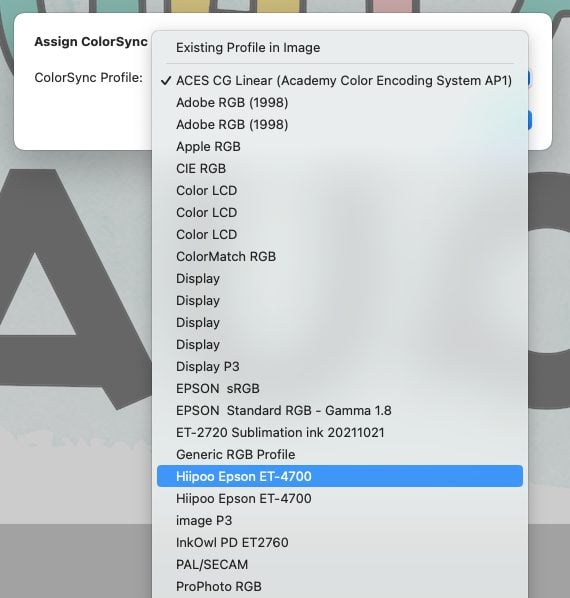
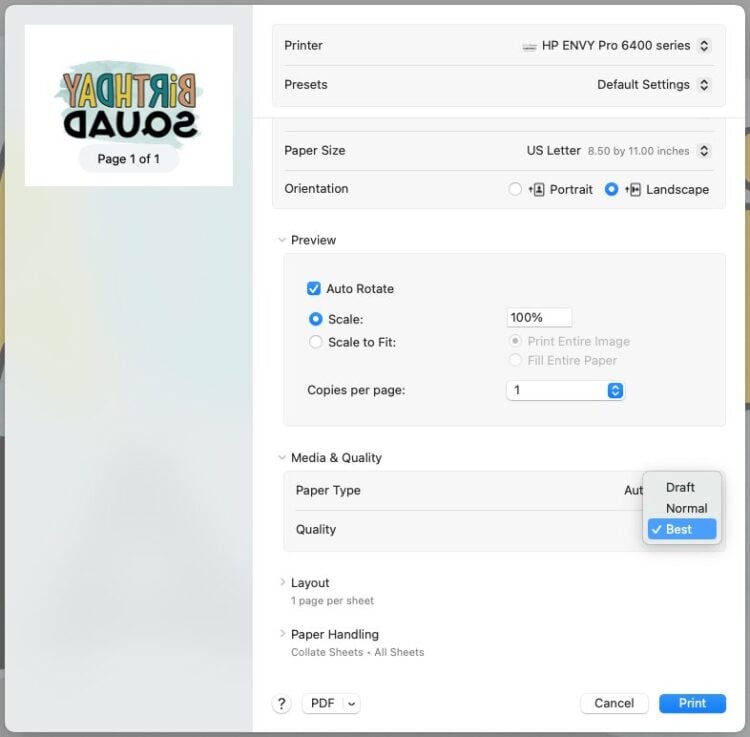
Now the image has the color profile assigned and you can hit File > Print to print your image.
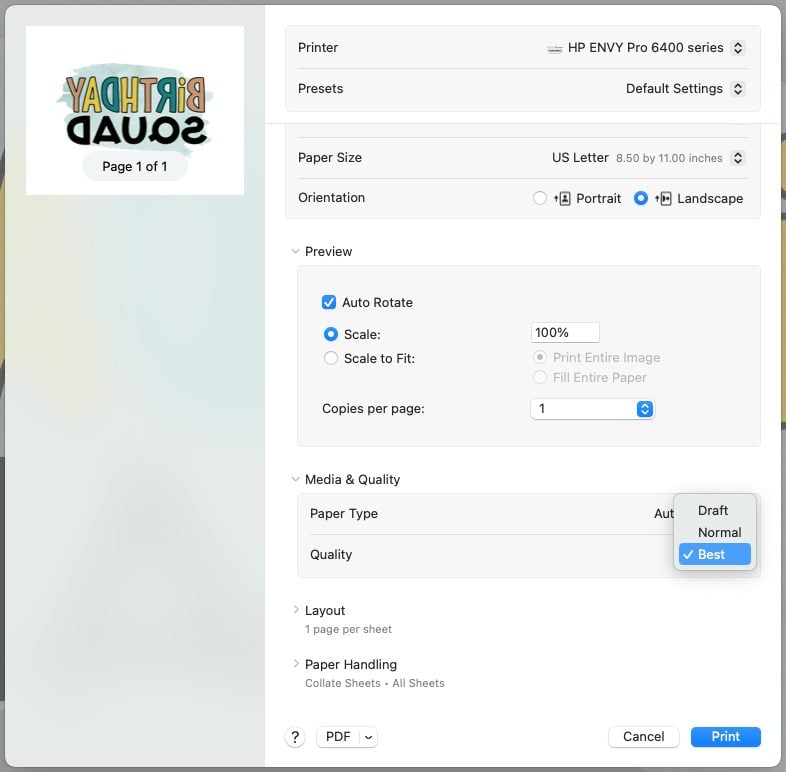
Remember to change other settings in your Print Dialog box, like changing the Quality to Best. Then click Print!
Using Adobe Photoshop
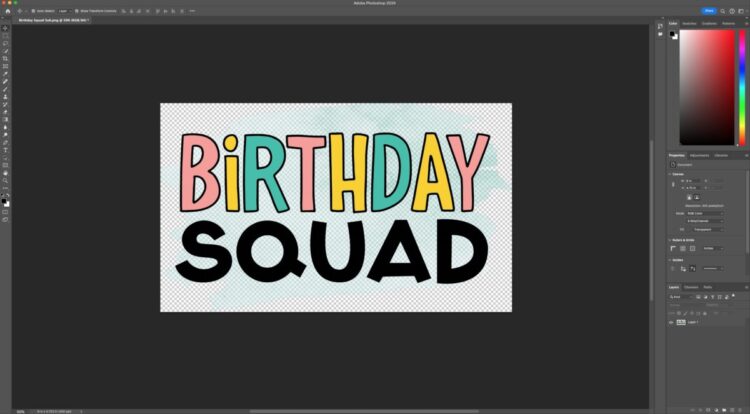
You can also use Photoshop in the same way as before. This is basically the same process in Adobe Illustrator as well.
Upload your file and resize if needed.
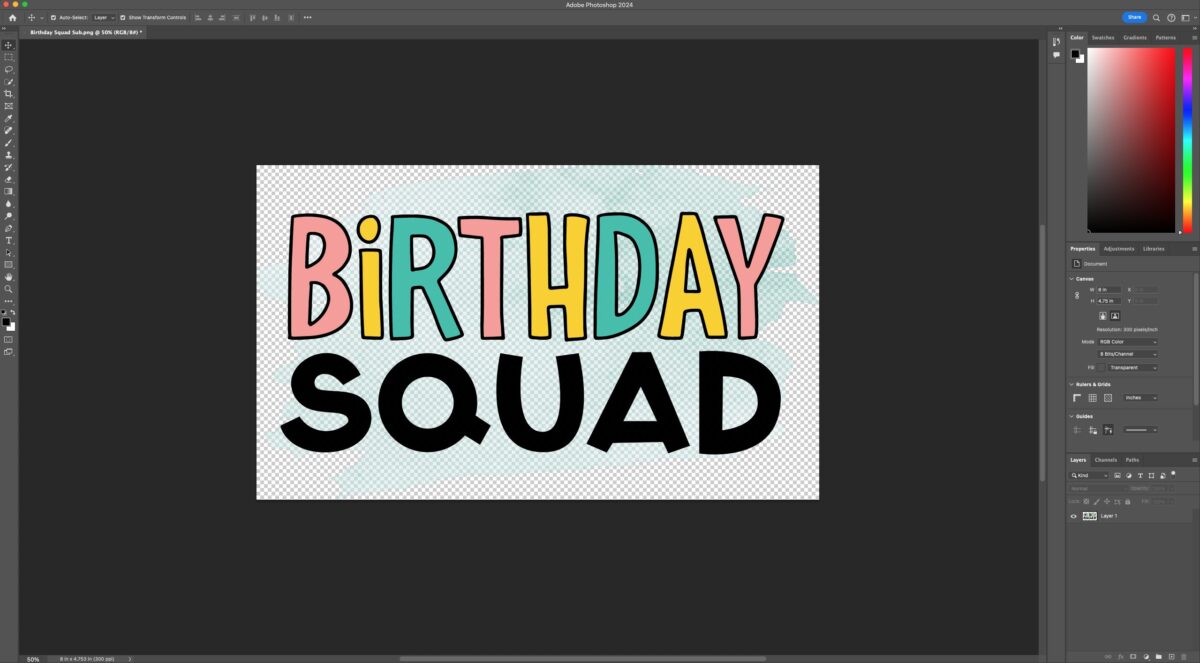
Go to File > Print.
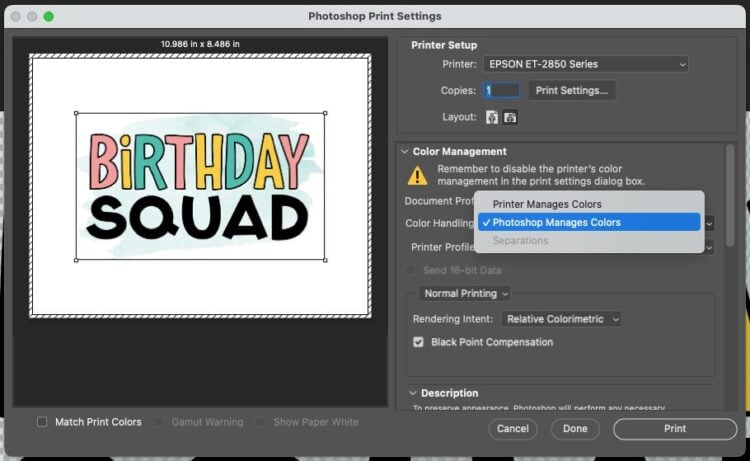
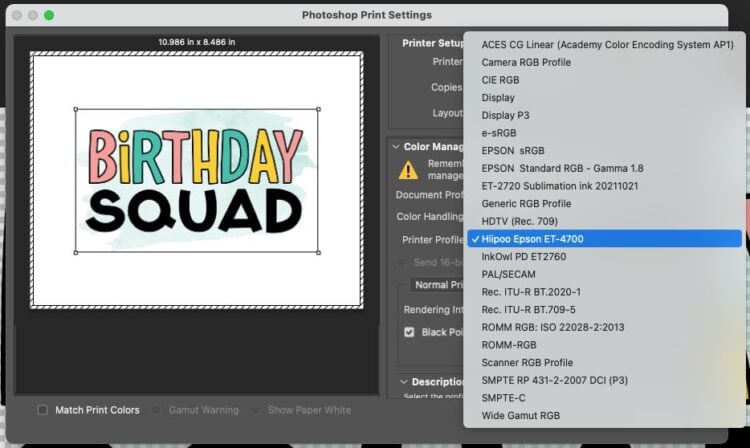
In the Photoshop Print Settings window, choose Photoshop Manages Colors in the Color Handling dropdown.
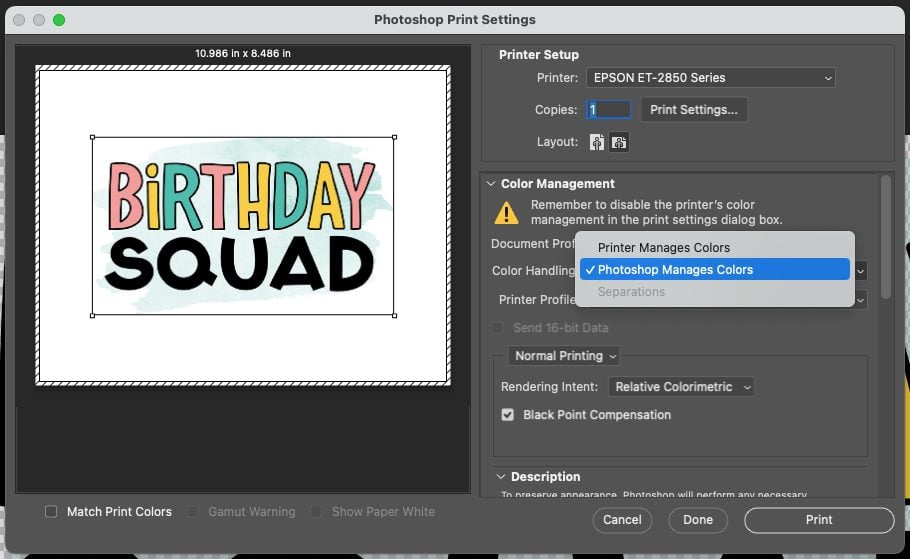
Then choose your ICC profile from the dropdown list of printer profiles.
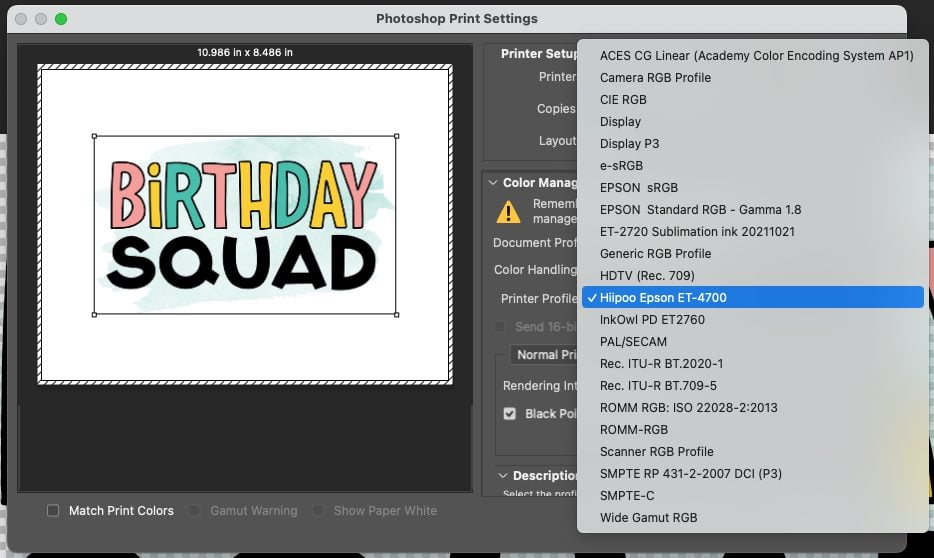
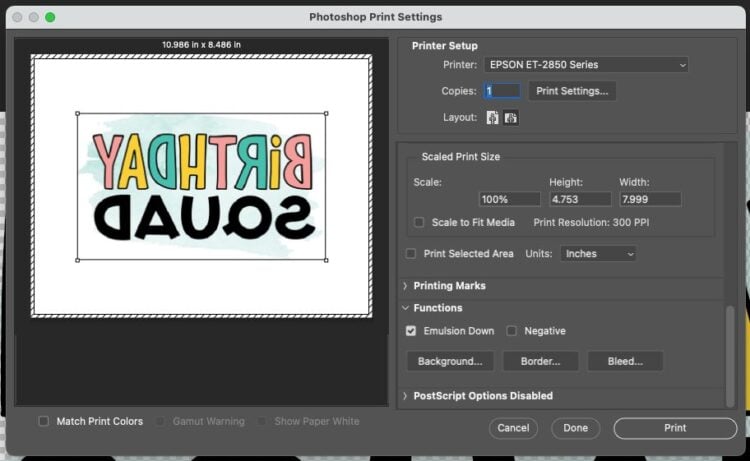
Then, to reverse your image (most sublimation projects need to be reversed, but if yours does not, like for sublimation cutting boards, then skip this step), scroll down and click Emulsion Down.
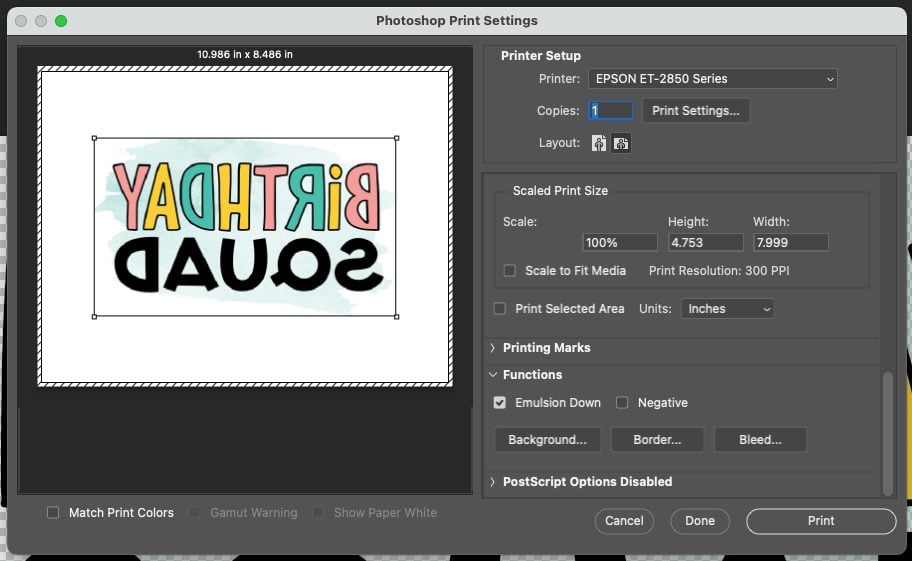
You will also want to go to Print Settings at the top to open the Print Dialog box, where you can change your quality to Best.
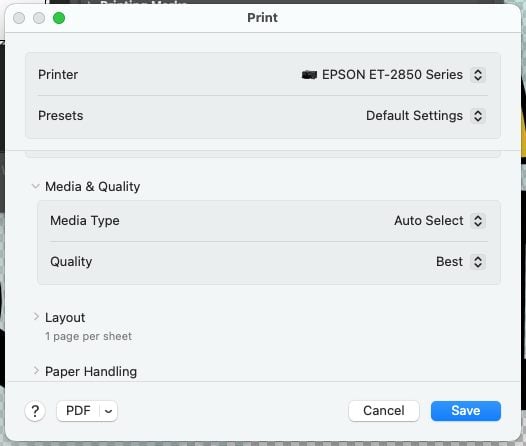
Then click Save and you’re ready to print with your ICC profile!
I know this isn’t the perfect solution! Being able to select an ICC profile under Color Matching in almost every program made using an ICC profile with a Mac much easier. But for now, I really hope one of these options work for you, and we can all write letters to Apple telling them to bring back Color Matching in the Print Dialog box!
SUBLIMATION ICC PROFILES FOR MAC USERS (MAC IOS 13 AND UP)
Instructions
- It is highly recommend you read Sublimation ICC Profiles & Color Management for Beginners first because it goes into more detail about why we need color correction, what ICC profiles are and where to find them, plus other color correction tips.Problem is, sometime in 2023 (maybe the Sonoma update, but it might have been Ventura before that), people started mentioning that there was no longer a way for Mac users to select their ICC color profile in the printer settings, which is one of the things that is covered in that post. Apparently Apple removed the ability to select a ColorSync profile.
- In the following instructions, some ways that you can correct your color using your Mac computer with the newer operating systems will be shared, so you can stop being frustrated by your sublimation printer. These instructions are specifically about ICC profiles on Mac computers. If you want to read more about color correction in general, if you have a PC or an older Mac, or if you want manual color correction, there are tips and tricks at the bottom of this post.A CaveatThe biggest caveat here is that changing a printer from a regular printer to a sublimation printer is a hack. Which means there are no guarantees that your color is going to be perfect. Most folks seem to be able to get to a color correction they are happy with, but some don't! And that can be really frustrating. You may need to try many ICC Profiles to find the best color and occasionally you'll find that one profile works better for a certain substrate and another works better on a different substrate. Sublimation is all about testing! Most of the people reading these instructions probably already have their Epson EcoTank, but if you have the extra money, Getting a Brother sublimation printer or a Sawgrass sublimation printer is highly recommended. Yes, more expensive, but you shouldn't have to worry about the color.
- Mac Printer Driver Issue for ICC ProfilesBefore you head into this post, there is an issue that is very specific to some Mac users. So double check you've done this correctly before proceeding. There's a chance if you have a Mac and you do NOT see "Color Matching" in the dropdown of the system dialog box, you need to completely uninstall your printer, download the correct drivers from Epson, and reinstall your printer. You want to make sure you have the correct driver for your operating system.This may work for you, depending on your operating system. But if not, let's talk about how to do sublimation color correction on a Mac!
- Using an ICC Profile on a MacLet's upload an ICC to start, and then you'll be shown different ways to use it on your Mac.How to Upload an ICC ProfileDownload the ICC Profile and unzip from the zip file if needed. You should have a file name with an extension of .icc or .icm. ICC and ICM are the same type of file.

- Open a second Finder window. Navigate to your Mac's hard drive in the sidebar.Note: if you do not see your Mac's hard drive in the Finder sidebar, you can go to Finder > Preferences and click the Sidebar tab. Make sure that "Hard disks" is checked and your hard drive should show up in the sidebar in your Finder.Then navigate from the Macintosh HD > Library > ColorSync > Profiles

- Drag and drop your ICC Profile file into the Profiles Folder—this will add it to all of the other standard ColorSync profiles that are on your computer.

- Using an ICC Profile in the Print Dialog BoxOne of the reasons that this update is so frustrating is that you can no longer select a color profile in the Print Dialog box. You used to be able to select this under Color Matching, but with the update, that's no longer an option. This is VERY frustrating because that means we can no longer use an ICC profile with a wide range of software programs, including:Cricut Design SpaceSilhouette StudioGoogle DocsCorelDRAWAffinity DesignerMicrosoft Word
- Printing from PreviewOne way to be able to select your ICC profile is to print from the Preview application on your Mac. This is a free program that comes on every Mac. Right click on your file and make a copy (you don't want to edit the original file because it will automatically save over the original). Double click your copied sublimation PNG image to open it in Preview. If it opens in another program, you may need to change the default program for your PNG file extension.

- Then go to the menu and select Tools > Flip Horizontal to reverse your image (most sublimation projects need to be reversed, but if yours does not, like for sublimation cutting boards, then skip this step).

- Now you can resize your image to fit on your blank. This image was 14" wide, but I went to Tools > Resize Image and chose 8" across instead. If your image is showing the pixel size, use the dropdown on the right to change the increment to inches.

- Now assign the color profile. Normally this would be done in the Print Dialog box, but if Color Matching is not an option for you there, you can go up to Tools > Assign Profile. Then use the dropdown to find the ICC Profile you uploaded earlier.

- Now the image has the color profile assigned and you can hit File > Print to print your image.Remember to change other settings in your Print Dialog box, like changing the Quality to Best. Then click Print!

- Using Adobe PhotoshopYou can also use Photoshop in the same way as before. This is basically the same process in Adobe Illustrator as well.Upload your file and resize if needed.

- Go to File > Print.In the Photoshop Print Settings window, choose Photoshop Manages Colors in the Color Handling dropdown.

- Then choose your ICC profile from the dropdown list of printer profiles.

- Then, to reverse your image (most sublimation projects need to be reversed, but if yours does not, like for sublimation cutting boards, then skip this step), scroll down and click Emulsion Down.

- You will also want to go to Print Settings at the top to open the Print Dialog box, where you can change your quality to Best.Then click Save and you're ready to print with your ICC profile!

- This isn't the perfect solution! Being able to select an ICC profile under Color Matching in almost every program made using an ICC profile with a Mac much easier. But for now, one of these options should work for you, and we should all write letters to Apple telling them to bring back Color Matching in the Print Dialog box!


Comments & Reviews
IAN WEBBER says
hi, I cannot get my new MacBook Air on sequoia to drag drop icc for hiipoo at all. help! my images have a blue tint, m and I only print in black and white.. thanks