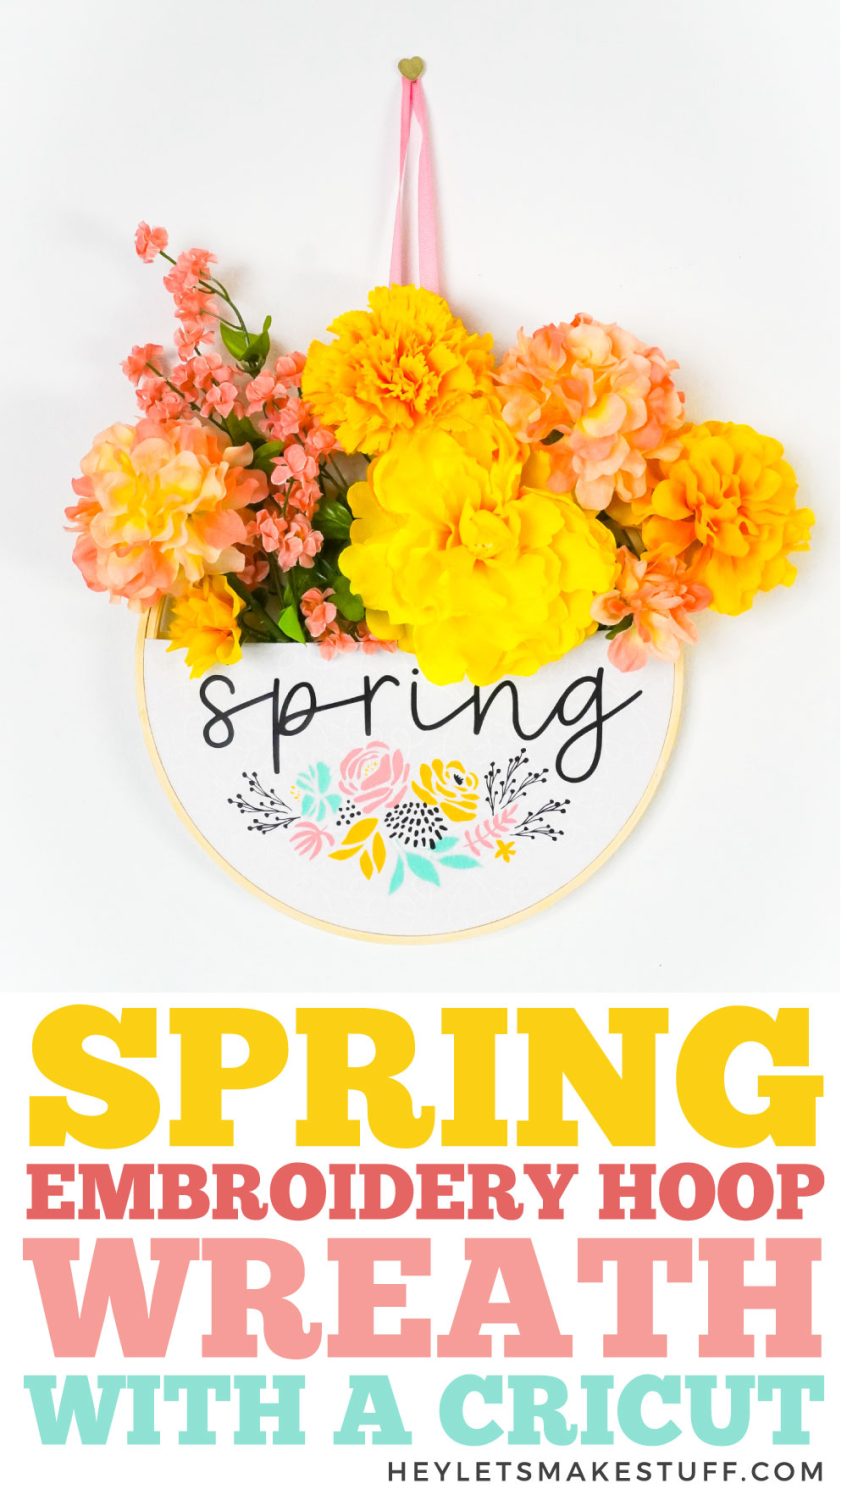
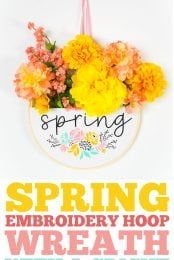
Use your Cricut and heat-transfer vinyl to make this easy spring-themed embroidery hoop wreath! Welcome the warmer weather with this fun piece of decor—perfect for your front door or mantel.
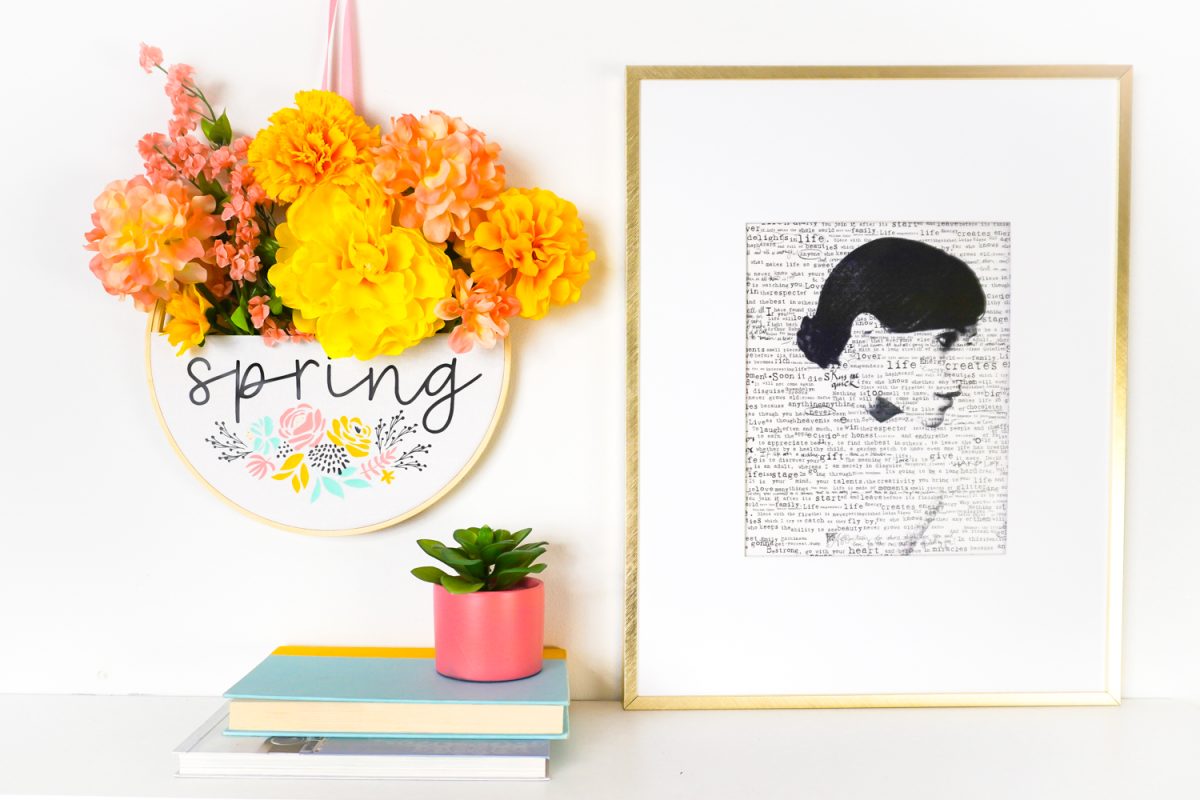
Hello friends! Are you ready for a fun spring DIY project?
One of the things I appreciate about living so far north is how quickly the days get longer as we move out of winter and into spring! While we have long (loooong) dark days in December and January, but toward the middle of February you can really start to feel that change. This time of year, we get around a few more minutes daylight each day and then, all of a sudden, the flowers burst forth and it becomes a colorful wonderland full of sunlight and joy.
I really do love spring here so much—can you tell?
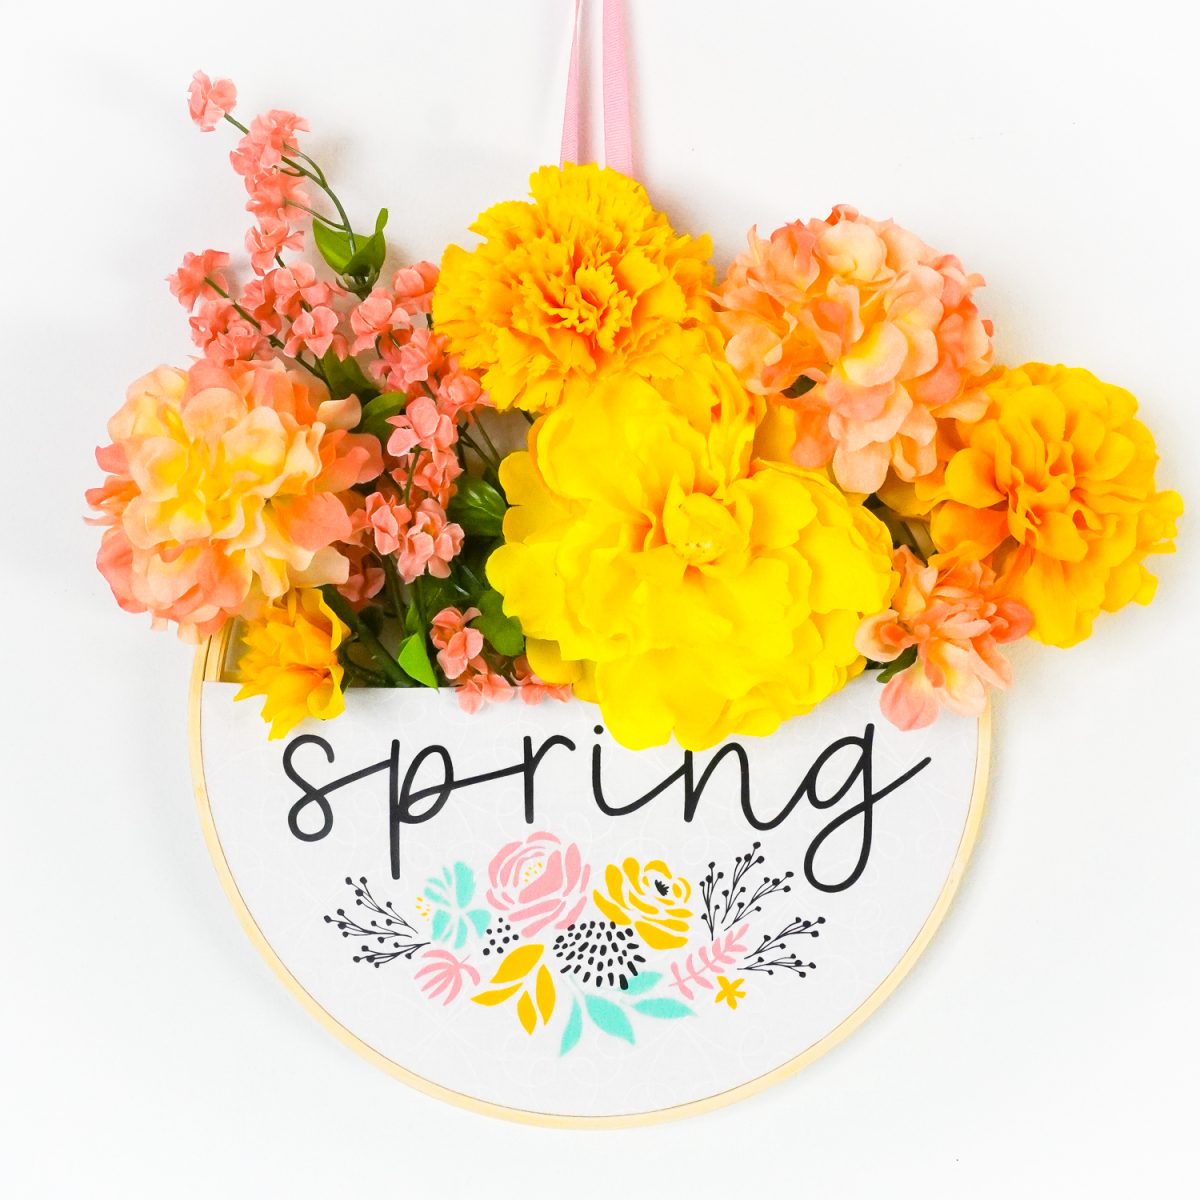
To celebrate the upcoming seasonal switch in the calendar, I’m making a DIY spring-themed embroidery hoop wreath, using your Cricut and Siser heat transfer vinyl! Using an embroidery hoop and making a pocket out of fabric is a fun twist on a traditional wreath.
This was also a great way to use a bunch of the amazing florals from my local craft store—they add so much texture and dimension to this pretty wreath.
Supplies Needed for the Embroidery Hoop Wreath
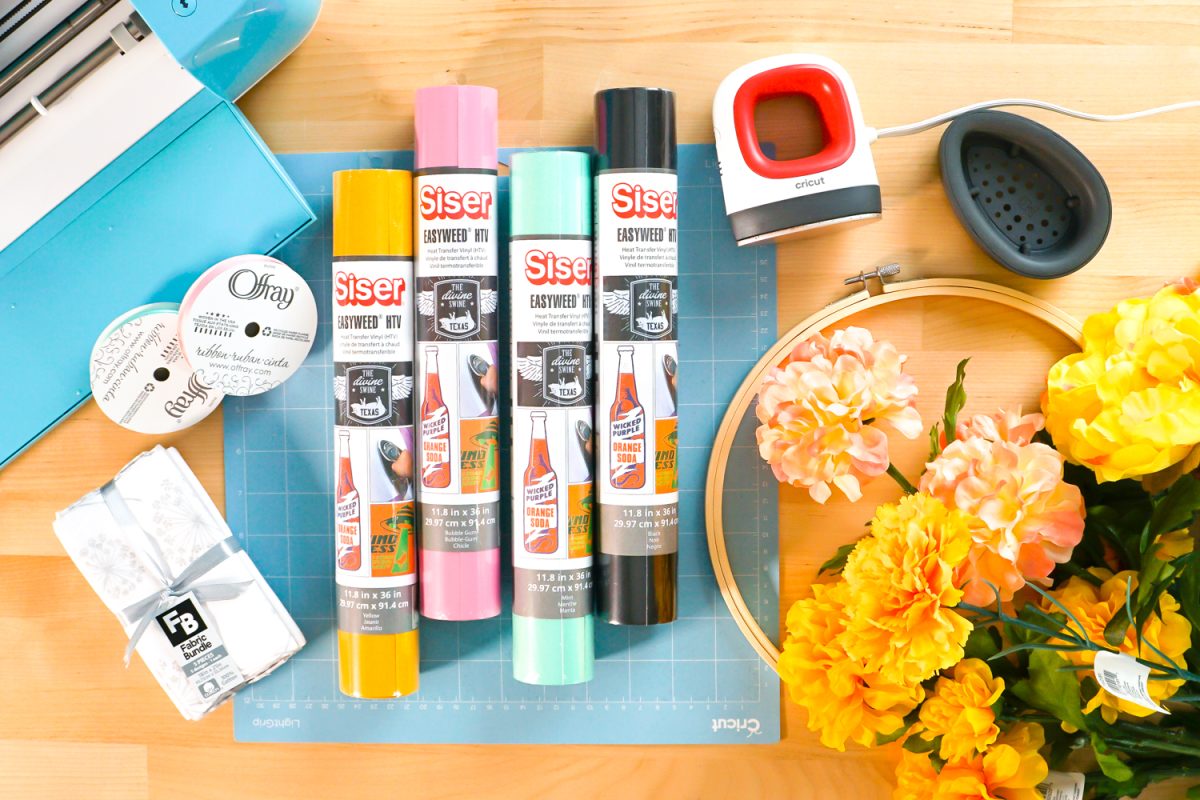
- Cricut Maker or Cricut Explore
- Blue LightGrip or Green StandardGrip mat
- Fabric fat quarter (18″ x 21″)
- Siser Heat-Transfer Vinyl: Pink, Yellow, Teal, Black
- Weeding tool
- Cricut EasyPress Mini or other heat press
- EasyPress mat
- 10″ embroidery hoop
- Scissors
- Hot glue gun and glue
- Piece of felt for backing
- Spring floral stems
- Wire snips
- Ribbon
- Free Spring Floral SVG (see below)
Get the Free File
Want access to this free file? Join my FREE craft library! All you need is the password to get in, which you can get by filling out the form below. The file number is: C421.
Instructions for Making the Spring Embroidery Hoop Wreath
Upload the File to Cricut Design Space
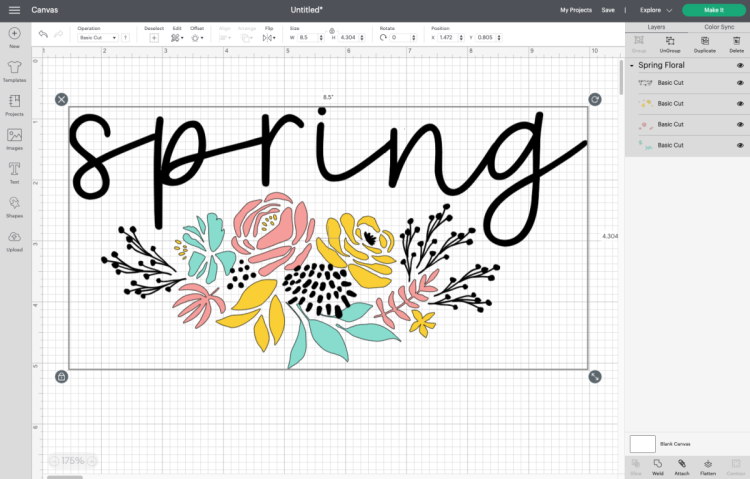
Start by uploading the free Spring SVG file to your Cricut Design Space canvas (learn more in my post How to Upload SVG Files to Cricut Design Space), and resize it to fit your wreath. Because of the small pieces, I suggest a minimum cut size of 8.5″. This fits nicely in a 10″ embroidery hoop—if you are using a larger hoop, increase the size of your file accordingly.
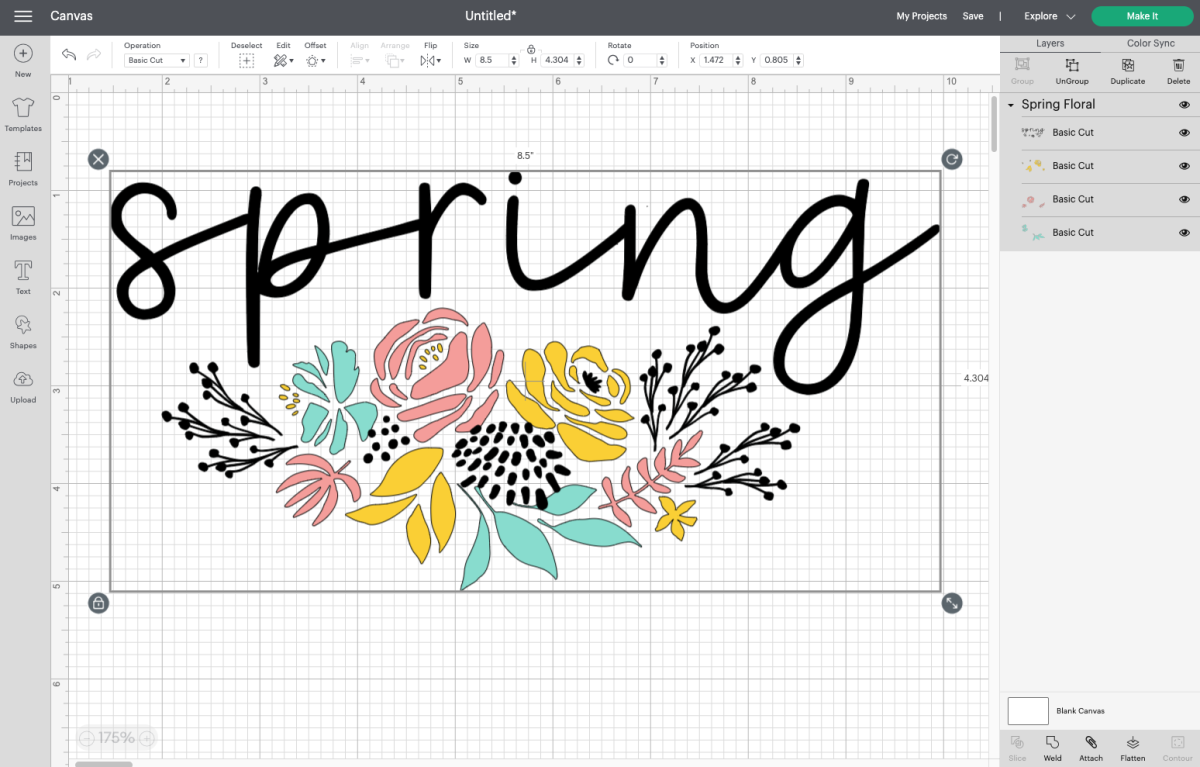
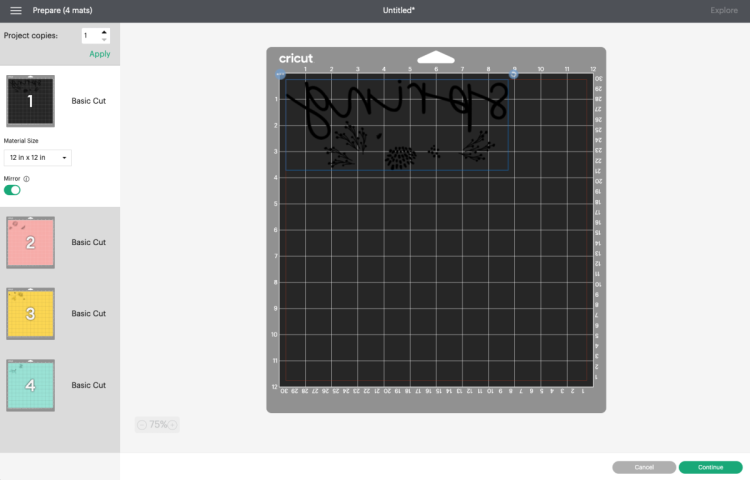
Once your file is ready to cut, click Make It in the upper right. In the Prepare screen, click the mirror slider for all of the layers so they will be the correct direction when you iron them onto your project. Make sure to click back on to the top layer so it cuts first.
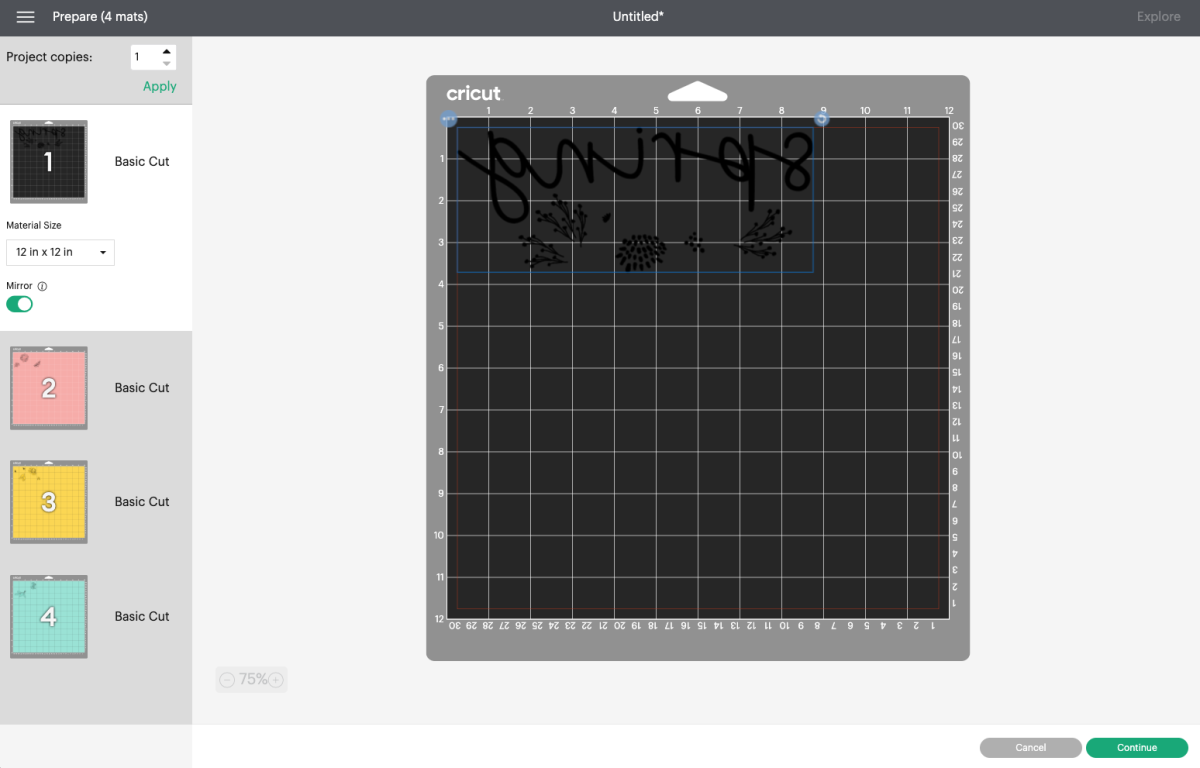
Then in the Make Screen, set your material to iron on vinyl (also called heat transfer vinyl or HTV) and cut the layers on your Cricut. I have an in-depth post on How to Use HTV if you need more guidance on cutting.
Weeding and Adhering the HTV
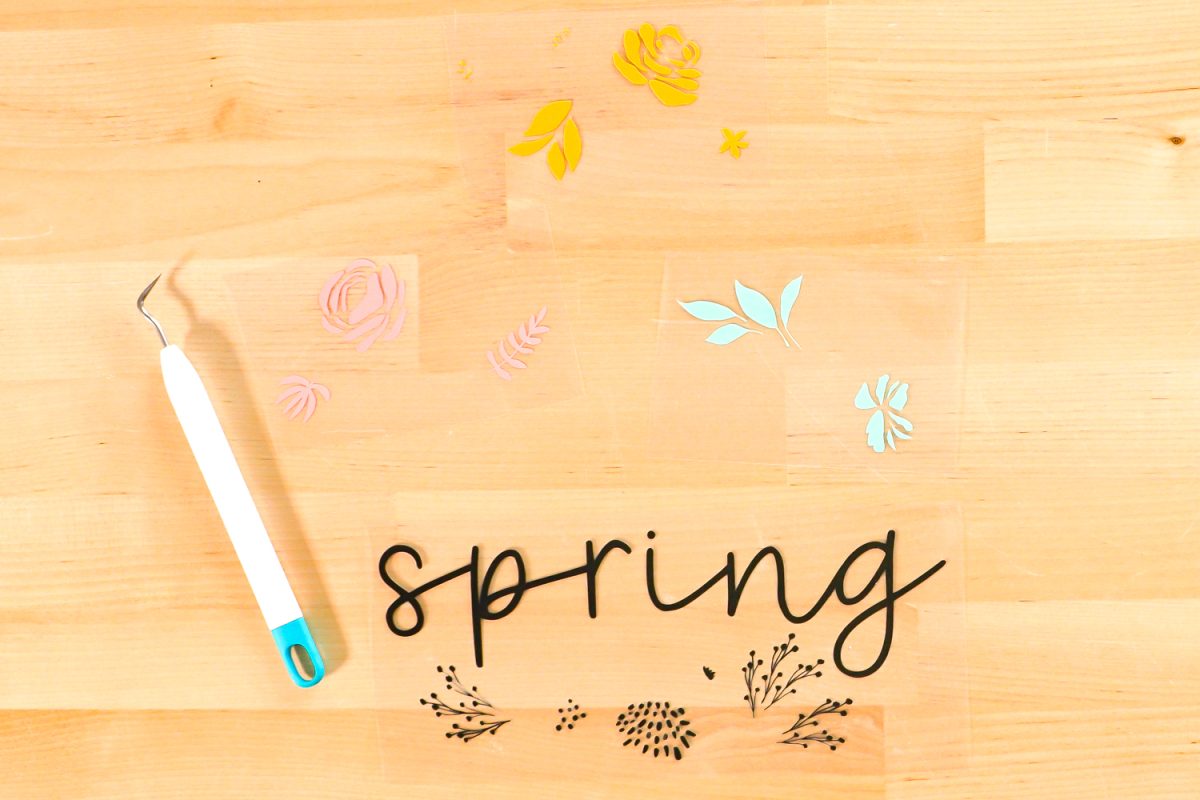
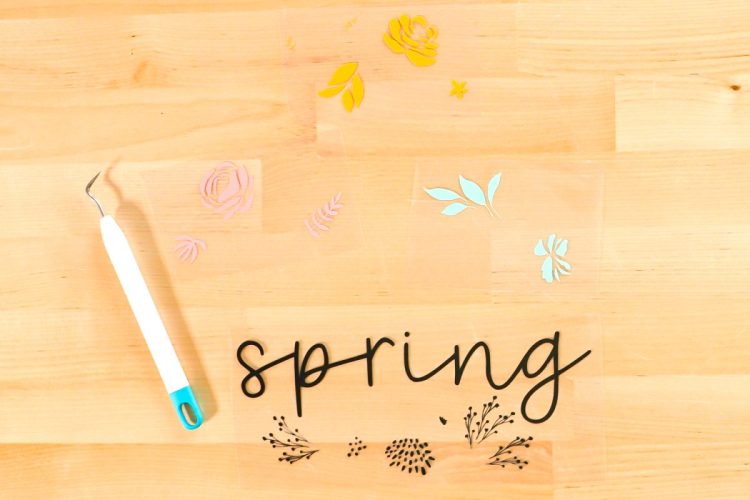
Weed your HTV, which is removing anything that is not your image. I love this Siser EasyWeed HTV—it weeds like a dream. If you need more tips and tricks for weeding, check out my post Weeding Iron On Vinyl: Tips and Tricks for Making it Easy.
Fold your piece of fabric in half—this will create a sturdier pocket for your floral stems. Iron the fold so it’s crisp. If you desire, you could also stitch a hem here using your sewing machine and thread.
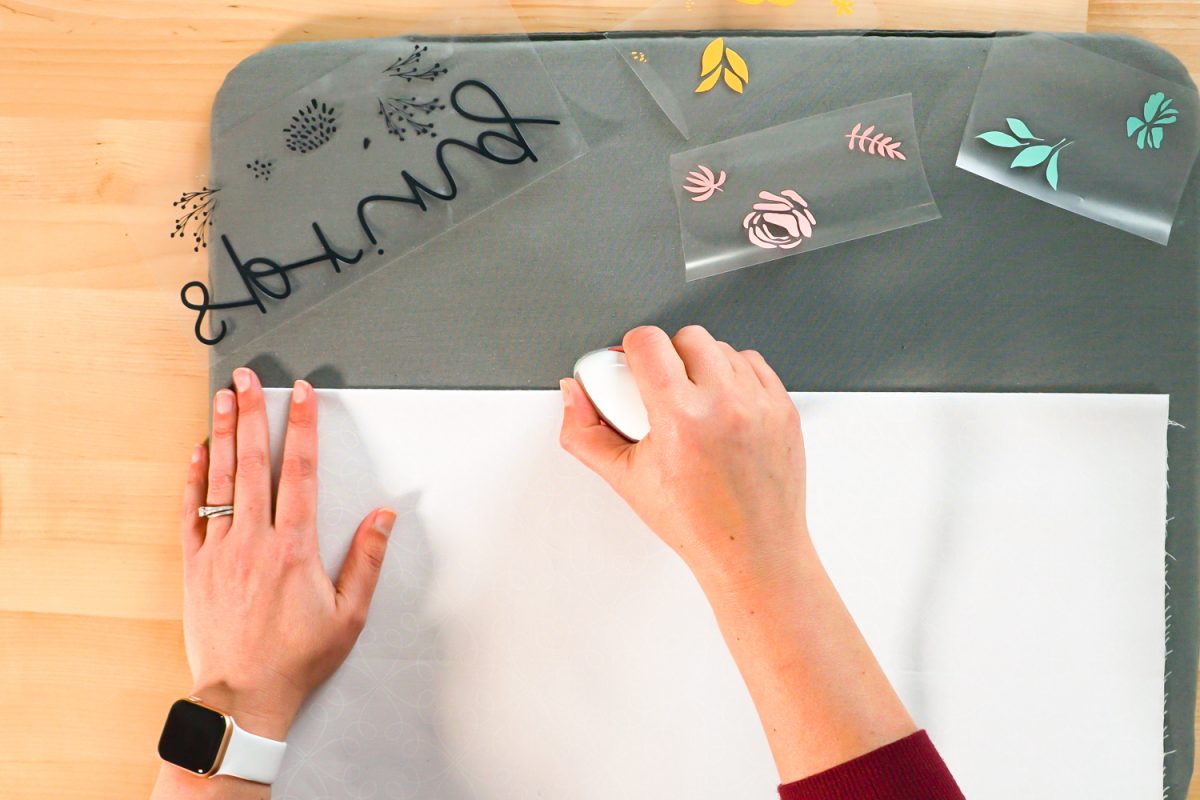
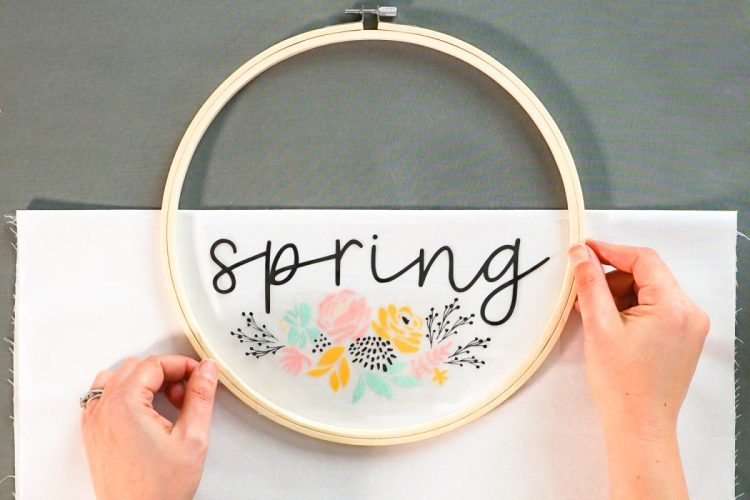
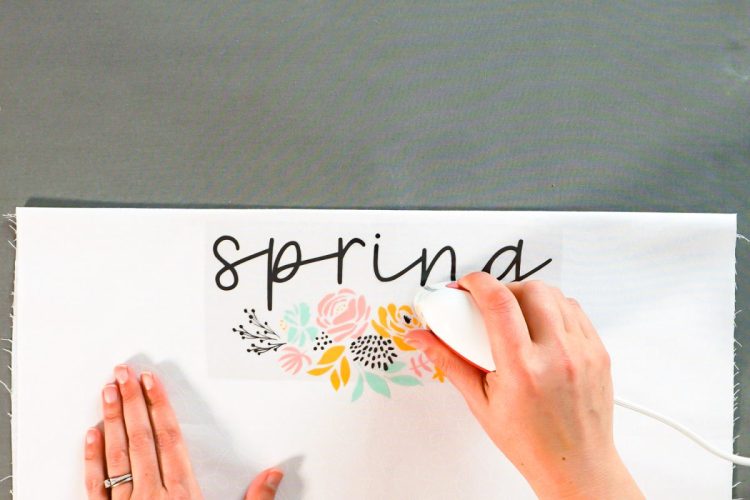
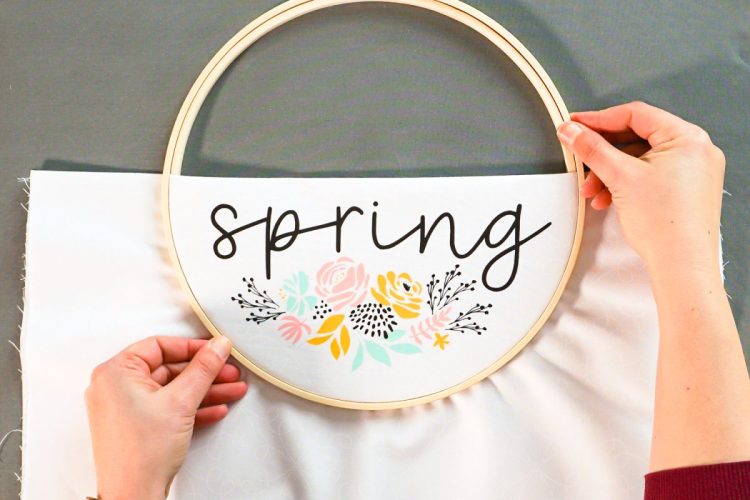
Now carefully layer your iron on vinyl pieces using the hoop as a guideline. You’ll adhere them one layer at a time, but you want to make sure everything is lined up properly. From bottom to top, I did the teal, the yellow, the pink, and the black, using the hoop as a guideline.
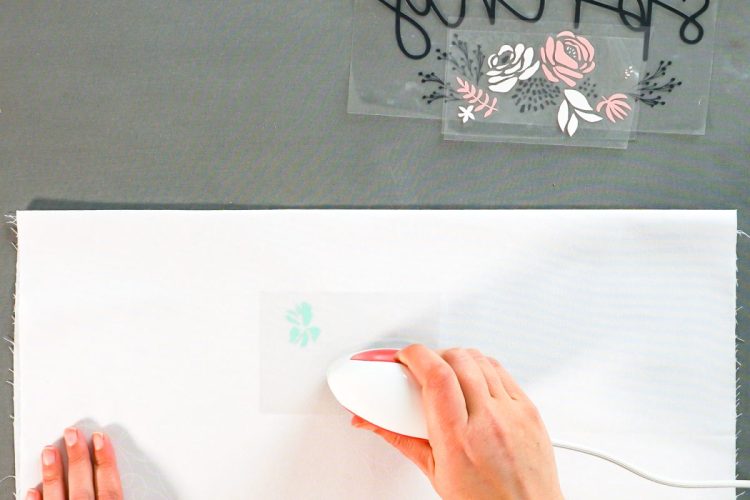
If you were to iron everything on as is, however, you’d iron the different layers to the carrier sheets of the layers below them. So remove the hoop and peel back everything but that bottom layer. Adhere the bottom layer using your EasyPress mini or other heat press device.
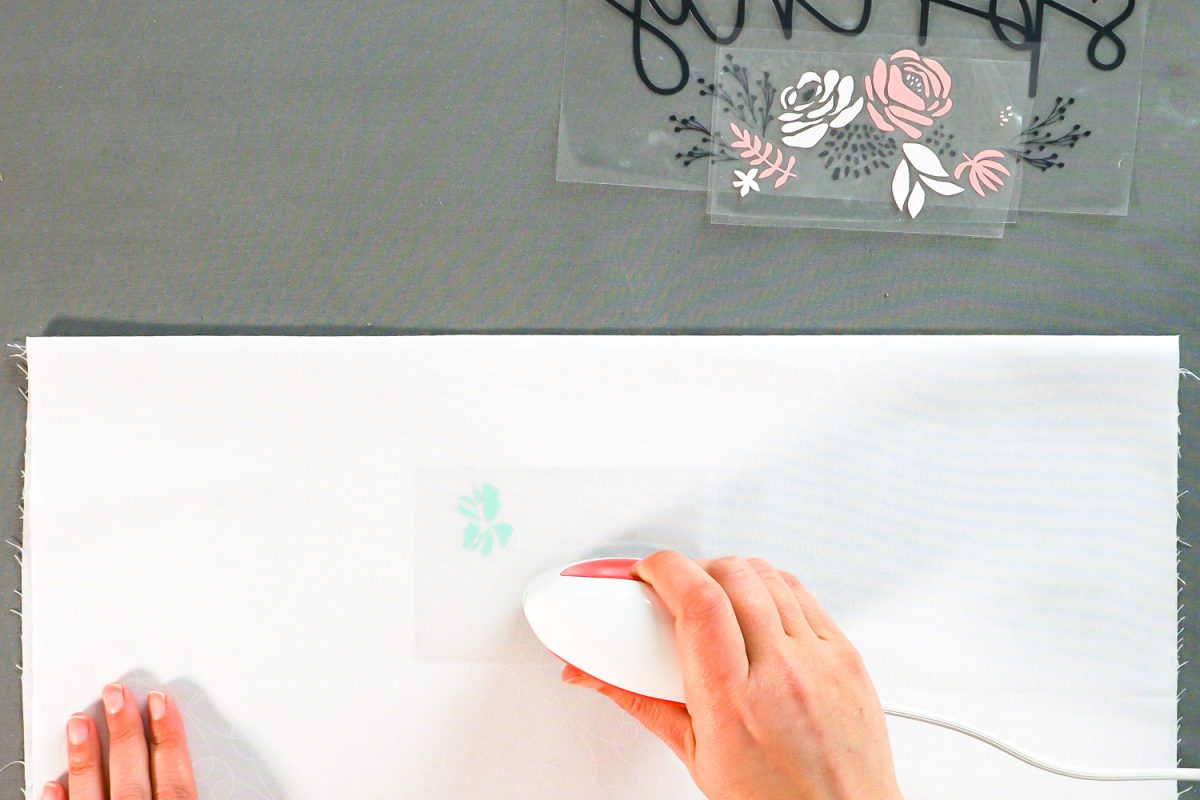
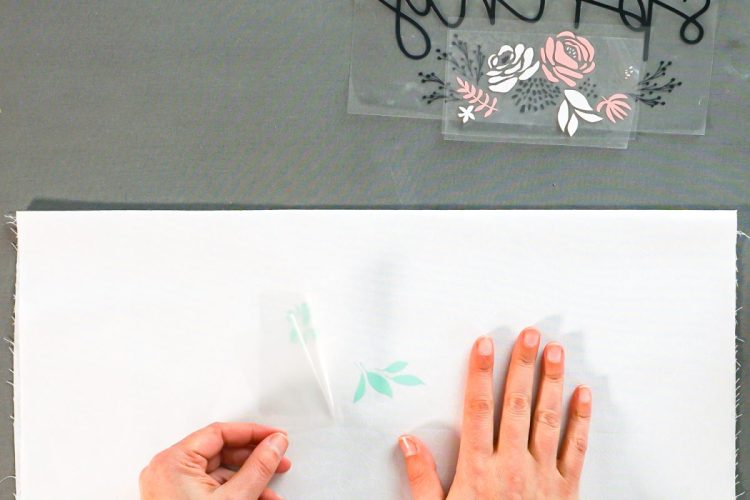
Then peel back the carrier sheet. If it’s not sticking, press for a bit more.
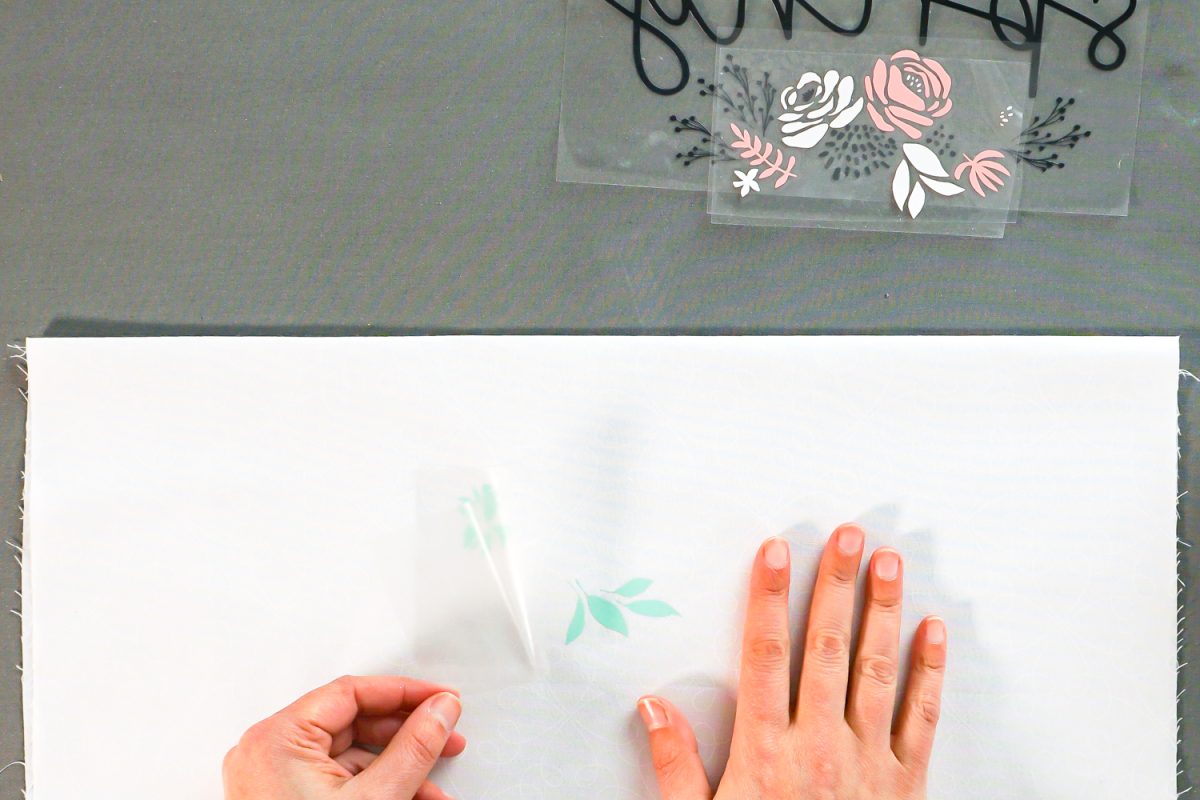
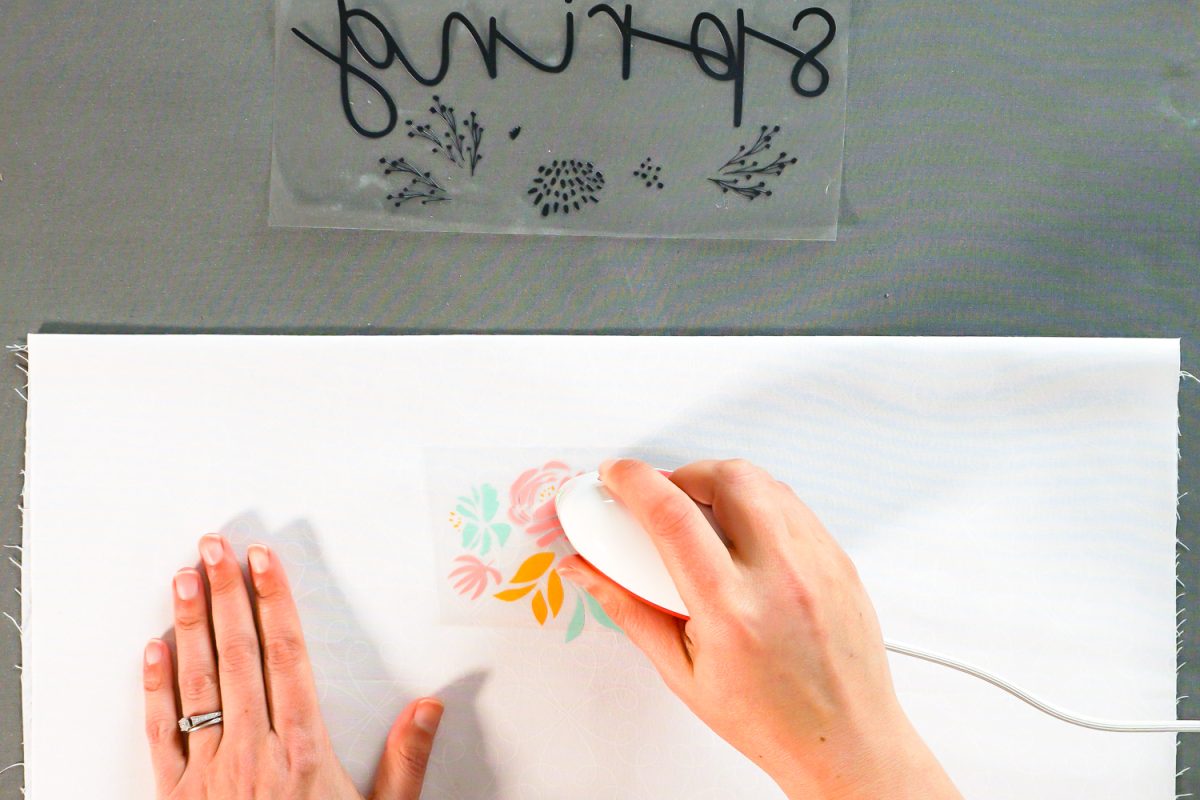
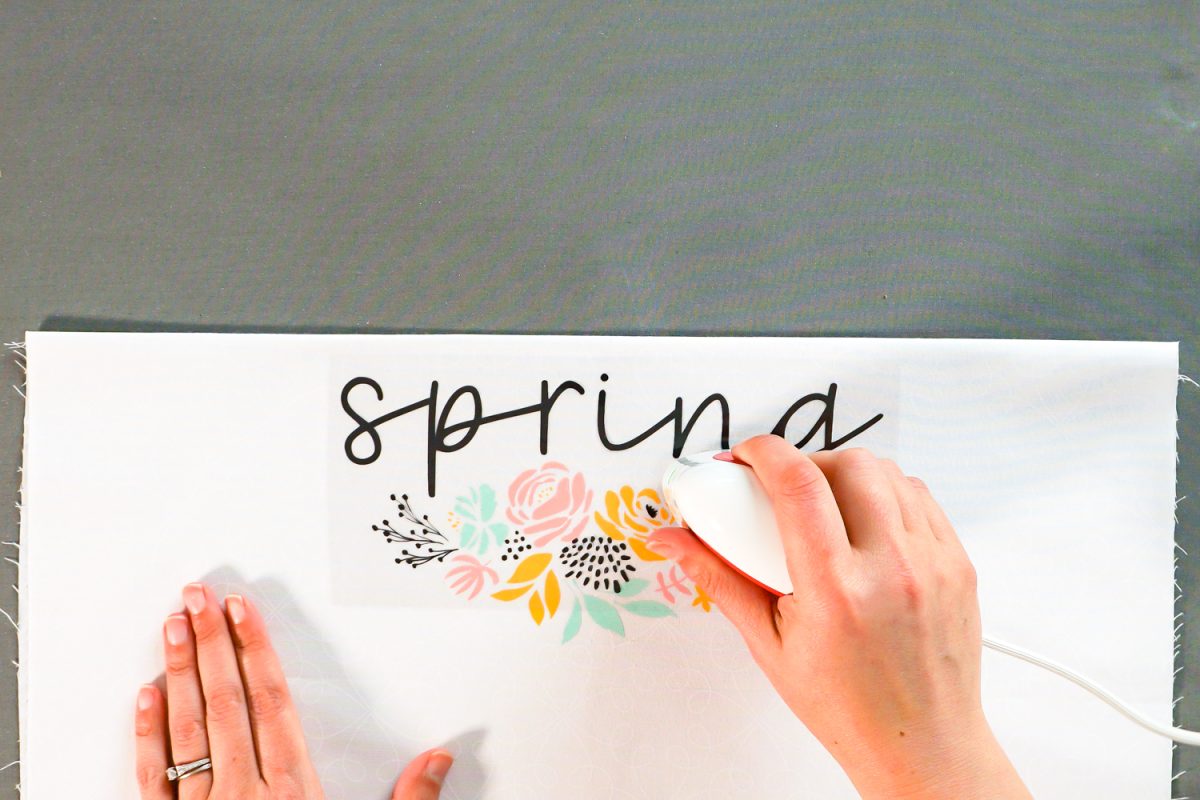
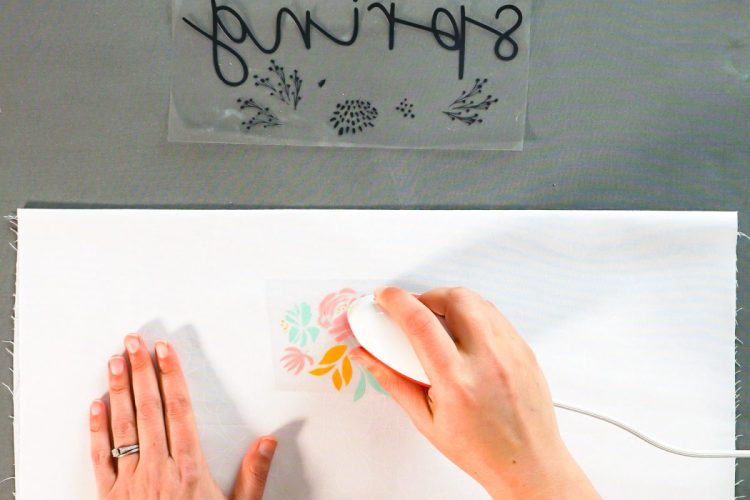
Repeat with the remaining layers, taking care not to run your EasyPress over any HTV that doesn’t have a carrier sheet over it.
Add Your Design to an Embroidery Hoop
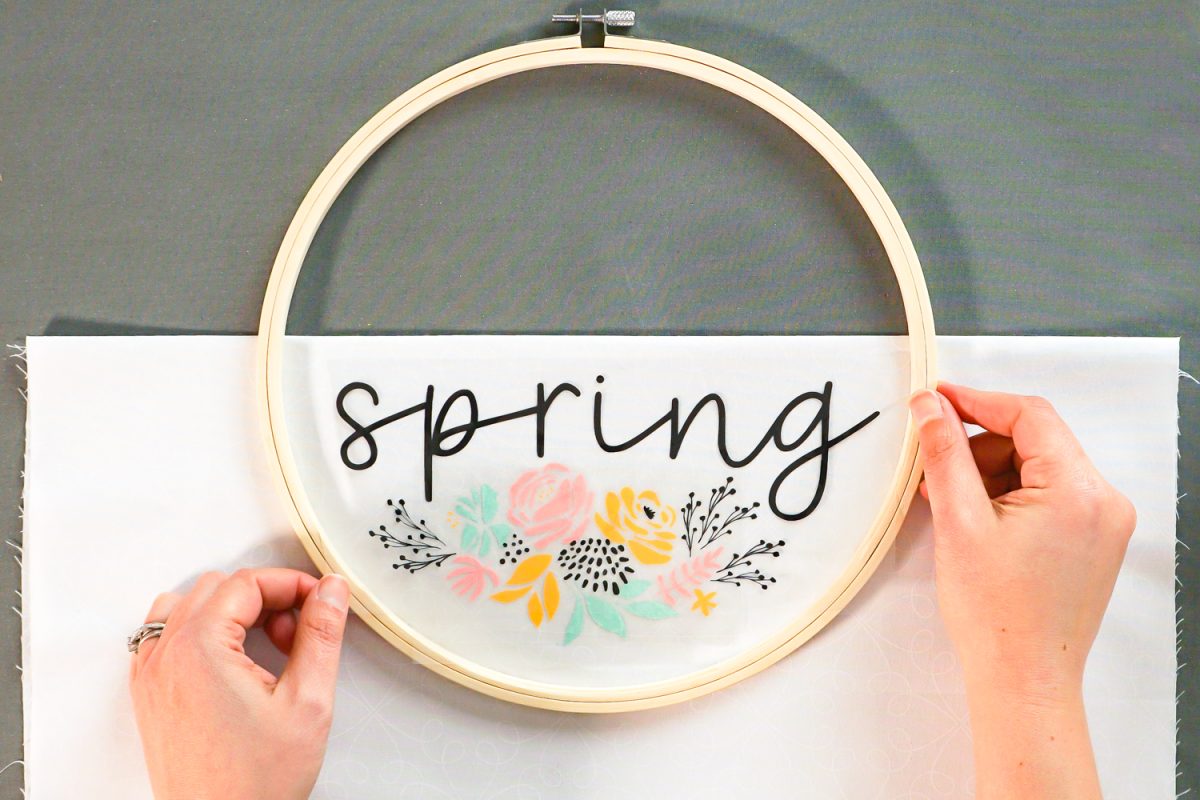
Once your design is complete, you can add your hoop. Try to keep the fabric as taut as possible as you secure it between the two layers of the embroidery hoop.
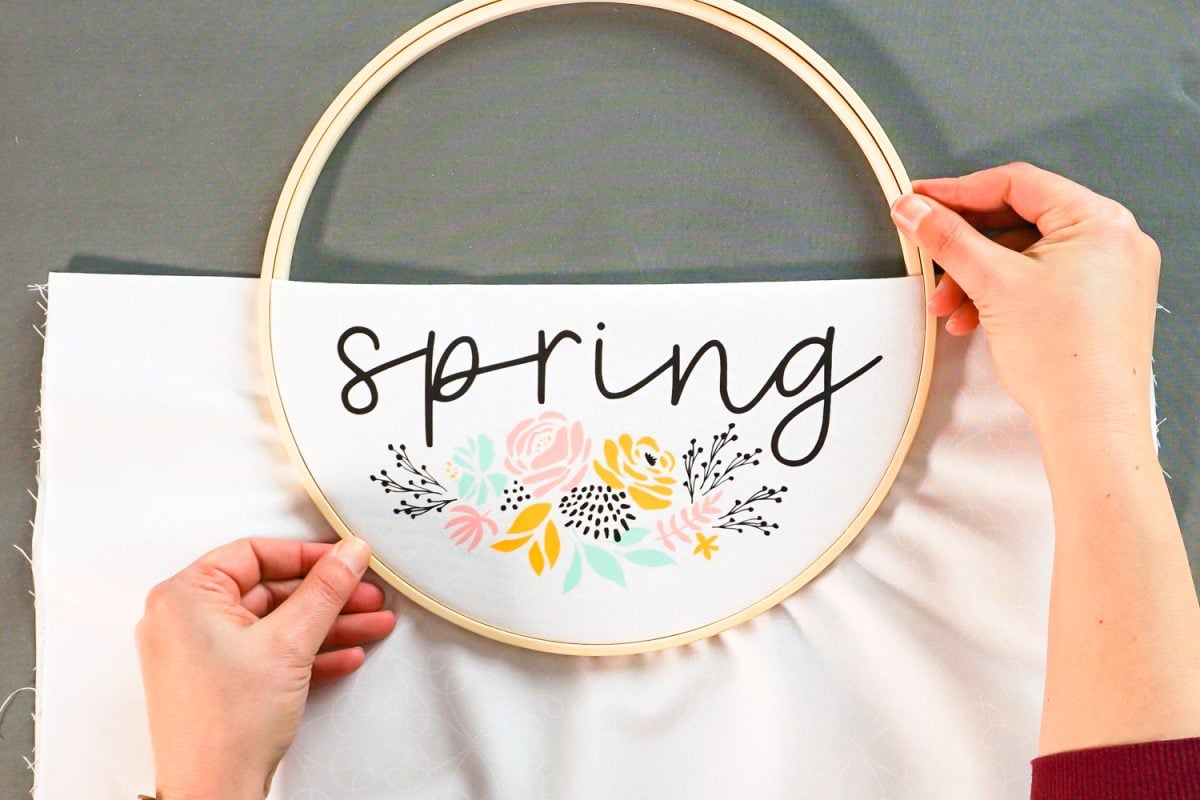
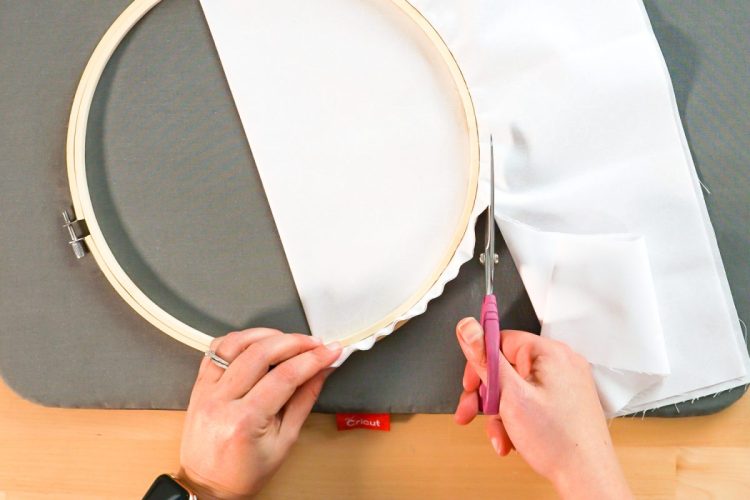
Once you’ve tightened the screw at the top, flip it over and trim off the excess fabric.
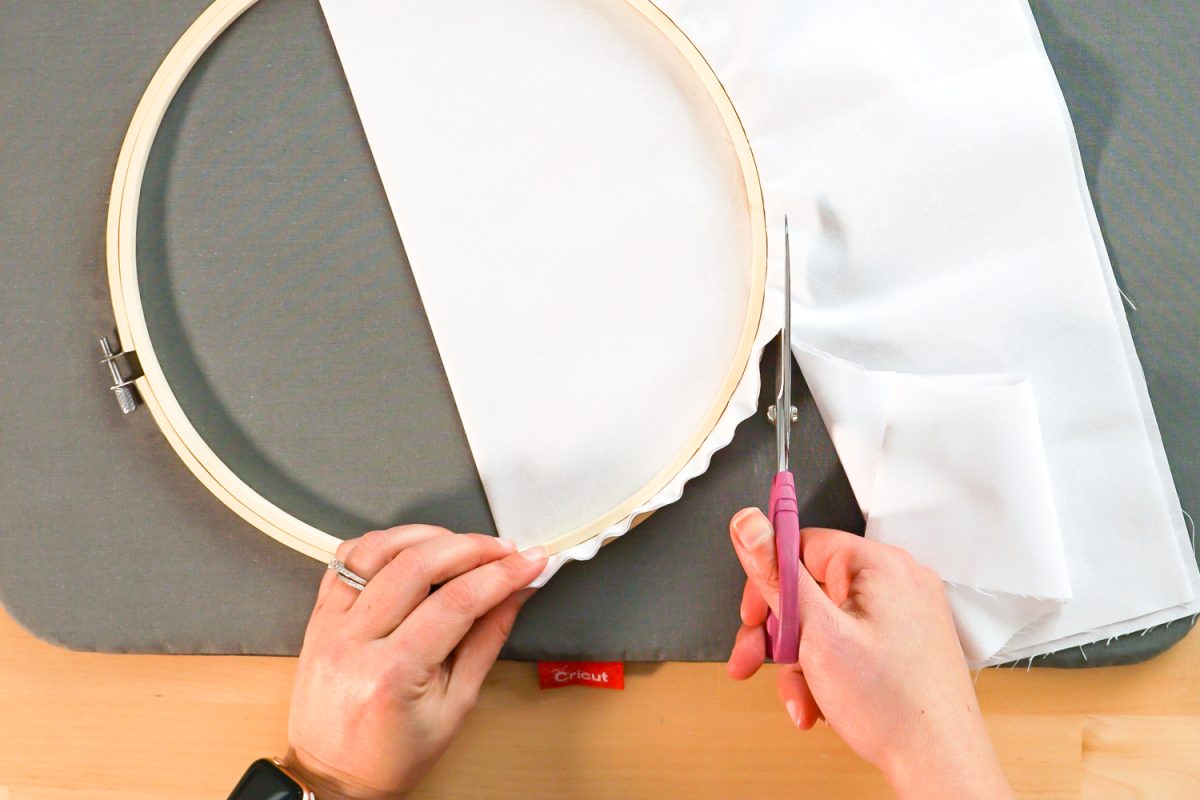
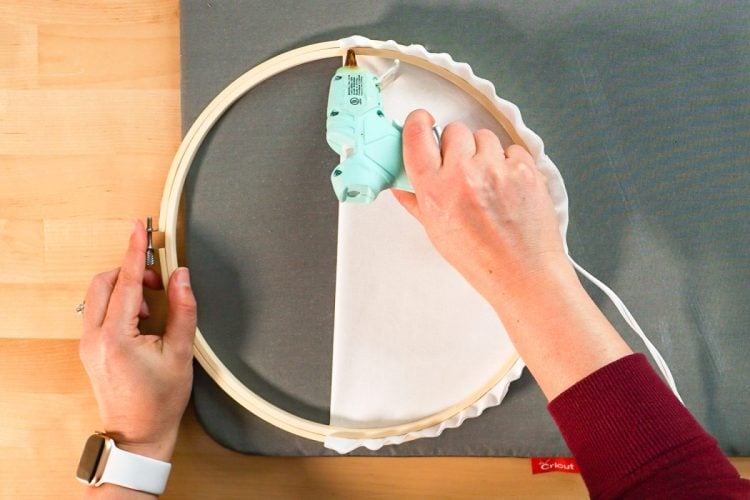
Finally, secure the fabric to the back of the embroidery hoop using a hot glue gun.
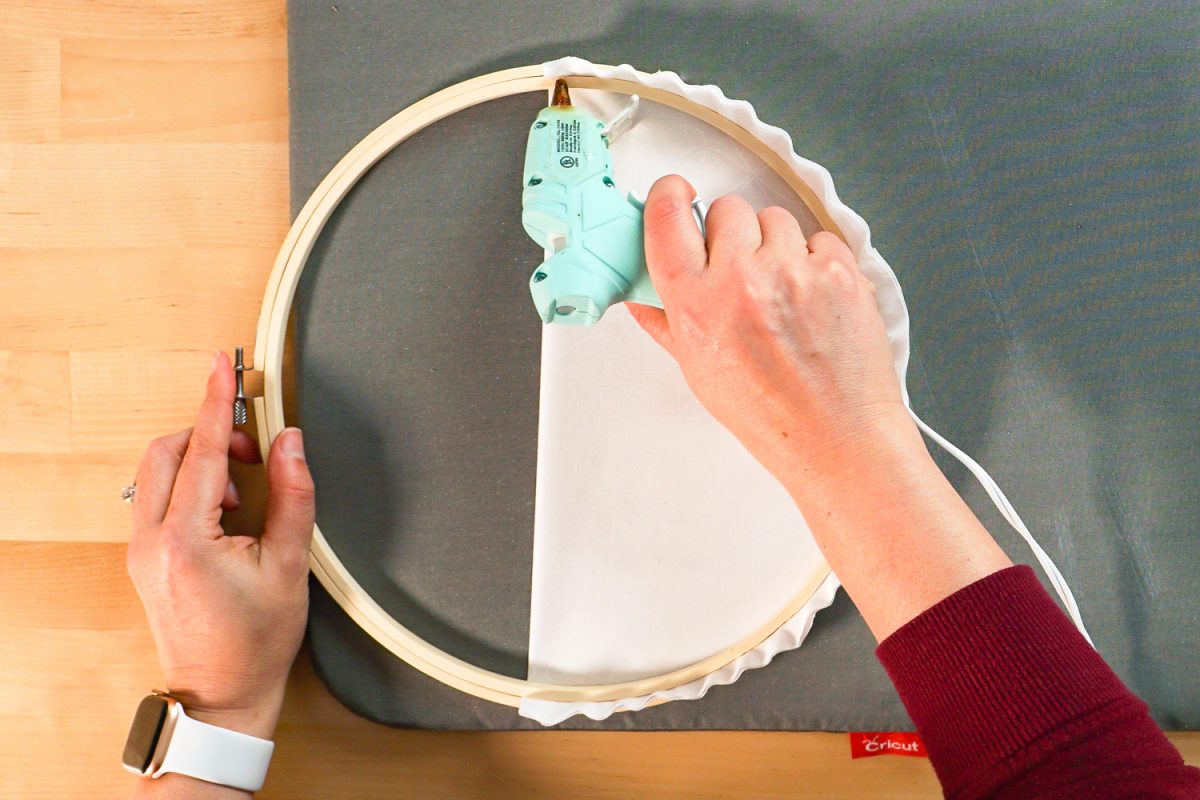
Finish Your Spring Embroidery Hoop Wreath
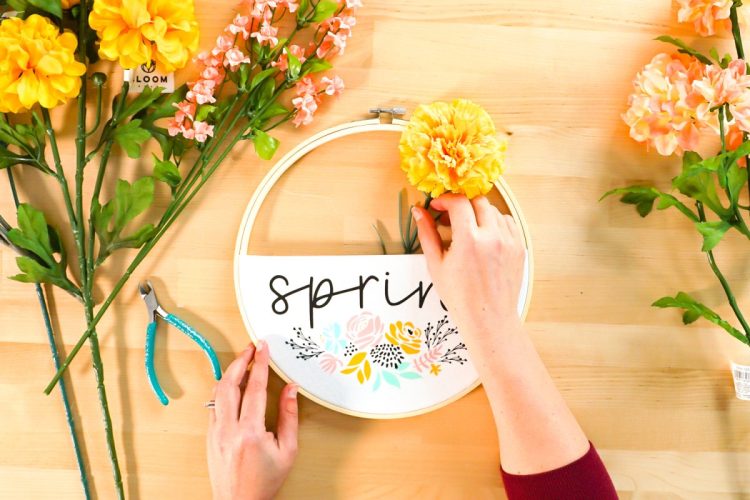
Now you’re ready to add your florals! I used a selection of florals that matched the colors I used for the HTV. Play around with different arrangements until you like how it looks. You could also add greenery, succulents, berries, or even paper flowers cut with your Cricut, if you want to try another fun option.
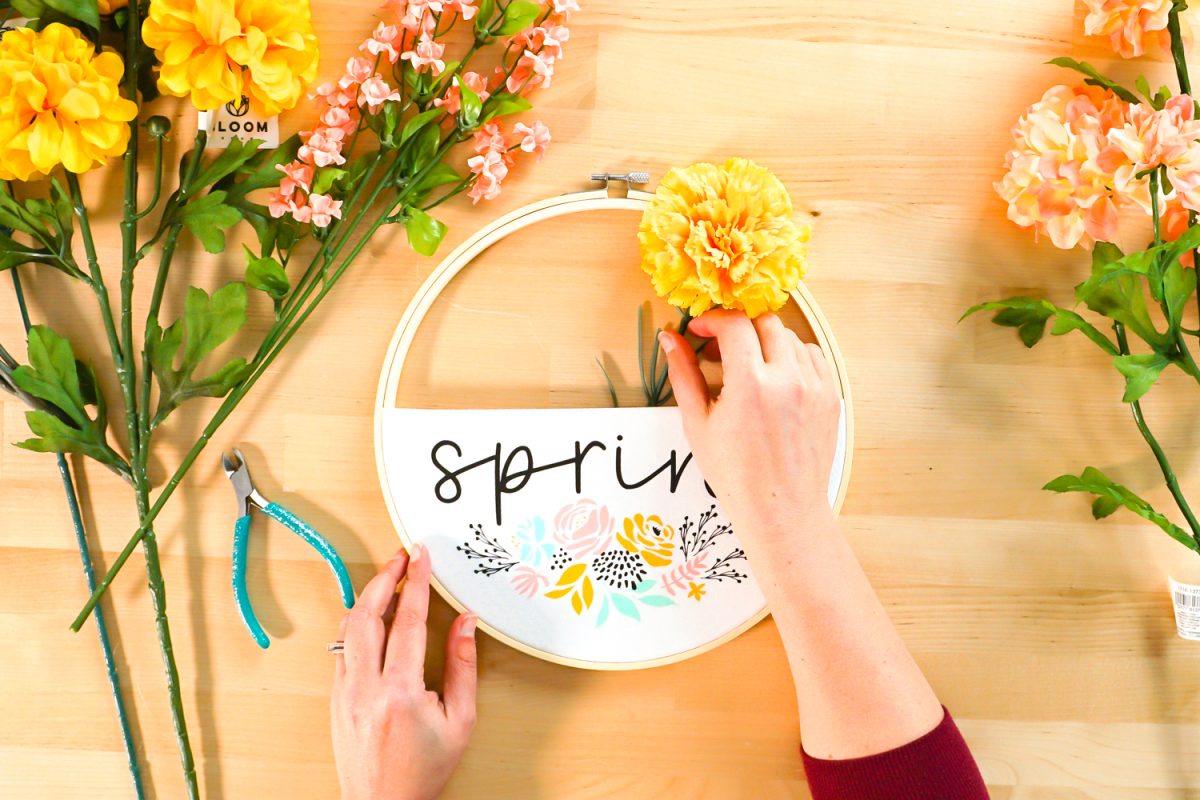
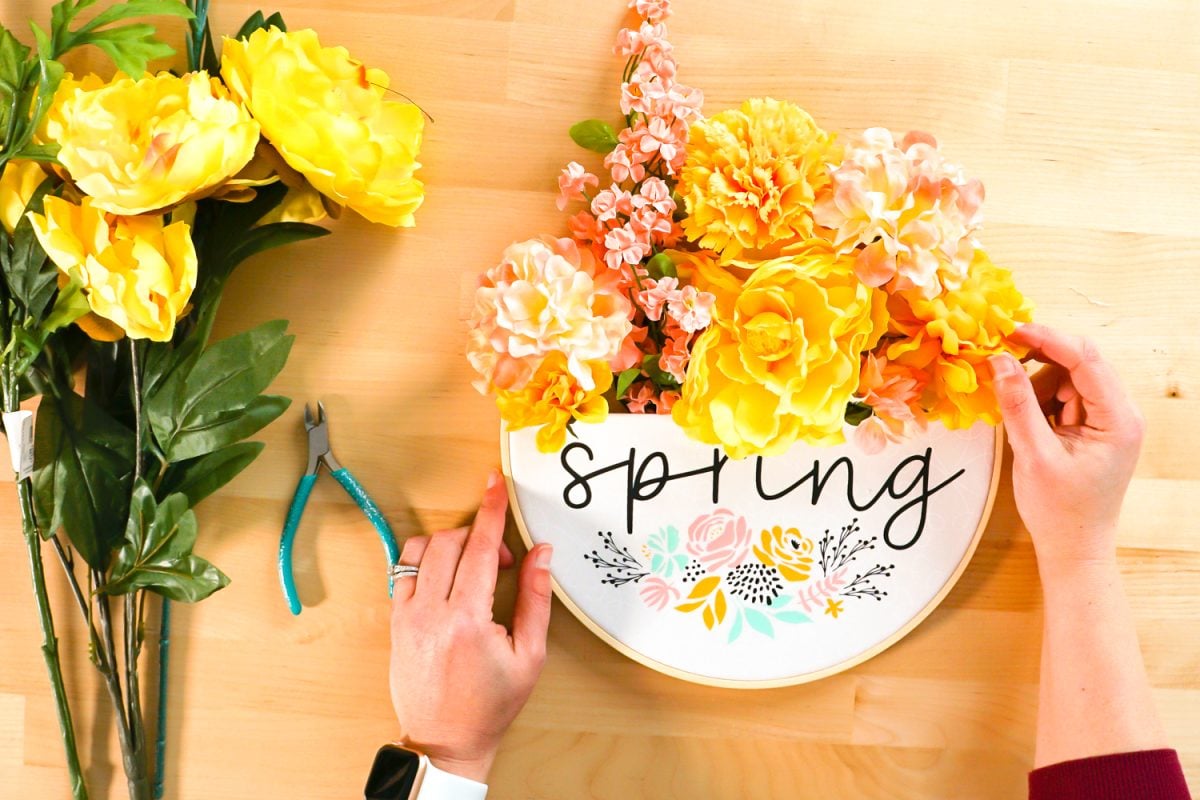
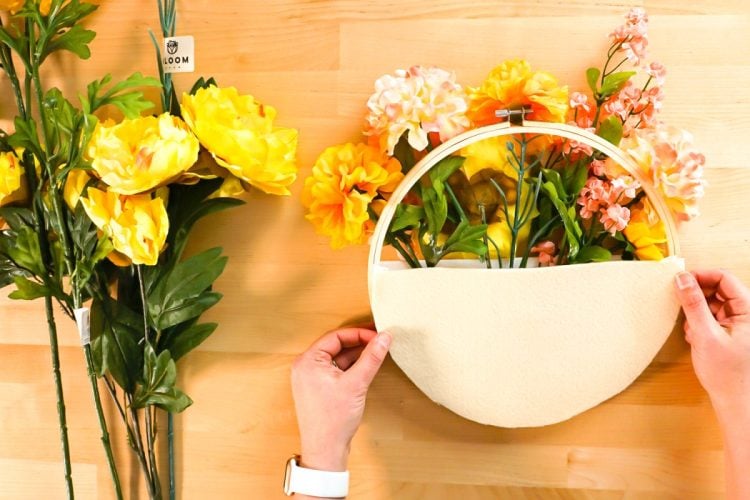
Once you have an arrangement you’re happy with, carefully flip the entire arrangement. To secure it, cut a half-circle of felt. Add a bunch of hot glue and flip it over and adhere it to the back of all of the floral stems (be careful, it’s hot!). You can then add more hot glue around the edges to secure it.
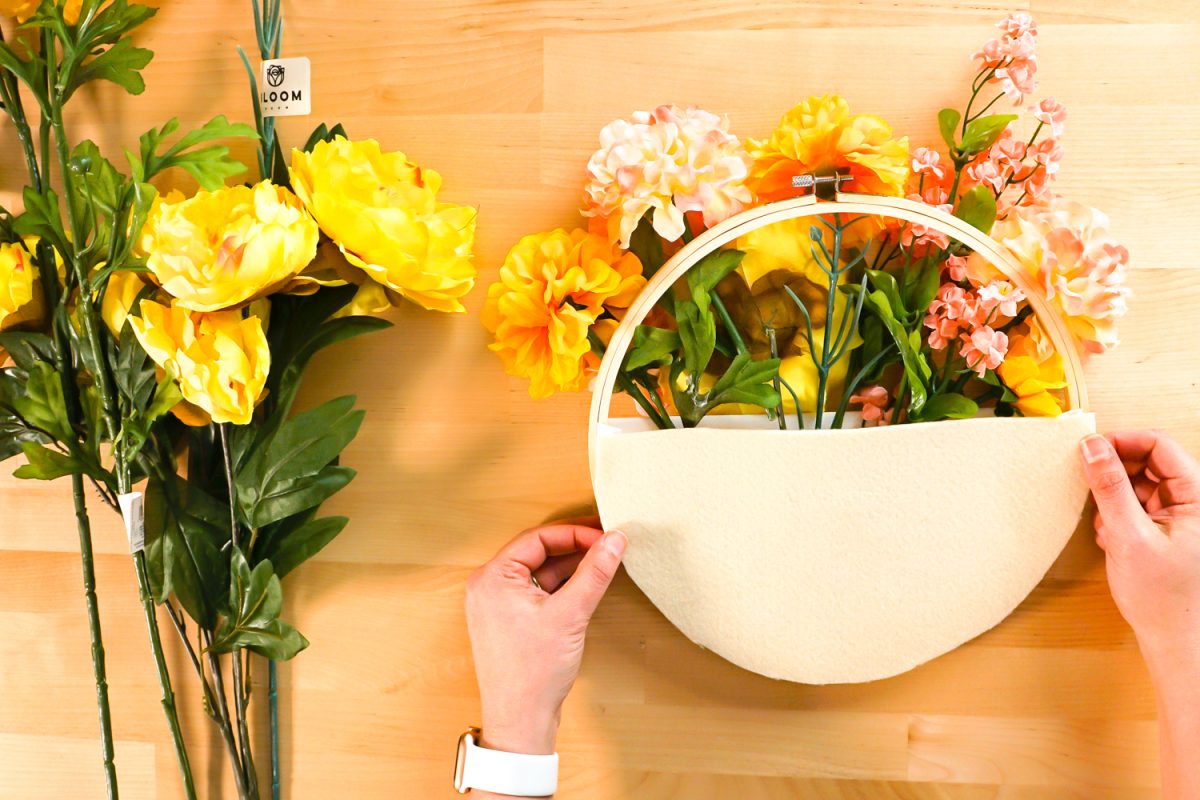
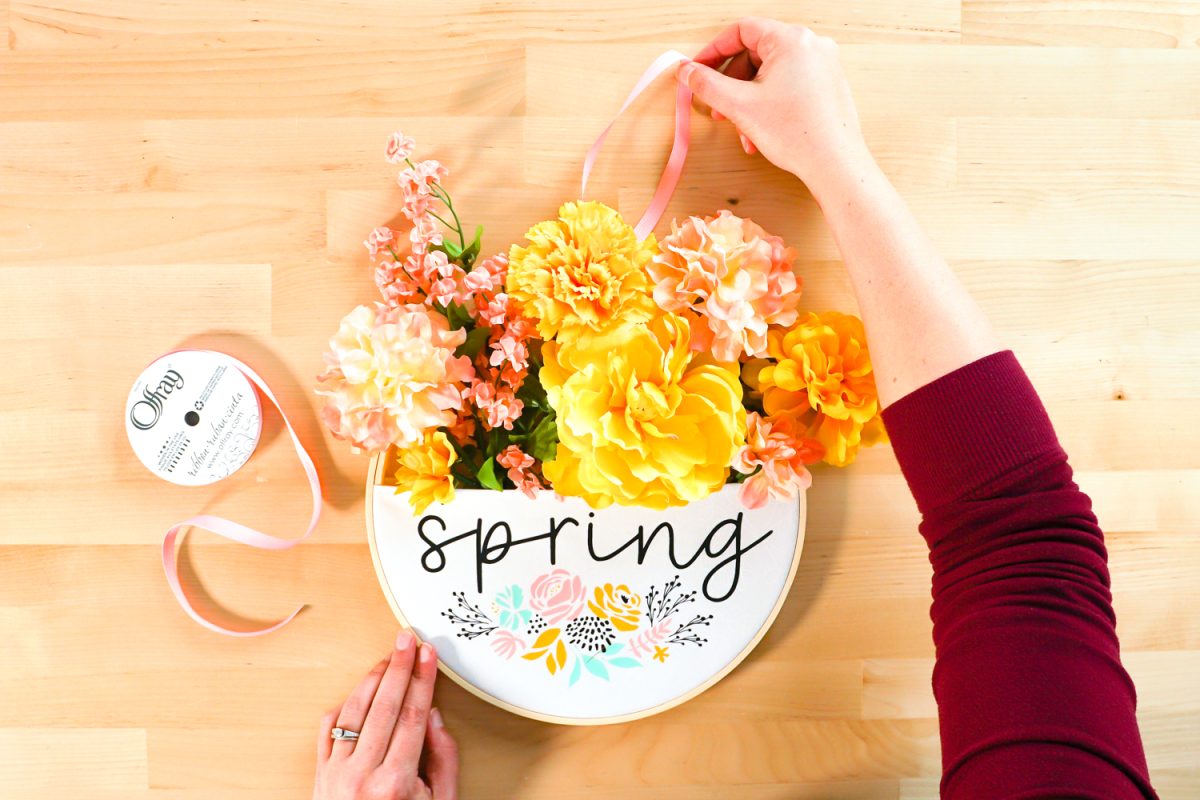
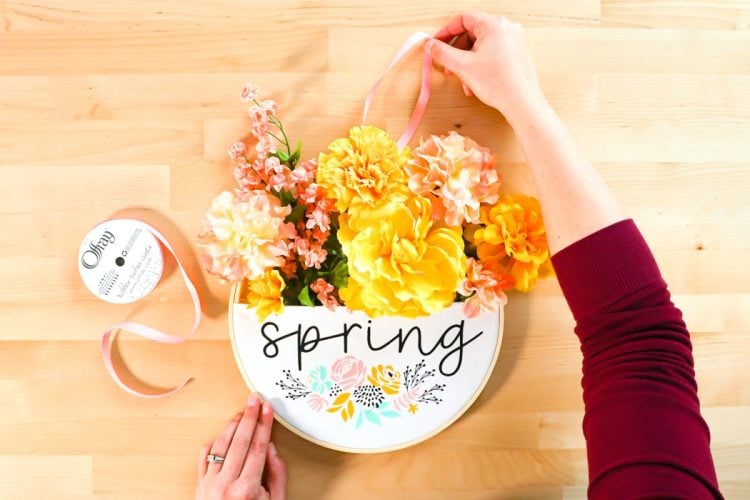
Add a piece of ribbon for hanging from the top of the hoop, using a simple knot. For a more rustic look, you can use burlap or a twine bow.
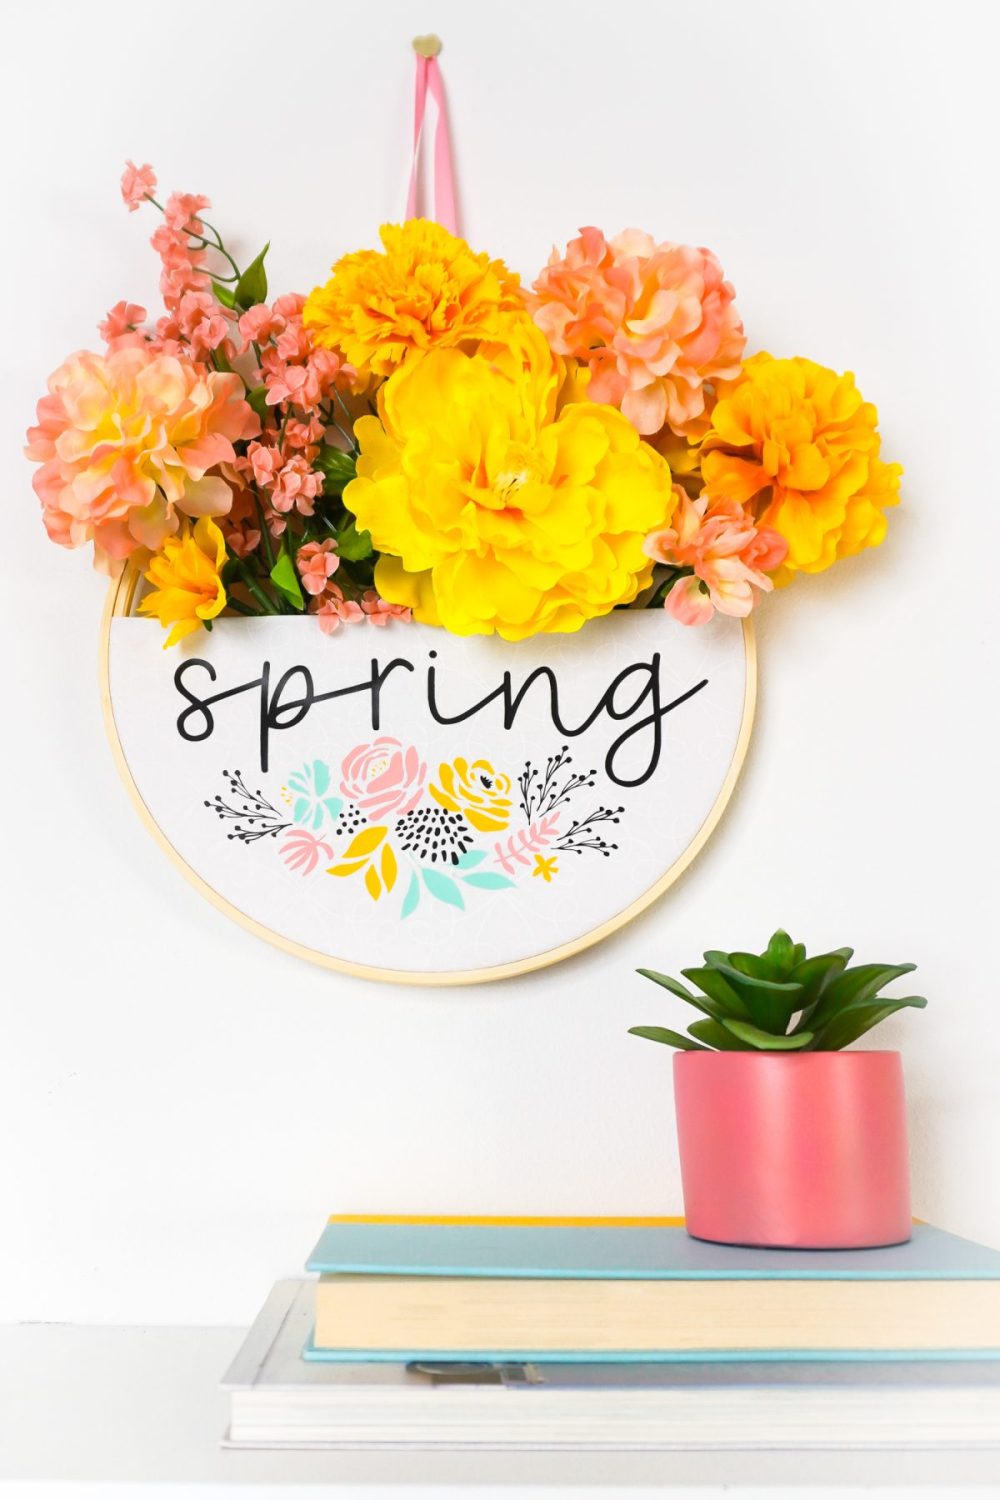
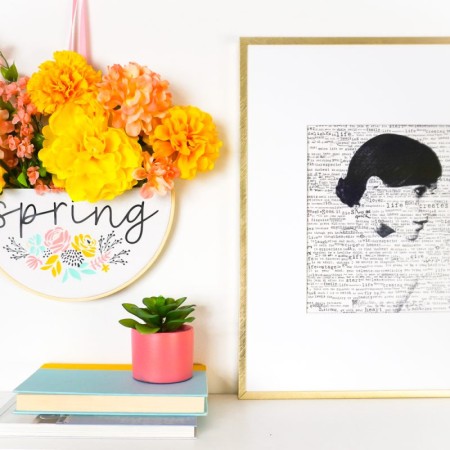
That’s it! Your spring floral embroidery hoop wreath is ready to display! This is a fun way to welcome spring on your front door or over your mantel.
SPRING EMBROIDERY HOOP WREATH
Equipment
- Cricut EasyPress Mini or other heat press
Supplies
- Fabric fat quarter (18" x 21")
- Siser Heat-Transfer Vinyl Pink, Yellow, Teal, Black
- 10" embroidery hoop
- Piece of felt for backing
- Spring floral stems
- Ribbon
- Free Spring File #C421
Instructions
- Upload the File to Cricut Design SpaceStart by uploading the free Spring SVG file to your Cricut Design Space canvas (learn more in this post How to Upload SVG Files to Cricut Design Space), and resize it to fit your wreath. Because of the small pieces, a minimum cut size of 8.5" is suggested. This fits nicely in a 10" embroidery hoop—if you are using a larger hoop, increase the size of your file accordingly.

- Once your file is ready to cut, click Make It in the upper right. In the Prepare screen, click the mirror slider for all of the layers so they will be the correct direction when you iron them onto your project. Make sure to click back on to the top layer so it cuts first.Then in the Make Screen, set your material to iron on vinyl (also called heat transfer vinyl or HTV) and cut the layers on your Cricut. Here's an in-depth post on How to Use HTV if you need more guidance on cutting.

- Weeding and Adhering the HTVWeed your HTV, which is removing anything that is not your image. If you need more tips and tricks for weeding, check out this post Weeding Iron On Vinyl: Tips and Tricks for Making it Easy.

- Fold your piece of fabric in half—this will create a sturdier pocket for your floral stems. Iron the fold so it's crisp. If you desire, you could also stitch a hem here using your sewing machine and thread.

- Now carefully layer your iron on vinyl pieces using the hoop as a guideline. You'll adhere them one layer at a time, but you want to make sure everything is lined up properly. From bottom to top, I did the teal, the yellow, the pink, and the black, using the hoop as a guideline.

- If you were to iron everything on as is, however, you'd iron the different layers to the carrier sheets of the layers below them. So remove the hoop and peel back everything but that bottom layer. Adhere the bottom layer using your EasyPress mini or other heat press device.

- Then peel back the carrier sheet. If it's not sticking, press for a bit more.

- Repeat with the remaining layers, taking care not to run your EasyPress over any HTV that doesn't have a carrier sheet over it.


- Add Your Design to an Embroidery HoopOnce your design is complete, you can add your hoop. Try to keep the fabric as taut as possible as you secure it between the two layers of the embroidery hoop.

- Once you've tightened the screw at the top, flip it over and trim off the excess fabric.

- Finally, secure the fabric to the back of the embroidery hoop using a hot glue gun.

- Finish Your Spring Embroidery Hoop WreathNow you're ready to add your florals! For this project a selection of florals was used that matched the colors used for the HTV. Play around with different arrangements until you like how it looks. You could also add greenery, succulents, berries, or even paper flowers cut with your Cricut, if you want to try another fun option.


- Once you have an arrangement you're happy with, carefully flip the entire arrangement. To secure it, cut a half-circle of felt. Add a bunch of hot glue and flip it over and adhere it to the back of all of the floral stems (be careful, it's hot!). You can then add more hot glue around the edges to secure it.

- Add a piece of ribbon for hanging from the top of the hoop, using a simple knot. For a more rustic look, you can use burlap or a twine bow.

- That's it! Your spring floral embroidery hoop wreath is ready to display! This is a fun way to welcome spring on your front door or over your mantel.




Comments & Reviews
Marie says
Looking forward to making this Spring Embroidery Hoop! I’ve going to visit my sister out of state in a couple weeks, and I wanted something as a gift. This will be fun! (Later I might even try to make one for summer or fall) Thank you for this design. Happy crafting, Marie T
Albina Laszlo says
Can’t wait to try this!
Pam says
I love the spring wreath!! Im not quite sure if you are arranging the flowers in between the HTV cloth or just laying them on top. Please Help.
Thanks
Crystal Summers says
Hi Pam,
Glad you like it! Cori arranged the flowers in between the front and back (inside the pocket she created with the hoop).
Hope this helps!
Crystal, HLMS Community Manager
Cathy says
I don’t think that is what she meant. I had the same question. When you fold the fabric in half, those 2 layers of fabric don’t become the pocket right? There isn’t really a pocket until you glue the felt on the back of the flower stems, right?
Crystal Summers says
Hi Cathy,
Exactly! You fold the fabric in half and attach it while it’s folded in half. Those layers are not the pocket. You lay the flowers on top and then create a “pocket” with the felt on the back.
~Crystal