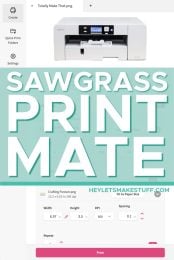
If you have a Sawgrass printer, you now have access to the new print software PrintMate! You can easily use Sawgrass PrintMate to print sublimation designs without any other software!
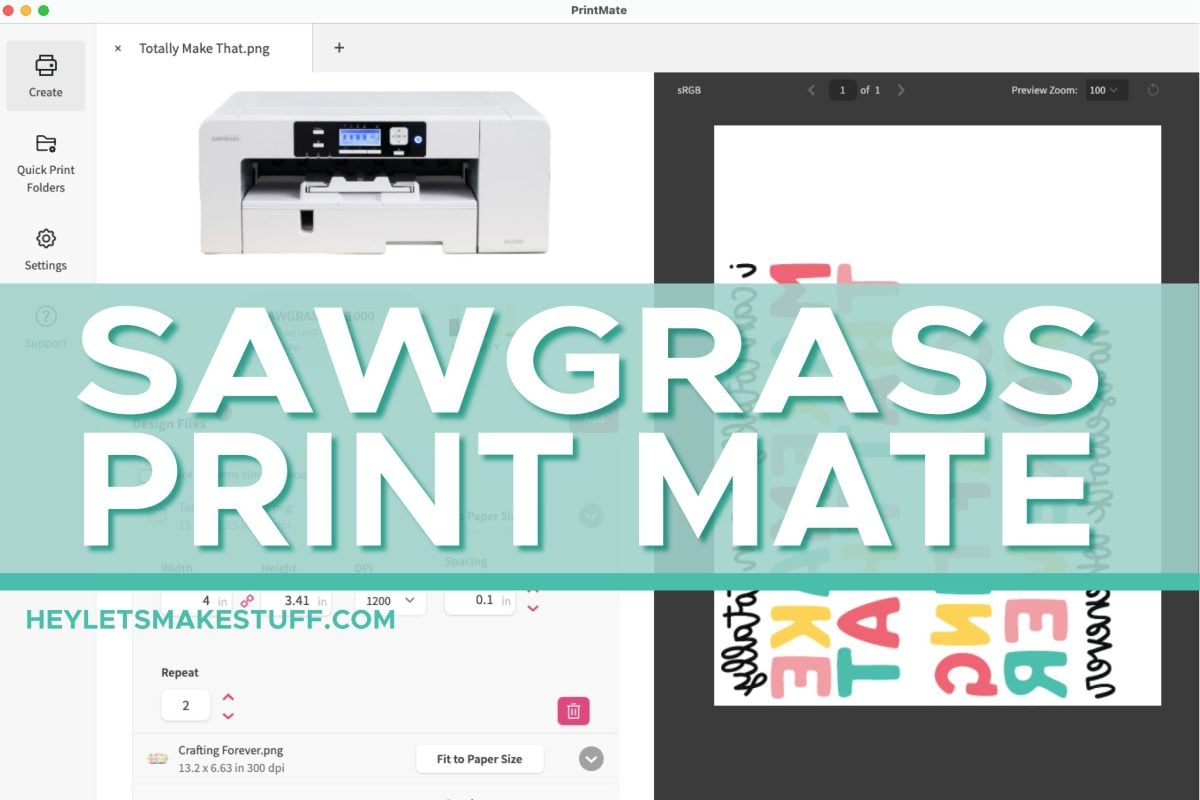
Sawgrass software is getting an update! In July of 2023, Sawgrass launched their new software suite called Sawgrass Exchange. These new programs and features are designed to make creating and printing your sublimation designs easier— along with giving you more options for selling products and connecting with other crafters.
- PrintMate
- DesignMate
- MarketMate
- MyMates
PrintMate is replacing Print Manager. It’s an easy-to-use software that lets you to print directly to your Sawgrass printer and I’ll be covering it in this post!
DesignMate is replacing Creative Studio. It’s used for creating designs and using templates and has a library of images you can use. MarketMate is a new feature that allows you to list products for sale that you will make and fulfill. And finally, MyMates is the new community aspect of Sawgrass Exchange where you can share your projects and connect with other creators. I’ll be going over all of these other “mates” in upcoming posts! (New Post: The Ultimate Guide to Sawgrass DesignMate)
Note: Print Manager and Creative Studio are not going away any time soon. They’ll still be active if you prefer them.
Visit my Amazon shopping list to find everything you need to get started with your Sawgrass printer!
How to Install Sawgrass PrintMate
If you have Print Manager on your computer, it was most likely installed by Sawgrass, or you managed to follow the complicated steps yourself. Installing PrintMate is much easier. Just go to the Sawgrass Exchange INFO HERE.
Note that software is always changing! If what you see in this post is a bit different than what you see on your screen, that’s totally to be expected. Sawgrass updates and improves their software based on their own needs and user feedback, so you may see features that I don’t cover or things may be a bit different. But overall, you should be able to make the software work based on this tutorial.
How to Use Sawgrass PrintMate
Let’s work our way down the sidebar on the left, starting with Create!
Create
Click Create in the sidebar. This is where you will upload an image to print.
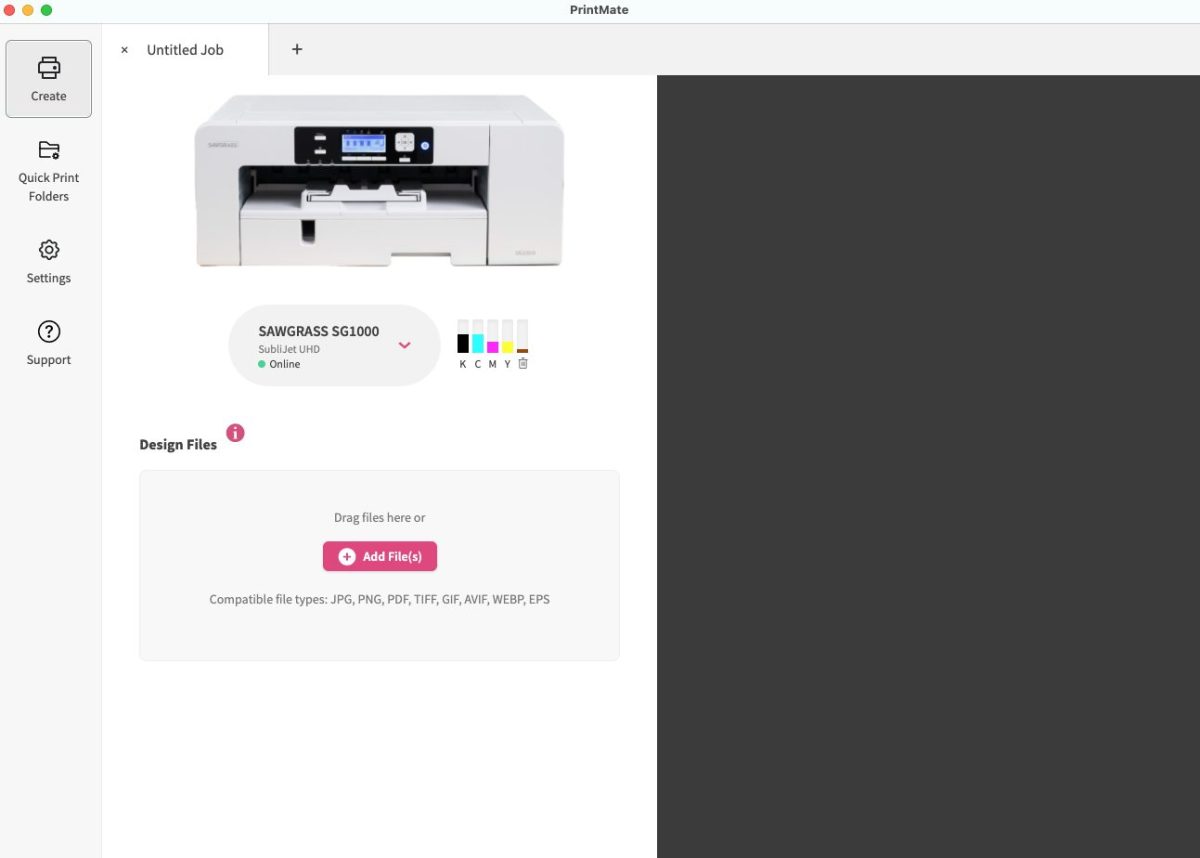
If you have more than one Sawgrass printer, you can choose it in the dropdown below the photo of the printer.
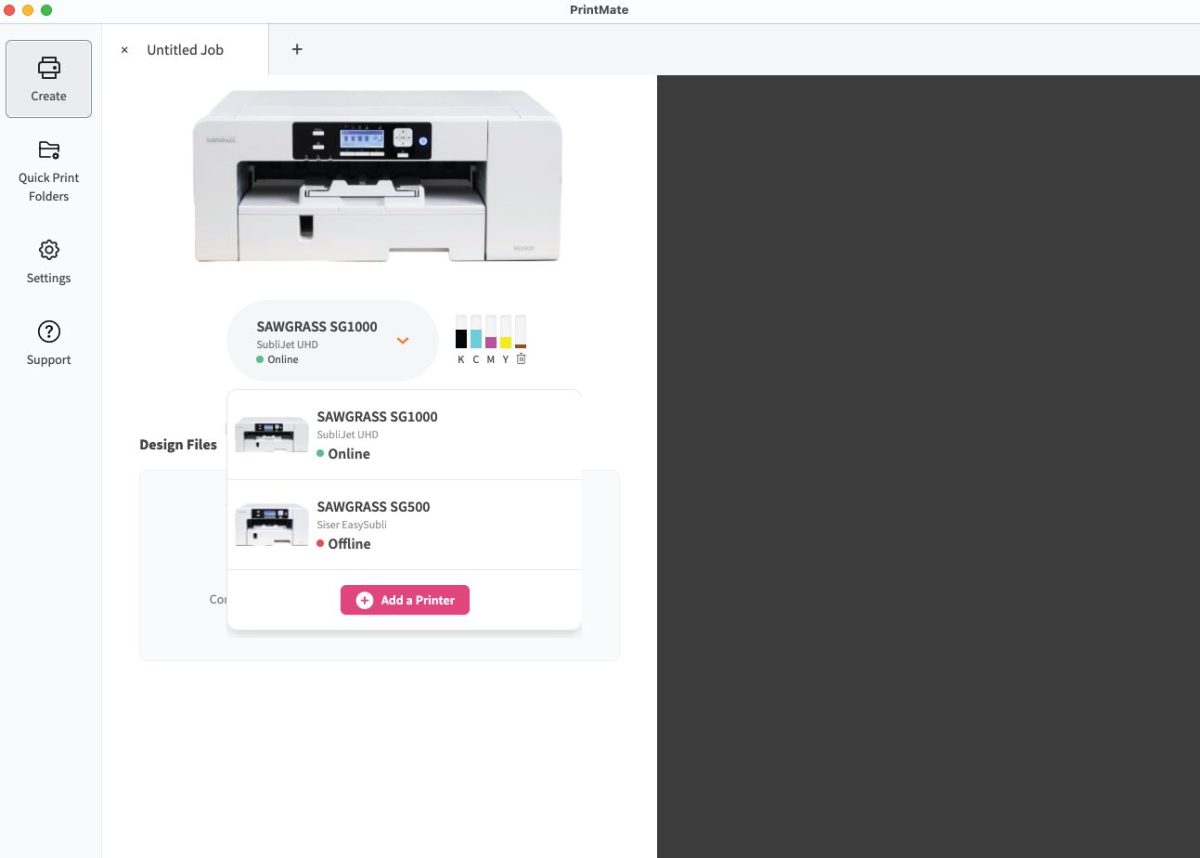
Use the “Add Files(s)” button to navigate and upload the file you want to print. Depending on the size of your file, it may be too big for your paper.
Note that I have found that really large file sizes sometimes won’t upload. You may want to make files smaller before importing into PrintMate if your file doesn’t want to upload.
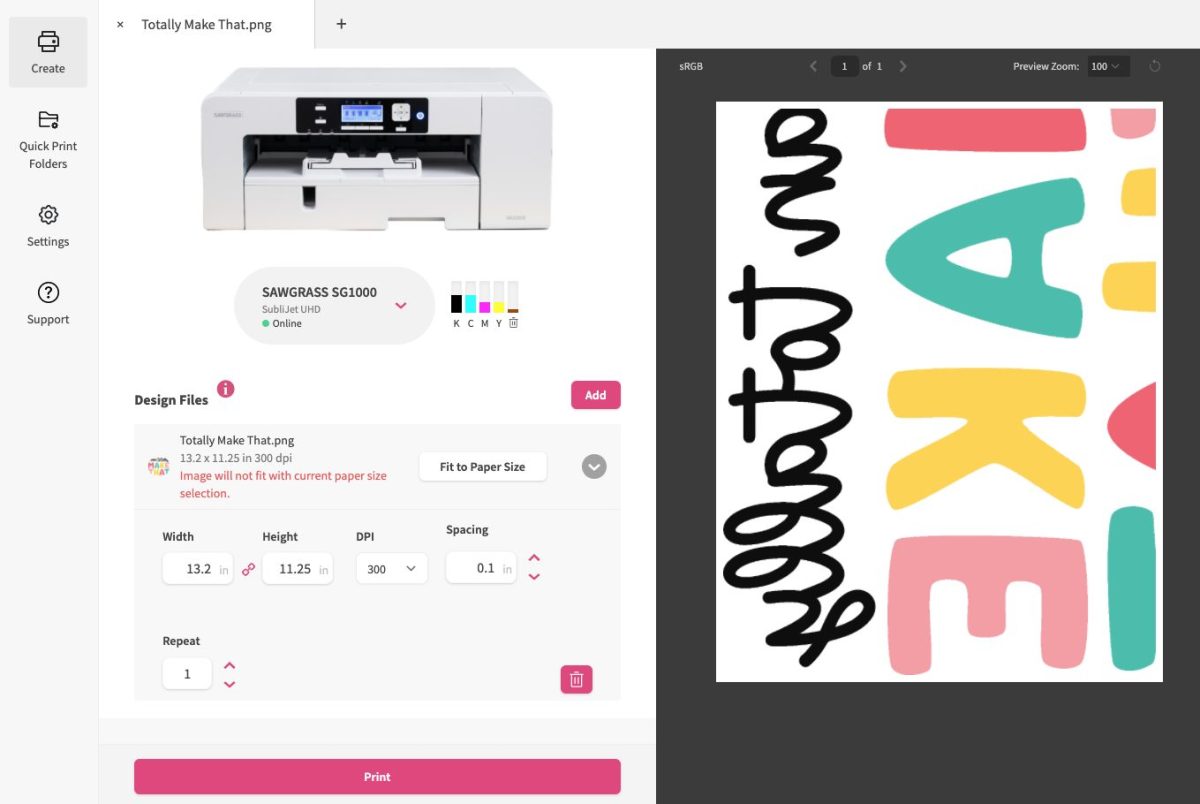
On the right, you’ll see some options for working with your image. You can change the size of your image (the DPI will change accordingly).
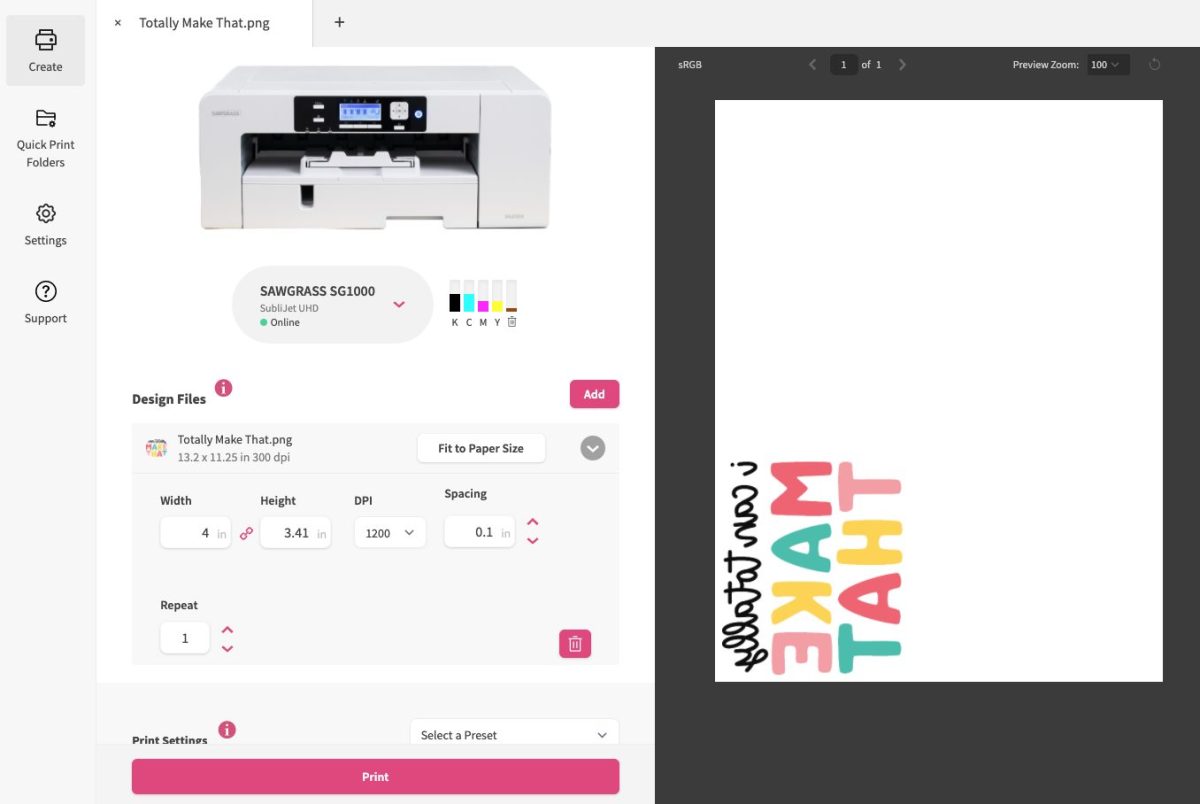
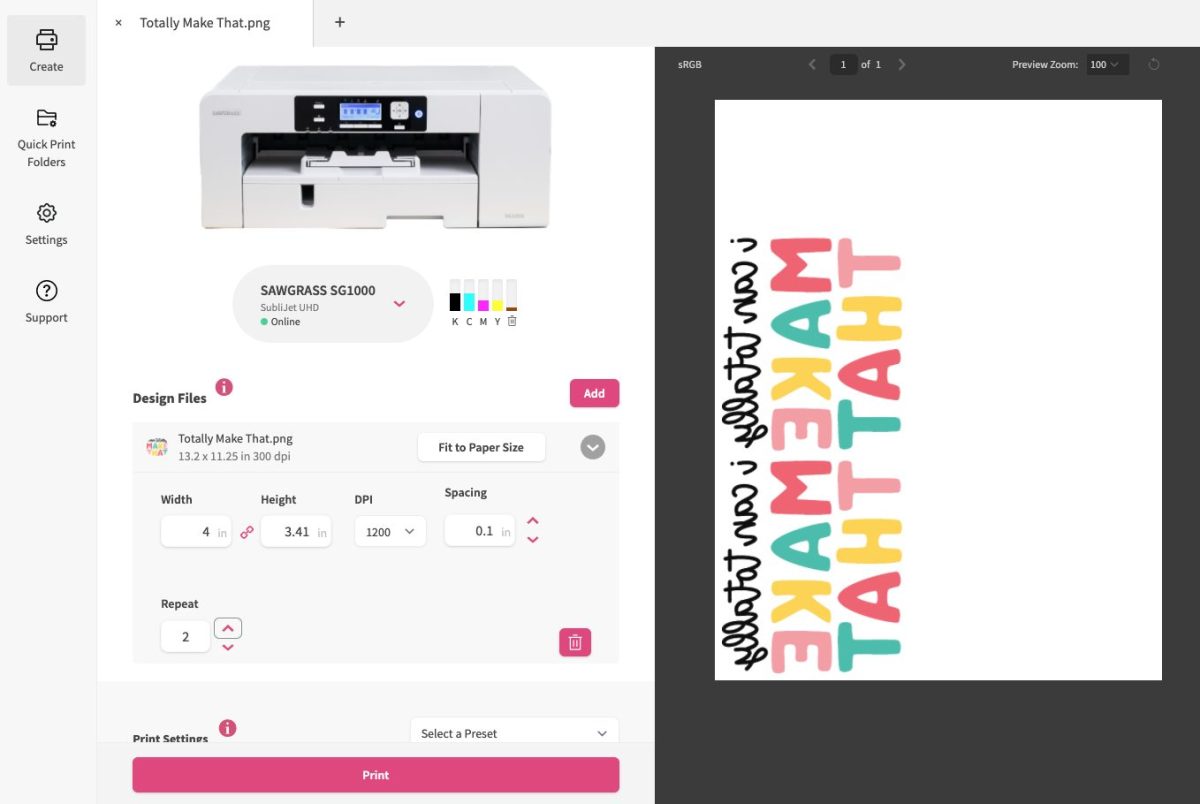
You can also increase the number under Repeat to make more copies of your image. Spacing will add white space between your images on the page.
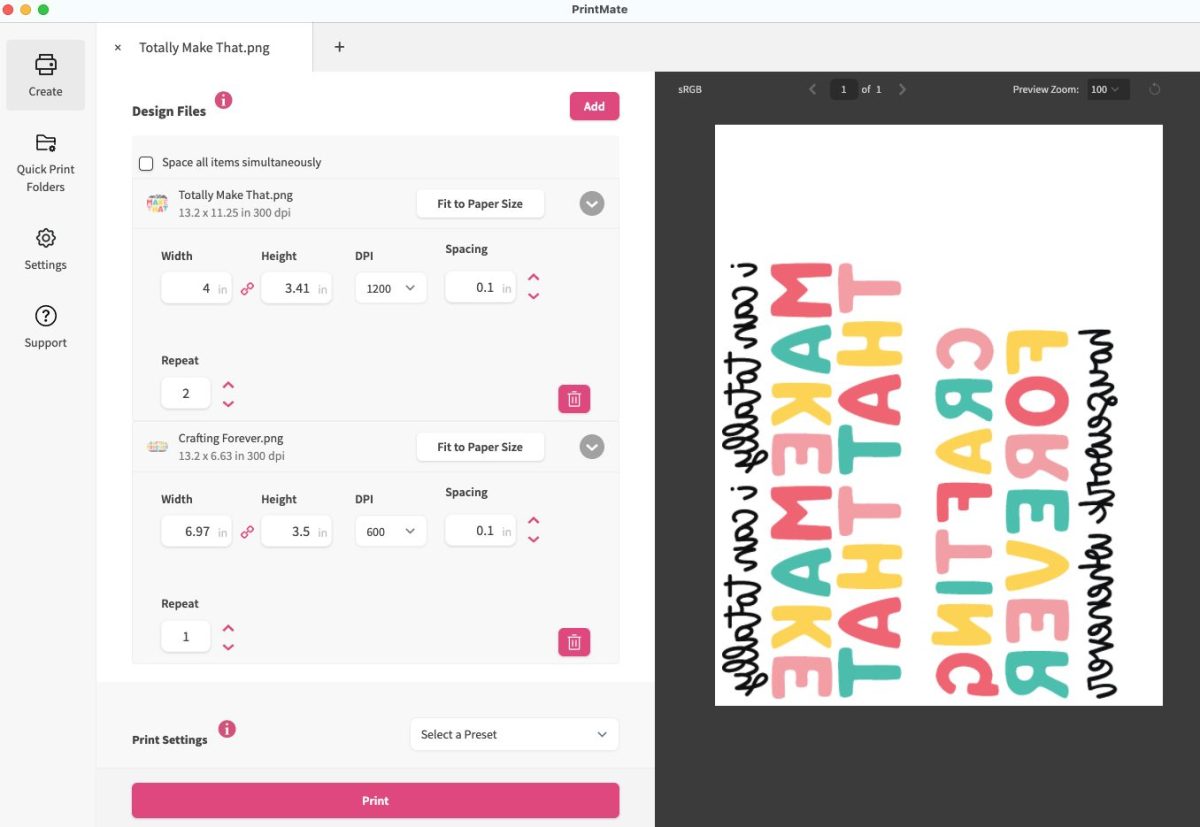
You can also click Add at the top of the Design Files section. Here, you can upload more files to add to your paper, which you can resize as needed. This is helpful for not wasting paper—just throw some small images on there you know you’ll use in the future, print them out, and store them until needed.
Then as you scroll down on the left, you’ll see all sorts of other options. You can select a preset in the top right which changes all of the settings automatically to work best for your substrate.
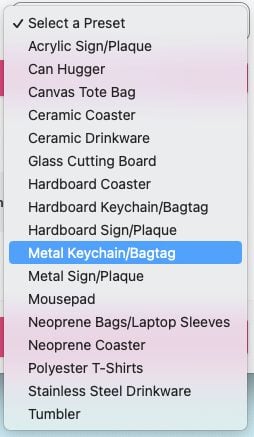
One of the things I recently learned was that not only does choosing the correct substrate help your printer lay down the right amount of ink, but it also affects the color ever so slightly because each substrate has a different “white point.” So white neoprene is different than white ceramic, which is different to white hardboard. Choosing a substrate means your print is fine-tuned for your project. If your product is not on the list, I recommend using the “Polyester T-Shirts” setting.
Heading down the General tab, you’ll see a lot of options for changing your image. If you’ve selected a preset, you can skip most of these, but they are helpful to know.
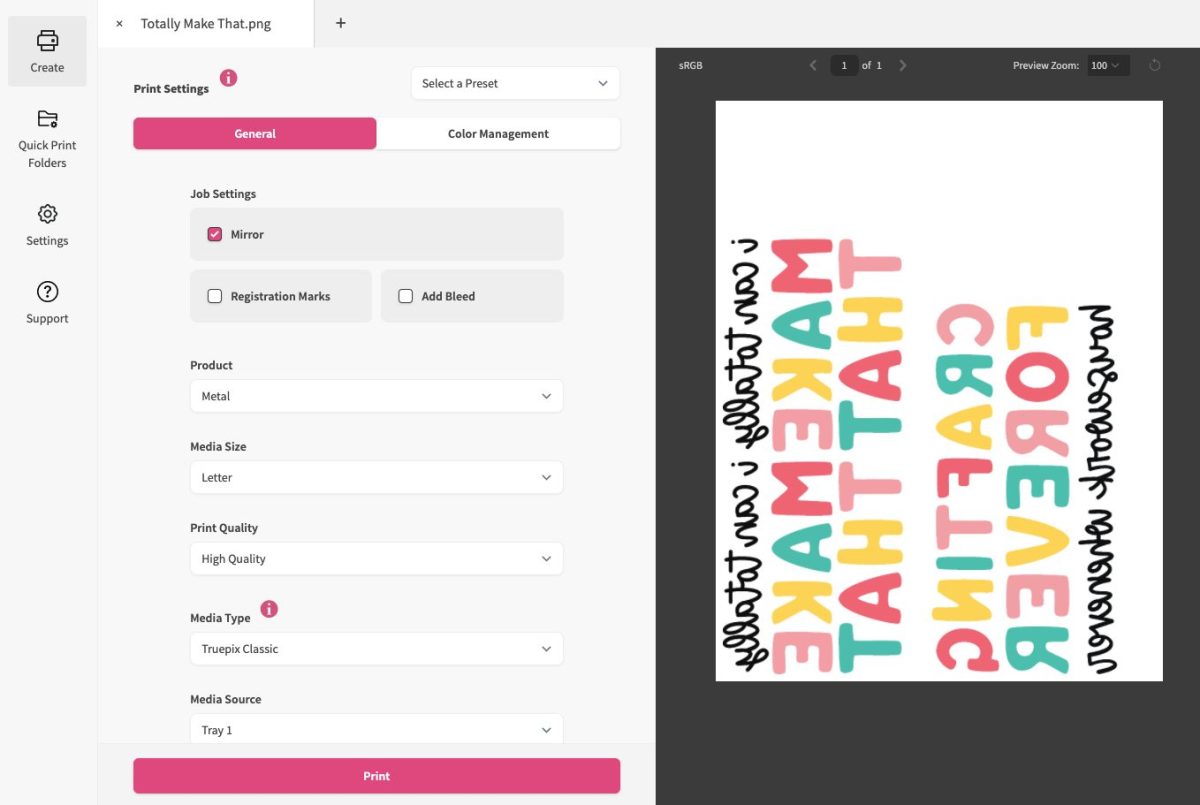
At the top, Mirror should almost always be selected (though there are times when you may not want to reverse your image). If you specifically have a Silhouette, you can print to PrintMate and it will add registration marks and bleed for cutting on your machine. Cricut users can’t use this feature—there’s no integration with Cricut Design Space.
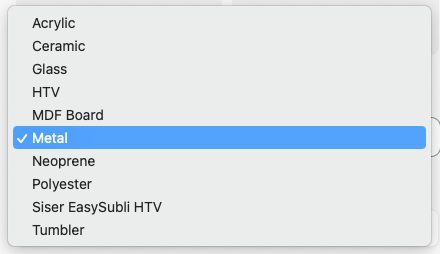
Below that you can choose some other manual settings if you’re not using a preset. Choose your Product (substrate), which actually has fewer options than the presets right now:
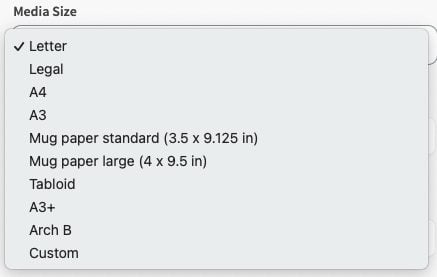
Then there’s paper size. All of the main options are there, but I’ll show you where to create custom sizes later in this post. Also check out my post How to Adjust the Sawgrass Paper Tray for more information on using different sizes of paper.
Scrolling down a little further, you can select your Print Quality (I suggest High Quality over High Speed).
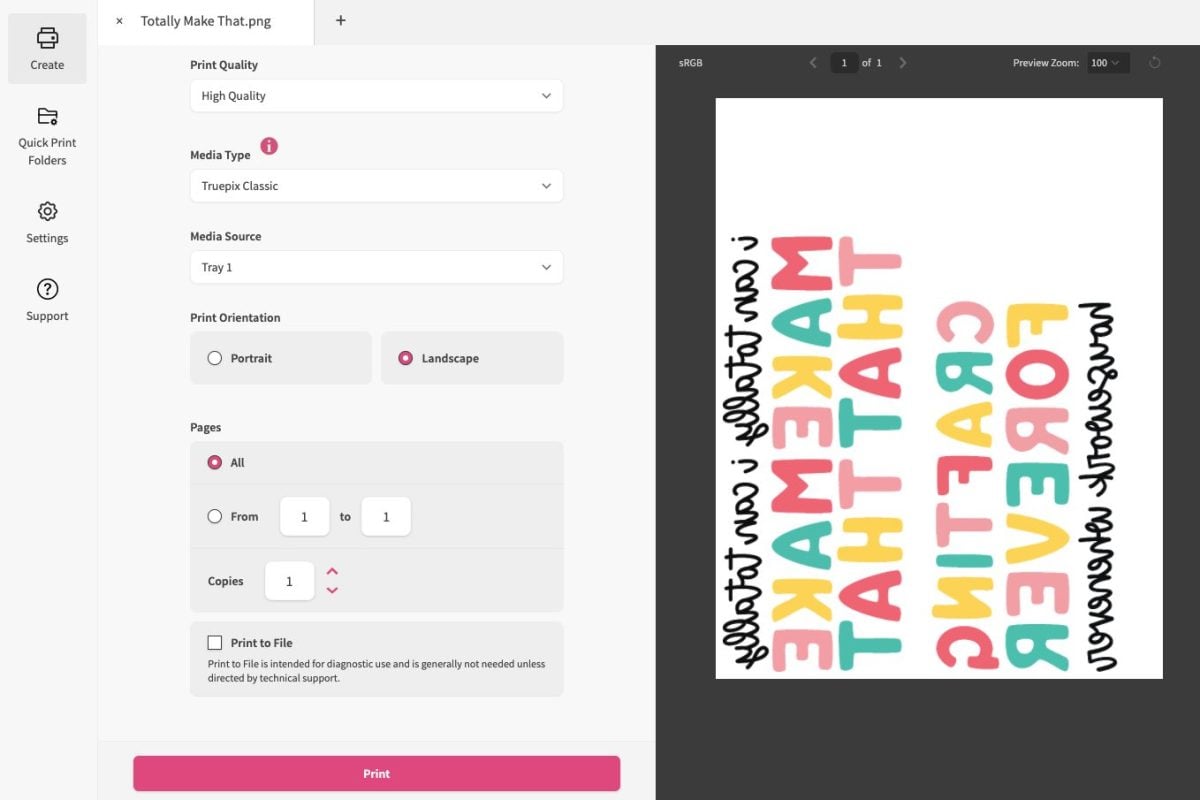
You can also choose the Media Type, meaning what you are printing on. If you are using a non-Sawgrass paper, just select TruePix Classic as your Media Type. There might be other options here depending on what type of ink you have in your printer.
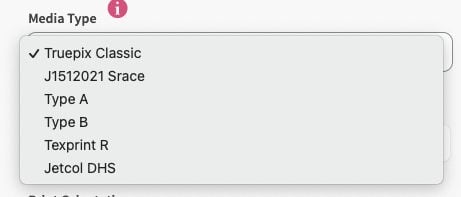
In the screenshot above, you can also see where to change your Media Source (the tray or perhaps a bypass). You can choose your Print Orientation as well. If you’re struggling to get an image to fit or it’s cutting part of your image off when printing, try changing the Media Orientation.
And then you can choose which pages of your document you want to print (if you have more than one) as well as the number of copies you want to print. Note that Repeat from earlier in this tutorial duplicates your images whereas Copies duplicates your pages.
If you scroll back up to the top of all of these options, you’ll see the tabs for General and Color Management. Click Color Management to see a few options here to adjust if your color isn’t quite right.
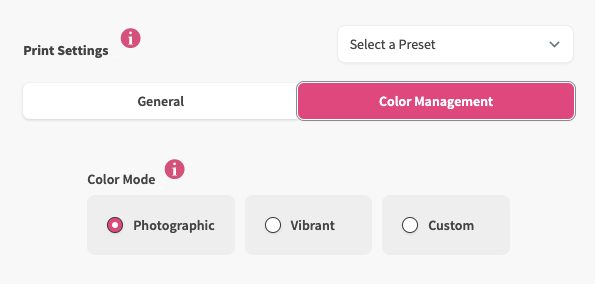
After that, scroll back to the bottom, hit print, and your Sawgrass will print your image!
Quick Print Folders
Let’s continue down the tabs on the left side of PrintMate. Next up is Quick Print Folders. This is where you add your settings for your Sawgrass PrintMate Quick Print Folder that is created when you install PrintMate. This folder is basically an even faster way to print—just drop an image into the folder on your desktop and if you have “Automatically Print” checked, it will print your image based on all of the settings you have selected here. The setting are all the same as you selected above in the Create tab.
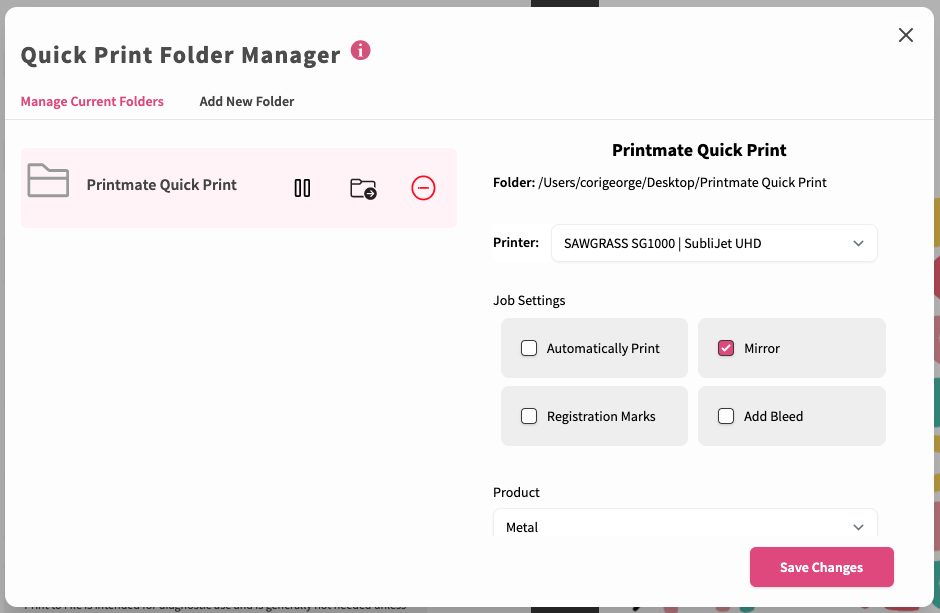
If you do not have Automatically Print checked, you can drop an image in that folder and it will open PrintMate so you can make all of your selections.
You can also Add a new folder with different print settings. So for instance, if you make sublimation slate tiles and you want to create a folder with the presets specifically for that substrate, you can do that here.
Settings
Next up is all of your settings.
General
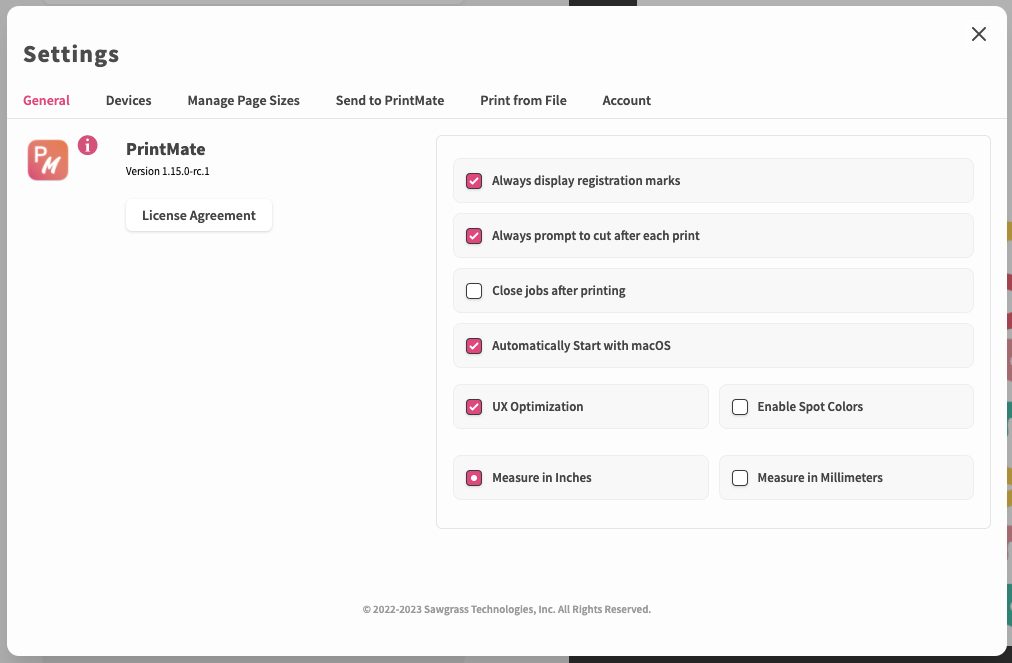
Here you can make some global changes like always displaying registration marks or changing your measurement increments from inches to millimeters.
Devices
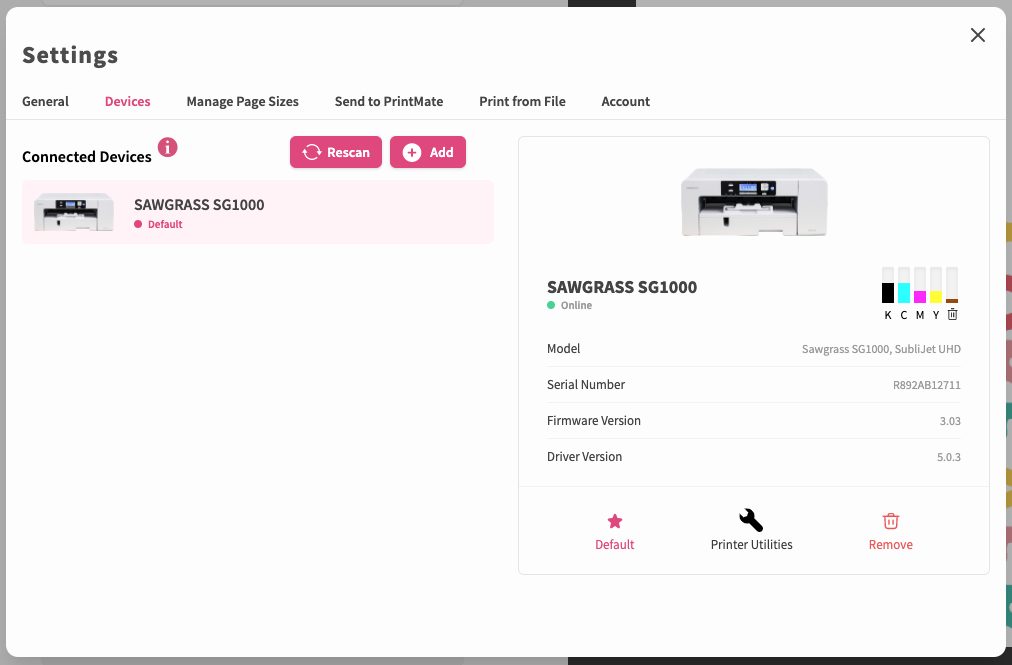
In this screen you can access your printer’s utilities or add a second (or third or tenth) printer. If you find your Sawgrass doesn’t want to connect to PrintMate, try re-scanning here and that often fixes the connection issue.
Manage Page Sizes
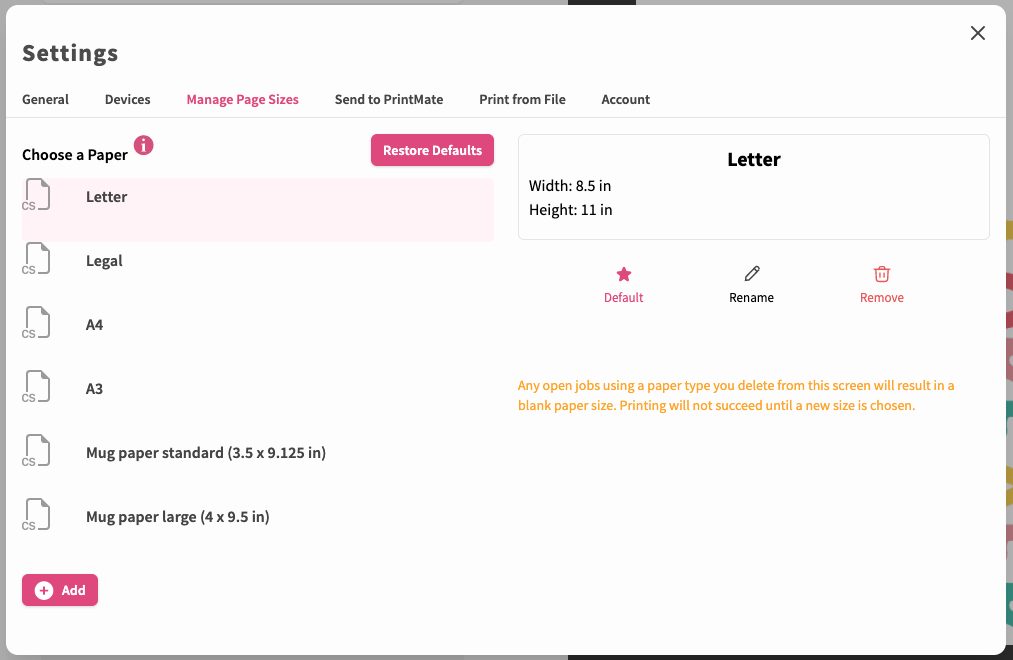
In this screen, you can add new paper sizes. This is definitely something that the majority of people don’t worry about, but if you have some other size of paper you want to use, just click Add at the bottom and create that page size.
Send to PrintMate
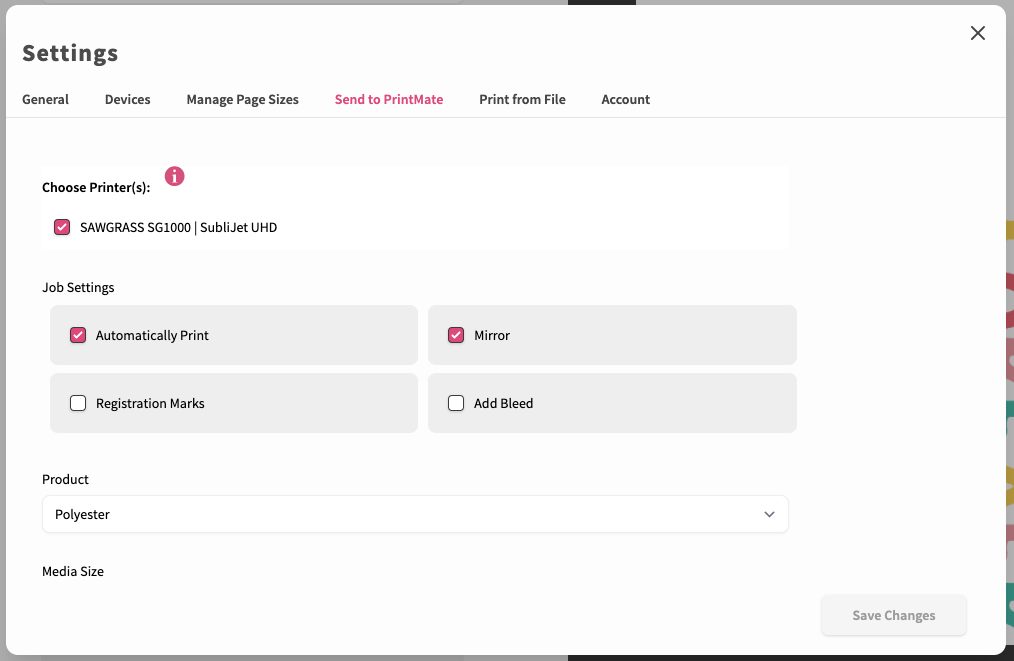
In other programs like Photoshop or Cricut Design Space, you can actually select Send to PrintMate as the “printer” you want to print to. That will open up PrintMate for you to do your printing. Here, you can select all the same presets as above.
Honestly I have found this a bit glitchy at the launch and it hasn’t been working reliably for me. So if you’re having issues, you’re not alone. Hopefully they’ll have all the kinks ironed out soon!
Print from File & Settings
Finally, there is Print from File, which is something that is more often used my Sawgrass support than anything you’ll need to know. And then there are your basic Account settings as well.
Is Sawgrass PrintMate better than Print Manager?
Overall, I like PrintMate more than Print Manager. The interface is more advanced and I find it to be more intuitive overall to use.
There are two key features, however, that I think are missing and I hope Sawgrass adds them in a future update.
The first is “trim whitespace.” This automatically trims any white pixels from around an image. Sometimes designers don’t save their files with a transparent background and there’s a bunch of white space around the image. Trim Whitespace was a feature in Print Manager that trimmed the white space off. This doesn’t exist in PrintMate, which can make working with some images more difficult. You may need to crop off that white space in another program first.
The second is “center.” You can’t center an image in PrintMate. I like to tear around the outside of my images before pressing on some substrates (vs cutting), and it’s much harder when there’s only a small margin of space around the image because it can’t be centered.
Hopefully they have these two features on the roadmap, but in the meantime I still think PrintMate is a definite improvement over Print Manager! I’d love to know what you think in the comments!


Comments & Reviews
Stephen Porter says
Can you help with transitioning to the new print mate program. I make all of my designs with Affinity Designer using CMYK. I can not find a CMYK format in print mate.
Antony says
The Centring feature on PrintMate has been added.
Jean watson says
I printed from design space. Howe we I got vertical strips on my print. I went back and used creative studio and print manager and it was fine. I think it will be great once all the glitches are out