
We totally transformed our dated 1980’s kitchen with bright painted cabinets, new lighting, and gorgeous butcher block countertops. A gorgeous budget kitchen renovation!
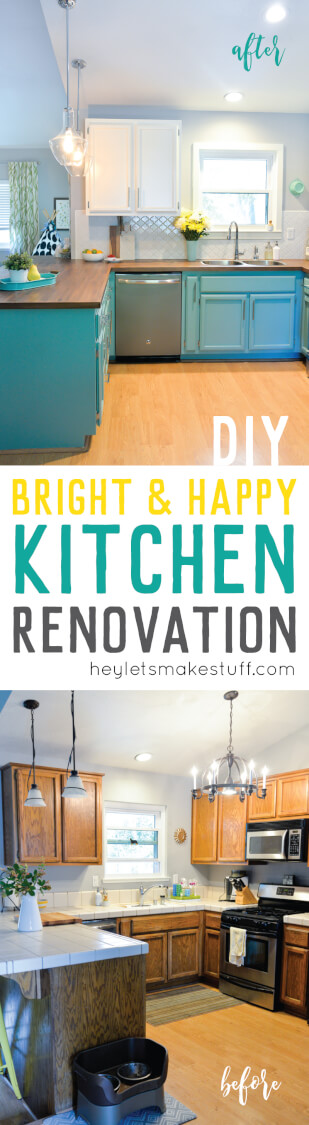
This last weekend we put the finishing touches on our kitchen renovation and I couldn’t be happier to finally share all the details with you today! We took this dated 1989 kitchen and totally refreshed it for around $2,500 (and a lot of elbow grease!). With the average kitchen renovation costing between $15,000 and $20,000, I think we did a fantastic job!
First, let’s recall what the original kitchen looked like:
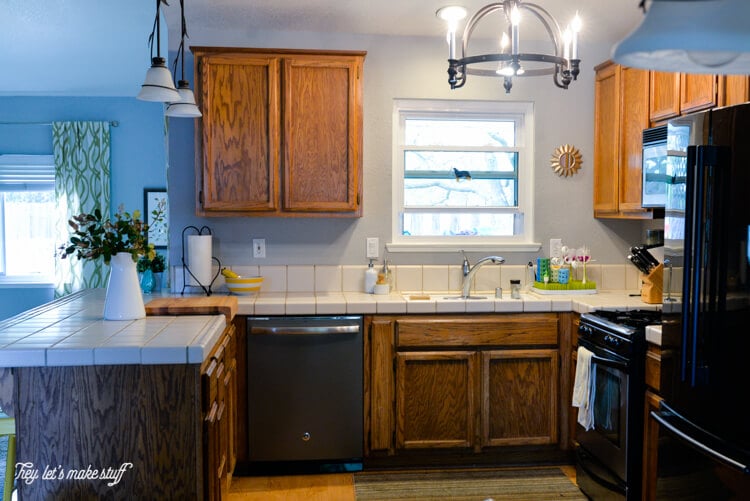
Dated oak cabinets, the world’s ugliest stained bone tile countertops, a shallow chipped porcelain sink (not even Barkeeper’s Friend could save it), and lighting that was totally not my style. It all had to go!
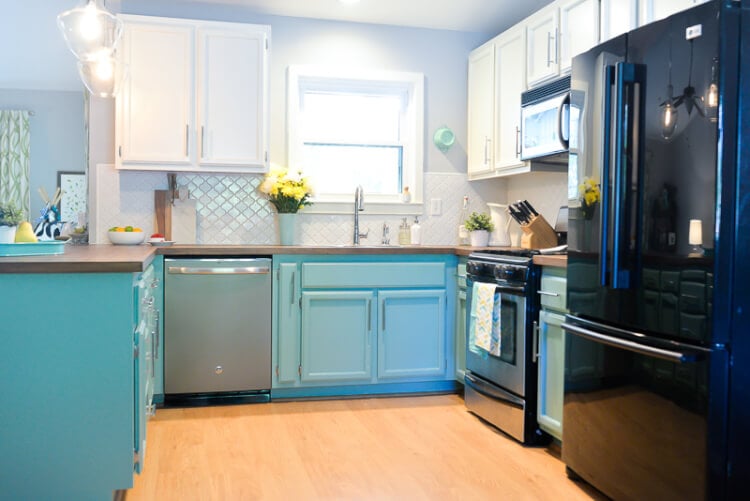
We decided on teal and white painted cabinets with new chrome hardware, stained walnut butcher block countertops, a deep stainless steel sink and tall chrome faucet, and gorgeous new lighting. I wanted it to be light and bright and colorful, but still warm and inviting. How do you think we did?
I am IN LOVE!
This renovation was backed by some of my favorite companies: Build.com, Sherwin Williams, Floor & Decor, and HomeRight.
I have a TON of tutorials about the different projects we did for the renovation, and I’m excited to share more in the coming weeks. In the meantime, I wanted to give an overview of everything we did to take this kitchen out of the 80s and into today!
We started by sanding, painting, and finishing the cabinets. We chose two bright and happy colors from the ProClassic line at Sherwin Williams — Swiss Coffee white for the top cabinets, which matches the rest of the trim in our house, and Drizzle, a bright and refreshing teal for the bottom cabinets.
To get such a nice coat we used the HomeRight Finish Max paint sprayer, which is basically my new favorite tool. I wrote a detailed tutorial on how I painted these cabinets — no shortcuts here and a lot of elbow grease, but these cabinets will be beautiful for a long time to come!
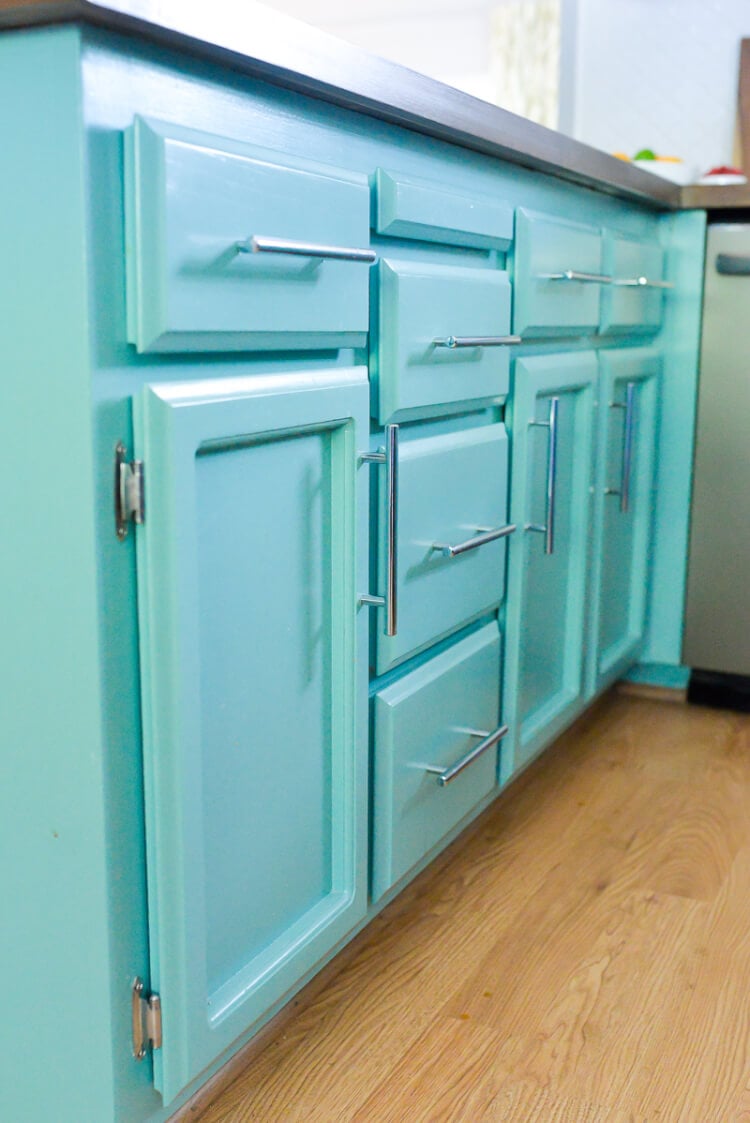
We added gorgeous new chrome hardware from Build.com that really makes the cabinets easier to use and adds a modern flair. Honestly, I was shocked at the heft of these handles — they are really high quality for such a reasonable price. We also replaced the hinges on the cabinets to match (the old bronze hinges were beyond saving).
(We won’t talk about how I basically built my twin toddlers a ladder to the counter. Whoops.)
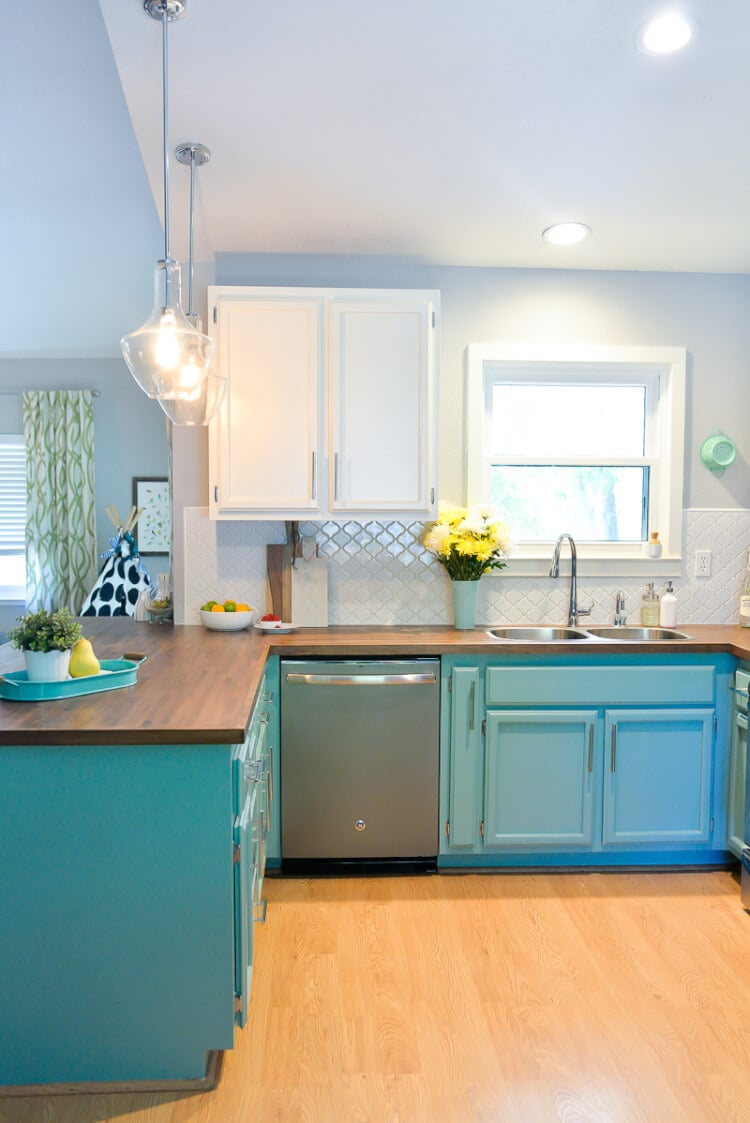
The lighting was updated from the original builder lighting, but wasn’t my style so it had to go. We started by taking the “chandelier” that was in front of the stove and replacing it with a simple can light. Just that one small change opened up the room and made it feel bigger.
I wanted to keep that open feeling, so we took out the bronze pendant lights and replaced them with a pair of modern chrome and glass pendants. They are significantly larger than the old lights, but because they are almost entirely glass, they don’t create any separation between the kitchen and our living room. I turned the lights off for one photo so you can see just how light and airy they are.
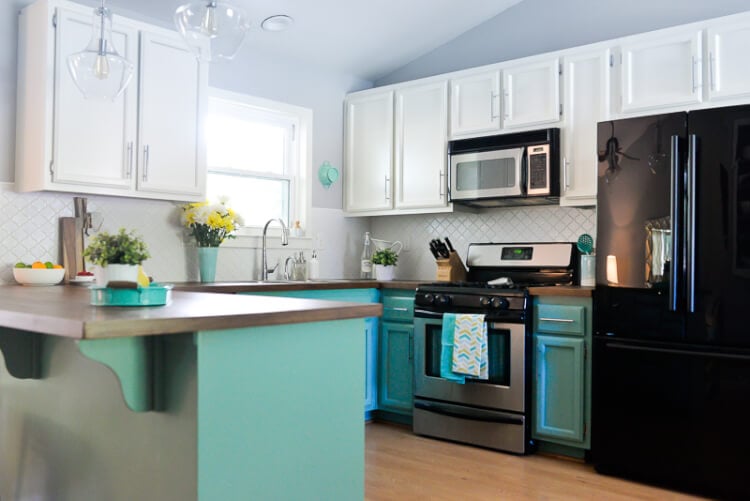
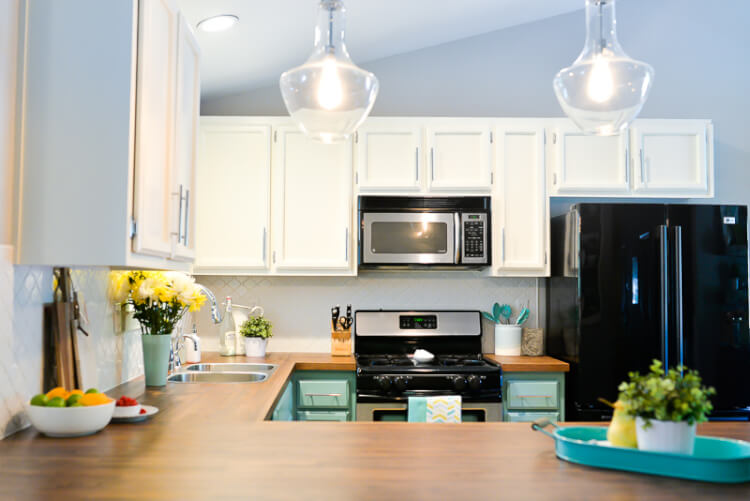
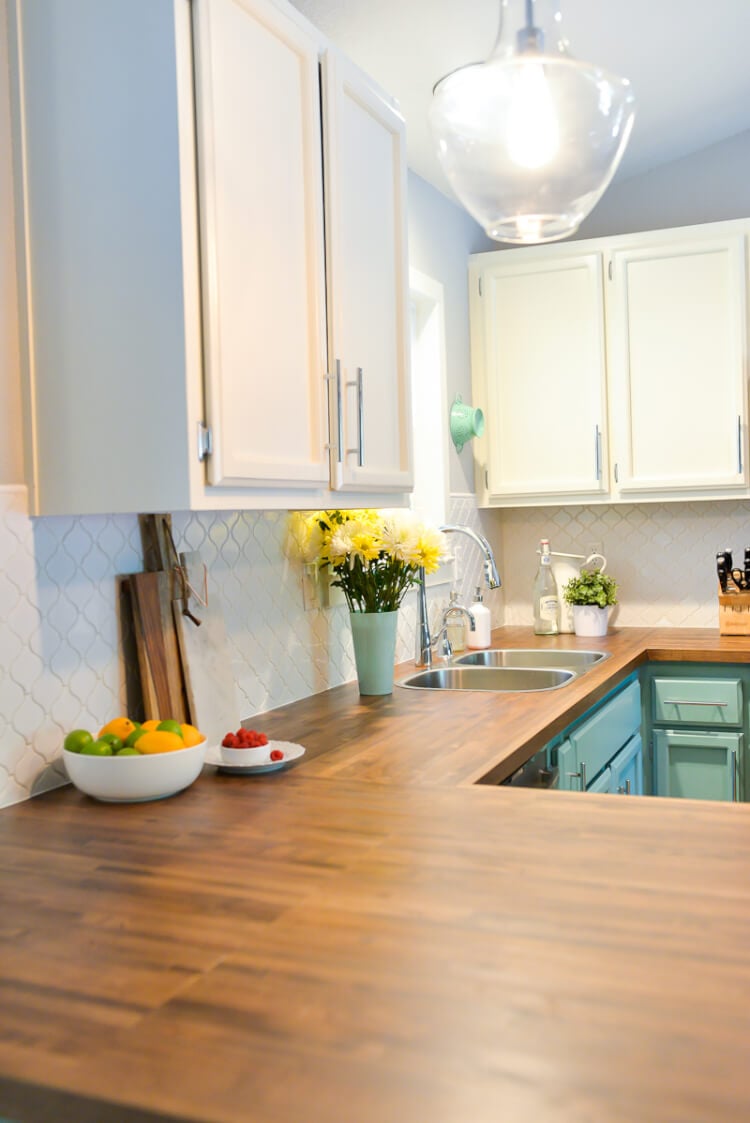
Then we come to the countertops. We decided to give butcher block a shot, mostly because we knew we could do it inexpensively compared to other countertop options, and Floor & Decor didn’t disappoint.
While the big box retailers and even IKEA didn’t have the butcher block we needed available, Floor & Decor had exactly what we wanted. Installing and staining it was a process, which I will write about in its own post, as well as how we care for them. Even though it was definitely a lot of work, I could not be happier with how they turned out. They are GORGEOUS.
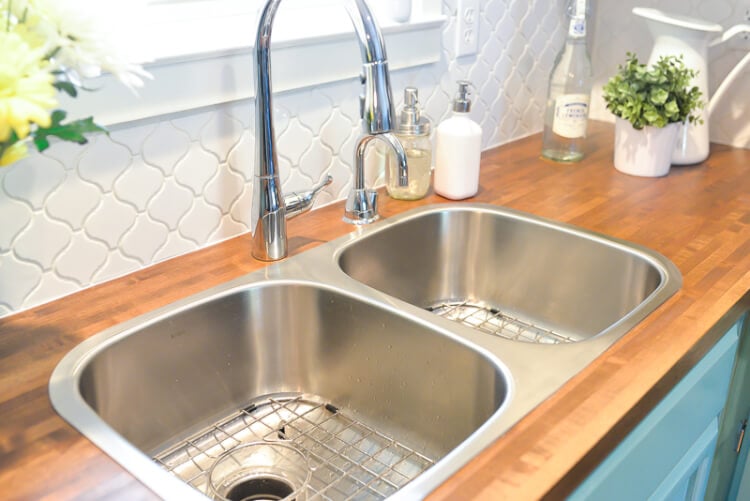
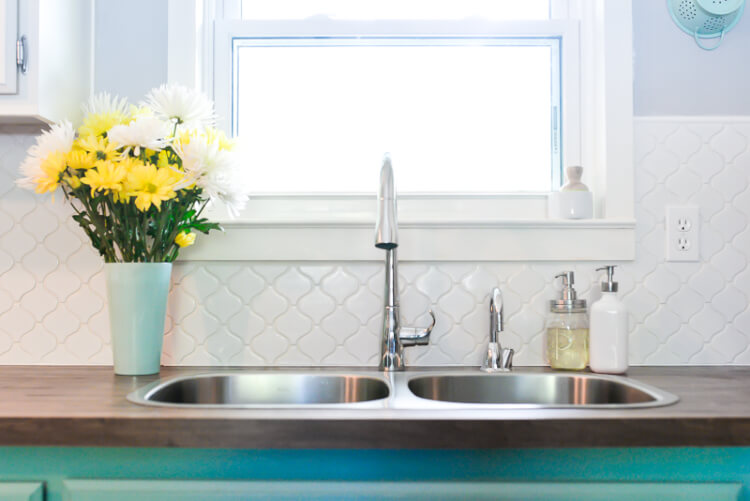
To go with the countertops, we decided on a deep Kraus stainless steel sink and chrome Kohler faucet, along with an instant hot water dispenser. The old sink was so shallow and the short faucet didn’t help.
We also switched the garbage disposal to the side of the sink closer to our dishwasher, so we’re not dripping dirty dishes across the clean dishes drying in the other side of the sink. Now it’s so easy to do the dishes and keep our kitchen cleaner! The wire racks in the bottom of the sink came with the sink and help protect the bottom of the sink from scratches.
For the backsplash, we went with the most beautiful bargain tile. It was less than $4 a square foot, also from Floor & Decor! With grout and tools and everything, the backsplash came to less than $150. What a deal! And it’s so beautiful — the arabesque style is trendy and classic at the same time, and adds some movement to the square lines of the kitchen.
We decided to grout it in white, since this was the first time we did grout ourselves and we wanted to hide any mistakes. Thankfully, we did a pretty good job and it looks great!
We also decided to case the kitchen window in wood. This helped make the tile installation easier and made the window a focal point instead of an afterthought. Another tutorial, coming up soon!
A lot of hard work, but what a transformation. We did all of the work ourselves, with the exception of the countertop — we hired a friend of a friend to help us with the installation. But we were there every step of the way, working with him on the install (to save the cost of him hiring someone to help). I have learned so much during this renovation, and, I’m not sure if I’ve said it yet…
I LOVE IT SO MUCH!
Cost Breakdown:
- Cabinet Paint: $120
- Cabinet Hardware: $125
- Butcher Block Countertops: $830
- Countertop Installation: $400
- Lighting: $300
- Sink: $260
- Faucet: $168
- Backsplash: $175
- Miscellaneous: $200
We also were able to beg, borrow, steal (and win — thank you Ryobi!) all the tools we needed for this project. I’ll go into these tools more in the individual tutorial posts.
And that’s it! We’re totally done and totally happy with how it’s turned out. Hope you find it inspiring to make changes in your own home!


Comments & Reviews
Nathaniel Guy says
Amazing write-up! 馃檪 Maybe add some visuals next time.!
Amalia says
What a beautiful transformation! I love how you kept the character of your home while making it fresh and bright. It reminds me of our own kitchen update a few years ago. We chose to refresh our cabinets and counters, but we kept our older, high-quality Sub Zero fridge – it felt like the reliable heart of the kitchen. When it finally started acting up last winter, we were really torn about replacing it. Getting a quick repair from a Sub Zero Appliance Repair in Glenview IL service completely changed our minds. The technician explained how much more solid the internal components were compared to newer models, and fixing it for a few hundred dollars felt so much smarter than spending thousands.