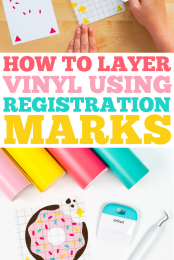
It can be tricky to layer adhesive vinyl so that all of the layers match up! Here’s a simple trick to layer adhesive vinyl using registration marks created in Cricut Design Space!
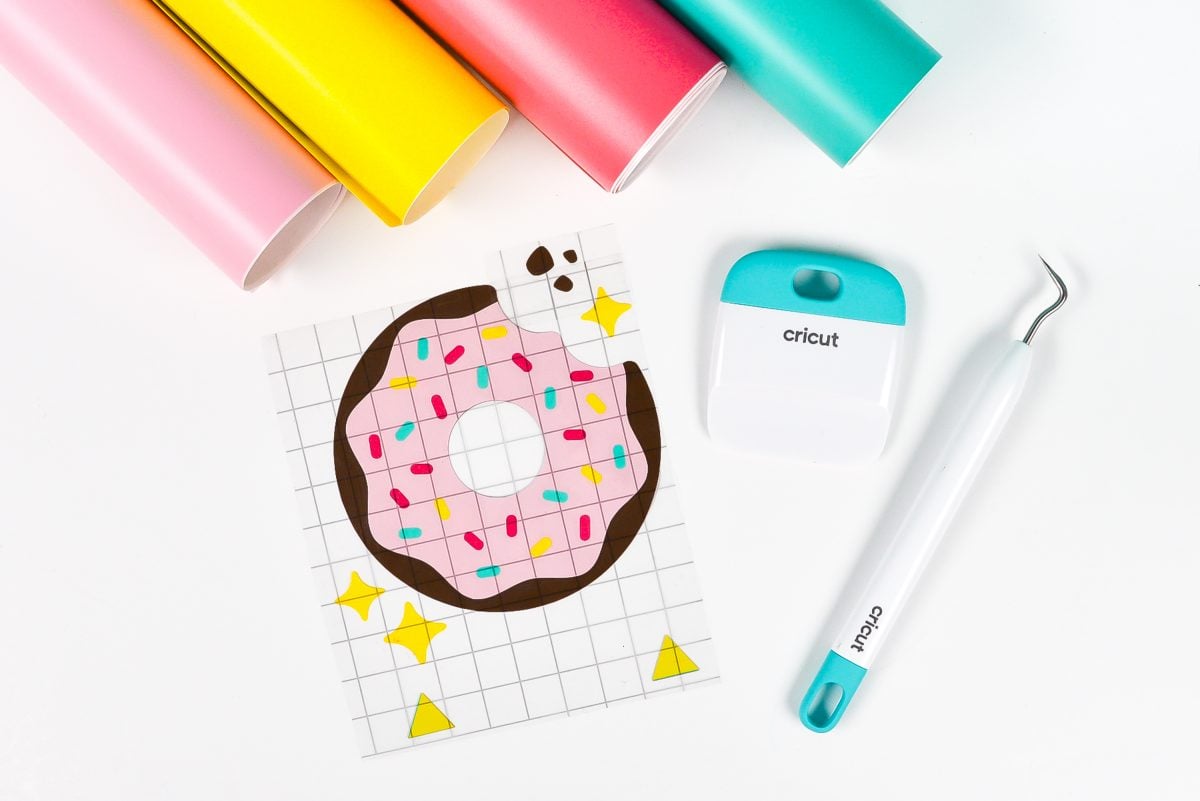
Layering adhesive vinyl can be frustrating—how can you get all of your layers to line up perfectly? Round or circular things, in particular, are hard to line up. Eyeballing it may work for some projects, but if you want really accurate layers, the best method is to create registration marks in Cricut Design Space.
This method builds your vinyl layers on a single piece of transfer tape, instead of using a piece of transfer tape for each layer. Not only does it allow you to line up your vinyl perfectly, you also use way less transfer tape!
[adthrive-in-post-video-player video-id=”4Zv0ymXX” upload-date=”2022-05-29T19:48:00.000Z” name=”Adhesive Vinyl Projects to Make with a Cricut” description=”Make all sorts of amazing adhesive vinyl projects using your Cricut, including tumblers, signs, mugs, ornaments, and more. ” player-type=”default” override-embed=”default”]
You can also layer your vinyl on transfer tape without registration marks if your project is fairly simple. Just follow the steps below without the registration marks. If your project is more complex, add the registration marks!
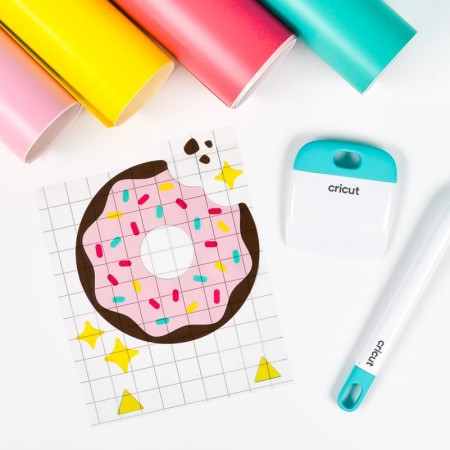
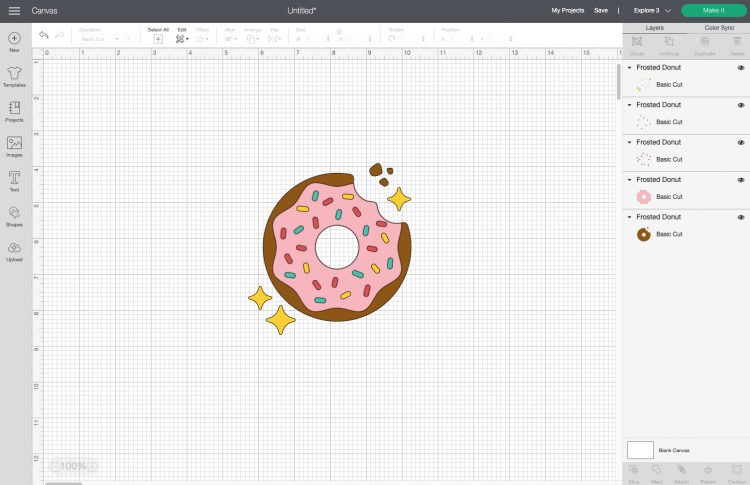
For this example, I’m using this five-layer donut (Cricut Design Space #M27424521). Who doesn’t love donuts?! (These are my fave!)
Setting Up Registration Marks in Cricut Design Space
Resize it to your final project size. Then ungroup all of the layers so you can work with them individually.
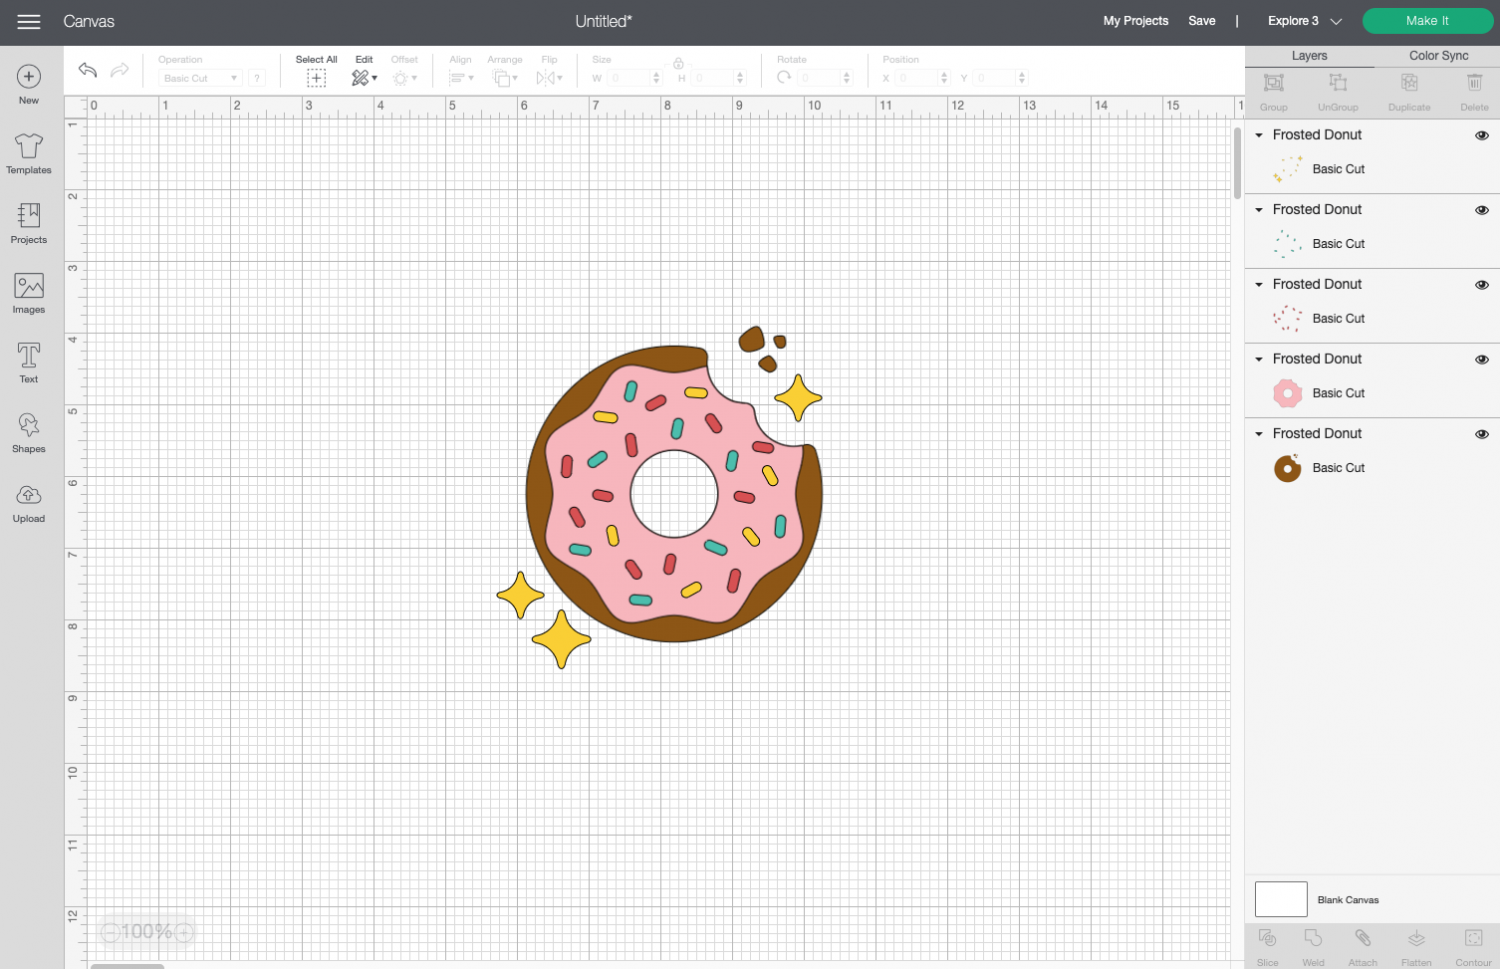
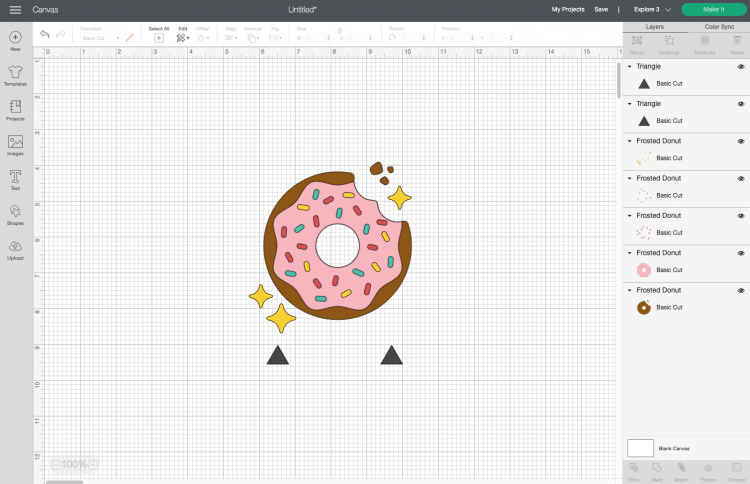
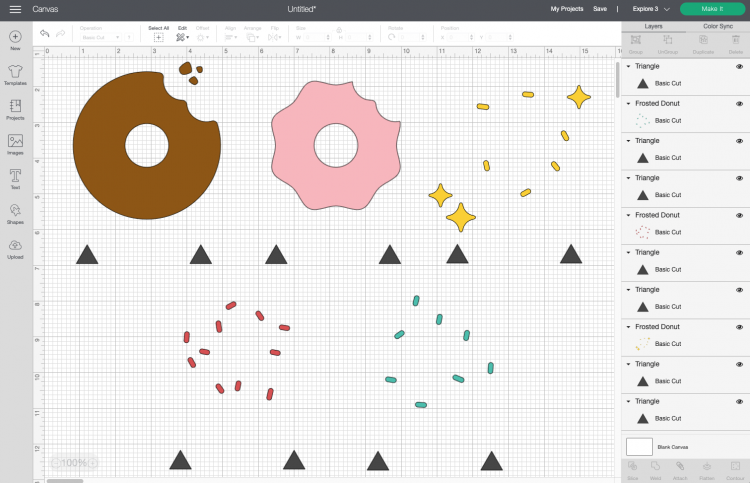
Use the shape tool to add two triangles underneath your image. These are your “registration marks” that you will use to line up your layers.
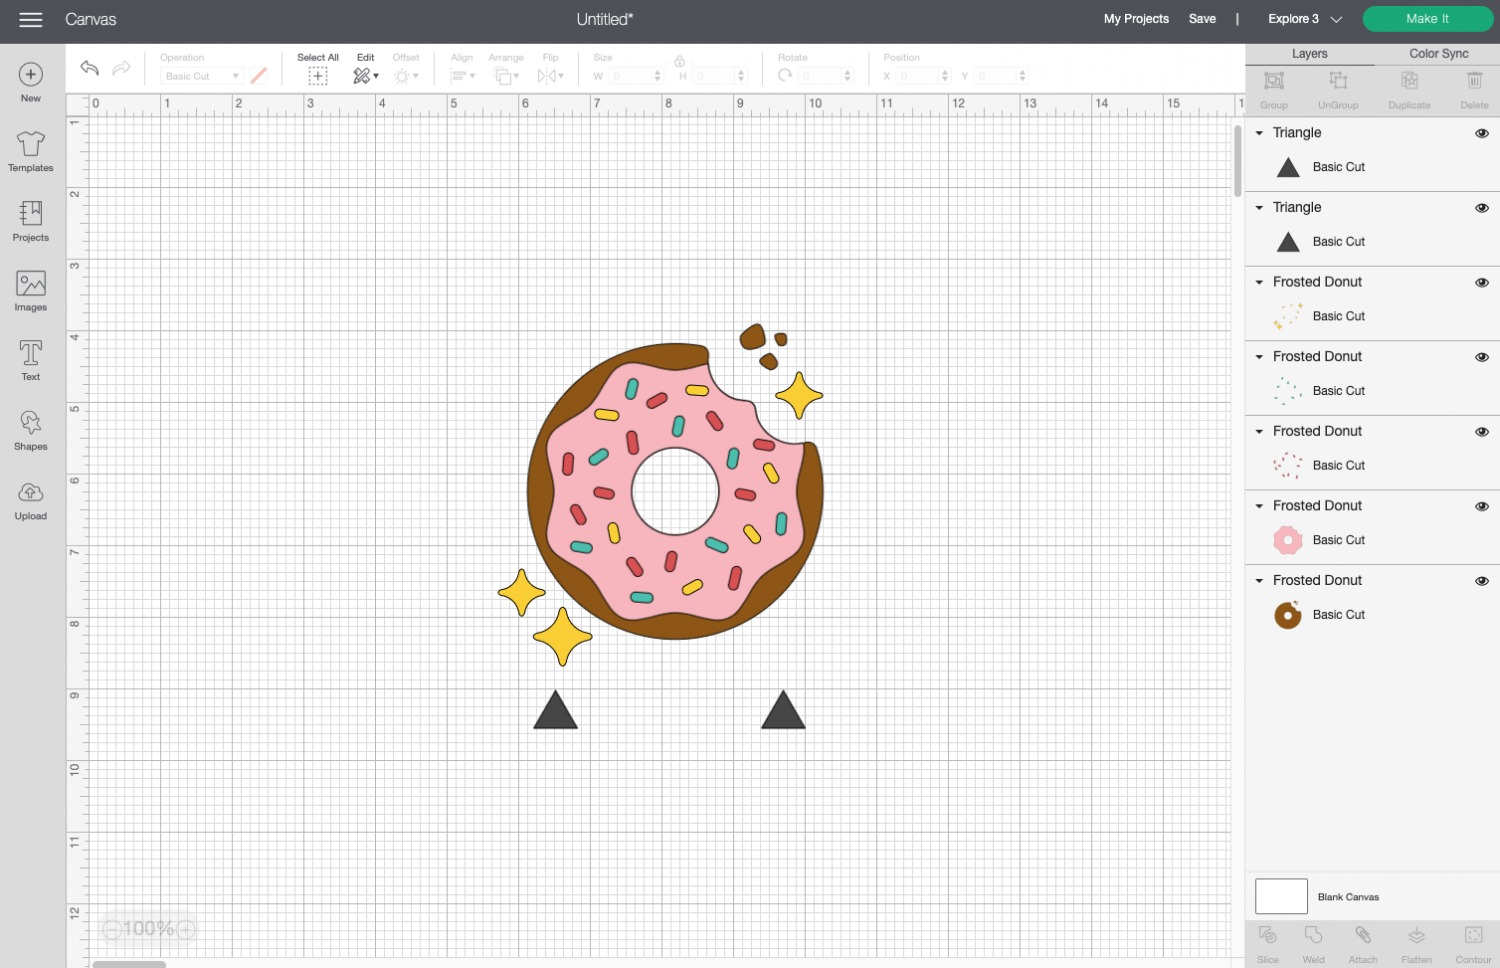
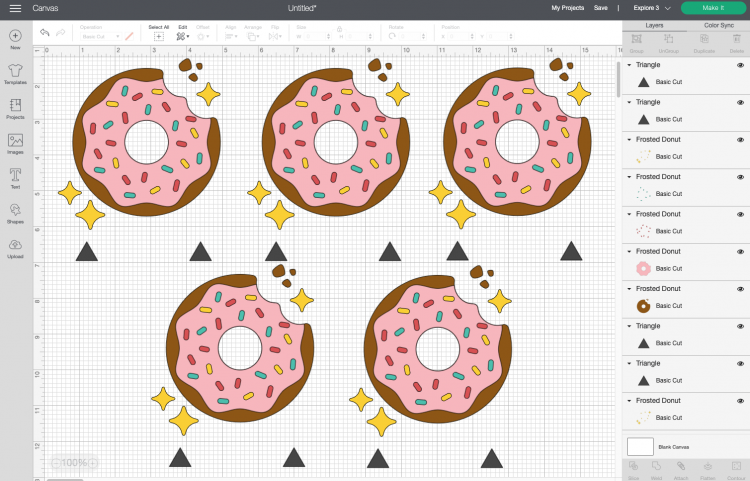
Duplicate your image AND registration marks for each layer you have. In this image, there are five layers so I made five total copies.
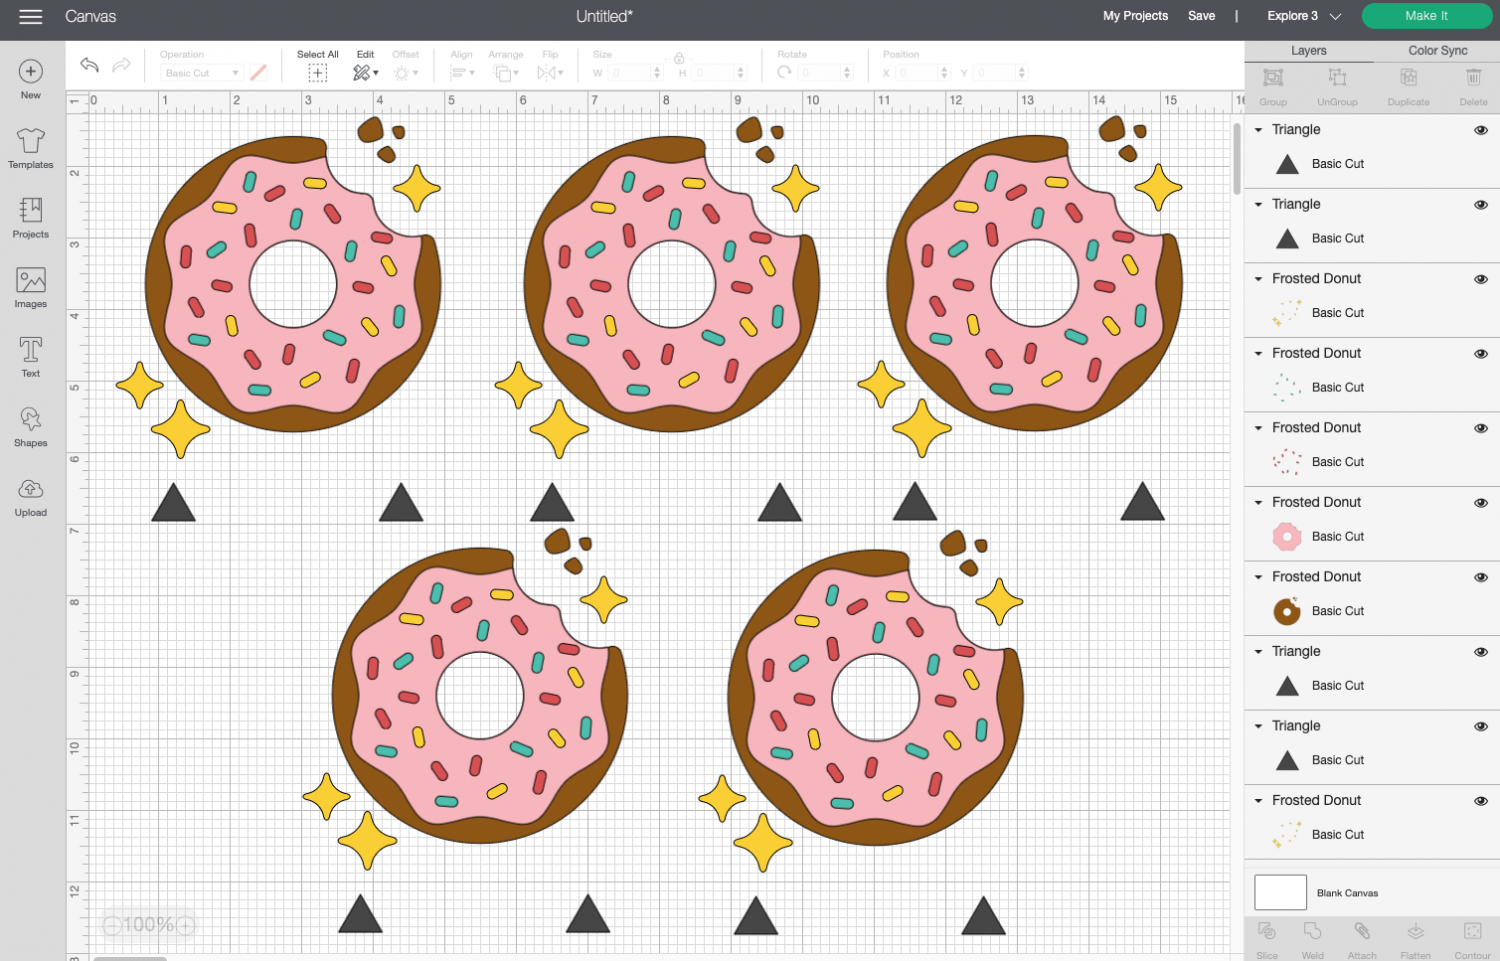
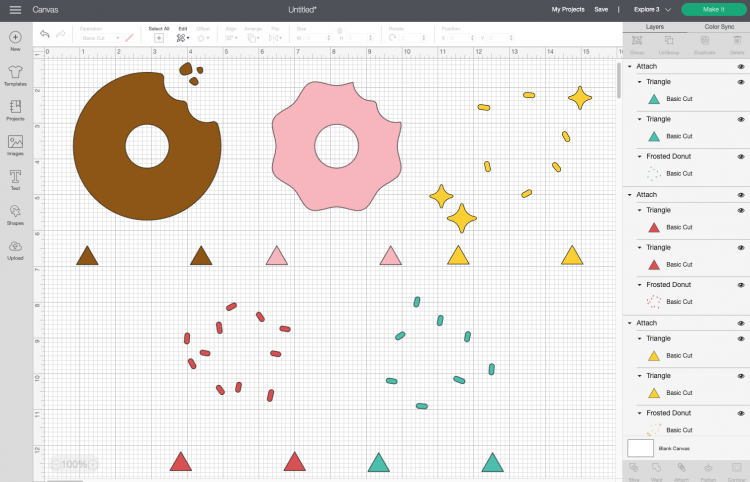
For each duplicate of the image, delete everything but a single layer and the registration marks, keeping a different layer with duplicate copy.
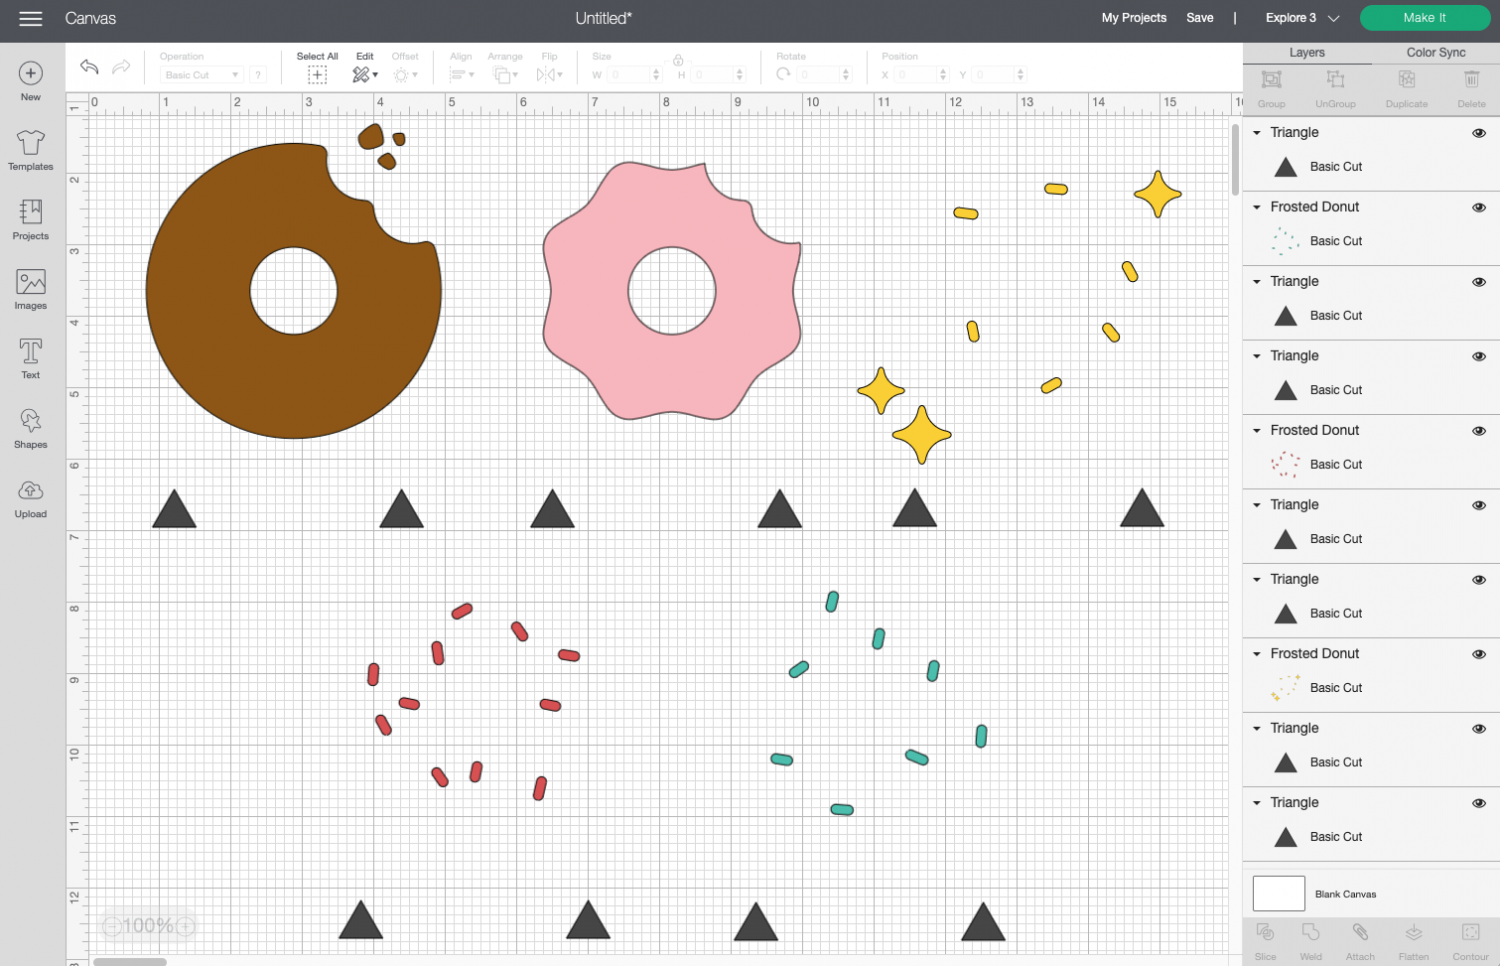
Select each image and its corresponding registration marks and click Attach. You will notice that when you select ‘attach’ the registration marks change to the color of your layer. The colors will change to the colors of your layer.
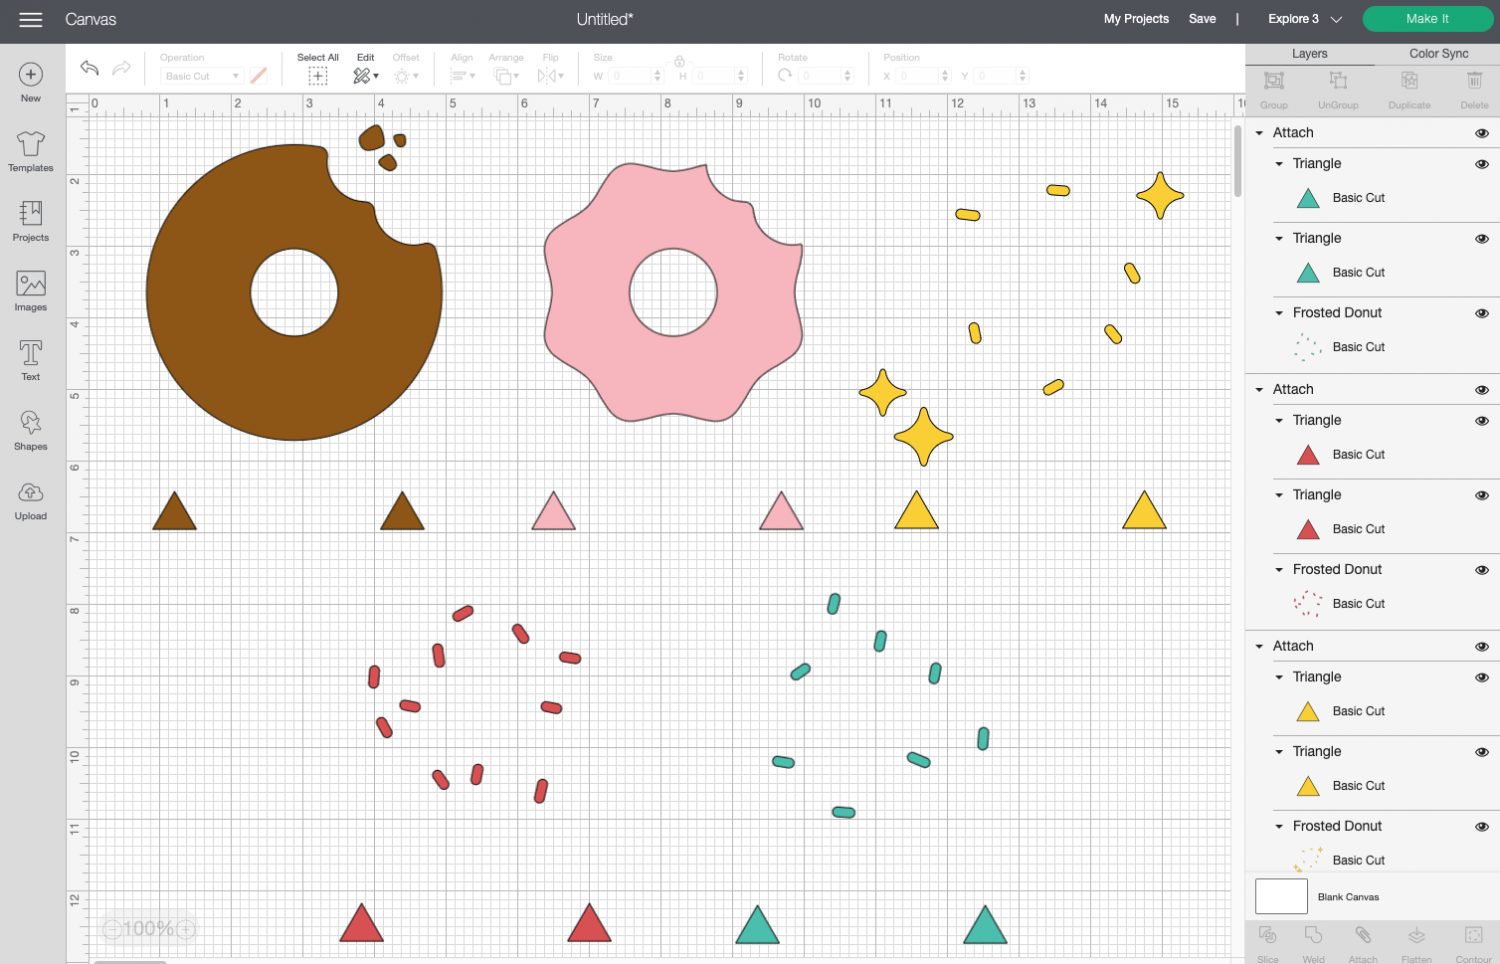
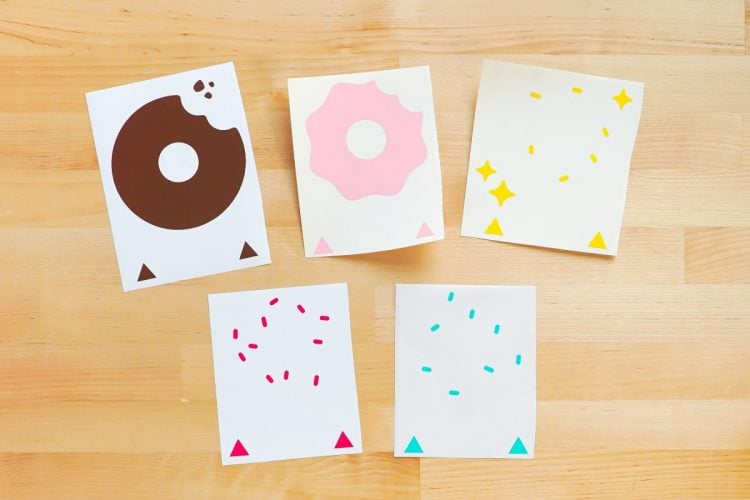
Now cut and weed all the adhesive vinyl layers of your project. See my posts How to Use Adhesive Vinyl and How to Weed Adhesive Vinyl for more information on how to do that.
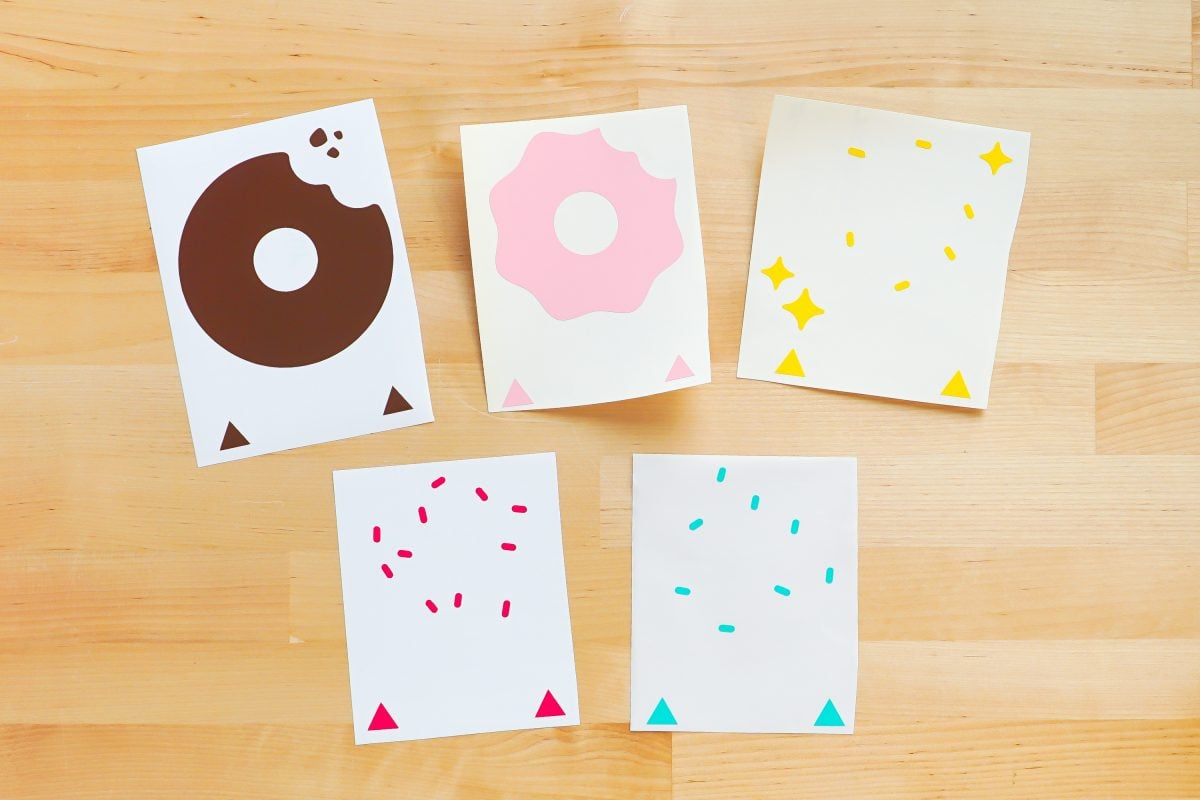
Layering Vinyl Using the Registration Marks
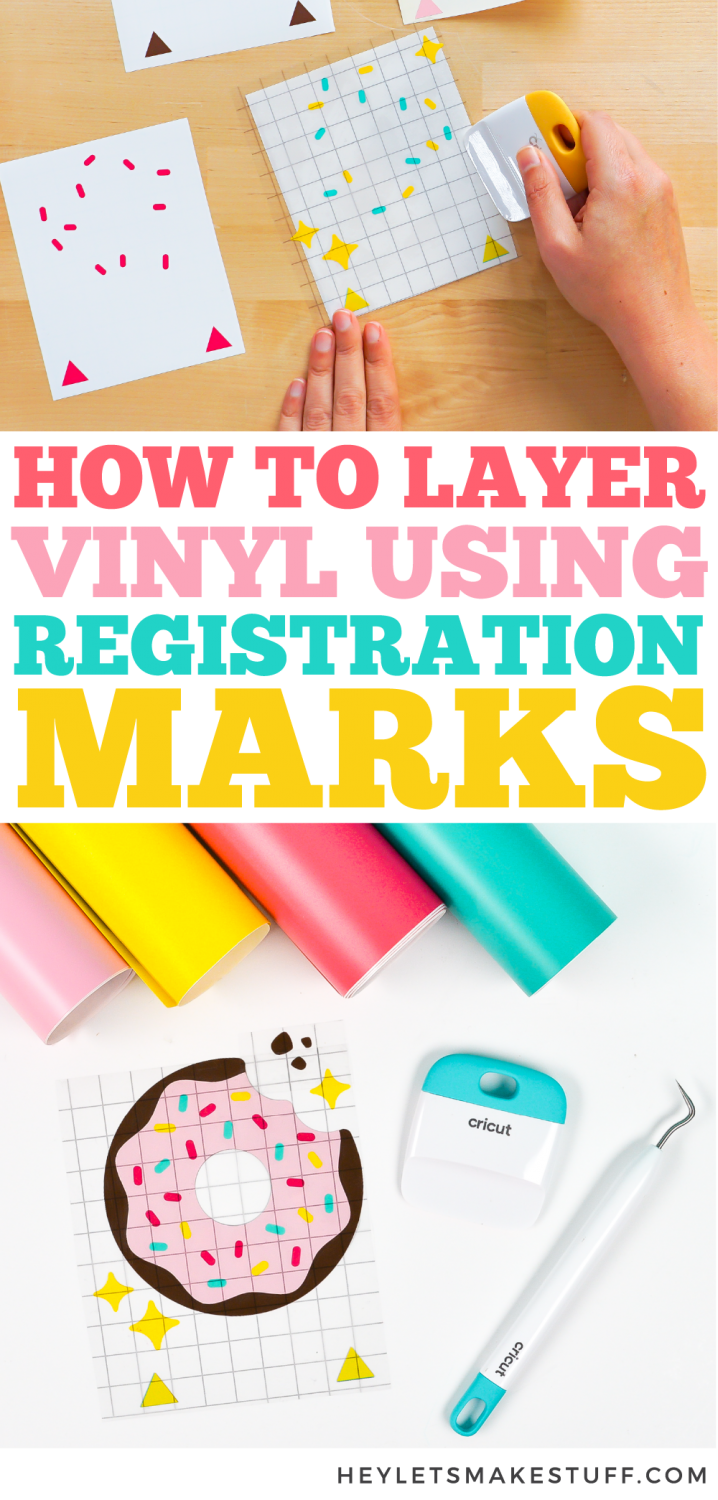
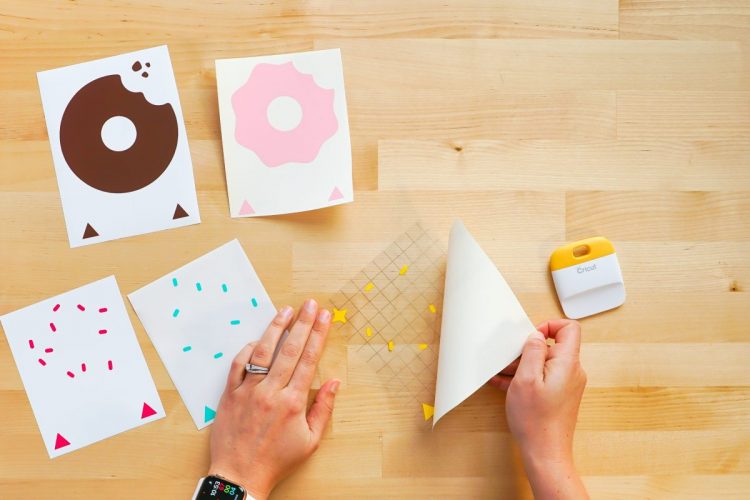
Now we’ll use transfer tape to layer our vinyl by lining up the triangles. As long as the triangles are lined up, the rest of the project will be too!
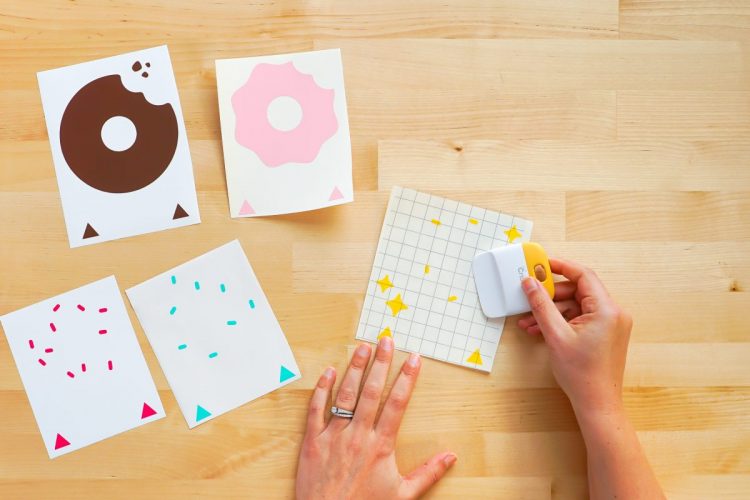
Start with the top layer of your vinyl—you will build your layers from the front to the back. Start by adding a piece of transfer tape to the first layer of your proejct.
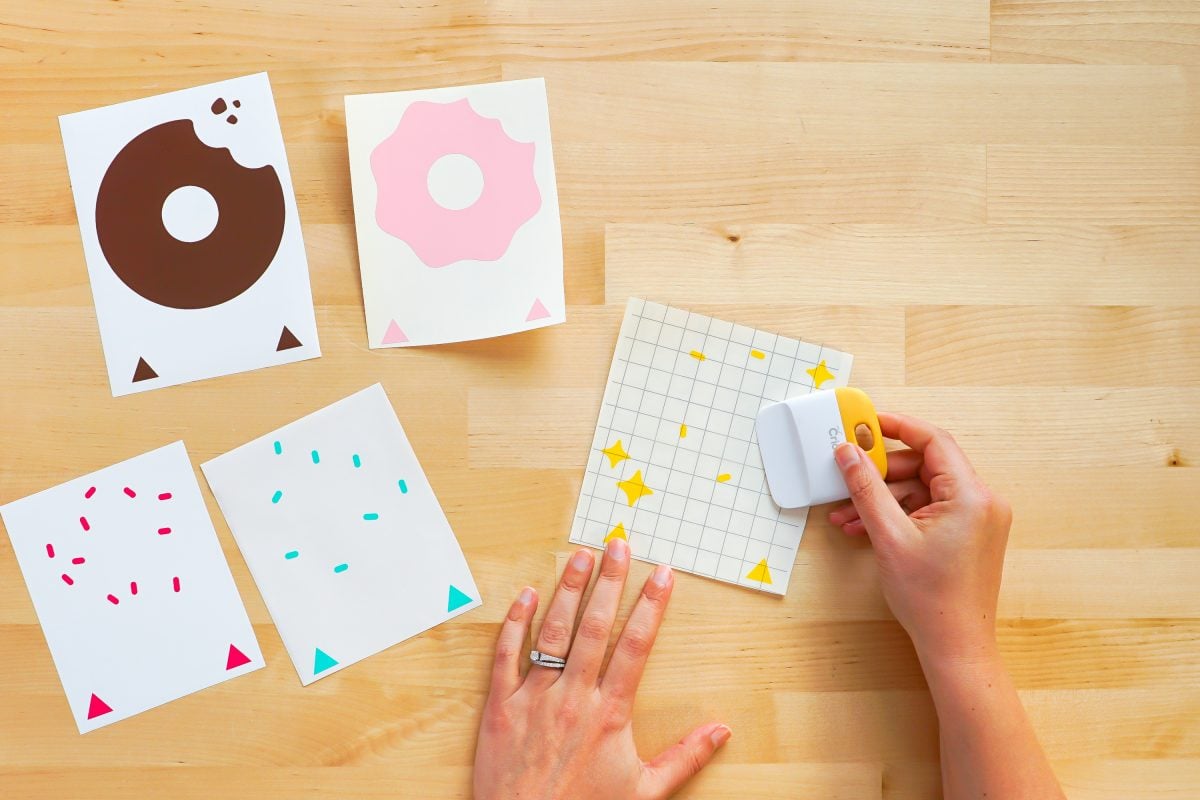
Peel back the transfer tape so that your first adhesive vinyl layer is on the transfer tape.
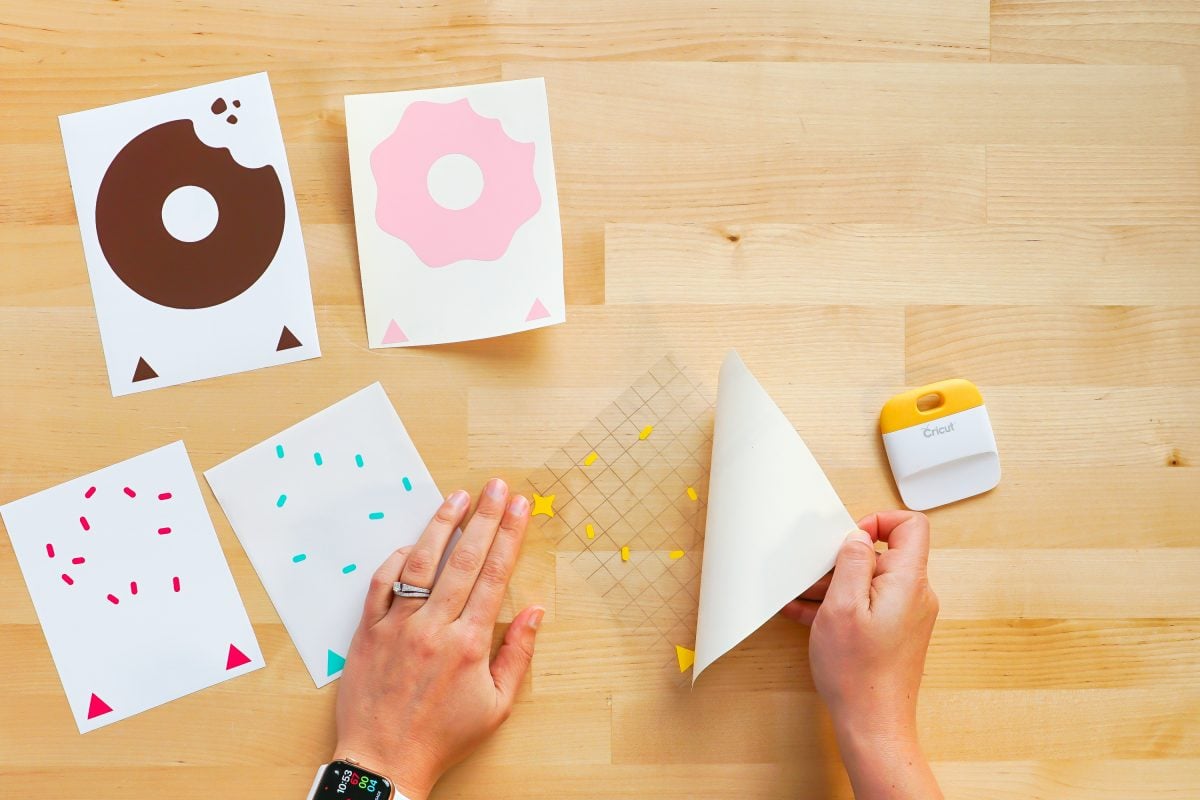
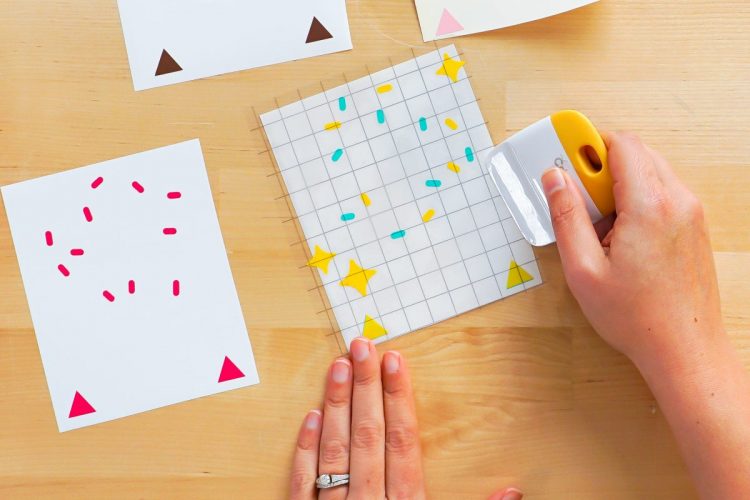
Then line up the triangles from that layer with the triangle of your next layer. The more accurate you can be in lining up your triangles, the better.
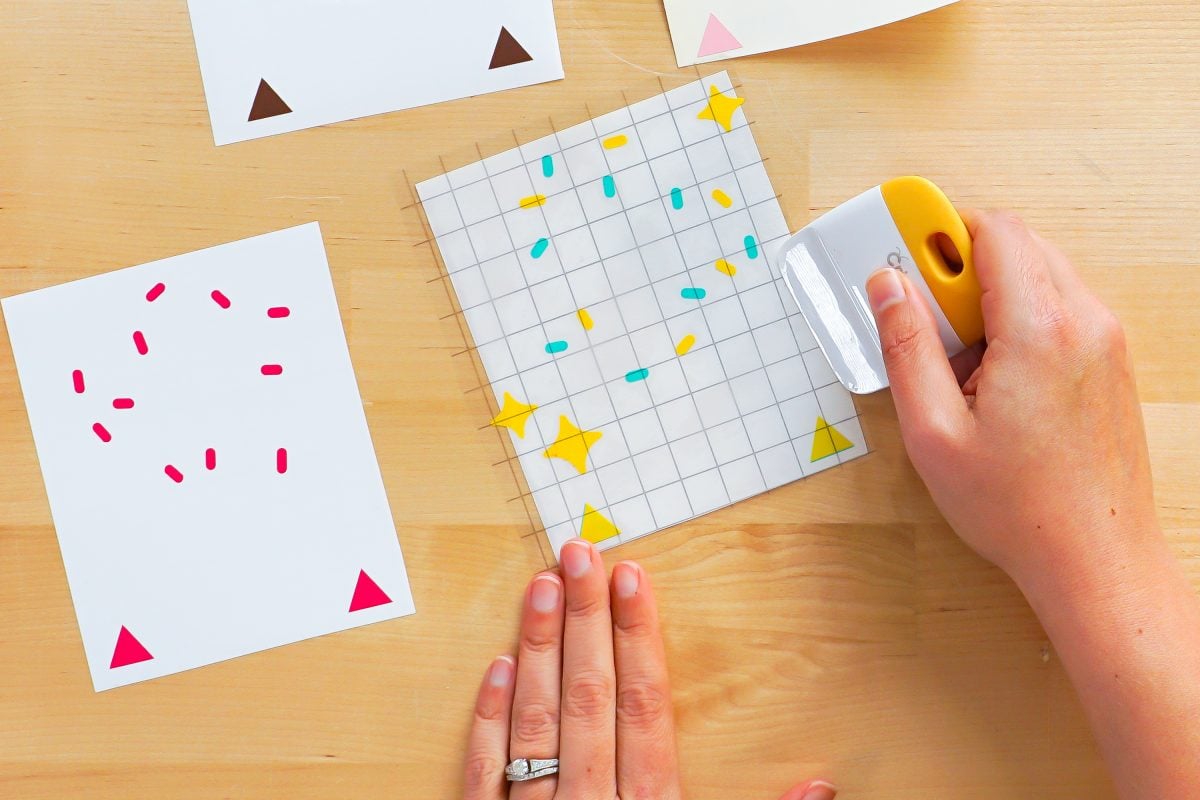
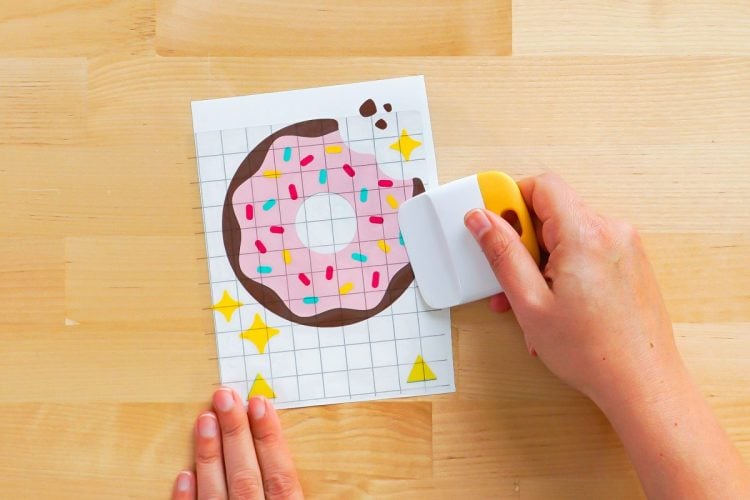
Then peel that back so that both your layers on on the transfer tape.
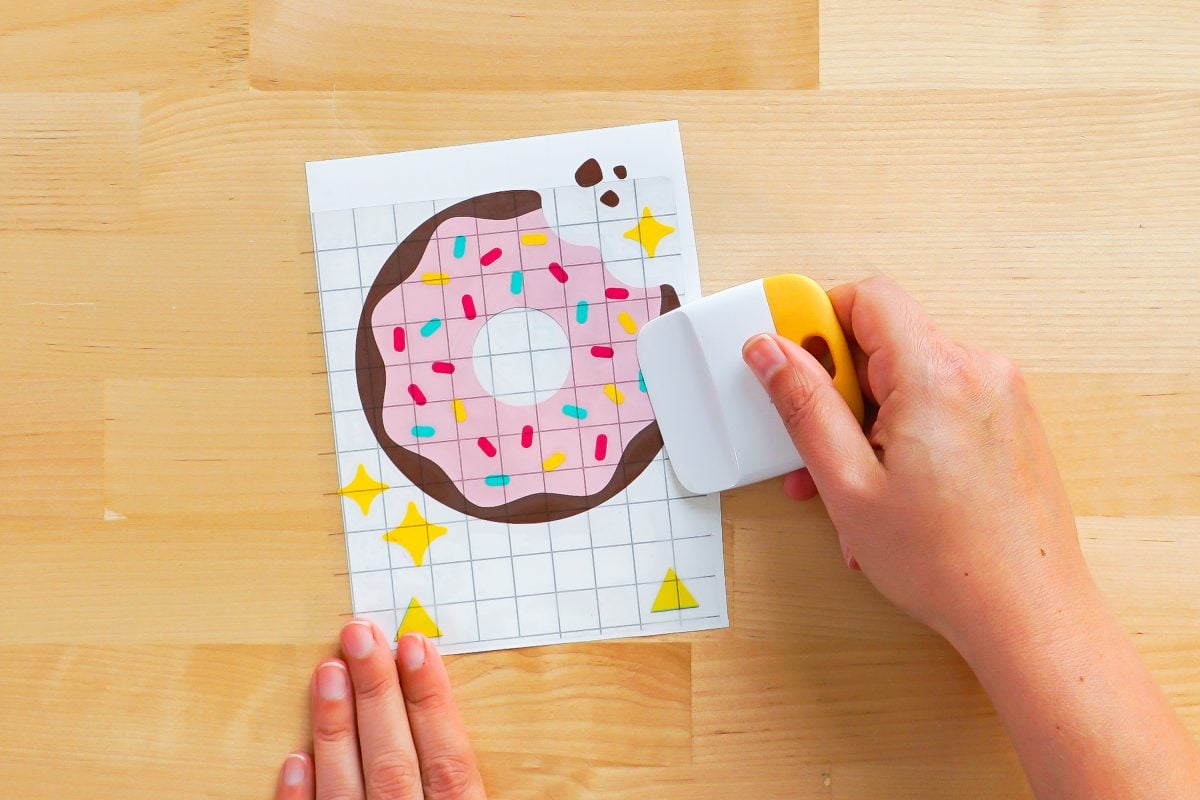
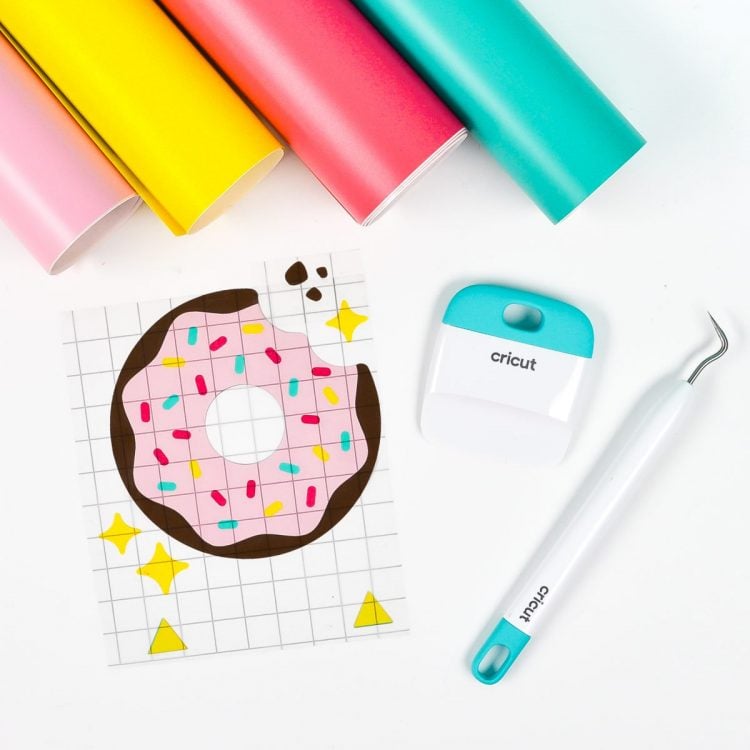
Repeat until you’ve transfer all of your vinyl layers to the transfer tape.

Then you can apply it to your base in the same way you would a single layer of vinyl on a piece of transfer tape. Check out my post How to Use Transfer Tape for more information on that!
NOTE: Be sure that once you have all of your layers of vinyl on a single piece of transfer tape that you cut off the registration marks so as not to adhere them to your blank during the heating process.
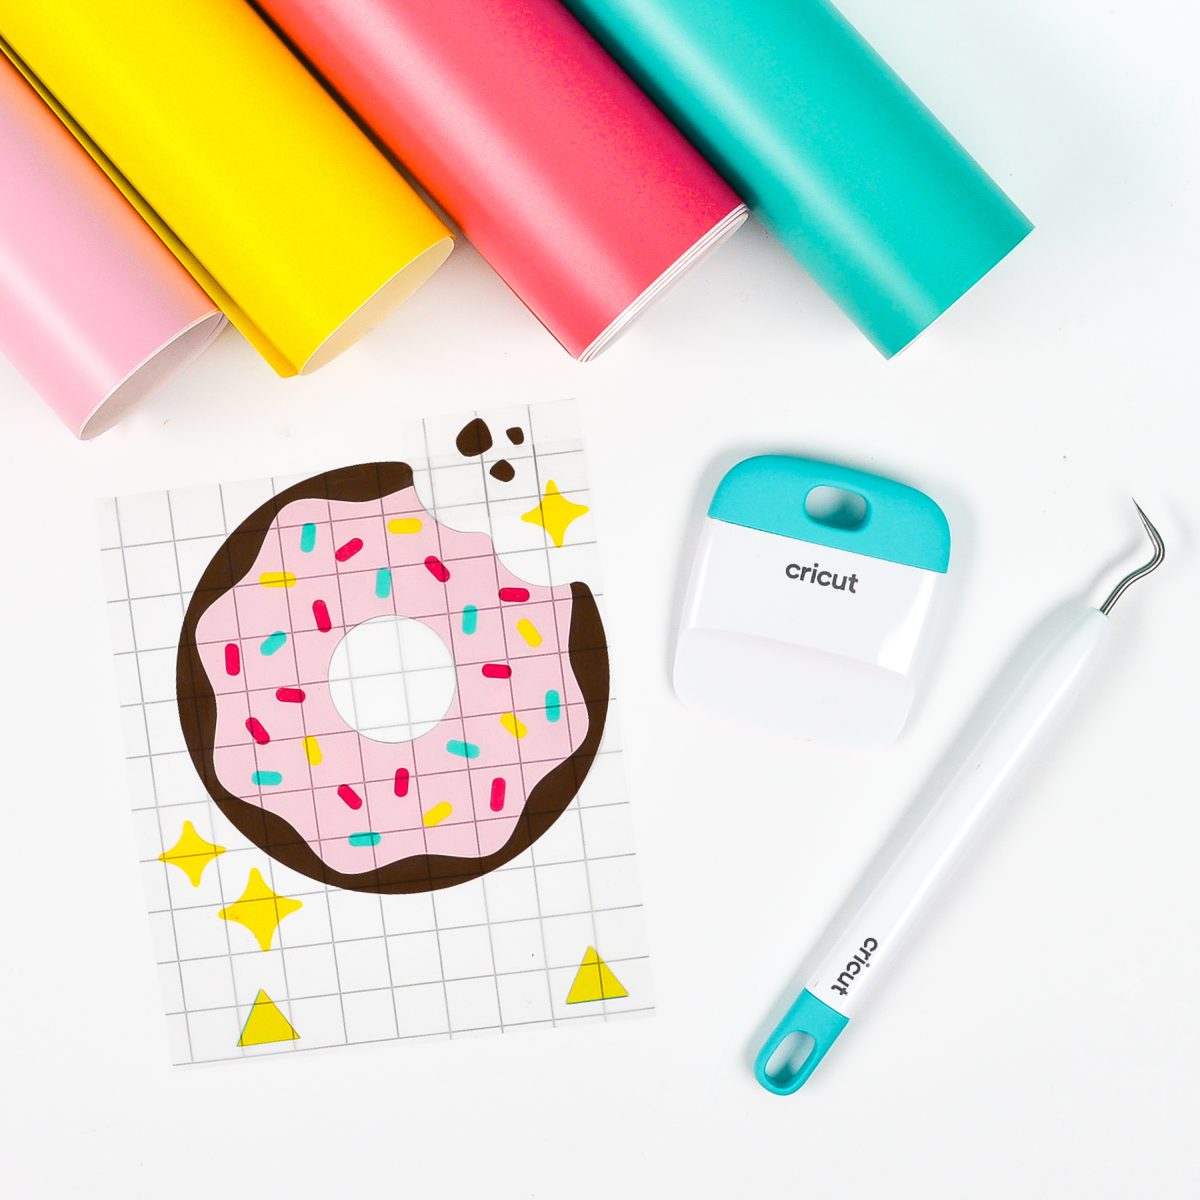
Hope you found this little hack for layering adhesive vinyl using registration marks helpful! Have questions? Let me know in the comments!
Get a Cricut!
HOW TO LAYER ADHESIVE VINYL USING REGISTRATION MARKS
Instructions
- NOTE: For this example, the file being used is a five-layer donut (Cricut Design Space #M27424521).Resize the design to your final project size. Then ungroup all of the layers so you can work with them individually.

- Use the shape tool to add two triangles underneath your image. These are your “registration marks” that you will use to line up your layers.

- Duplicate your image AND registration marks for each layer you have. In this image, there are five layers so five total copies were made.

- For each duplicate of the image, delete everything but a single layer and the registration marks, keeping a different layer with duplicate copy.

- Select each image and its corresponding registration marks and click Attach. You will notice that when you select ‘attach’ the registration marks change to the color of your layer. The colors will change to the colors of your layer.

- Now cut and weed all the adhesive vinyl layers of your project. See these posts How to Use Adhesive Vinyl and How to Weed Adhesive Vinyl for more information on how to do that.

- Now we’ll use transfer tape to layer our vinyl by lining up the triangles. As long as the triangles are lined up, the rest of the project will be too!Start with the top layer of your vinyl—you will build your layers from the front to the back. Start by adding a piece of transfer tape to the first layer of your proejct.

- Peel back the transfer tape so that your first adhesive vinyl layer is on the transfer tape.

- Then line up the triangles from that layer with the triangle of your next layer. The more accurate you can be in lining up your triangles, the better.

- Then peel that back so that both your layers on on the transfer tape.

- Repeat until you’ve transferred all of your vinyl layers to the transfer tape.

- Then you can apply it to your base in the same way you would a single layer of vinyl on a piece of transfer tape. Check out my post How to Use Transfer Tape for more information on that!NOTE: Be sure that once you have all of your layers of vinyl on a single piece of transfer tape that you cut off the registration marks so as not to adhere them to your blank during the heating process.



Comments & Reviews
Simone says
Thanks for the tutorial, easily explained and I’m going to try it.
Can this hack be used with layering Iron on as well? Thank you 😊
Nicole says
Thank you for this tutorial, it was easy to follow and made it SO MUCH easier to line up my layered decals ! :)
Sandra Ames says
That is brilliant!!!!! Just made my first layered vinyl last night and hoped it aligned. This method will surely help and save so much transfer tape!
Mary Purvis says
Don’t forget to cut off the extra triangles before applying!
Crystal Summers says
Great tip, Mary!
Crystal, HLMS Community Manager
Nina Paul says
Thanks for sharing this. It really looks interesting.