Lost your quick reference guide for the heat settings for the Cricut EasyPress or EasyPress 2? Get a printable version and learn more about this awesome heat press, including the differences between the EasyPress and the EasyPress 2!
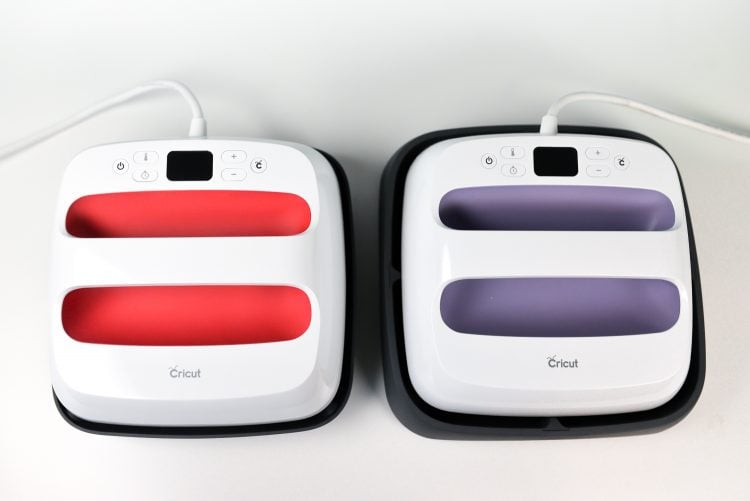
I originally published this post back in 2017, but wanted to give it a bit of an update with the release of the EasyPress 2! Read along for the original information in this post, plus updated information about the second generation EasyPress.
What is the EasyPress and EasyPress 2?
I’ve always found working with iron-on vinyl (also called heat-transfer vinyl or HTV) to be both fun and a little frustrating. Can you relate?
It’s a delicate balance with a household iron—hot enough to get the vinyl to stick to your material (and stick well enough to survive washing) but not so hot that it’ll melt your plastic carrier sheet or cause your vinyl to bubble. I often avoided iron on projects because I couldn’t guarantee good results each time. And since I tend to be a perfectionist without a lot of extra time (can I get an amen?), it was just easier to work with other materials.
Then Cricut released the EasyPress and, more recently, the EasyPress 2 (learn more about the differences below). If you want to work with iron-on vinyl, the EasyPress is a game changer. It marries the ease of an iron with the even heating of a traditional heat press. And it. is. awesome!
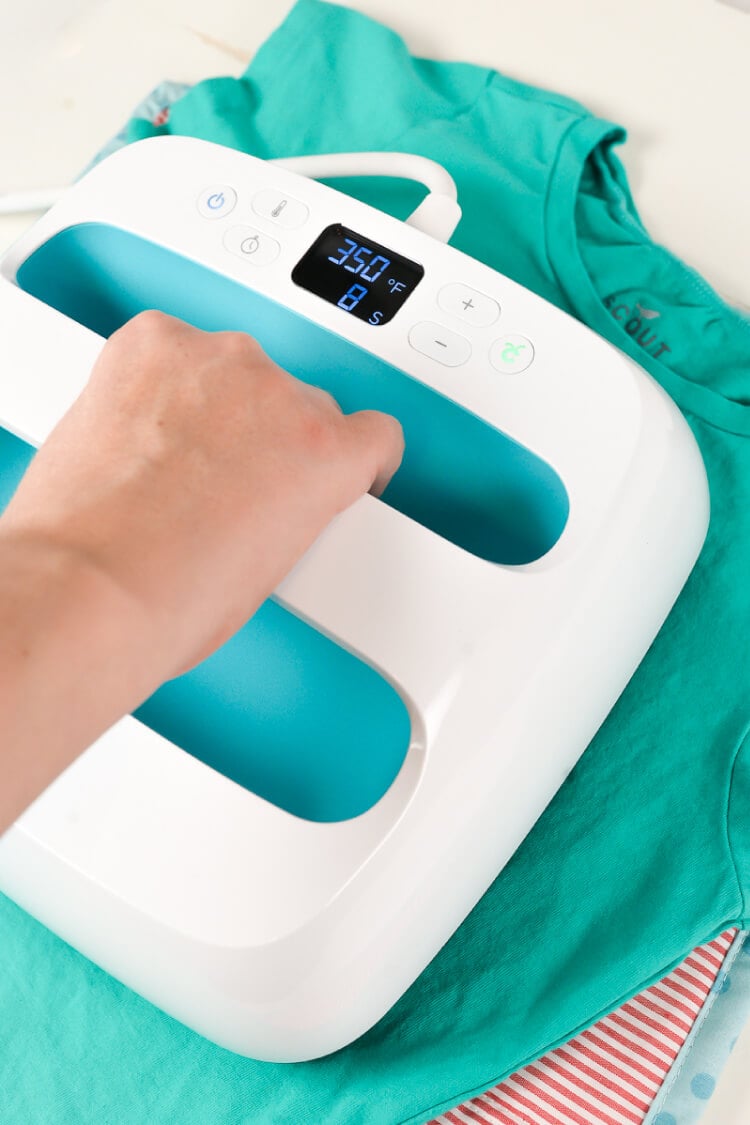
Unlike an iron, the heating on the EasyPress is even across its surface. An iron can vary in temperature hundreds of degrees—400° in the middle, for example, and 150° on the outer edges. The EasyPress has a completely even heat source. Need 315° for Everyday Iron On on a cotton t-shirt? You get 315° all the way across the heating element, like you would get from a traditional heat press. But unlike a heat press, it has a much smaller footprint and the design makes it much easier to keep your hands away from the hot surface. Perfect if you don’t have a ton of space store it!
You can read more about using an EasyPress vs a heat press here.
Anatomy of the EasyPress
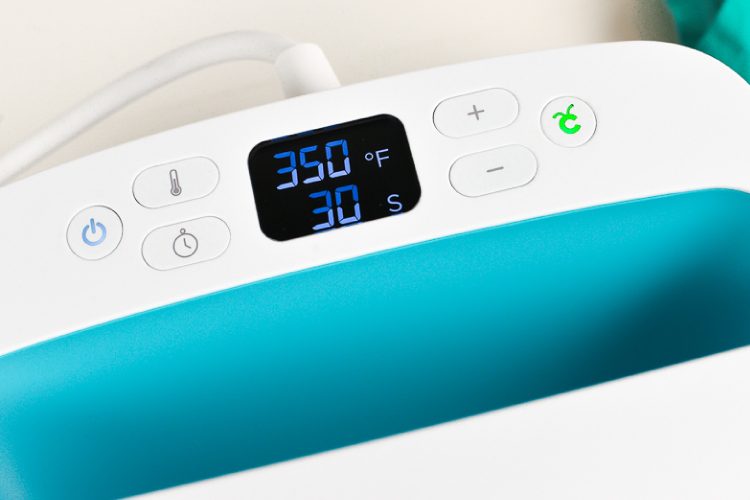
On the EasyPress, you’ll see a handful of controls, from left to right:
Power Button: Turns the EasyPress on and off. The EasyPress 2 will remember your last used temperature and time settings.
Temp: Push this to change the temperature. If you want to switch between Celsius and Fahrenheit, hold down the temp button. If you notice that your EasyPress isn’t getting as hot as you think it should, there’s a good chance you are in Celsius—your machine isn’t broken! (Yes, this happened to me…totally thought my EasyPress 2 was malfunctioning!). You’ll use the + and – to navigate to the temperature you want to use.
Timer: Push this to change the countdown timer. Like the temperature, you’ll use the + and – to navigate to the number of seconds you want your EasyPress to countdown.
Countdown Button: Once you are ready to make your project (we’ll go into actual projects more later in this module), you’ll put your EasyPress down on your project and push the countdown button. The EasyPress will count down the seconds so you know you’re not pressing too long or too short, and beep when it reaches zero.
This button has two colors—orange is when your EasyPress is still heating up, and green when it’s ready to go.
Using the EasyPress
Lay out your project with the EasyPress Mat or a folded towel underneath, on a solid surface like a table, versus your ironing board. Then use the EasyPresses buttons to select your temperature and time (see below for settings information), place the EasyPress right on top of your project.
There’s no need to use a teflon sheet or pressing cloth for most materials. Click the little green Cricut logo button to start the countdown.
Maintain light pressure on the EasyPress and once the timer beeps, set it back down on the tray. If your material allows, flip your project over and press for 15 seconds on the back.
Peel back the plastic carrier sheet, making sure to check whether your iron on is warm peel vs. cool peel.
Easy! If it doesn’t stick fully the first time, do it once more. For the record, I’ve never had to do it more than once. It’s been a homerun every time.
EasyPress vs. EasyPress 2
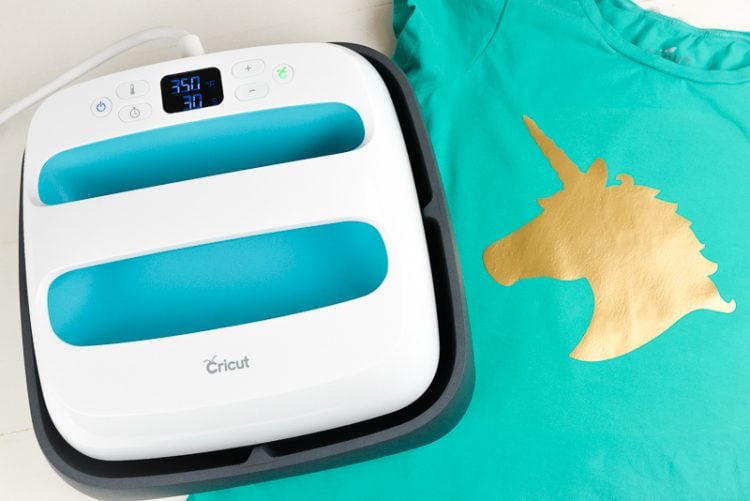
The original EasyPress is a great machine. It comes in a single size, 9″ x 9″, which can be used for almost all applications. The maximum temperature for the EasyPress is 350° with a variable temperature of +/- 9° (remember that an iron can have a difference of hundreds of degrees between the center of the plate and the edges; 9° is negligible.). It takes around three minutes to heat up.
The new EasyPress 2 is a (smallish) step up from the EasyPress. If you have and are happy with your EasyPress I don’t think it’s necessary to upgrade unless you really want one of the following features. If you don’t have an EasyPress, though, and are thinking of getting one, I’d go with the EasyPress 2!

The first difference is that the EasyPress 2 comes in three sizes:
Thanks to the generosity of the folks over at Cricut, I have all three sizes. I love the smallest one for a lot of my projects, so I most often break it out—it’s small and light and easy to use. The large one is…really large! And quite heavy. It’s great if you’re doing a bunch of larger projects, like a bunch of t-shirts in a variety of sizes. The plate is large enough to do most projects in a single press, which is handy. Each of these sizes has a matching EasyPress mat as well.
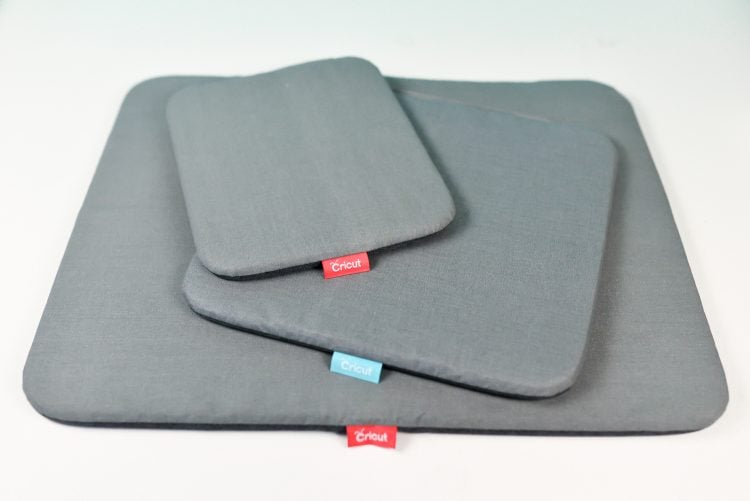
All three presses come in a “raspberry” color. You can also get a more expensive 9″ x 9″ Martha Stewart version in vanilla and gold if you’re feeling fancy.
The time it takes for the EasyPress 2 to heat up is a bit faster than the original EasyPress. The small one heats up in about a minute, the medium one takes about two minutes, and the large three minutes.
The maximum temperature of the EasyPress 2 is 400°, 50° hotter than the original EasyPress. Honestly this isn’t all that big of a deal if you’re using most materials—regular iron on vinyl is 315°, for example.
And finally, it remembers the last temperature you used. This is a small but nice little feature—I’ve been known to hit the power button instead of the countdown button, and it’s nice not to have to re-set the EasyPress’s temperature if I do that!
Heat Settings for the Cricut EasyPress
Speaking of heat settings, are you wondering what heat settings you should use? The EasyPress comes with a Quick Reference Guide—which, of course, I immediately misplaced (my craft room is a glittery black hole). There is also a super-handy interactive online guide.
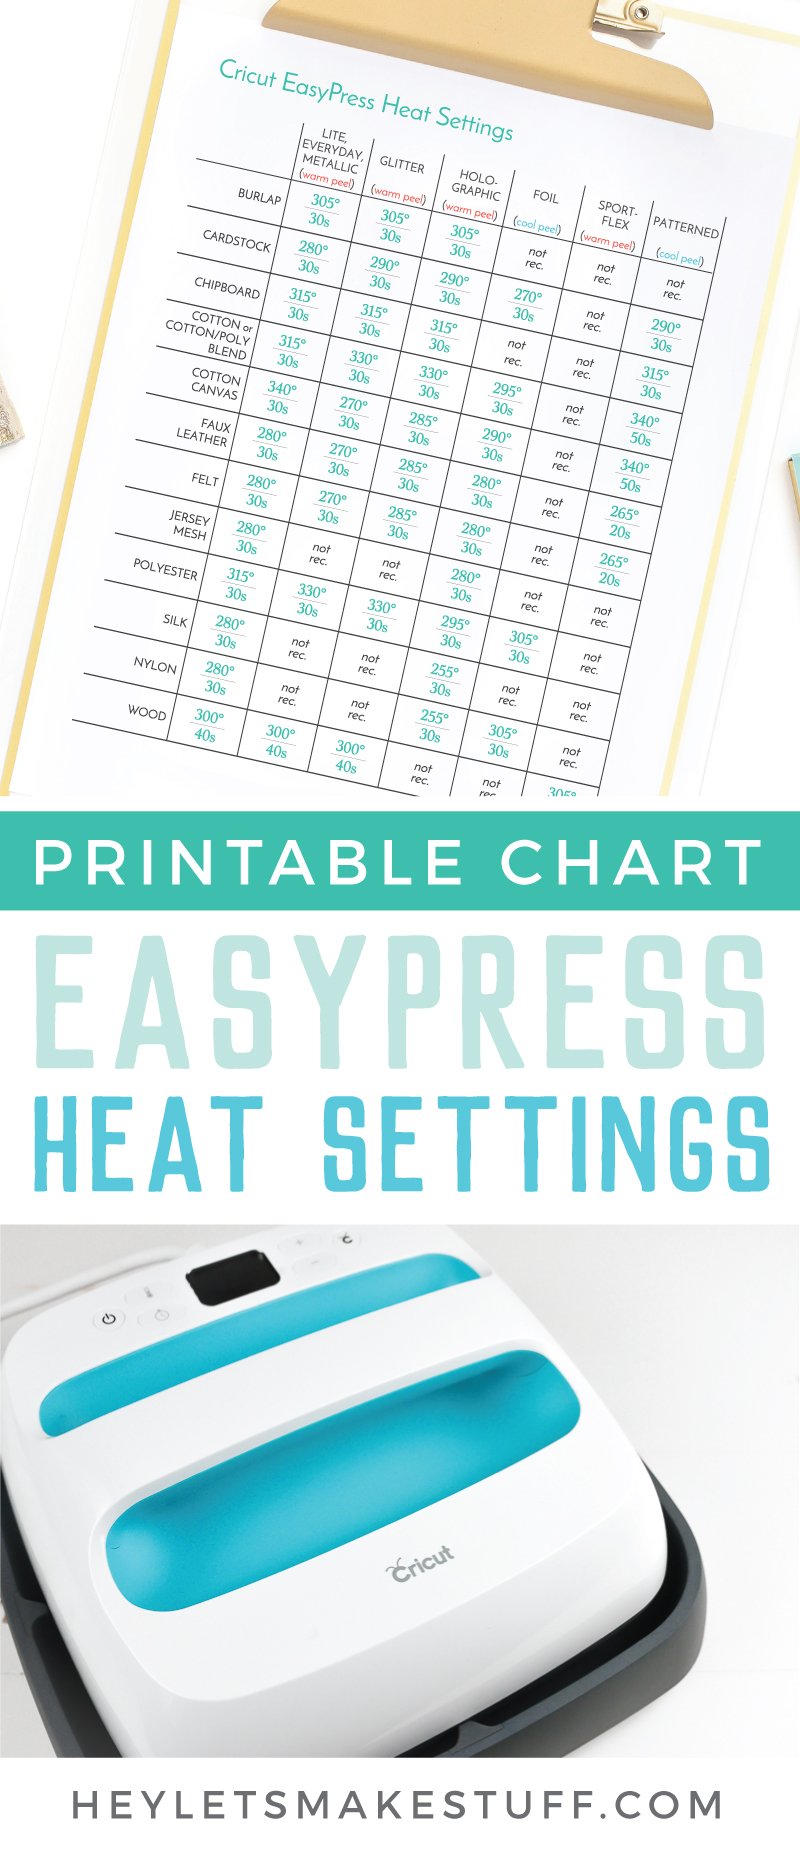
But if you don’t have your reference guide and you don’t want to hop online to Cricut’s site, I made a printable EasyPress heat settings guide, so you can download and reference!
I replaced the original guide I designed—this newer guide has updated heat settings to go with the EasyPress Mat, as well as additional iron on materials and base materials—and whether or not your material is warm peel vs. cold peel.
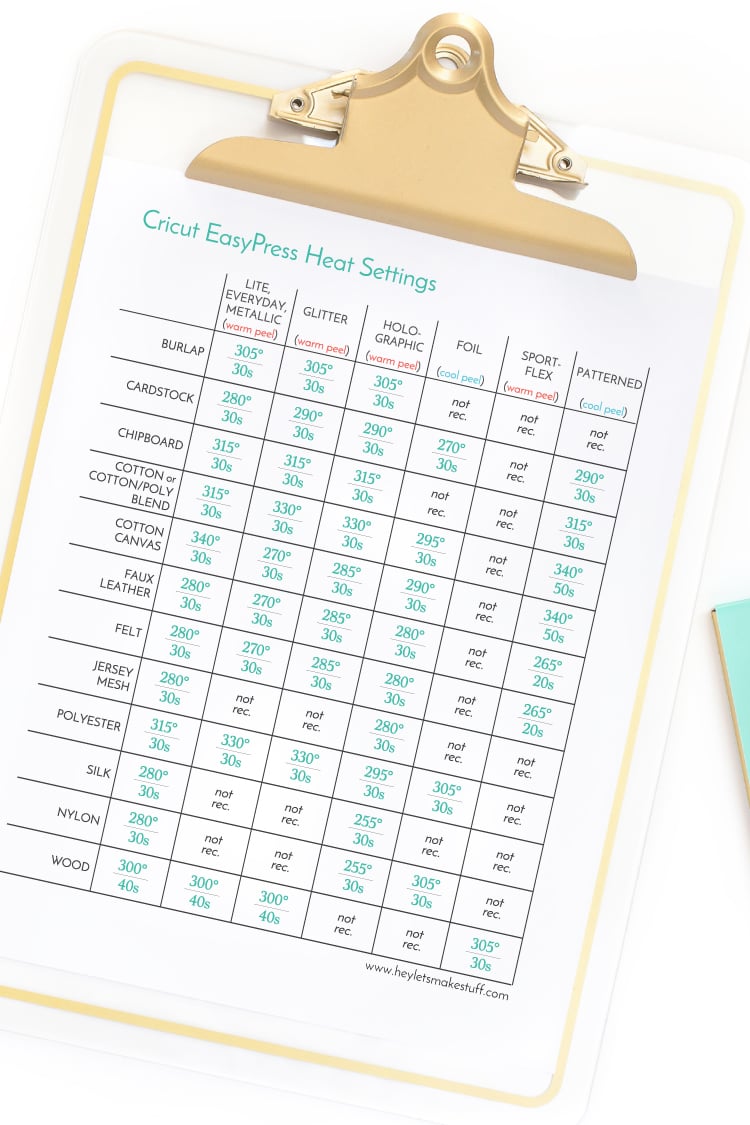
I will also note that these settings are just a guide. If you’re worried about your materials, do a test run if possible. It’s hard to mess up though.
You’ll notice that I had my EasyPress set to 350° in my photos. Cotton is supposed to be 315°. It still worked perfectly. The heat source is SO even that you won’t get those same hotspots you get with an iron.
I also made an even bigger mistake on a set of pennants I was making. I forgot to hit the timer button, forgot about my project, and my EasyPress sat on those pennants for a good five minutes before I remembered. Picked it up in a panic and my project was still perfect. No scorches, no melted plastic. I didn’t burn my house down like I might have done with an iron.
Get the Free File
Want access to this free file? Join my FREE craft library! All you need is the password to get in, which you can get by filling out the form below. The file number is: P38.


Comments & Reviews
Lisa Marie Miller says
Has anyone tried to use HTV with the easy press on a creative memories album spine? If so, can you please include instructions.
Cathy says
Cori,
I was going nuts because I thought something was wrong with the heating element. So many times I googled my problem and no one address it until you! It was in Celsius. Ok, sanity back. Thank-you so much!
Sharon says
I would of thought this would of been included in the purchase of the easy press.
Cori George says
There is a smaller guide that comes with the press and you can use their online tool as well. This is just a third, more expanded option :)
Dawn Ballard says
This is a great list. Can you please update to include the infusible ink?
Laurie J Higgins says
I have a 95% rayon, 5% spandex shirt. Do you know if I can put Cricut holographic HTV on that? I can’t find anything about it any where. Thanks for you help.
Amy Motroni says
Hi Laurie,
Yes, you can, but Cori says to definitely not wash it. Sportflex is really the way to go on that material, though!
Hope that helps!Amy, HLMS Reader Support
Nuri says
What the right temperature for transfer paper on light color shirt?
Amy Motroni says
Hi Nuri,
It depends on the shirt material. You can use Cricut’s heat guide for specifics:https://cricut.com/en_us/heatguide
Happy Crafting!
Amy, HLMS Reader Support
TAMMY PEEBLES says
What setting would i use for a graduation cap that is polyester/acetate for glitter iron on and for how long?
Cori George says
Unless your hat is high-quality, I’d probably avoid putting iron on on it—I’d be too afraid it would melt! Instead, I’d do iron on vinyl on a square of black cardstock, and then cut a tiny X in the middle and fit it over the button on the top, and then glue to the hat itself. I think there’s a less likely chance it would get messed up that way. Hope that helps!
Constance says
Very nice pattern and superb subject material, very little else
we need :D.
brenda says
I have the same question as Jennifer. What about Siser Therma Flex?
Liz, HLMS Reader Support says
Because the Easy Press was made specifically for Cricut Iron-On materials, there isn’t a chart provided for competitor product, but I’m sure it’s probably pretty close to Cricut? There will also be differences with the carrier sheet and if it is a hot or cold peel. Your best bet is to contact Siser and ask what they suggest or do a test on a small piece of material first.
Liz, HLMS Reader Support