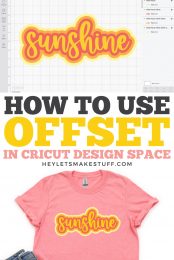
After many years of asking, Cricut users can now offset their designs in Cricut Design Space! An offset is basically a solid outline/shadow for text or images. The new Cricut offset tool makes it easy!
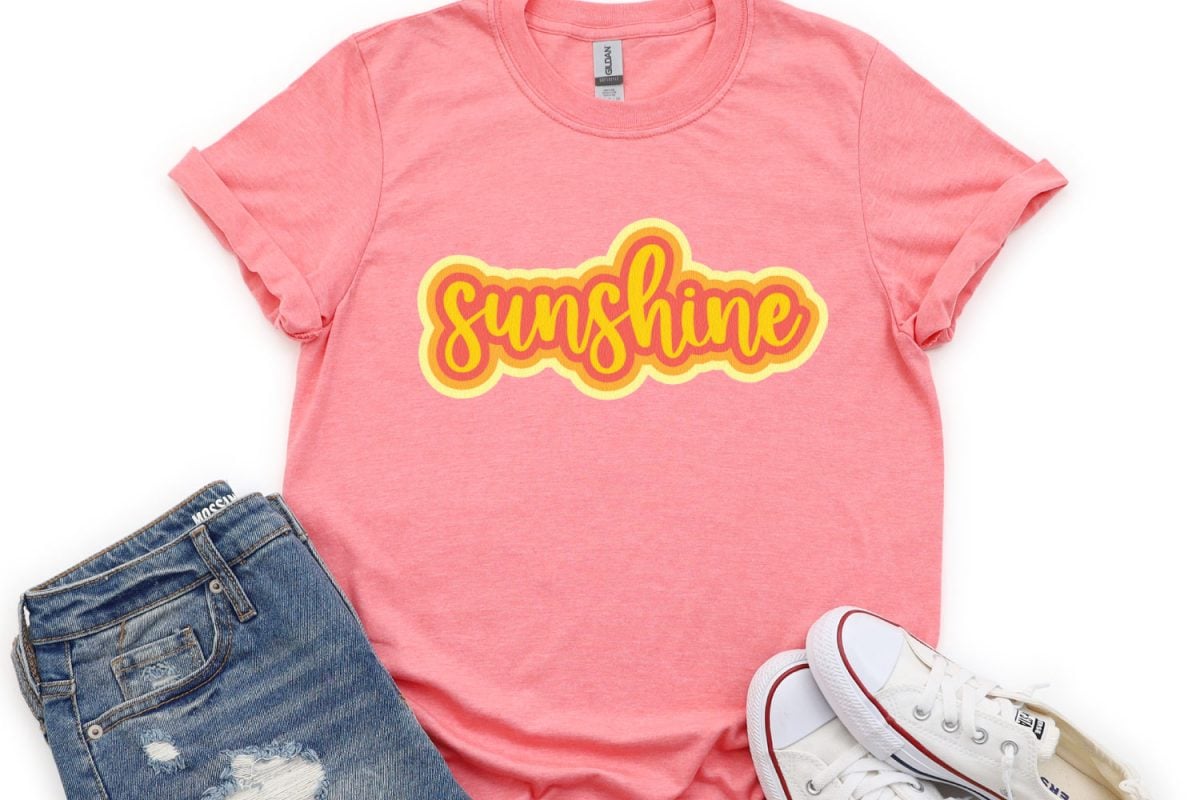
I’ve been a Cricut user since 2014, and ever since I first got my machine I’ve seen requests for an offset feature in Cricut Design Space. Seven years later (!!), Cricut is finally releasing an offset feature! This has been such a popular request that I even wrote how to Create a Shadow/Outline in Cricut Design Space without it.
This new Cricut offset feature is rolling out gradually to Cricut Design Space accounts—keep checking your account to see if you have it!
This tool is currently only available on the desktop app—you can’t use the Cricut offset tool on your iOS or Android app.
Stop pulling your hair out and start creating confidently with your Cricut! Finally understand how to use your Cricut with my Learn Your Cricut eBooks!
What is Offset
Offset is basically a background mathematical equation that allows you to create an outline (or inset) around an image or text. Basically the line around the text is “offset,” thus the name. Note that the offset is solid behind the text—it’s different than something like a stroke or just an outline.
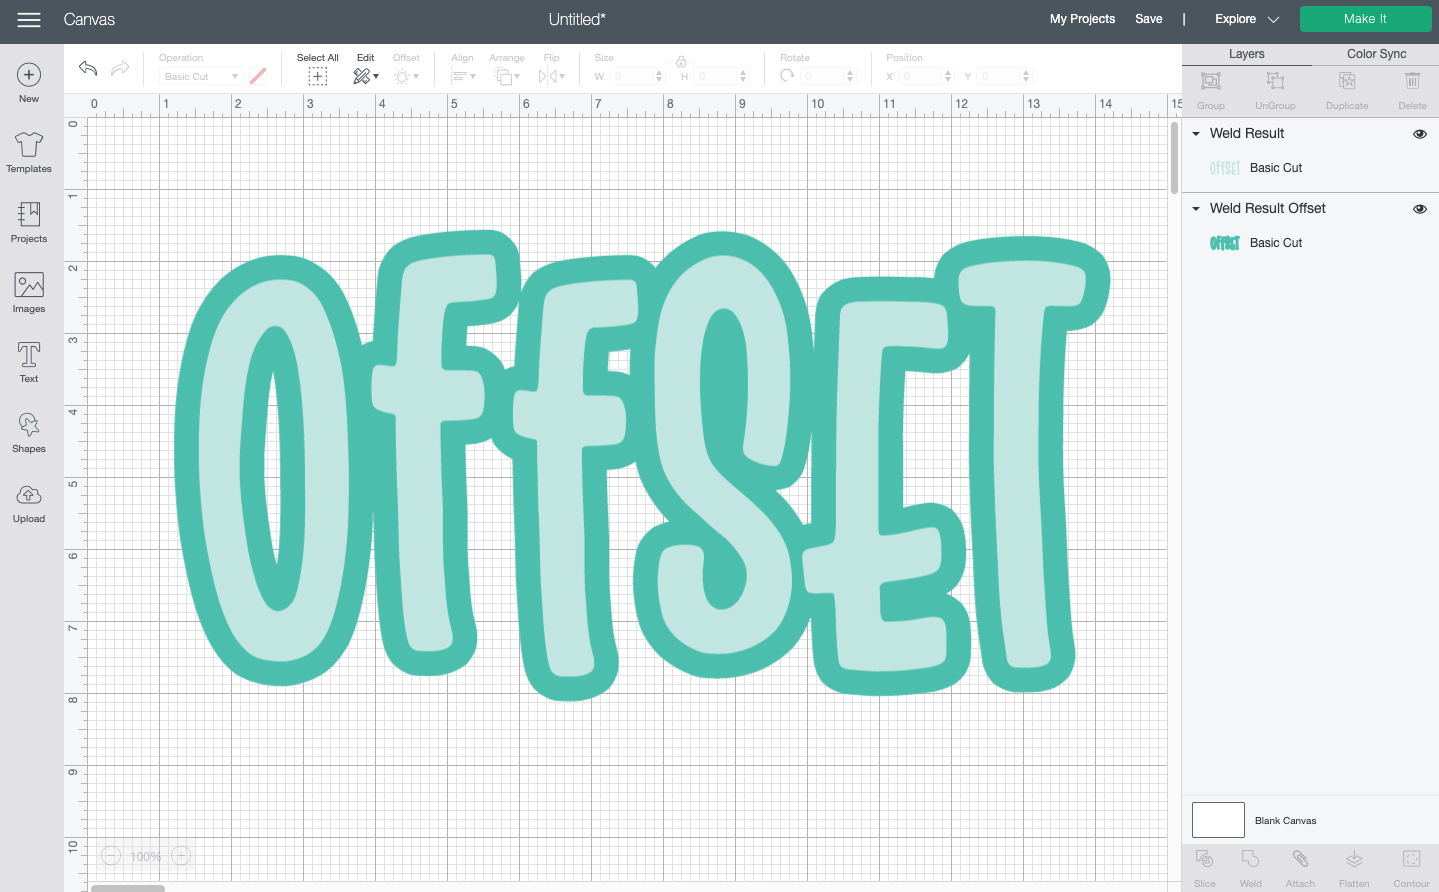
Some people call this an outline or a shadow, though “offset” is becoming the most-used term these days.
It’s a pretty standard feature in other design programs (for example, here’s my offset in Adobe Illustrator tutorial), so I’m glad that Cricut finally got it figured out!
Cricut Offset Tool
Let’s start by looking at the actual options when you open the tool. The tool itself, once you have it in your version of Design Space, is in the top toolbar between Edit and Align.

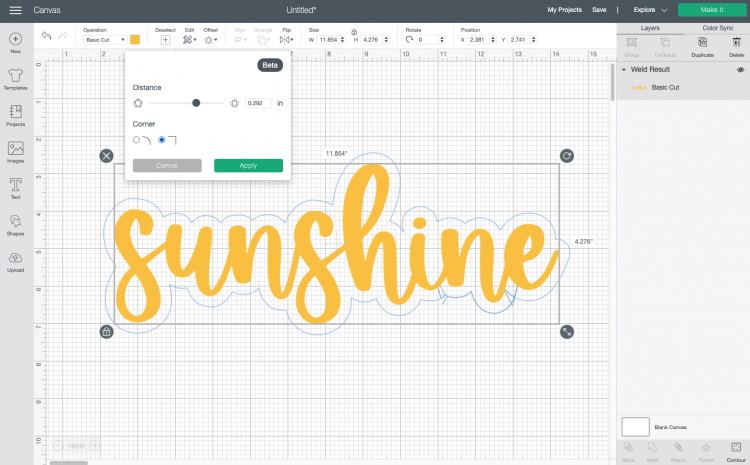
If you have something (text or images) selected on your Canvas, you’ll be able to click offset and see this dropdown toolset:
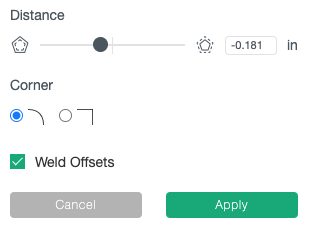
These are the tools you’ll see:
- Distance: this is the spacing between the edges of your image and the edge of the offset. The farther right the slider goes, the larger your offset. The farther left the slider goes, the larger your inset. You can also type in numerical values if you prefer. If the offset looks glitchy, I found that just nudging the slider one way or the other helped “fix” the glitch.
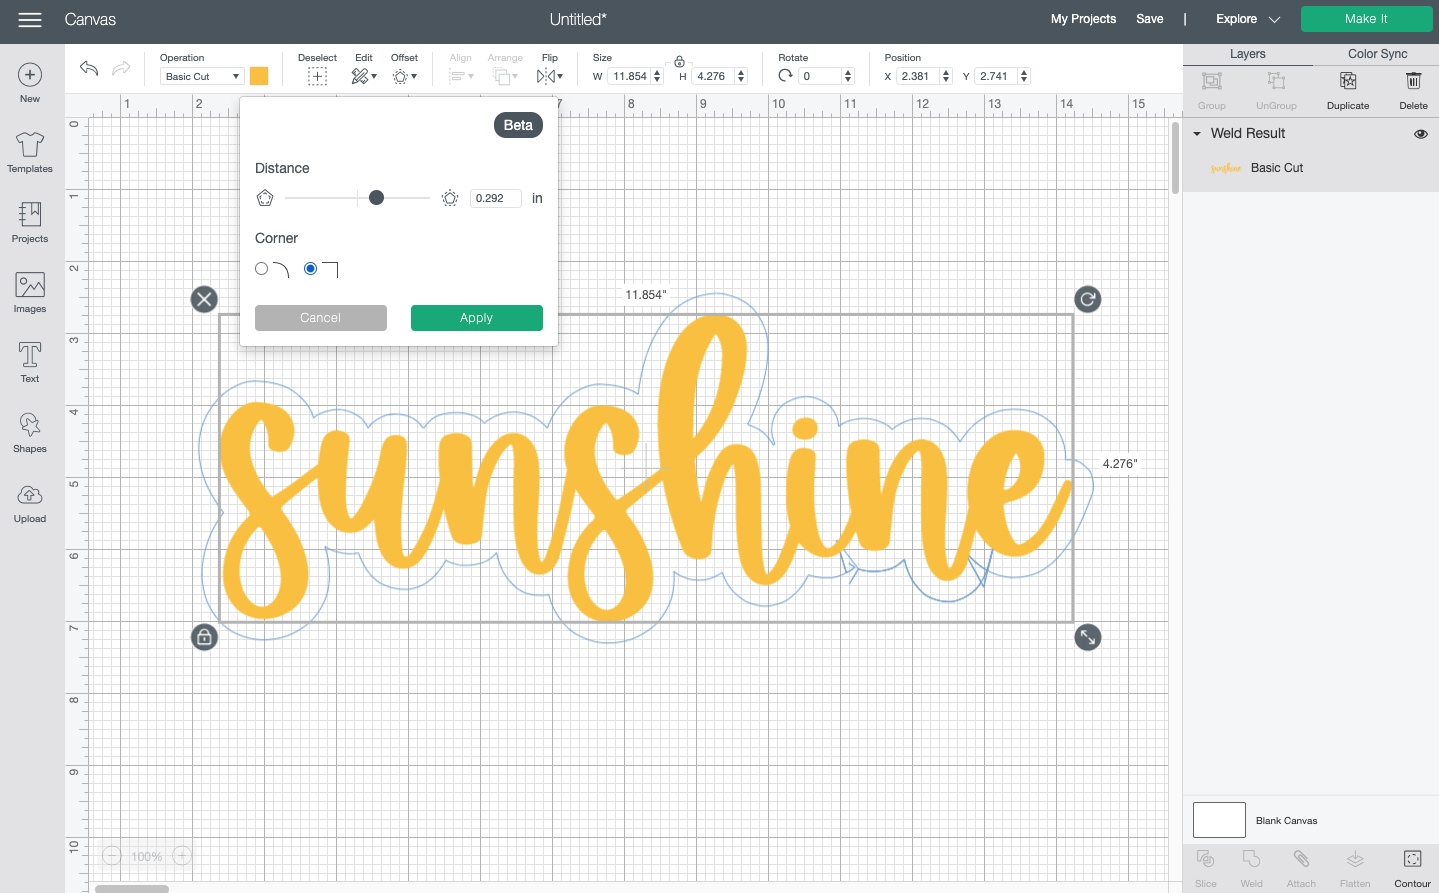
- Corner: This lets you select whether you’d like a rounded corner on your offset or a square corner.
- Weld Offsets: This option only shows if you have more than one layer or piece on your canvas. If you have “Weld offsets” ticked, this will basically treat all of the pieces/layers of your image as a single piece and create an offset around all of it. If you do NOT have it ticked, it will offset each individual piece/layer. Generally I think you’ll want this box ticked unless you want a ton of layers.
Creating a Rounded Offset
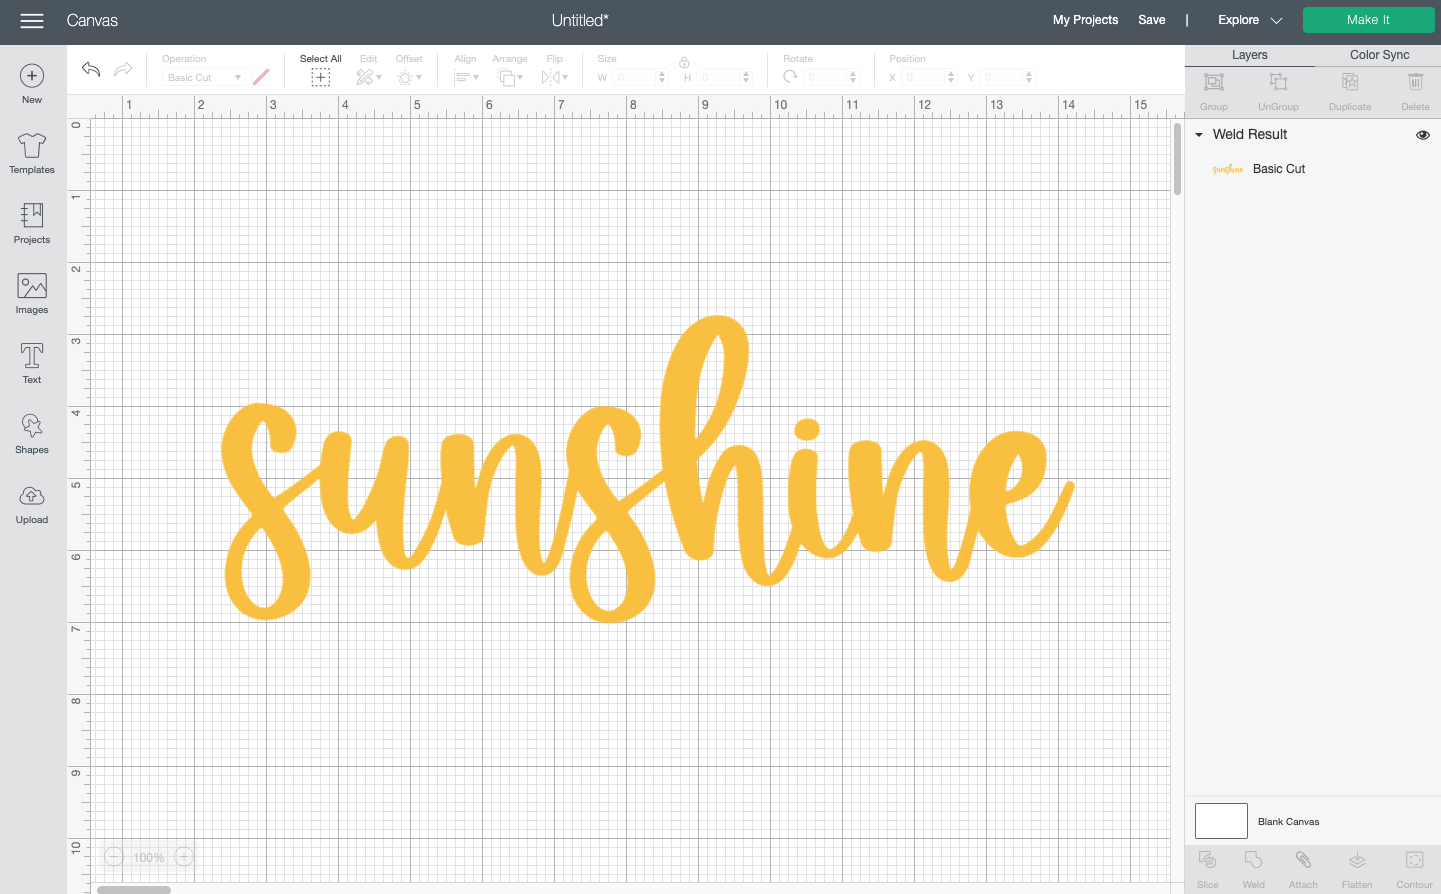
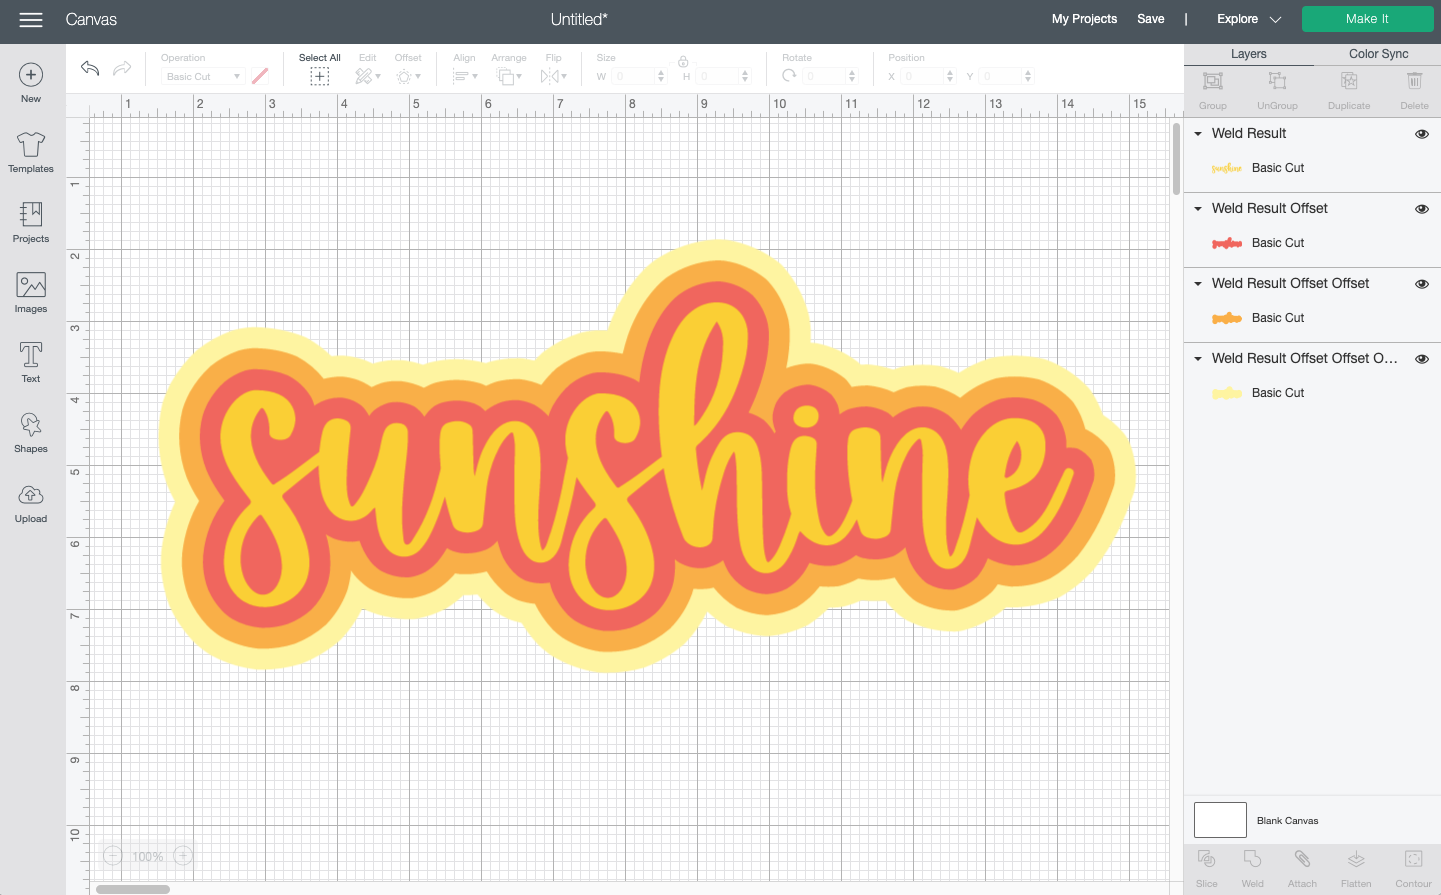
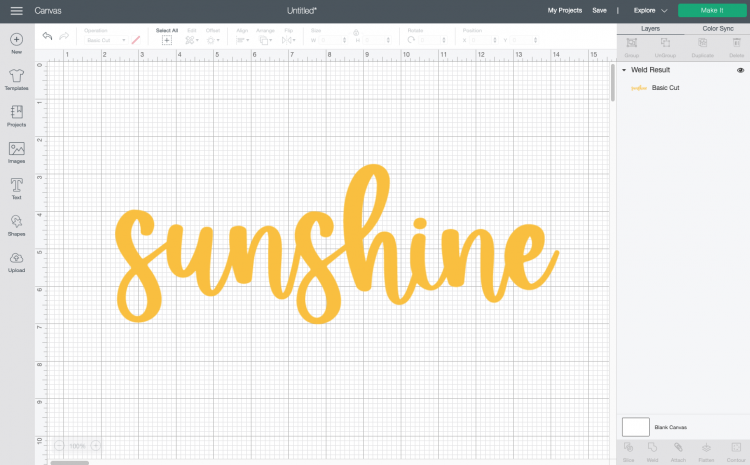
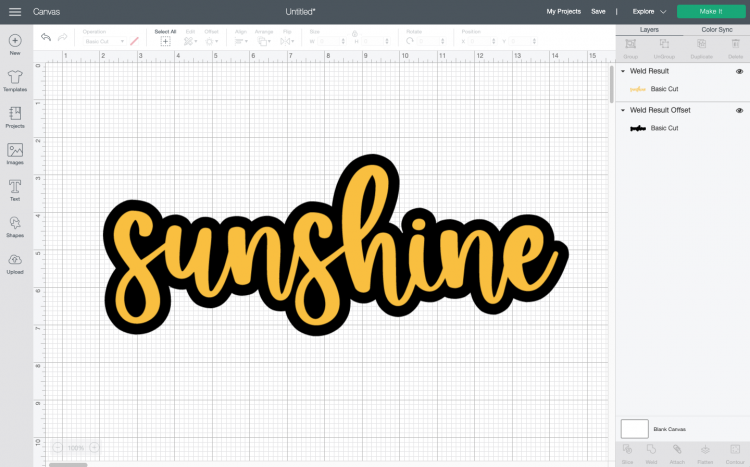
I created this cute word “sunshine” using the font Festive and some tricks for using script fonts in Design Space. I welded the word (I find this helps create a smoother offset) so it would cut as a single piece, and then clicked the offset tool.
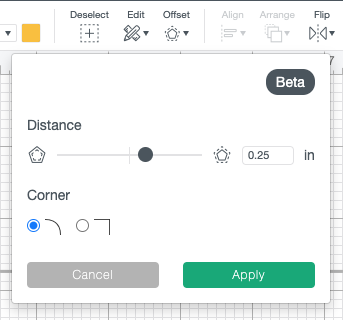
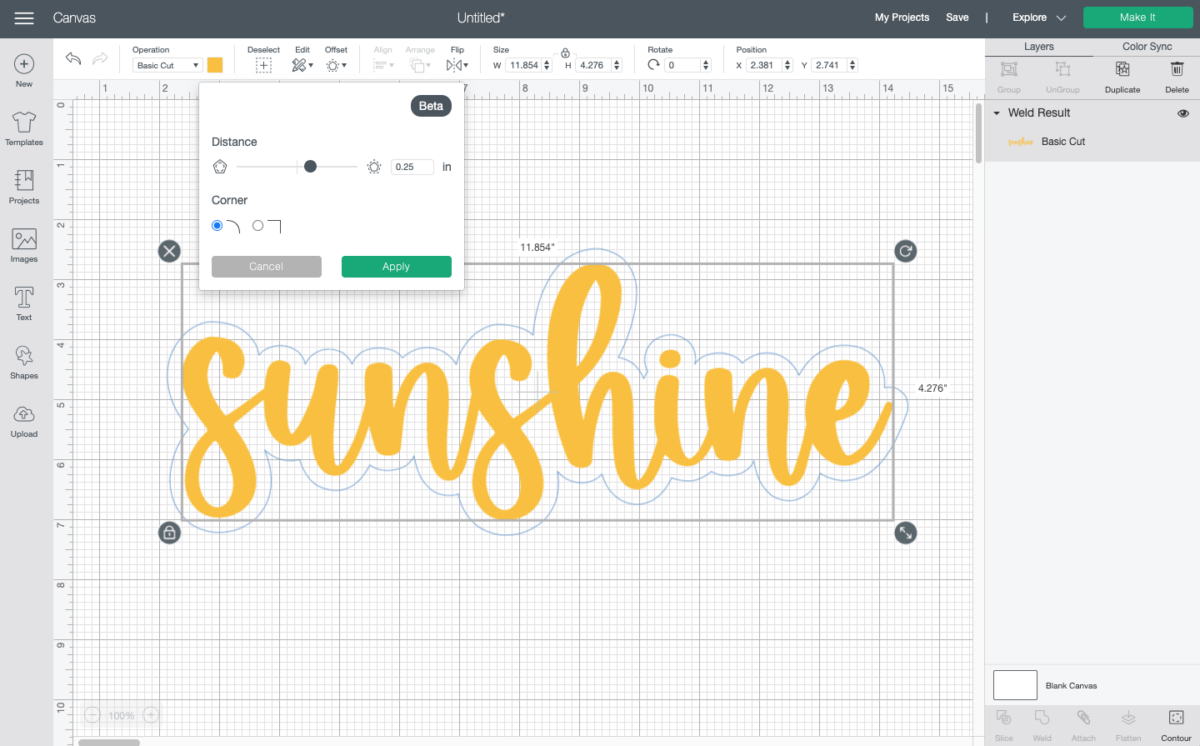
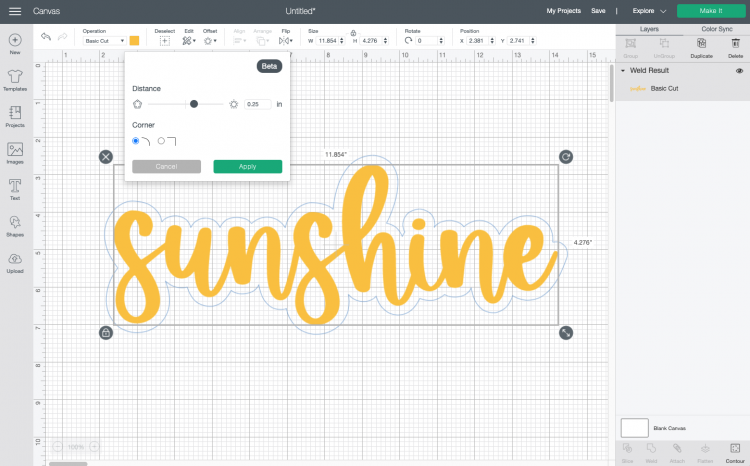
From here, I selected a .25: offset with rounded corners. Note that I don’t see that “Weld Offsets” option because I am working with a file that is a single cut piece. You can see the offset in real time as you change the settings:
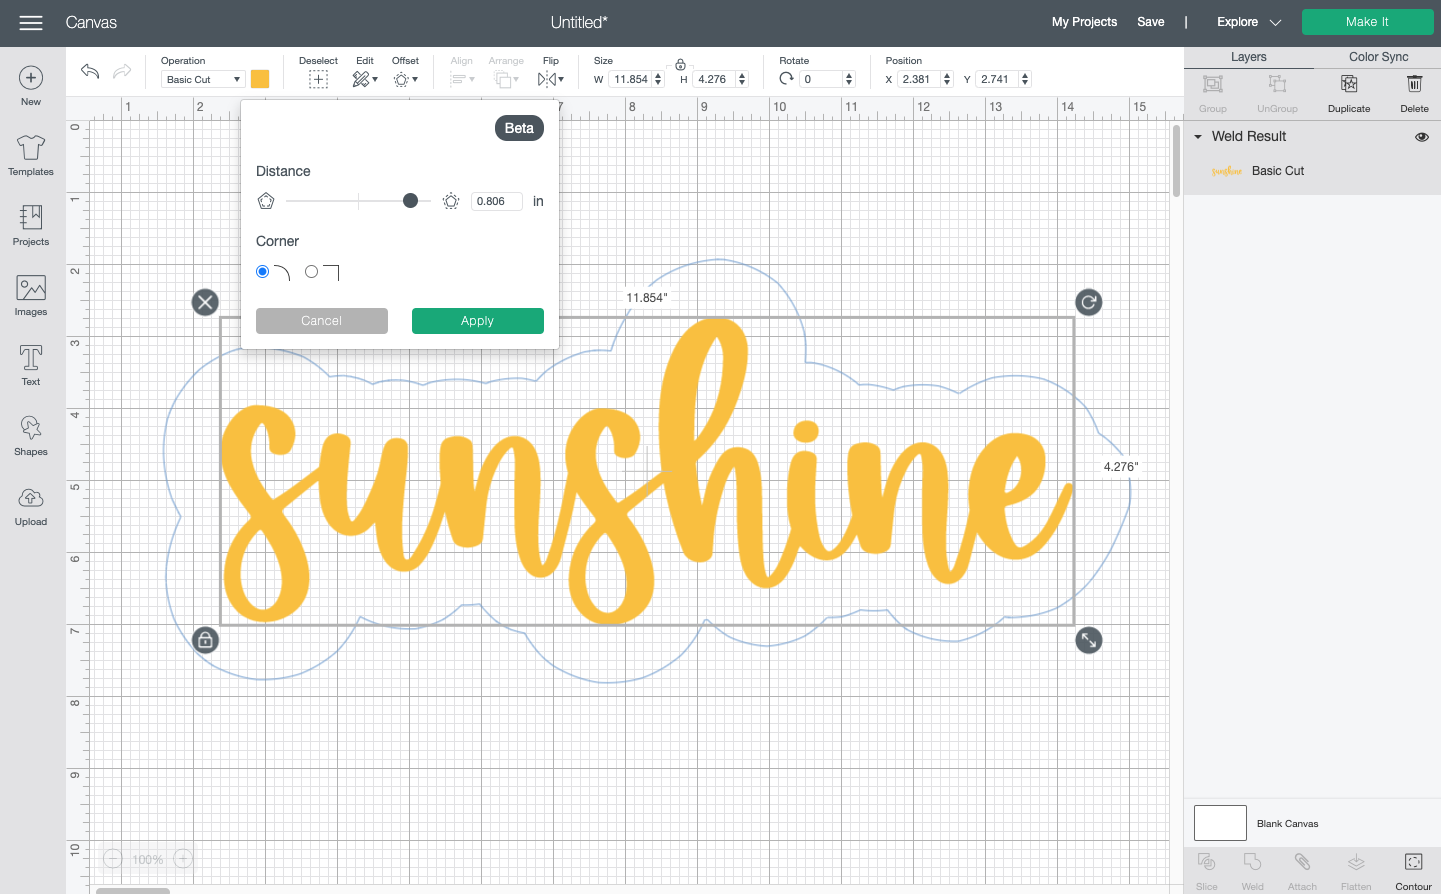
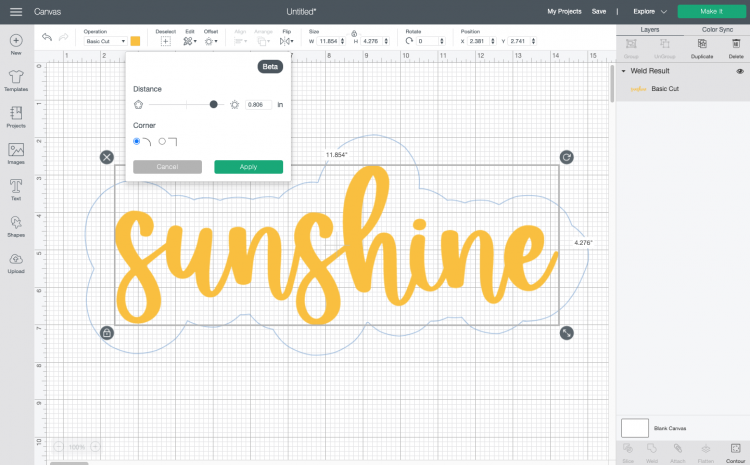
Now play around with the slider to create a bigger offset:
Once you click Apply, it will apply the offset as a new, black layer on your project.
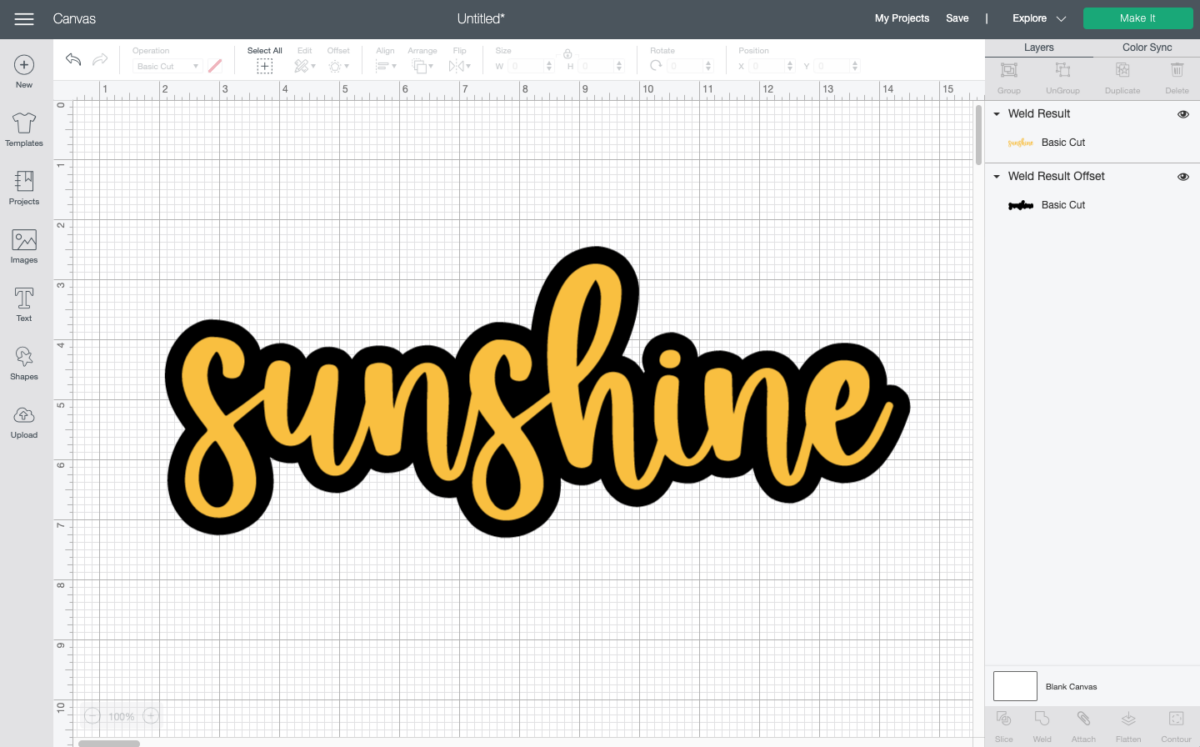
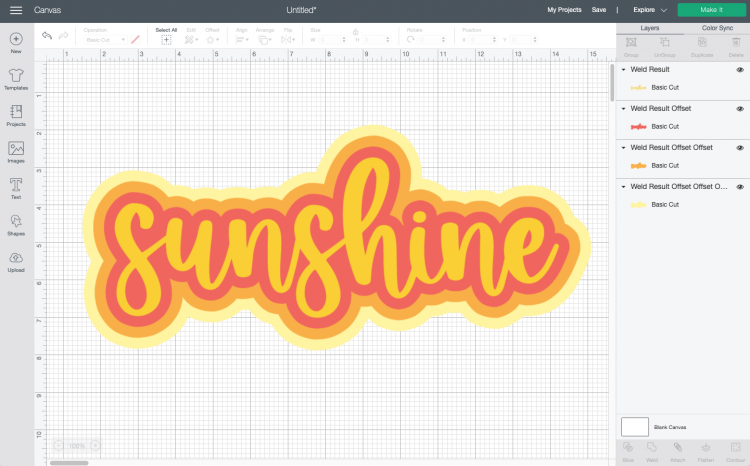
You can then change the color of that layer to whatever you’d like. You can also offset offsets to create a fun effect!
Creating a Square Offset
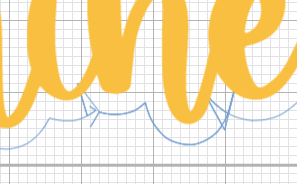
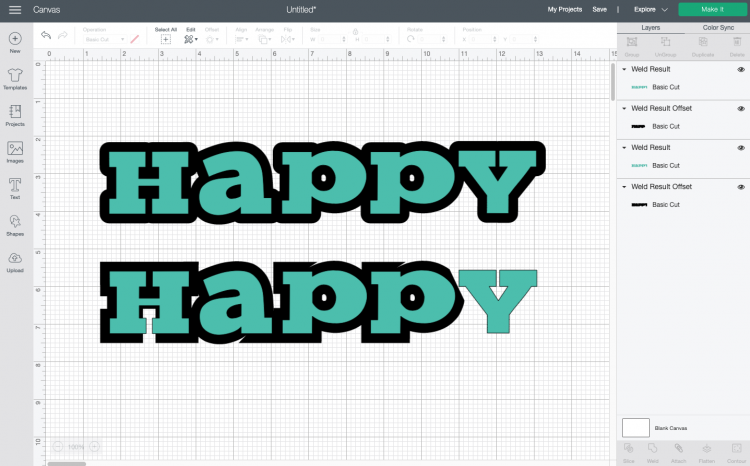
You’ll also see that there’s the tick box to change it to a square or block offset instead of the rounded corners above. I found this to be a bit glitchy, depending on the font I worked with. I didn’t expect it to work on the rounded Festive font, and I was right—got a little ugly down in the bottom right and everything else stayed rounded (since it had no mathematical square edges to offset):
I also tried using the square outline on a few different block fonts, and had mixed results. The first you can see how it did fine for the rounded offset, but then sort of lost its mind on the square:
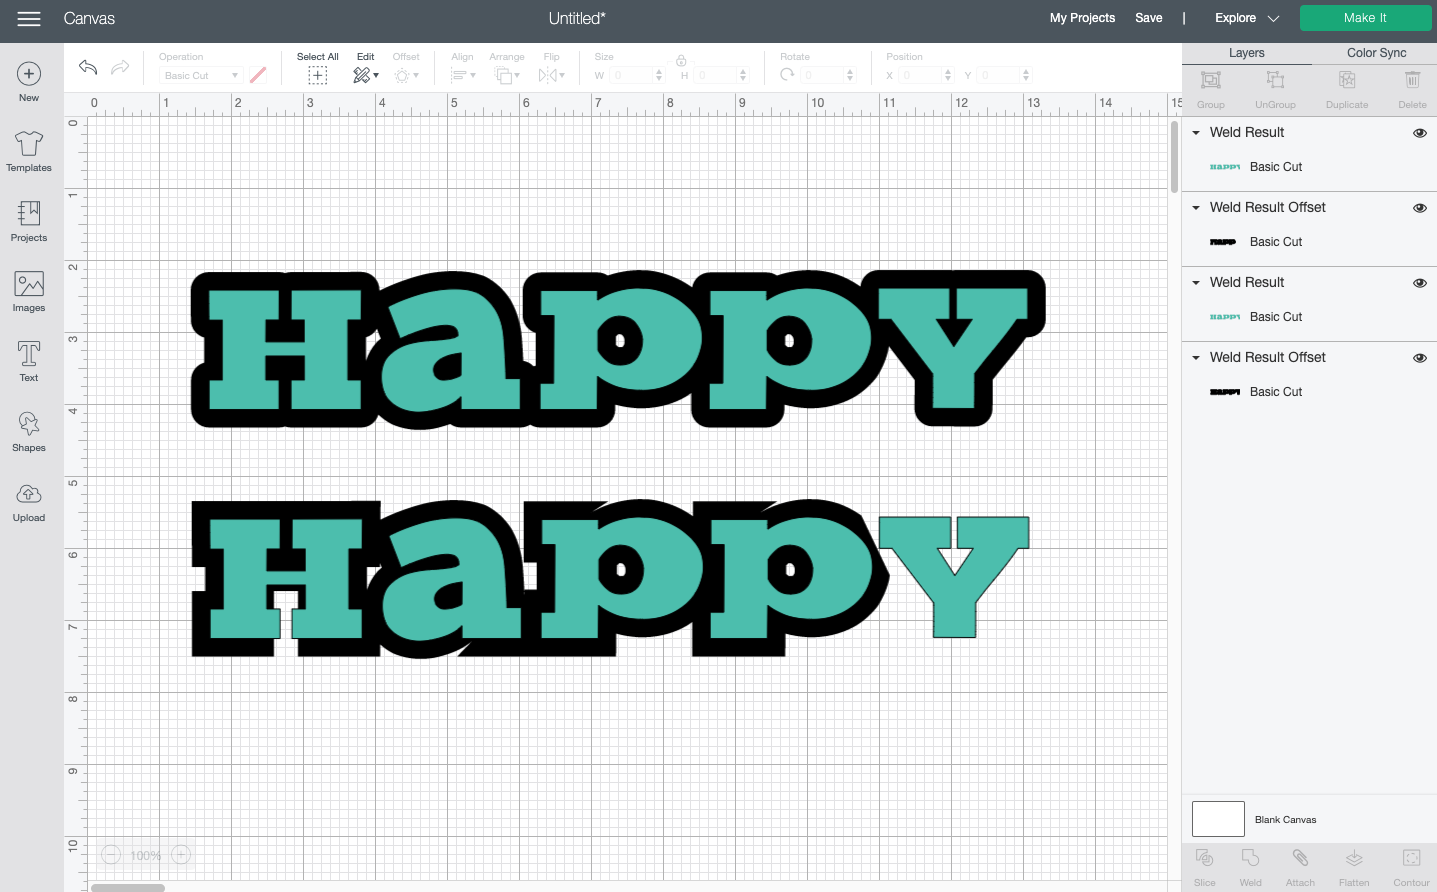
Again, you can slide the slider a bit and a lot of these glitches may resolve themselves.
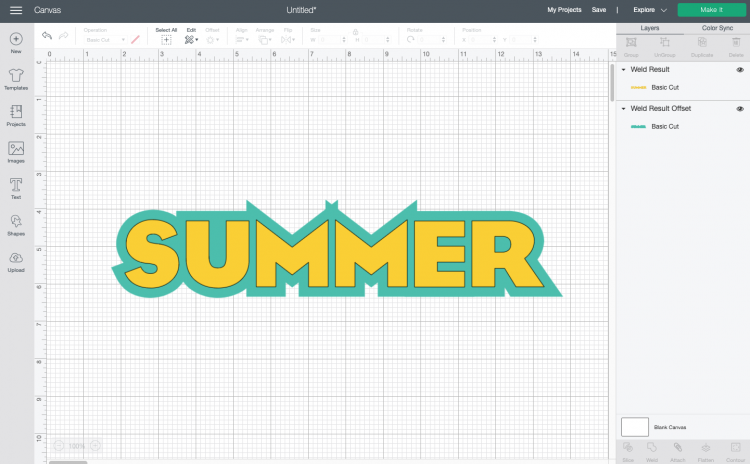
And here it did a lot better, but I’m just not a fan of those spikes on the top of the “m”s.
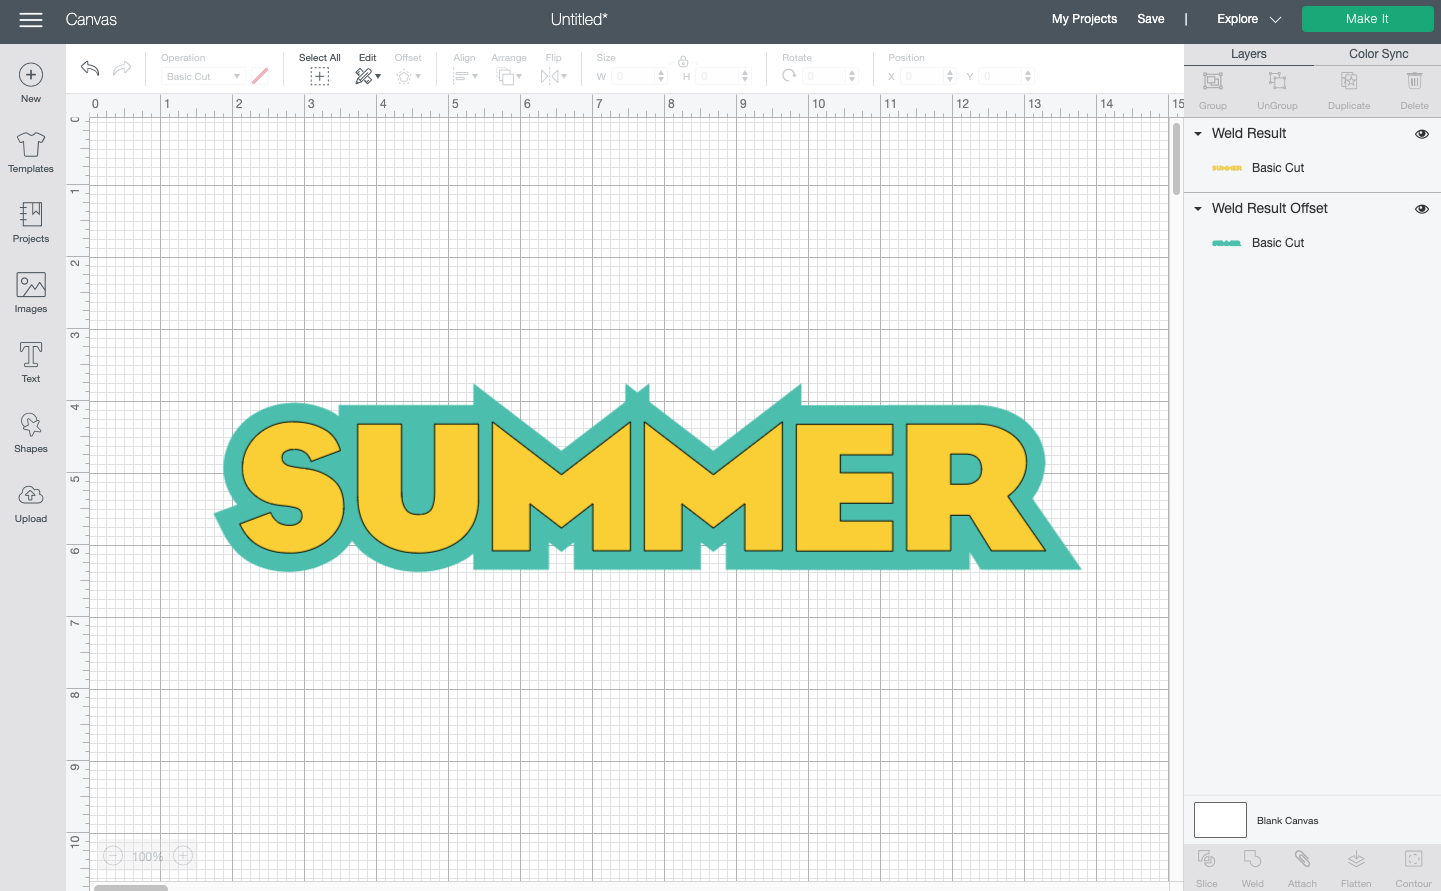
Note that Adobe Illustrator has a third option to “miter” the corners (vs. just round and square), which cuts off those strange spikes to make a cleaner square offset.
Overall, I think I just prefer the rounded offset and I ran into fewer glitches with it. Remember that this is a brand new feature, so hopefully Cricut will refine some of this as time goes on.
Creating an Inset
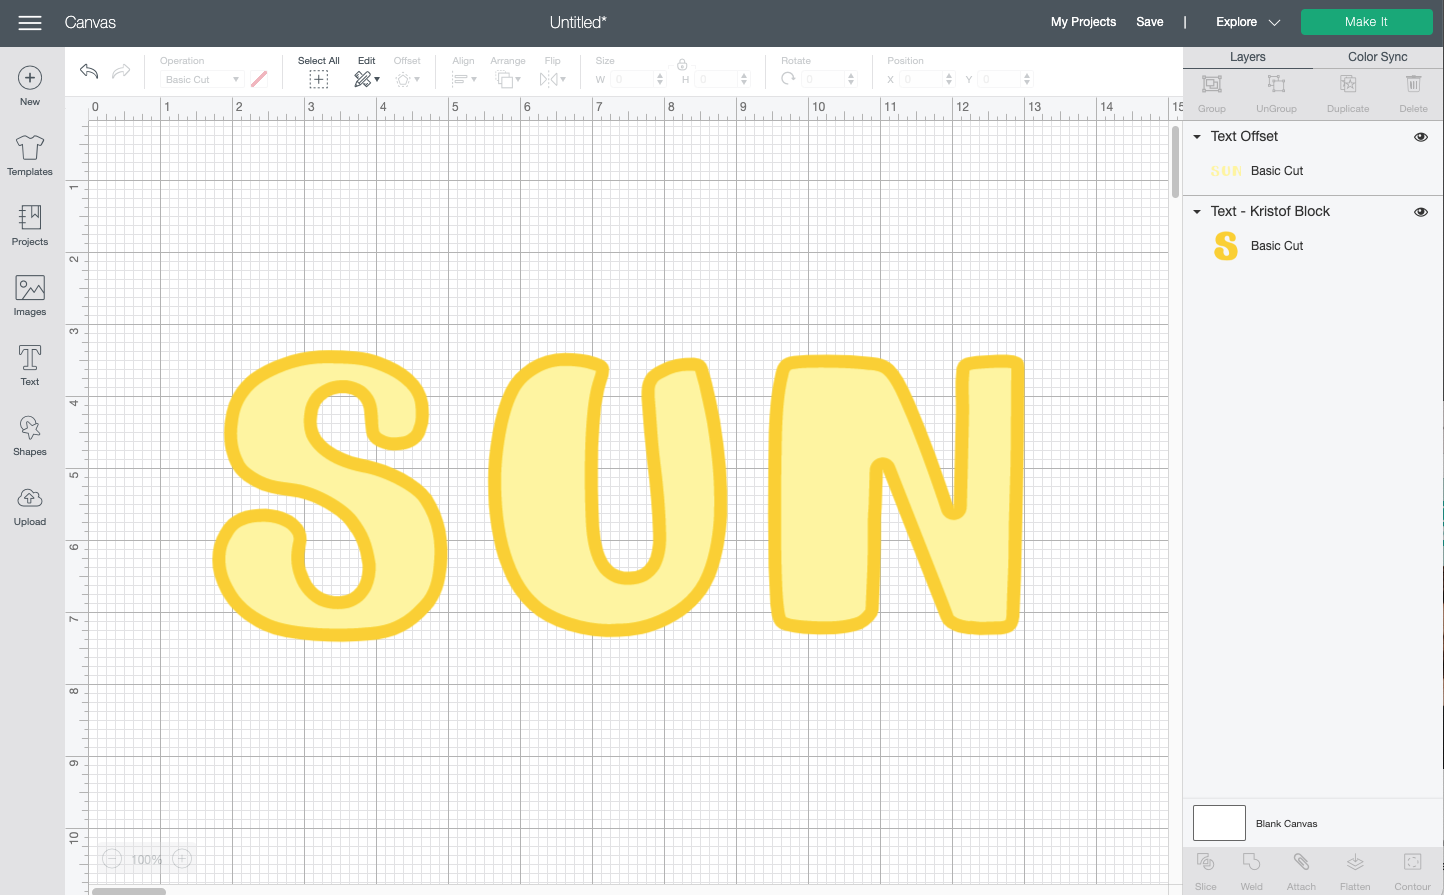
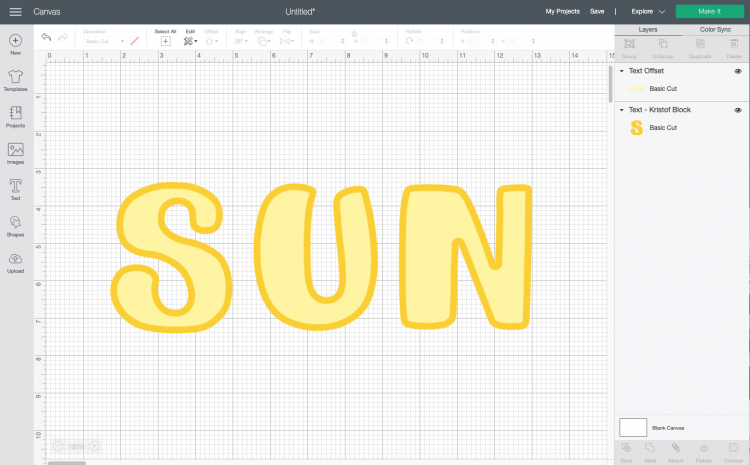
In addition to creating an offset, you can slide that slider to the left and create an inset (or a “negative offset”). This works best with chunkier fonts and images, like the font Kristof. Here’s the word “sun” with a negative offset. The darker yellow is the font itself and the lighter yellow is the inset:
Creating an Offset for Images
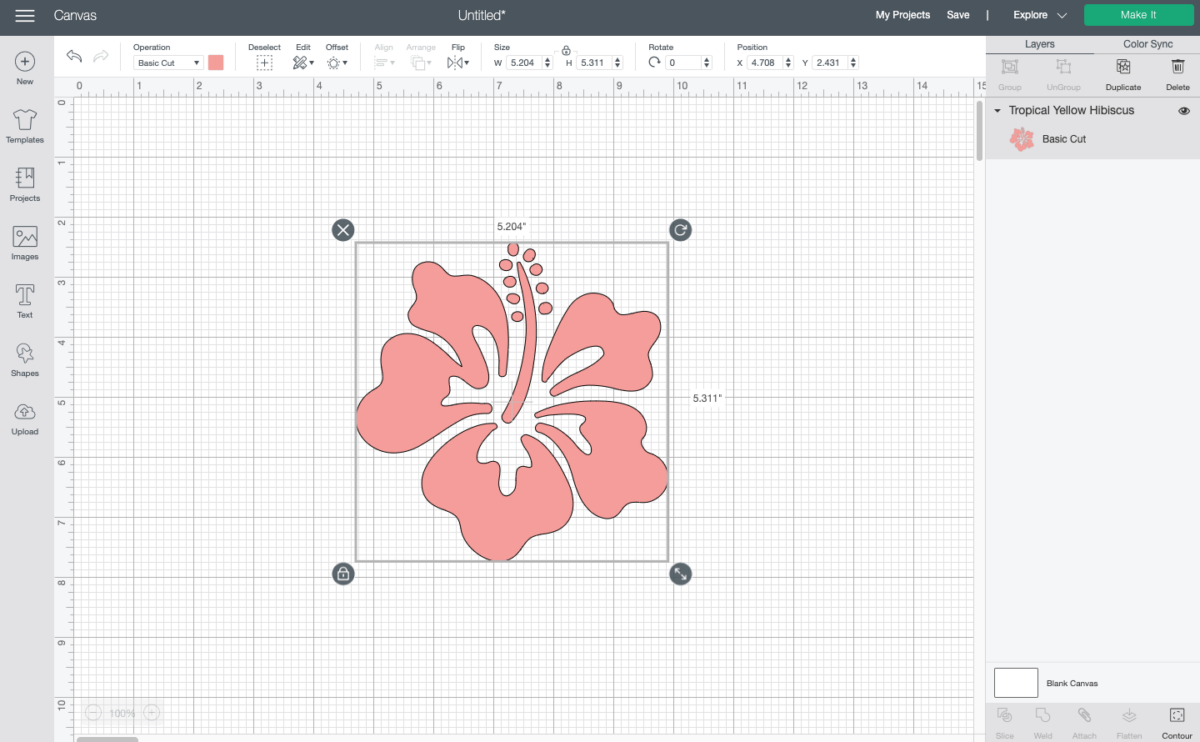
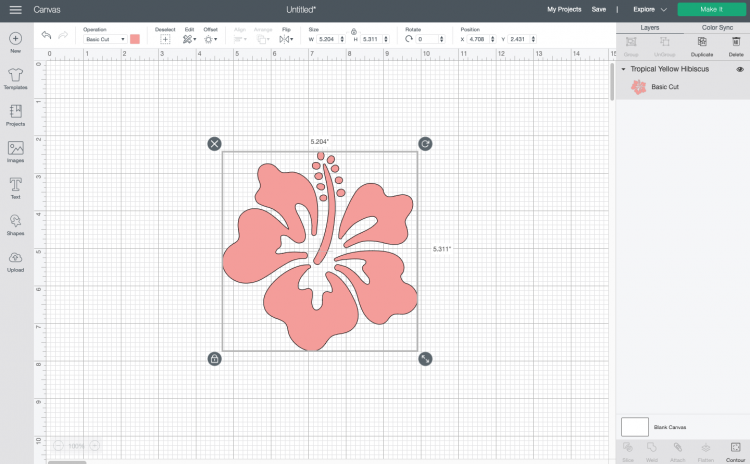
So we’ve seen how this Cricut offset works on a bunch of text, now we’ll look at a few images. Let’s start with a simple hibiscus flower from Cricut Design Space.
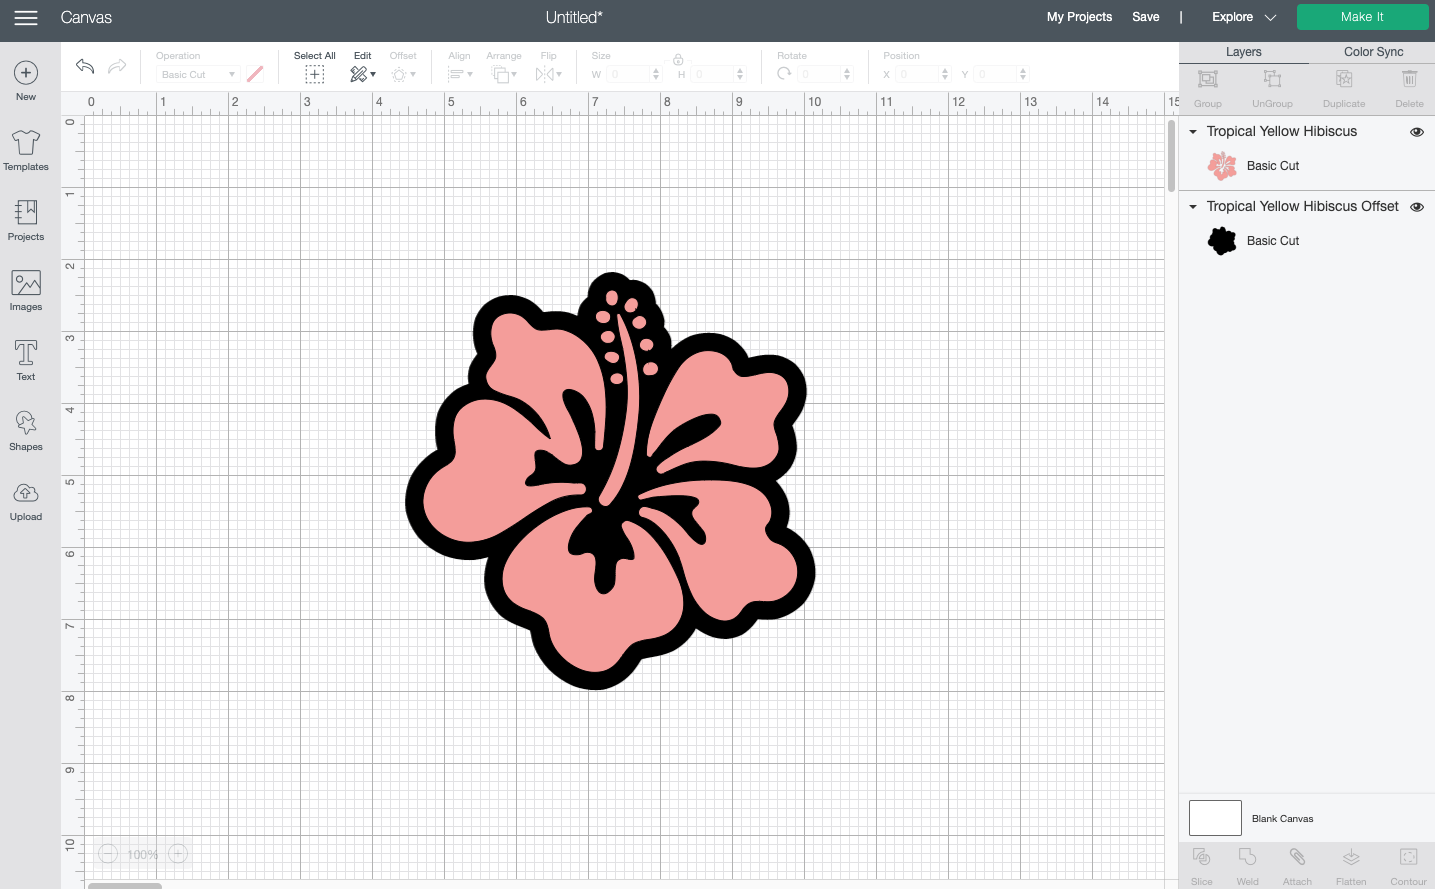
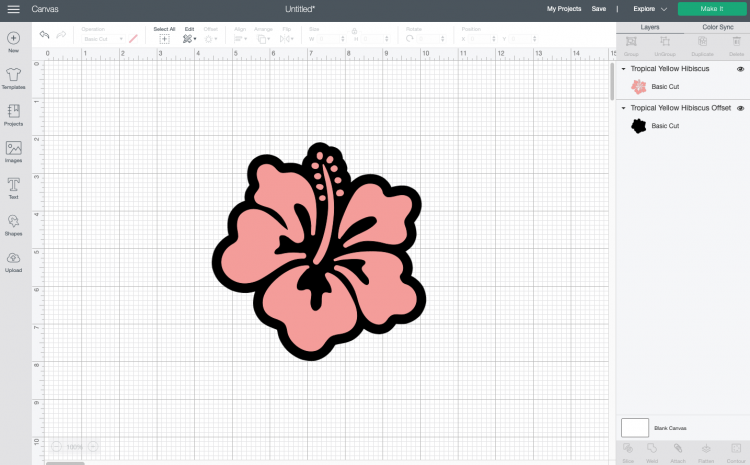
Worked like a charm:
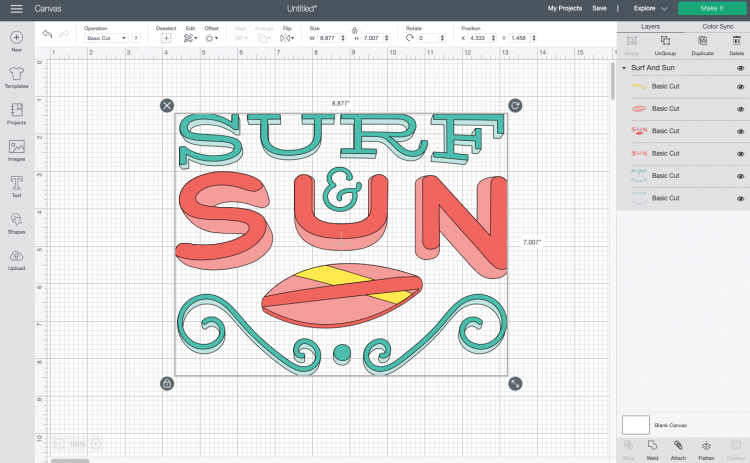
Now let’s try a more complex image from the Cricut Image Library:
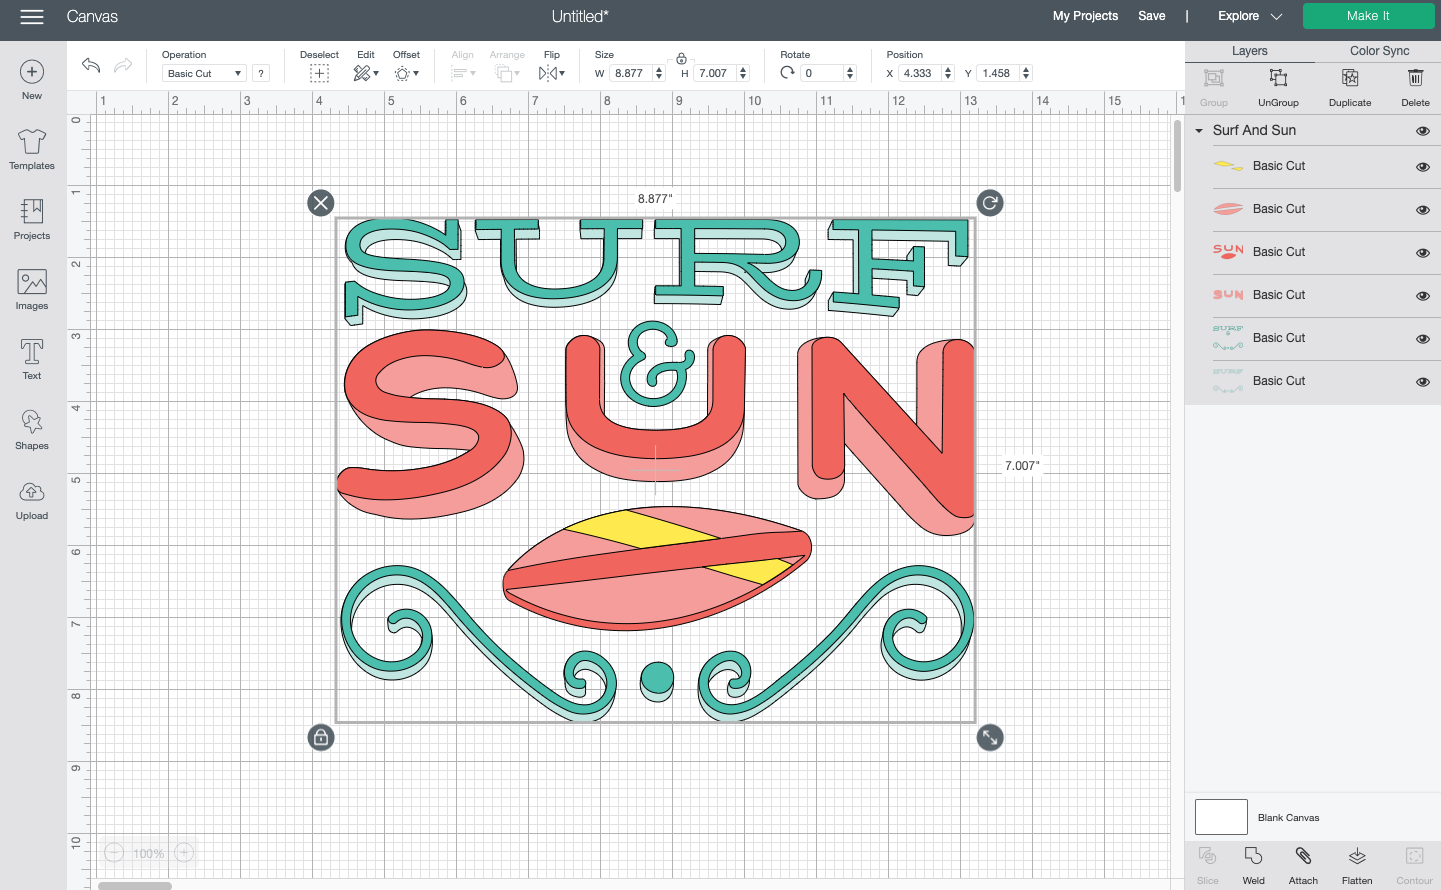
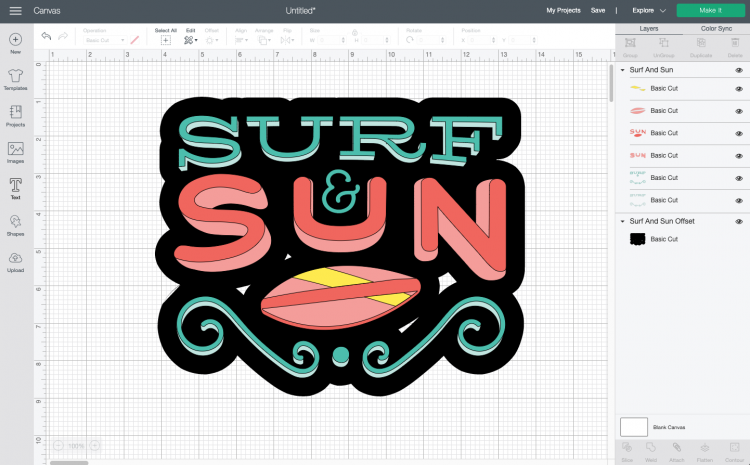
If we create an offset for this, you’ll notice that we need to make the offset quite large not to have “holes” in the offset. But I don’t love how the huge offset looks, so here’s a way to fix it. Create the offset that you’d like. You’ll see mine has four holes in it. Not so cute on this image.
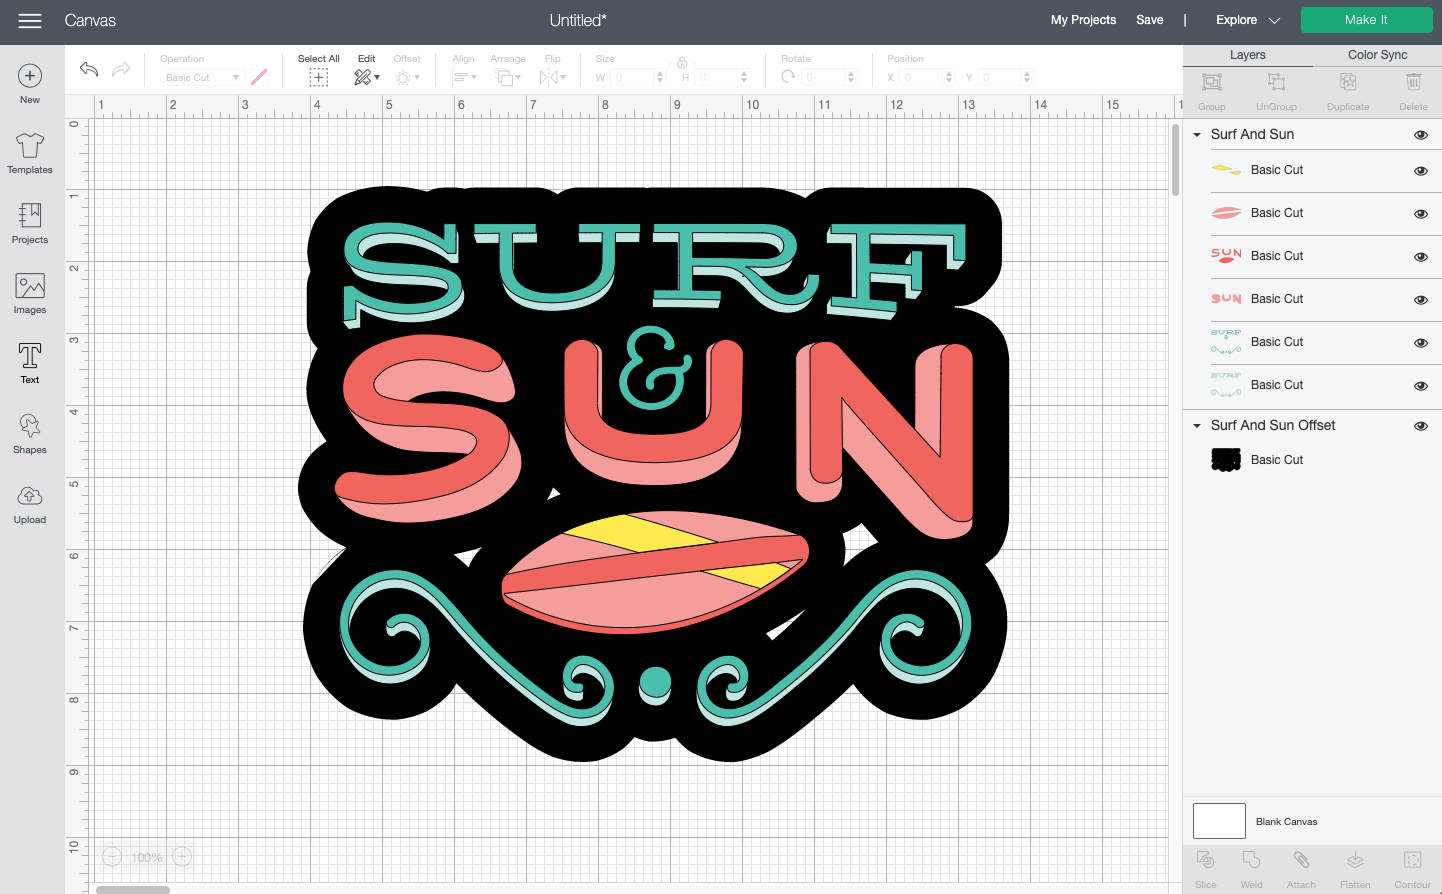
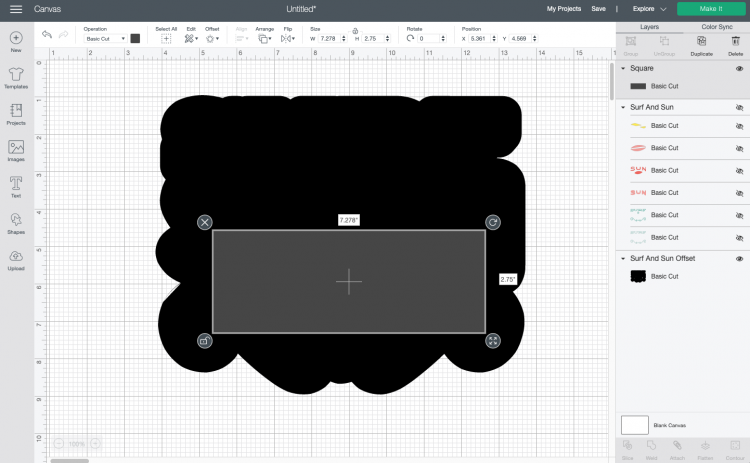
In the Layers Panel on the right, hide the Surf & Sun image so you just have the offset layer showing. Then use a shape like a square to cover the holes.
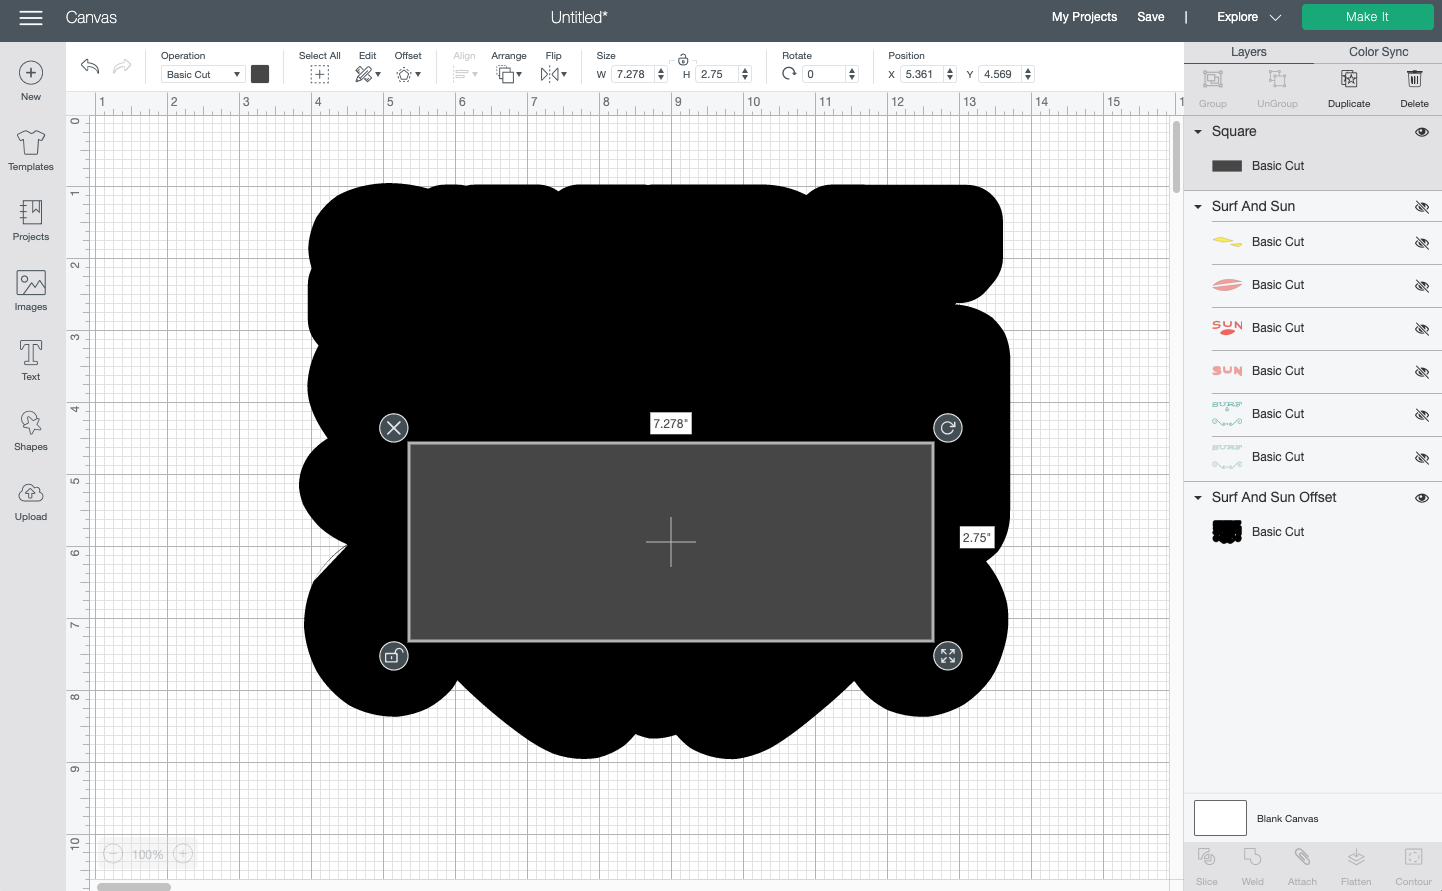
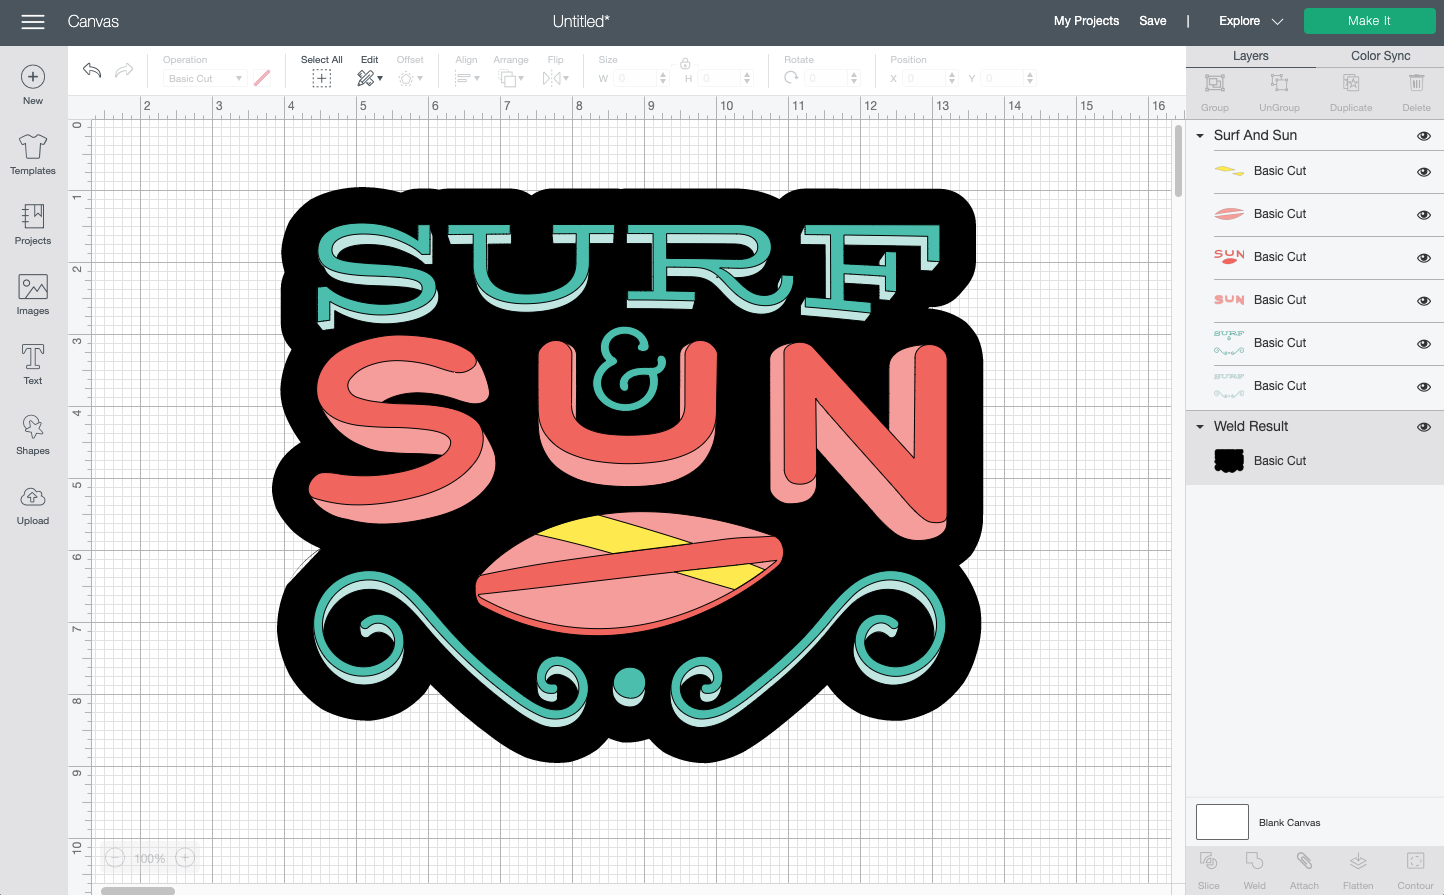
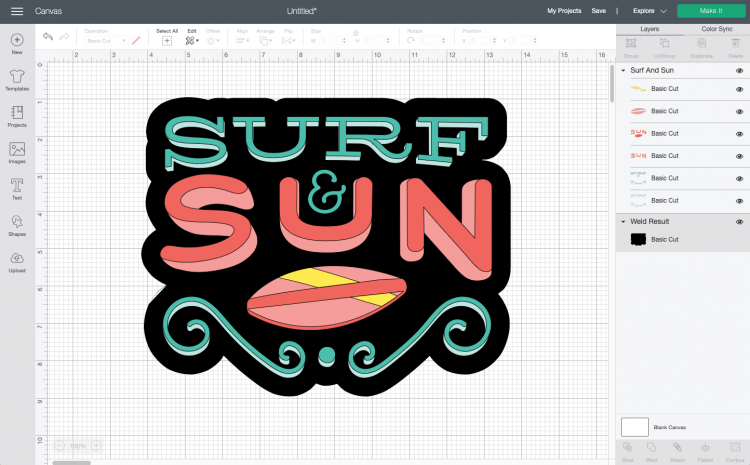
Then weld the square and the offset to make it a single piece. Unhide the rest of the image and move the offset back to the back (it will pop to the top when you weld it) and you can see that this is a much better offset image:
Creating Stickers with Cricut Offset
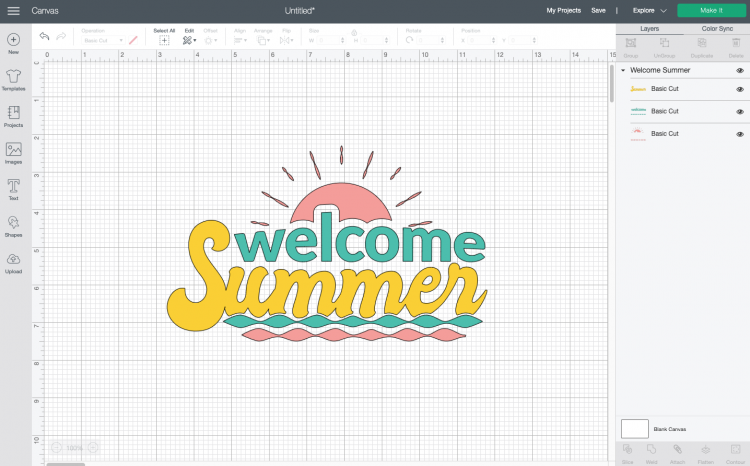
Finally, I’ll show you a quick way to create stickers using the Cricut offset tool. Start by uploading or choosing an image from the Cricut Image Library. I chose this Welcome Summer image (clearly I am dreaming of summer this dreary March!).
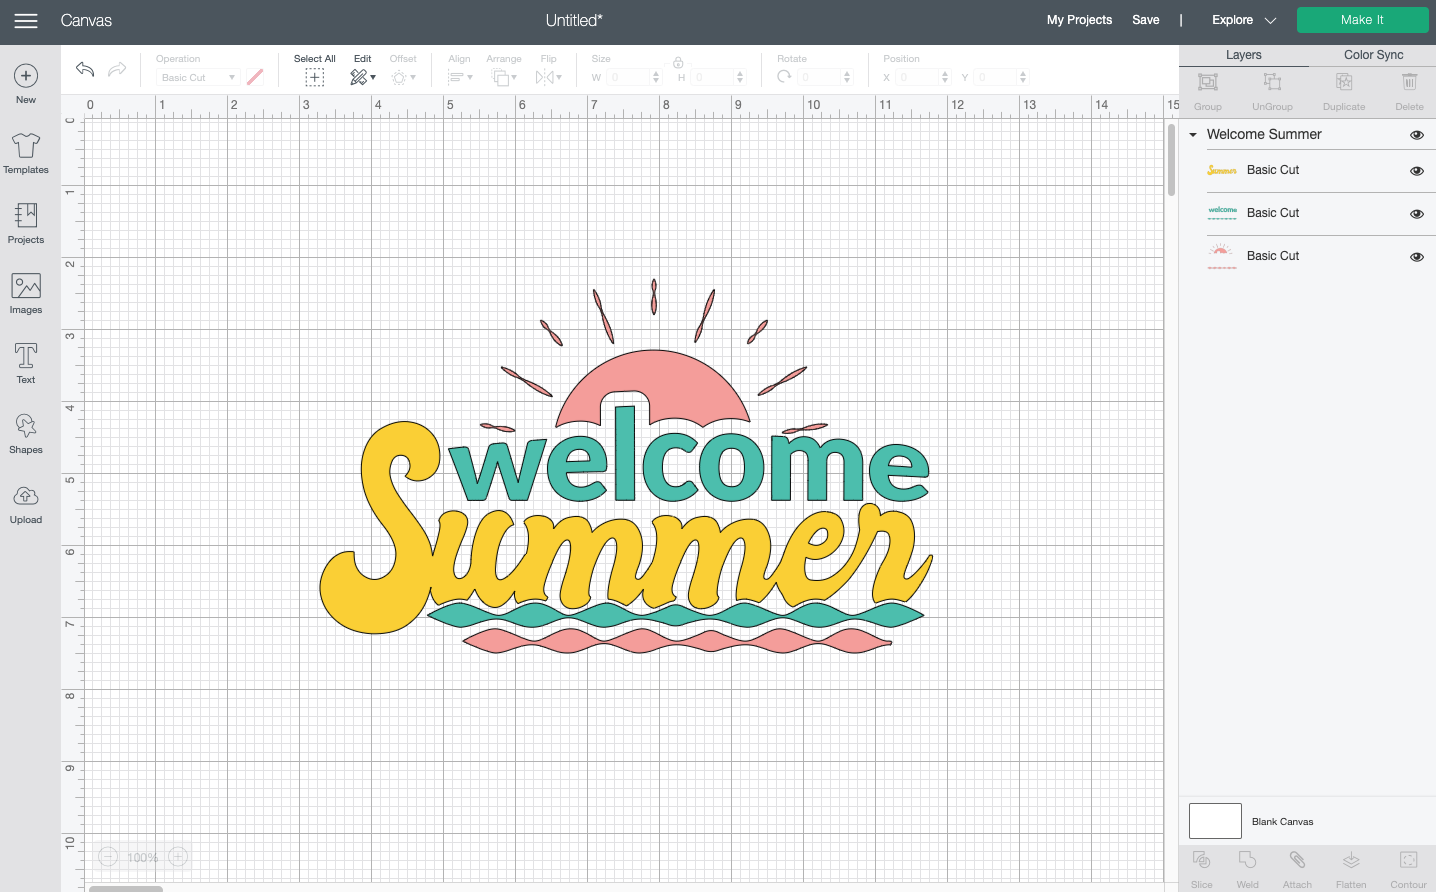
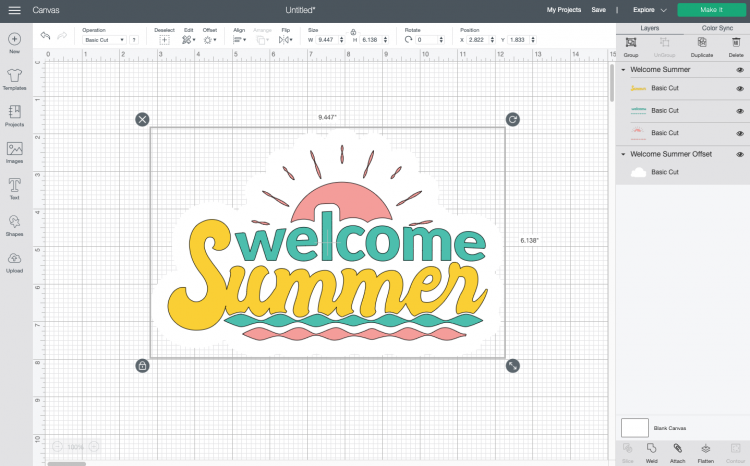
Create your offset and make it white. Fill in any holes using the method in the previous section, if needed.
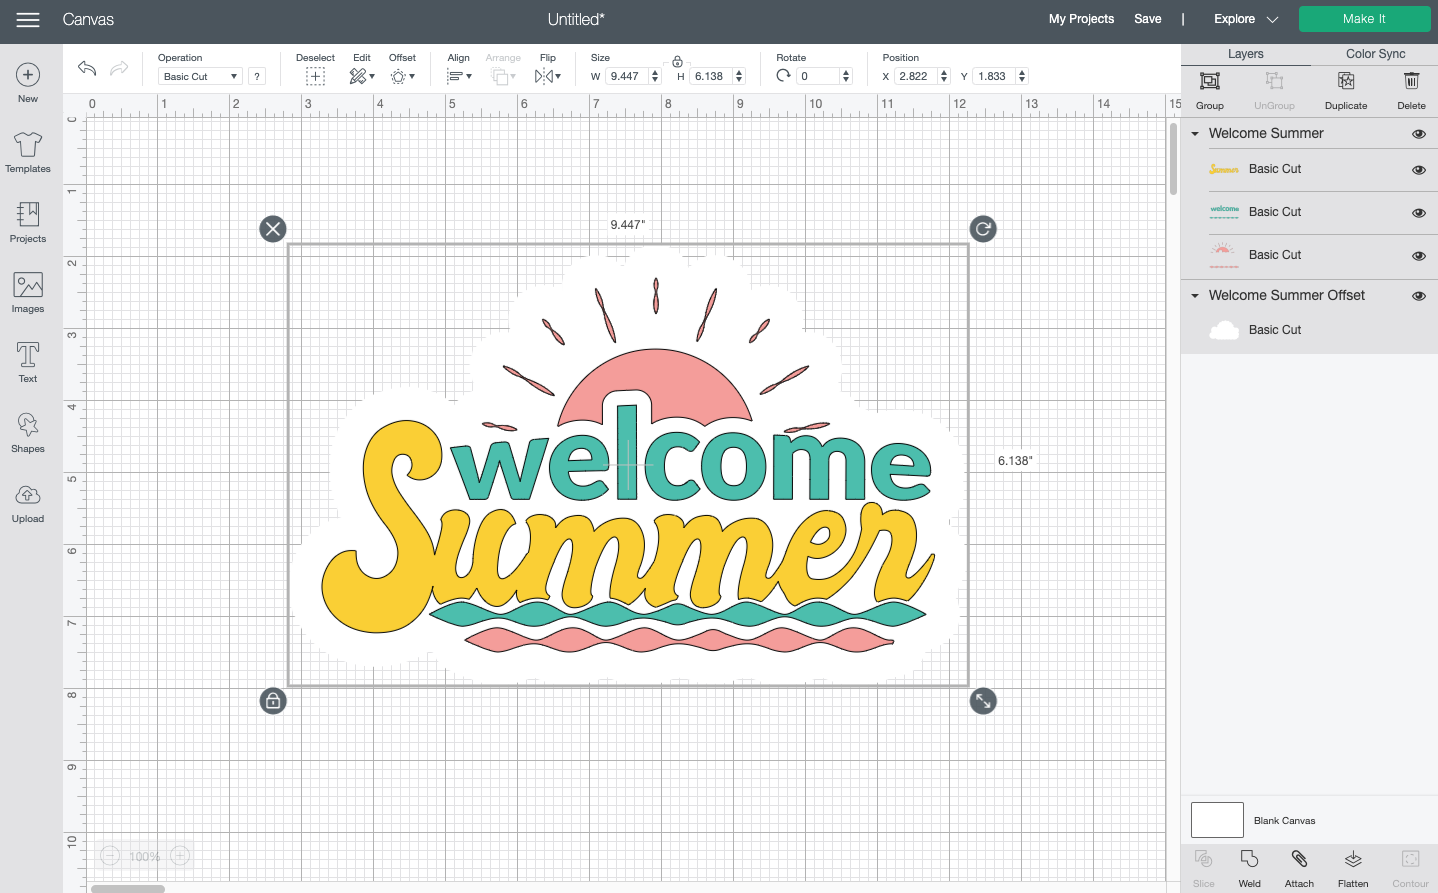
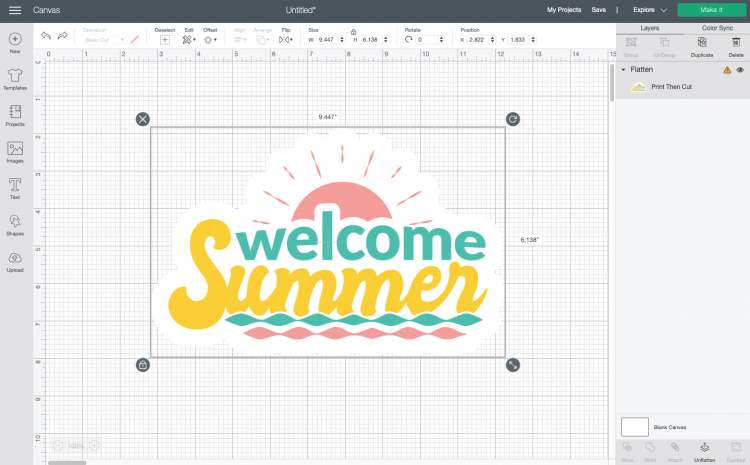
Then choose both the image and the offset and click Flatten in the lower right. This will turn your image into a print then cut image, which you can see in the Layers Panel.

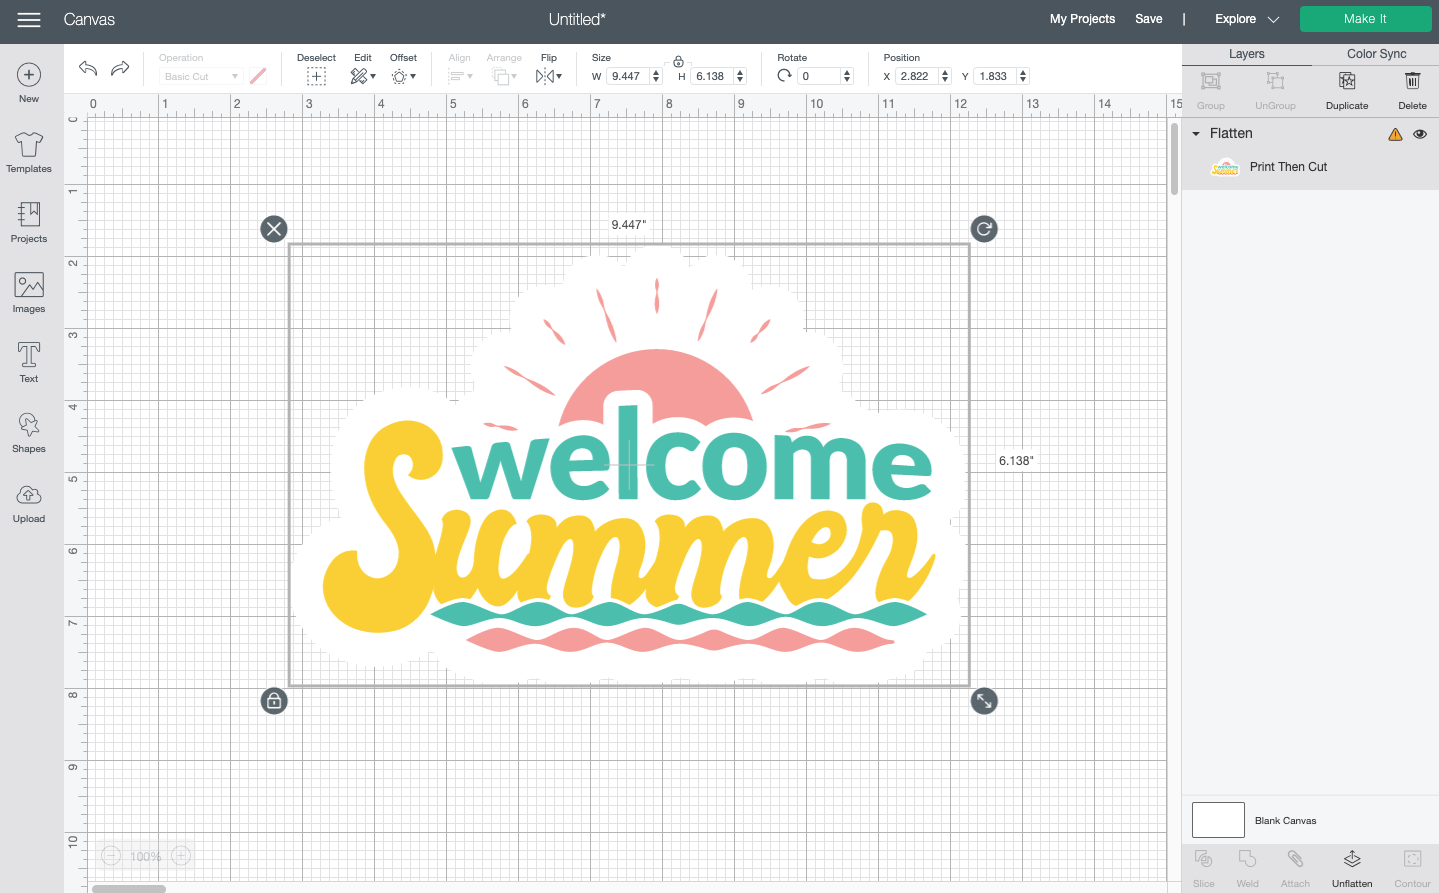
Now you can use Print then Cut to cut this image on sticker paper!
I hope you found this Cricut offset tutorial helpful. I’m still playing around with all of the features and ways to use this tool—I’ll be updating this post if I find anything else that’s super cool! And if you have any questions, let me know in the comments!
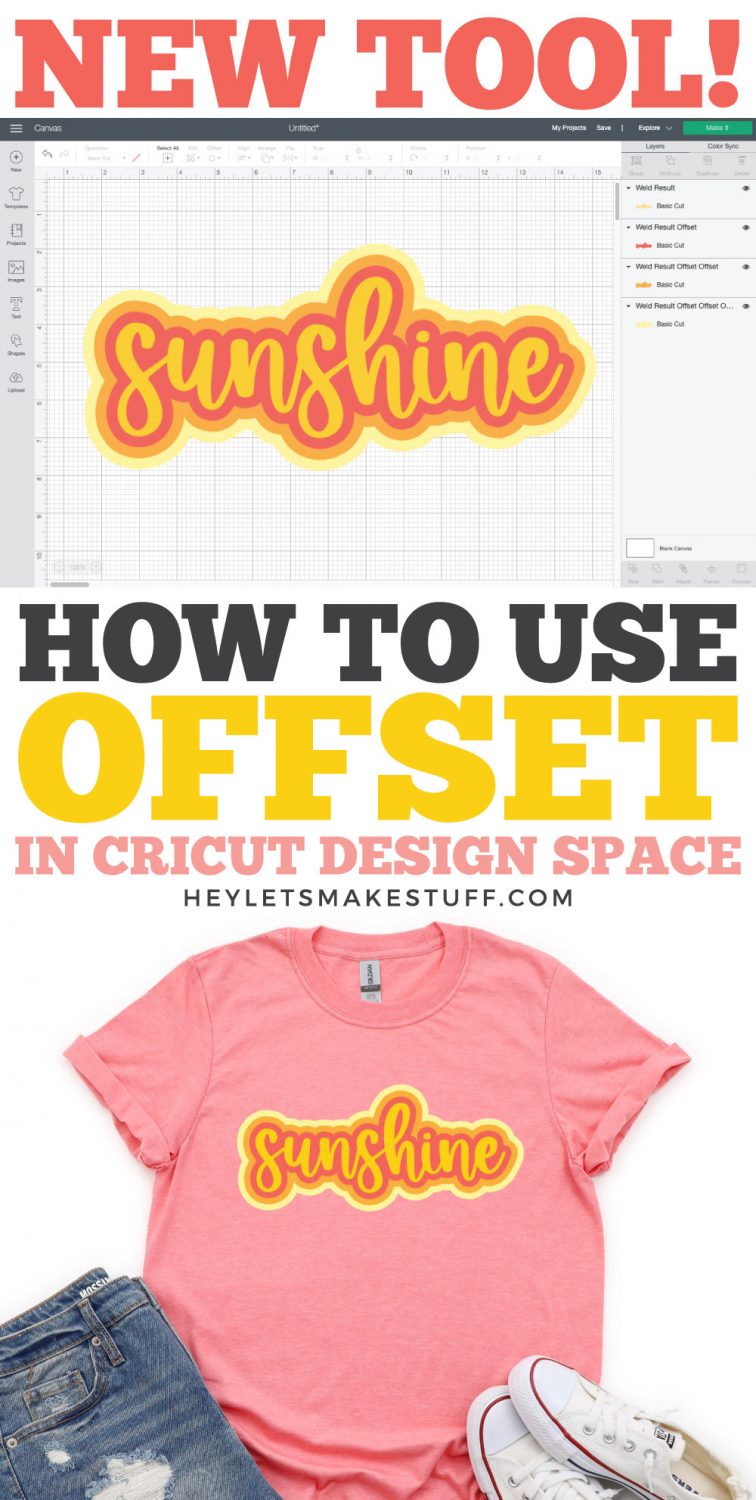

USING THE DESIGN SPACE OFFSET TOOL
Instructions
- Creating a Rounded Offset

- Create your design like this cute word "sunshine", weld the word and then click the offset tool.

- From here, select a .25: offset with rounded corners. Note that you won't see that "Weld Offsets" option because this file is a single cut piece. You can see the offset in real time as you change the settings:

- Now play around with the slider to create a bigger offset:

- Once you click Apply, it will apply the offset as a new, black layer on your project.

- You can then change the color of that layer to whatever you'd like. You can also offset offsets to create a fun effect!

- Creating a Square OffsetYou'll also see that there's the tick box to change it to a square or block offset instead of the rounded corners above. This was found to be a bit glitchy, depending on the font being worked with.

- Didn't expect it to work on the rounded Festive font, — got a little ugly down in the bottom right and everything else stayed rounded (since it had no mathematical square edges to offset):

- Also tried using the square outline on a few different block fonts, and had mixed results. The first you can see how it did fine for the rounded offset, but then sort of lost its mind on the square:

- Again, you can slide the slider a bit and a lot of these glitches may resolve themselves.And here it did a lot better, but not a fan of those spikes on the top of the "m"s.

- Note that Adobe Illustrator has a third option to "miter" the corners (vs. just round and square), which cuts off those strange spikes to make a cleaner square offset.Overall, I think I just prefer the rounded offset and I ran into fewer glitches with it. Remember that this is a brand new feature, so hopefully Cricut will refine some of this as time goes on.
- Creating an InsetIn addition to creating an offset, you can slide that slider to the left and create an inset (or a "negative offset"). This works best with chunkier fonts and images, like the font Kristof. Here's the word "sun" with a negative offset. The darker yellow is the font itself and the lighter yellow is the inset:

- Creating an Offset for ImagesSo we've seen how this Cricut offset works on a bunch of text, now we'll look at a few images. Let's start with a simple hibiscus flower from Cricut Design Space.

- Worked like a charm:

- Now let's try a more complex image from the Cricut Image Library:

- If you create an offset for this, you'll notice that you need to make the offset quite large not to have "holes" in the offset. But not loving how the huge offset looks, so here's a way to fix it. Create the offset that you'd like. You'll see this one has four holes in it. Not so cute on this image.

- In the Layers Panel on the right, hide the Surf & Sun image so you just have the offset layer showing. Then use a shape like a square to cover the holes.

- Then weld the square and the offset to make it a single piece. Unhide the rest of the image and move the offset back to the back (it will pop to the top when you weld it) and you can see that this is a much better offset image:

- Creating Stickers with Cricut OffsetFinally, here's a quick way to create stickers using the Cricut offset tool. Start by uploading or choosing an image from the Cricut Image Library. For this project this Welcome Summer image was chosen.

- Create your offset and make it white. Fill in any holes using the method in the previous section, if needed.

- Then choose both the image and the offset and click Flatten in the lower right. This will turn your image into a print then cut image, which you can see in the Layers Panel.

- Now you can use Print then Cut to cut this image on sticker paper!



Comments & Reviews
Talia says
Hello!
I am new to using Cricut Design Space. I currently use it on my ipad. When I attach my images that have offsets, for some reason the offset color changes from white (preferred) to mirroring the colors that are on my image.
For example: If I try to create a white offset around clipart of a blue fish, I flatten both layers and it looks fine until I try and print. Once I print the white offset changes to the color of the blue fish instead of white. I made sure the offset was set to basic cut and not print then cut, but this still happens. Any idea as to why this might be?
I cant seem to find any tutorials or help topics on this.
Best!
Cristal Bennett says
OMG! Thank you so much! I could not get the hang of offset so straight forward. The sticker one blew me away, I’ve been asking myself how come I can’t create stickers like I see everywhere, now I can!
Jackie B says
Thanks for all this info.
I have also found that if your offset has holes in it that you don’t want, instead of welding something to the offset, you can simply use the contour function and remove all the contours.
Tammy says
Cori, thanks so much for the clear and easy to follow tutorials for offset,inset and stickers. You are so awesome to share your knowledge with the rest of us ! Love your site !!!
Debbie says
Thank you. This offset step by step was hugely helpful!!
Kim says
I can see the offset button, however, when I click it the blue line never shows up and when I click apply it does not generate another layer. I can not seem to figure out why.
Crystal Summers says
Hi Kim,
Do you have your layer/design selected when you select the offset tool? You also may need to adjust the size of the offset to see it appear. If you are still having issues, reach out to Cricut Support, as it may be a software issue.
Hope this helps!
Crystal, HLMS Community Manager
Debbie White says
The offset doesn’t show up on my laptop (HP) at home, but does on my work laptop (Lenova). Any idea why? Thanks
Crystal Summers says
Hi Debbie,
Hmm… that’s strange. It sounds like a technical issue. I would reach out to Cricut Support and see if they can help troubleshoot.
Good luck!
Crystal, HLMS Community Manager
Judy Joseph says
Is Cricut planning to bring the offset feature to the design space for The IPad?
Crystal Summers says
Hi Judy,
Offset is only available on the desktop version for now. Cricut hasn’t said if/when it will be available for the iPad. Hope this helps.
Happy crafting!
Crystal, HLMS Community Manager
Mary says
Thank you for this easy-to-follow lesson. I wish I’d watched it before I tried my first offset, but now I’m ready to try again!
Pamela says
Thank you for this tutorial! I use Inkscape to create offsets, but it’s so nice to be able to do those within the design software for the Cricut.