Make sure to give the Easter Bunny something to chomp on when he visits your house this Easter! Make this Carrots for the Easter Bunny plate using your Cricut and adhesive vinyl.

My boys were tickled this Christmas when we left cookies and milk out for Santa, so this year when I suggested giving the Easter Bunny some carrots to munch, they were all in! I told them I’d whip up a plate that we could use so the Easter Bunny would know the carrots were his to nosh on.
Making a Carrots for the Easter Bunny plate is super easy using your Cricut or other cutting machine! For this project, I’m putting the vinyl straight on the plate, which I generally wouldn’t recommend for plates that will be used for food consumption and washed all the time. But since this plate comes out once a year, adhesive vinyl is the perfect material.
I created this Easter plate for National Craft Week! My blogger friends and I are sharing some awesome crafts and DIY projects this week! Make sure to check them out at the bottom of this post.
Carrots for the Easter Bunny Plate Supplies
- Cricut Explore, Cricut Maker, or Cricut Joy
- Blue LightGrip mat or green StandardGrip mat
- Fine Point Blade
- Black, orange, and green adhesive vinyl
- Weeding tool
- Transfer tape
- Scraper
- Plate
- SVG File (see below)
Get the Free File
Want access to this free file? Join my FREE craft library! All you need is the password to get in, which you can get by filling out the form below. The file number is: C277.
Carrots for the Easter Bunny Plate Instructions
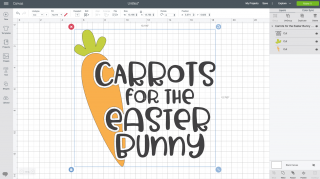
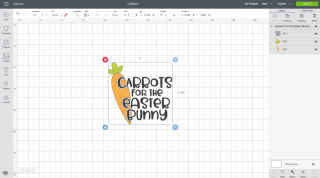
Start by uploading the SVG file to Cricut Design Space. See my post on Uploading SVGs to Cricut Design Space for more information if you need help.

Depending on the size of your plate, resize your image. I actually found that mine was small enough, just barely, to cut on my Cricut Joy! I love not having to pull out my larger machine if I don’t have to.

Then use your machine to cut out your three layers of vinyl. Do NOT reverse your images for this project.
Once you have all of your pieces cut, use the weeding tool to remove all of the excess material. Learn more about Weeding Adhesive Vinyl.
Next you’re going to apply all three layers with transfer tape. You can read more about Using Transfer Tape.
First peel back the backing paper on the transfer tape, and place it sticky-side down on the text decal—I find it’s easiest to start with that one. Use a scraper to burnish the transfer tape onto the decal. Peel back the transfer tape and the decal should come with it.
Then place the decal on the plate. I find that adhesive vinyl generally sticks VERY well to ceramic, so try to get it right the first time. Make sure you’re saving space for the carrot on the left. Use the scraper to burnish the decal to the plate and peel back the transfer tape, leaving the decal on the plate.
Repeat with the carrot and carrot top!

To care for your Carrots for the Easter Bunny plate, wipe with a damp cloth and store. Don’t run it through the dishwasher or use it for much more than carrots.
Need help with your Cricut? Get started with my Cricut Basics eBook!


Carrots for the Easter Bunny Plate
Equipment
- Cricut Maker or
Supplies
- adhesive vinyl Black, orange, and green
- Transfer tape
- Plate
- Free Carrots for the Easter Bunny File #C277
Instructions
- Start by uploading the SVG file to Cricut Design Space. See this post on Uploading SVGs to Cricut Design Space for more information if you need help.

- Depending on the size of your plate, resize your image.

- Then use your machine to cut out your three layers of vinyl. Do NOT reverse your images for this project.Once you have all of your pieces cut, use the weeding tool to remove all of the excess material. Learn more about Weeding Adhesive Vinyl.Next you're going to apply all three layers with transfer tape. You can read more about Using Transfer Tape. First peel back the backing paper on the transfer tape, and place it sticky-side down on the text decal—it's easiest to start with that one. Use a scraper to burnish the transfer tape onto the decal. Peel back the transfer tape and the decal should come with it.Then place the decal on the plate. Adhesive vinyl generally sticks VERY well to ceramic, so try to get it right the first time. Make sure you're saving space for the carrot on the left. Use the scraper to burnish the decal to the plate and peel back the transfer tape, leaving the decal on the plate.Repeat with the carrot and carrot top!To care for your Carrots for the Easter Bunny plate, wipe with a damp cloth and store. Don't run it through the dishwasher or use it for much more than carrots.


Leave A Reply!