
Carrots for the Easter Bunny Plate
Make sure to give the Easter Bunny something to chomp on when he visits your house this Easter! Make this Carrots for the Easter Bunny plate using your Cricut and adhesive vinyl.
Equipment
- Cricut Maker or
Ingredients
- adhesive vinyl Black, orange, and green
- Transfer tape
- Plate
- Free Carrots for the Easter Bunny File #C277
Instructions
- Start by uploading the SVG file to Cricut Design Space. See this post on Uploading SVGs to Cricut Design Space for more information if you need help.
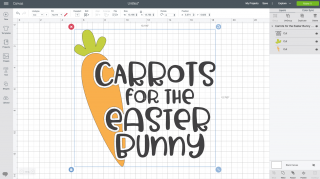
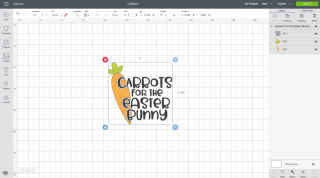
- Depending on the size of your plate, resize your image.
- Then use your machine to cut out your three layers of vinyl. Do NOT reverse your images for this project.Once you have all of your pieces cut, use the weeding tool to remove all of the excess material. Learn more about Weeding Adhesive Vinyl.Next you're going to apply all three layers with transfer tape. You can read more about Using Transfer Tape. First peel back the backing paper on the transfer tape, and place it sticky-side down on the text decal—it's easiest to start with that one. Use a scraper to burnish the transfer tape onto the decal. Peel back the transfer tape and the decal should come with it.Then place the decal on the plate. Adhesive vinyl generally sticks VERY well to ceramic, so try to get it right the first time. Make sure you're saving space for the carrot on the left. Use the scraper to burnish the decal to the plate and peel back the transfer tape, leaving the decal on the plate.Repeat with the carrot and carrot top!To care for your Carrots for the Easter Bunny plate, wipe with a damp cloth and store. Don't run it through the dishwasher or use it for much more than carrots.