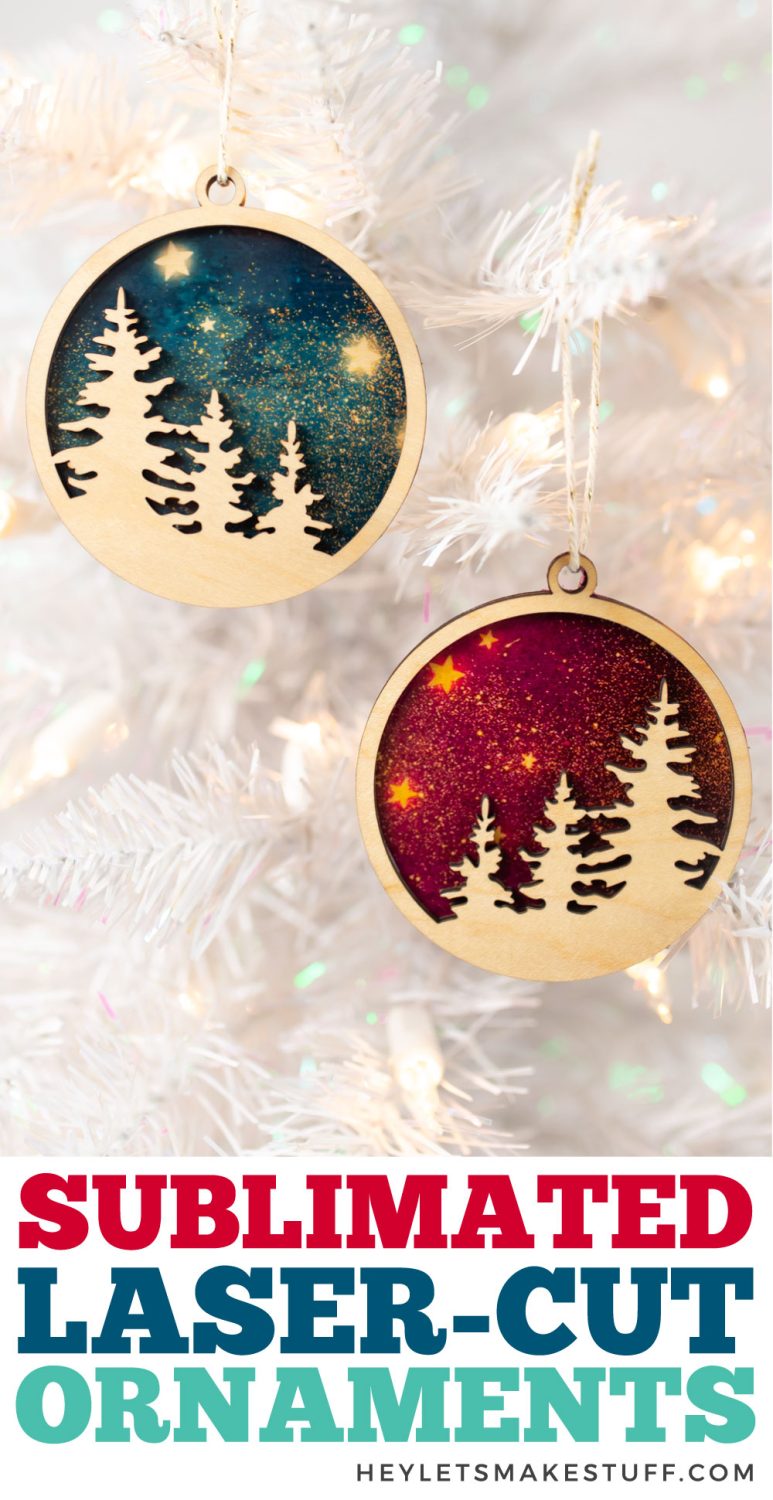
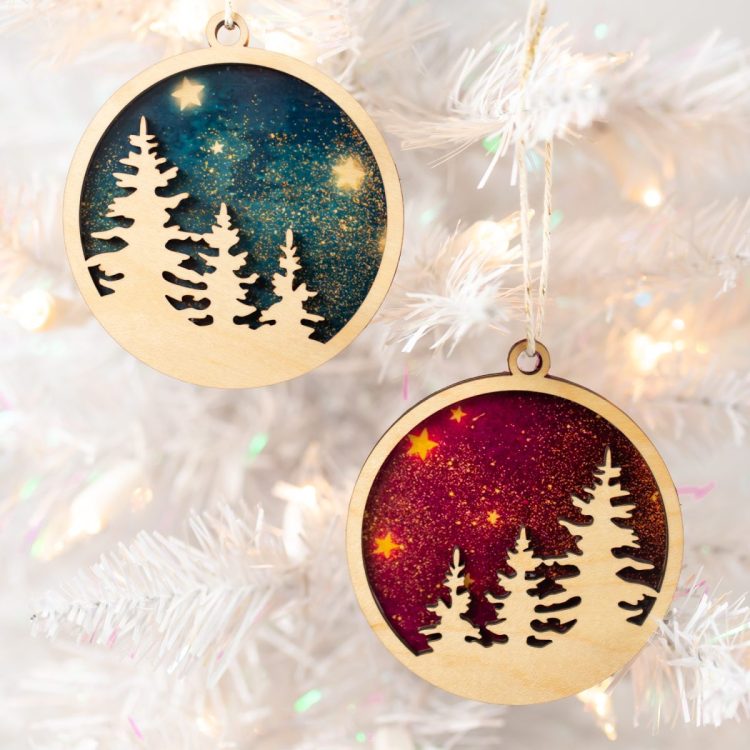
Combine sublimation and laser crafts with these cute ornaments! I’ll show you a trick for sublimating laser-cut wood using lamination sheets so you can endlessly customize your projects!

I love all my crafting machines, so when I can find a project that combines more than one, I’m thrilled! In this post, I’m going to share how to sublimate on laser-cut wood, which uses both a laser cutter and a sublimation printer. I’m using ornaments as an example, but you could also use this technique with other layered projects, like door signs and decor pieces.
The secret to sublimating wood (well, one of the secrets—there are a few ways to do it) is using lamination pouches. Yes, the same lamination pouches that teachers use to make paper projects more permanent. Because lamination pouches are made from a poly material, sublimation ink will adhere to it! It’s a simple process and one you can use on a variety of projects.
For this project I’m using my Glowforge, but you can also use your xTool or other laser cutter. I’m cutting 1/8″ maple plywood but there are a variety of woods and thicknesses that you might use. I’m also using my Sawgrass SG500 sublimation printer, but an Epson printer with sublimation ink would work as well. If you’re still shopping for a laser or printer, these reviews and tutorials might help you make a decision:
- The Beginner’s Guide to the Glowforge Overview
- The Beginner’s Guide to the xTool M1 Hybrid Laser / Blade Cutter
- The Beginner’s Guide to the Sawgrass SG500 Sublimation Printer
- Convert an Epson EcoTank Printer for Sublimation
For the files for this project, I’ve designed a simple tree ornament file which you can download below. Of course you can use any file you’d like. Both Etsy and Design Bundles have lots of layered ornament files that are perfect for a project like this. I’ve linked some of my favorites at the end of this post.

For the sublimated star image, I used a starry night PNG file from Design Bundles. Again, you can use any background or pattern PNG or JPG—think buffalo plaid, glitter, or snowflakes, for example.
Video Tutorial for these Laser Cut Ornaments
Sublimated Laser Cut Ornaments Supplies
Get everything you need to make this ornament project on my Amazon shopping list!
- Laser cutter
- 1/8″ Maple plywood or other wood
- Paper masking (if your wood doesn’t have it already)
- Plastic razor blade (optional)
- Sublimation printer with sublimation ink
- Sublimation paper
- Lamination sheet
- Heat press
- Heat resistant tape
- Craft knife
- E6000 glue
- Clamps (optional)
- Ribbon for hanging
- SVG file for cutting (obtain download below)
- PNG file for printing
Get the Free File
Want access to this free file? Join my FREE craft library! All you need is the password to get in, which you can get by filling out the form below. The file number is: L3.
Sublimated Laser-Cut Ornaments Instructions
Cutting the Ornament with the Laser Cutter
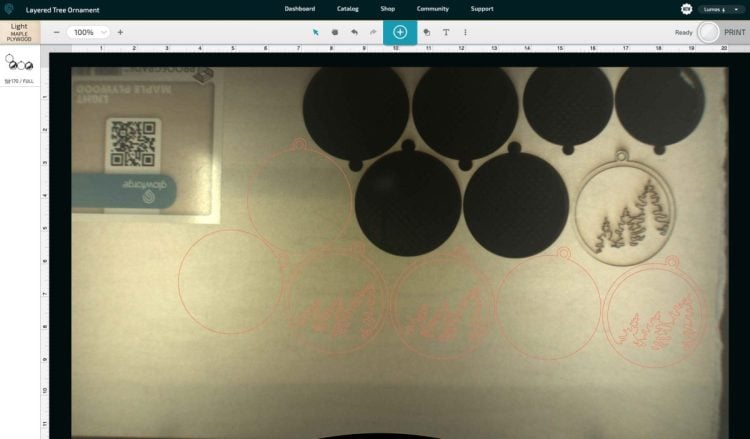
Let’s start with the laser portion of this project. Upload your file to your laser cutting software. Move your ornaments and arrange them to save the most material. I’m making three ornaments so I laid them all out.
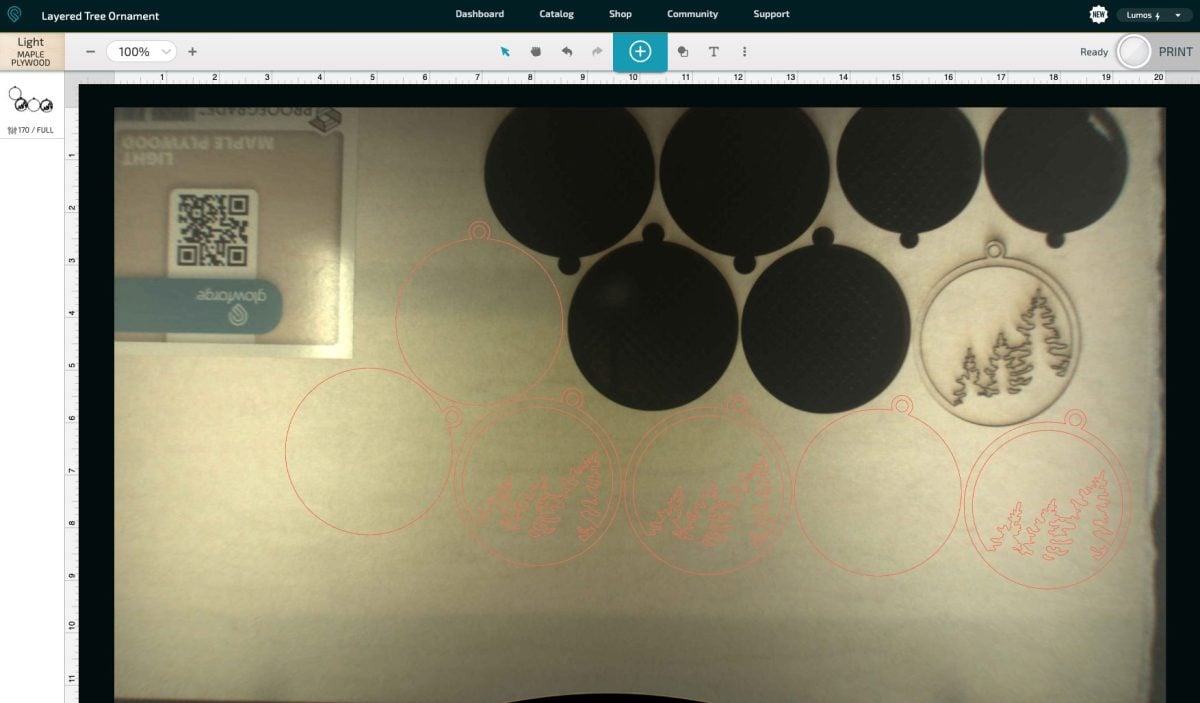
Then make sure the two layers in the file are set to cut and choose the correct material you are cutting. (Note: I found the light maple plywood setting wasn’t cutting quite through, so I changed the settings to 170 speed, full power, 1 pass, and it cut great.)
If your wood isn’t masked, add a layer of masking (basically huge making tape) over the front and back of your wood to prevent charring. I’m using Glowforge maple, which comes pre-masked. It’s more expensive than other materials, but the quality of the wood is always good and it saves me a step when it comes to masking.
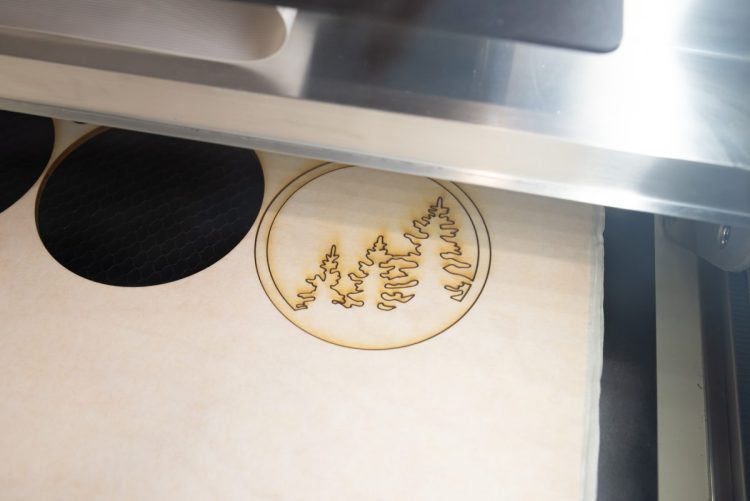
Then fire up that machine and cut the two pieces of your ornament.
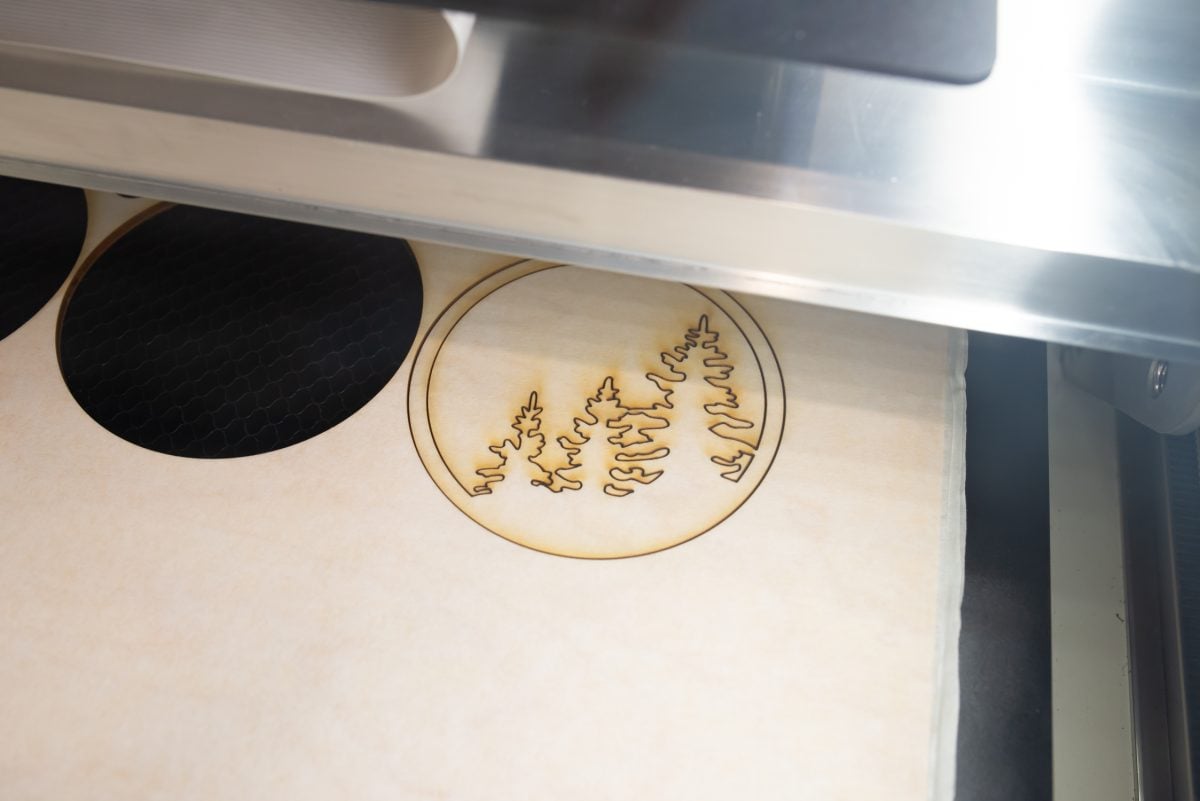
Remove the mask from your ornament, being careful not to scratch the wood. I recommend using a plastic razor blade to save your fingernails.
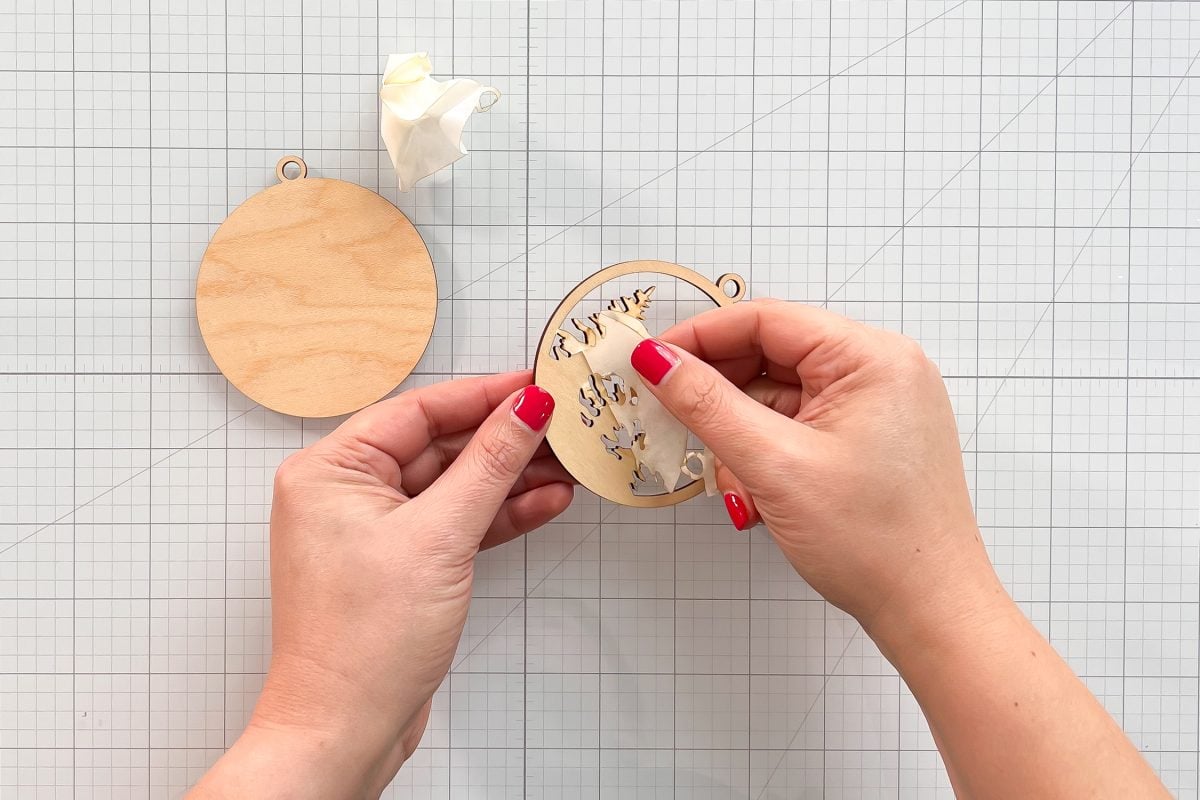
Now we’re ready to sublimate our image onto the wood.
Printing the Sublimation File
To start, we’ll need to print our sublimation design. I am not going to re-size it for this project. Instead I’m just going to print the file as is and I’ll use the unused portion of the star sublimation image on other small projects.
For this project, I’m going to use Sawgrass Print Manager. If you are using an Epson printer, I have an overview of sublimation software options. All you need to do is upload the file and print!
For Sawgrass Print Manager, click on the PM icon and choose Open Local File.
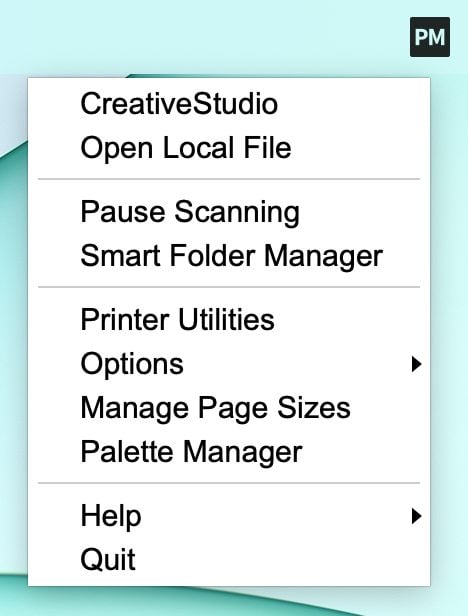
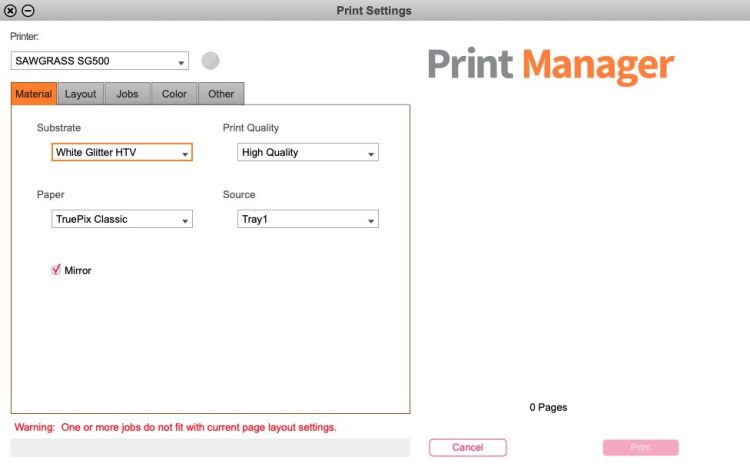
Navigate to the PNG or JPG you want as your sublimation background and click Open. Depending on the size of your file, you may get a warning that says “one or more jobs does not fit with the current page layout settings.”
Don’t worry about that error, we’ll fix it in a second. First, though, select your material. There’s no option for laminating sheet, so I chose polyester since it’s a fairly well-rounded setting. Leave all the other options as is, unless you are using a different paper tray in your Sawgrass.
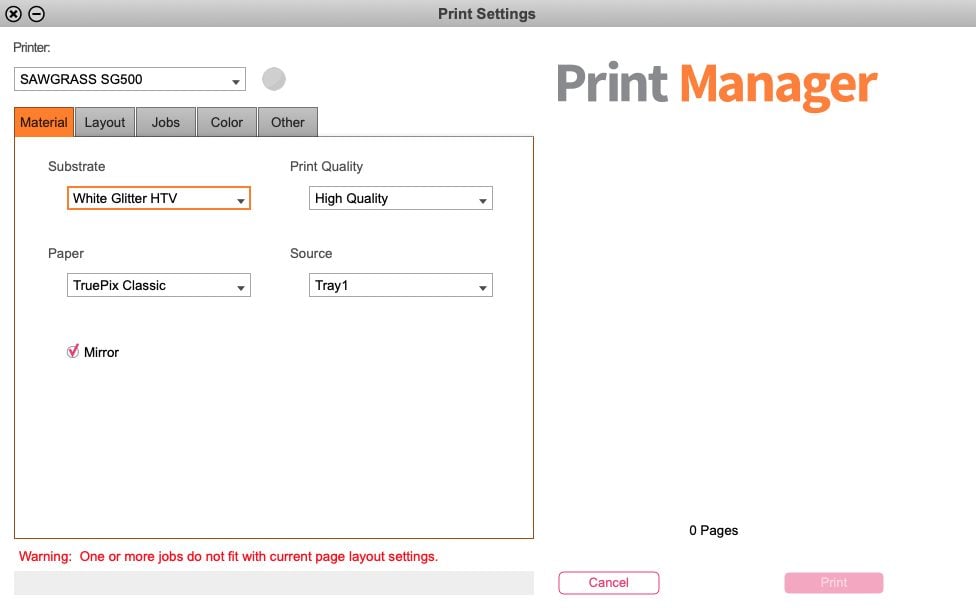
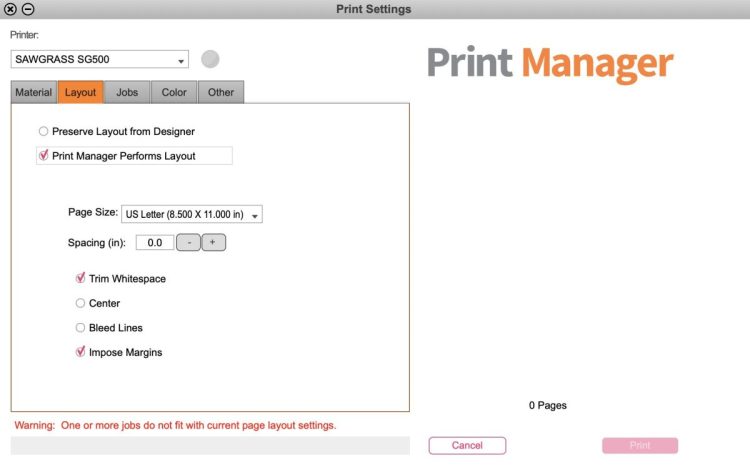
Next click on the Layout tab. Here, change “Preserve Layout from Designer” to “Print Manager Performs Layout.” I also like to keep Trim Whitespace and Impose Margins selected.
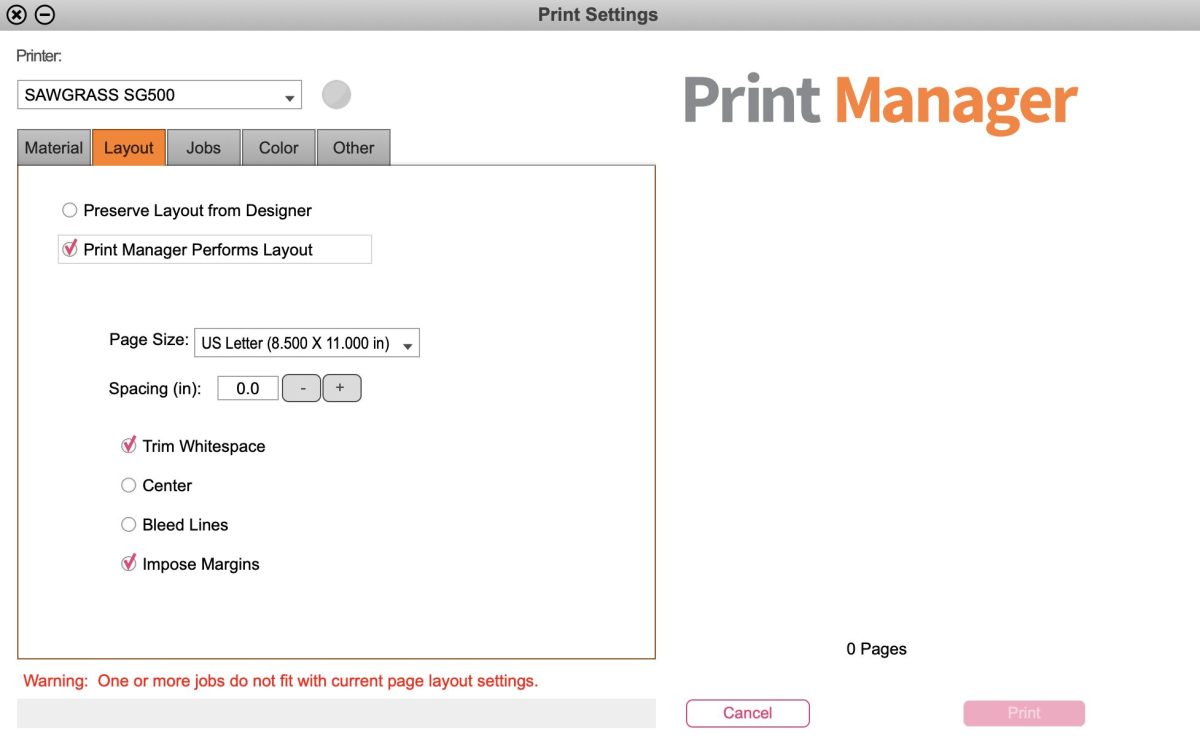
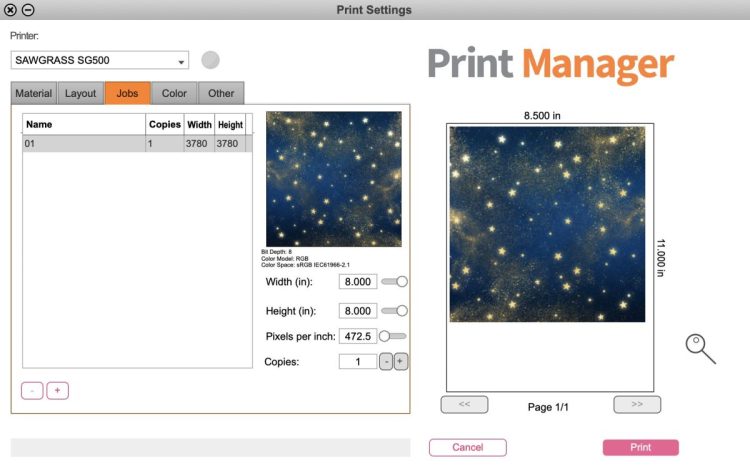
Then click on the Jobs tab. Here you’ll see your image. If the size is larger than will fit on your paper (like my image is a bit larger than 12″ x 12″) you’ll need to resize it to fit on your paper. Change one dimension and the other will change proportionally. I sized my image to be 8″ across to fit on my paper. You can now see the preview of your image in Print Manager.
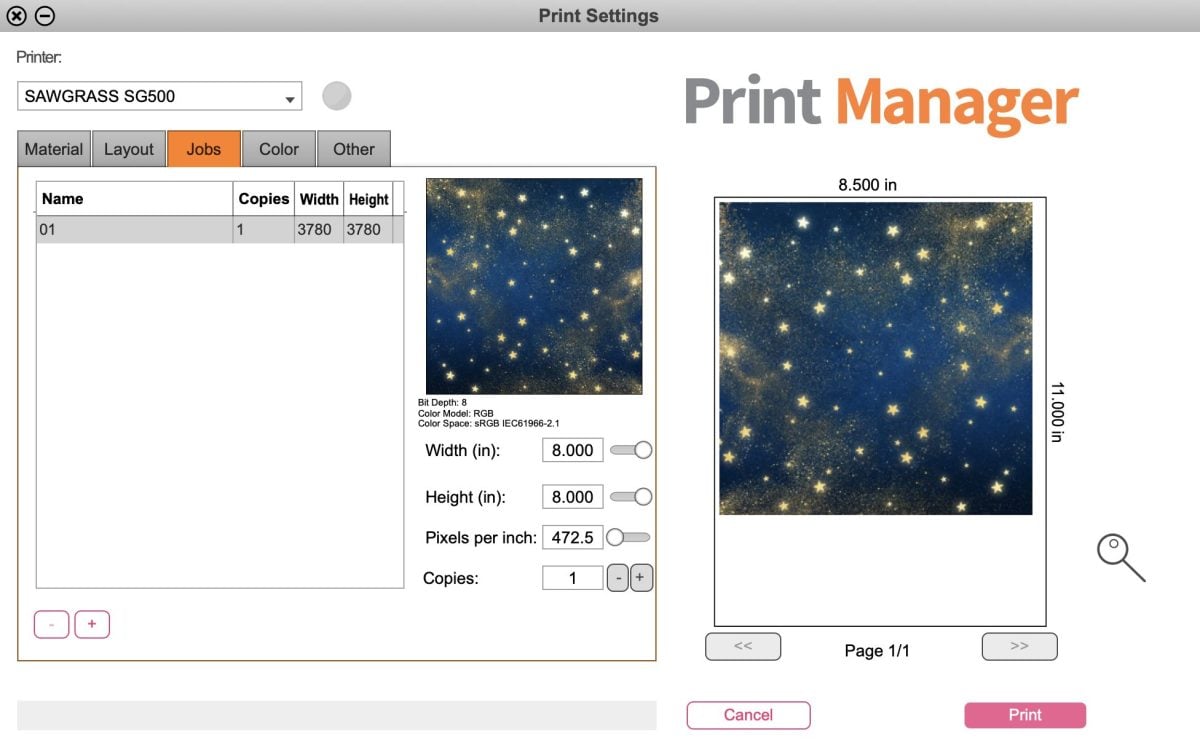
Your file should be ready to go now, so click Print and your Sawgrass will print your image.
Adding the Lamination Sheet to the Ornament
Important: I have found that the wood has a bit of moisture, which can mess with the sublimation. So before you do any of the following steps, press your ornament for 60 seconds in your heat press at 385°. This will dry out the ornament and you’ll have much better luck with the sublimation.
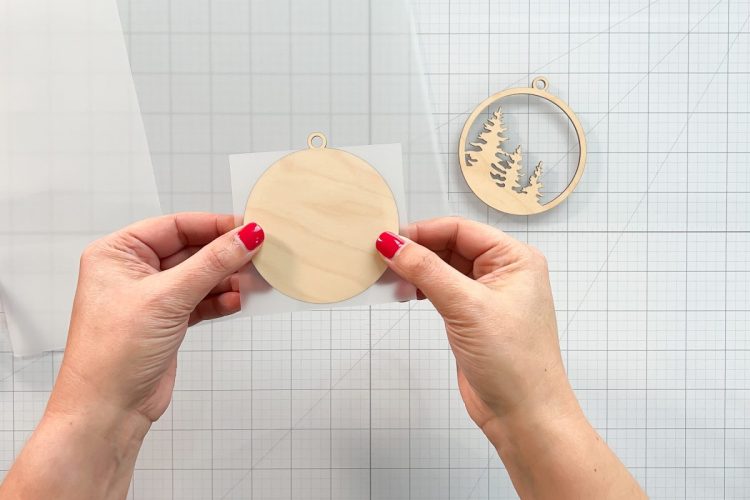
To make the wood “sublimatable” (just making up words over here), we’ll use laminating sheets. The laminating sheets have a pocket, so cut a slit down one side so you have a single layer. Then cut a piece of the laminating sheet that is just larger than the solid backing piece for the ornament.
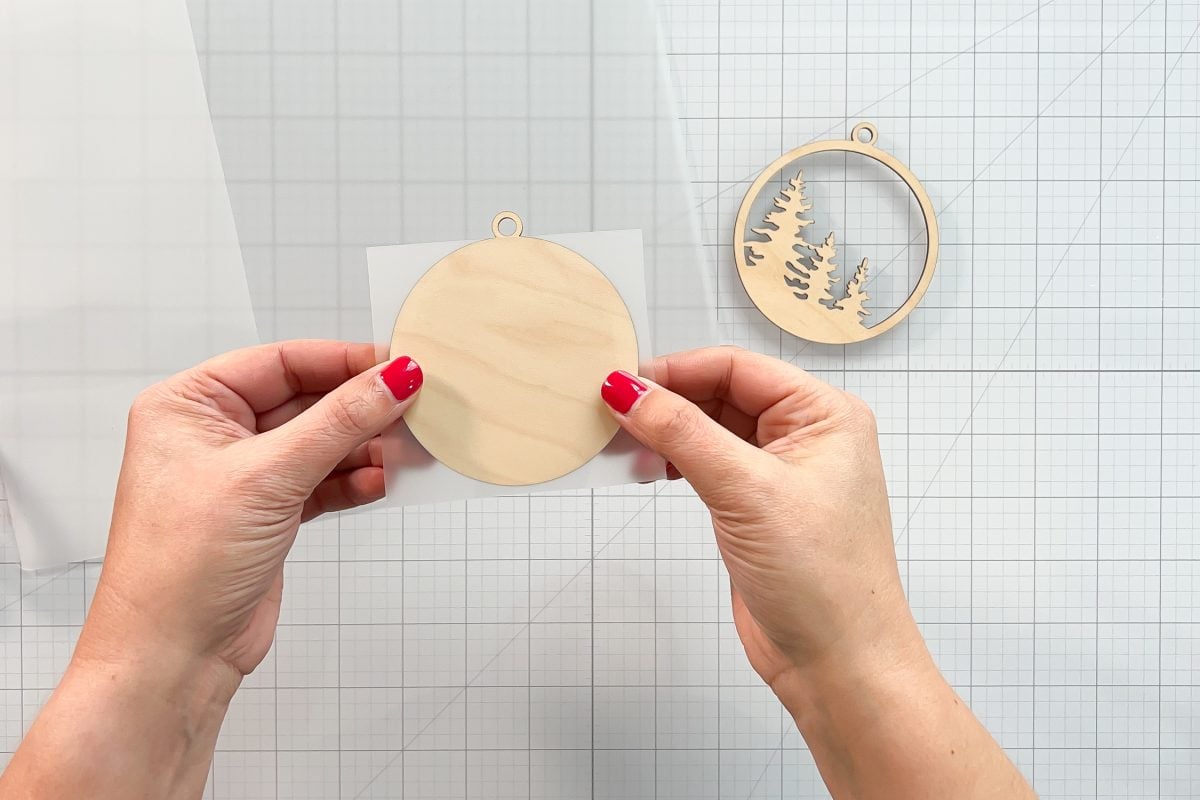
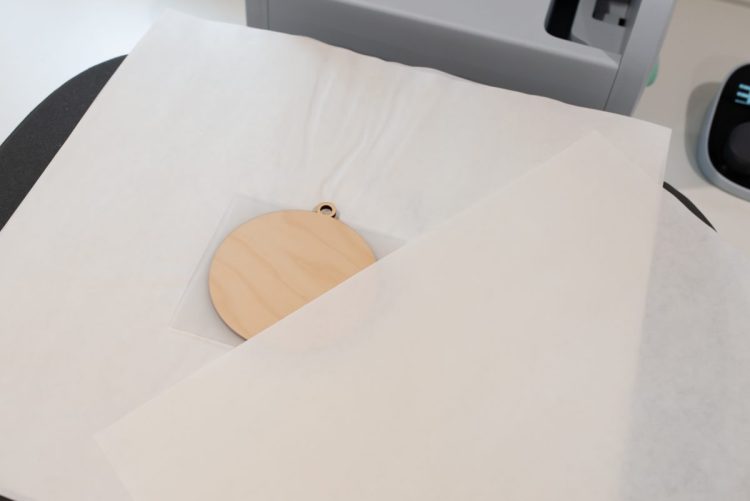
Set your heat press to 385°. Place a piece of butcher paper on the bottom platen of your press, then set the ornament piece face up. Place your laminating sheet with the shiny side up on top of the ornament piece. Then another piece of butcher paper. Press for 20 seconds.
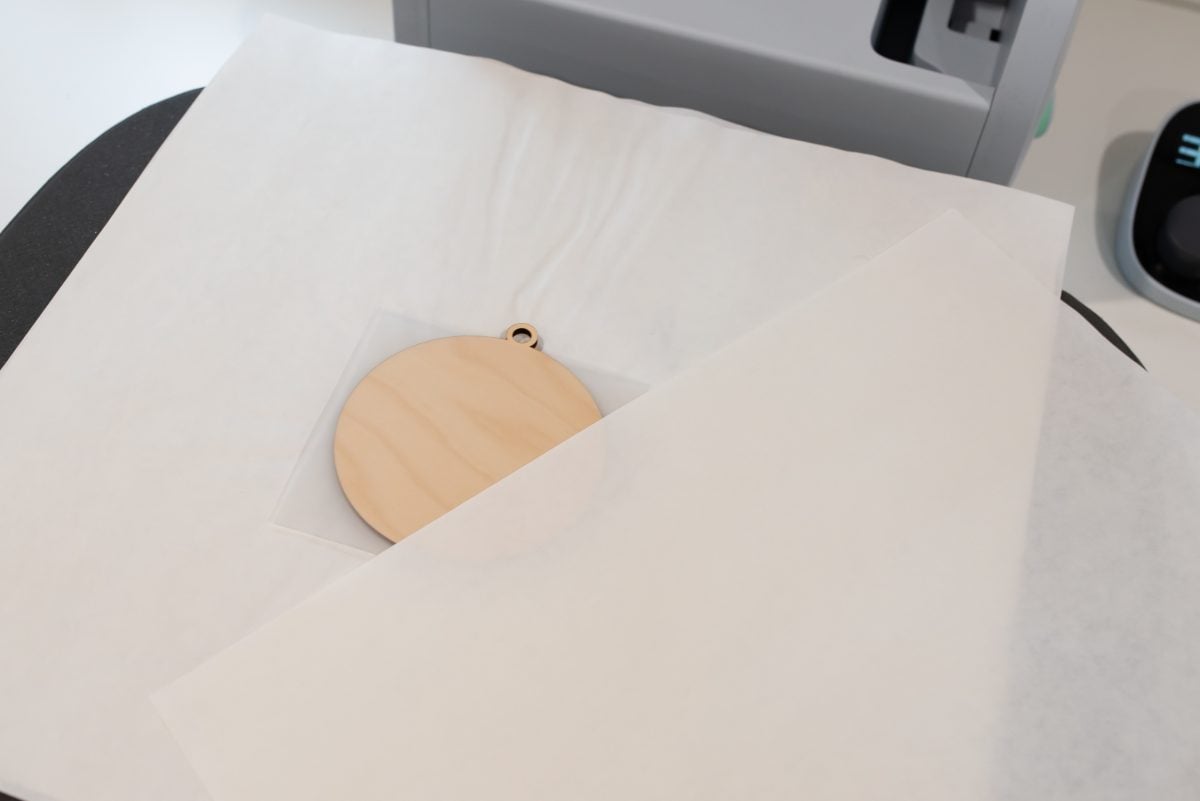
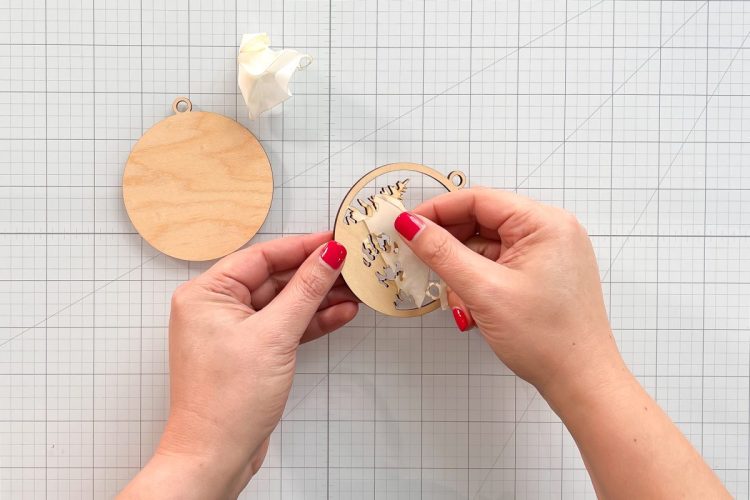
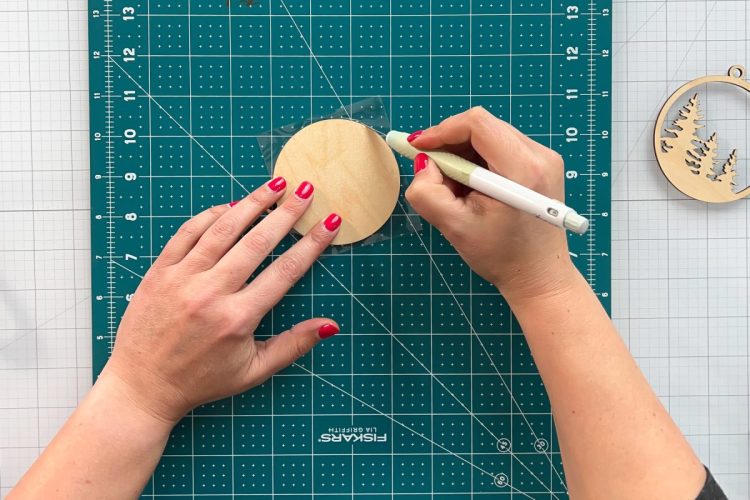
Once cool, use the craft knife to cut away the excess laminate sheet from around the ornament. If your edges are rough, you can use a sanding block to smooth them out.
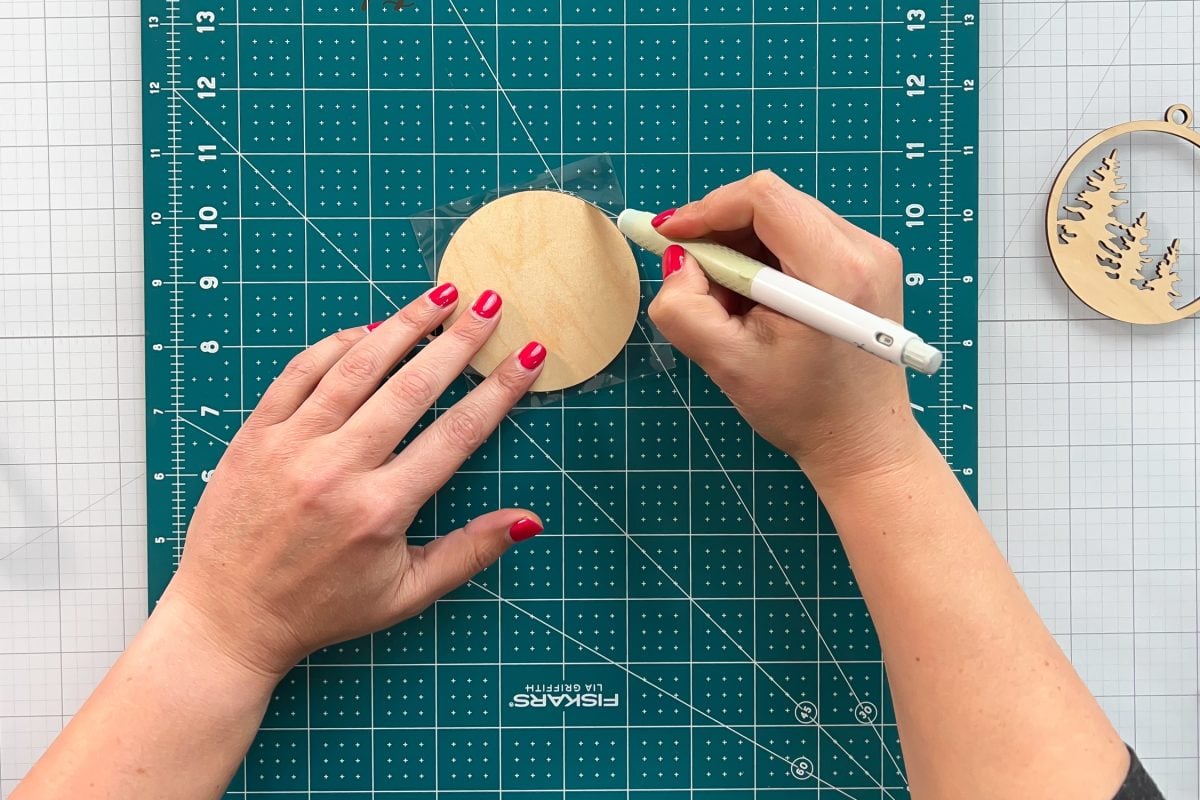
Sublimating the Ornament
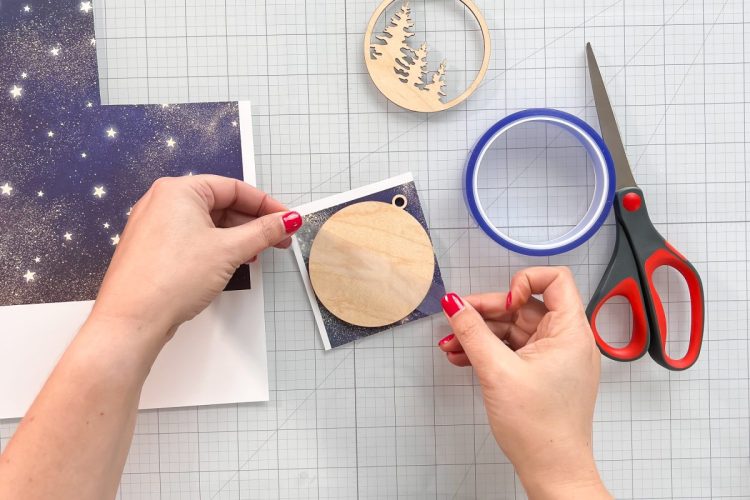
Now cut a piece of your background pattern just larger than the ornament. Place a piece of butcher paper on the bottom platen of your press, then set the ornament piece with the laminated side up. Tape your sublimation image face down on top of the ornament piece. Then add another piece of butcher paper. Press for 60 seconds at 385°.
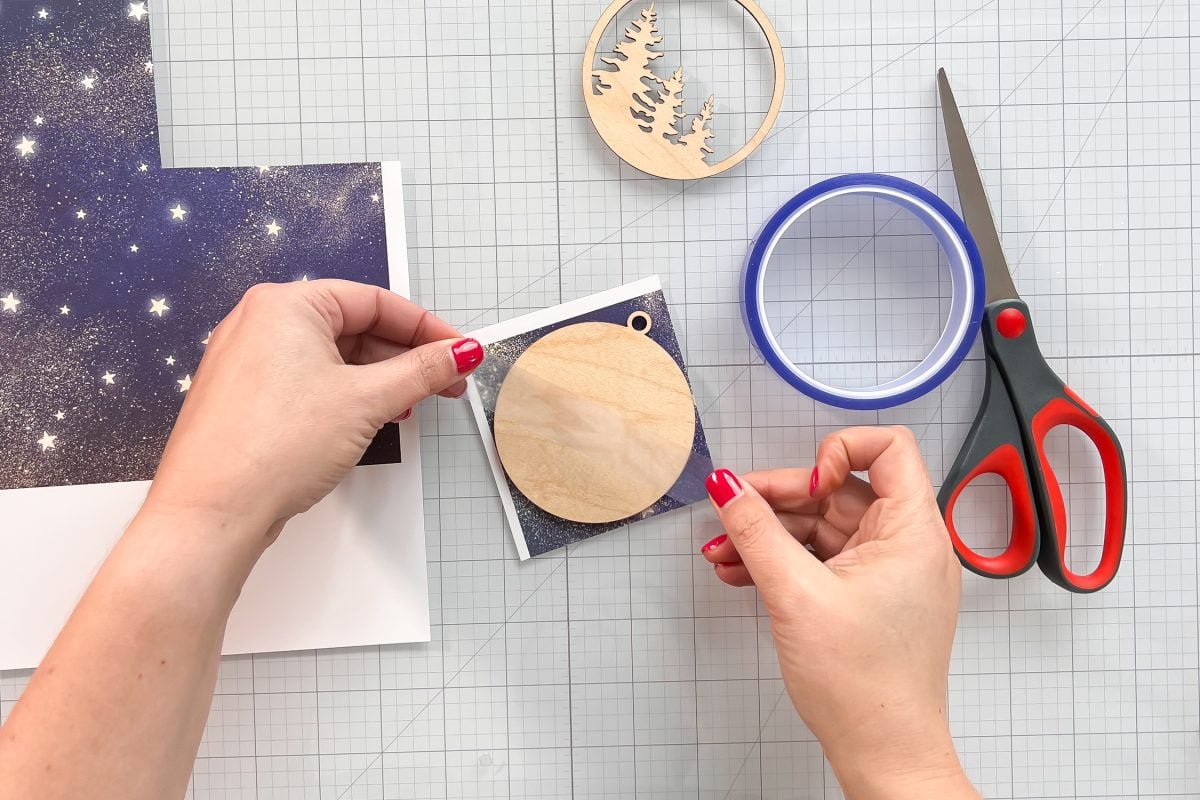
Once it’s cool, pull off the paper to reveal your sublimated image on wood!
Assembling the Ornament
Assembling the ornament is easy. Add a very small amount of the E6000 glue in a few places on the back of the front tree piece of the ornament. Line it up with the back piece and press to adhere. You can use clamps if you’d like to hold them together while the glue dries.
Once the glue is fully dried, add your ribbon or twine to hang!
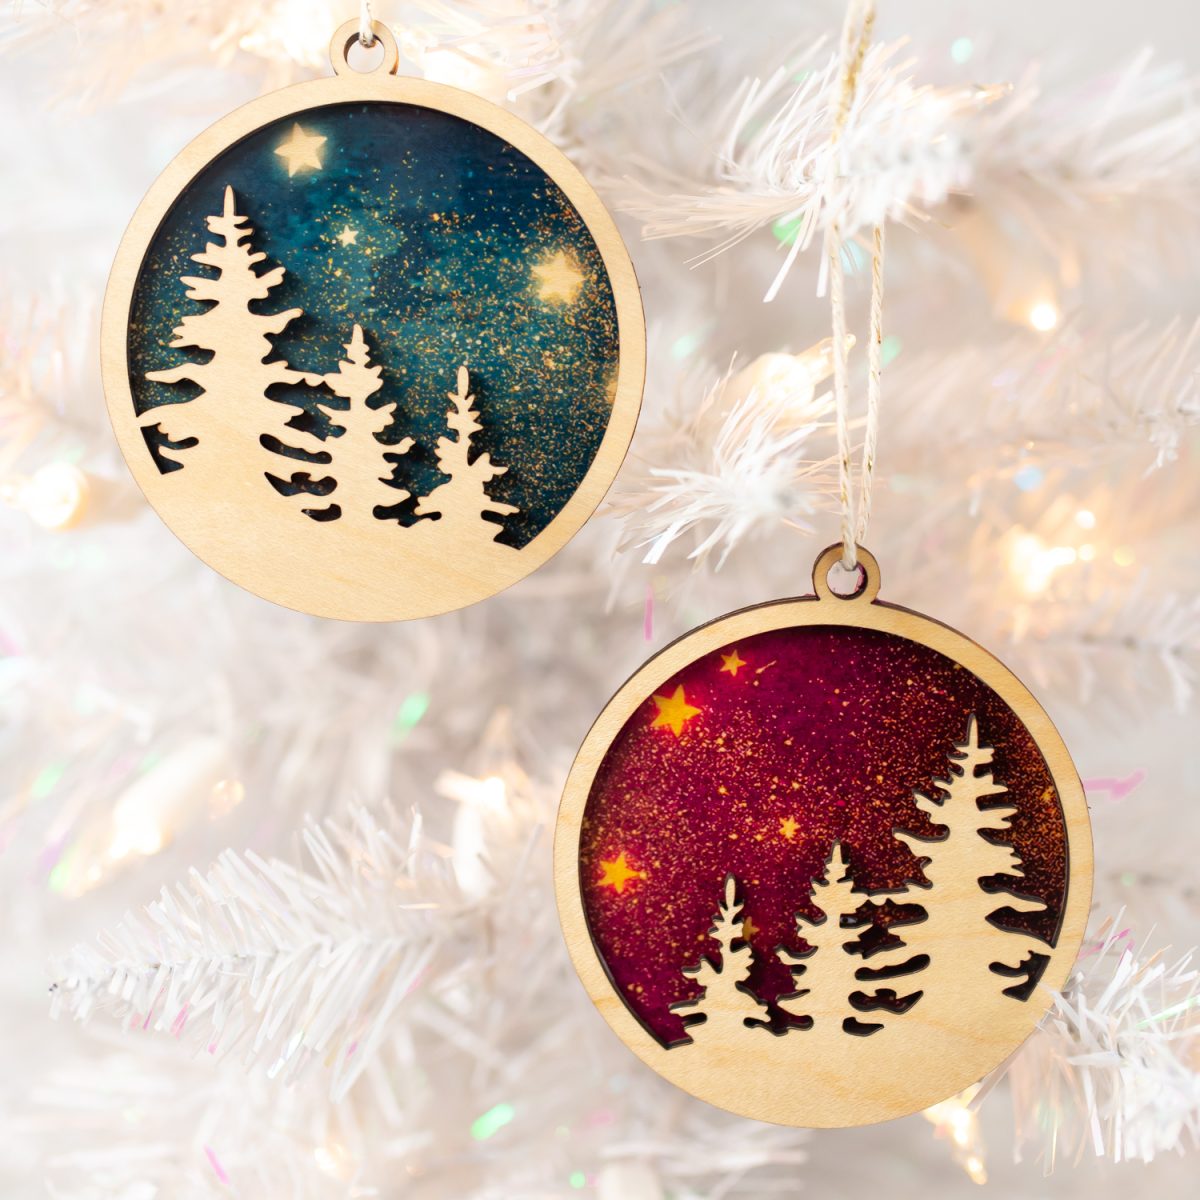
This ornament seems like it has a lot of steps but it’s actually pretty easy with the right equipment. Here are some of my favorite ornament files that would work really well with this project!
- Merry Christmas Wreath Ornament
- Ugly Christmas Sweater Ornament
- Reindeer Ornament
- Christmas Balls Ornaments
- Christmas Ornament Bundle
And if you are interested, here’s some more on sublimating ornaments. Check out How to Make Sublimation Ornaments: Ceramic, Wood, and Metal!

SUBLIMATING LASER-CUT WOOD ORNAMENTS
Equipment
- Sublimation printer with sublimation ink
- Clamps optional
Supplies
- 1/8" Maple plywood or other wood
- Paper masking if your wood doesn't have it already
- Sublimation paper
- Lamination sheet
- Ribbon for hanging
- Free Laser Cut Ornament File under LASER L3
- PNG file for printing
Instructions
- Cutting the Ornament with the Laser CutterLet's start with the laser portion of this project. Upload your file to your laser cutting software. Move your ornaments and arrange them to save the most material. For this project three ornaments are being made, so they were all laid out.

- Then make sure the two layers in the file are set to cut and choose the correct material you are cutting. (Note: The light maple plywood setting wasn't cutting quite through, the settings were changed to 170 speed, full power, 1 pass, and it cut great.)If your wood isn't masked, add a layer of masking (basically huge making tape) over the front and back of your wood to prevent charring. For this project Glowforge maple was used, which comes pre-masked. It's more expensive than other materials, but the quality of the wood is always good and it saves a step when it comes to masking.Then fire up that machine and cut the two pieces of your ornament.

- Remove the mask from your ornament, being careful not to scratch the wood. It is recommended to use a plastic razor blade to save your fingernails.Now we're ready to sublimate our image onto the wood.

- Printing the Sublimation FileTo start, we'll need to print our sublimation design. The design was not re-sized for this project. Instead, the file was printed as is and the unused portion of the star sublimation image will be used on other small projects.Sawgrass Print Manager was used for this project. If you are using an Epson printer, check out this overview of sublimation software options. All you need to do is upload the file and print!For Sawgrass Print Manager, click on the PM icon and choose Open Local File.

- Navigate to the PNG or JPG you want as your sublimation background and click Open. Depending on the size of your file, you may get a warning that says "one or more jobs does not fit with the current page layout settings."Don't worry about that error, we'll fix it in a second. First, though, select your material. There's no option for laminating sheet, so polyester was chosen since it's a fairly well-rounded setting. Leave all the other options as is, unless you are using a different paper tray in your Sawgrass.

- Next click on the Layout tab. Here, change "Preserve Layout from Designer" to "Print Manager Performs Layout." Keep the Trim Whitespace and Impose Margins selected.

- Then click on the Jobs tab. Here you'll see your image. If the size is larger than will fit on your paper you'll need to resize it to fit on your paper. Change one dimension and the other will change proportionally. For this project the image was sized to be 8" across to fit on the paper. You can now see the preview of your image in Print Manager.Your file should be ready to go now, so click Print and your Sawgrass will print your image.

- Adding the Lamination Sheet to the OrnamentImportant: The wood has a bit of moisture, which can mess with the sublimation. So before you do any of the following steps, press your ornament for 60 seconds in your heat press at 385°. This will dry out the ornament and you'll have much better luck with the sublimation.To make the wood "sublimatable" (just making up words over here), we'll use laminating sheets. The laminating sheets have a pocket, so cut a slit down one side so you have a single layer. Then cut a piece of the laminating sheet that is just larger than the solid backing piece for the ornament.

- Set your heat press to 385°. Place a piece of butcher paper on the bottom platen of your press, then set the ornament piece face up. Place your laminating sheet with the shiny side up on top of the ornament piece. Then another piece of butcher paper. Press for 20 seconds.

- Once cool, use the craft knife to cut away the excess laminate sheet from around the ornament. If your edges are rough, you can use a sanding block to smooth them out.

- Sublimating the OrnamentNow cut a piece of your background pattern just larger than the ornament. Place a piece of butcher paper on the bottom platen of your press, then set the ornament piece with the laminated side up. Tape your sublimation image face down on top of the ornament piece. Then add another piece of butcher paper. Press for 60 seconds at 385°.Once it's cool, pull off the paper to reveal your sublimated image on wood!

- Assembling the OrnamentAssembling the ornament is easy. Add a very small amount of the E6000 glue in a few places on the back of the front tree piece of the ornament. Line it up with the back piece and press to adhere. You can use clamps if you'd like to hold them together while the glue dries. Once the glue is fully dried, add your ribbon or twine to hang!

- This ornament seems like it has a lot of steps but it's actually pretty easy with the right equipment. Here are some of my favorite ornament files that would work really well with this project!Merry Christmas Wreath OrnamentUgly Christmas Sweater OrnamentReindeer OrnamentChristmas Balls OrnamentsChristmas Ornament Bundle


Leave A Reply!