UV DTF is a great way to decorate all sorts of hard blanks! Learn how to order and use UV DTF transfers with this easy tutorial, plus get a free file to make your own!
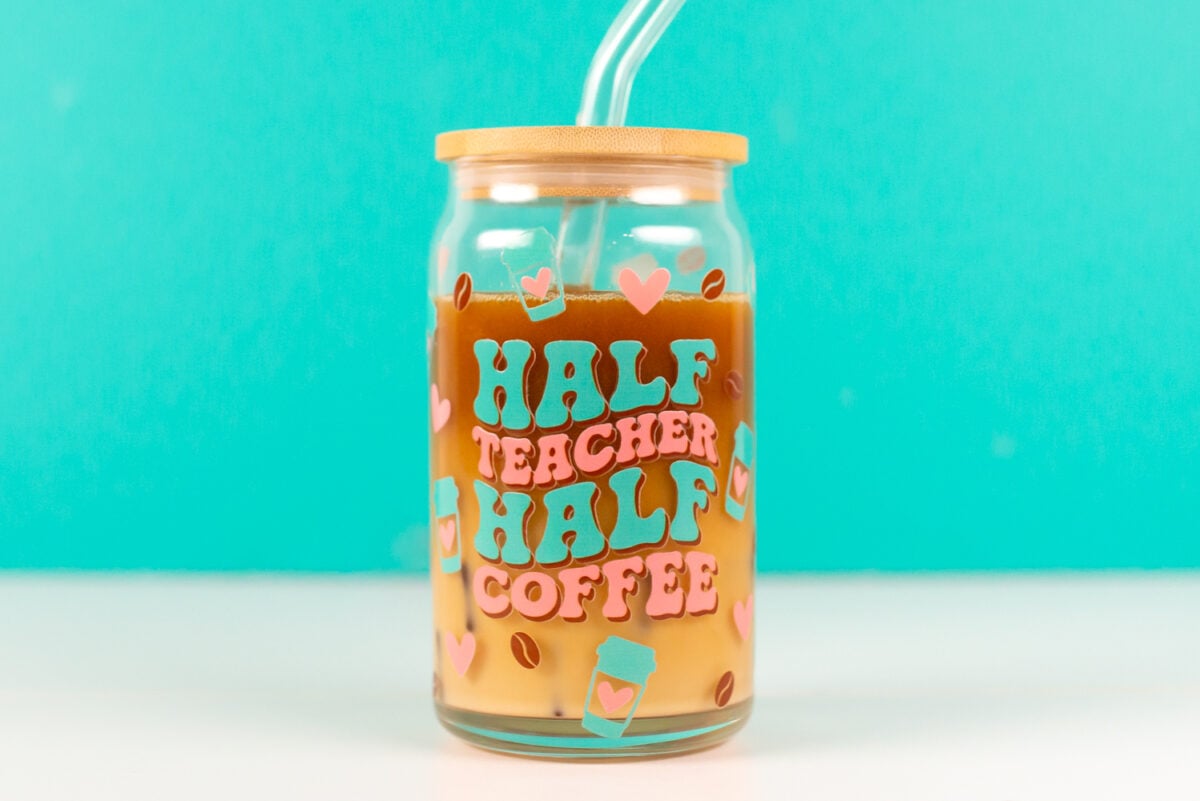
I’ve talked a bit about DTF printing here, but there is also another technology that is similar but also totally different: UV DTF. While DTF printing is designed for soft blanks like garments, UV DTF is like a very strong sticker that works well on hard surfaces. Both are printed on a film (DTF = direct to film), but that’s basically where the similarities end.
In today’s post, I’m going to talk about UV DTF printing and how to make a project using transfers you’ve ordered. If you want to learn more about regular DTF printing, see The Beginner’s Guide to DTF Printing.
Watch the Video
Want to get a video overview of DTF vs. UV DTF? Just hit play below! Or keep reading for a written tutorial.
Get the Free File
Want access to this free file? Join my FREE craft library! All you need is the password to get in, which you can get by filling out the form below. The file number is: S36.
What is UV DTF Printing?
UV DTF is a printing process where the printer prints onto a film. And adhesive is then cured (by the manufacturer) to the back using UV light. The film with the printed design can then transferred onto a hard substrate like glass, metal, or plastic. The UV curing process ensures that the image has vibrant colors and good durability, making it suitable for high-quality, long-lasting prints on various materials.
The top layer is glossy, which may be a downside to those of you who want a matte finish to your stickers and decals. I’m hoping that a matte finish will be available soon from some suppliers since I know many folks want that option!
The back of a UV DTF transfer is white. This is because a layer of white is added to all stickers to make the colors pop. Without that white layer, your sticker would most likely look really muddy when applied to a darker colored blank. You can use these transfers on any color blank—a black water bottle? Yes! A pink keychain? Yes!
The adhesive is STRONG on UV DTF transfers and may require a bit of a learning curve. I’ll talk a bit more about this later in this post.
What Can UV DTF Transfers Be Used On?
When thinking about a UV transfer, you’ll want to think about hard blanks. These apply sort of like adhesive vinyl (though they are much more durable) so anything that you might use with adhesive vinyl should work with UV DTF. Here are some ideas to get you started:
- Mugs
- Tumblers and water bottles
- Glass cans
- Phone and earbud cases
- Laptops, tablets, e-readers
- Bookmarks (plastic, acrylic, metal)
- Ornaments (plastic, acrylic, metal, ceramic)
- Keychains (plastic, acrylic, metal)
- Tumbler toppers
- Window decals
You can even use these transfers on projects that will be in the sun because they are UV resistant!
Designs
You can turn just about any image into a UV DTF transfer, but I did want to show one issue I had. I wanted to do a full cup wrap of a bookshelf. But I struggled to get my transfer to line up perfectly on the back. I tried three different times and each time it wasn’t straight.
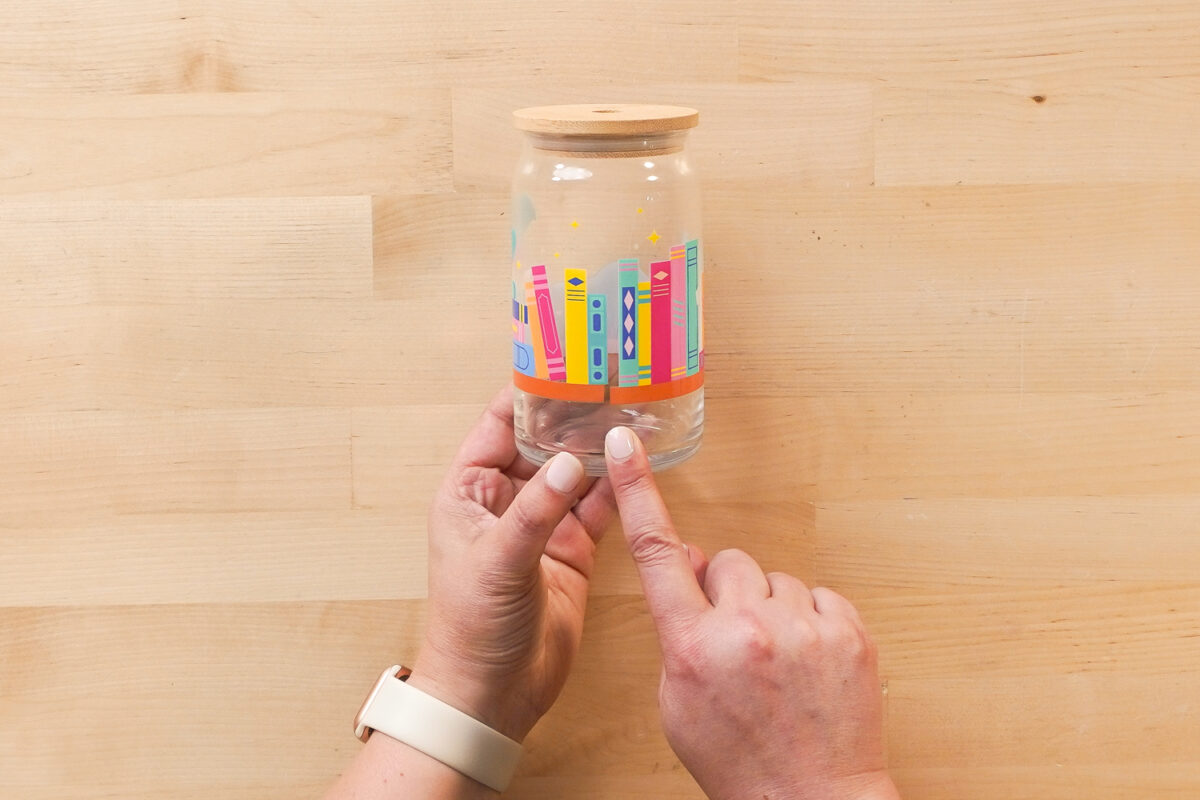
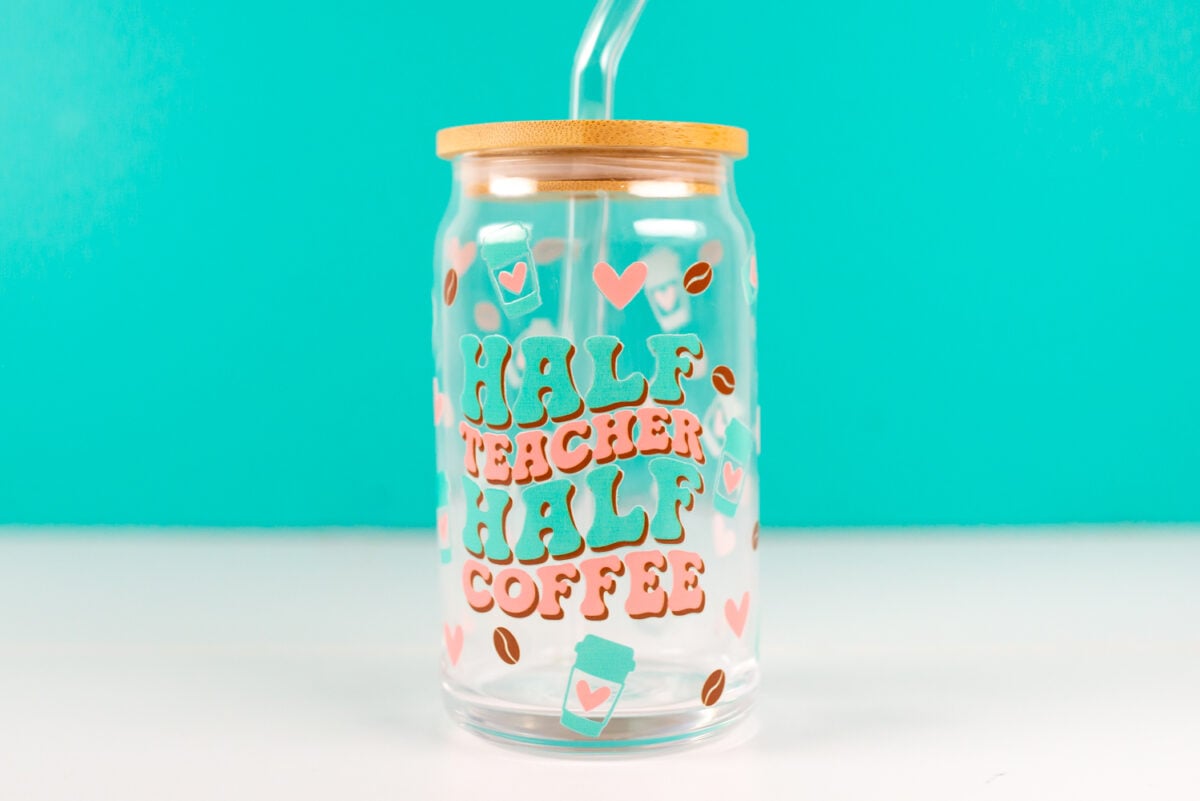
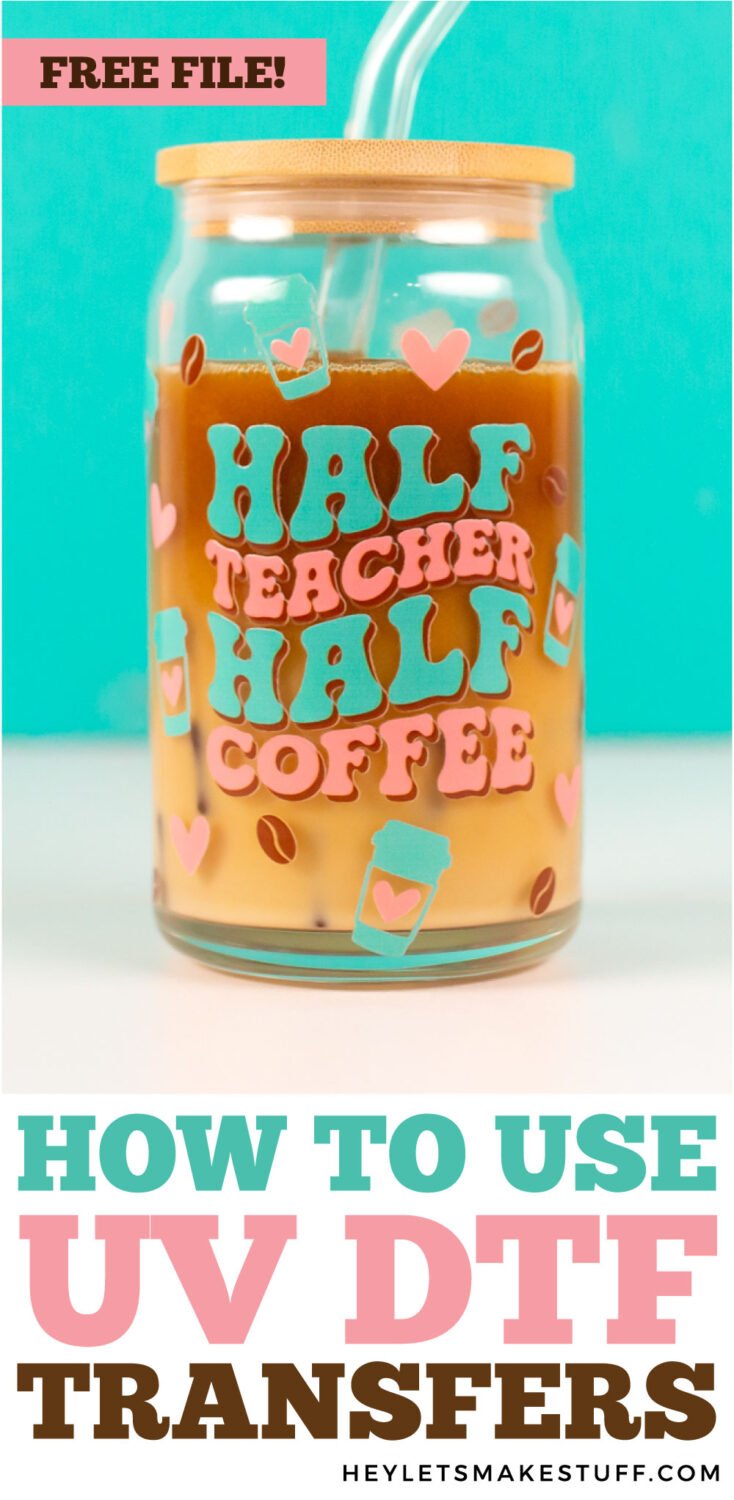
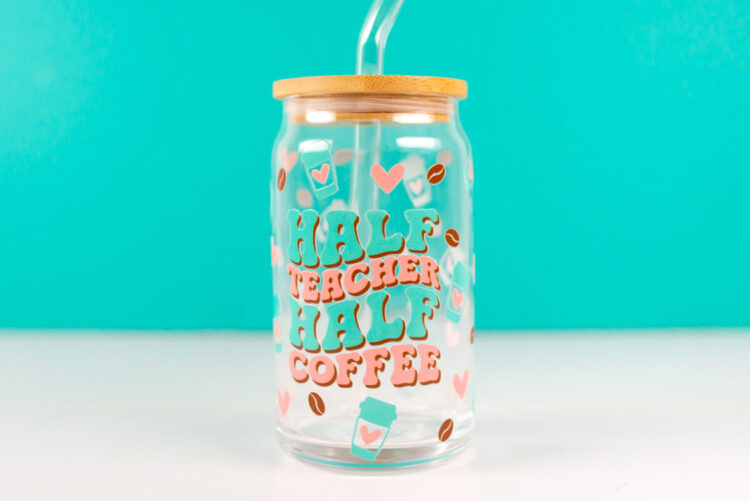
So if you want to do cup wraps or other projects where precision is important, you may want to choose an image like the one I have for you for free today. Instead of needing to line up perfectly, the floating elements can be off just a bit and it will still look good.
Ordering a UV DTF Transfer
There are many places that offer UV DTF transfers. I ordered from Ninja Transfers and that’s what I’ll show here, but the process is similar with most places you might order from.
On the Ninja Transfers website, there are a few ways to order UV DTF transfers, including using a gang sheet. This is where you have more than one design on a single sheet. I will be doing a whole post soon about creating a gang sheet that you can upload, so stay tuned for that.
But for this post, we’re just going to stick to ordering transfers individually by size.
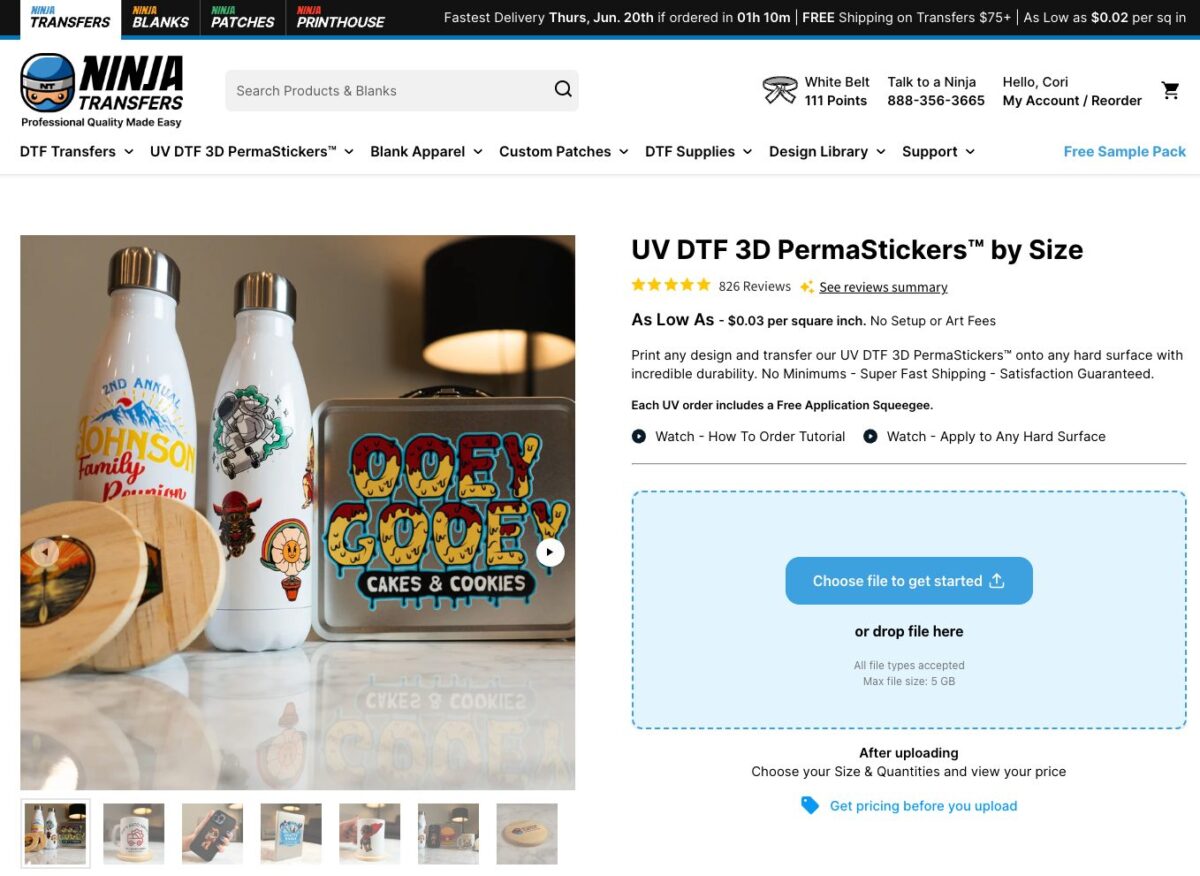
On this page, upload your file. I’m uploading the Half Teacher, Half Coffee file I designed that you can get above, but you could upload any image. You will want your image to have a transparent background or else it will print white.
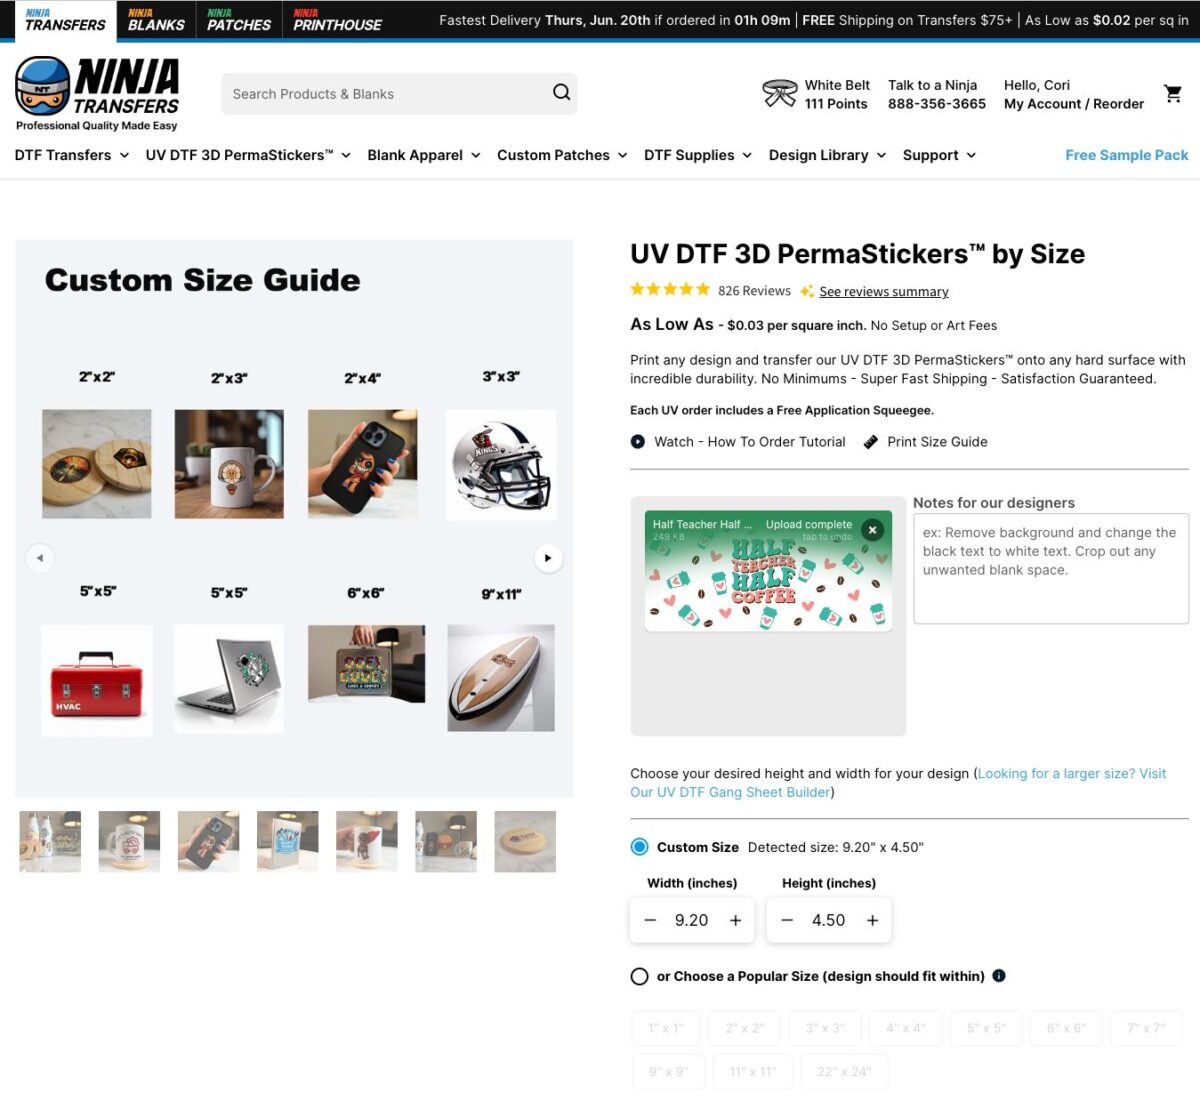
Because this was a special size for my particular project, I chose custom size. But if you are uploading more of a single image to use like a sticker, then there are also popular sizes to choose from.
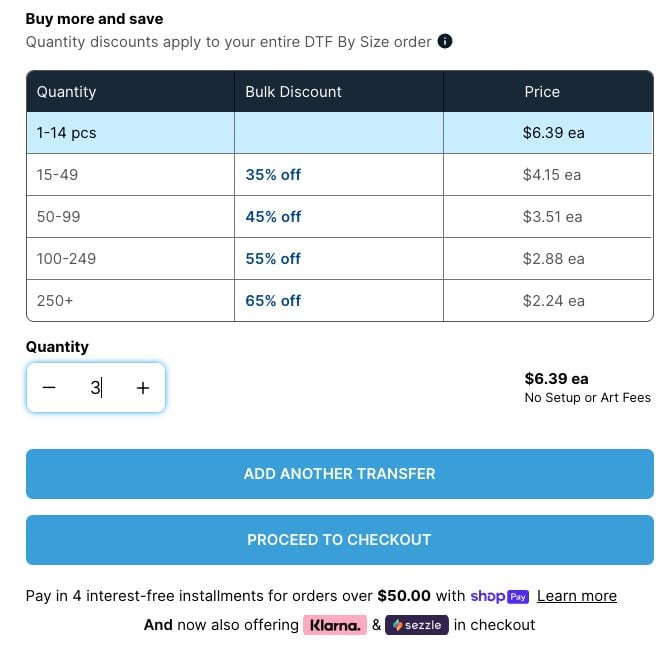
Then you can select the number of prints you want. Mine are a little expensive because they are a custom size and quite large. This is where a gang sheet might make things cheaper! Ordering in bulk also lowers the price.
UV DTF Transfer Application
Once you have your prints, it’s time to apply them to your blank! You don’t need any other transfer tape or anything to apply your UV DTF transfer to your blank.
If you’ve ordered more than one transfer, cut them apart using scissors.
With your Ninja Transfers order, you should get a felt-wrapped scraper. If you used another printer and you don’t have one of these scrapers, you can get a felt-wrapped scraper on Amazon. You can also wrap a piece of felt around a Cricut scraper or credit card.
Clean Your Surface
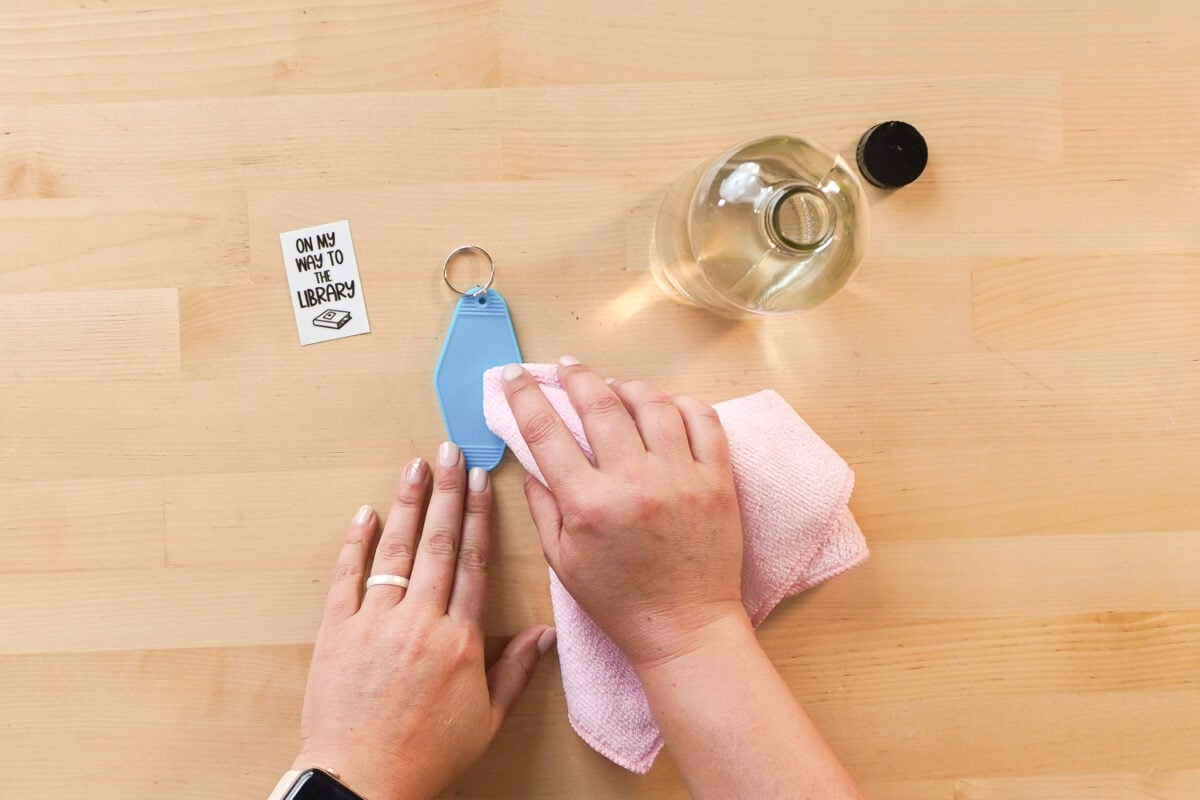
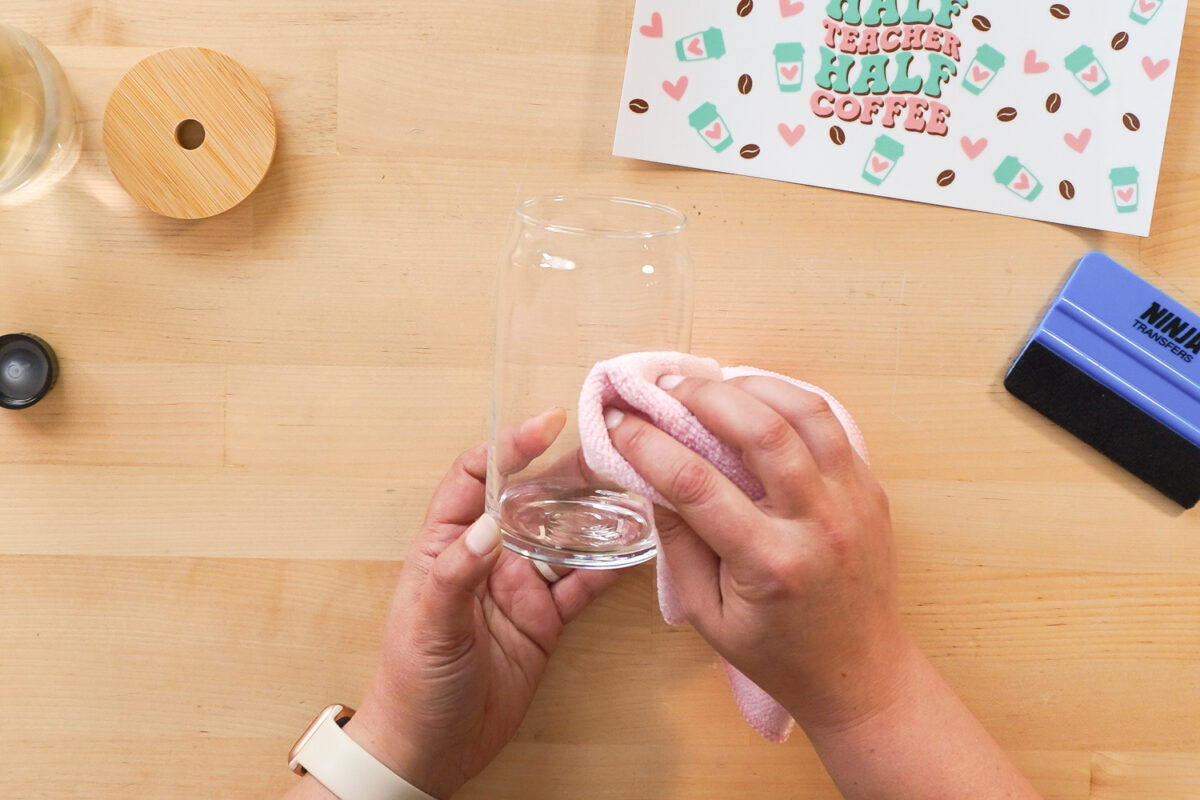
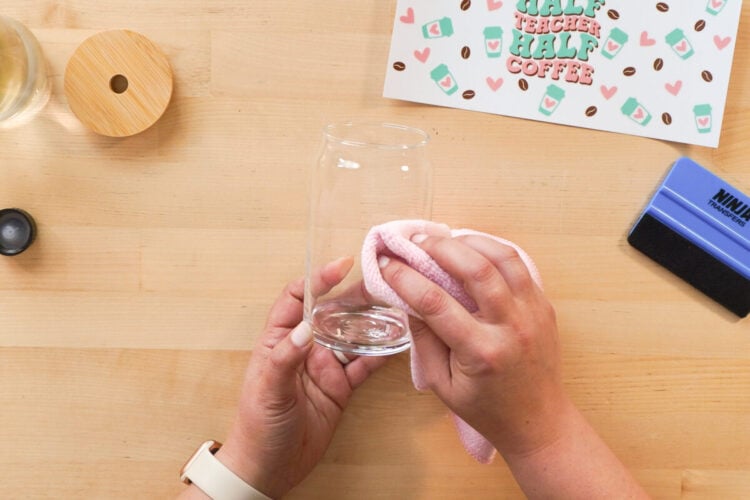
It’s very important that we start with a very clean surface. A lint roller is not enough. You’ll want to use alcohol and a microfiber cloth to pick up any oils, fingerprints, or other things that can get in the way of good adhesion. Allow the alcohol to dry fully before proceeding.
Sticker Application
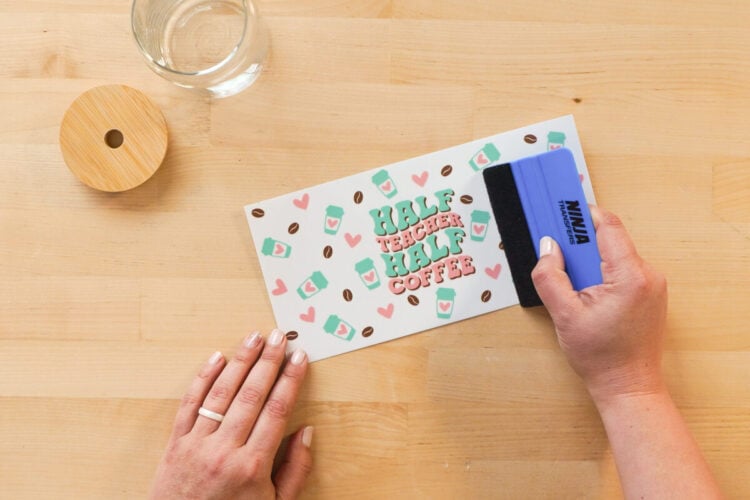
If your top laminate has any bubbles, run the scraper over the top to make sure that top layer is smooth.
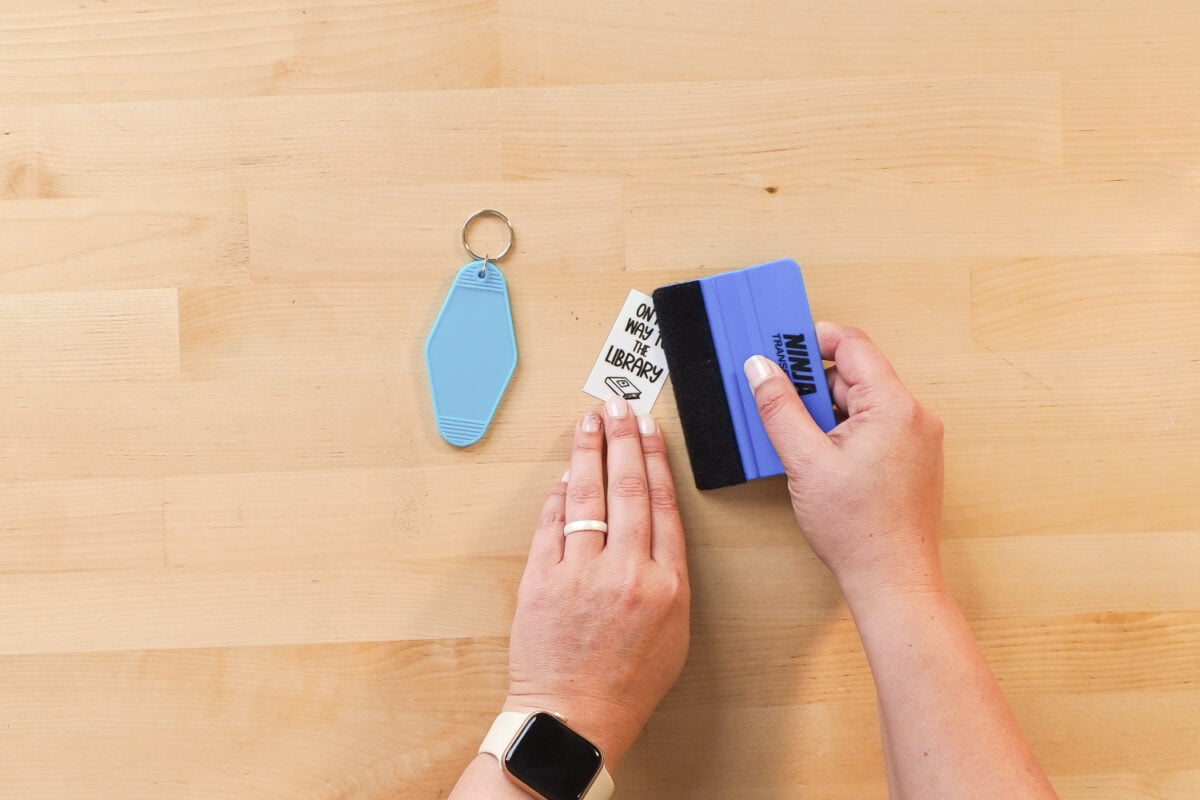
For smaller applications like a sticker, you can just peel off the white backing piece. The inked layer should stick to that clear laminate piece.
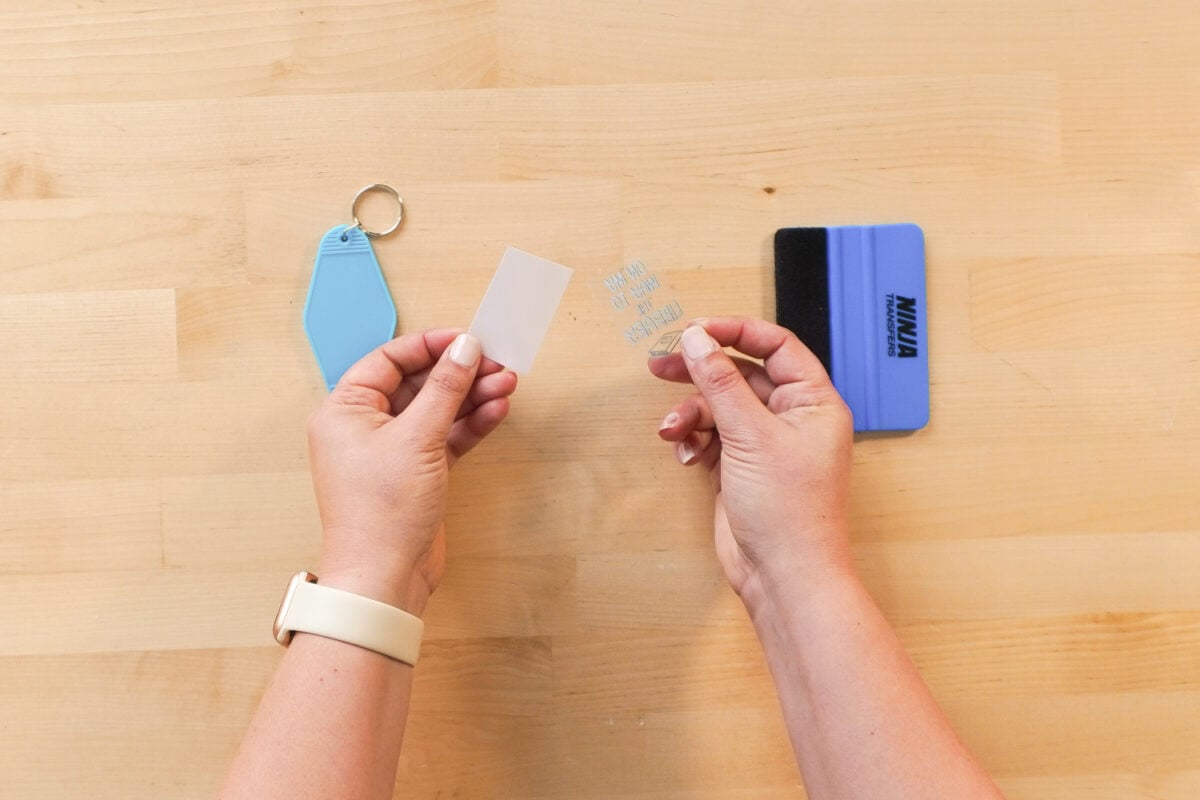
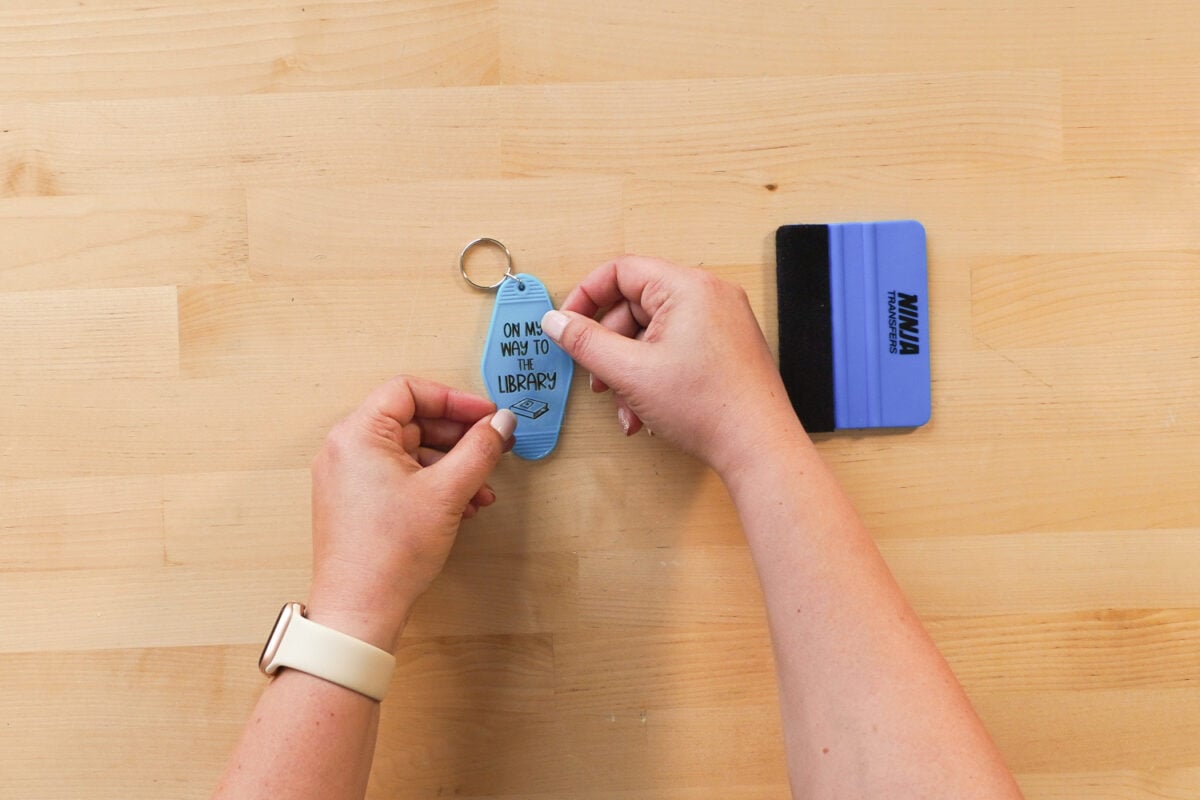
Then you can just apply similarly to a vinyl decal. Locate your sticker where you want it, noting that the adhesive is VERY strong. Once you set it down, it’s going to be stuck, so get it right the first time.
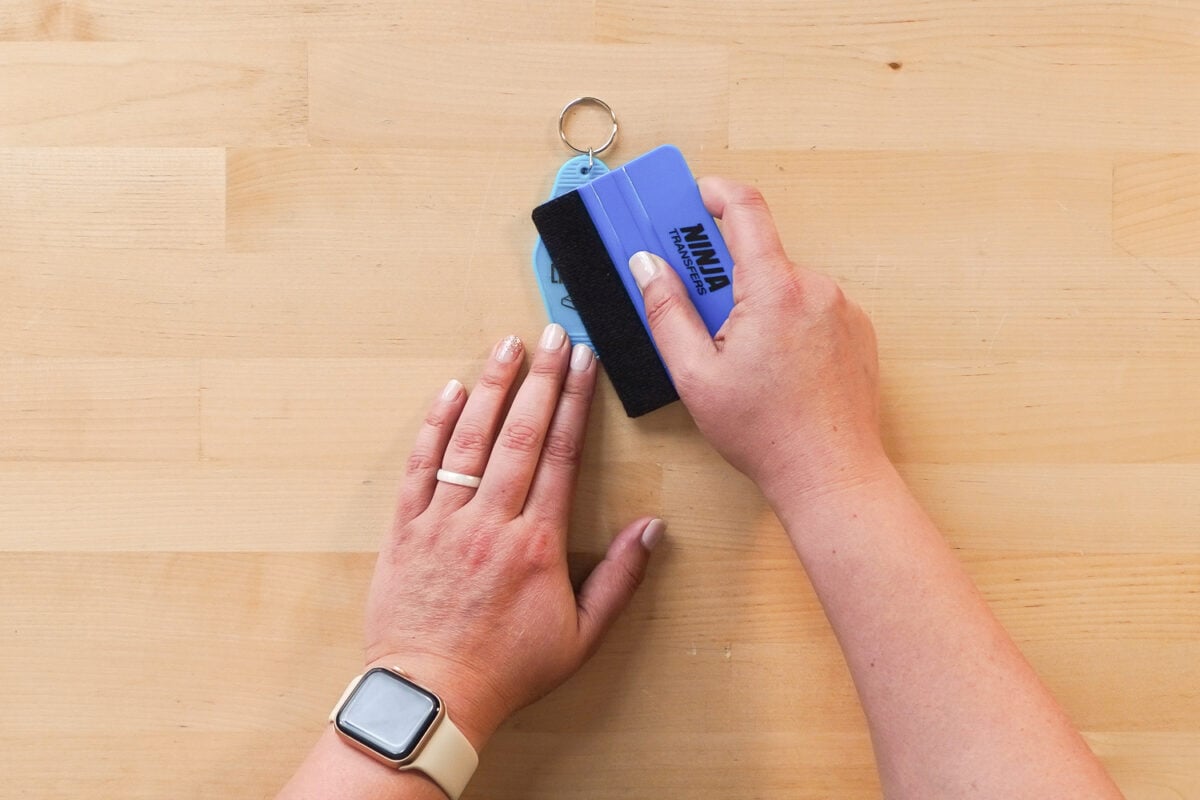
Burnish it with the scraper to make sure everything is adhered.
Peel back the clear liner. The liner is very strong and you may need to pull hard—be careful that your transfer is fully stuck down or you can rip it. Peel back against the surface of your blank, vs. pulling up and away from the blank.
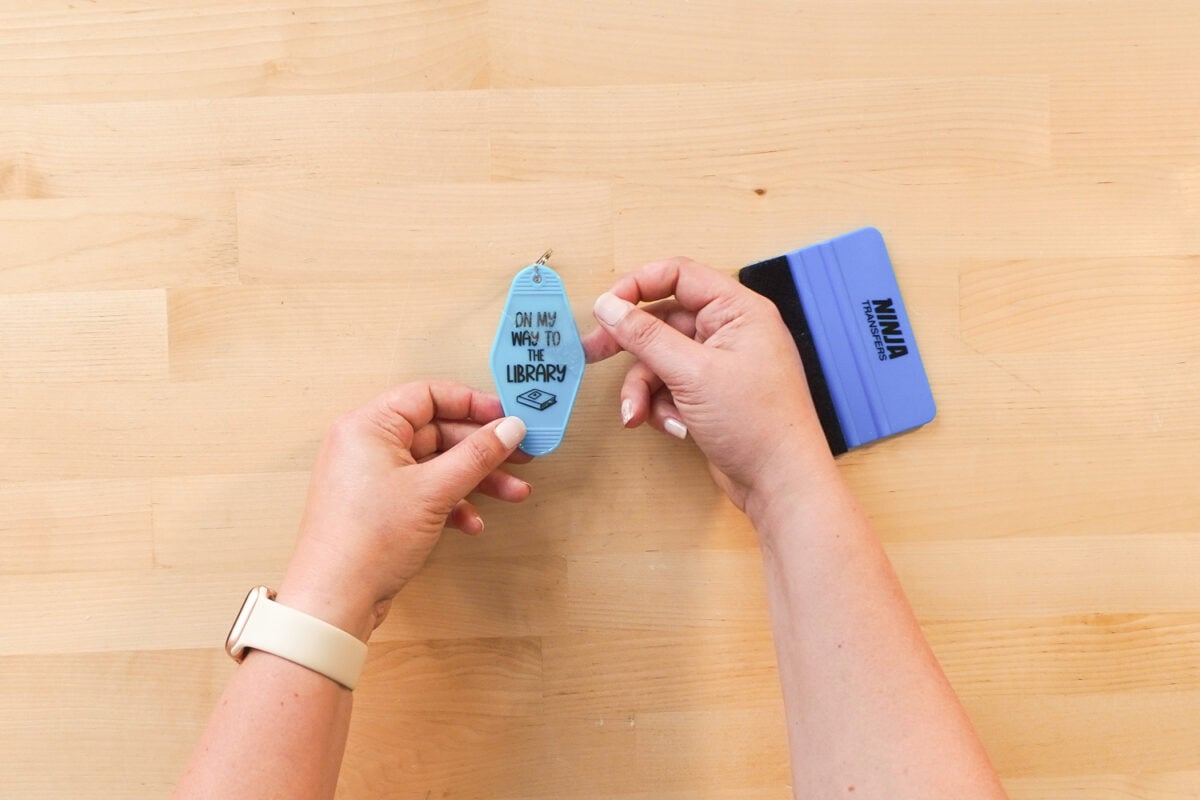
See below for troubleshooting tips if your transfer rips.
That’s it!
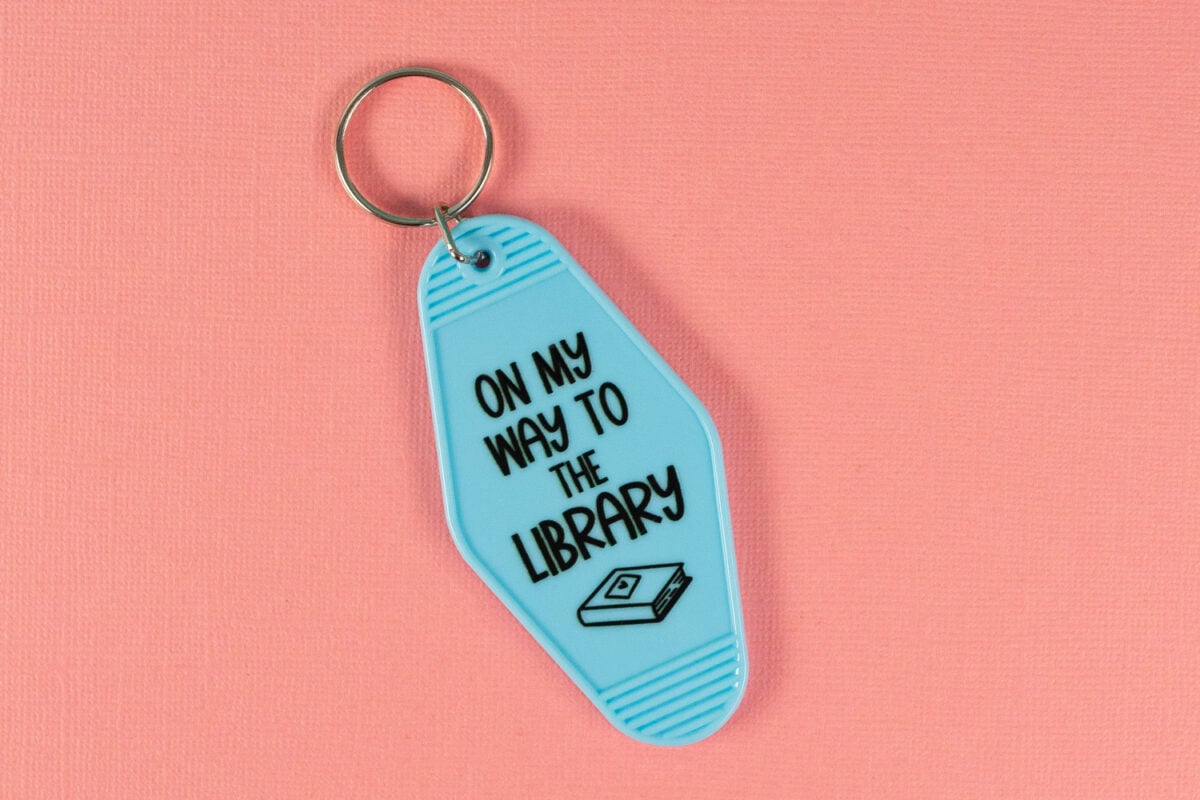
Wrap Application
If your top laminate has any bubbles, run the scraper over the top to make sure that top layer is smooth.
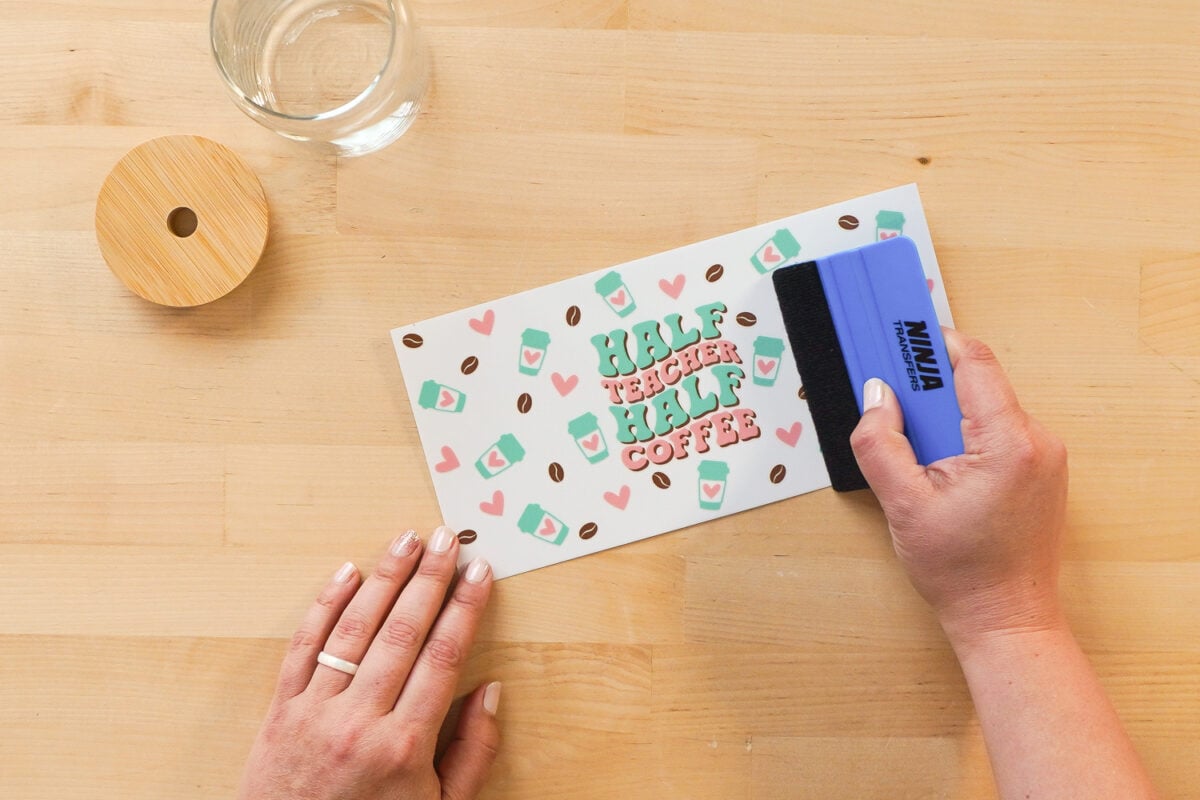
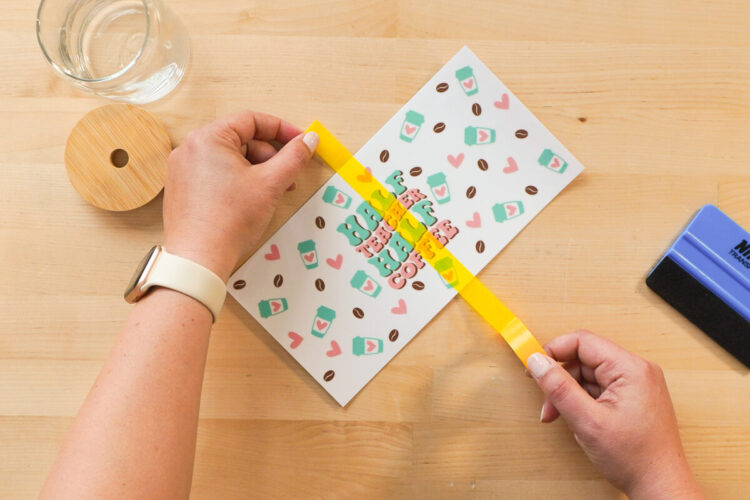
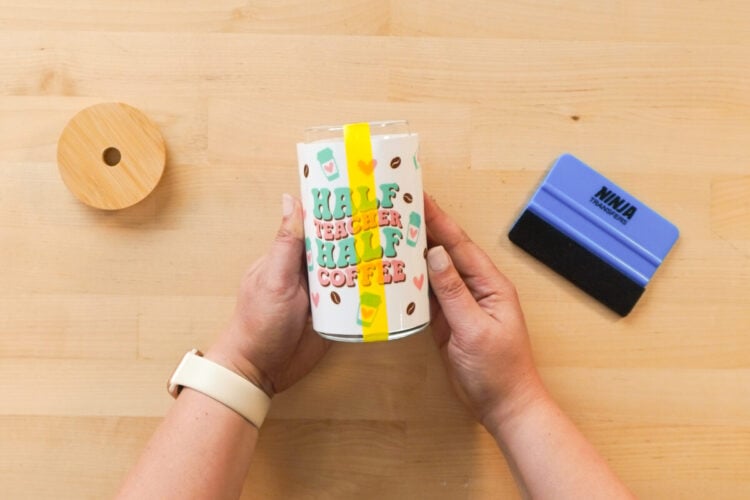
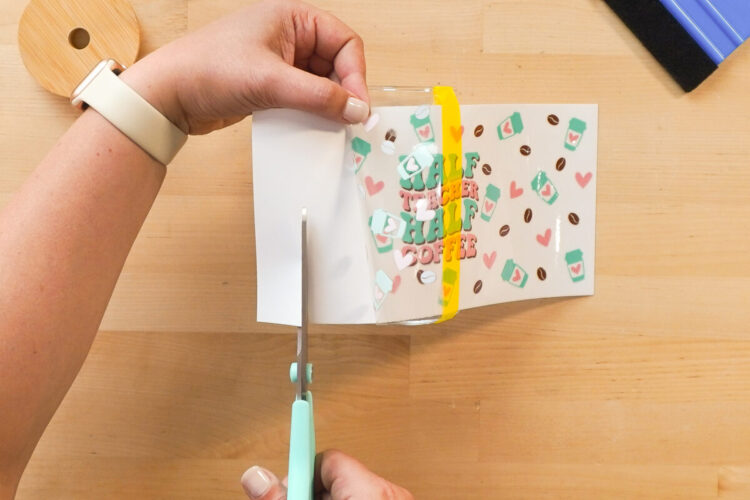
I’m doing a tumbler wrap so I am going to use the hinge method. I started by taping my transfer to my cup with the backing still on.
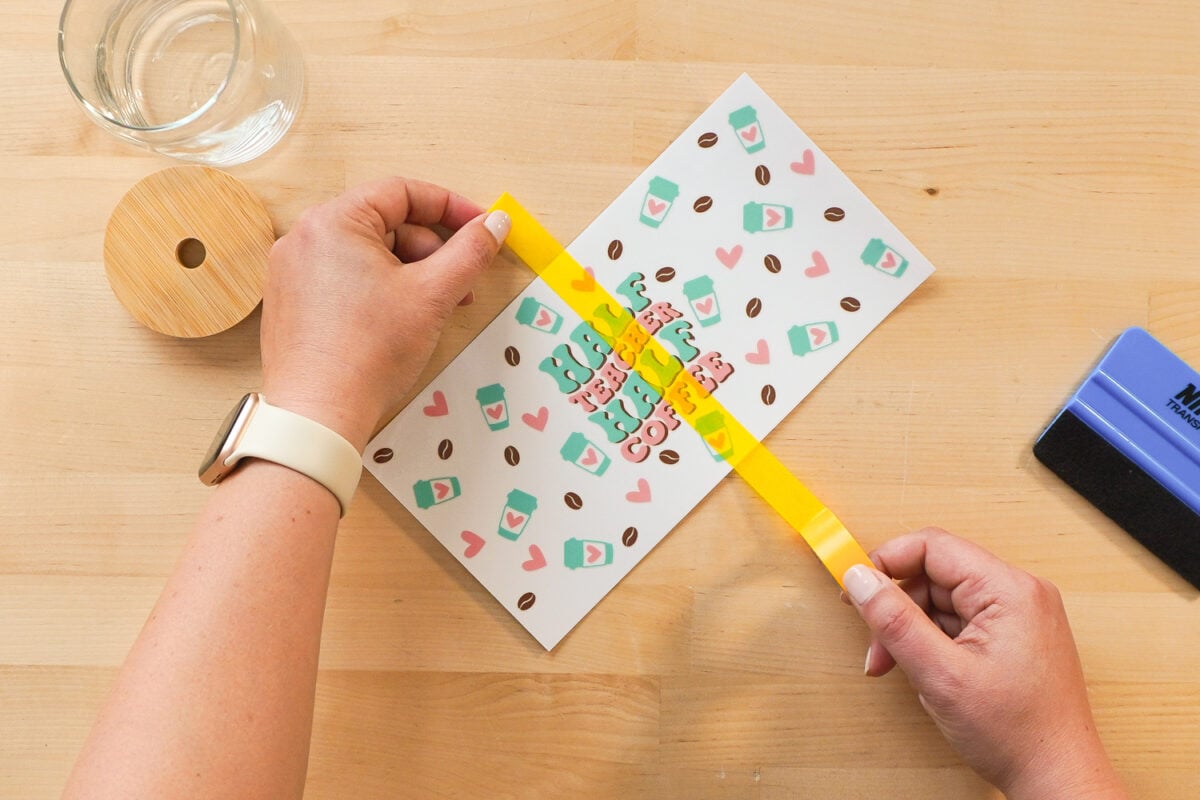
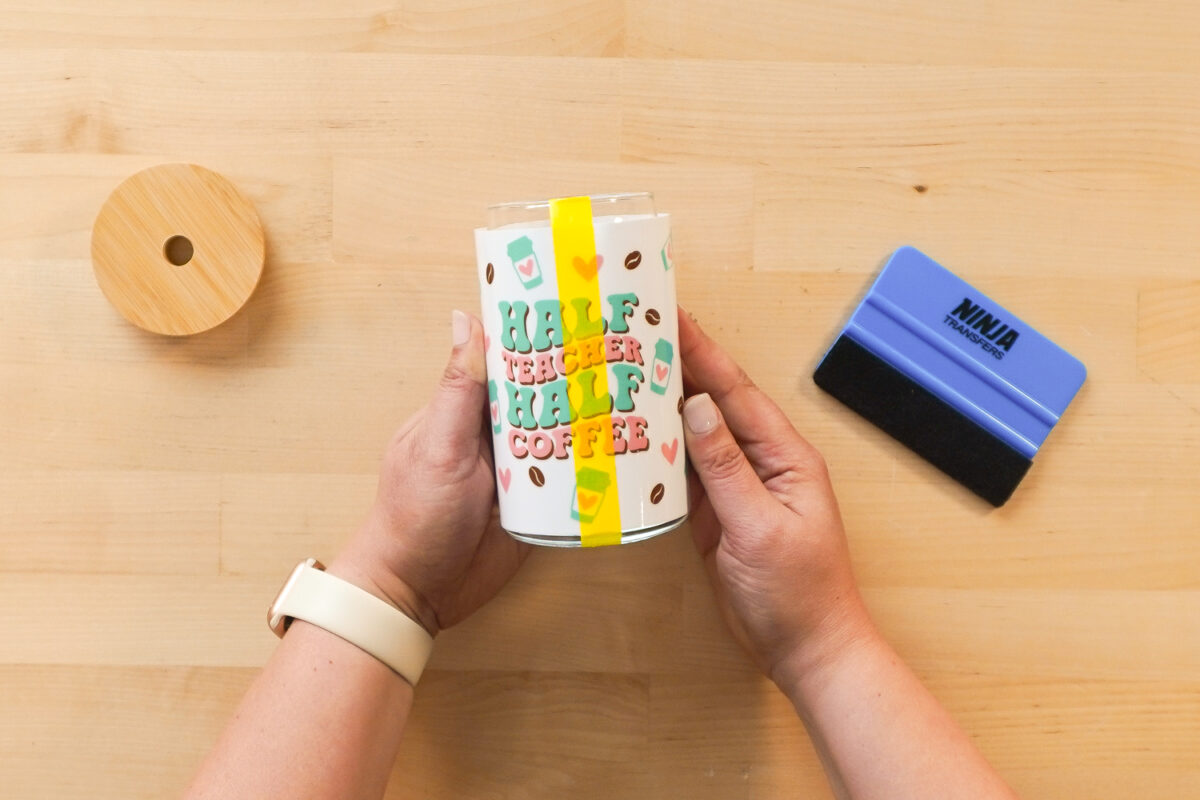
Then peel off just one side and cut the backing away from maybe an inch of your wrap.
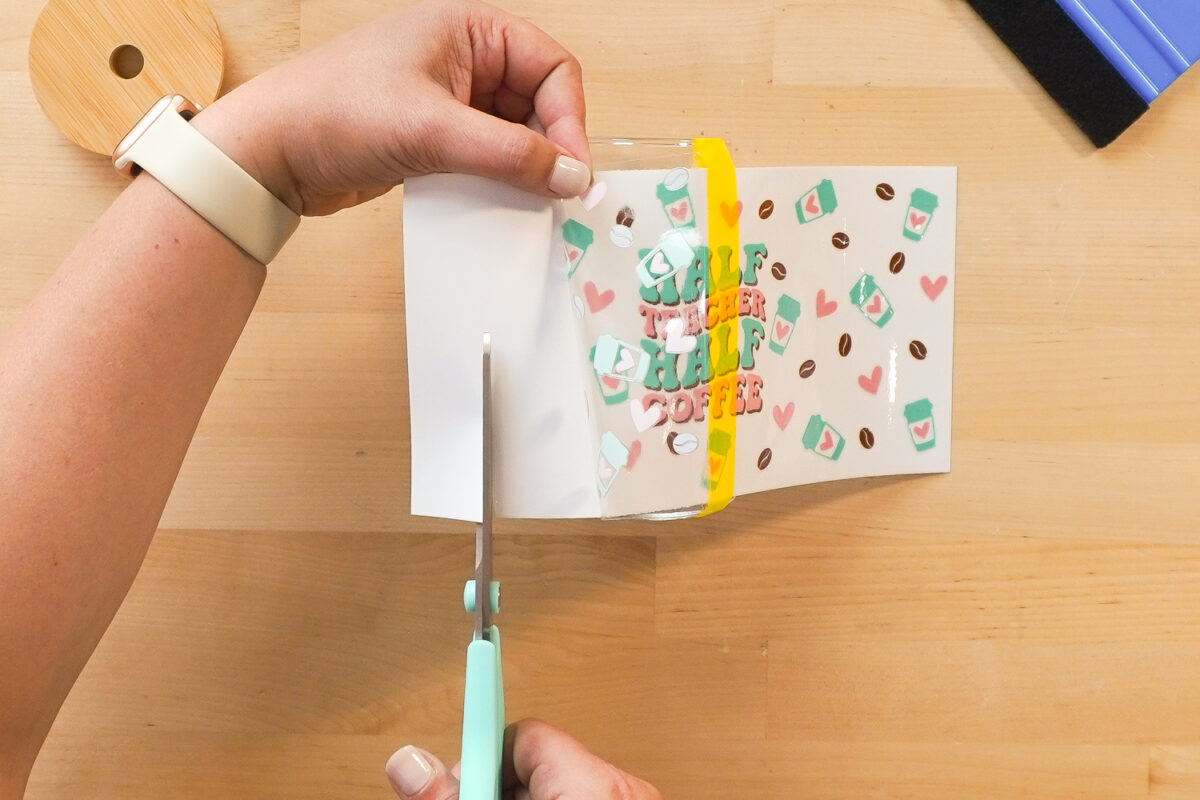
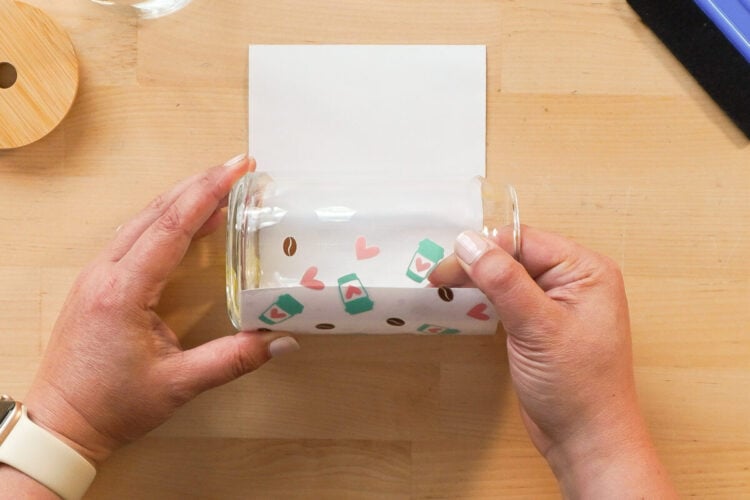
Making sure your wrap is as straight as possible, place down the edge of the wrap. This stuff is STICKY so you have to get it right the first time. There’s no peeling it up and putting it back down.
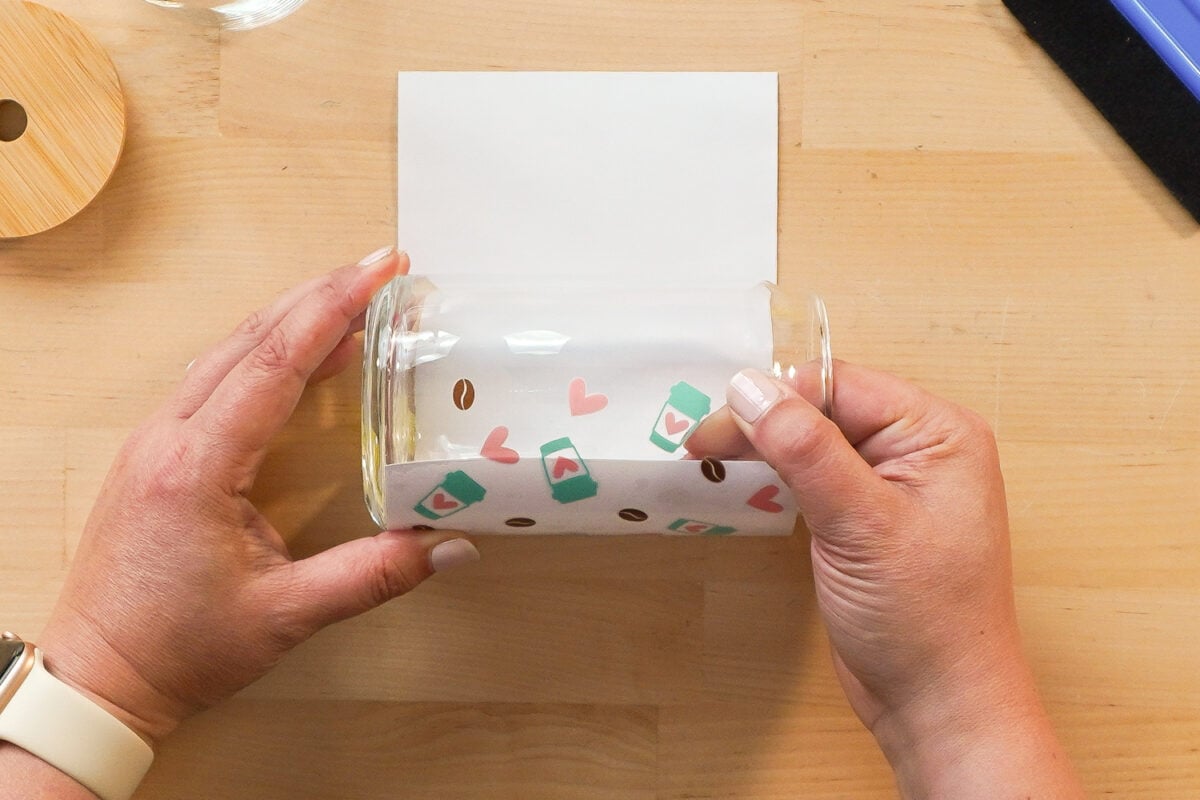
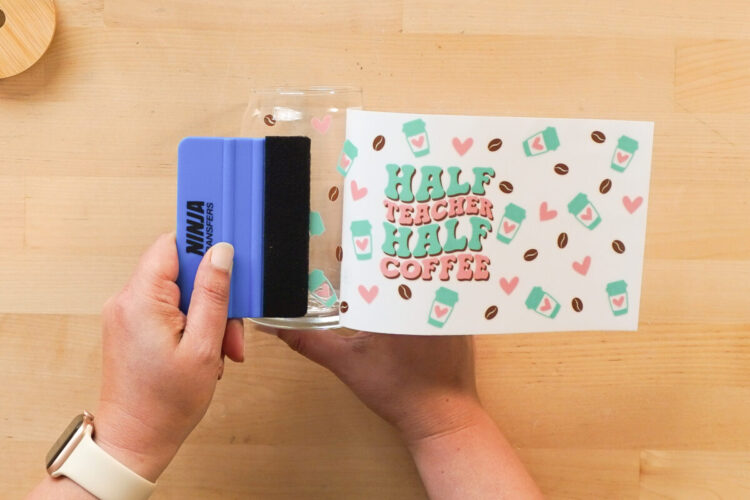
Then carefully pull the backing away as you use the scraper to apply the sticker to the surface. Work your way around the cup slowly. Burnish it with the scraper and your fingers.
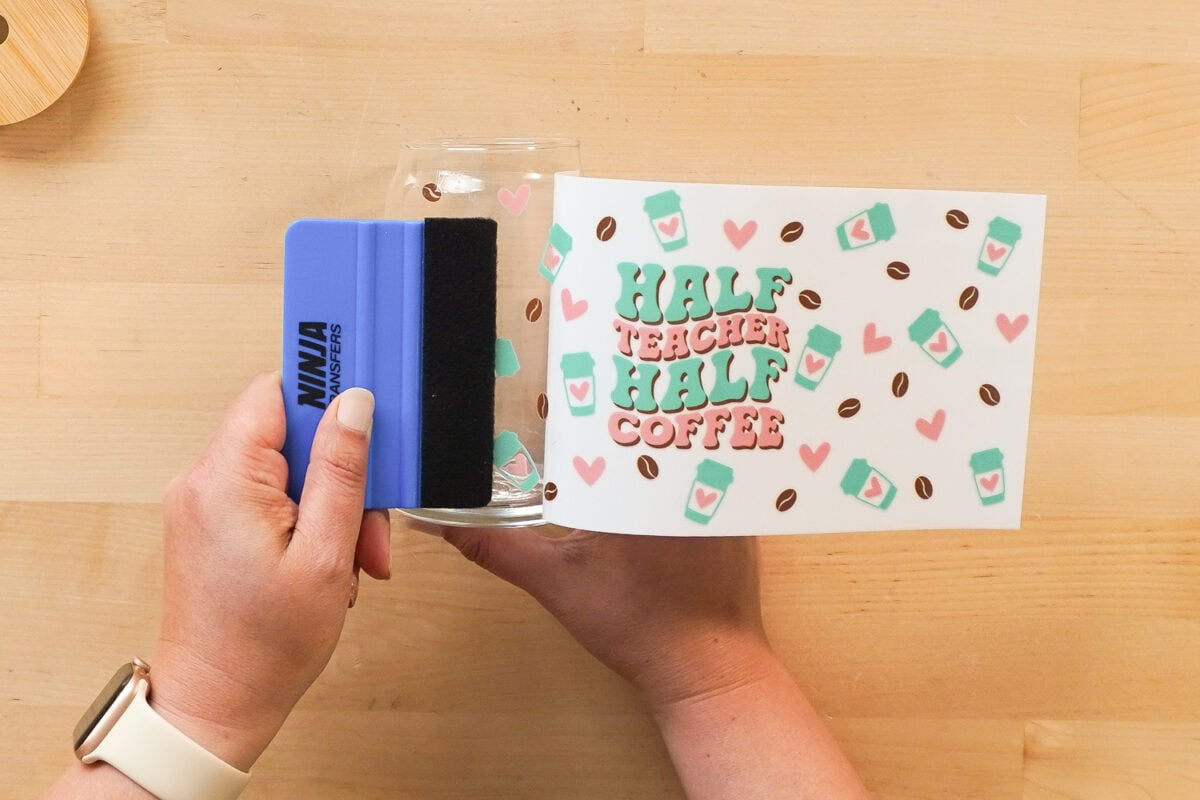
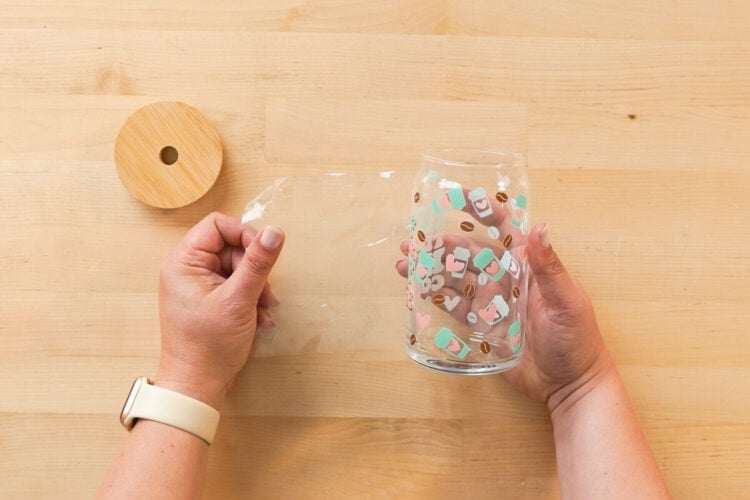
Then carefully peel back the clear liner. The liner is very strong and you may need to pull hard—be careful that your transfer is fully stuck down or you can rip it. Peel back against the surface of your blank, vs. pulling up and away from the blank.
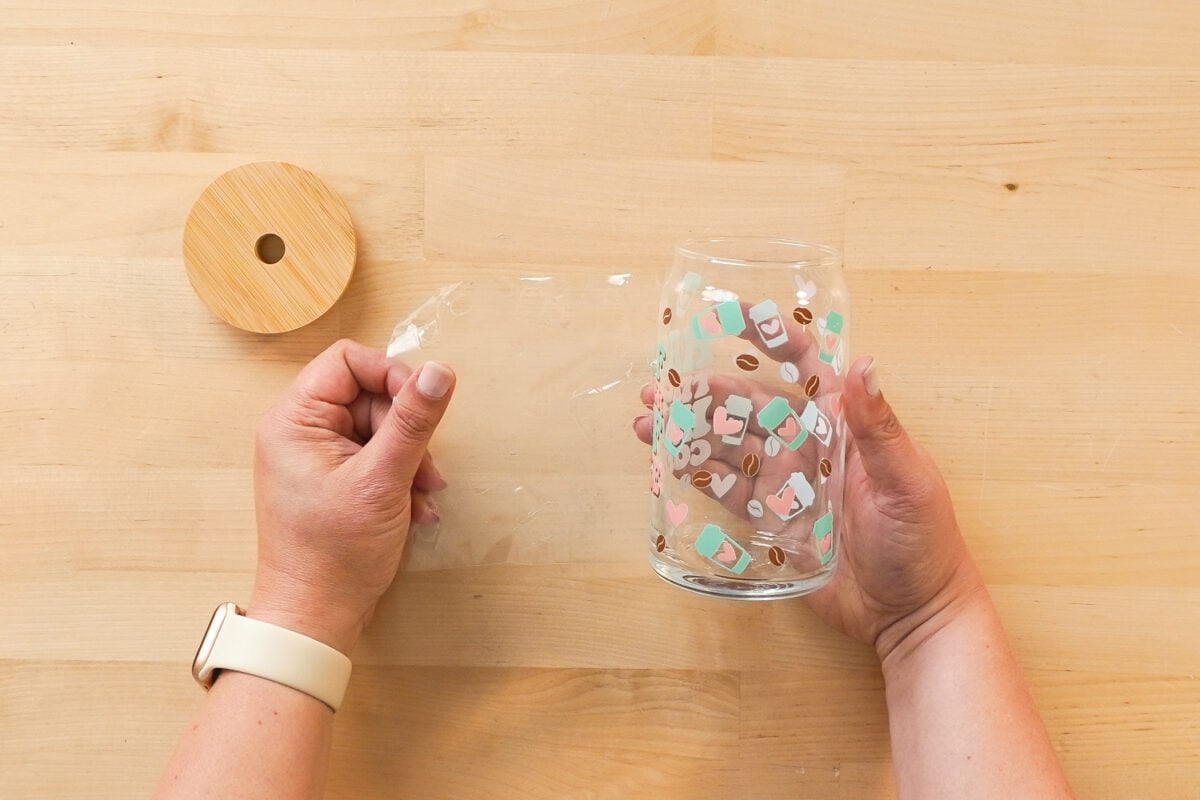
If your transfer tears, see below for troubleshooting it.
That’s it!
Troubleshooting
I have now done about 150 UV transfers for a craft fair, mostly on keychains and bookmarks. I’ve got the process down, and yet I still occasionally have times when I am peeling back my transfer and it tears.
I have been able to save 100% of my projects by watching the peeling process closely so I can see where the transfer tears as I go. If you see a bit of transfer that didn’t stick, carefully place it back down exactly where it goes. Then burnish with your scraper once again and carefully peel the backing away from the torn area. With this method, you won’t be able to see the rip at all!
UV DTF Transfer Wash Instructions
Many of these transfers say they are dishwasher safe, but there are a lot of people who have actually tried and ended up with a peeling transfer. So my recommendation is to hand wash anything that has a UV DTF transfer.
Pros and Cons
Let’s look at an overview of the pros and cons of using a UV DTF Transfer!
Pros
- Better adhesion than vinyl
- Bright, vivid transfers
- Can be used on any color blank
- Permanent (do not put in dishwasher)
- No special coating needed on the blanks
- Professional results
Cons
- Sit on top of the surface (vs. sublimation where the image is embedded in the blank itself)
- You have to get it right the first time
HOW TO USE UV DTF TRANSFERS
Supplies
- blank of your choice
- Free Half Teacher / Half Coffee UV DTF File #S36
Instructions
- UV DTF Transfer ApplicationOnce you have your prints, it's time to apply them to your blank! You don't need any other transfer tape or anything to apply your UV DTF transfer to your blank. If you've ordered more than one transfer, cut them apart using scissors.With your NInja Transfers order, you should get a felt-wrapped scraper. If you used another printer and you don't have one of these scrapers, you can get a felt-wrapped scraper on Amazon. You can also wrap a piece of felt around a Cricut scraper or credit card.
- Clean Your SurfaceIt's very important that we start with a very clean surface. A lint roller is not enough. You'll want to use alcohol and a microfiber cloth to pick up any oils, fingerprints, or other things that can get in the way of good adhesion. Allow the alcohol to dry fully before proceeding.

- Wrap ApplicationIf your top laminate has any bubbles, run the scraper over the top to make sure that top layer is smooth.

- For this project, the design is for a tumbler wrap so the hinge method will be used.

- Start by taping the transfer to the cup with the backing still on.

- Then peel off just one side and cut the backing away from maybe an inch of your wrap.

- Making sure your wrap is as straight as possible, place down the edge of the wrap. This stuff is STICKY so you have to get it right the first time. There's no peeling it up and putting it back down.

- Then carefully pull the backing away as you use the scraper to apply the sticker to the surface. Work your way around the cup slowly. Burnish it with the scraper and your fingers.

- Then carefully peel back the clear liner. The liner is very strong and you may need to pull hard—be careful that your transfer is fully stuck down or you can rip it. Peel back against the surface of your blank, vs. pulling up and away from the blank.

- That's it!



Leave A Reply!