If you need help aligning your HTV, sublimation, or other decorative decals on a shirt, there are quite a few options on the market. In this post I’m testing four different t-shirt rulers to figure out which one is the best!
This post was sponsored by BELLA+CANVAS but all opinions are my own!
Tired of your t-shirt decals being crooked on your shirts? Maybe you have a tough time eyeballing where the decal goes. Or maybe you have a t-shirt ruler, but you have no idea how to use it. If any of these are true for you, then keep reading!
I talk a lot about how to decorate shirts on this blog. From dozens of types of HTV to sublimation, there are so many ways to make custom shirts. But you can easily ruin a perfectly good shirt by adding the design too high or too low or crooked.
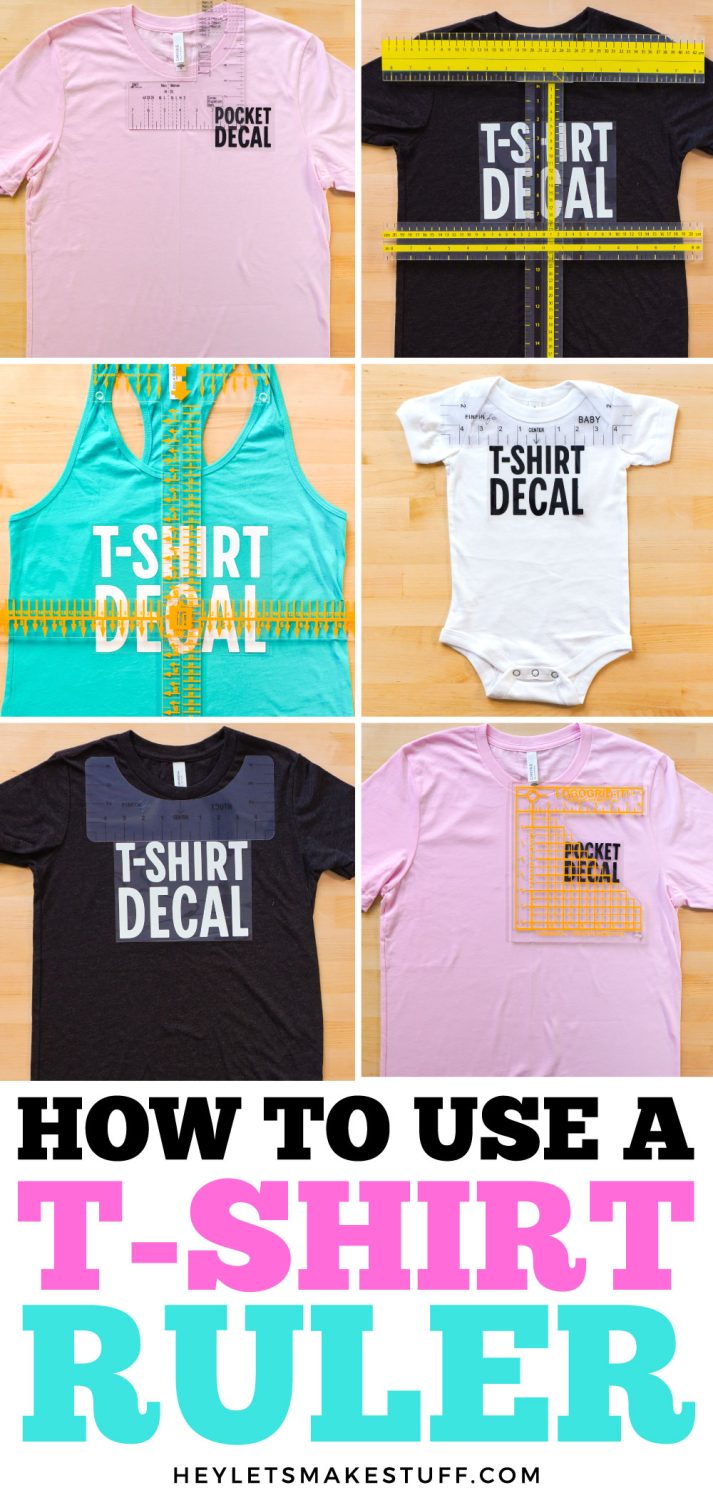
In this post, I’m going to show you how to use four different t-shirt rulers! For each ruler, we’ll look at the price and ease of use, and I’ll give you the pros and cons of each so you can make the best choice for your needs and budget. Note that because of Amazon’s terms of service, I can’t share the exact price of these rulers in my post, so I’m just using dollar symbols to indicate how expensive they are compared to the other rulers.
Here are the four t-shirt rulers we are going to test:
- 9-Piece Transparent T-Shirt Ruler Set
- Tee Square It Graphic Alignment System
- UPTTHOW T-Shirt Ruler System
- Logo Placement Ruler
See all the rulers I feature in this post in my t-shirt ruler Amazon shopping list!
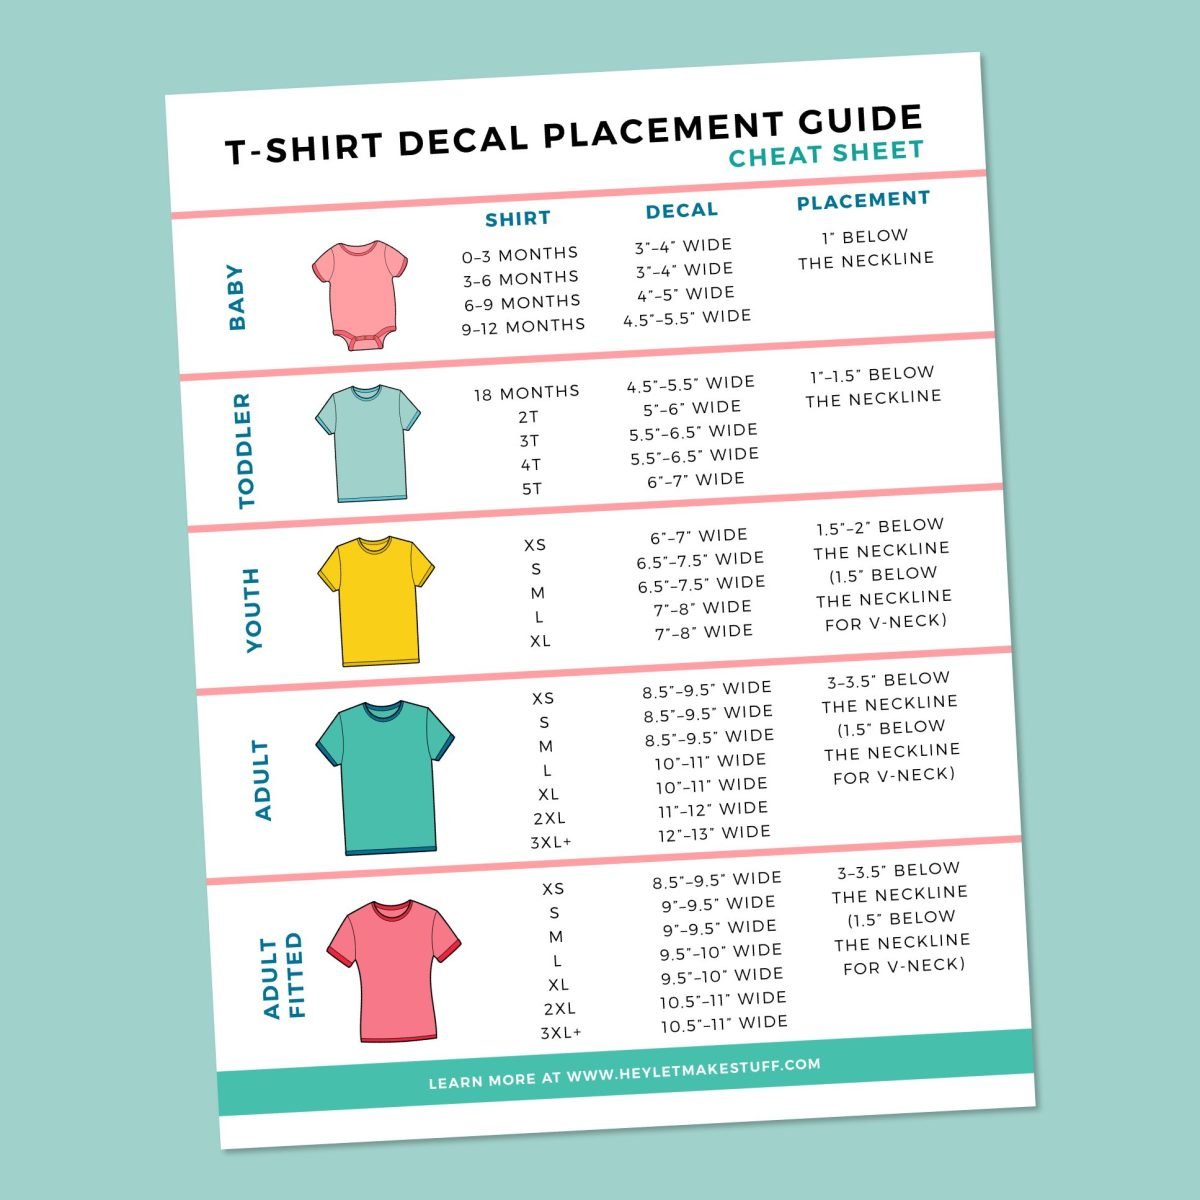
There’s also a free printable t-shirt decal placement guide that you can grab from my resource library! This will help you determine how large your decal should be depending on the type and size of your shirt.
Shirts for Testing
For this project I am, of course, digging into my BELLA+CANVAS stash! I have a huge bin of awesome BELLA+CANVAS shirts and other garments so I knew I could find four very different styles to test with all of these rulers.
Did you know BELLA+CANVAS tees come in up to 300 colors, depending on the silhouette? And they are so incredibly soft, especially their Tri-blend garments! Plus they have eco-friendly processes, like nearly 100% scrap recycling, environmentally friendly dyeing processes and more.
For this post I’ve pulled out:
- Medium adult tee: BELLA+CANVAS 3001 in Pink
- Medium youth tee: BELLA+CANVAS 3001YCVC in Black Heather
- 6–12 Month Baby bodysuit: BELLA+CANVAS 100B in White
- Large adult racerback tee: BELLA+CANVAS 8800 in Teal
Did you know you can buy BELLA+CANVAS garments at wholesale pricing without a reseller license? Get a BELLA+CANVAS Maker’s Account! This account allows you access to the wholesale side of their business without the need for any permits or licenses. Even better? It’s free! Learn more in my post Buying Wholesale Blanks without a Resale License!
Watch the Video
Join me as I show you how to use all four of the rulers featured in this post!
Get the Free File
Want access to this free file? Join my FREE craft library! All you need is the password to get in, which you can get by filling out the form below. The file number is: P120.
On the Table or In the Heat Press?
You may be wondering where to use your ruler—on your table before you put your shirt onto the bottom plate of your heat press, or when you have the shirt already inside the heat press. It’s really up to you! I think it’s faster overall to use the rulers inside the heat press, but my photos are shown on my table just so that they are easier for you to see. Note that if you have larger shirts, you may have a harder time working within your heat press because the seams of the garment will hang off the sides of the bottom platen.
If you use your table instead of inside the heat press, you may want to use a small piece of tape or two (painter’s tape works well) to secure your decal to your shirt so when you move it to your press, it’s still in the proper location when you go to press.
The Parchment Trick
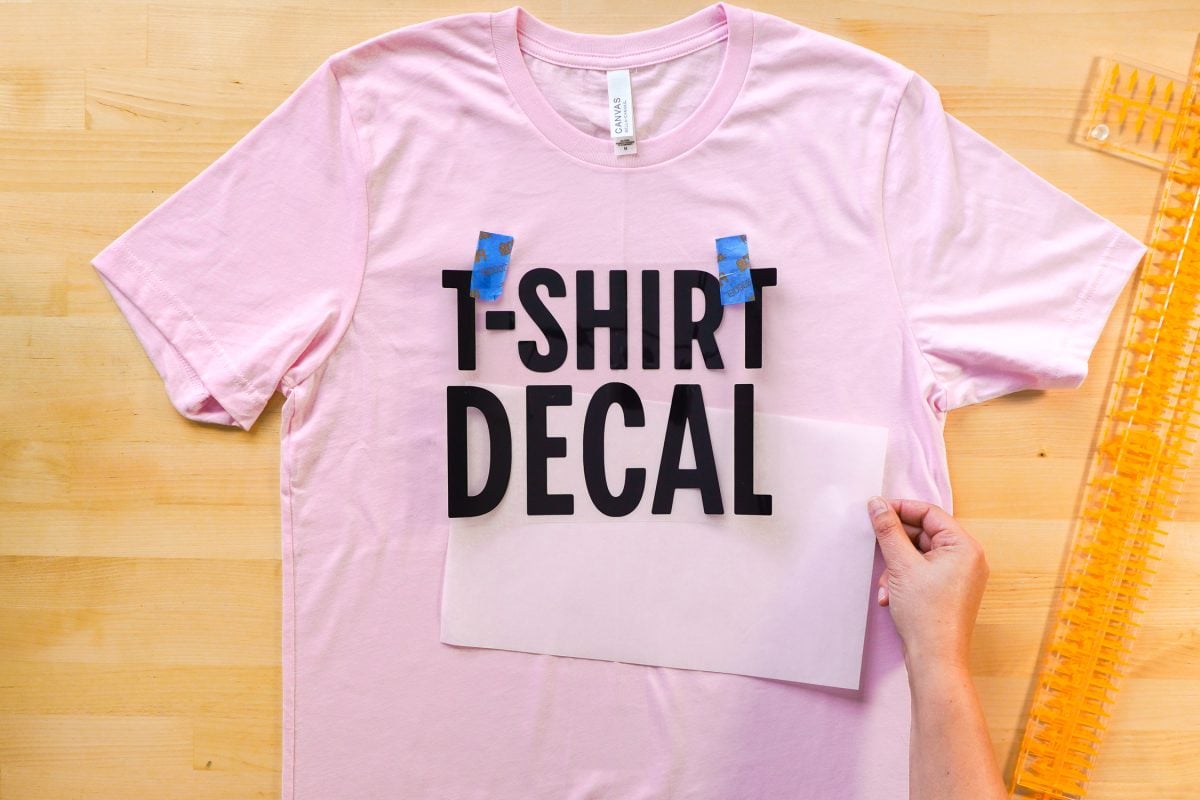
Sometimes you may struggle with moving your decal underneath some of the rulers here. HTV in particular can “stick” to the garment and try to pull it as you adjust your decal. Putting a piece of parchment paper or a teflon sheet underneath your decal while you center it can help. When centered, tape your transfer in one or two places and pull the sheet out from under the transfer.
V-Neck Shirts
If you have a v-neck shirt but no v-neck ruler, place your decal higher than suggested by the round-neck ruler. 1″–1.5″ from the bottom of the collar is a good rule of thumb.
Other Shirts
In this post, I share photos of a racer back tee using these rulers. I have to say, I didn’t find the rulers particularly helpful with this style of shirt. I was able to use them to make sure I had an equal distance from right to left, but I couldn’t use any of the collar measurements because the shirt was shaped differently than other “standard” shirts.
So depending on your shirt, t-shirt rulers may not work at all! If you make something other than standard tees, you may not find them as helpful.
9 Piece Transparent T-Shirt Ruler System
Overview
- Where to purchase: Transparent T-Shirt Ruler System
- Price: $
- Easy of Use: ★★★
- Pros: easy to use, inexpensive, wide variety
- Cons: harder to line up decals vertically, dark markings are hard to see on a dark shirt (you may want to buy a light set and a dark set), some reviews say the markings wear off quickly
Let’s start with the most common type of t-shirt ruler that you’ll see many crafters using. These are a popular choice because they are inexpensive and you get a wide number of options, from infant bodysuits up to adults. Some sets come with a v-neck option as well. You can also make your own versions using SVG t-shirt ruler files found on Etsy or elsewhere online. But honestly, at the price point, I think purchasing them is easier.
This set says “9 piece” but there are actually only 7 rulers. There’s also yellow heat tape (trash it, it’ll leave yellow marks on your shirts) and a tape measure.
How to Use
First up, it’s good to find the center of your shirt. This is because every t-shirt is a little different in the way the collar and tags and sleeves are sewn. So you could think you have the center of your shirt, but it’s actually a little off. Some of the other rulers I’ll talk about here have rulers for finding the center of your garment, but these rulers do not.
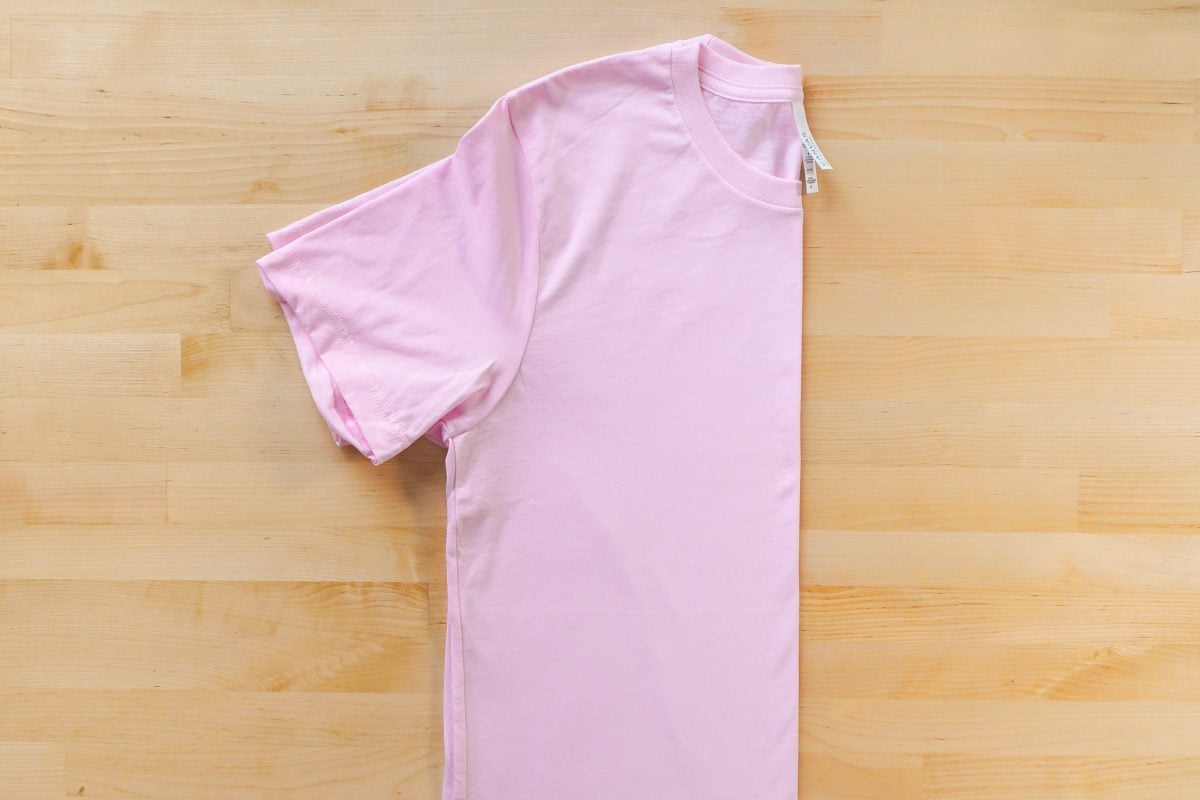
Fold your shirt in half, matching up the shoulder seams and side seams. Then use your heat press or EasyPress to press the fold line on your shirt. This is the center.
Unfold the shirt and place it on your pressing pad or the bottom of your heat press. Place your decal on your shirt, and then lace the ruler so the top of the shirt so that the curve of the ruler sits at the bottom seam of the collar.
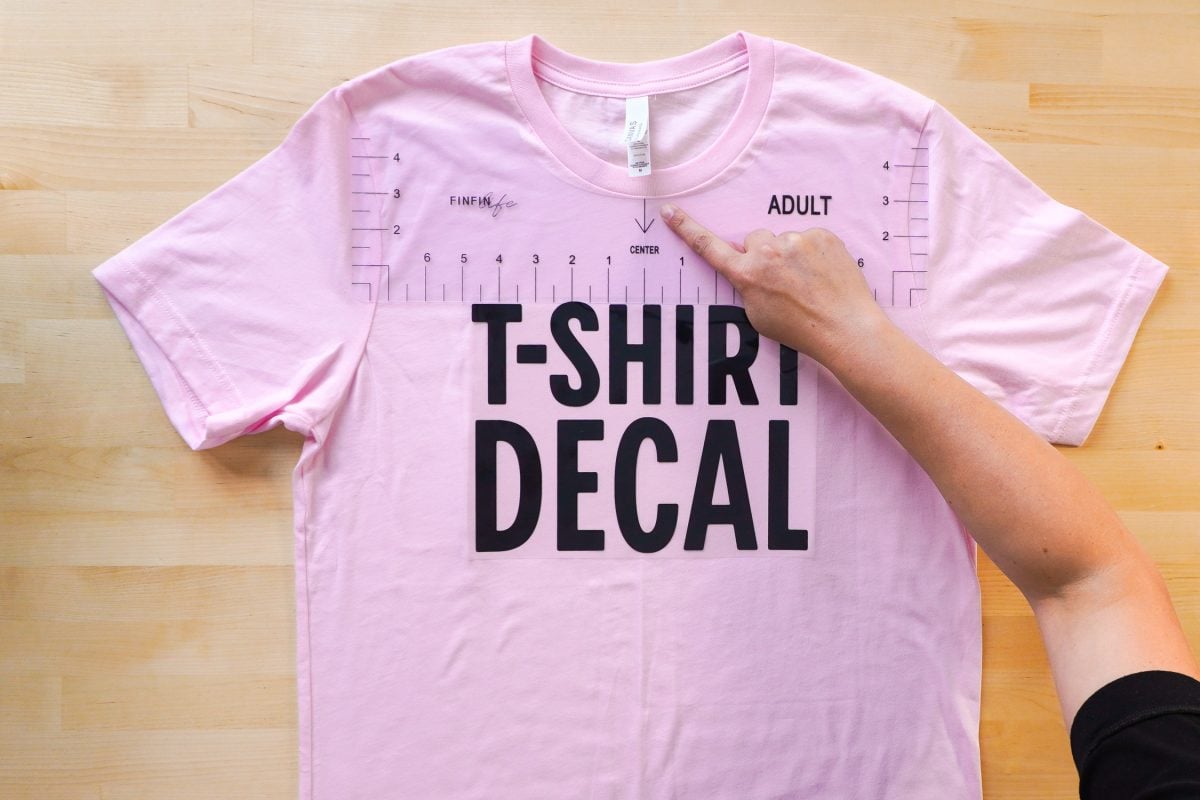
Line up the center line on the ruler with the folded center line on the shirt. Note that the curved part of the ruler might not look perfectly centered on the collar—but you know it’s centered because you’re on that center folded line.
Adjust your decal so it lines up with the ruler, using the measurements extending from the center of the ruler out. You want the decal to touch the edge of the ruler. In this case, each side of the decal extends a little over 4.5″ from the center.
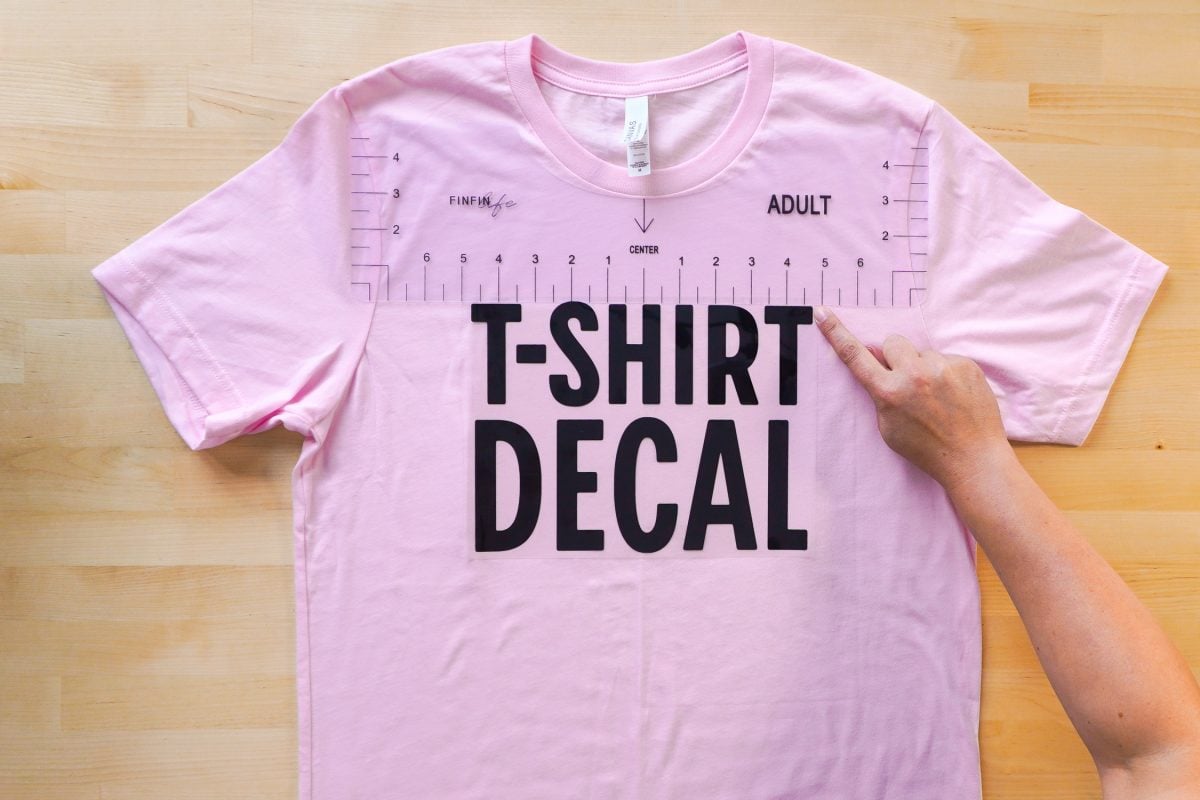
If your decal has a carrier sheet (like with HTV), make sure the decal itself aligns with the ruler, not the carrier sheet.
If needed, secure the transfer to your shirt with a few small pieces of tape so you can transfer it to your heat press and press your project!
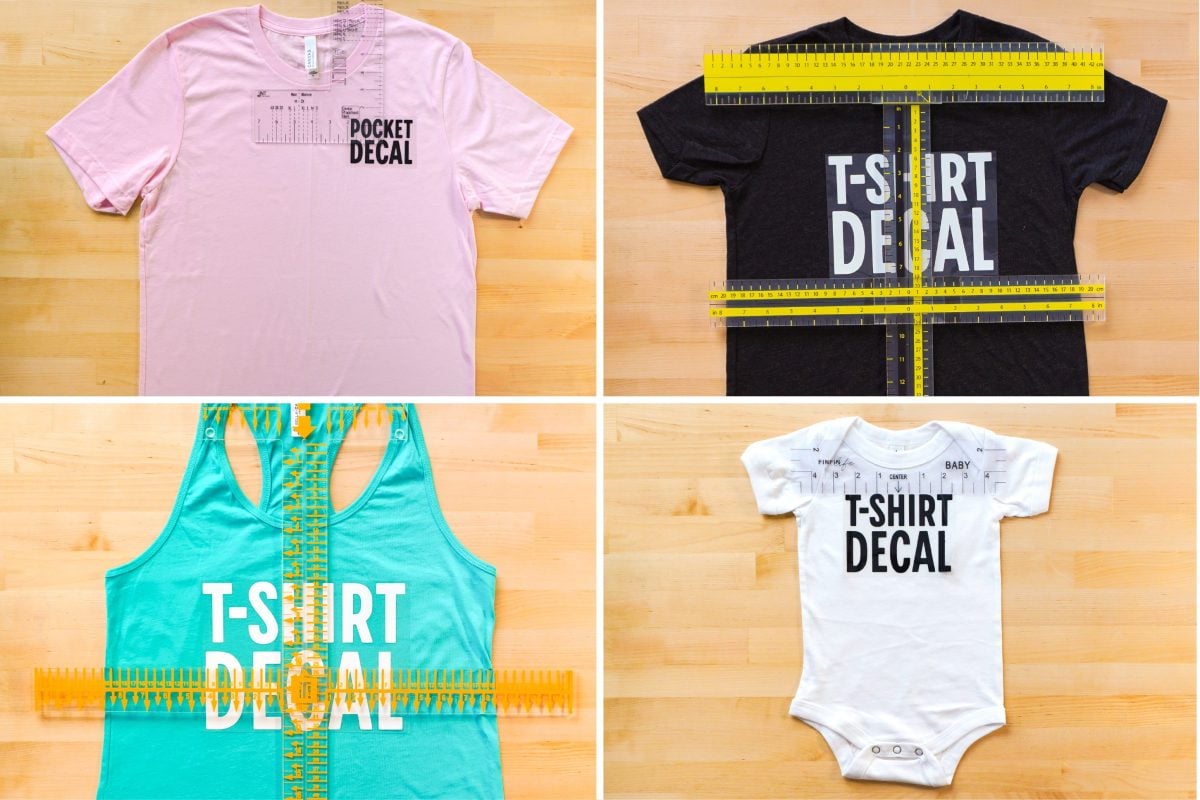
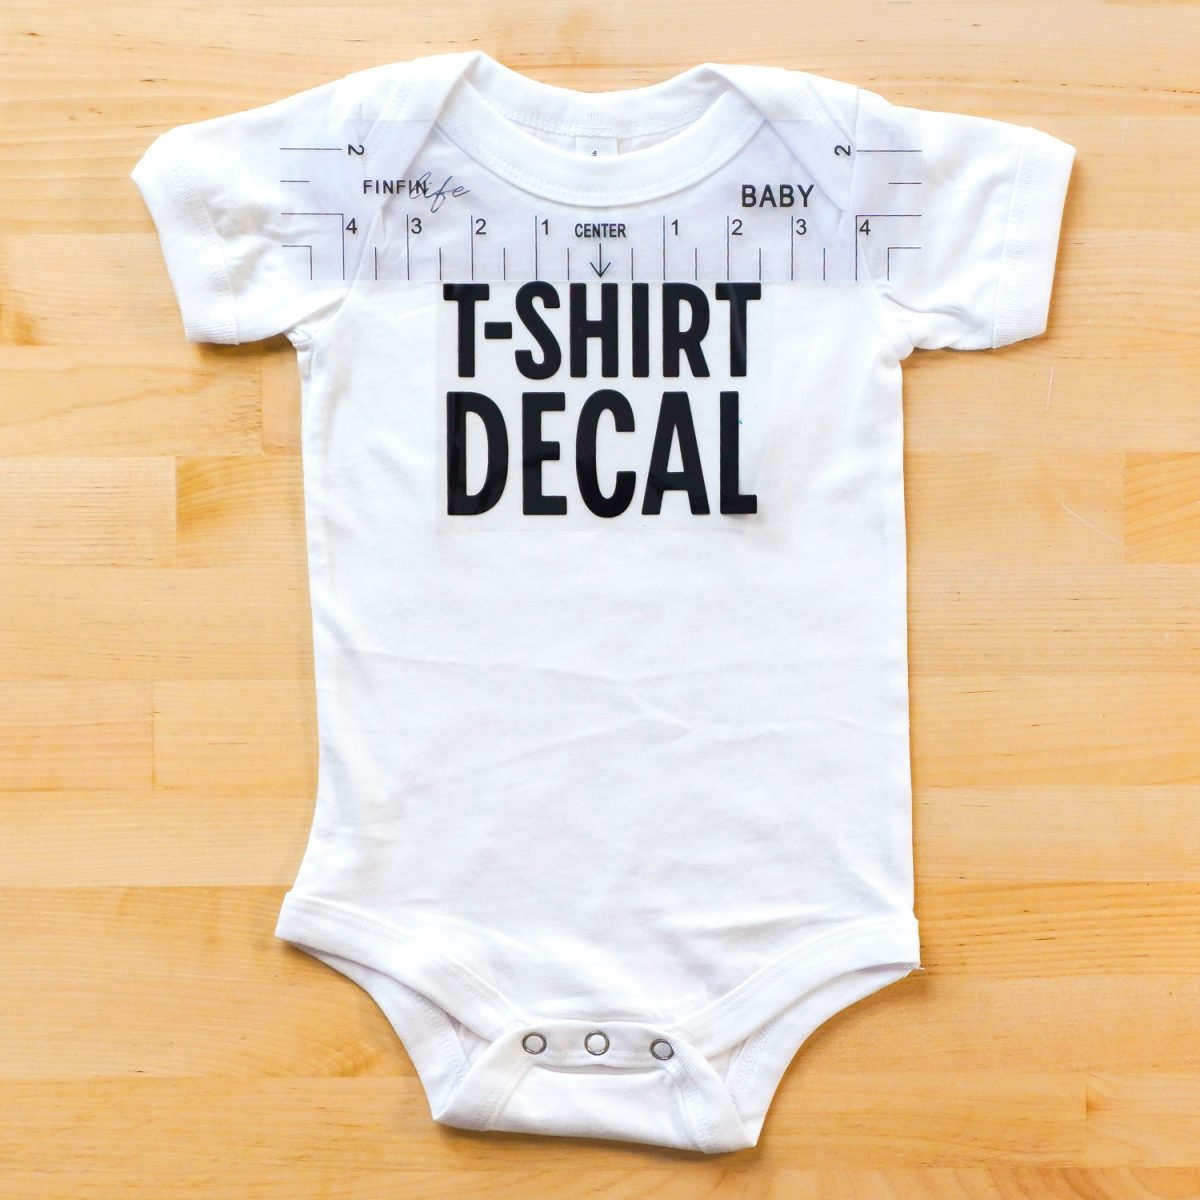
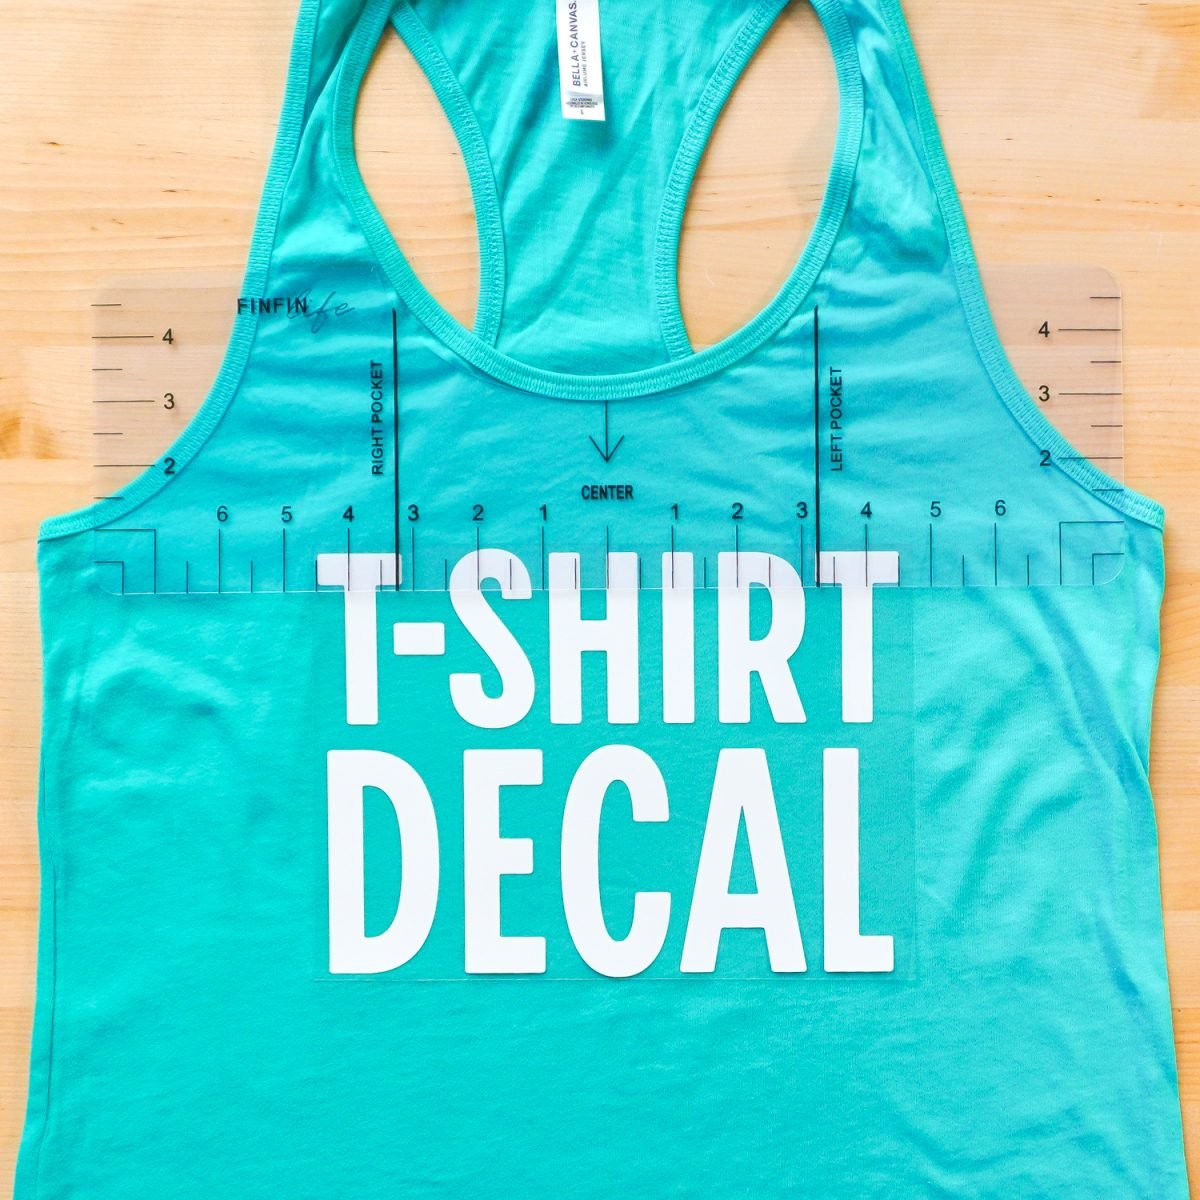
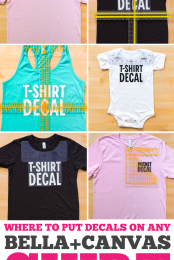
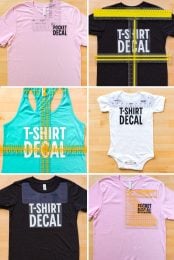
Here is an example of this ruler being used on a few different garments. Note that for the tank, I raised the image a bit behind the ruler because of the wider neck.
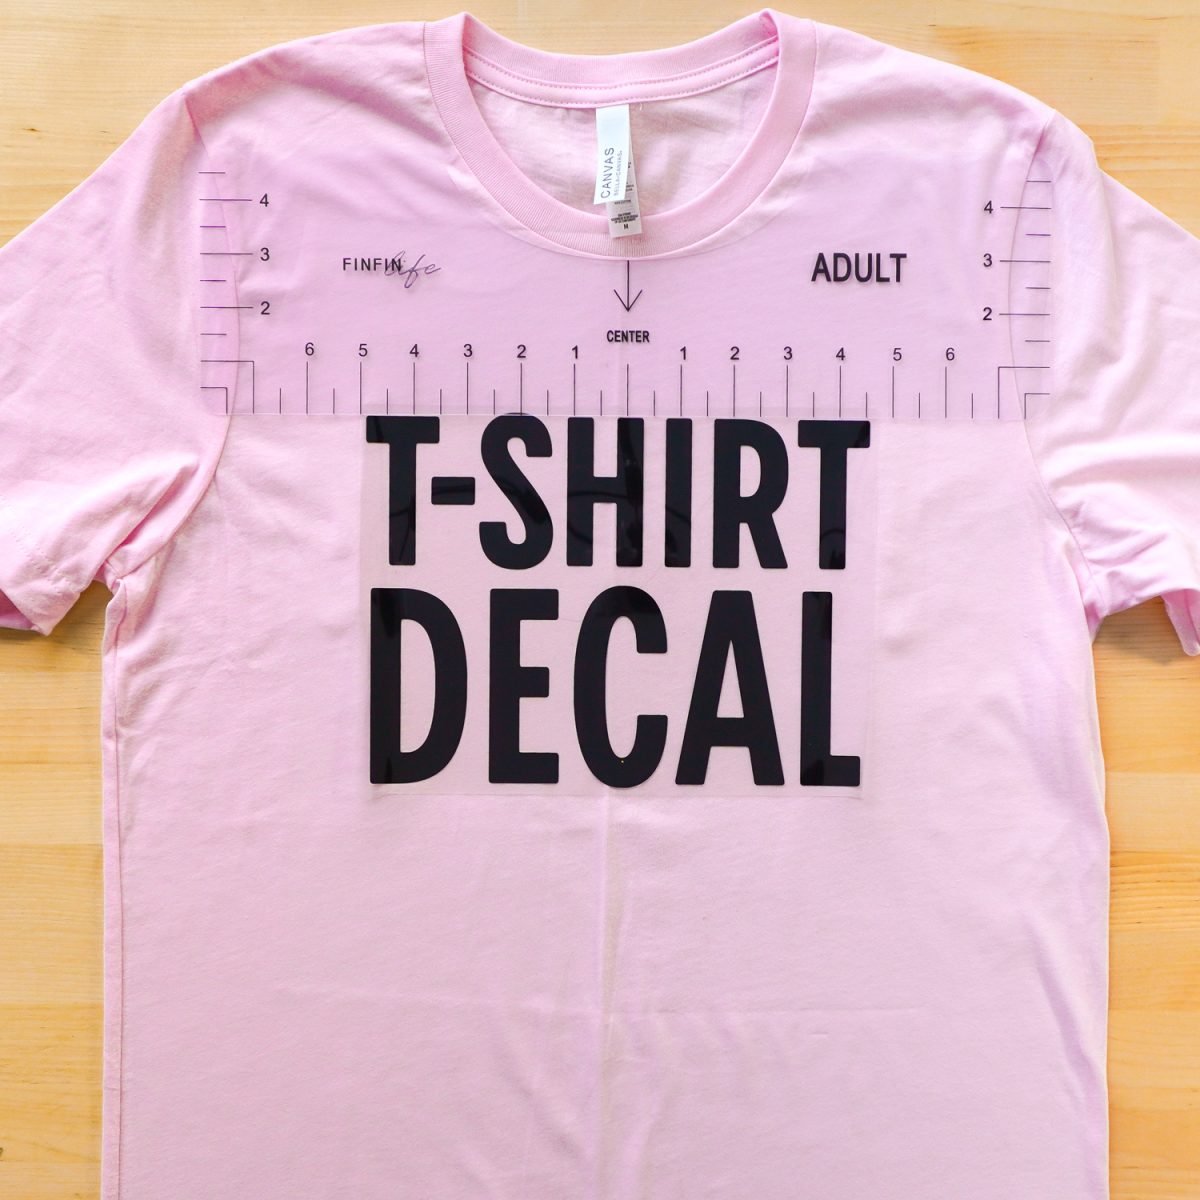
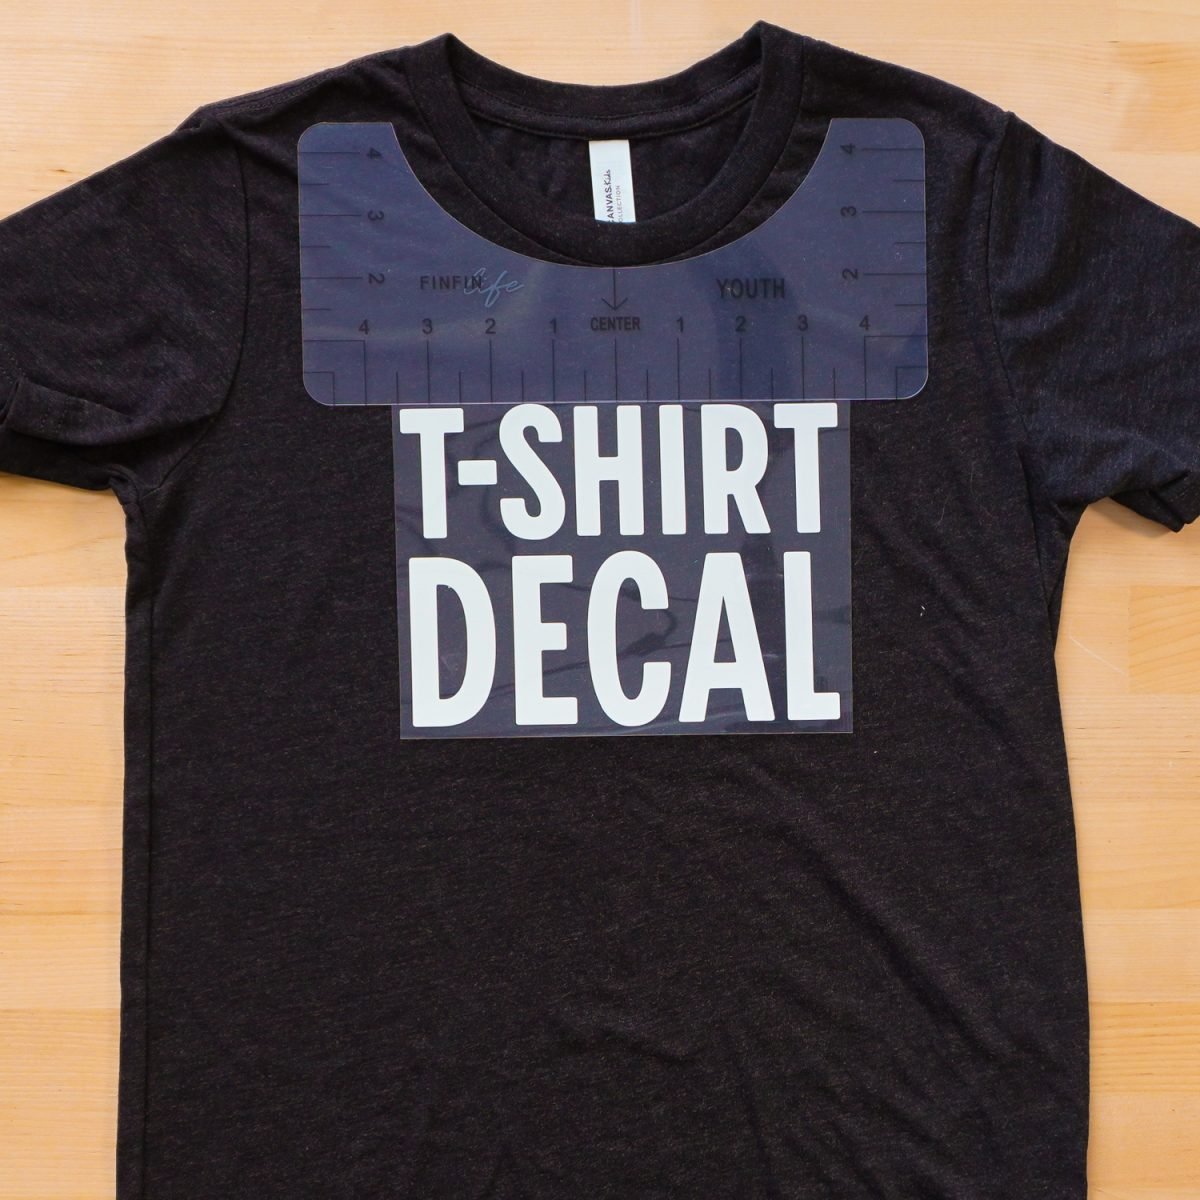
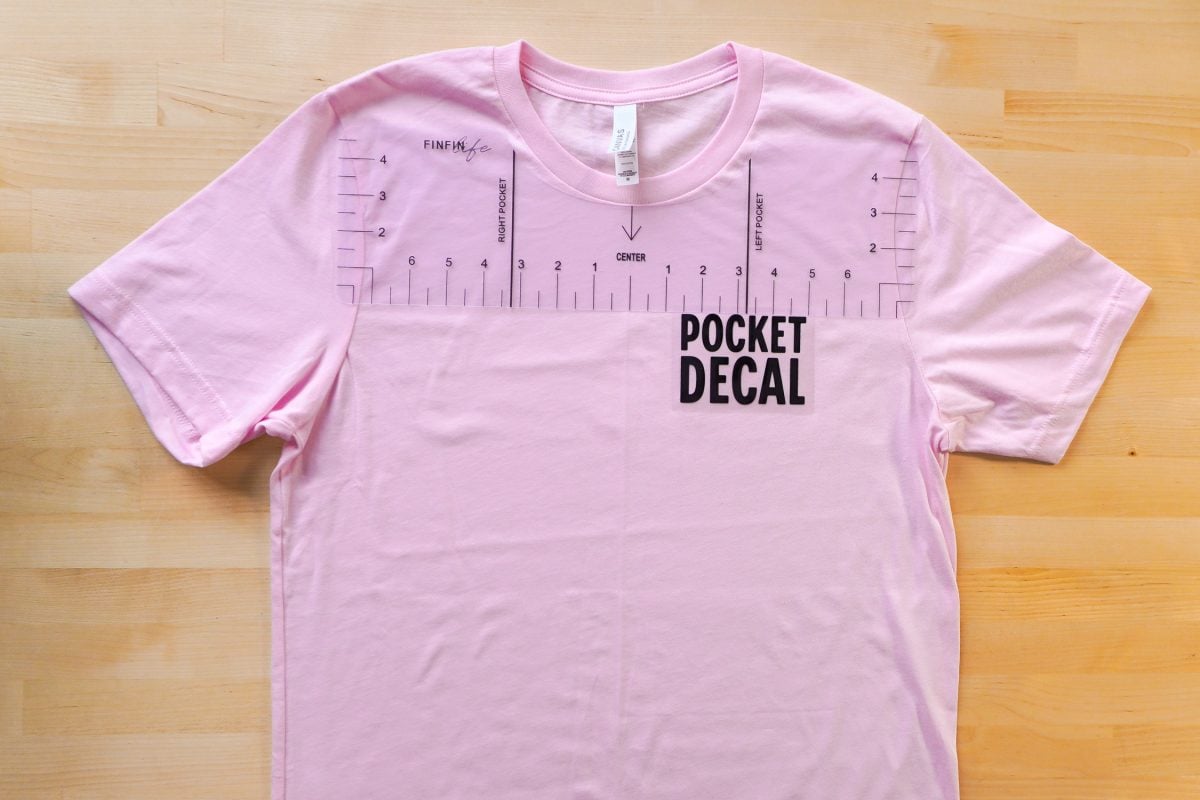
This particular ruler didn’t come with a pocket decal ruler, but it does have a ruler with a couple of pocket lines on it for adult tees. Center your pocket decal below the pocket lines on the ruler. This actually seems pretty accurate to me, though it might be harder to do a round image here because there’s noting aligning it vertically.
Tee Square It Graphic Alignment System
Overview
- Where to Purchase: Tee Square It Alignment System
- Price: $$$
- Easy of Use: ★★
- Pros: High quality, aligns about as perfectly as possible, bright markings for light and dark fabrics
- Cons: A little unwieldy, takes a bit to get the hang of it
How to Use
Next up is a popular but much more expensive ruler system. This system helps you align your decals in every way that matters, including pocket decals.
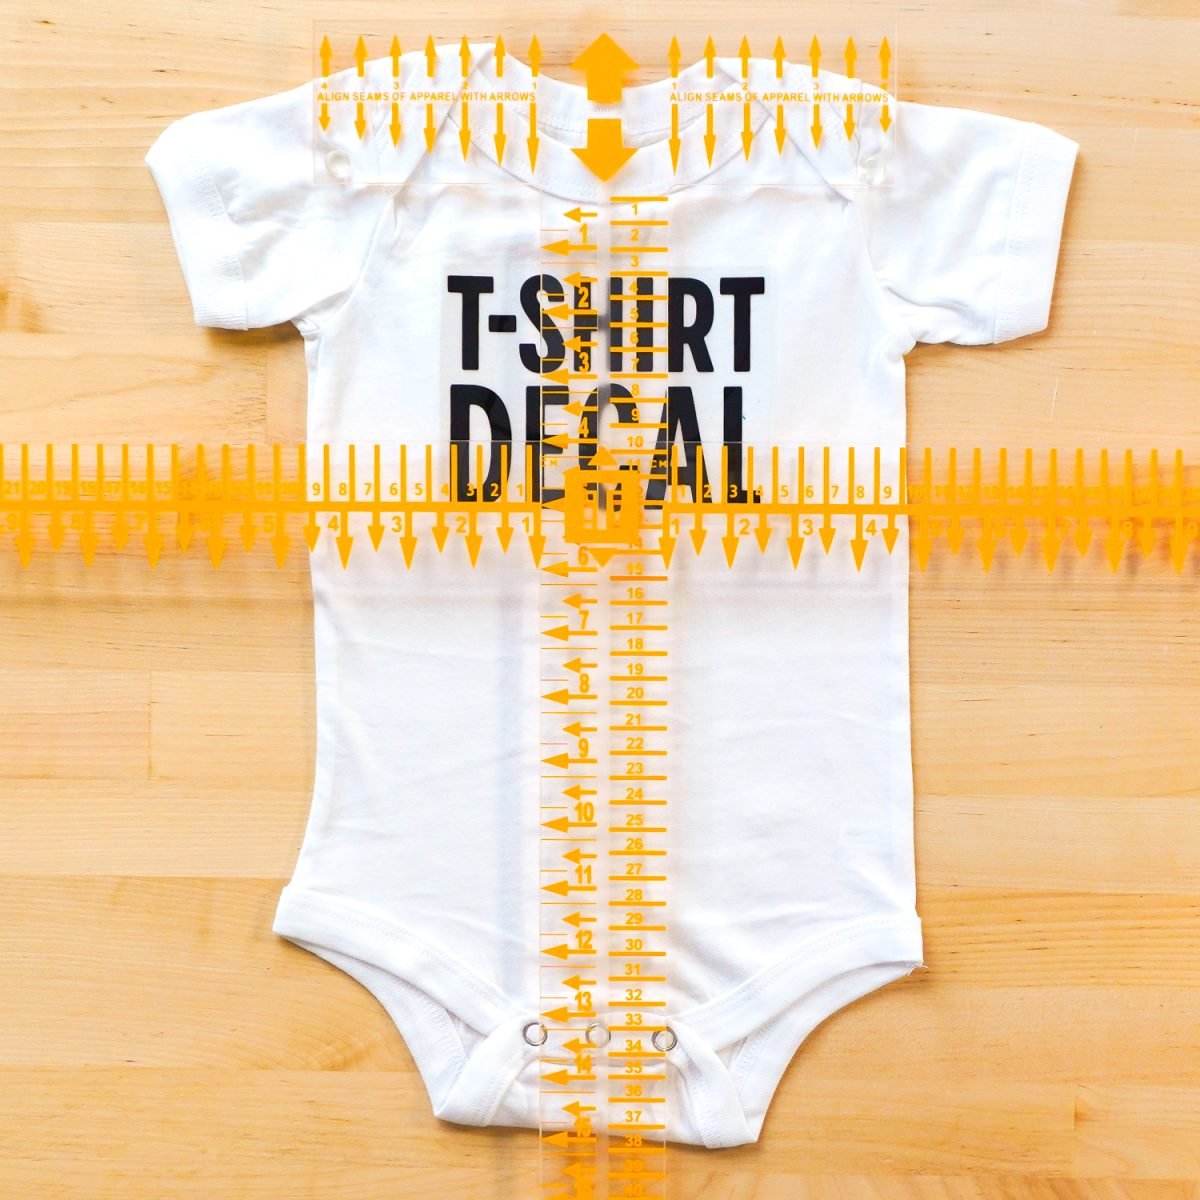
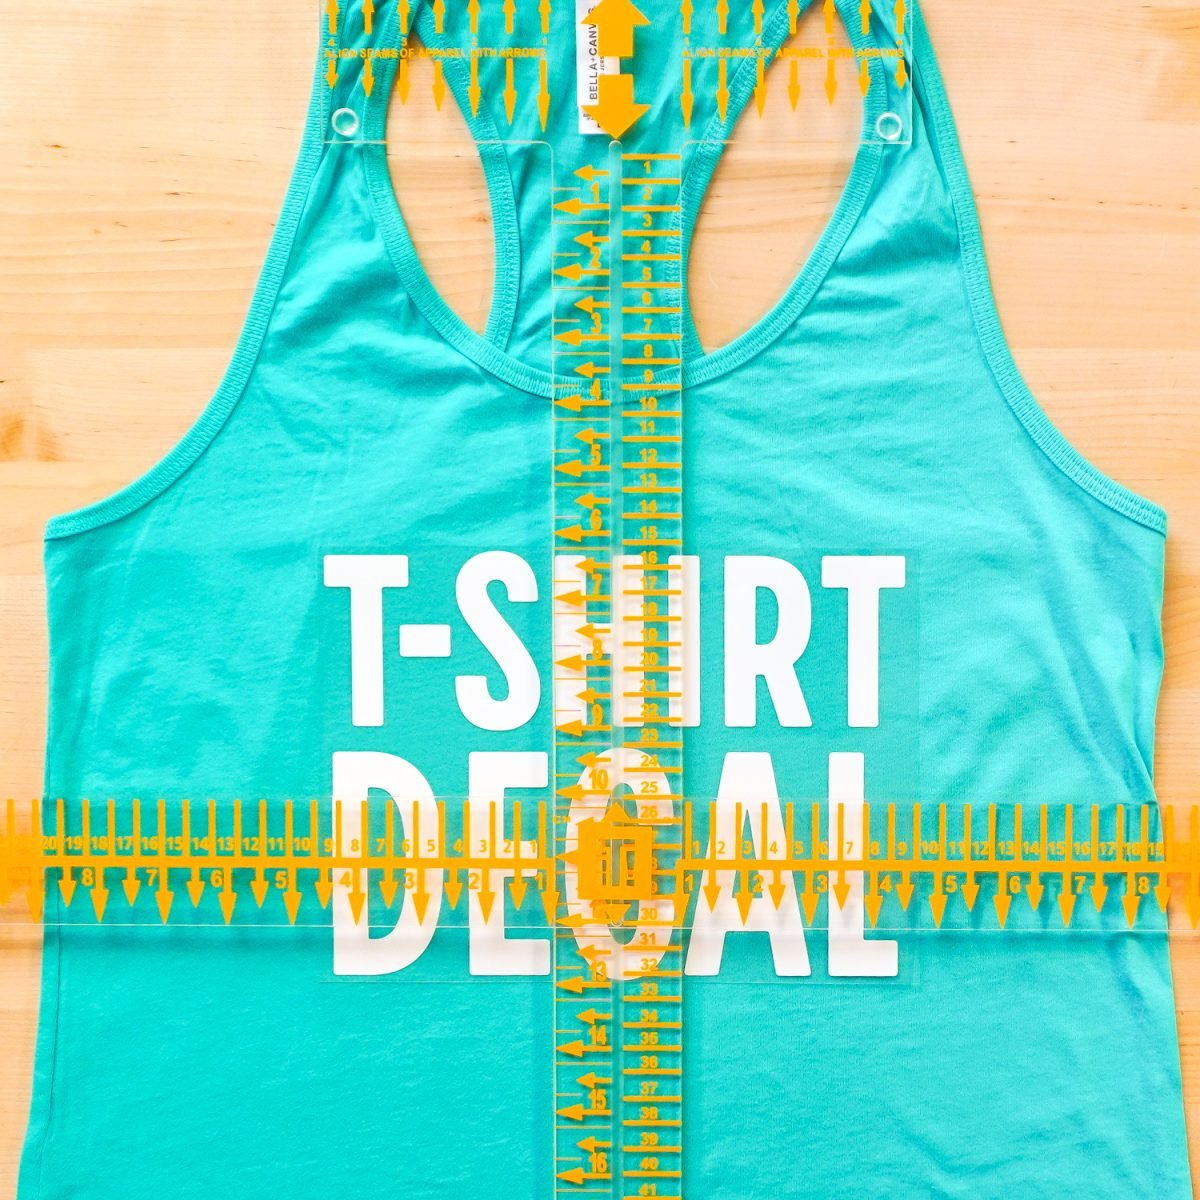
Start by placing your decal on your shirt (parchment paper really helps here!) and the T-shaped ruler piece on your shirt, with the top arrows along the back neckline seam of the garment. Center it so that the arrow numbers are the same on both sides of the collar.
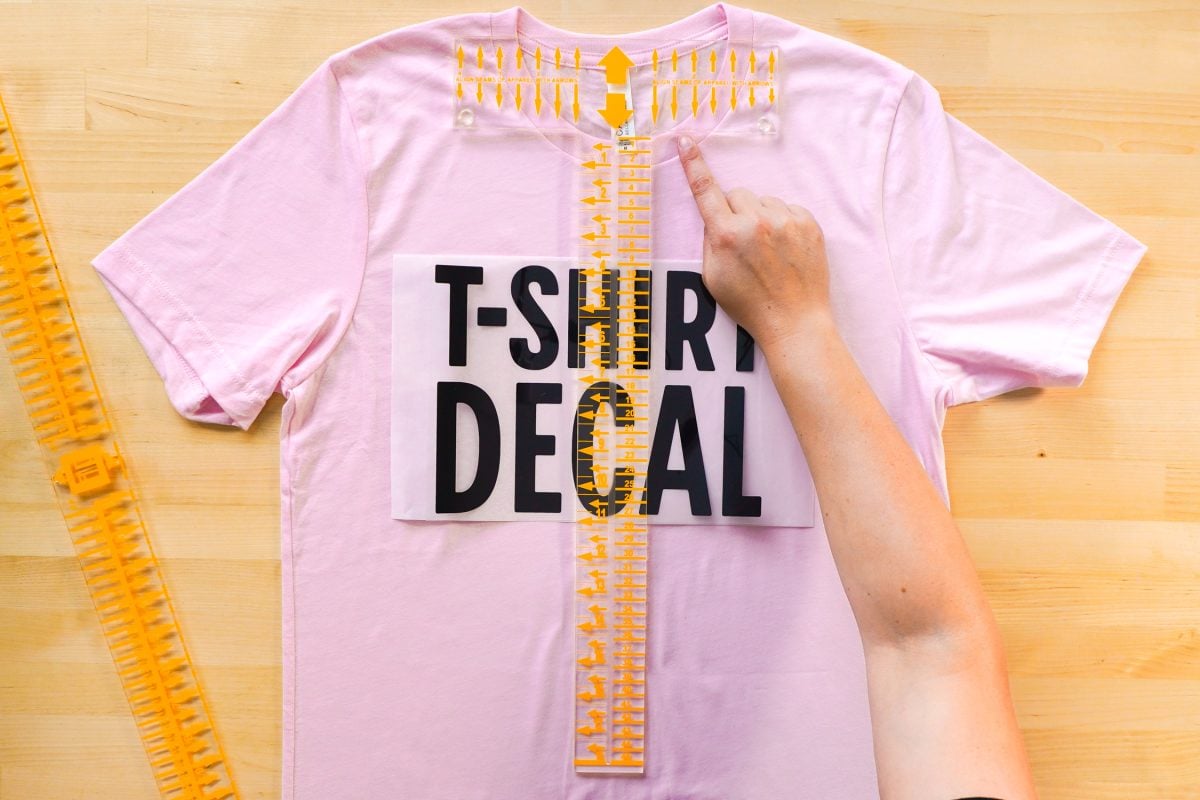
Place the width ruler piece onto the center bar so that it sits on the track. Then center the center bar using the width bar—the numbers should be the same on both side seams.
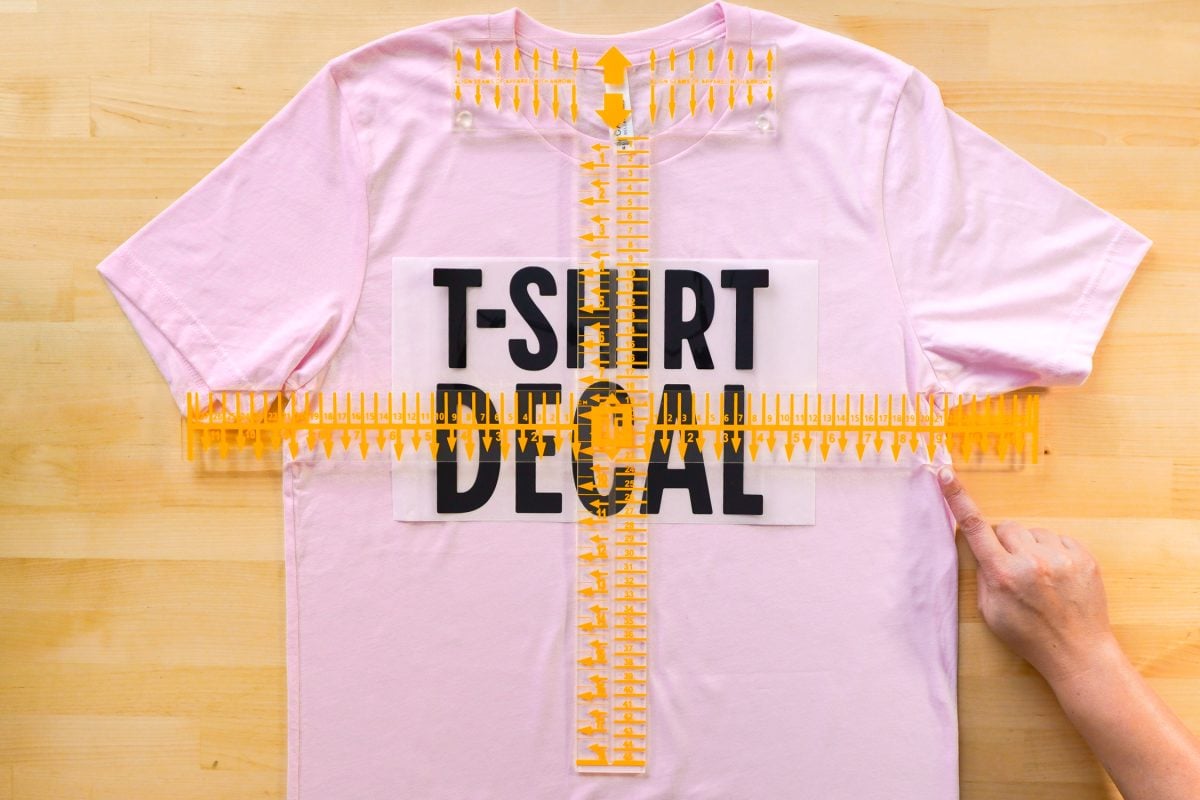
Use the width piece to center your design so that the number is the same on both sides. With this ruler, you’ll need to refer to the free downloadable guide above to know how far below the collar to place your decal. In this case, I have it three inches below the bottom seam on the collar, which is actually 4″ on the ruler because the first inch is over the collar.
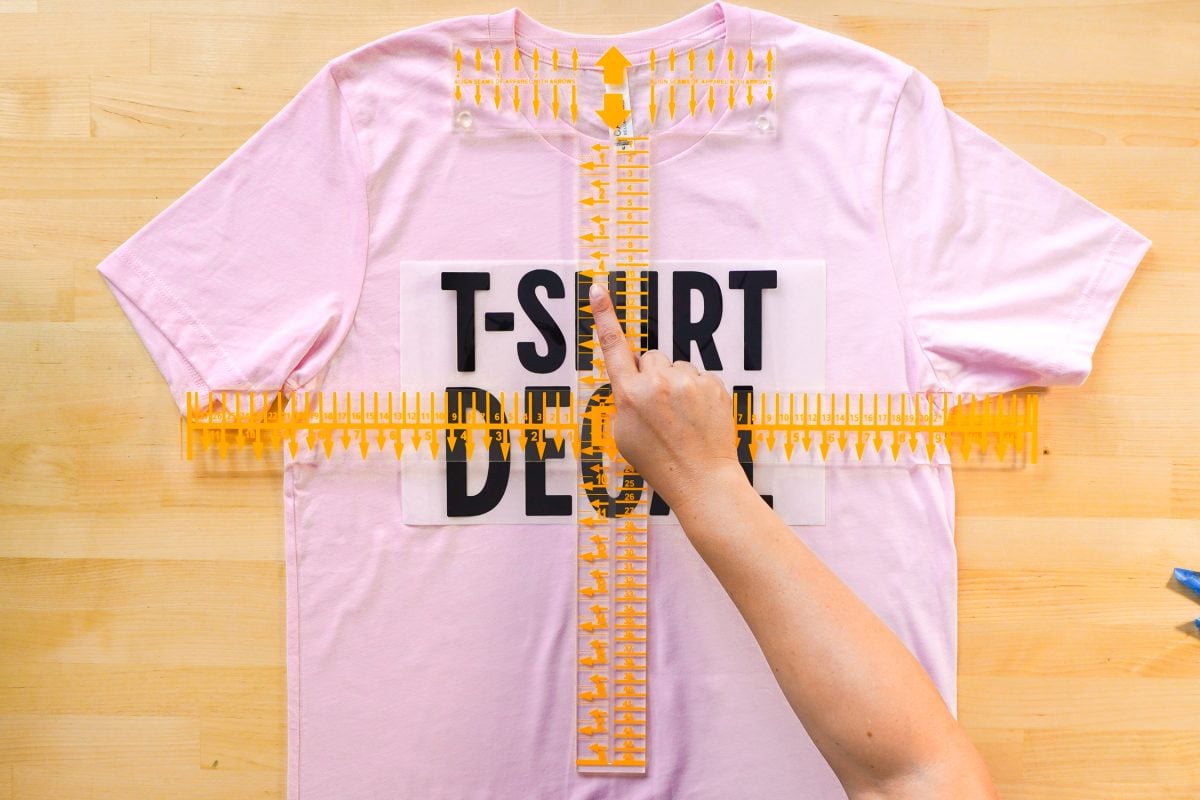
If needed, secure the transfer to your shirt with a few small pieces of tape so you can transfer it to your heat press and press your project. Remove the parchment paper if you used it.

Here is an example of this ruler being used on a few different shirts.
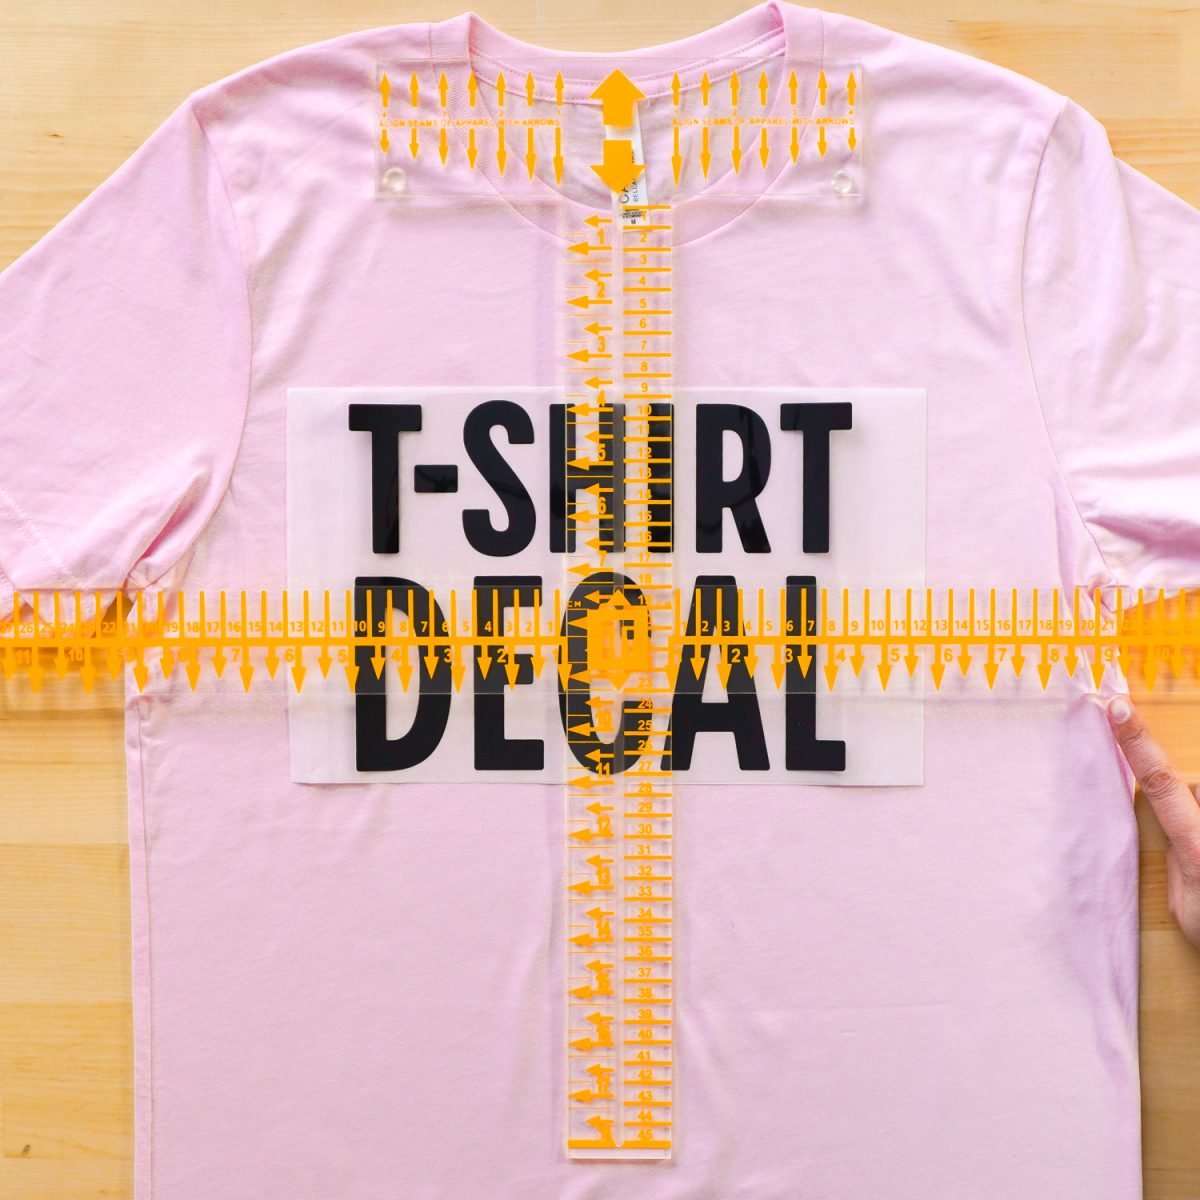
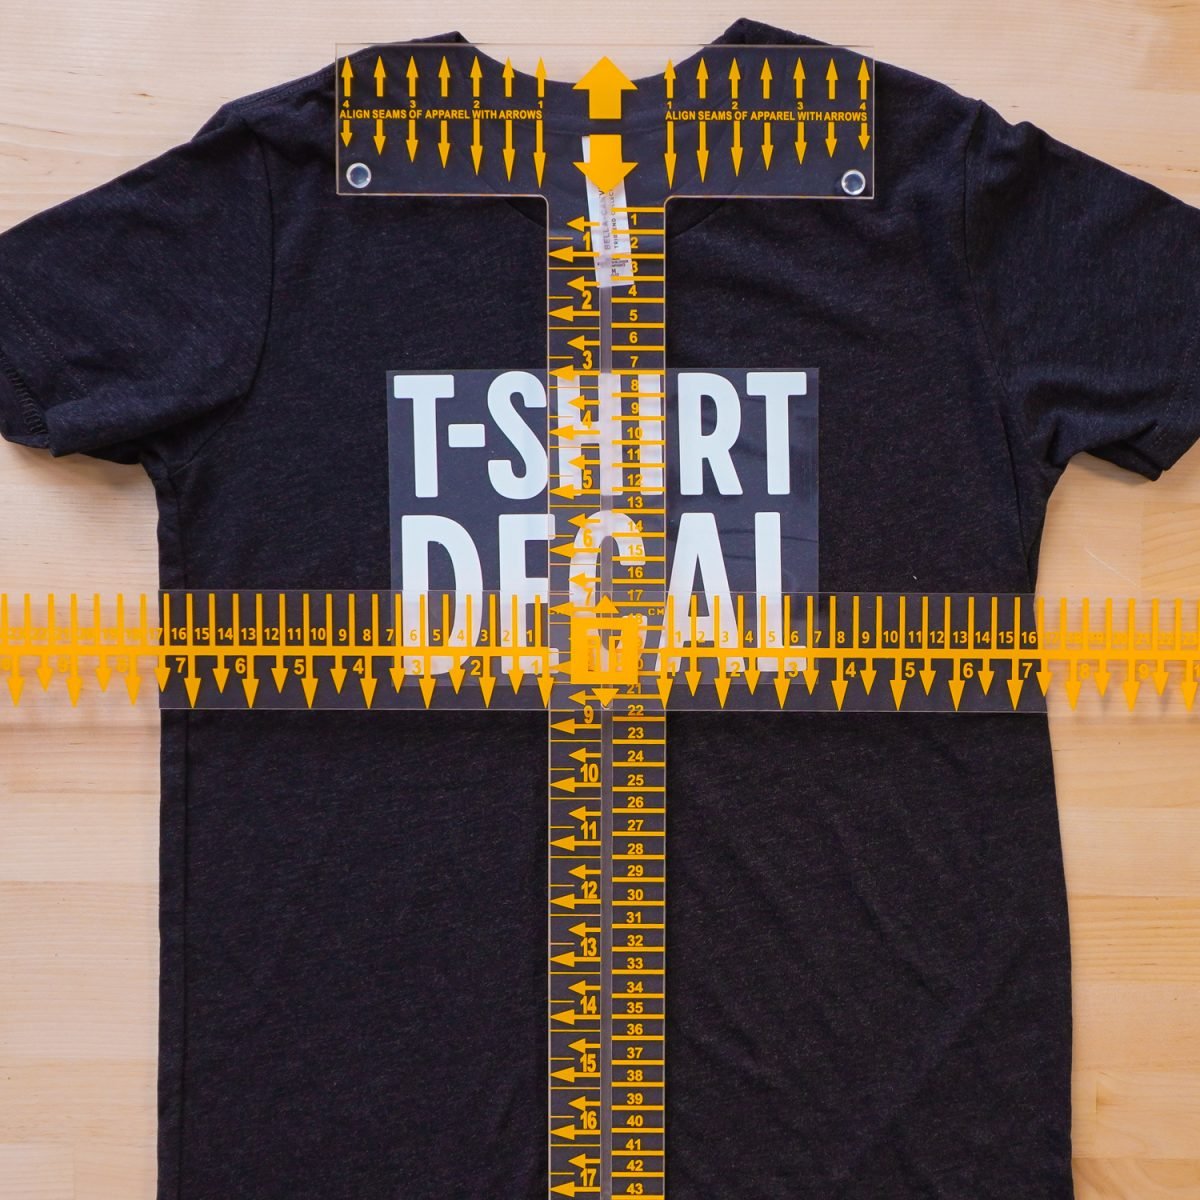
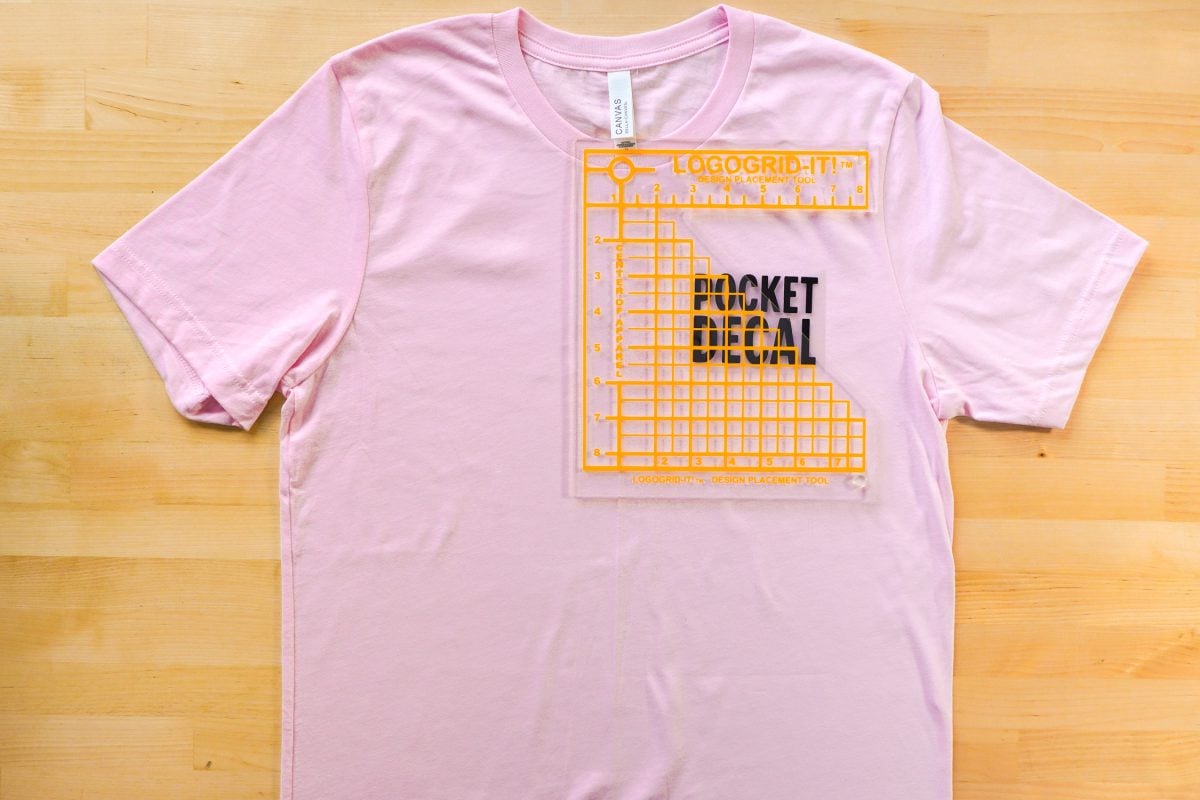
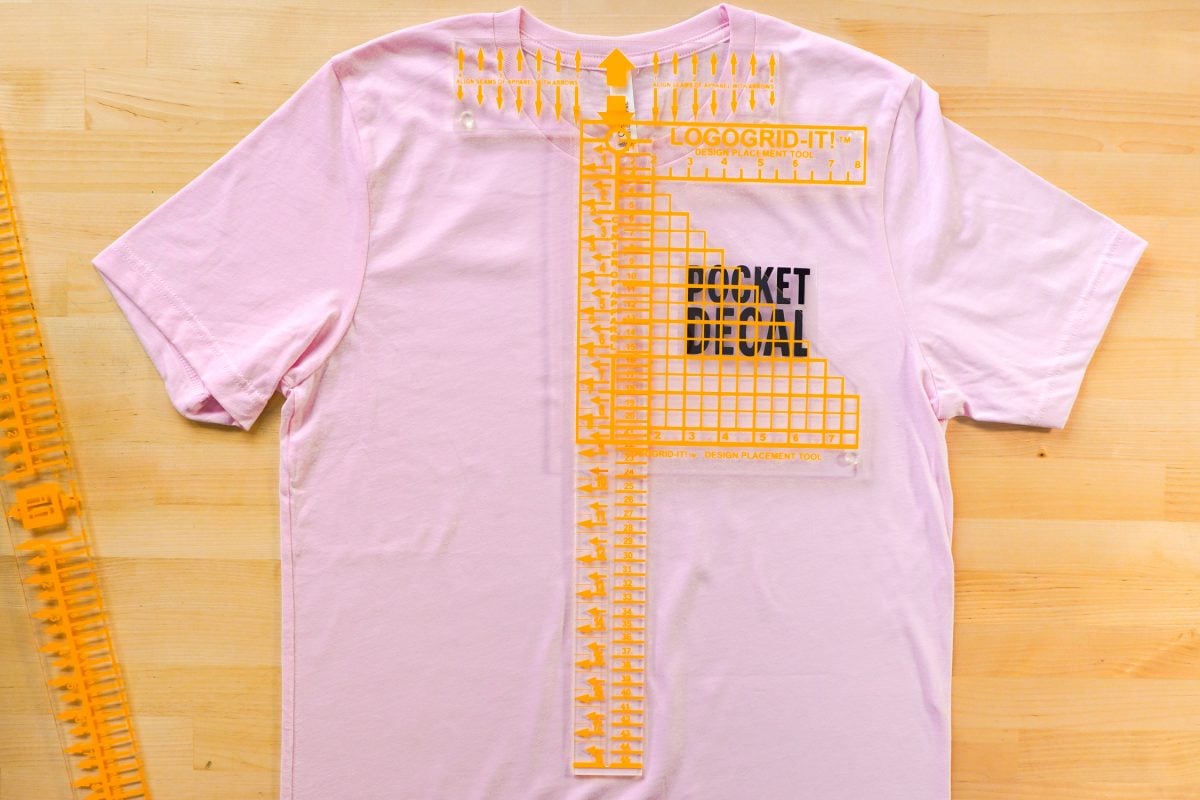
This ruler also comes with a pocket decal ruler. You can use it with the ruler above (there are slots for it when the other two pieces are assembled), but I found it easier to just line up the ruler with center of the collar and the side of the shirt. You can use the same trick for folding and pressing your shirt to find the middle that was used with the transparent rulers above if you’d like. Choose where you want your decal to go, and then make mental note of the X and Y axis numbers so you can use it on additional shirts of the same type and size.
UPTTHOW T-Shirt Ruler System
Overview
- Where to Purchase: UPTTHOW T-Shirt Ruler System
- Price: $$
- Easy of Use: ★
- Pros: Helps with vertical alignment, bright marking for light and dark fabrics
- Cons: Unwieldy (the top piece would be better off connected), some numbering is unhelpful, takes a bit to get the hang of it, some reviews say the markings wear off quickly
This ruler wants to be the budget version of the Tee Square It ruler. It functions similarly, but it doesn’t work quite as well as you’ll see.
Add your decal to your shirt. Start by placing the longer vertical ruler piece on your shirt and add the top horizontal ruler. There’s a “frame” on the back of the horizontal piece that helps connect it to the vertical piece, but I really wish these two pieces were actually connected because having three separate ruler pieces is a bit fussy.
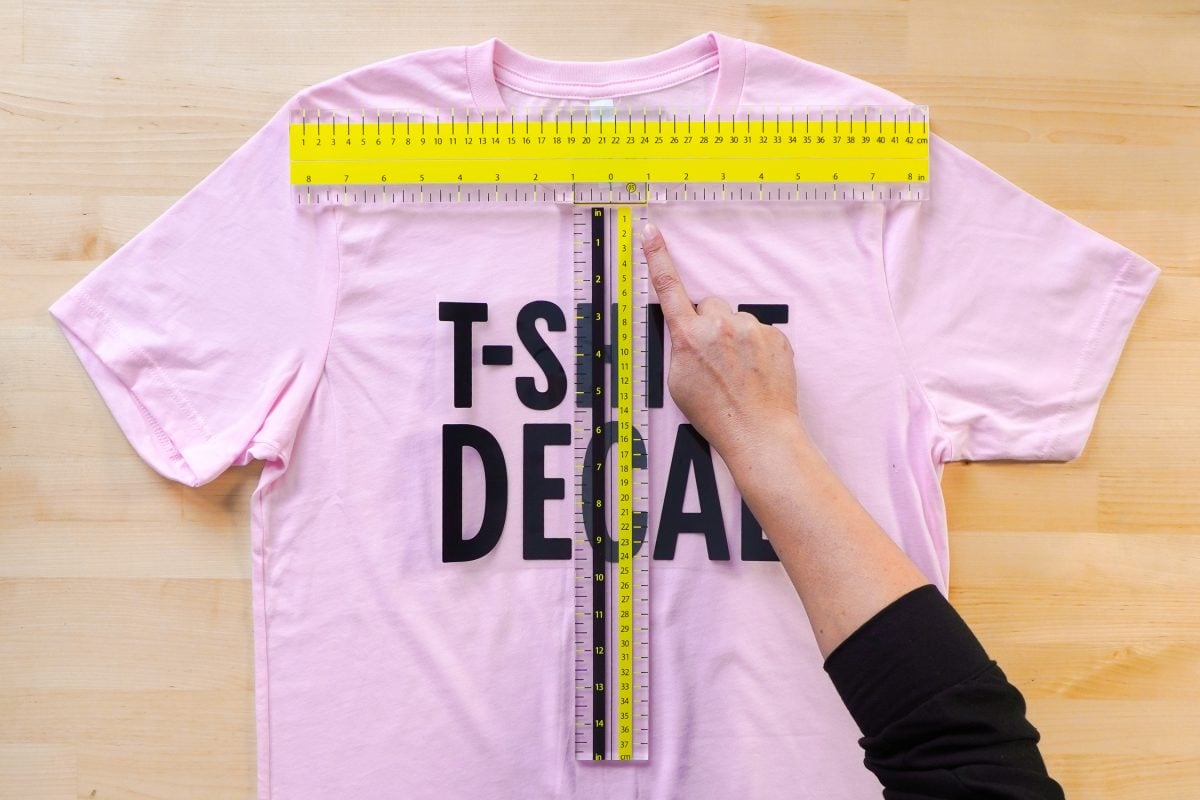
Now here’s the first problem for those of you who use centimeters—instead of having the numbers start at zero in the middle and count up on both sides like the inches below it, it counts from 0cm to 43cm left to right. Not helpful at all for finding the center of a garment.
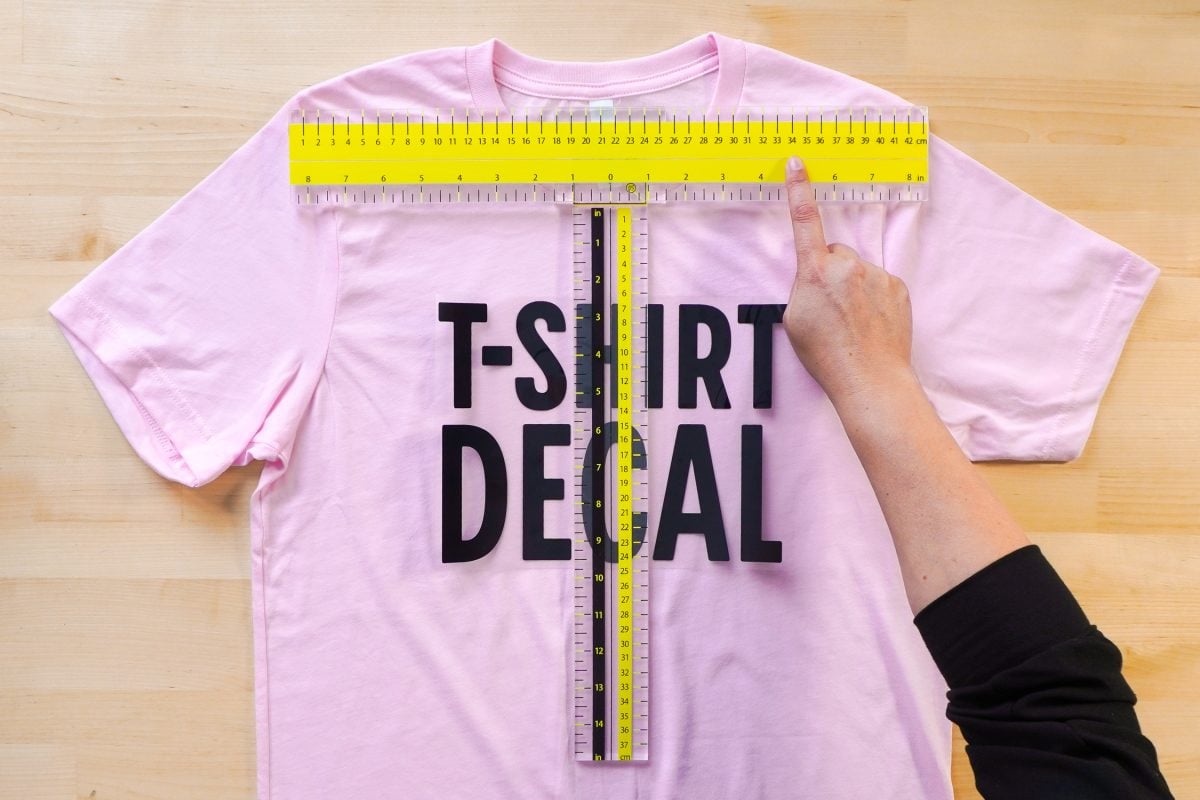
Then there are no arrows to make it clear where to put that top bar—the instructions don’t indicate either. At best guess, I think the top-most part of the ruler should sit at the bottom collar seam. You can then center it on the garment so that the arrow numbers are the same on both sides of the collar (at least in inches you can).
Place the width ruler piece onto the center bar so that it sits on the track. You’ll notice that this crossbar isn’t as long as the Tee Square It, meaning you can’t use it to make sure many larger garments are centered toward the bottom of your shirt.
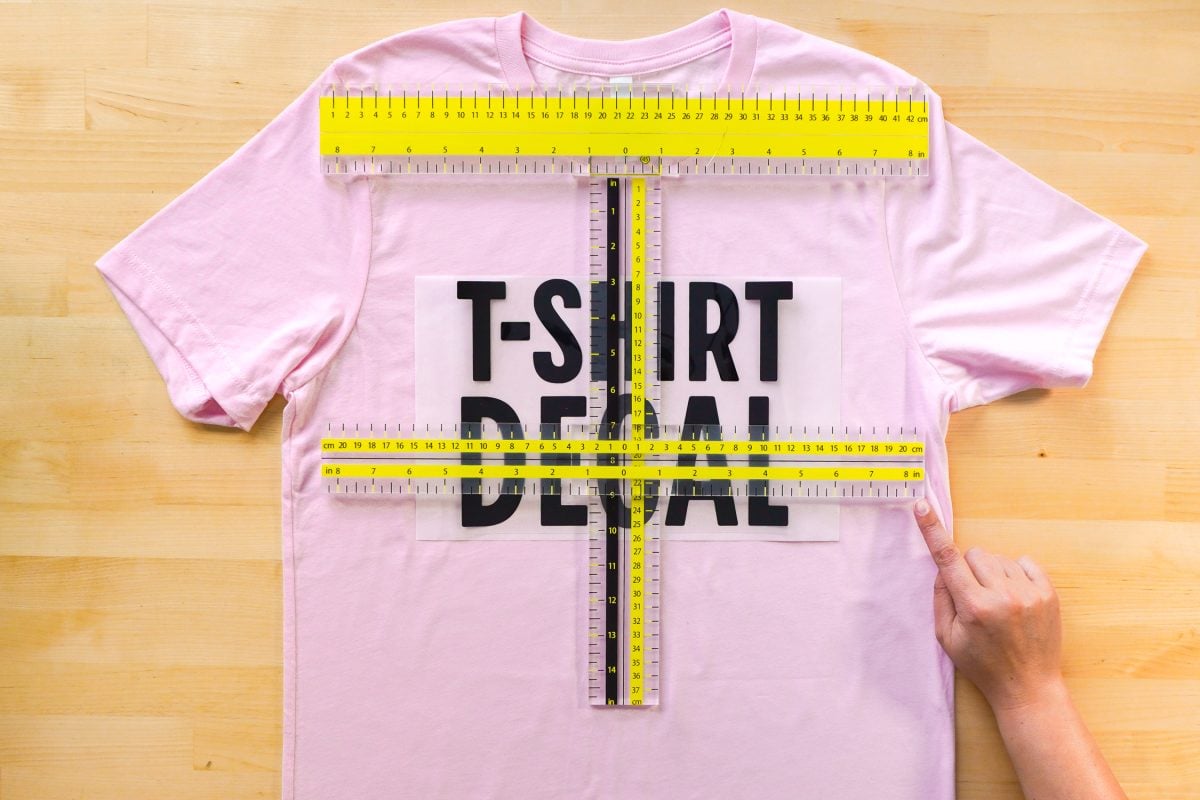
Use the width piece to center your design so that the number is the same on both sides. With this ruler, you’ll need to refer to the free downloadable guide above to know how far below the collar to place your decal. In this case, I have it three inches below the bottom seam on the collar,.
Because we’re working with three pieces here, I find the rulers shift a bit as I’m trying to align my decal, so I have to re-align the rulers a bit. Using the parchment paper trick above can help.
If needed, secure the transfer to your shirt with a few small pieces of tape so you can transfer it to your heat press and press your project! Remove the parchment if you used it.
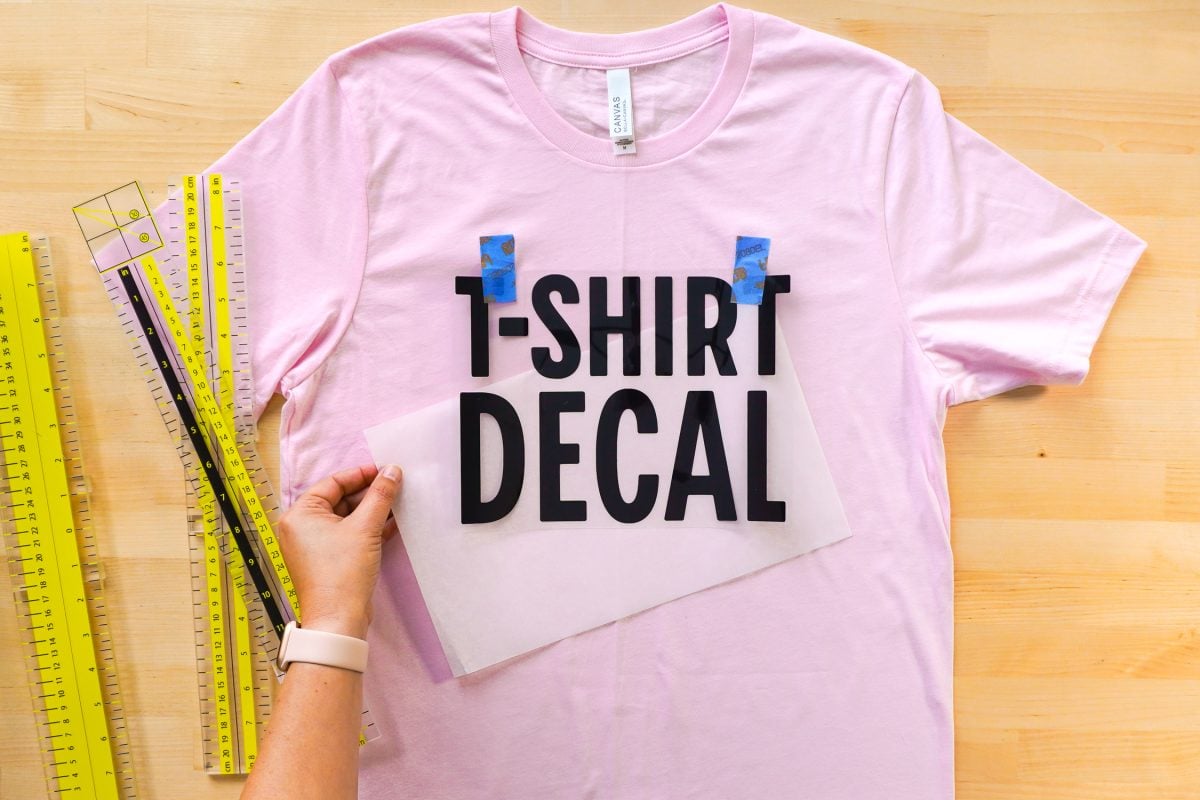
Here is an example of this ruler being used on four different shirts:
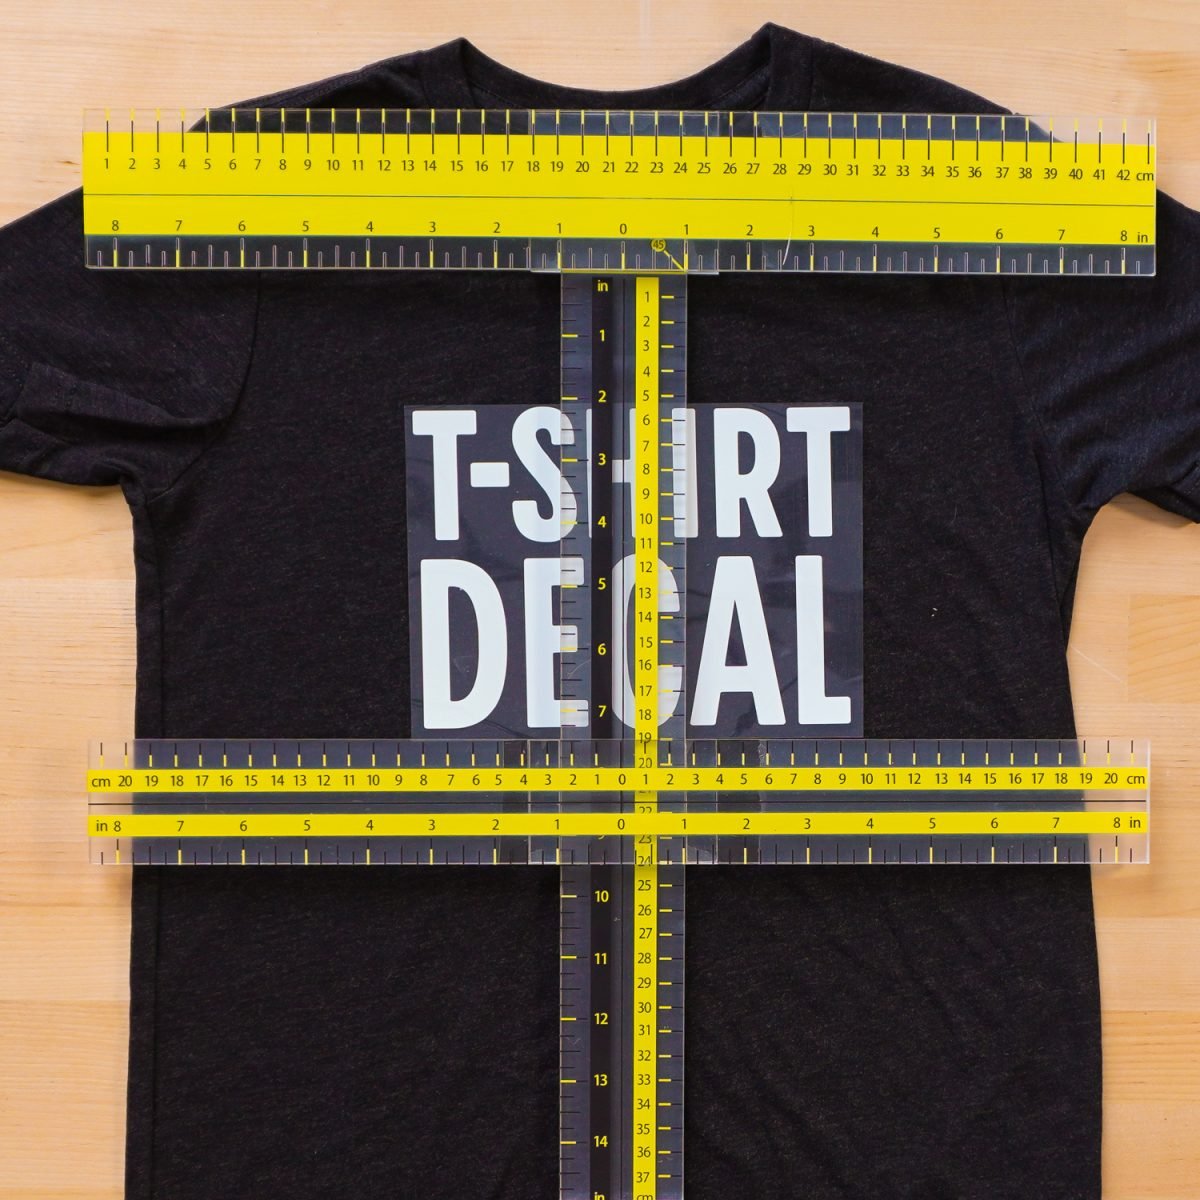
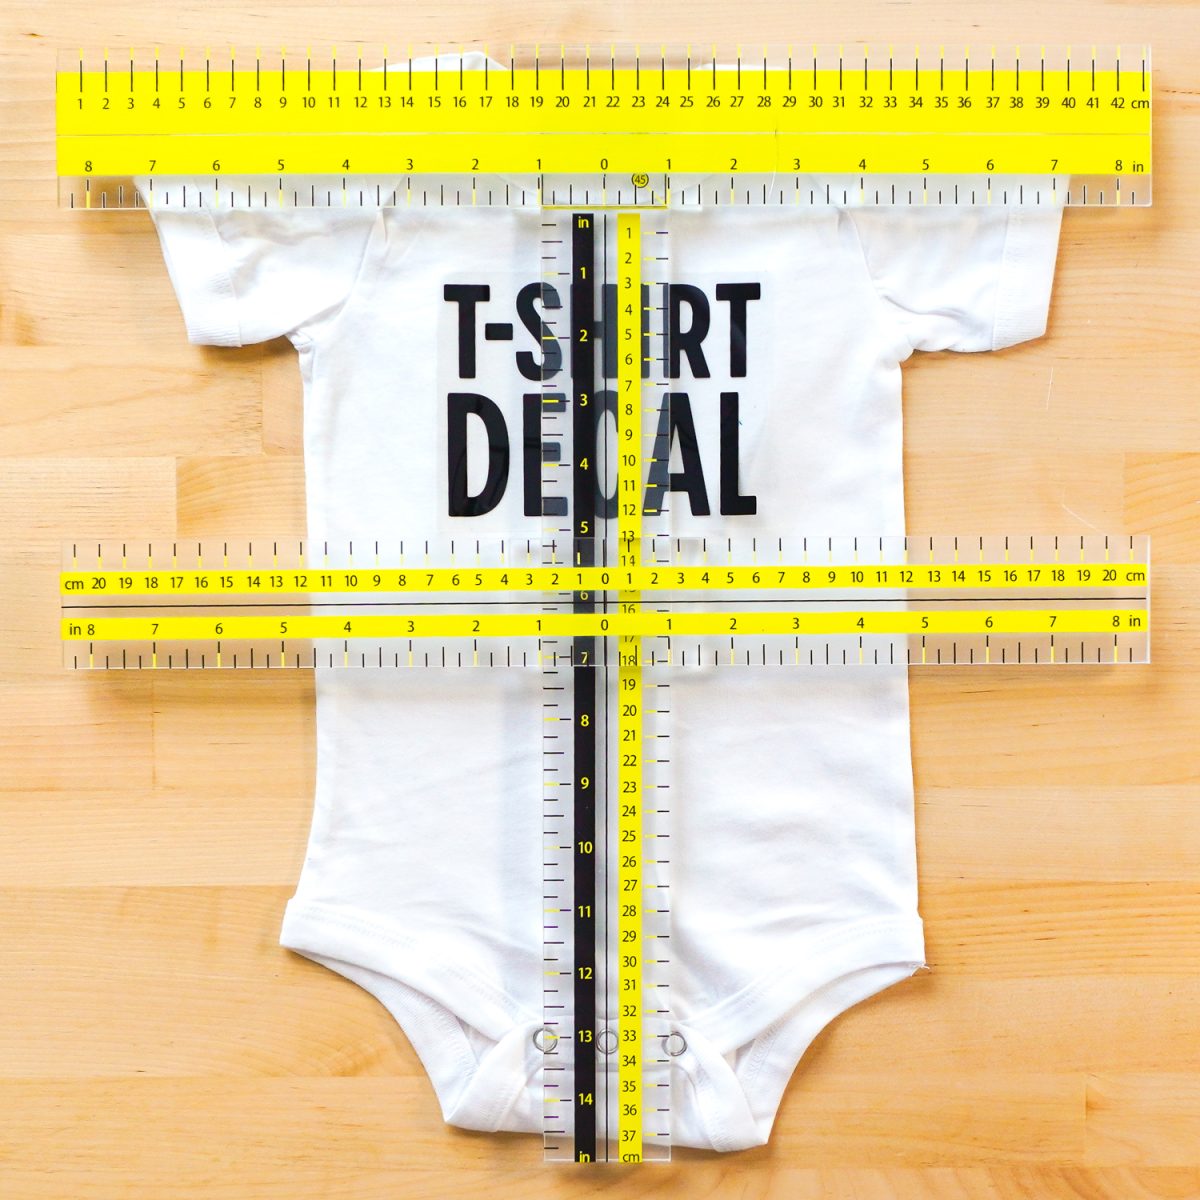
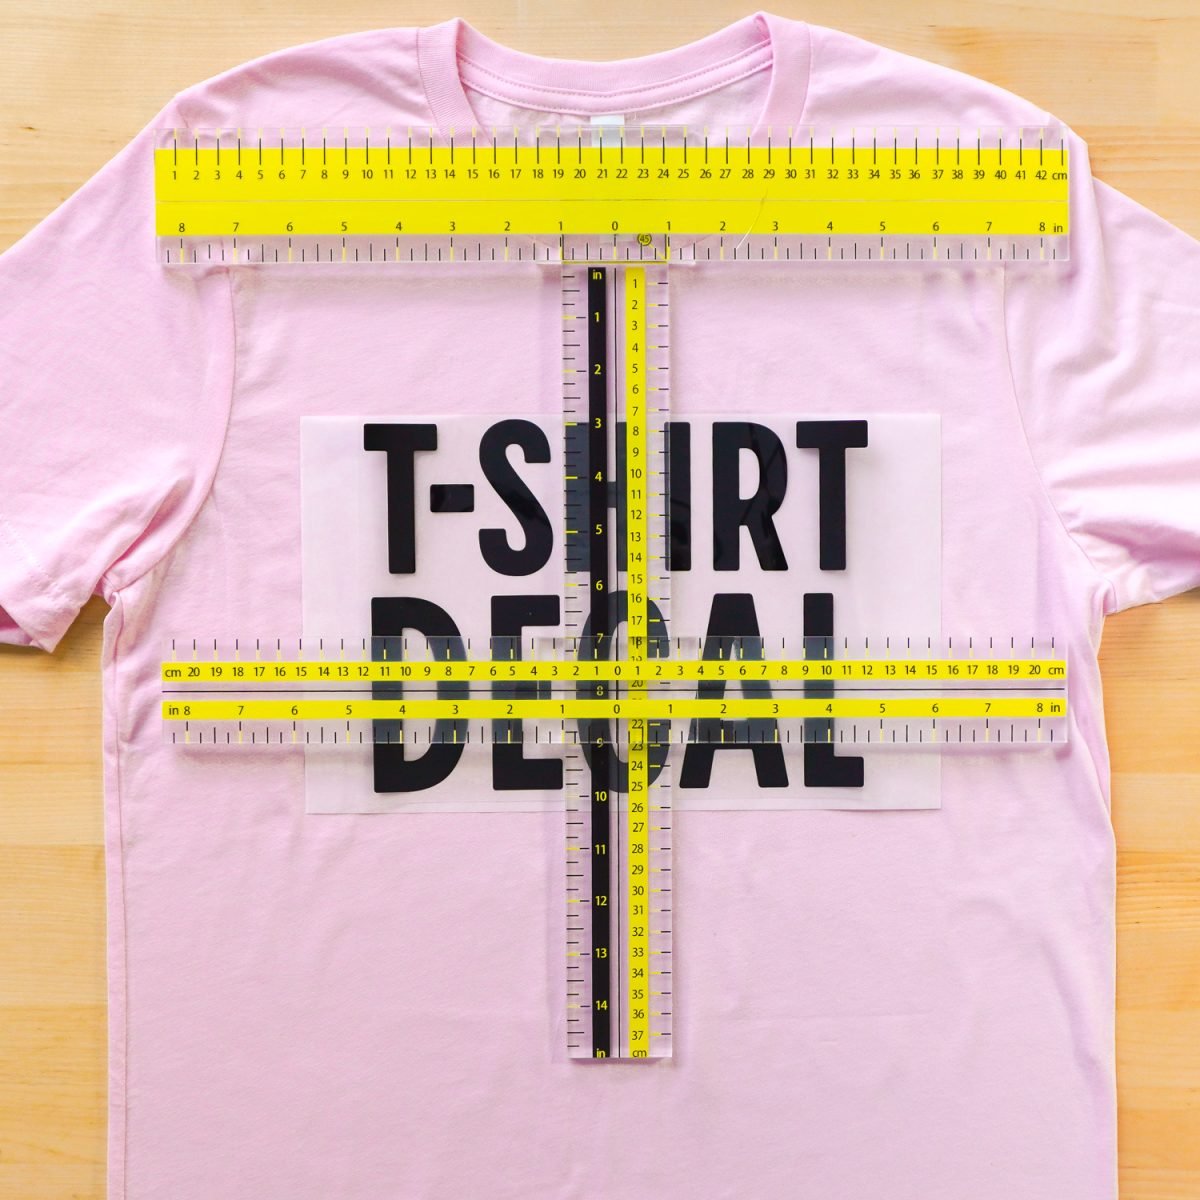
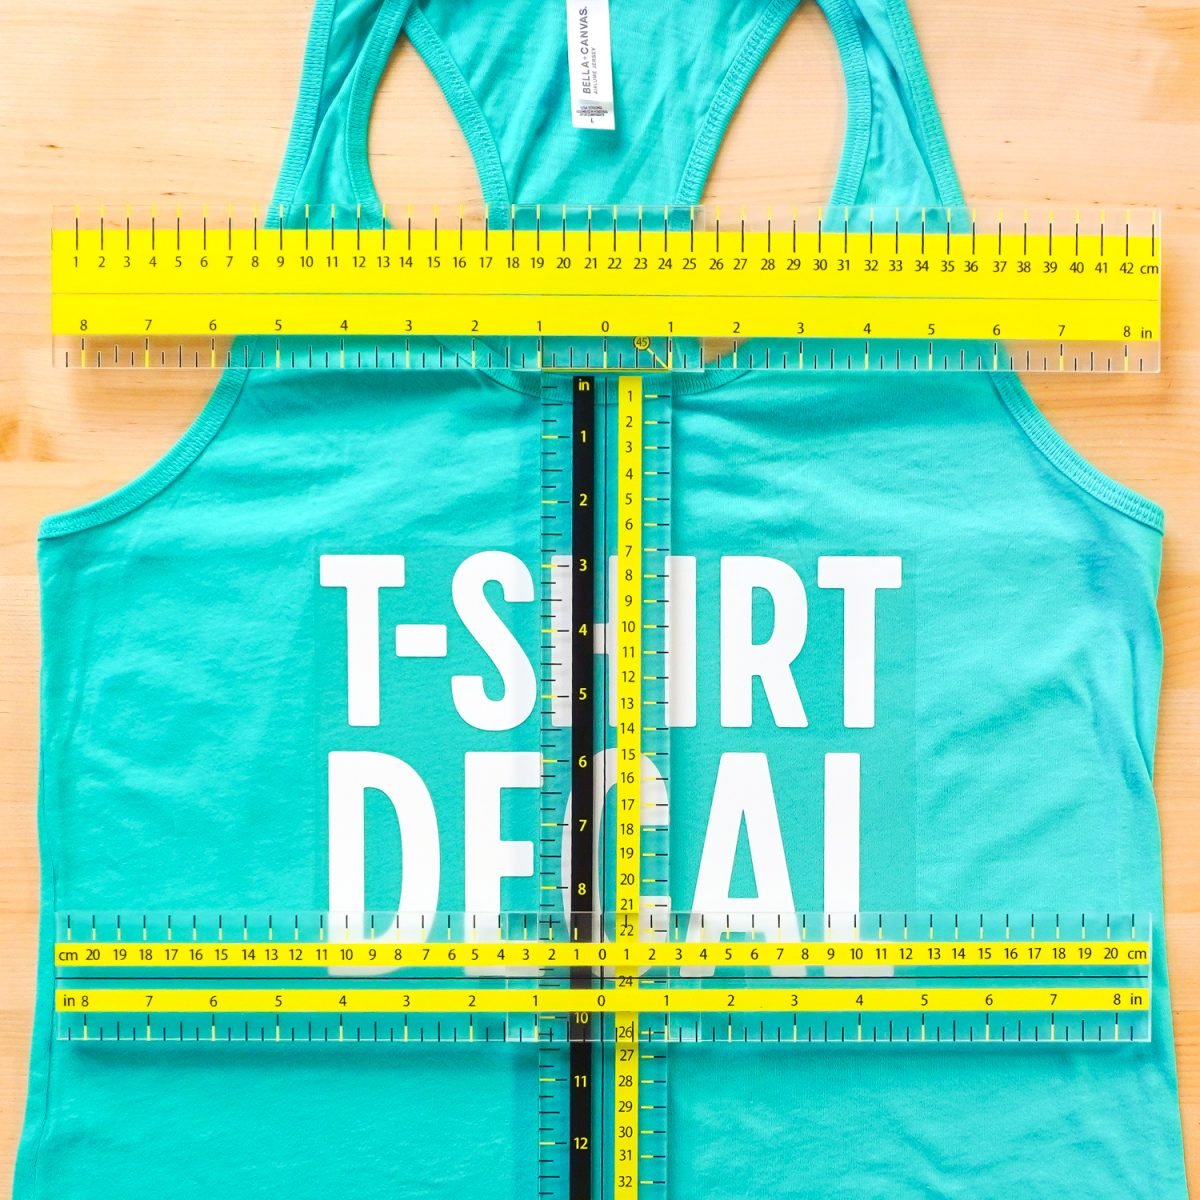
This ruler doesn’t come with any sort of help for aligning pocket decals.
Logo Placement Ruler
Overview
- Where to Purchase: Logo Placement Ruler
- Price: $
- Easy of Use: ★★
- Pros: Easy to use,
- Cons: Not sure if placement is where I would put it, dark markings are hard to see on a dark shirt, no way to tell if the logo is crooked
If you find yourself doing a lot of shirts with pocket decals or logos, getting a ruler specifically for that task can be helpful. This is a simple L-shaped ruler from Amazon and it’s pretty easy to use.
Fold your shirt in half, matching up the shoulder seams and side seams. Then use your heat press or EasyPress to press the fold line on your shirt. This is the center.

Line up the ruler using this center fold. You’ll line it up by size based on that center fold and the top shoulder, using the size of the shirt as a guideline.
Then center the decal at the corner of the ruler.
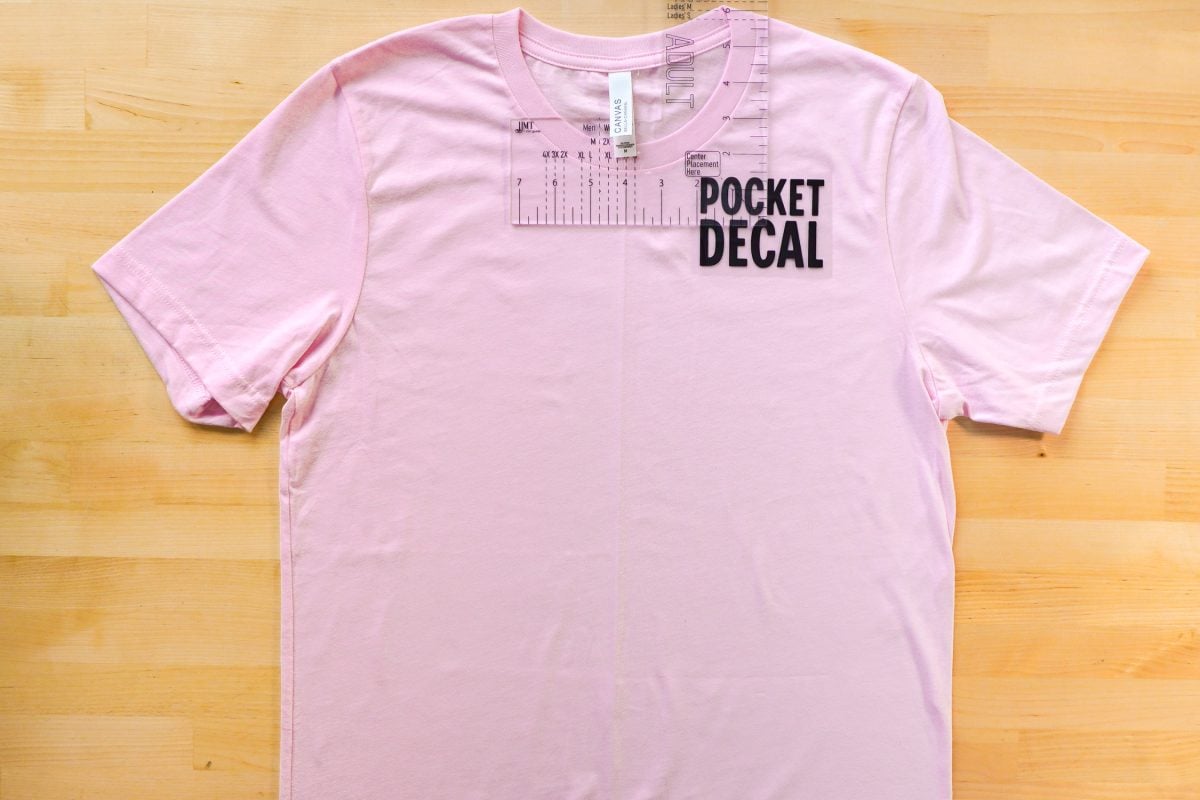
Problem is…it doesn’t seem to be anywhere I think it should be. It’s too close to the collar. I think the top shoulder measurement isn’t quite correct for this shirt. I would actually move it down quite a bit:
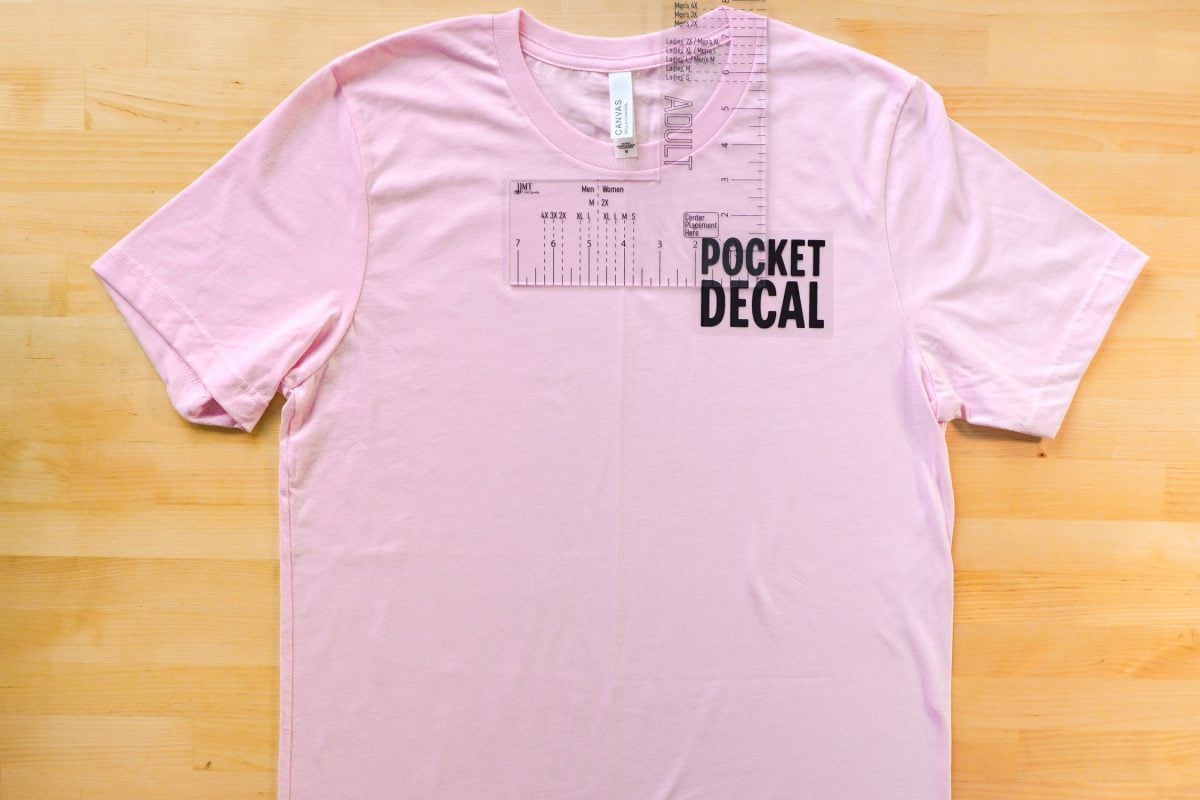
Still might even be a bit higher than I’d like it, honestly.
It also doesn’t really help you make sure your logo isn’t crooked. You can use some of the lines on your ruler if your decal is straight-edged like mine, but it’s more difficult if you have a round or other oddly shaped logo.
Overall Thoughts
Honestly…I found using most of the rulers a bit of a pain. The plastic ruler set was the easiest overall, but it really does help to do the center fold press so you are lining your image up vertically as well as horizontally.
The two larger rulers were okay (the Tee Square It was by far a better option, but significantly more expensive), but I found them a bit clunky to use overall, especially to try and move the decal around underneath the rulers.
No wonder I’ve been eyeballing things for years! For me, it’s so much easier and I’m usually good at it. I found that when I put my decal down on the shirt and then used the rulers…my decal was usually pretty darn close to where it needed to be, often right on the money.
But I know that eyeballing is difficult for some folks! So if you really want a ruler to make t-shirts, I think my overall suggestion would be the first pack of plastic rulers. For the price and ease of use, they are just easier than the heavier acrylic ruler options!


Leave A Reply!