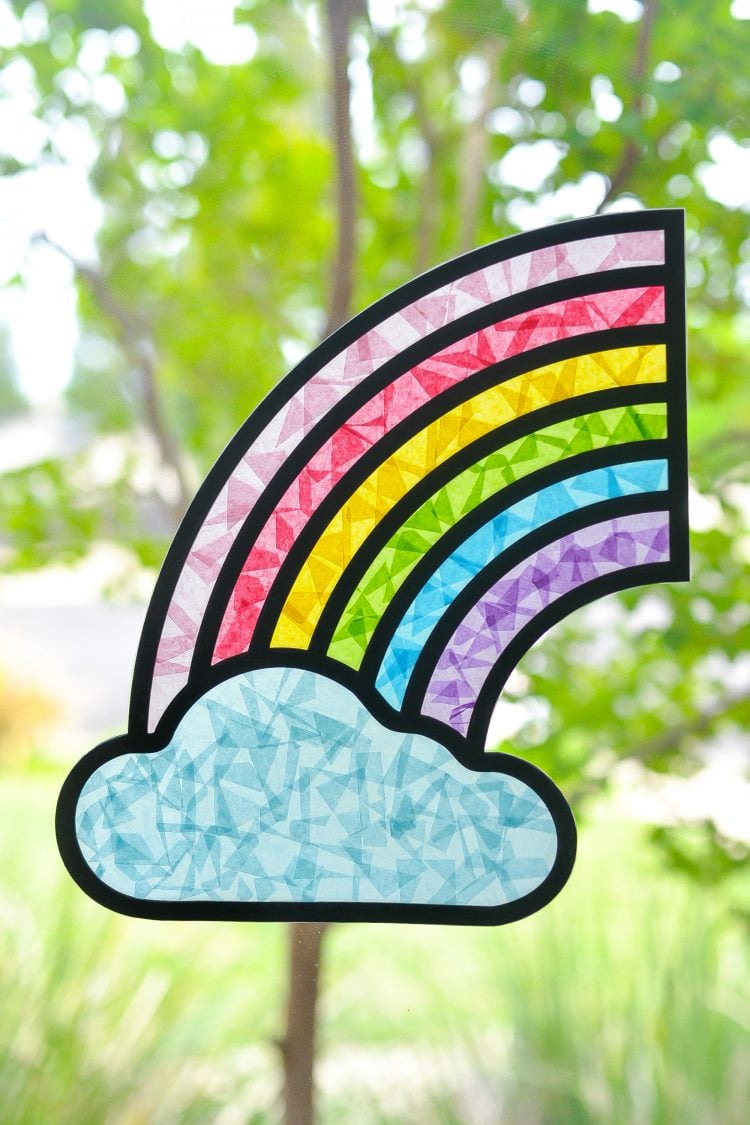
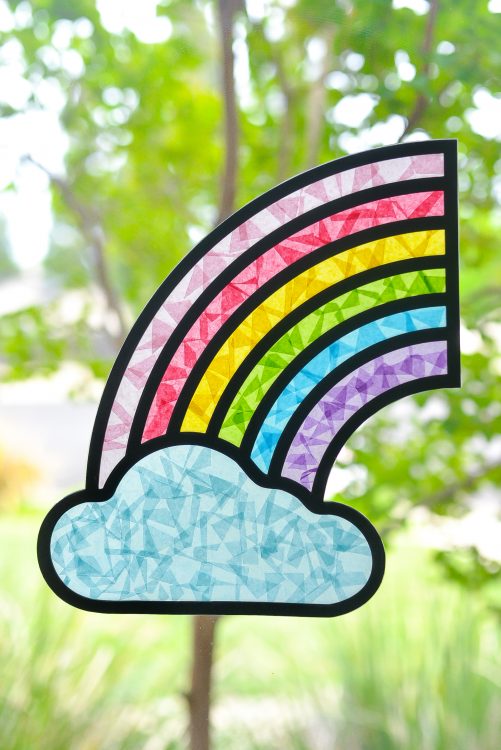
Add a little happiness to your window with this DIY rainbow suncatcher! Cut the frame with your Cricut Explore or Maker, and then use contact paper and tissue paper to create the colorful rainbow!

Amidst all the darkness of the coronavirus pandemic, one of the silver linings has been watching families get crafty to show their love for each other using all sorts of rainbows. From sidewalk chalk to adhesive vinyl, paint to paper banners, rainbows have been popping up in windows and front yards across the world. All of these rainbows bring me such joy!
For our house, I made a rainbow suncatcher using my Cricut! I love how vivid the tissue paper looks against the black outline. It was easy to make, too!
Making a DIY Rainbow Suncatcher
Supplies
- Cricut Explore or Cricut Maker (you can use your Cricut Joy, but your rainbow will be really small)
- Blue LightGrip or Green StandardGrip mat
- Fine Point Blade (comes with your machine)
- Two 12″ x 12″ pieces of black cardstock
- Tissue paper in seven colors
- Contact paper
- Washi or other tape
- Glue stick
- Scissors
- Rainbow SVG
Get the Free File
Want access to this free file? Join my FREE craft library! All you need is the password to get in, which you can get by filling out the form below. The file number is: C291.
Instructions
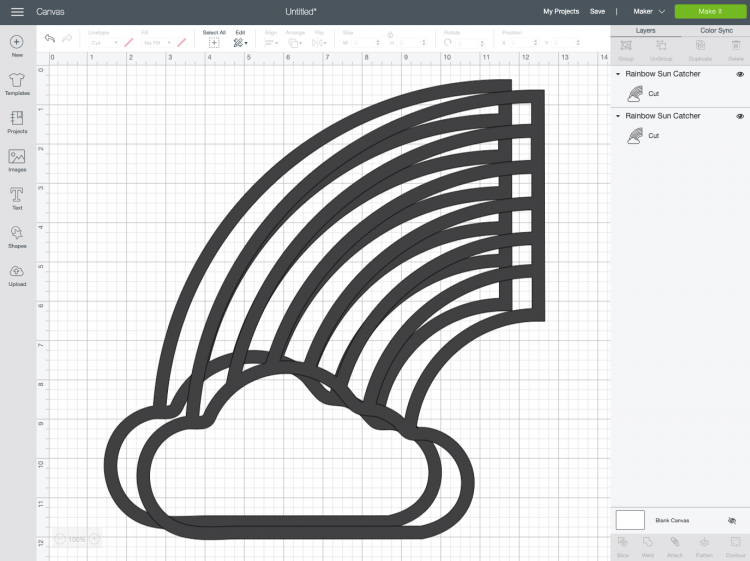
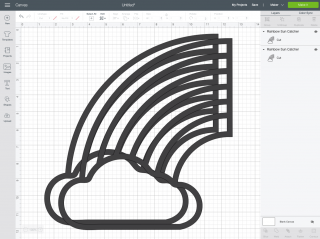
Upload the rainbow shape to Cricut Design Space (learn more about uploading SVG files). There are two identical pieces—cut both out of black cardstock. If you need help using your Cricut, get started with my Cricut Basics eBook!
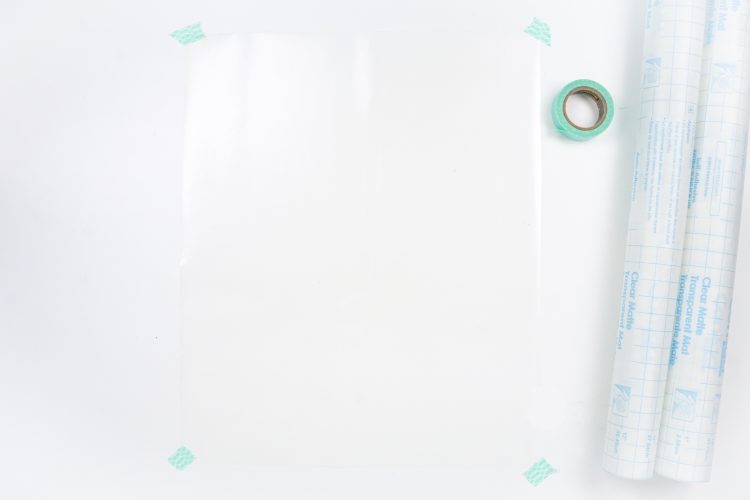
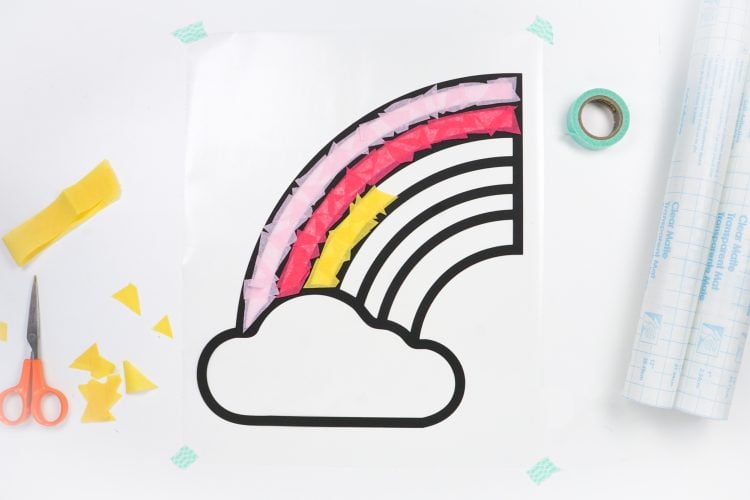
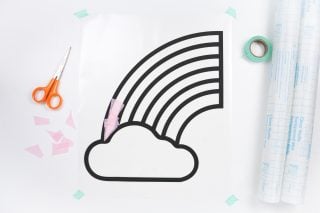
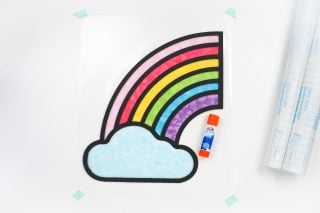
Cut a piece of contact paper larger than your rainbow pieces and peel off the backing paper. Place sticky-side up and adhere to your work table using a bit of washi or other tape—this helps keep everything from shifting.
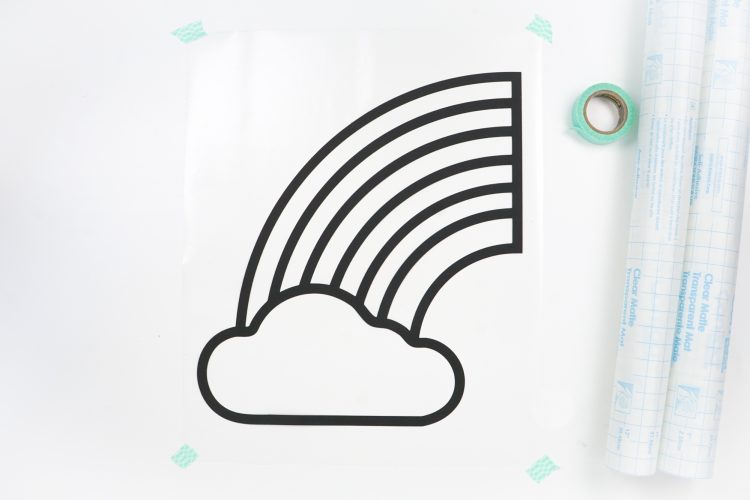
Then place one of your black rainbow outlines onto the contact paper and press to adhere.
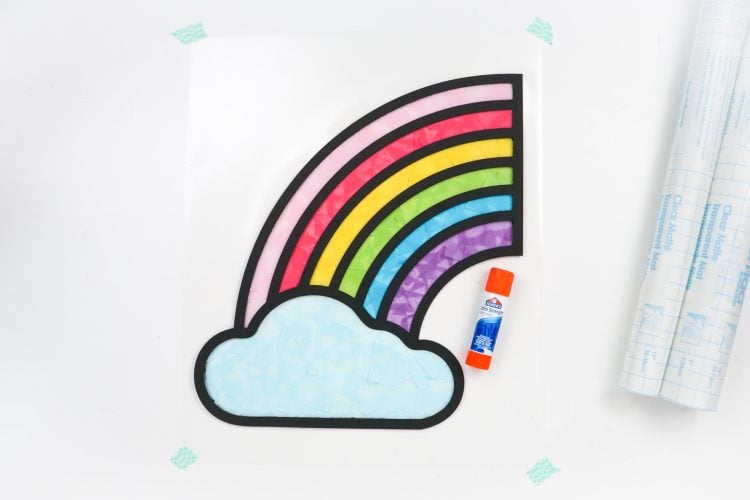
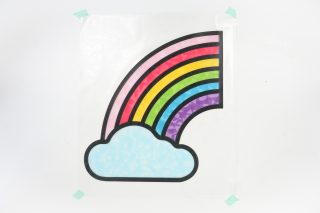
Cut small scraps of tissue paper out of seven colors and stick to the contact paper to create your rainbow sun catcher. You can do a traditional rainbow like I did, or mix it up!

Once you’ve finished up your tissue paper, carefully glue the other black rainbow outline on top of the first outline, lining it up as perfectly as possible.
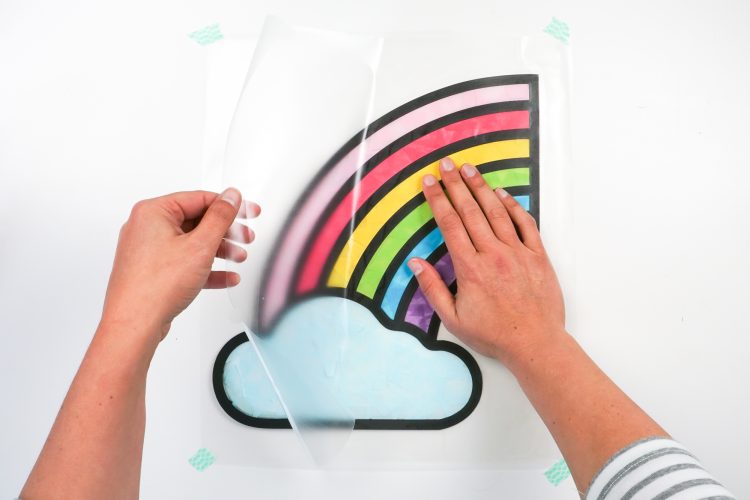
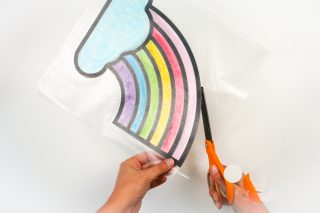
Then cut another piece of contact paper the same size as the first one, and carefully place it on top of the rainbow. I started in the center and worked my way out. It’s VERY sticky so try to get it right on the first go.
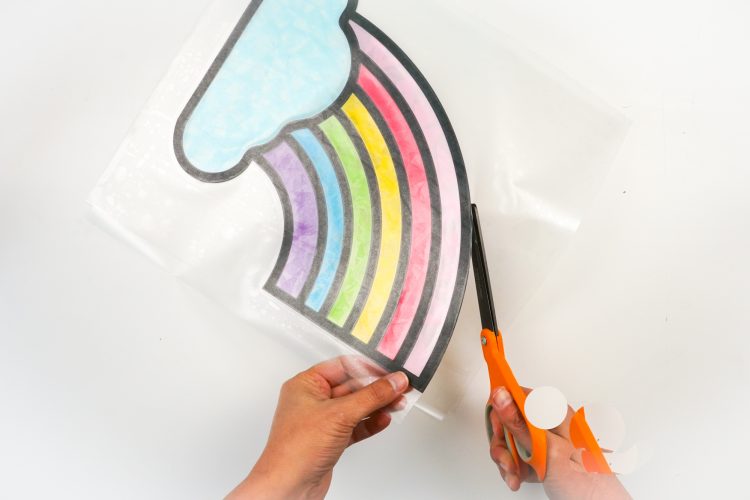
Then cut all the way around the edge of your rainbow suncatcher, leaving a small 1/8″ border of contact paper to help hold everything together.
Then hang! I opted for a bit of tape, but you could also punch holes and hang with string.
Have you made anything cheery for your neighborhood lately? If you have a photo on Instagram, tag me—I’d love to see it!! And let me know if you make this rainbow suncatcher!

DIY RAINBOW SUNCATCHER
Equipment
- Cricut Joy (your rainbow will be really small)
- Fine Point Blade (comes with your machine)
- Washi or other tape
Supplies
Instructions
- Upload the rainbow shape to Cricut Design Space (learn more about uploading SVG files). There are two identical pieces—cut both out of black cardstock. If you need help using your Cricut, get started with my Cricut Basics eBook!

- Cut a piece of contact paper larger than your rainbow pieces and peel off the backing paper. Place sticky-side up and adhere to your work table using a bit of washi or other tape—this helps keep everything from shifting.

- Then place one of your black rainbow outlines onto the contact paper and press to adhere.
- Cut small scraps of tissue paper out of seven colors and stick to the contact paper to create your rainbow sun catcher. You can do a traditional rainbow as shown here, or mix it up!
- Once you've finished up your tissue paper, carefully glue the other black rainbow outline on top of the first outline, lining it up as perfectly as possible.
- Then cut another piece of contact paper the same size as the first one, and carefully place it on top of the rainbow. I started in the center and worked my way out. It's VERY sticky so try to get it right on the first go.
- Then cut all the way around the edge of your rainbow suncatcher, leaving a small 1/8" border of contact paper to help hold everything together.
- Then hang! This was hung with a bit of tape, but you could also punch holes and hang with string.


Comments & Reviews
Marie says
Do you have more suncatcher files?